iOS 18 introduces a powerful new feature that allows users to lock individual apps, including the Messages app, for enhanced privacy and security. This comprehensive guide will walk you through the process of locking your Messages app and managing its settings.
- Why Lock the Messages App?
- How to lock the Messages app
- How to access your messages when the app is locked
- What happens when you lock the Messages app
- What else can I do to increase privacy of my messages?
- How to make sure your messages are perfectly secure
- What else to know about locking messages on iOS 18
- Make your iMessages private
Why Lock the Messages App?
Locking the Messages app provides an extra layer of privacy, especially useful in situations where:
- You share your device with friends or family members.
- You don’t want anyone to peek into your sensitive conversations.
- You need to hand your phone to someone temporarily.
How to lock the Messages app
- Ensure your iPhone is updated to iOS 18.
- Locate the Messages app icon on your Home Screen.
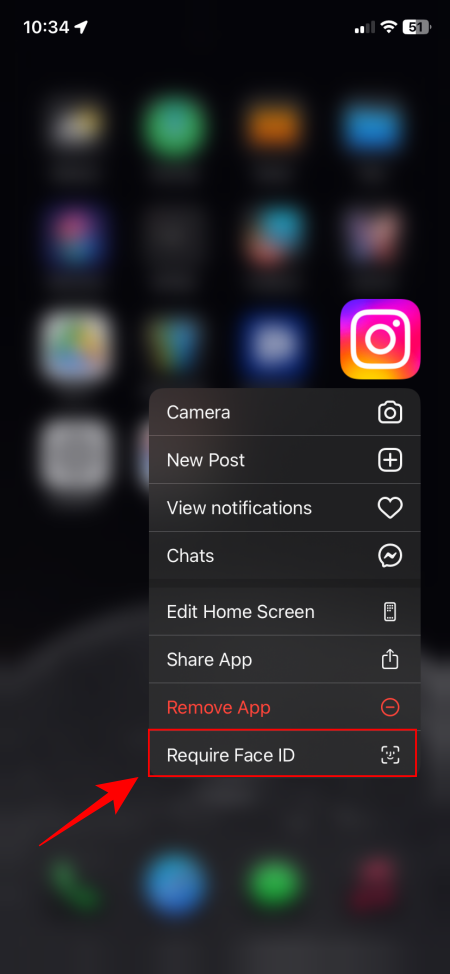
- Long-press (press and hold) the Messages app icon.
- In the context menu that appears, select “Require Face ID” (or “Require Touch ID” for older models).

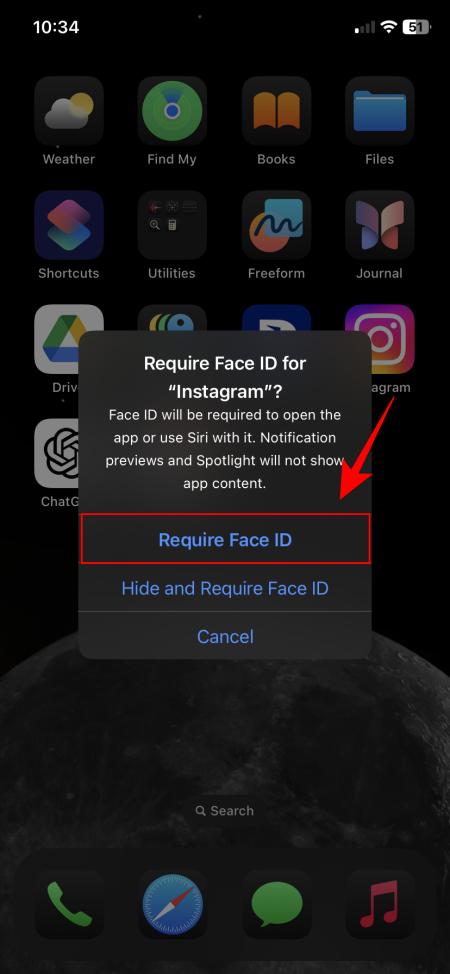
- Select “Require Face ID”. This will lock the app but not hide it. Select the “Hide and Require Face ID” option if you want to both hide and lock the app.

- You will see the tick mark, indicating it’s done.
Once set up, the Messages app will require Face ID, Touch ID, or your device passcode to open.
How to access your messages when the app is locked
To access your messages:
- Tap the Messages app icon.
- Authenticate using Face ID, Touch ID, or your device passcode.
- The app will open, granting full access to your conversations.
By default, locking an app hides its notifications. However, iOS 18 offers a way to allow notifications while keeping the app locked:
- Go to Settings > Notifications > Messages.
- Scroll down to find the “Show Previews” option.
- Select “Always” to show message previews even when the app is locked. Or select “When unlocked (default)”.
This setting allows you to see incoming message notifications without unlocking the app, balancing convenience with privacy.
Here’s a video guide for your reference. Go full screen for a better view:
What happens when you lock the Messages app
When you lock the Messages app:
- The app icon remains visible on your Home Screen.
- Attempting to open the app triggers a Face ID/Touch ID prompt.
- Message content is hidden from search results and Siri suggestions.
- Notifications for new messages are hidden by default.
Locked apps require Face ID authentication to unlock. But if your apps don’t require a lock (maybe, anymore), it’s better to remove it. Here’s how to go about it:
- Long press on a locked app.
- Select Don’t Require Face ID.
- Provide your Face ID authentication to confirm.
And that’s it! You would’ve now removed the lock for the app.
Related: How to hide apps on iPhone
What else can I do to increase privacy of my messages?
iOS 18 offers other privacy enhancements for the Messages app:
- Hide Messages App: For ultimate privacy, you can completely hide the Messages app from your Home Screen.
- Contact Key Verification: This feature helps verify the identity of the person you’re messaging.
- Scheduled Messages: Compose messages and set them to send at a later time.
How to make sure your messages are perfectly secure
To maximize the effectiveness of app locking:
- Use a strong device passcode.
- Enable two-factor authentication for your Apple ID.
- Regularly update your iOS to ensure you have the latest security features.
What else to know about locking messages on iOS 18
While app locking enhances privacy, it’s important to note:
- Locked status doesn’t sync across devices.
- Some system apps cannot be locked or hidden.
- Users under 13 cannot use the app locking feature.
Make your iMessages private
Locking the Messages app in iOS 18 is a simple yet powerful way to protect your private conversations. By following this guide, you can ensure that your sensitive messages remain secure while still enjoying the convenience of iOS notifications. Remember to balance security with usability to find the right settings for your needs.


