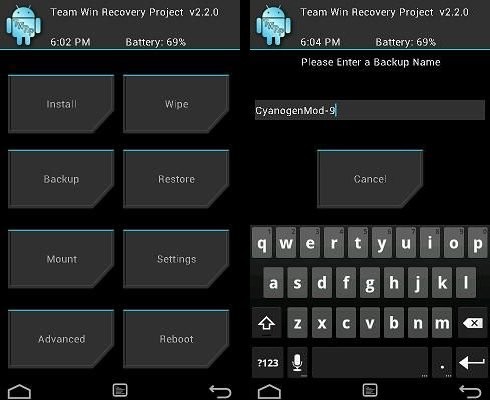
The official TWRP recovery has been released for the AT&T Galaxy S3. TWRP is a custom recovery used for installing custom ROMs much like ClockworkMod recovery, but has more features, such a proper graphical user interface, ability to queue zips for installing, faster backups and restores (when uncompressed), the ability to rename backups using an on-screen keyboard in recovery itself, an inbuilt file manager, and lots more which make your time in recovery hassle-free.
Follow the instructions in the guide below to install TWRP recovery on your AT*T Galaxy S3.
Compatibility
This guide below is compatible only and only with the AT&T Galaxy S3, model no. SGH-I747. It’s not compatible with any other Galaxy S3, it only works for AT&T variant. Check your device’s model in Settings» About phone.
Warning!
The methods and procedures discussed here are considered risky and you should not attempt anything if you don’t know completely what it is. If any damage occurs to your device, we won’t be held liable.
How to Install TWRP Recovery on AT&T Galaxy S3
Goomanager is an official android app to install the TWRP recovery. TWRP comes only on touch version, which is good, and Goomanager always installs the latest available version for the device within few clicks, which is just incredible!
VIDEO:
To make things easier than easy, first watch the video below over viewing the installation to get a fair idea of what you are going to do how. It’s of international S3 btw, but as the process is exactly same, that doesn’t matter at all.
STEP-BY-STEP GUIDE:
- You would need root access for Goomanager app. Get it now if you don’t have it already → ROOT the AT&T SAMSUNG GALAXY S3, SGH-I747
- Open play store and search and install Goomanager android app.
- Open Goomanager and select OK/Grant to provide root access when the pop up from SuperUser/SuperSU app respectively shows up.
- Now, press menu key on your Galaxy S3 and then select Install OpenRecoveryScript. Select Yes to confirm recovery install.
► the image below covers step 4 and 5.

- The app will check the very existence of TWRP recovery for your Galaxy S3 and when it finds, which it surely will, it will ask you to ‘confirm download, reboot and install’ the TWRP recovery. Select Yes.
- Now, it’s all automated. A webpage will open up inside the app itself, and the recovery will start downloading after displaying adverts for 10 seconds. You can see its progress in the notification bar. The app will be back on main screen.
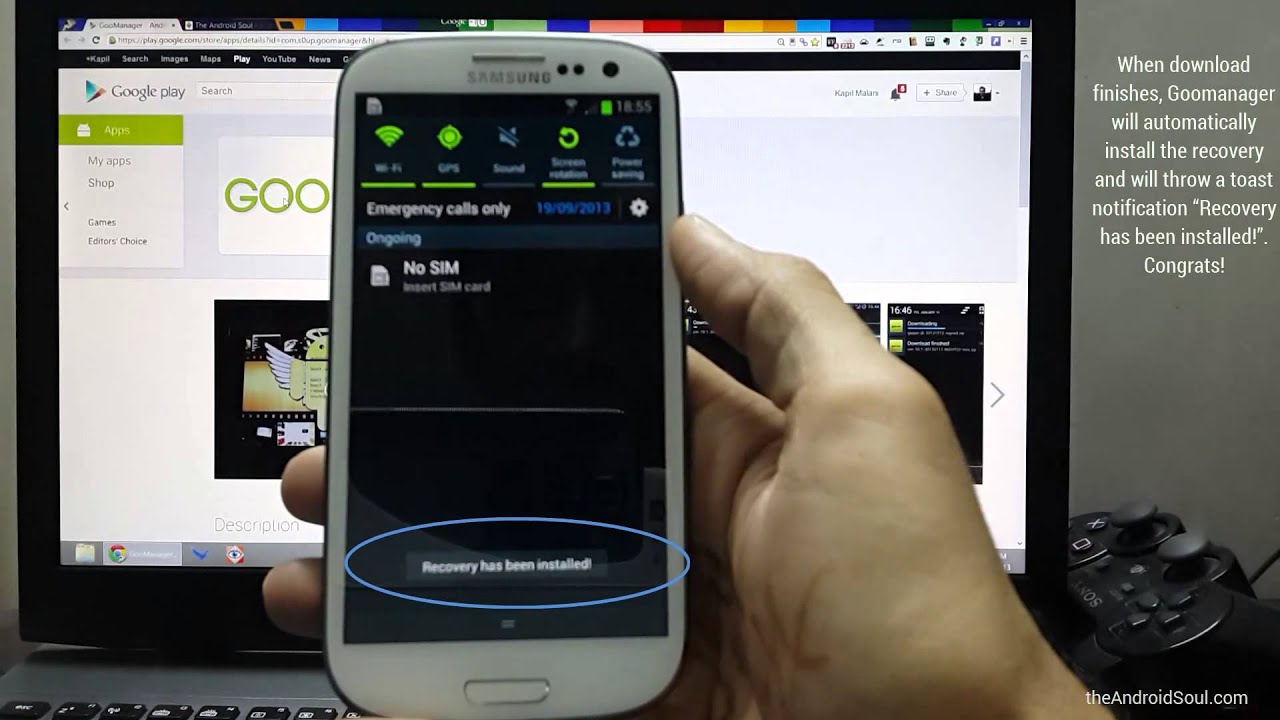
- When download finishes, Goomanager will automatically install the recovery and will throw a toast notification Recovery has been installed!. Congrats!
- Don’t use the ‘Reboot Recovery’ option in the Goomanager app for this time around and instead, simply exit the app. It’s better to to do a ‘hard reboot’ into recovery for the first time.
► To boot into recovery mode: first power Off your Galaxy S3, and wait till lights go off. Now, press and hold these 3 keys (Power + Home + Volume Up) together until you see Samsung logo. - You should boot into TWRP recovery now. It’s one very incredible recovery. Enjoy and Happy flashing!
That’s it.
If you need any help, be sure to tell us via comments below.


