There’s no denying the fact that average users are now more comfortable using there Android devices to do stuff than using a PC. Android apps are more user friendly and offer features in ease that’s remained wanting on PC softwares — and let’s not talk about the UI, which is just superb on Android devices, compared to PC.
So how about installing your favorite Android apps on PC? Well, you can do that, and quite easily. Since Android is an open source platform, it’s easily possible to run it on a PC with a virtual Linux environment.
And thanks to BlueStacks, who took advantage of this and have developed one good, if not great, Android App player for Windows and Mac.
The BlueStacks App Player runs on your PC as an Android tablet in landscape mode. It runs in both full screen and windowed mode. And it even syncs notifications from Android apps with notification system on your Windows PC, keeping you updated with all the information from Apps like Gmail, Twitter, Facebook, Google+ and others.
Yes, you get notifications just like you get them on your Android device, and it takes place in the form of the traditional balloon popping up on the left-bottom of your PC.
So if running Android Apps and Games on your Windows PC and Mac interests you then go ahead and follow the guide below for installation and usage instructions.
DOWNLOAD AND INSTALL BLUESTACKS ON YOUR PC
You first need to download the BlueStacks software on your PC. Below’s how to:
DOWNLOAD BlueStacks
- Install BlueStacks app player using the installation file you received from the download link above.
- Once the installation is finished, BlueStacks will automatically start itself. In case it doesn’t, then start it from the BlueStacks icon that’s now created on your desktop.
NOTE FOR MAC USERS: The guide below is written for Windows PCs. But the process of setting BlueStacks is similar on Windows and Mac so you can still follow the steps below to setup BlueStacks on your Mac and run Android Apps and Games easily.
SETUP BLUESTACKS
Setting up BlueStacks on your PC is a process similar to that of setting up an Android device. A Google account is added to your BlueStacks installation giving you complete access to Play Store with all the Apps and Games just like an Android device.
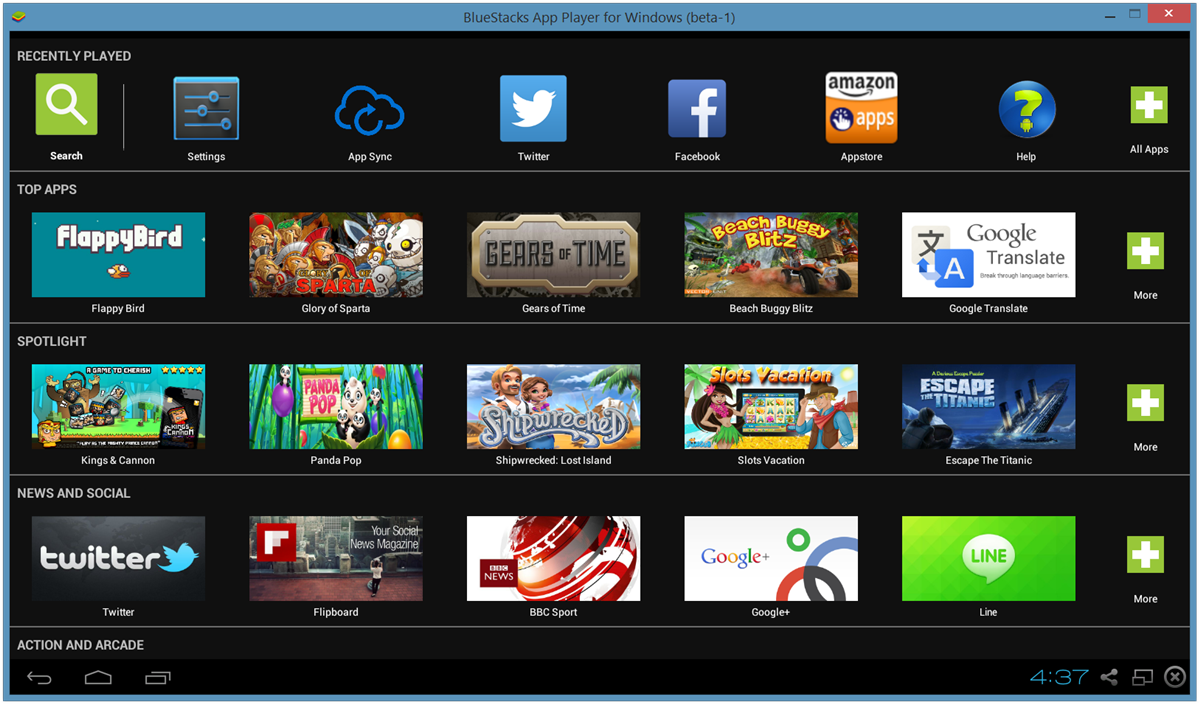
BlueStacks App Player Start Screen
You’ll see a screen like this when you start BlueStacks on your PC. The apps and games listed here are only icons and not installed actually, but clicking on them will lead you to Play Store for download and installation. And for that you’ll need to setup an Google account first, if you haven’t already.
Setup Google Account on BlueStacks
Like every Android device, setting up a Google account on your BlueStacks is a one time process. If you’re familiar with Android devices, then you must already know how to add a Google account on Android, however if you’re new to this then follow the steps below for a step-by-step guide:
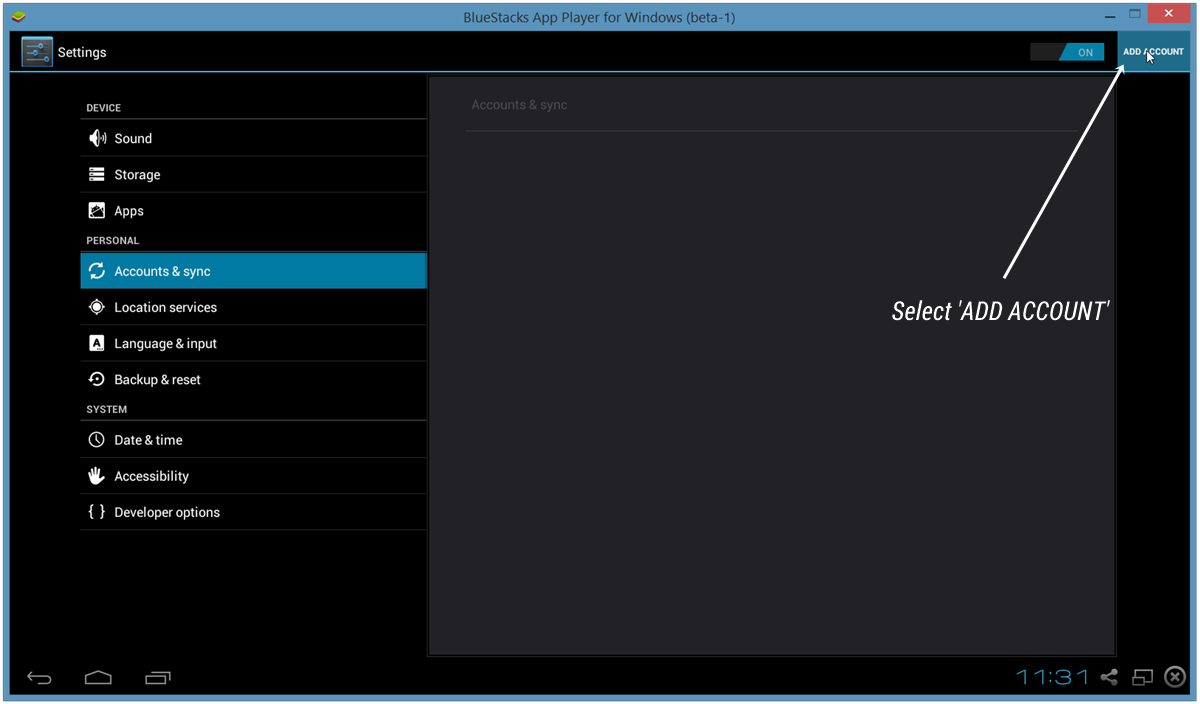
- Click the ‘Settings’ icon (find the app under All Apps) in BlueStacks App Player and select ‘Accounts & Sync’ from there.

- Select ‘ADD ACCOUNT’ from the top-right corner of the screen and then select ‘Google’ from the list that shows up.
- Now on the ‘Add a Google Account’ screen click on ‘Existing’ if you already have a Google (Gmail) account or ‘New’ if you want to create a new account on Google.
- Sign in with your Google account login details and you’ll be all set.
Once you’ve setup an Google account, the next needed to be done is to App Sync, lets see how to do that:
Setup App Sync
- Go to the home screen of your BlueStacks App Player.
- Select the ‘App Sync’ icon and login with the same Google account that you used in the steps above.
That’s it. You’re all set to download and install apps from Play Store now.
Installing Apps and Games on your PC using BlueStacks
- Click on the ‘Search’ icon on BlueStacks home screen.
- Now search for the app you want to install. For example, let’s search for the ‘Google Drive’ app.

- After you’ve typed your search, click on the link that reads ‘Search Play for Google Drive’. This will search for the app (Google Drive, in this case) on the Play Store
└ If it asks you to agree to ‘Google Play Terms of Service’, click Accept. - Select the app from the search results and click install.
Useful Tips
- Install a third-party launcher like Nova Launcher from the Play Store. It’ll be a lot easier to browse and manage apps installed on BlueStacks using a third-party launcher.
- Access Notification Bar by clicking on the clock in the bottom bar.
- Press F11 or Click the window icon in the bottom bar to run BlueStacks in full screen mode.
- Click the share icon in the bottom bar to take a screenshot of your current screen on BlueStacks and share it.
- After connecting to your Google Account Go to Setting on web Google Play here (link) and you’ll see a T-Mobile Galaxy S2 (or any name) appearing over there. That’s your BlueStacks Android App Player. Click on Edit in the right most and give it a nickname BlueStacks or PC or any name to differentiate it from phones, if you want to. It’s optional, of course.
- Yes! you can install the apps from Web Google Play Store. Click on Install on any app’s page, and your BlueStacks Android App player should show up in the list.


thank you for telling us the simple and easy way to use android apps on PC through bluestack, keep posting such nice informative articles. good work indeed.
thank you for telling us the simple and easy way to use android apps on PC through bluestack, keep posting such nice informative articles. good work indeed.