What to know
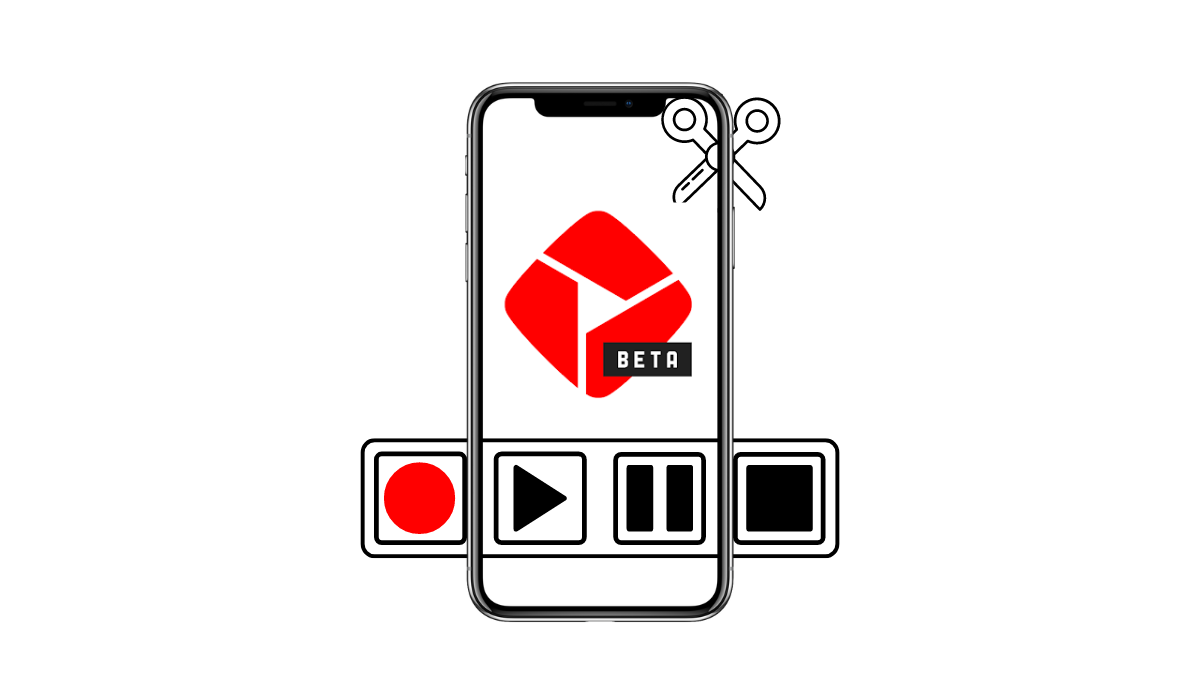
- YouTube has an easy-to-use video editing app for creators called YouTube Create.
- The app offers a simple editing environment, with several features like Audio Cleanup and Find Beats that automatically ensure your videos have that professional look.
- Among several features, YouTube Create also includes royalty-free songs and sound effects to add to your videos.
- YouTube Create is currently only available for Android devices.
With the YouTube Create app available in 21 countries, more and more creators will be looking to try out Google’s standalone mobile app for video editing. Even though there are many such video editors already available in the market, YouTube Create has a few things working in its favor, including a clean interface, effects, stickers, royalty-free music, an ad-free editing environment, and of course Google’s brand name. If you want to create your shorts and videos on the go with YouTube Create, here’s all you need to know to get started.
How to use the YouTube Create app
First things first, download and install the YouTube Create app from the following link.
- YouTube Create | Android
Once installed, launch the app, sign in to your Google account, and you’re all set to go.
Importing and editing videos
Since video editing involves a variety of things, let’s start with the basics first.
Import video
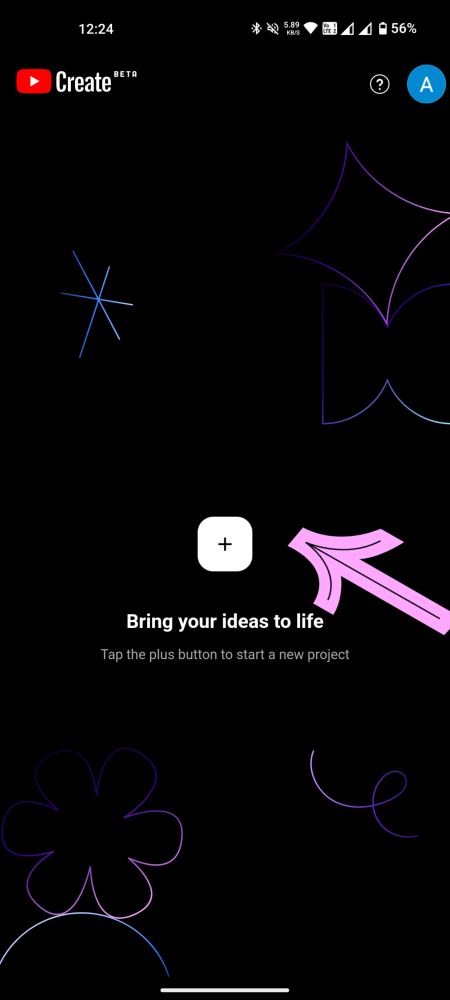
- Tap on the + icon to start a new project. Then select the video you want to import and tap Import in the bottom right corner.
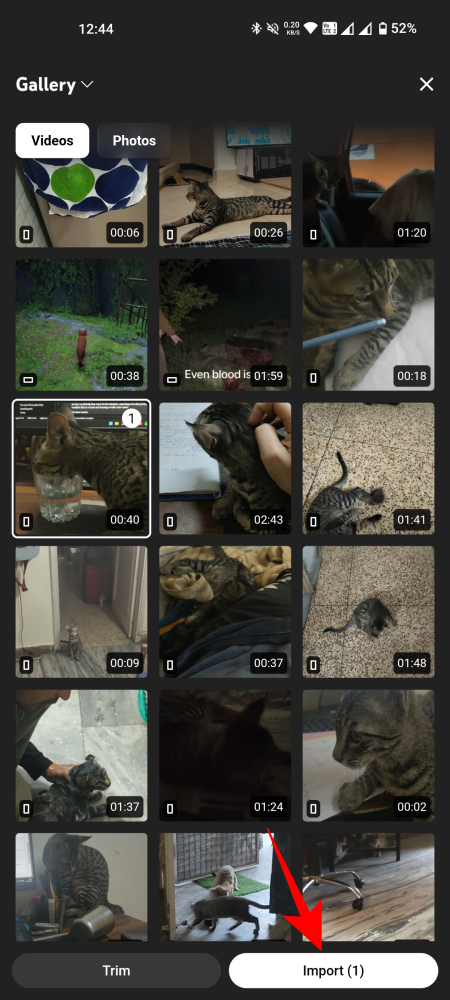
- If you choose more than one video, they’ll be added one after the other in the timeline.
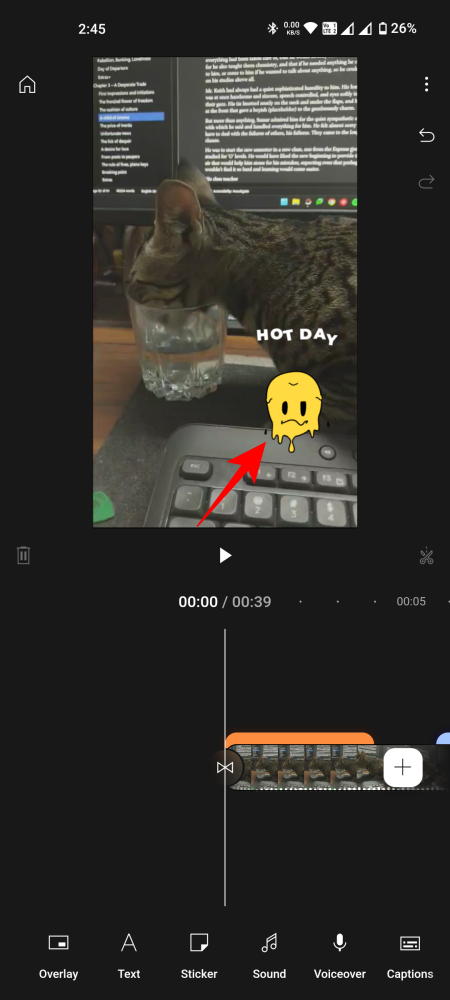
Now, before we move on, let’s look at the basic elements of the editor. Your video preview is at the top, taking about half the screen (You can change the aspect ratio from the three-dot icon in the top right corner > Aspect ratio)
The timeline is in the middle. This is where all the content will go, including videos, audio, transitions, GIFs, effects, etc.

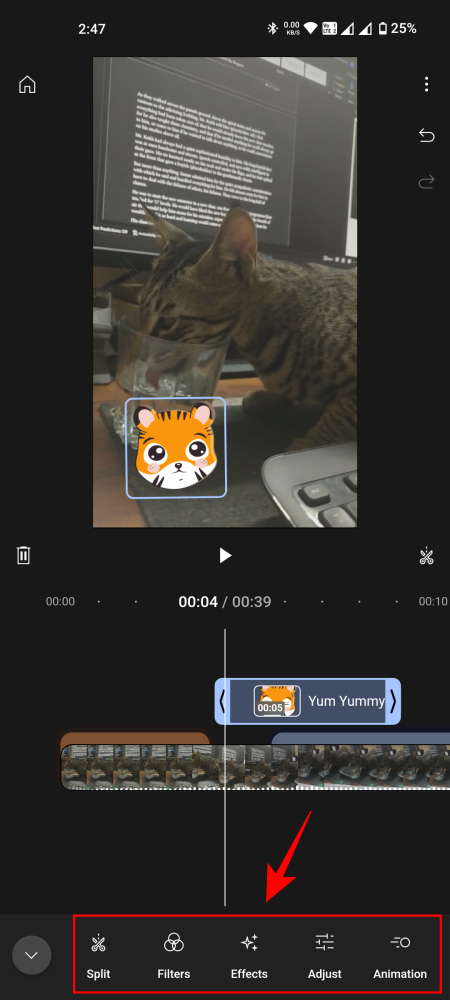
The bottom row is where you’ll find the main options depending on what’s selected. When nothing is selected in the timeline, you’ll see the elements that you can add, such as ‘Overlay’, ‘Text’, ‘Sticker’, ‘Sound’, etc.

But when you’ve selected something in the timeline, such as a video clip or audio, the options in the bottom row will change accordingly, allowing you to further customize the selected element.

Now, let’s see how to go about adding other elements and editing your video.
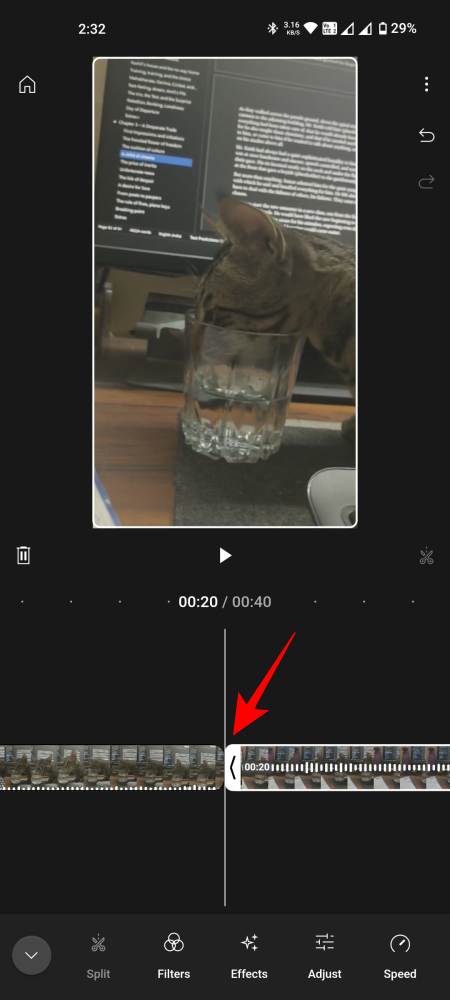
Split or Trim video
If your imported video clip is longer than you need, you can shorten it in a couple of ways.
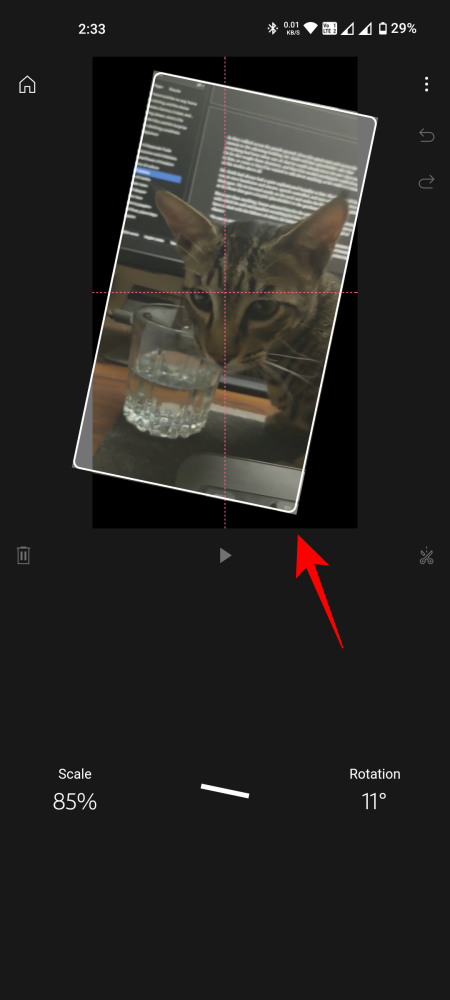
- To trim a video, first tap on the clip to select it. Then, tap and hold either edge of the video and drag it inward. To split a video, swipe to the frame where you want to split the video. Then tap on ‘Split’ (scissor icon) toward the top right of the timeline.
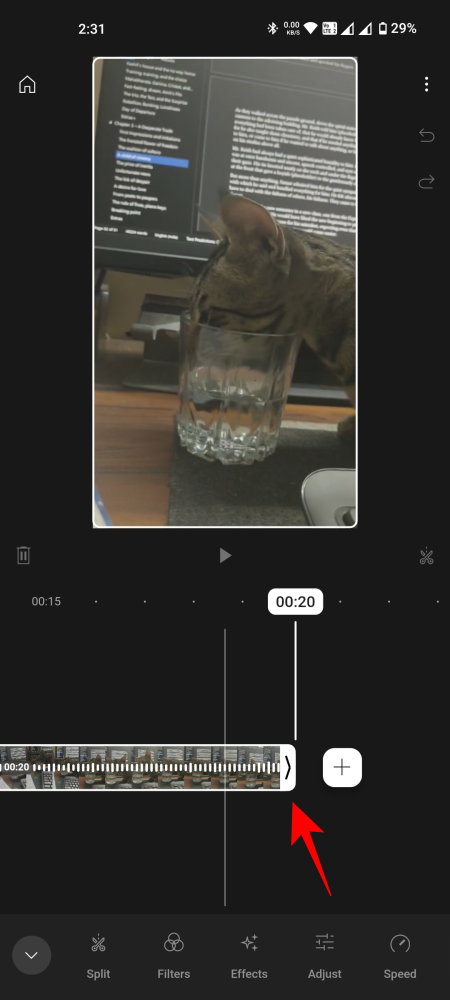
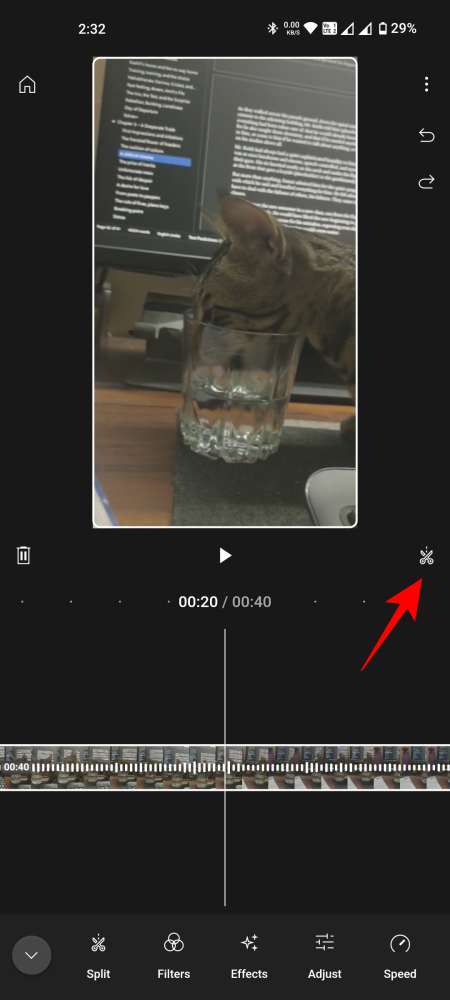
- You will see the split happen at the marker. You can also pinch to zoom in or zoom out the video preview, and even rotate it if you like.
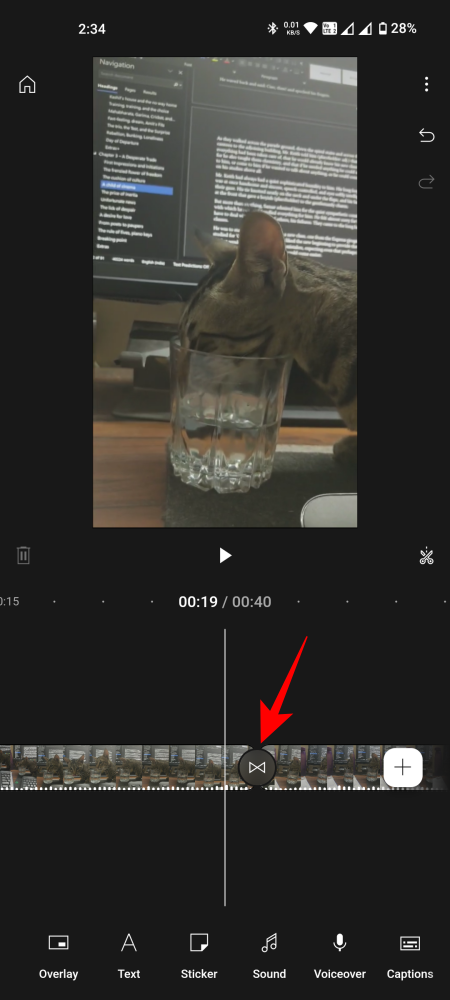
Add transitions
Transitions can be added between clips on the same channel. Here’s how to do so:
- Tap on the ‘Transitions’ option between two clips on the same channel. It looks like a horizontal hourglass. Then select a transition, adjust the duration of the transition from the slider at the bottom, and tap ‘Done’.
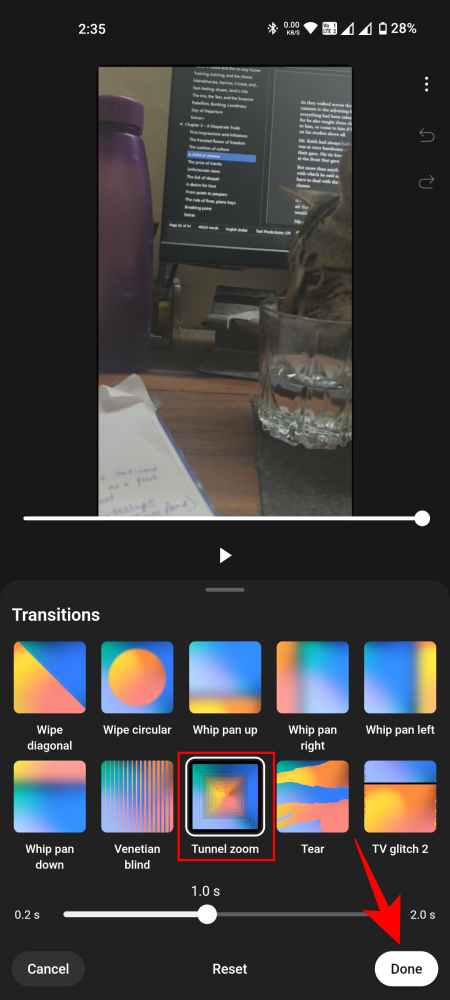
- You can also add a transition at the start and end of the clip.
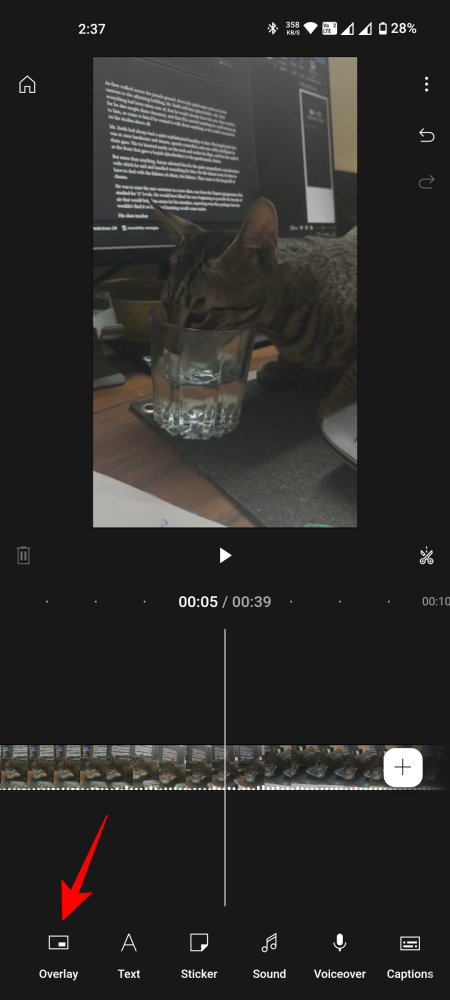
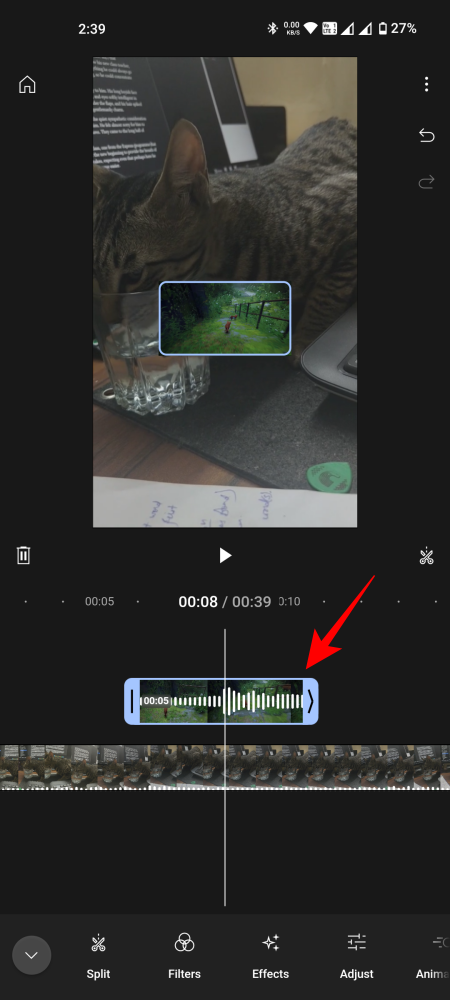
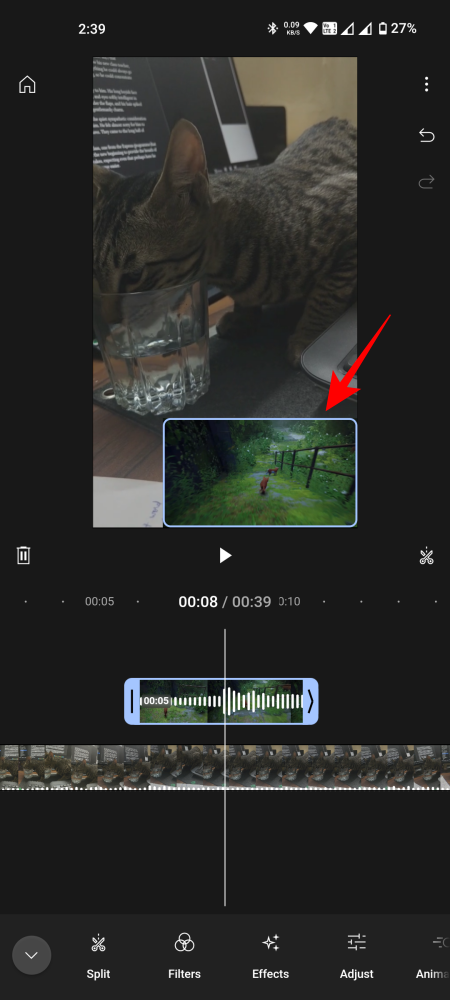
Add an overlay video
An overlay works wonders when you want to add another clip (video or picture) on top of the base video.
- Tap on ‘Overlay’ in the bottom row. Select the video or picture that you want to add as an overlay and tap ‘Import’ in the bottom right corner.
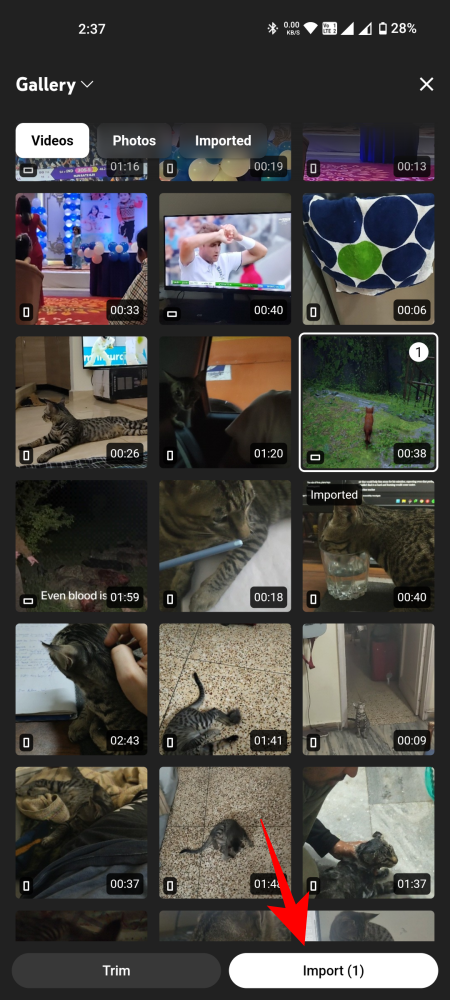
- Once imported, the overlaid clip will be added on top of the main video in the timeline. Trim it, if necessary, and drag the clip to where you want the overlaid clip to come in.
- Also, drag the clip in the preview to where you want the overlaid clip to be placed. You can also pinch to shrink or enlarge the clip, or rotate it if necessary.
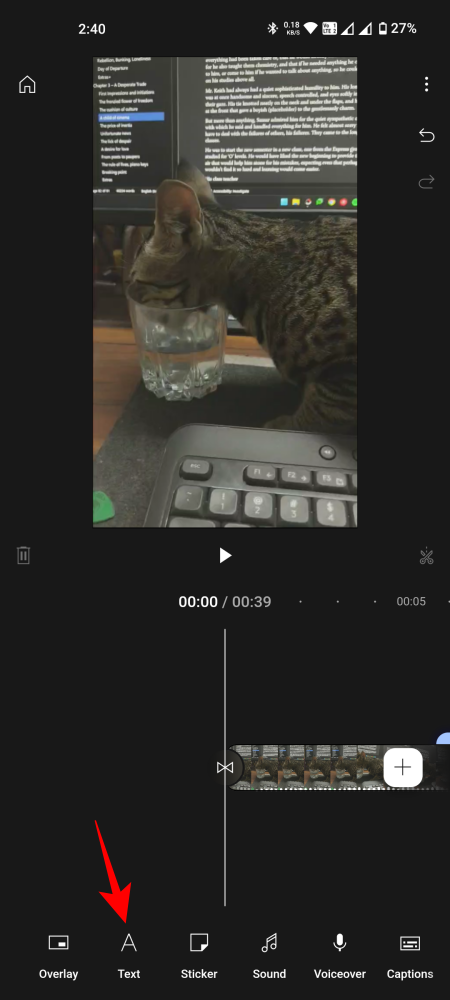
Text and Stickers
Text is often a necessary element in a video, especially when adding a title. Similarly, stickers (GIFs and emojis) come in handy when one has to spruce up a boring video. Here’s how to:
Add Text (plain and with effects)
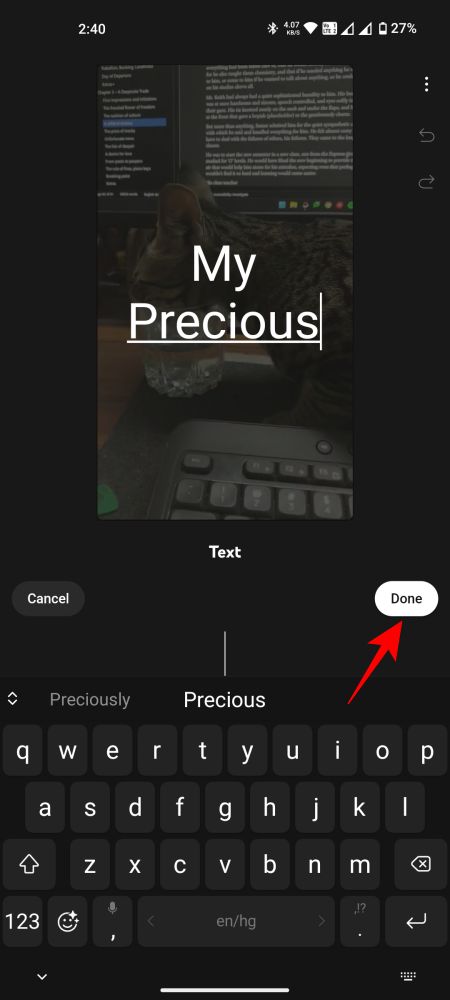
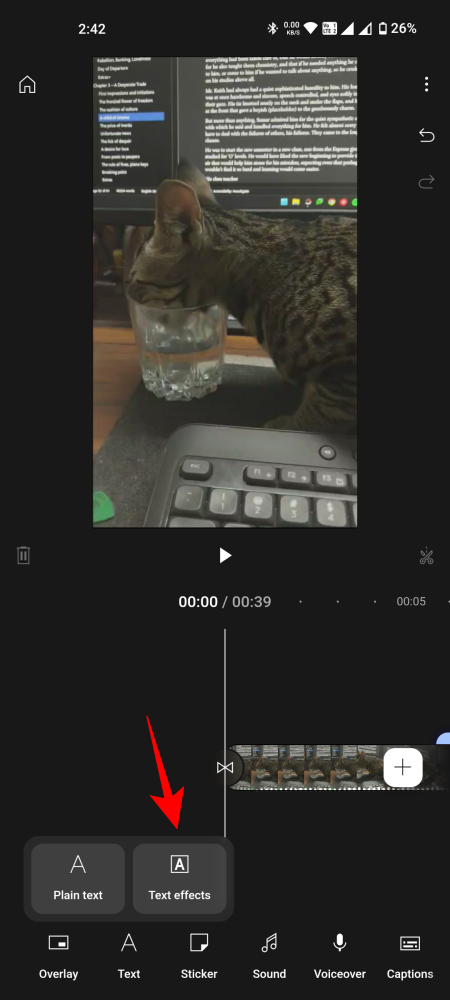
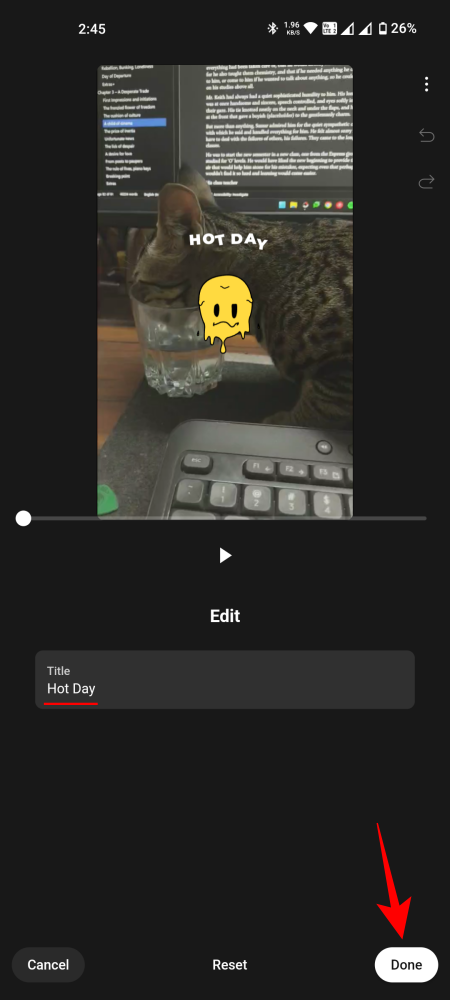
- Tap on ‘Text’ in the bottom row and select between ‘Plain text’ and ‘Text effects’.
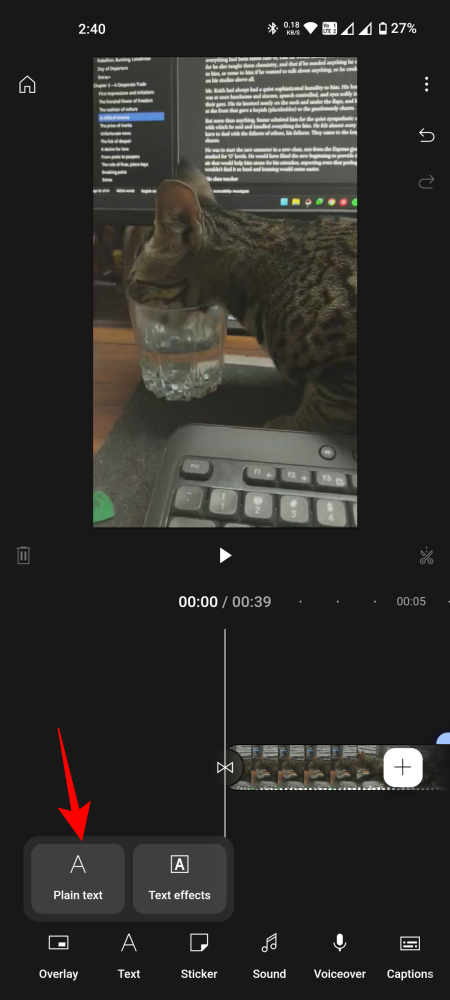
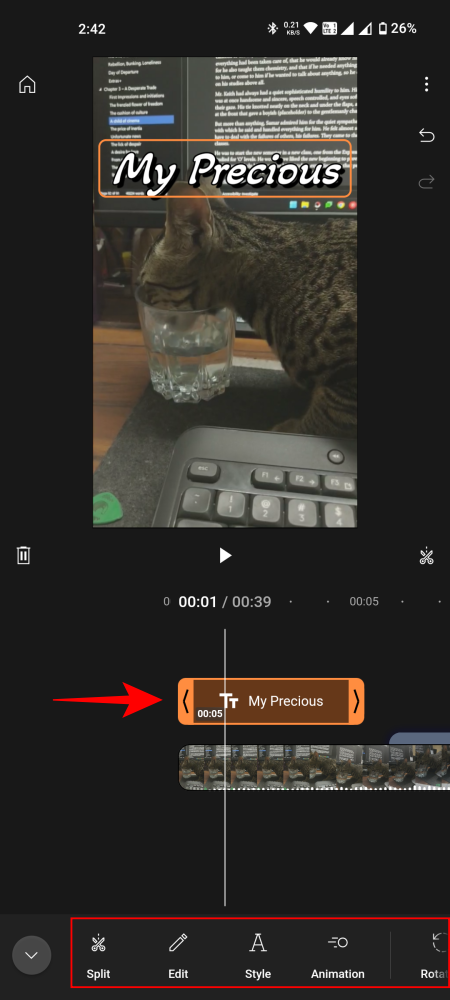
- With plain text, you need only type your text, tap ‘Done’, and then adjust its length in the timeline.
- To edit the text, tap to select it in the timeline, then choose from available options in the bottom row. ‘Edit’ will let you change what’s written; ‘Style’ will allow changing the size, font, color, background, format, outline, and shadow of the text; ‘Animation’ will allow you to choose from a variety of animated styles.
- If you chose ‘Text Effects’ instead, select from the available effects first.
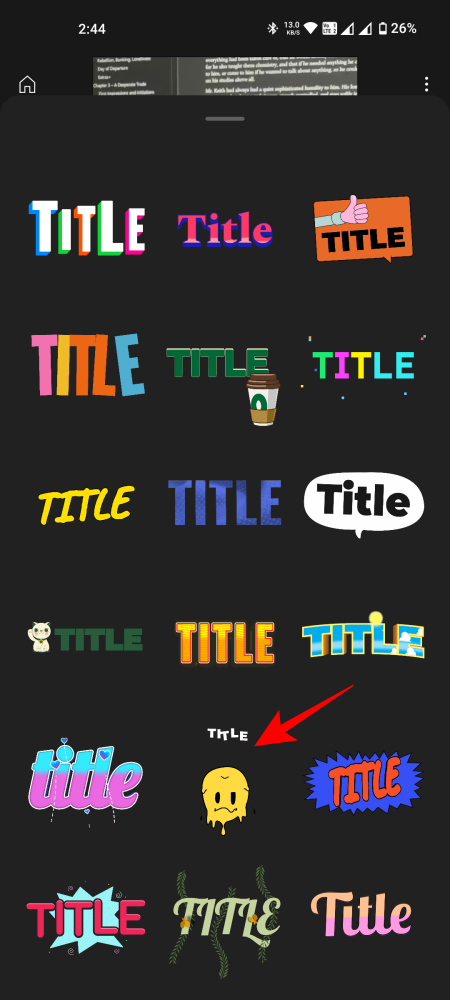
- Then type your text and tap ‘Done’.
- Once added, you’ll be able to edit the text as before.
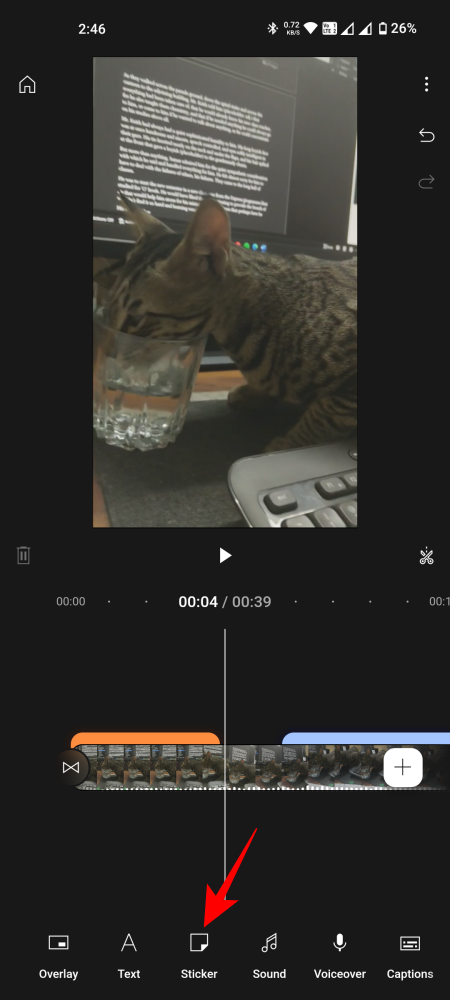
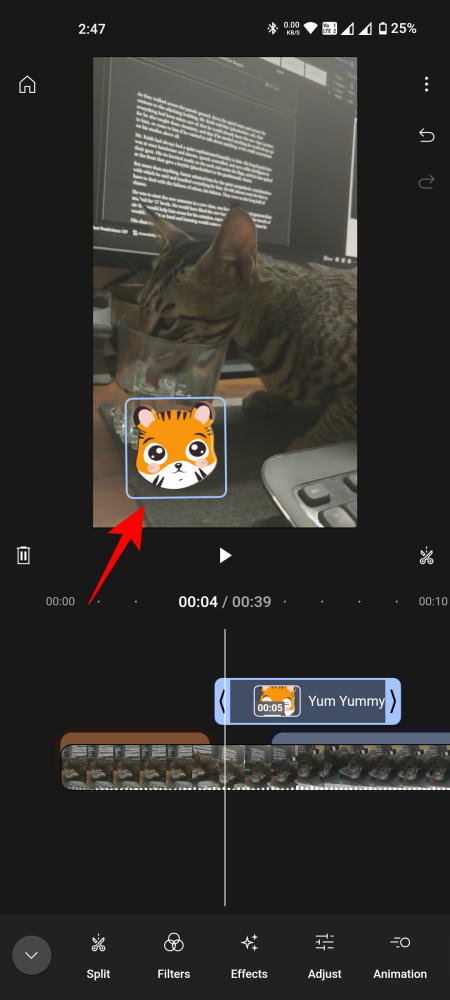
Add Stickers, GIFs, and Emojis
- Tap on ‘Sticker’. Then select from a wide collection of Stickers, GIFs, and Emojis or search for it in the field at the top. To add one, simply tap on it.
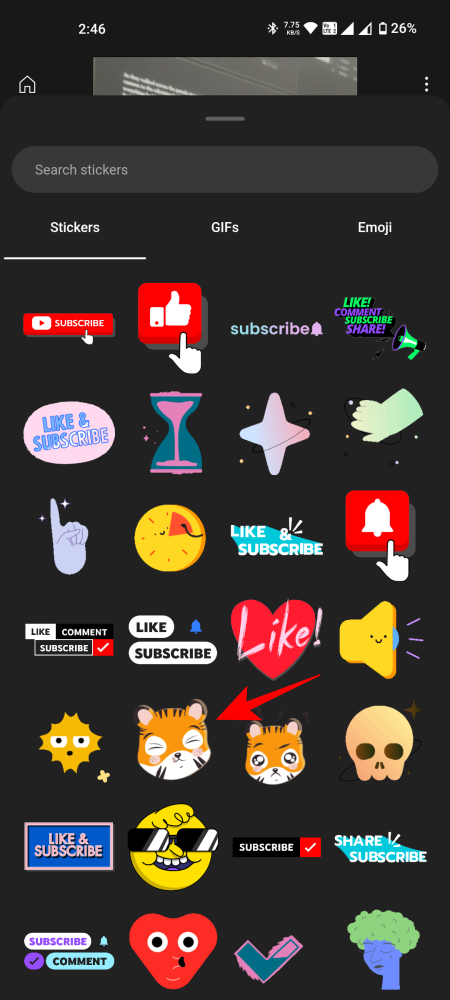
- Once added, change its size and position in the video preview. As before, you can edit it (like any other element) using the options in the bottom row.
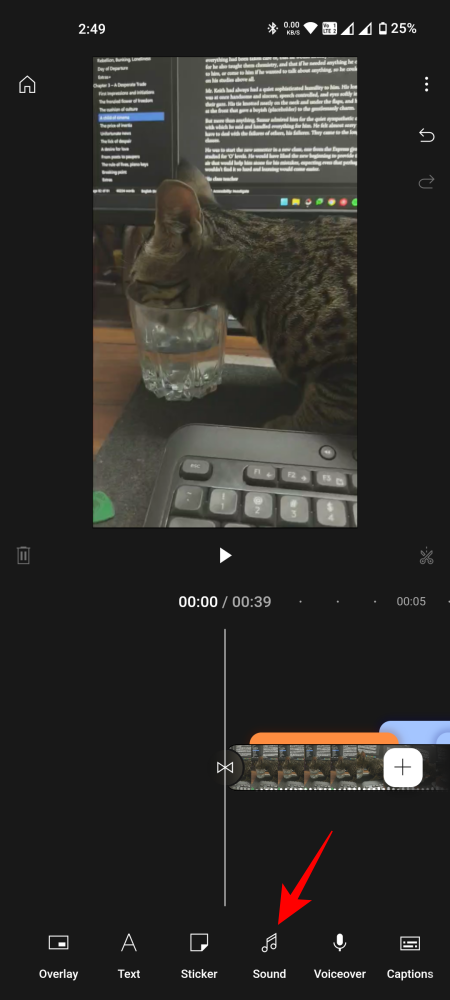
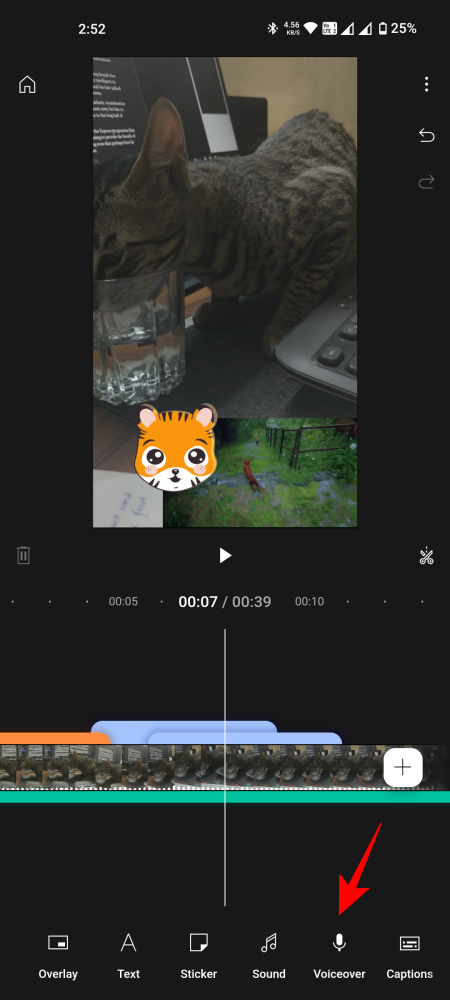
Sound, Voiceover, and Captions
Now, let’s see how to bring the videos and the images to life with the right sound and music.
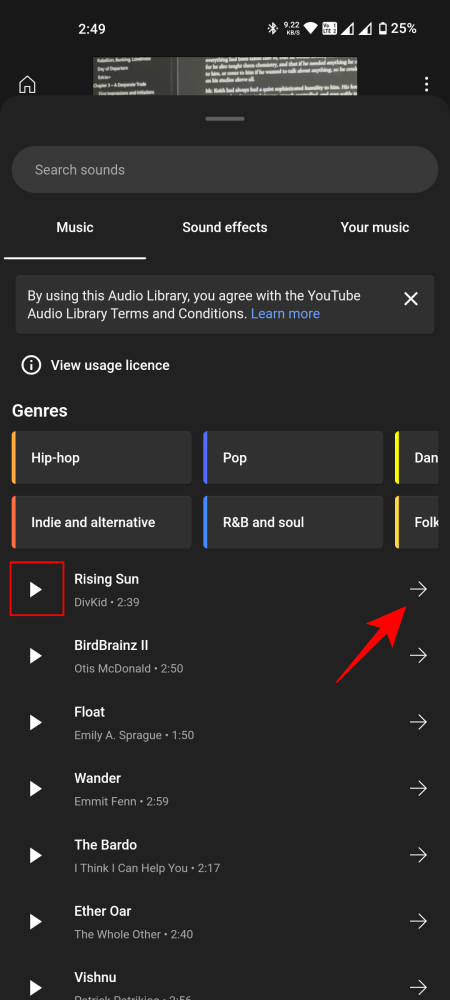
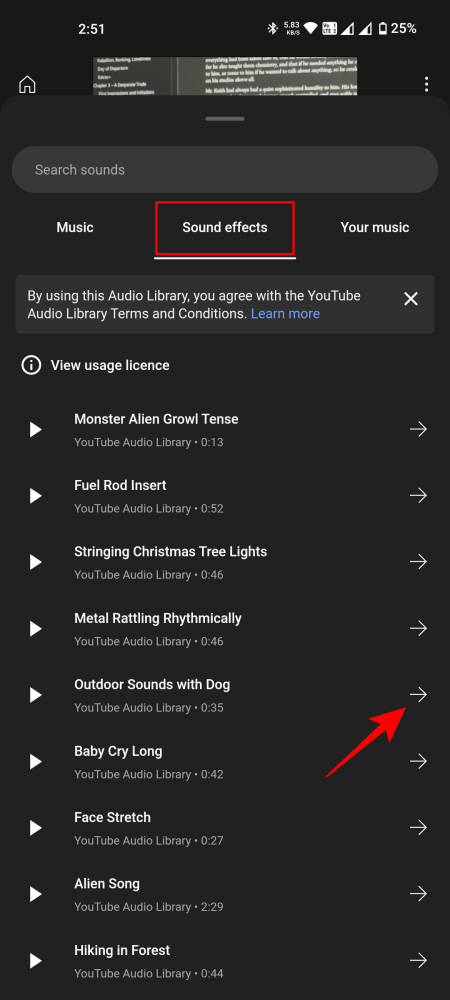
Add Sound effects and Music
- Tap on ‘Sound’ to start. Under the ‘Music’ section, you’ll find several genres and short music clips to add to your video.
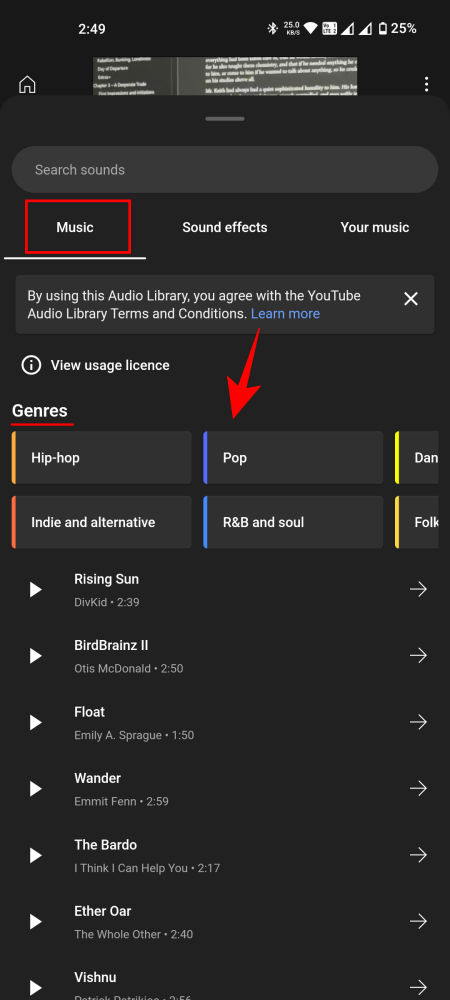
- Check out a piece by tapping on the ‘Play’ button. To add it to your video, tap on the right arrow next to it.
- Once added, you can adjust the volume or fade it in or out.
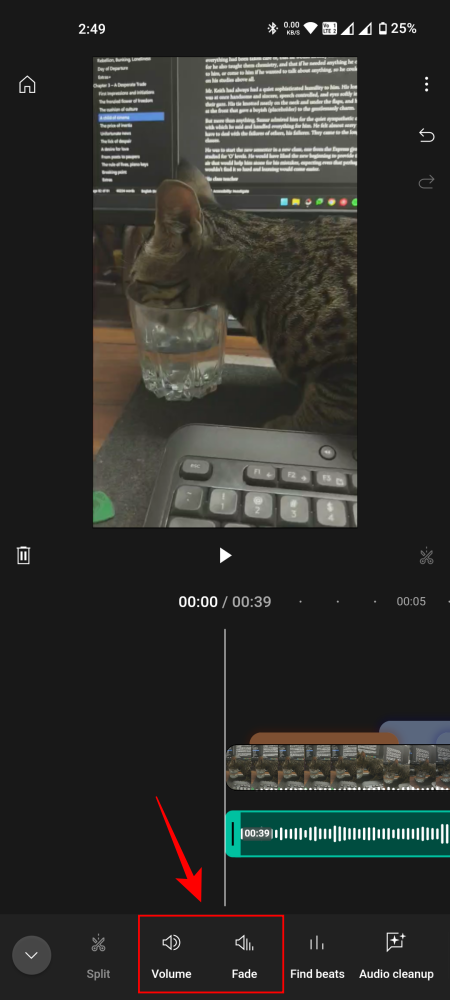
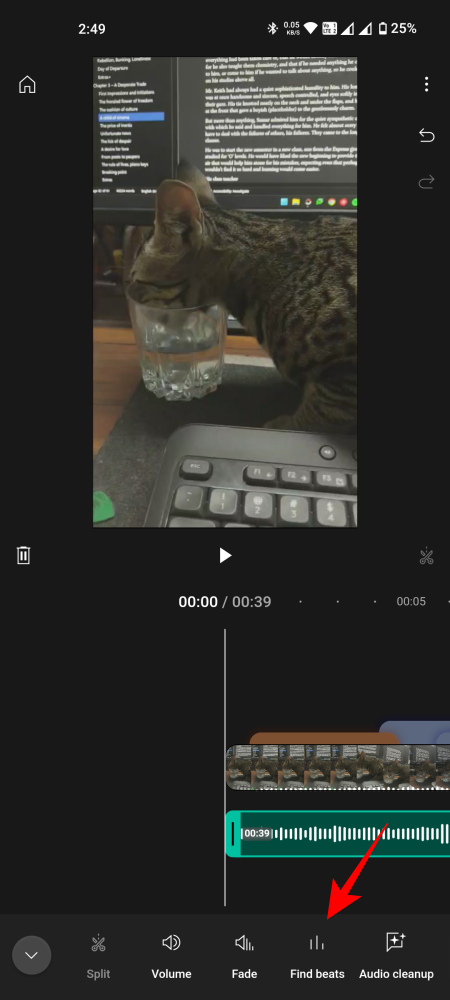
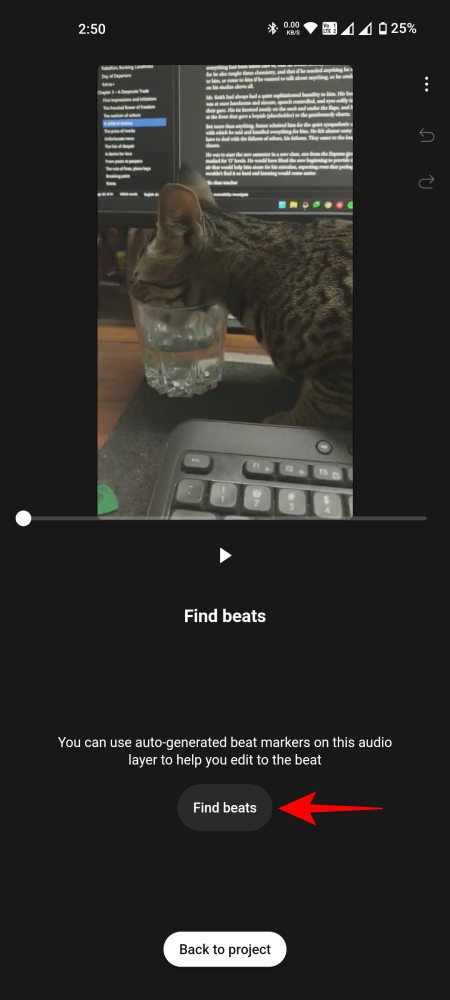
- You can also match the beat perfectly to the transitions using ‘Find beats’, which is one of the more advanced features here.
- On the other hand, if you’d rather have ‘Sound effects’, you can add them similarly as well.
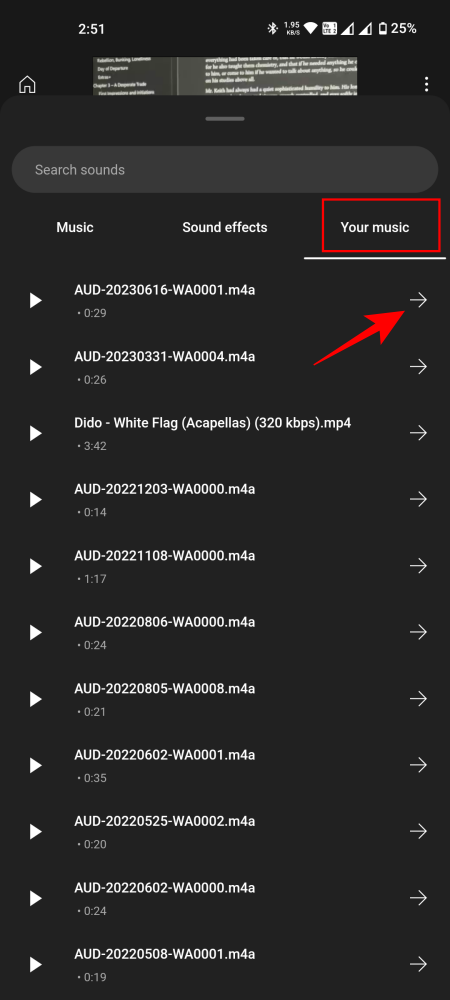
- If you don’t find anything in the Audio Library worth using, you can always add music from your phone as well from the ‘Your Music’ tab.
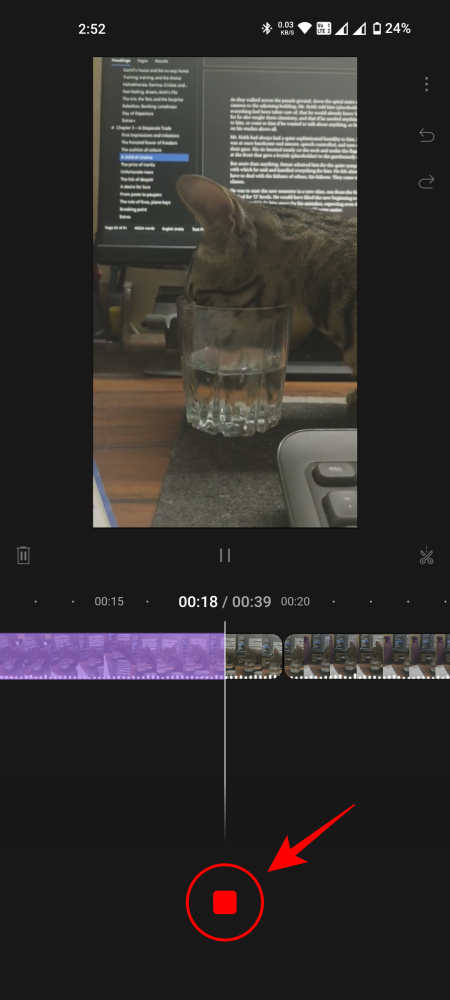
Add Voiceover
If your video would do well with some narration, YouTube Create lets you add Voiceovers as well. Here’s how:
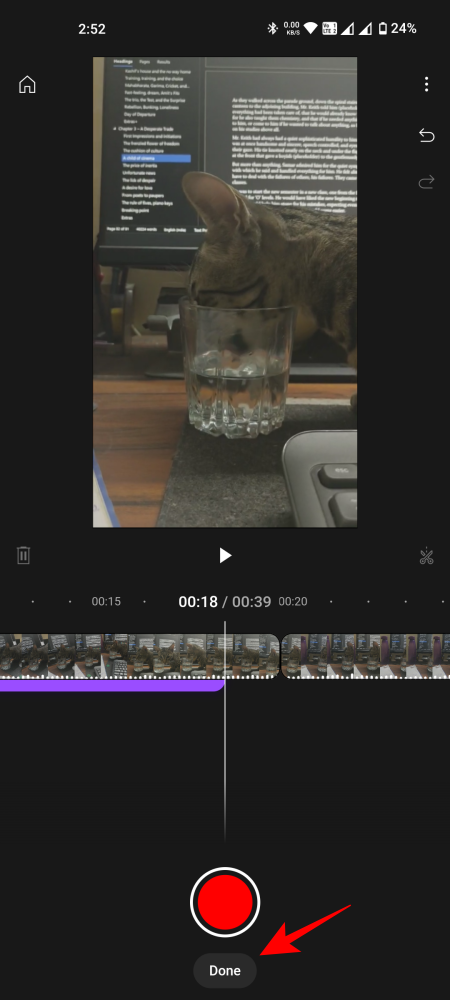
- Tap on ‘Voiceover’ in the bottom row. Give the necessary permissions if asked for it. Then tap the red button to start recording.
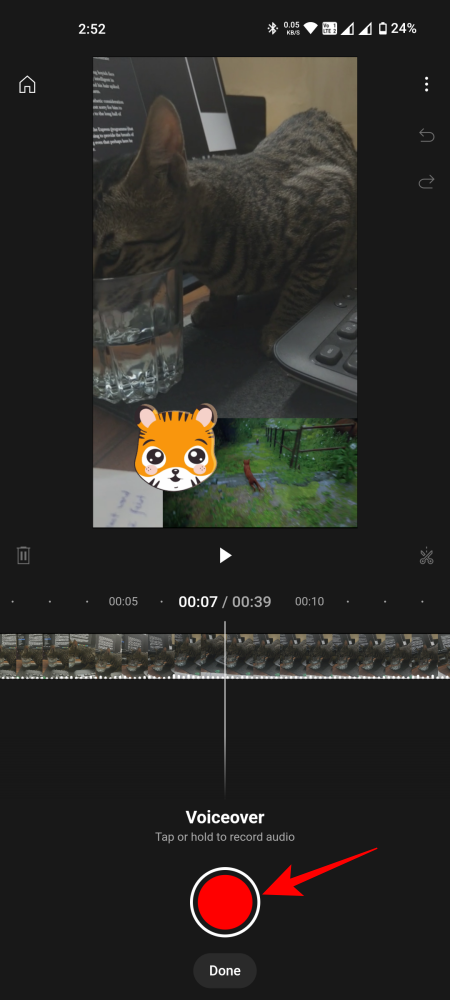
- Tap on the stop button to stop. Use the preview to listen back to the narration. Once finished, tap ‘Done’.
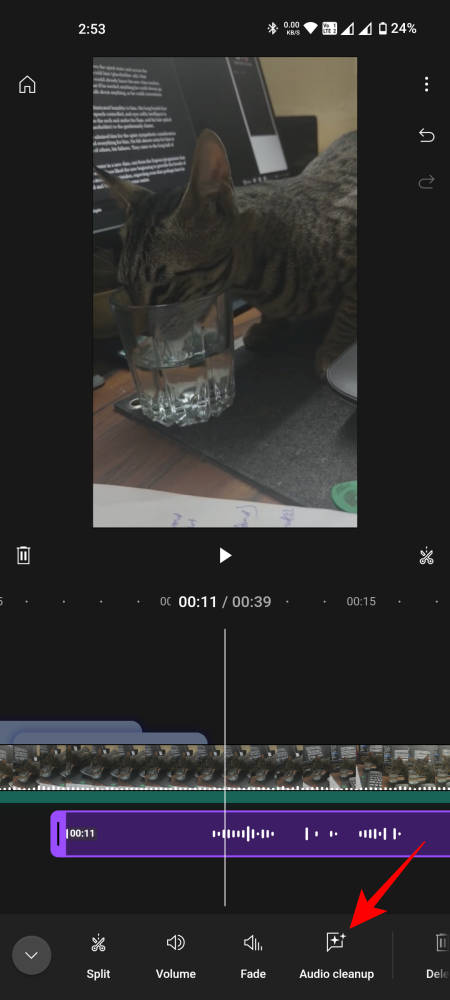
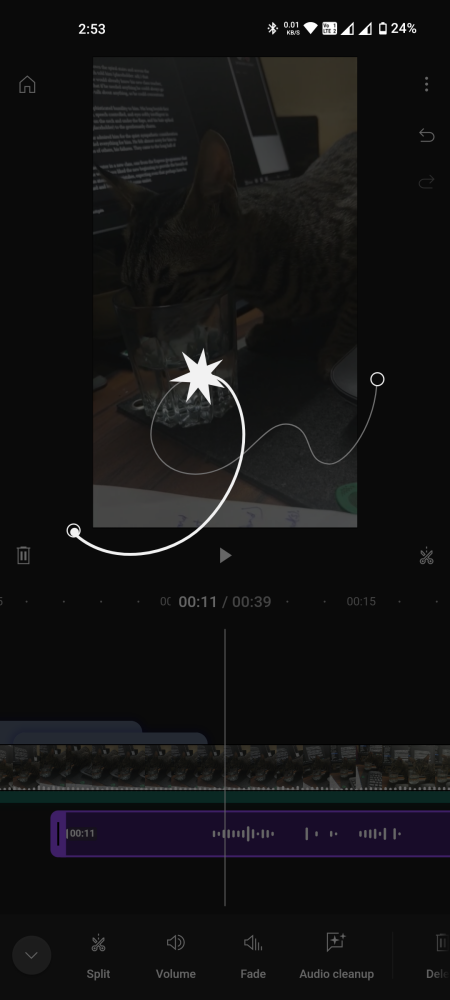
- Once your narration is added to the timeline, you can use the options in the bottom row to edit the volume, make it fade in and out, and even remove noise using ‘Audio cleanup’.
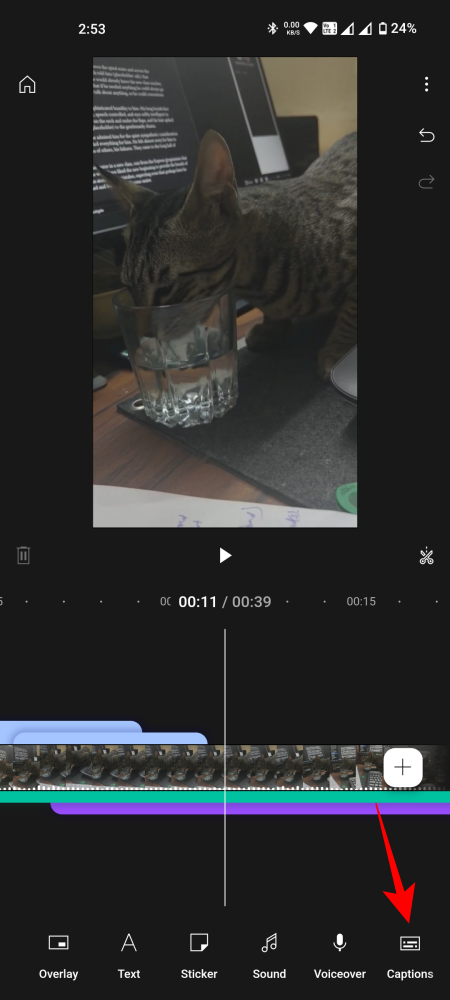
Add Captions
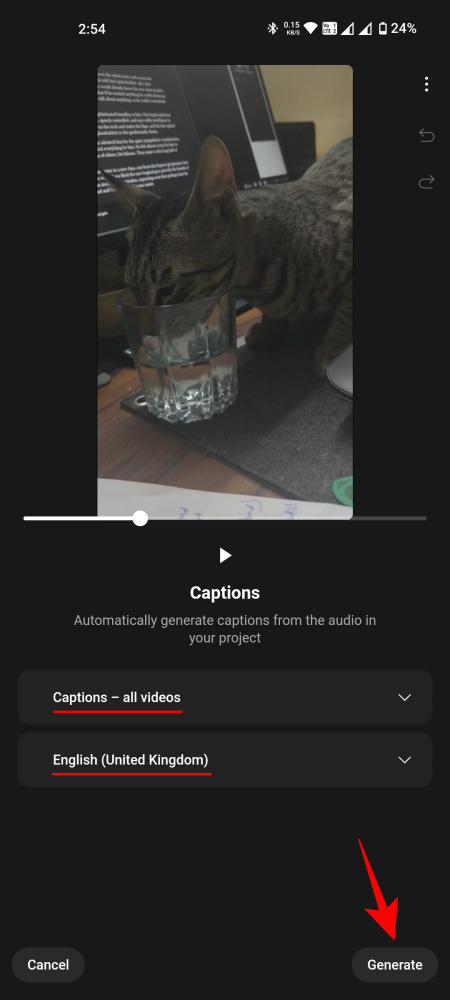
‘Captions’ is one of the more advanced features of YouTube Create, especially since they are generated automatically based on your video. But they do need to be set up first. Here’s how to do so:
- Tap on ‘Captions’. Then ‘Select source’ (if you have multiple in your video), and the language in which to generate the captions.
- Tap ‘Generate’. Once they’re done generating, tap ‘Done’.
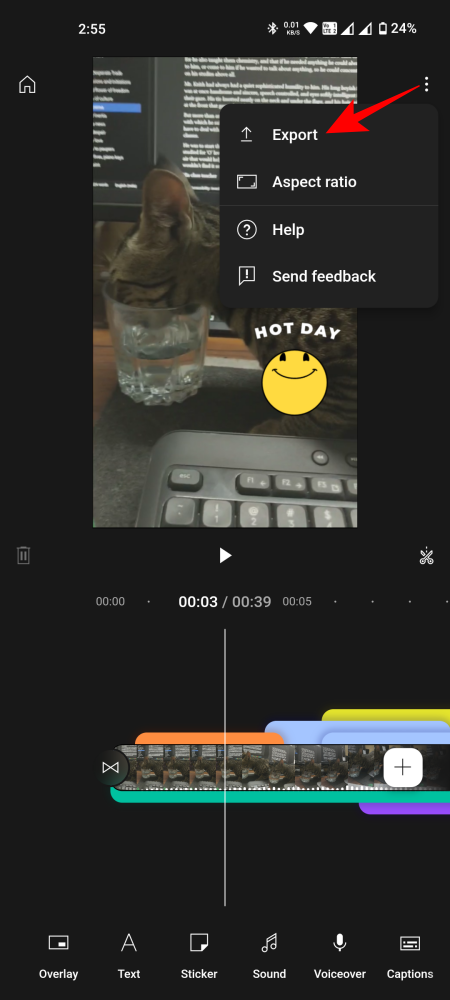
Export video
Once you’re finished and all the elements in the video are to your liking, it’s time to export.
- Tap on the three-dot icon in the top right corner and select ‘Export’.
- Select the quality and tap ‘Export’.
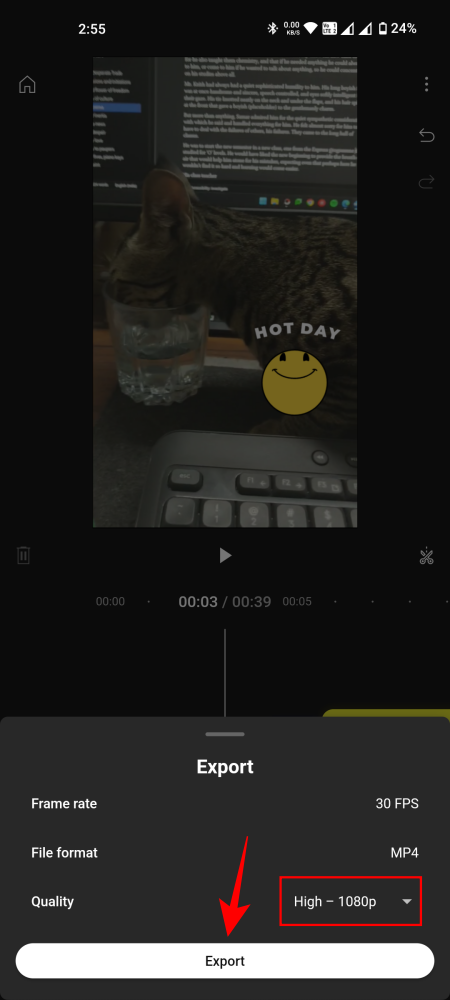
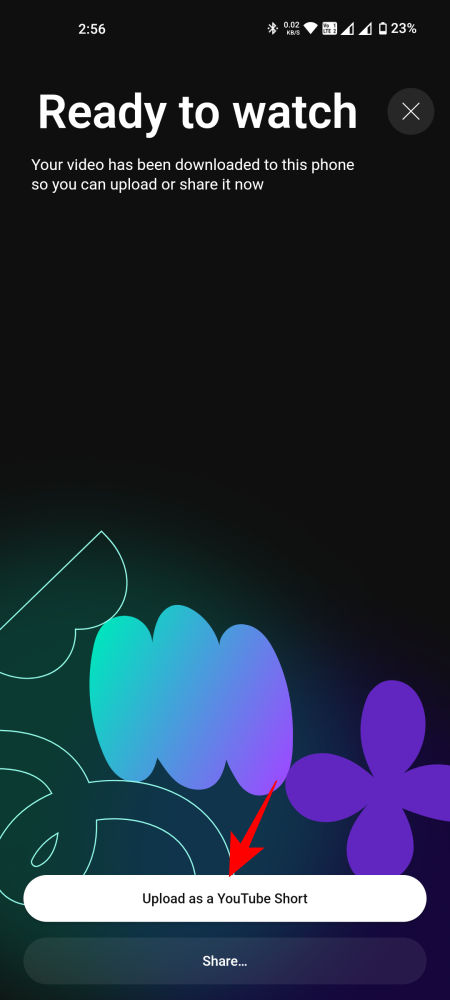
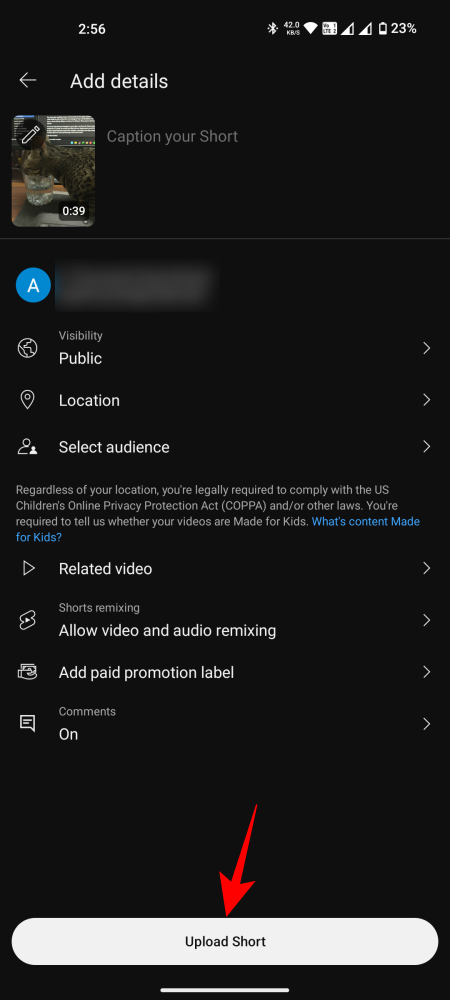
- Once exported, the file will be available on your phone’s storage. You can ‘Share’ it with others, or choose to ‘Upload as a YouTube short’.
FAQ
Let’s consider a few commonly asked questions about the YouTube Create app for video editing.
Where is YouTube Create available?
YouTube Create is available in 21 countries, including Argentina, Australia, Brazil, Canada, Finland, France, Germany, Hong Kong, India, Indonesia, Ireland, Netherlands, New Zealand, Singapore, South Korea, Spain, Taiwan, Thailand, Turkey, United Kingdom, and the United States.
Is YouTube Create available for iOS?
Currently, YouTube Create is only available for Android phones.
YouTube is clearly targeting non-technical creators with its Create app while at the same time looking to wean users away from other similar apps like TikTok that have built-in editing tools. Nevertheless, the app in itself gets a ton of things right and offers several quick edit features that are sure to stand it in good stead.
We hope this guide helped you get started with the YouTube Create app. Until next time! Keep creating.