The Corkboard is a powerful tool for outlining your manuscript, organizing key storytelling beats, and getting a birds-eye-view of your work. One of Scrivener’s most inviting features to those thinking about purchasing the program, the Corkboard both emulates an old-school corkboard experience (even coming with an applicable corkboard texture for background) and aids in experimentation with the layout of your story.
While relatively simple to grasp, learning how to use the corkboard in Scrivener and optimizing your experience means familiarizing yourself with the smaller, less obvious tools within this fantastic feature. Down below, we’ll run you through exactly how the corkboard works and everything you need to know to get the most out of it.
Related: How to Compile in Scrivener
How to use Corkboard in Scrivener
Down below, we’ll run you through the ins and outs of the Scrivener Corkboard tool, explain why it’s an invaluable tool for writers looking to see the forest rather than the trees or experiment and play around with the structure of their manuscript.
If, by the end of this quick explainer, you still have any questions left about how to use the corkboard in Scrivener, feel free to shoot ’em at us in the comments below. We’re all ears.
Opening up the Corkboard
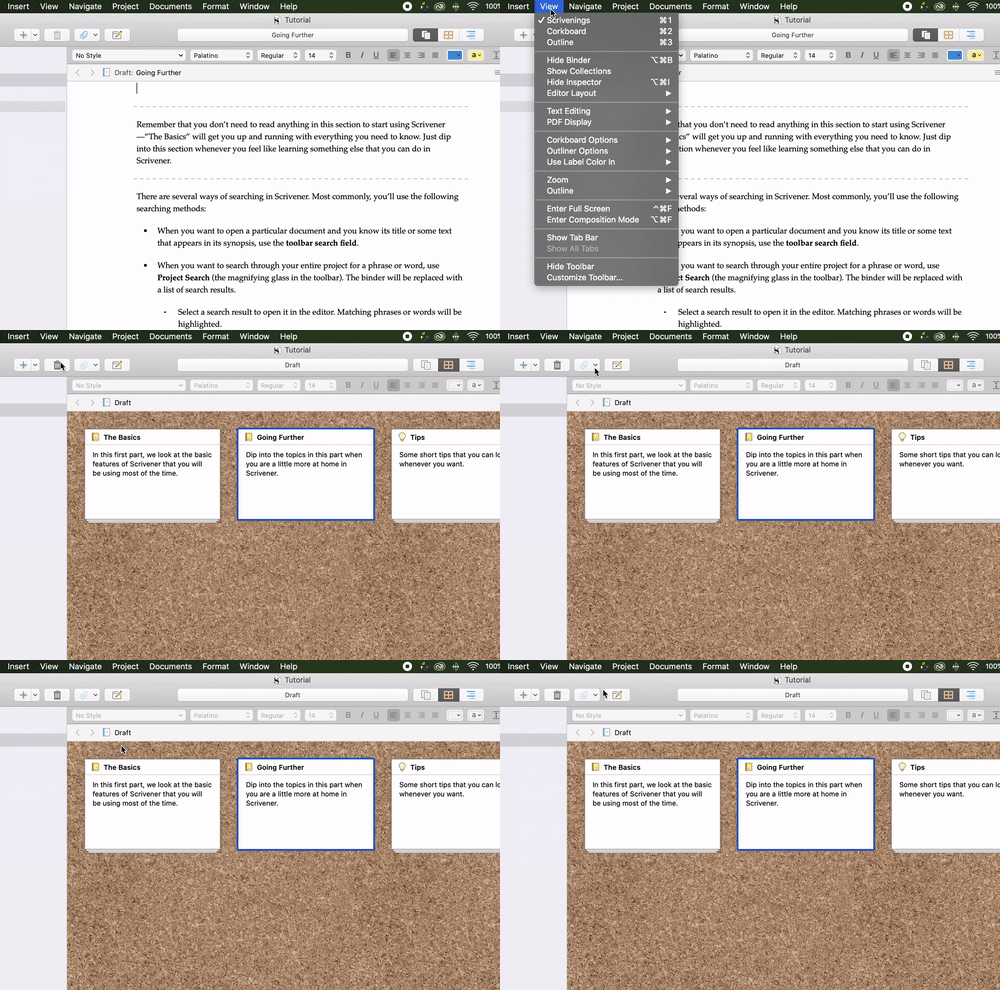
Rather than a separate tool, the Corkboard is one of the three main viewing modes for your manuscript. It delineates the structure of your manuscript through re-arrangeable index cards that afford you both an overview of your piece as a whole, as well as the ability to rearrange its individual components quickly and easily. To open up the corkboard, head to View > Corkboard. Depending on where in the Binder you are, the Corkboard will take a top-down view of all of the section’s subordinate folders, displaying them as index cards.
Anatomy of an Index Card
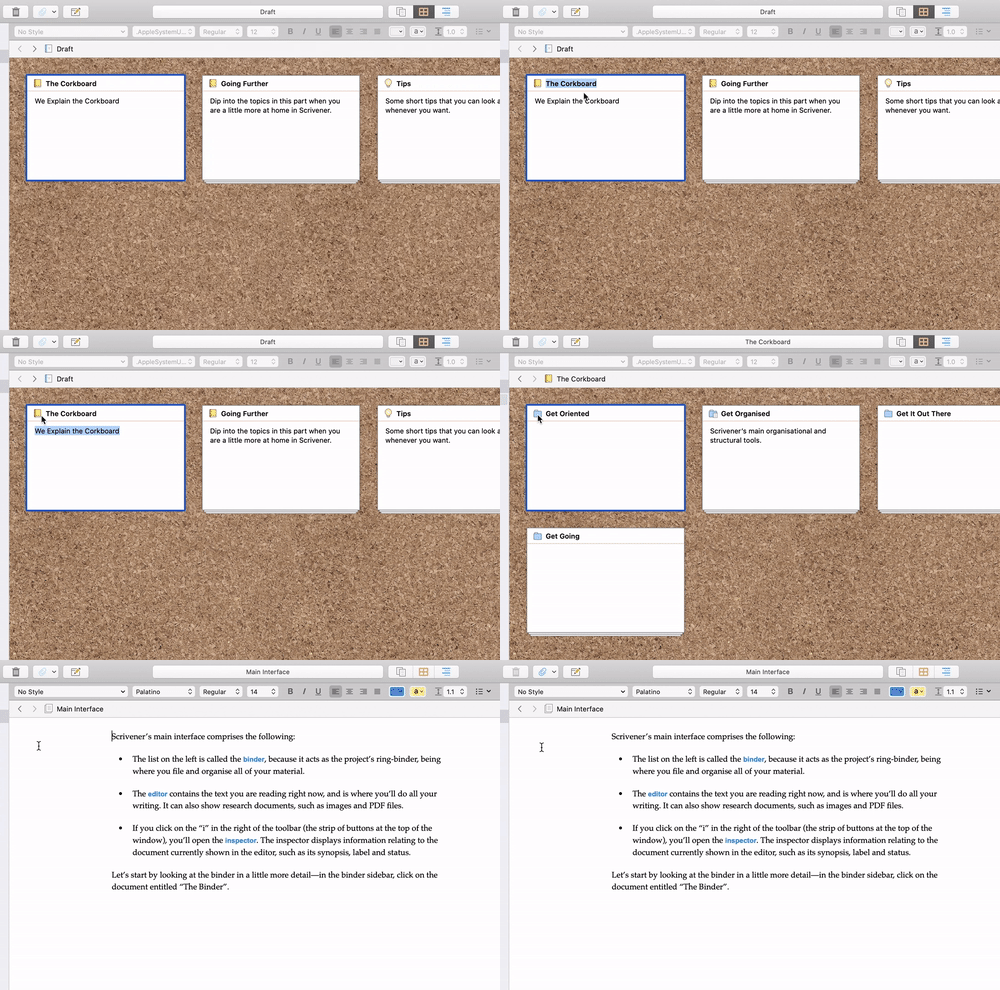
An Index card in Scrivener has three important elements to take note of. First is the title, which reflects the title of the actual folder as it appears in the binder — by double-clicking the title you are changing the folder’s name. The second is the synopsis, the main section of the card below the title which edits the Synopsis within the Inspector panel on the far right.
The third component of a Scrivener Index Card is the actual content of the folder the card represents — be it a scene, chapter, or anything else. Through the deceptively small icons in the top left corners of the cards, users can travel downward through their binder. The icon itself reflects the nature of the content below — ranging from folder types to text documents. Eventually, users will reach the bottommost content of the card, be it text or anything else.
Experimenting With Your Manuscript
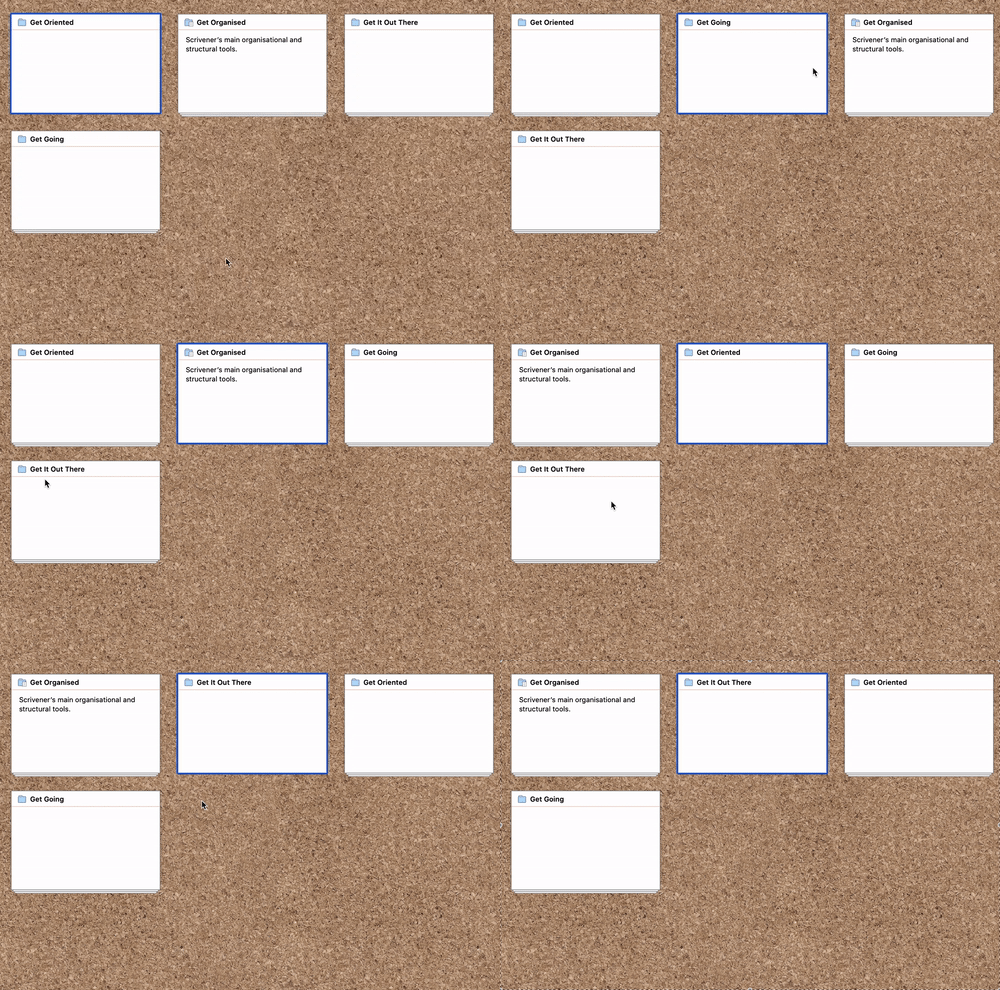
With an understanding of both the Corkboard’s purpose and the mechanics of Index Cards themselves, you can be free to use the tool as you like. Remember: the Corkboard is simply an alternative method of organizing and viewing your manuscript — how you’d like to use it is up to you.
Many users embarking on a novel, for example, may choose to structure chapters as folders and flesh out component scenes individually. For complex scenes, perhaps with several POV-jumps or high-frequency intercuts, composing your beats as index cards in a sub-folder can allow you to experiment with different timelines.
Using Different Corkboard Modes

Once accustomed to the workings of the Corkboard, you can start to customize it further to your liking using the variety of modifications available. The most important of these modifications to understand first is the Corkboard’s Freeform mode. In its default state, rearranging the index cards makes corresponding changes to the binder on your left — with each index card slotting right into place before, between, or after another card.
By going to View > Corkboard Options > Freeform, users can toggle the Freeform mode which enables you to rearrange your cards without changing the order of your manuscript’s elements in the binder. This is important because it allows users to experiment non-destructively with the progression of their manuscript.
If you’ve made a series of changes to your cards in freeform that you would like to implement in the binder, you can go to View > Corkboard Options > Commit Freeform Order. Doing so will immediately apply the changes made to the order of your cards to the manuscript itself.
Additionally, under Corkboard Options, users can alter the appearance and behavior of Index cards in a number of ways — everything from color-coding them by keyword, playing with the grid size to numbering them sequentially. You can also split your corkboard in two by tapping on the rightmost window icon in the corkboard’s mini-toolbar. All of the aforementioned items, from minor customizations to the corkboard modes can be accessed via the shortcuts in the footer of the Corkboard itself.
And that’s just about it when it comes to the nitty-gritty of using the Corkboard in Scrivener. And ah, what a wonderful tool it is. If you’re still confused or nursing specific questions you need answered, do let us know in the comments below and we’ll get back to you as soon as we can. Until then, happy Scrivening!






Hello Will,
I’ve not long purchased Scrivener 3 for iPad iOS and started reading your explanation of ‘ How To Use the Corkboard in Scrivener’. I mostly use my iPad Pro and must confess that I am struggling with such a basic task of using the Corkboard (the main reason for purchasing Scrivener). I’m not exactly a novice when it comes to using a computer but I cannot seem to get past the ‘first post’.
In the paragraph ‘Opening up the Corkboard’, you mention ‘To open up the corkboard, head to View > Corkboard ‘ and demonstrate this by an arrow going up to a black Toolbar to click on View. Well, for the life of me, I cannot see how to access this black Toolbar. I feel like a bit of a dufus, but I must be missing something? Can you assist here please? Any help would be appreciated.
Regards,
Charles Bruce, novice.
Hey Bruce!
Thank you for being patient! The reason you’re not seeing the same black menu on your iPad is because Scrivener operates a little differently on iOS devices. The clip you see above was taken on a Macbook.
To access the corkboard for any file, first make sure it is ‘collapsed’ by swiping left on its name within the lefthand menu and choosing ‘collapse all.’ You should then see a four-square icon beside the file name — tapping on that icon will reveal the corkboard for that file and its subordinate documents.
I hope that helps! And remember, if you have any more questions to please give us a shout here in the comments once again!
Happy Scrivening!
I’m on a Mac air Big Sur 11.6 and Scivener 3.2.3 and I have No Freeform on my Corkboard. The icons for such are in the footer or header (where I’m informed they should be). In the Corkboard >Options, Freeform is grayed out.
Have tried uploading a screenshot of what I don’t have: labeled A.
thanks in advance for considering my problem.
Thomas
/Users/thomasoliver/Desktop/Screen Shot 2021-11-19 at 3.09.49 PM.png
Meant they are NOT in the footer or header
I’m a beginner here using the Mac version. How do you stack and unstack cards in corkboard mode? Is there a short video that you recommend?