If you take videos from your Android phone, you might have felt the need to shorten it (cut or trim it) at least once. What may seem like a difficult task to do is actually quite easy. You don’t require any super skills to trim or cut your video. All you need is an Android phone (That you obviously have since you landed on this page) and a video trimming app.
It’s not necessary that the video should be taken from your camera, you can use the same app to cut a portion from any other video as well.
Packed with apps, Google Play Store has an abundant collection of video trimming apps. In this post, we’re trying some of those apps – Quik by Go Pro, PowerDirector by Cyberlink, and InShot Video Editor.
Also read: Android Ringtones: How to edit, create and set custom tones
How to trim your videos using Quik by Go Pro
GoPro offers its own video editor that you can use for free on your Android device by downloading the app from Google Play. The app’s interface is the simplest of the three, setting you trim and cut your videos without needing much effort and if you’re okay with it, GoPro will shorten it out for you.
To start editing on Quik, open the app, tap on the ‘Create a new video’ button on the app’s home screen, select the video you want to edit and hit the tick mark bubble on the bottom right. You will be taken to the app’s video editing window that will show you various effects to apply to your video. On this screen, tap on the Edit icon at the center of the screen.
Inside the Edit screen, tap on the ‘Trim’ tile on the bottom half and you will be taken to the video trimming tool. Quik offers you two modes of trimming – Balanced and Manual; for those of you editing videos not captured on a GoPro Camera.
Balanced: Choosing this will allow Quik to automatically pick the best portion of the video within the video range you selected.
Manual: You can trim your video however you like and it will play without cuts.
Once you have selected any of the two modes, you can choose the new start and end points of the video, that will basically trim the non-selected portions of the clip. Once this is selected, tap on the green tick-marked box at the bottom. 
You will now be taken back to the Edit screen where you can make all the other changes you want to perform in the video. You can add texts, highlight a portion of the video, adjust audio, rotate, change video speed, crop, and split desired parts. You can add multiple videos to the current clip by tapping on the ‘+’ icon on either side of the screen. Once you’re done with all the changes on the Edit screen, tap on the Close icon at the top left corner.
The main video editor screen will now show up. Here you can try different styles and effects for your video, choose background music or edit other aspects of the clip like duration, filter, font, color, and more.
When you’re done making all the necessary changes, tap on the download bubble at the bottom right and your video will be saved to your local storage.
You can also share the file or send a link to the video to social media or upload the video directly on Instagram Stories.
How to trim your videos using PowerDirector by Cyberlink
PowerDirector is a video editor developed by renowned video editing software maker Cyberlink. The app offers full video editing controls like trimming, splicing, rotating clips, adjusting the color, brightness, and saturation. You can download and install PowerDirector from Google Play to start trimming your clips.
To start editing your clip, open the PowerDirector app on your Android device, and give it storage permissions. Once inside, tap on the ‘New Project’ button at the top, select a preset aspect (16:9, 9:16 or 1:1), and set a name for the project.
Now select the video you want to edit from the available folders shown on the screen. Your video will now be added to the main layer of the project. 
You can directly start trimming the video clip by selecting it from the project layer and dragging the start and end points of the clip according to your requirements. PowerDirector lets you get trimming done more accurately by allowing pinch-to-zoom functionality to stretch the video editor to a larger portion of the screen. This way crop certain portions of the video at the precise point of time. 
Once you have successfully selected the desired start and end times for the video, tap on the Edit icon at the bottom left corner (in landscape mode) to make other adjustments.
Inside the Edit toolbar, you can make changes to audio, speed, color, saturation, rotate, crop, flip, and more. You also get options to apply filters, effects, skin smoothener, pan and zoom effect, duplicate, stabilization and reverse playback. 
You can check the adjustments by playing the edited video which you can do by tapping the play button on the right-hand side. After you have made all the changes, tap on the Save button at the top right corner (video clip icon with a right arrow).
The video either be saved to your local storage or can be uploaded to a social platform of your choice. 
How to trim your videos using InShot Video Editor
InShot Inc’s Video Editor & Video Maker has garnered many praises for packing the most features and that might be why the app has a gross rating of 4.8 stars on Google Play. The app offers a video trimmer among other video editing tools and you can download the InShot Video Editor on your Android device from Google Play.
After you’re done installing the InShot Video Editor on your phone, open the app and tap on the ‘Video’ tile inside the ‘Create new’ box on the main screen. In the next screen, select a video you want to edit after which point, you will be taken to the main video editor. Here, scroll through the bunch of tiles at the bottom that correspond to different editing features and tap on the ‘Trim’ tile.
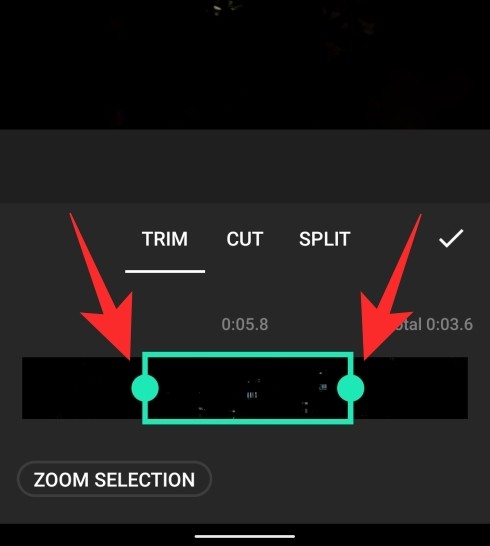
The Trim screen will now show up on the screen. Select the start and end times for the video by sliding the left and right edges of the video seek bar towards the middle so that you can shorten the selected video clip. 
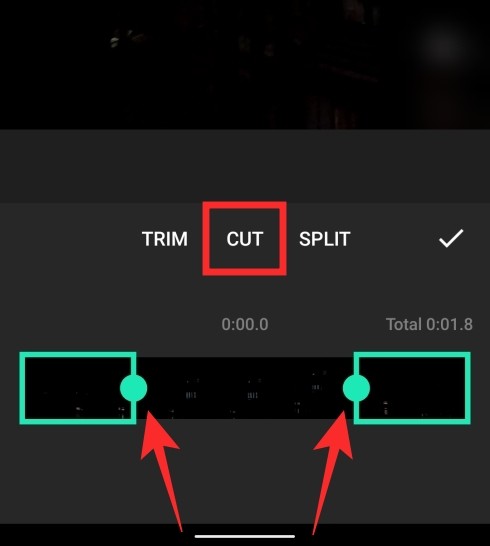
InShot also lets you trim your video in such a way that you remove a middle portion and merge the portions on the sides inside a single clip. You can do so by tapping on the ‘Cut’ tab inside the Trim screen and then adjusting how much of the middle portion you want to do away with. 
When you’re done with trimming the clip, tap on the tick mark button. You can make other changes to your video by choosing an option that you’d like to apply like adding music, sticker, text, filter, background, or change things like video speed, volume, aspect ratio, and more. There’s a Canvas mode that lets you add your video to a new canvas where you can add other elements and present it as a video.
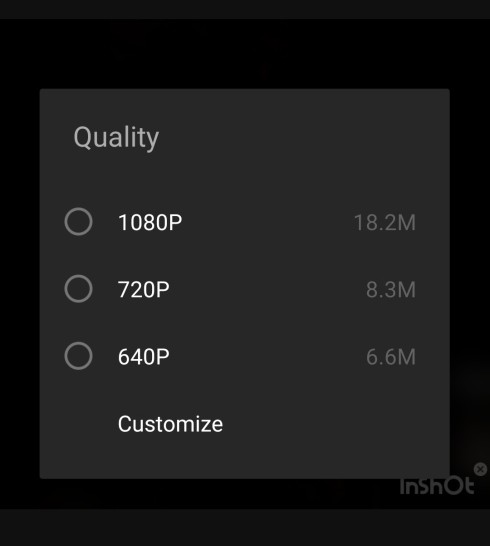
After all the necessary changes are done, tap on the Save button at the top right, and select your output video resolution.
Your video will now start processing and will be saved to your local storage. You can share it to social media and messaging apps directly from the InShot app.
Which one of these three apps did you use to trim your videos on Android? Is there a suggestion you’d like to share? Feel free to send us your tip in the comments below.


I have tried both vidtrim and crop and trim app. i find the second way far more accurate than the first. vidtrim cut where they want while crop and trim is almost perfect. just my humble opinion
Both the ways are good. Really helpful guide.