What to know
- The ChatGPT app on Windows uses the Snipping Tool to grab screenshots.
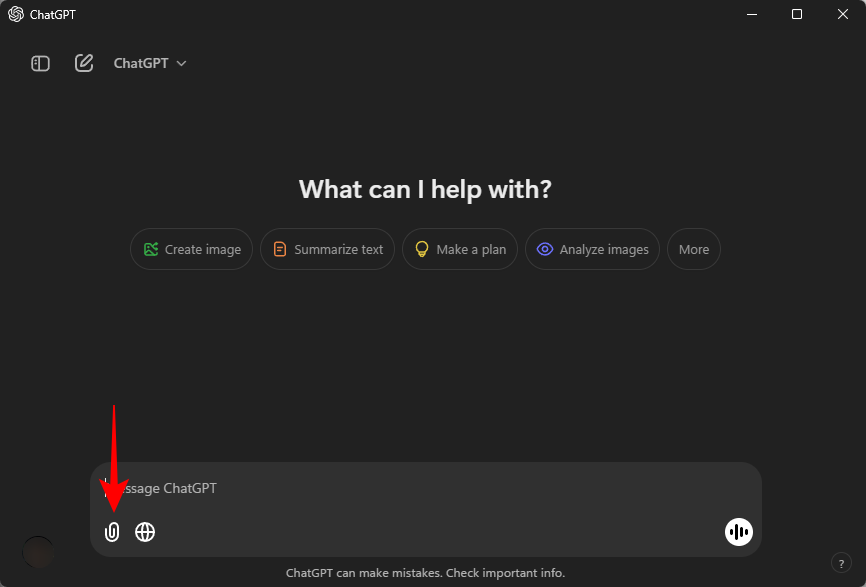
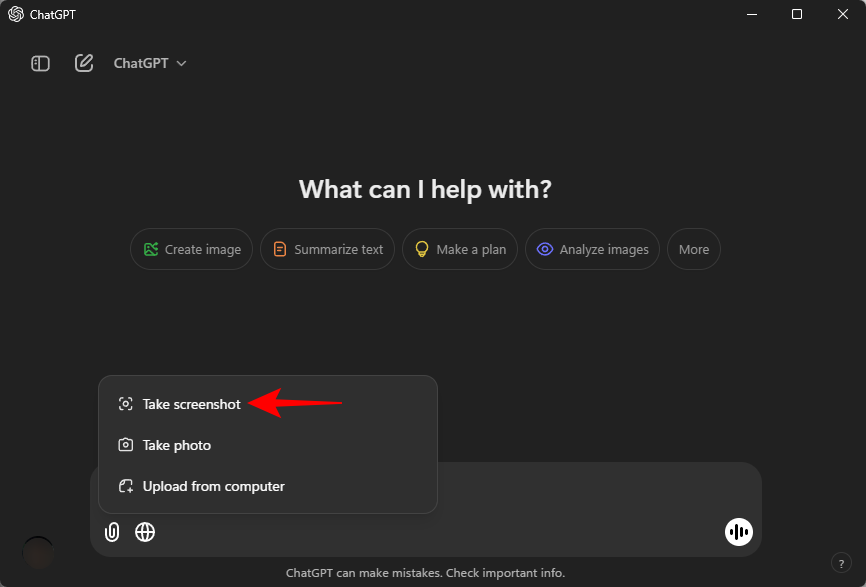
- To take a screenshot, click on the paperclip icon, select ‘Take screenshot’, and then highlight the area of the screen you want to screenshot.
- By default, ChatGPT uses the default ‘Window’ snipping mode to take screenshots. But you can change the Snipping mode to take ‘Rectangle’, Full screen’, or ‘Freeform’ screenshots as well.
ChatGPT’s desktop app has just about every feature that’s available on its web version and mobile app. But since it caters to the desktop environment, it also has certain additional features like the ability to take screenshots to allow users to capture what they see on screen and then ask questions about it. Here’s how to take advantage of ChatGPT’s screenshot function on Windows.
How to take screenshot with the ChatGPT desktop app
ChatGPT leverages Windows Snipping Tool feature to take screenshots. Here’s how to go about taking screenshots with it:
Video guide:
Step-by-step guide with screenshots
Step 1: Launch the ChatGPT app. If it’s already running, you can use the default shortcut Alt+Space to invoke it as well.
Step 2: Click on Attach files (paperclip icon) in the bottom left corner.
Step 3: Click Take screenshot.
Step 4: Select the window to take a screenshot.
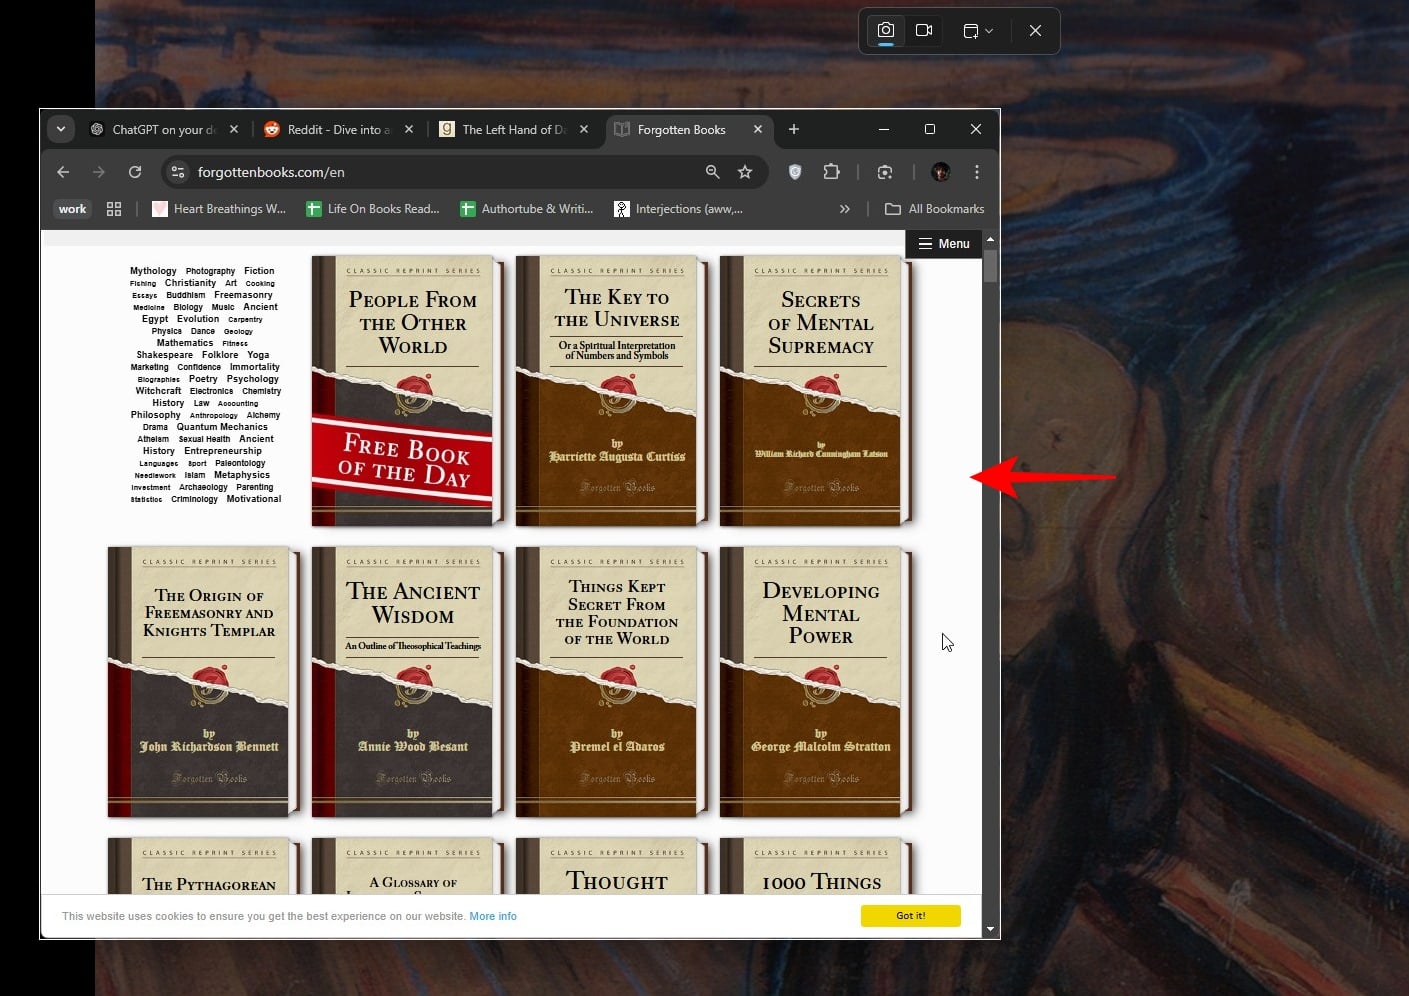
Step 4.5: By default, ChatGPT will use Snipping Tool’s default ‘Window’ screenshot grabbing mode. You can use other modes like ‘Rectangle’, ‘Full screen’, and ‘Free form’ if necessary.
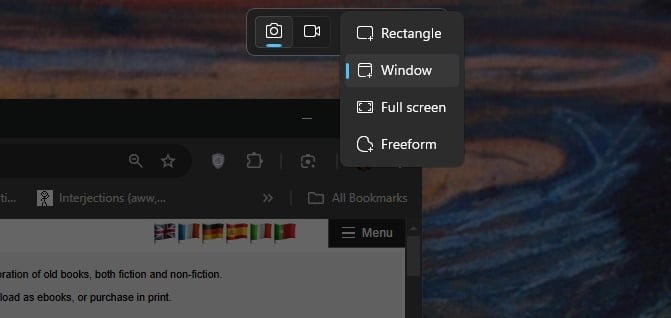
Note: Even though you can technically start screen recording as well, ChatGPT won’t pick it up. So keep it to screenshots only.
Step 5: Once the screenshot is captured and available in ChatGPT’s prompt box, type your prompt and send it through.
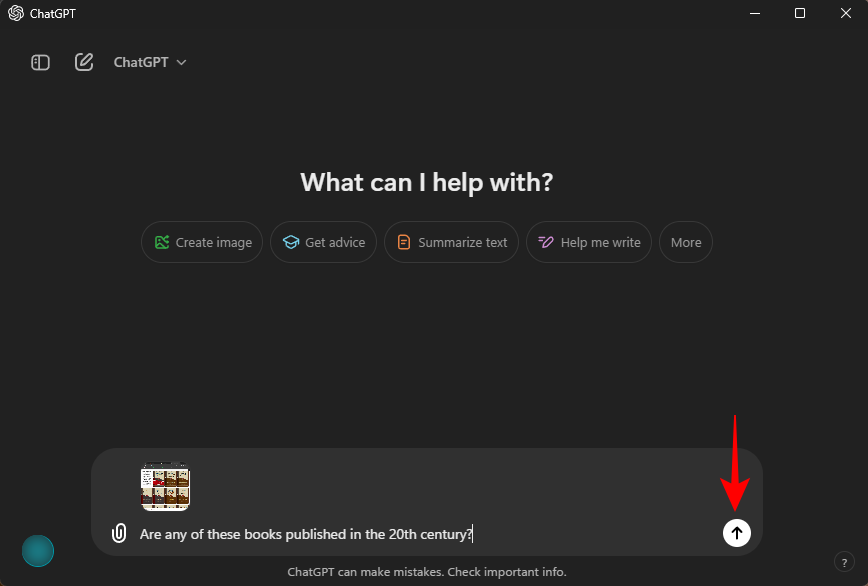
And that’s it! Although you can launch the ChatGPT app in full view, the mini view which is invoked by its shortcut is recommended when taking screenshots.


