Scanning documents have gotten easier through the years. Gone are the days where you needed expensive pieces of equipment to scan a single piece of paper. Now, with a decent Android smartphone, you can scan your paperwork into PDF format and save it online for a completely paperless office.
The following article will help scan documents and store them online with ease so that you’re never limited to searching for physical copies of your documents when you’re outside the office.
Why scan documents?
Scanning a document isn’t a joyous task to do and if you are traveling it’s more painful. Also keeping a heap of paper is so 19th century. Besides, what is the first thing that comes to your mind when you hear the term “scan? We know, we know! It is that big unhandy time-consuming machine – the scanner.
Have you ever thought of replacing the scanner with something small and portable? My dear friend – your wish has been granted. Your best buddy – your mobile phone is capable of doing everything – including scanning your documents/receipts/whiteboard.
You know you could kill two birds with one mobile, I mean stone. Use your Android phone to scan the documents and store the digital data online in any cloud storage – Google Drive, DropBox which you can access from any device, anywhere, anytime.
Further, scanning the document using an Android phone has two more benefits. First, if you lose an important paper document you would have its backup in the digital form and second, searching for digital data is a cakewalk.
Also read: Best pre-installed Android widgets that you should know about
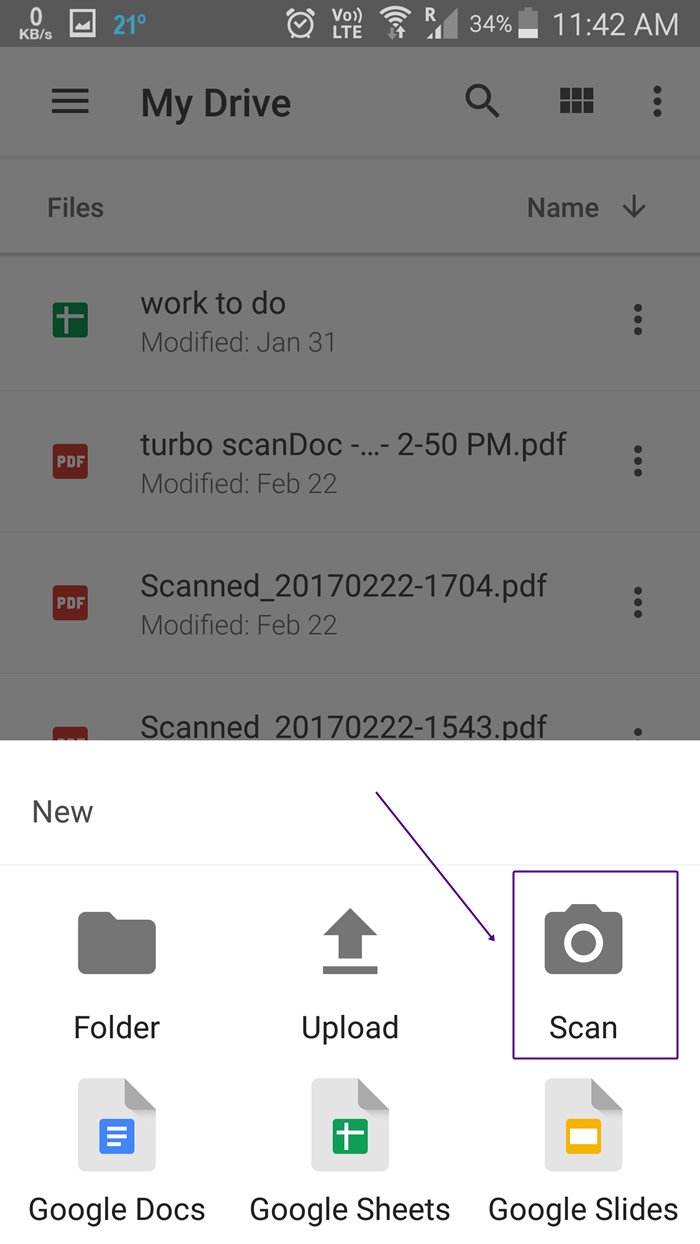
How to use Google Drive to scan the documents
You can use the pre-installed Google Drive app on your Android phone to scan your documents and save them online – no need to install anything.
Google Drive is one of the best and simple apps to scan the documents. It’s a godsend app that automatically saves the data online by creating a PDF file – that you can access anywhere. Moreover, Google Drive app indexes your documents meaning you can search within the PDF files.
Suppose you upload multiple prescriptions of Bharti Medicines, New Delhi and you want to search for a particular medicine in one of the prescriptions. With Google Drive, you don’t need to manually open each document, you can search for the medicine directly via the search bar and Google Drive will show you the files containing the exact term. (I know, it’s Awesome)
To scan the documents using the Google Drive Android app, follow the steps:
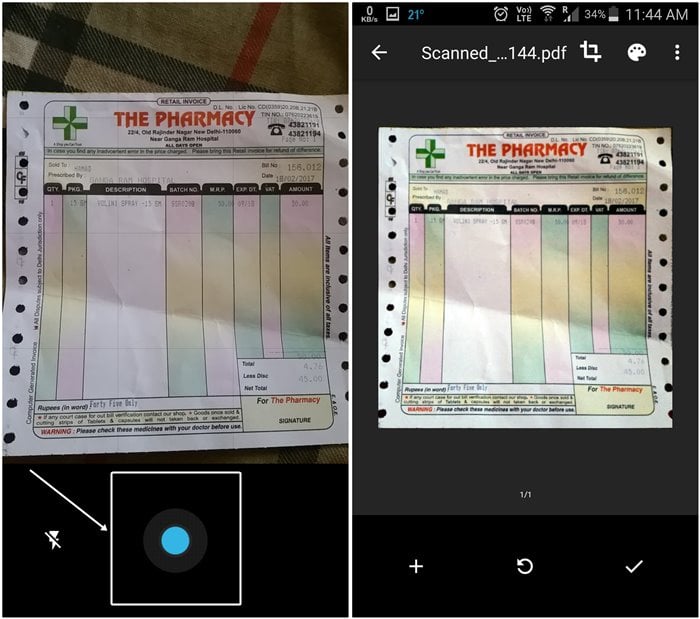
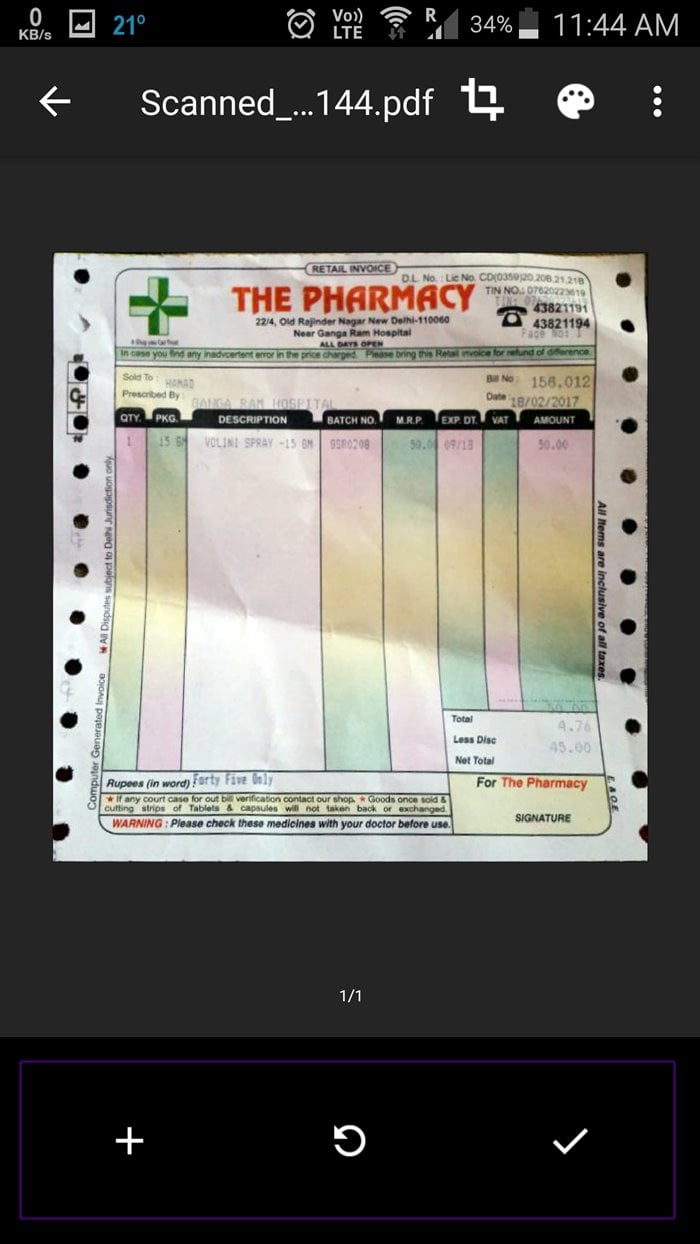
The app will automatically crop the photo to fit the document as seen in the above picture.
Also read: How to recover notifications cleared from notification bar on Android, including Samsung devices
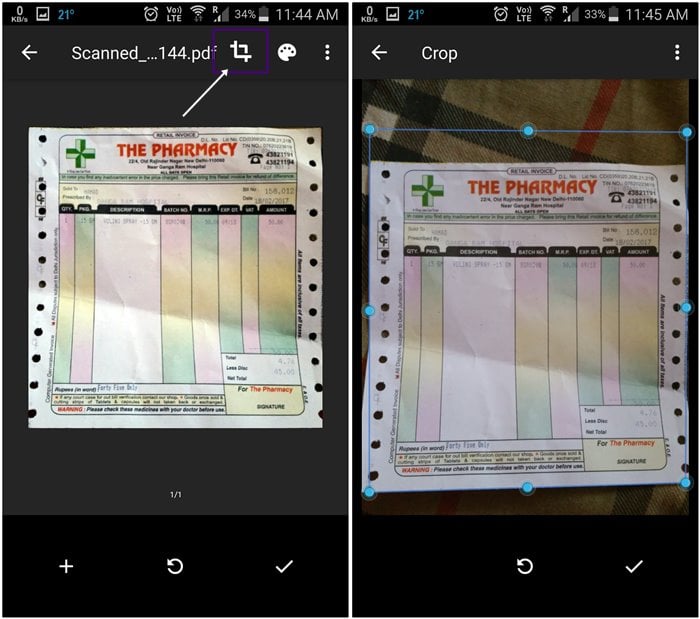
However, if you are unhappy with the automatic crop, you can tap the crop icon in the top bar to modify the dimensions.
Further, the app provides you the following settings to enhance your documents.
- Tap the color palette next to the crop icon to change the color of the document.
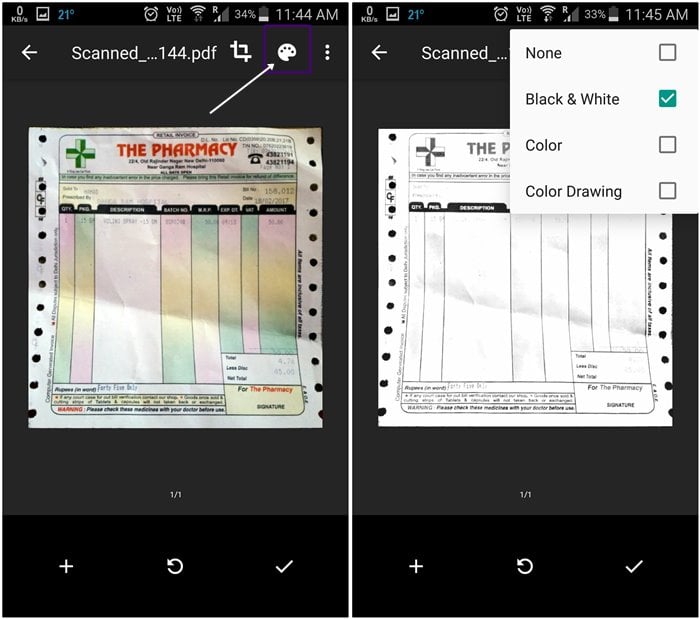
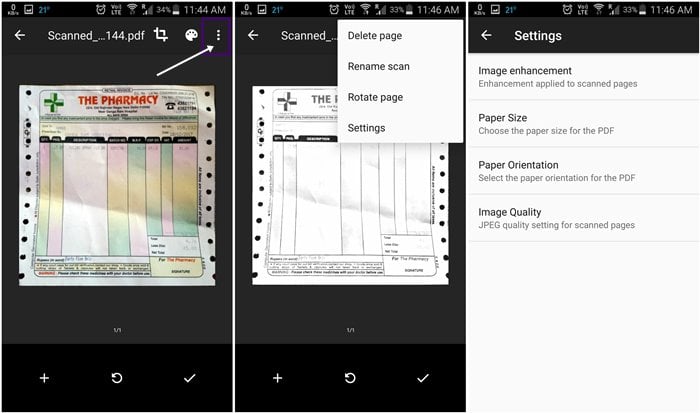
- Tap to three dots to reveal more settings. The first three are self-explanatory. In the settings option, you will find paper size, paper orientation, and image quality.
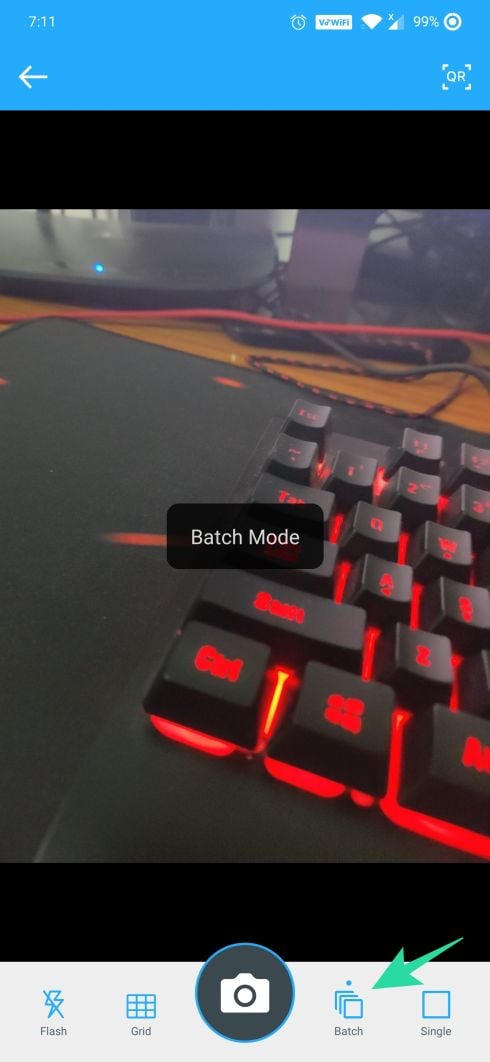
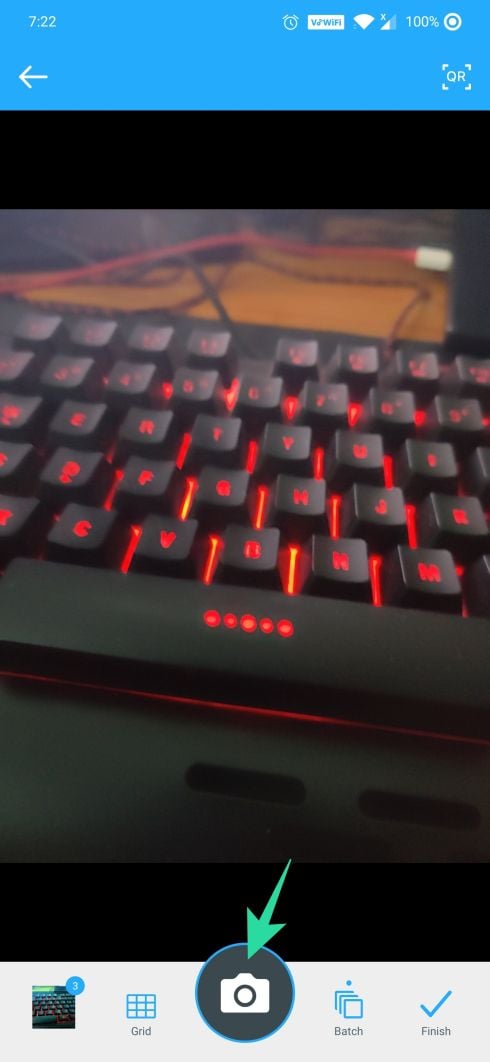
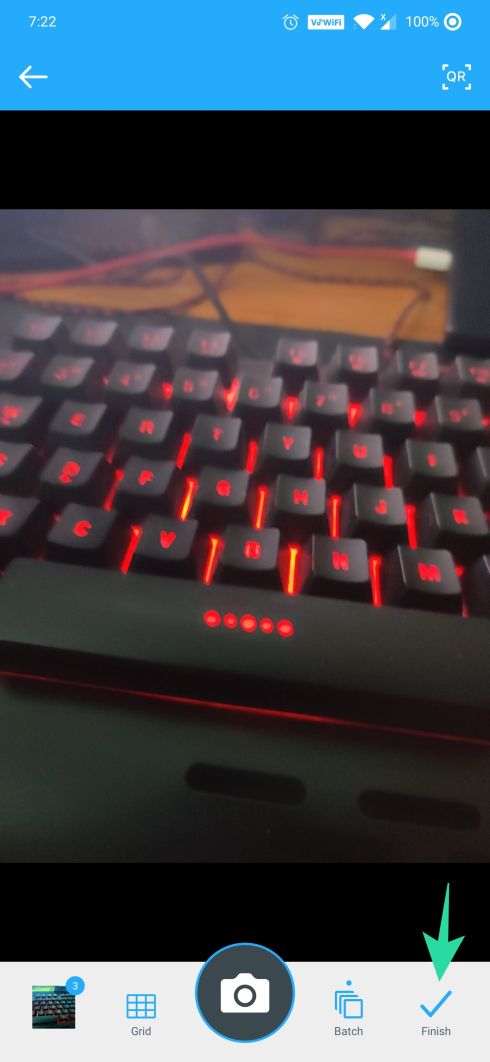
- The bottom bar holds three buttons: a plus sign to add bulk (multiple pages) to the same PDF, a retake button to re-scan the document if you are unhappy with it, and the final check button to confirm that everything is perfect and you are ready to save it.
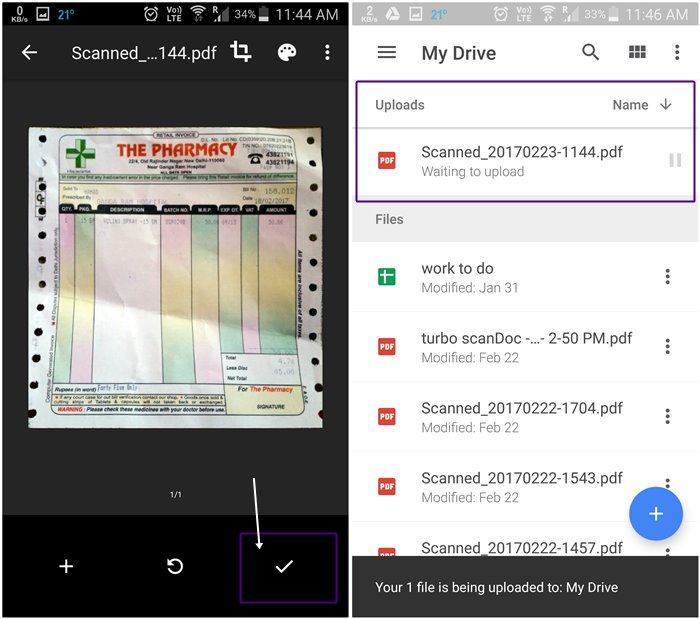
 Step 5. When you are happy with the scan, tap the check button to save the document. Tapping this icon will automatically upload the document to your Gmail account. I personally like this feature – one tap and direct upload.
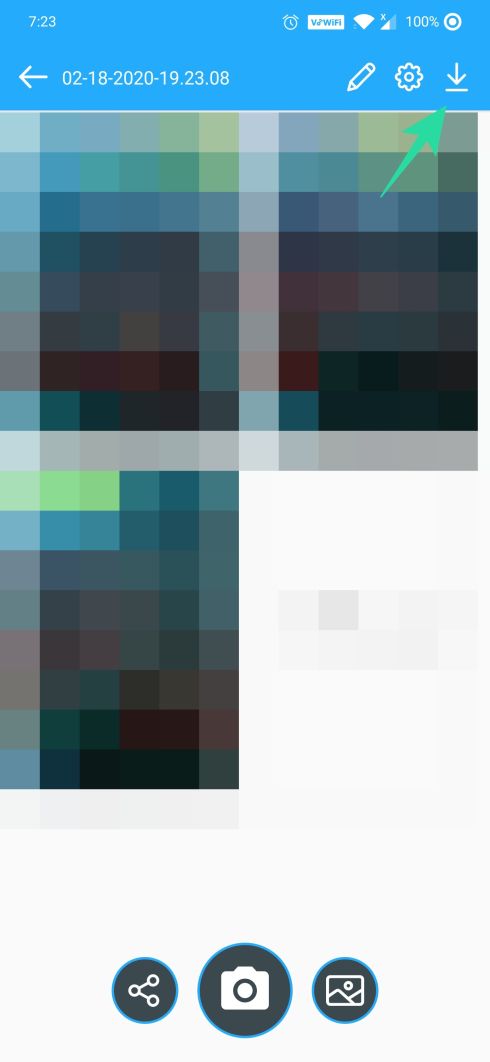
Once it’s done syncing, you will be able to view this file from any other device – specifically, if Google Drive is installed.
How to scan and save documents online using TapScanner app
The scanned documents on your phone can be sent to your preferred cloud storage in two methods. You can either opt to back up your documents automatically using the auto-backup option or upload them manually. We’ve explained the steps involved for both of them down below.
Scanning and storing files manually

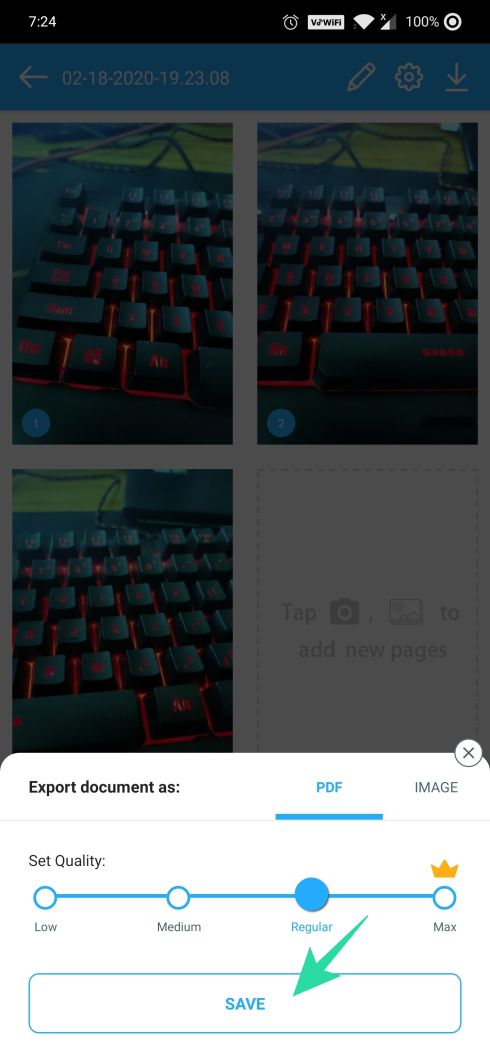
Step 9: Tap on the share icon below the scanned file.
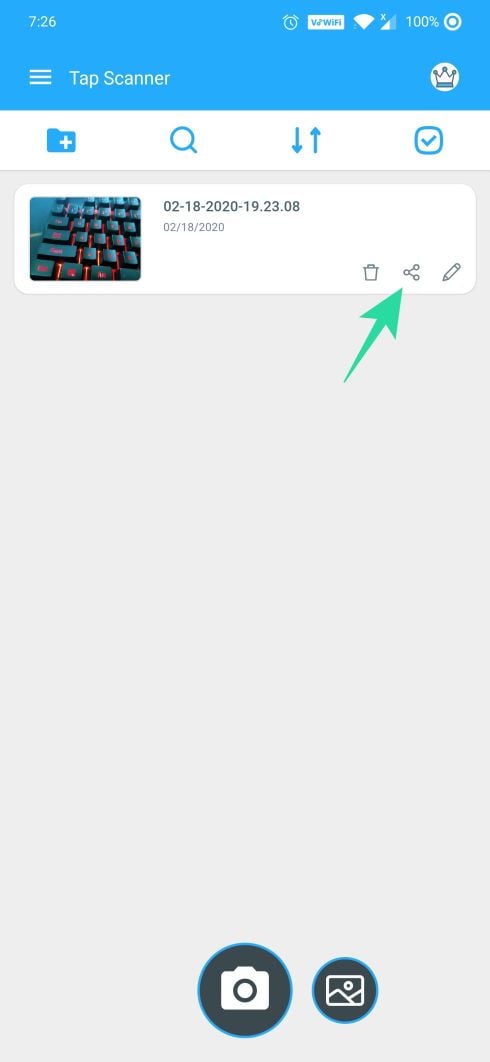
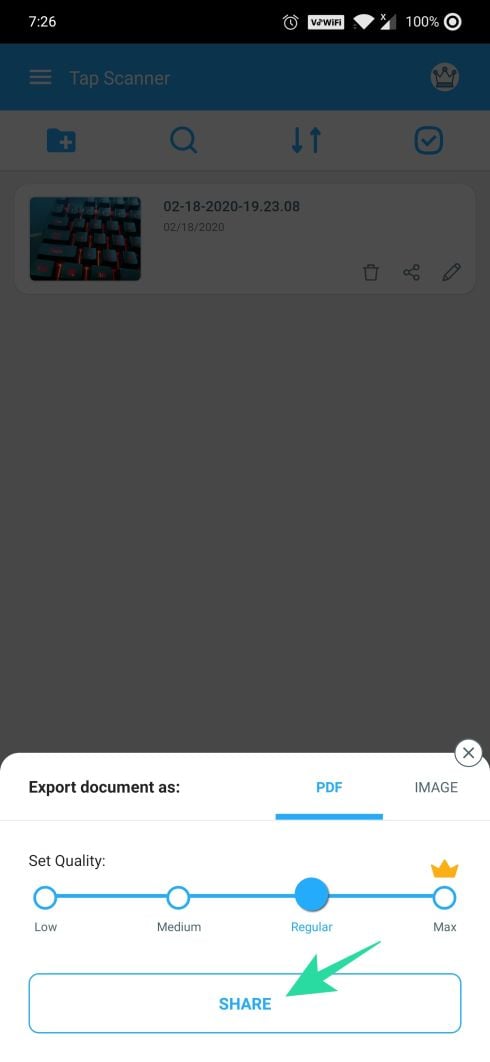
The scanned file from your phone will now be uploaded to your preferred cloud storage service. You can access it by opening that particular cloud storage app on your Android device.
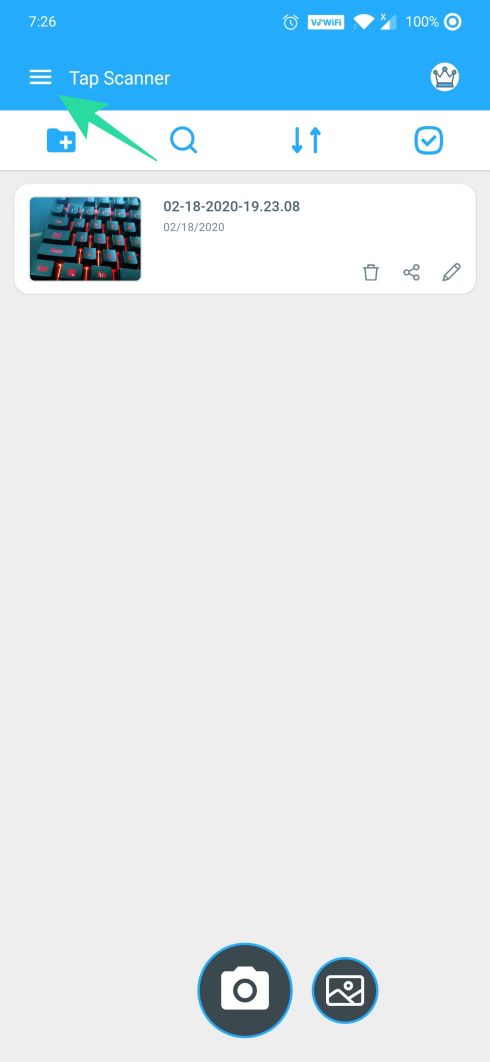
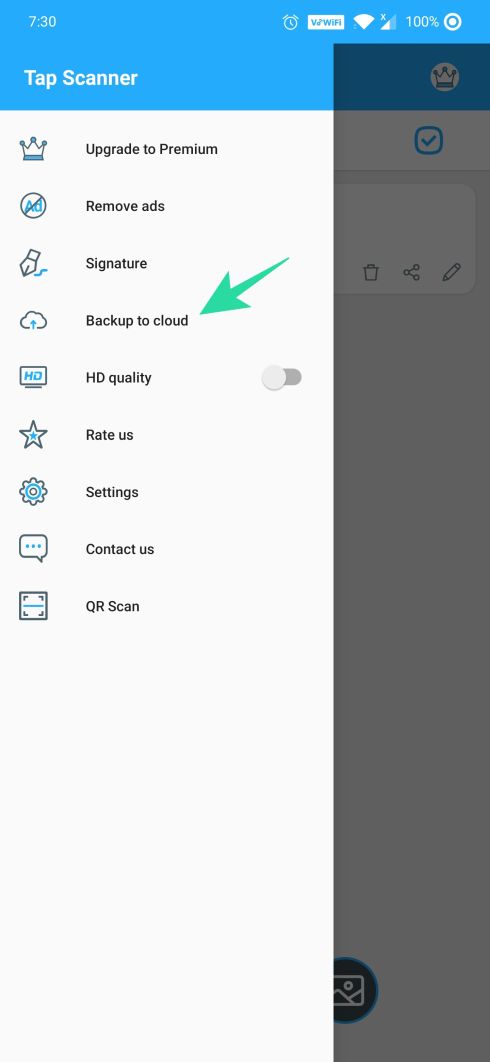
Set up automatic cloud upload
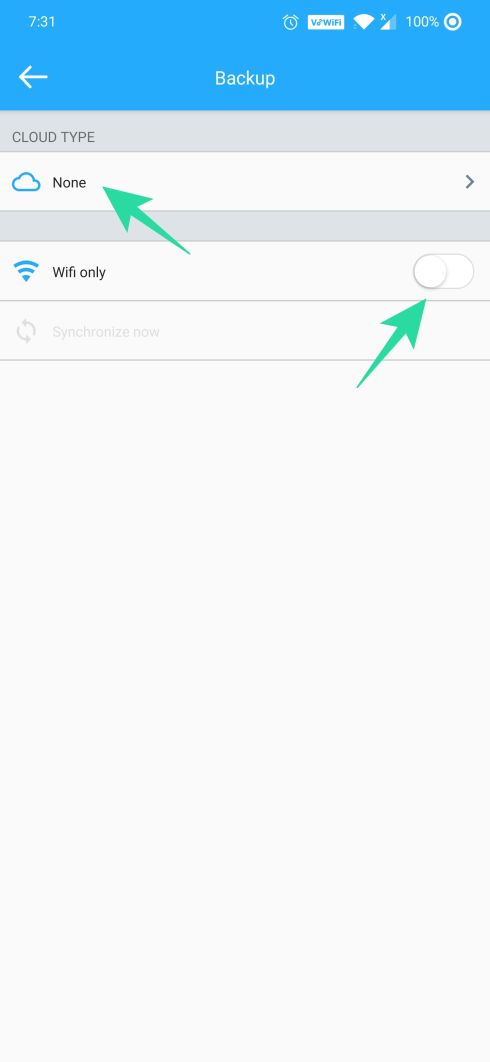
You can set up a cloud account in the Tap Scanner app and enable the auto-backup option via wifi to auto-upload scanned images from your library. To enable cloud storage auto-backup, follow these steps:
Step 2: Tap the hamburger menu icon at the top left.
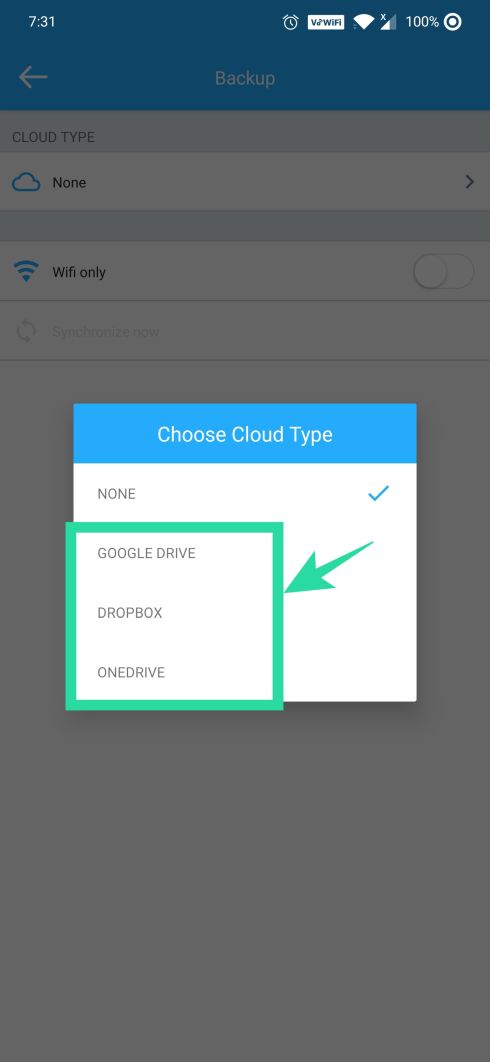
That’s it! Your files will be now auto-uploaded to the preferred cloud service when you’re connected to a wi-fi network.
Note: The auto-backup feature is only available for pro users of the Tap Scanner app. Free users can upload/share the files only manually.
Other 3rd party Android apps you can use to scan and save documents online
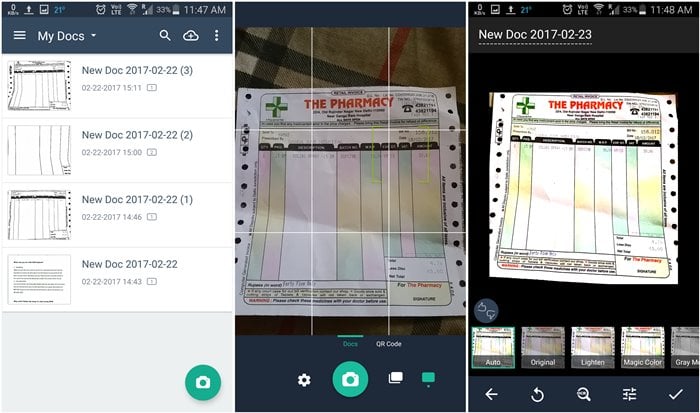
However, if for any reason you are not satisfied with the Google Drive app, you can use third-party apps like CamScanner, Turbo Scanner, Tiny scanner, Microsoft Office Lens, etc. to scan the data. These apps have few additional functions like improved batch mode, import existing photos, etc. But, most of the third-party apps lack Optical Character Recognition – search within the image (which is available on Google Drive), in the free version.
The first name that pops up on the Google Play store when you search for “scanner” or “scan” is the CamScanner app. Being one of the well-known apps, it doesn’t disappoint at all – I tried many 3rd party apps, but CamScanner won the race.
Similar to Google Drive, CamScanner scans the document and auto crops it. Additionally, it provides other settings like image size, batch mode, filters, etc. to further enhance the document.
Also read: How to sync a local folder with Google Drive on your Android device
To remote access your data, you can save it online to cloud tools like DropBox, Google Drive, OneDrive, etc. however, auto sync is available only for premium users.
Though the free version of CamScanner lacks few other features like Optical Character recognition and adds a watermark to the scanned documents, CamScanner still leads the gang.
Of course, you could use the default phone camera to capture a photo and save it in the gallery but the best approach is to use an independent app that automatically crops the photo, organizes the scanned data in different folders and offers text recognition – which allows the apps to search within the image.
Do you often scan documents using your phone? Do you store them on the cloud and if yes, how? Let us know in the comments below.


2 responses to “How to scan documents and store them online on Android”
I have always used scanbot and camscanner to scan paper. I never knew google drive scan was this functional. Thank you. Genuinely helped
I have always used scanbot and camscanner to scan paper. I never knew google drive scan was this functional. Thank you. Genuinely helped