

If you’re someone who stays online on your Mac more than your phone, you may have used WhatsApp’s web app for sending and receiving messages without picking up your phone. While this functionality has existed for a few years, one downside to that has been that your phone was always required to stay online for you to use WhatsApp on a computer.
Besides this, some features weren’t available on the Mac app or WhatsApp’s web client which made it all the way less convenient. WhatsApp has now changed this experience with its new native Mac app which lets you use the messaging app without any of these restrictions.
In this post, we’ll explain to you what’s new about the new WhatsApp app, how you can download it and start using it on a Mac.
What’s new with WhatsApp on Mac
Although WhatsApp has been available as an app on macOS, this app was more or less a web-wrapped version that would look and feel similar to WhatsApp on the web. Thanks to recent developments, the company has now developed a native version of the messaging app, one that offers all the features that you’d otherwise get on its iOS app without any restrictions.
The main difference between this app and the old version is that you no longer require your phone to be connected to the internet to use WhatsApp on your Mac. The older app relied on your phone’s internet connection to relay the same messages to your Mac. In the new version, you will be able to use it as a standalone app, meaning you can send and receive messages directly from the Mac without needing your iPhone to connect to a network.
The native version of WhatsApp on Mac is built using Apple’s cross-platform development framework – Catalyst. This framework helps developers port their apps from iOS to Mac or vice versa and can also be used to create apps that work on both platforms. The new native WhatsApp app thus offers a faster user experience that can take advantage of your Mac’s hardware along with newer features like drag and drop files.
Instead of a two-panel window, the new WhatsApp app for Mac will offer an additional third panel which will be available on the left-most side of the window. This panel should resemble the bottom navigation bar on the iOS version of WhatsApp, offering quick access to chats, calls, archived & starred messages, and app settings.
Related: Top 2 Ways to Lock Photos on Mac
How to install the WhatsApp app on a Mac
The new native app for WhatsApp on Mac is available directly on WhatsApp’s website but the version that’s currently installable is still in beta. This means, you may not be able to use all the features on the app or you may end up facing an issue or two during your usage.
Before you install the native WhatsApp app on your Mac, you need to make sure that your Mac is running on the latest version of macOS available on it. This is important because the new WhatsApp app can only be installed on macOS Big Sur or newer versions.
To download the native WhatsApp app on your device, click on this link from any web browser.
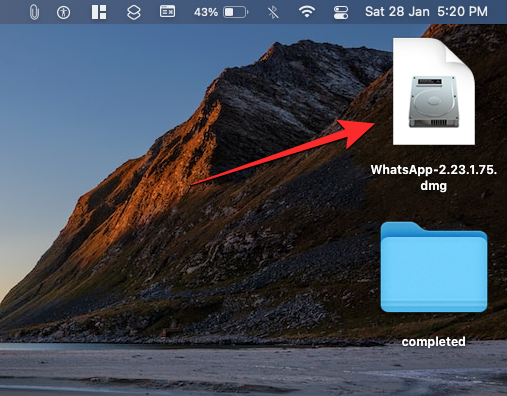
This will download the WhatsApp-2.23.1.75.dmg file on your desktop. Once the download completes, open the WhatsApp-2.23.1.75.dmg file by double-clicking on it.
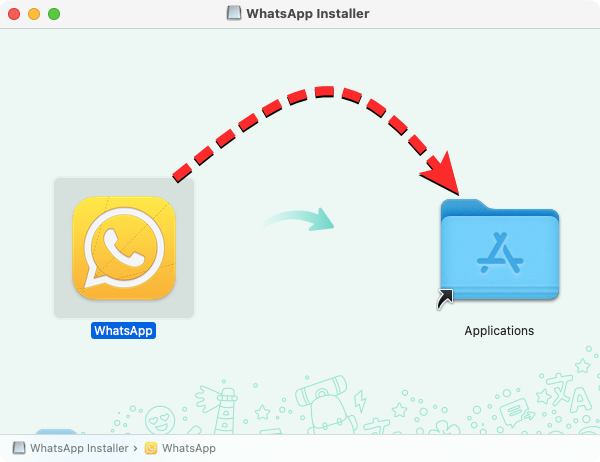
You should now see the WhatsApp Installer window on the screen. To install the downloaded app, drag the WhatsApp app icon to the Applications folder inside the WhatsApp Installer window.
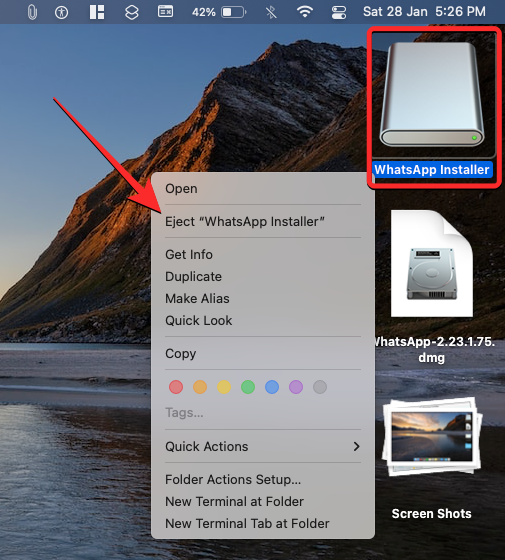
macOS will now move the app onto your Mac and install its contents. When the transfer is complete, you can go ahead and eject the installer by right-clicking or Control-clicking on the WhatsApp Installer icon on your desktop and selecting Eject “WhatsApp Installer” from the menu that appears.
Related: How to set up and use Split View on Mac
How to sign in to your WhatsApp account on Mac
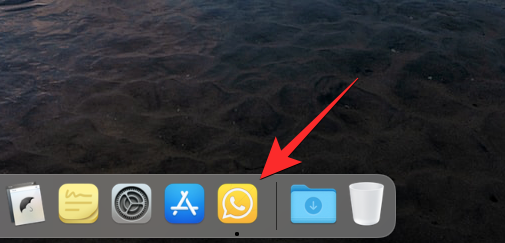
When you’ve installed WhatsApp on your Mac, you can start using it but before you do that, you first need to log in to your WhatsApp account on the app. To do that, first open the WhatsApp app on your Mac from the Dock, Launchpad, or Spotlight.
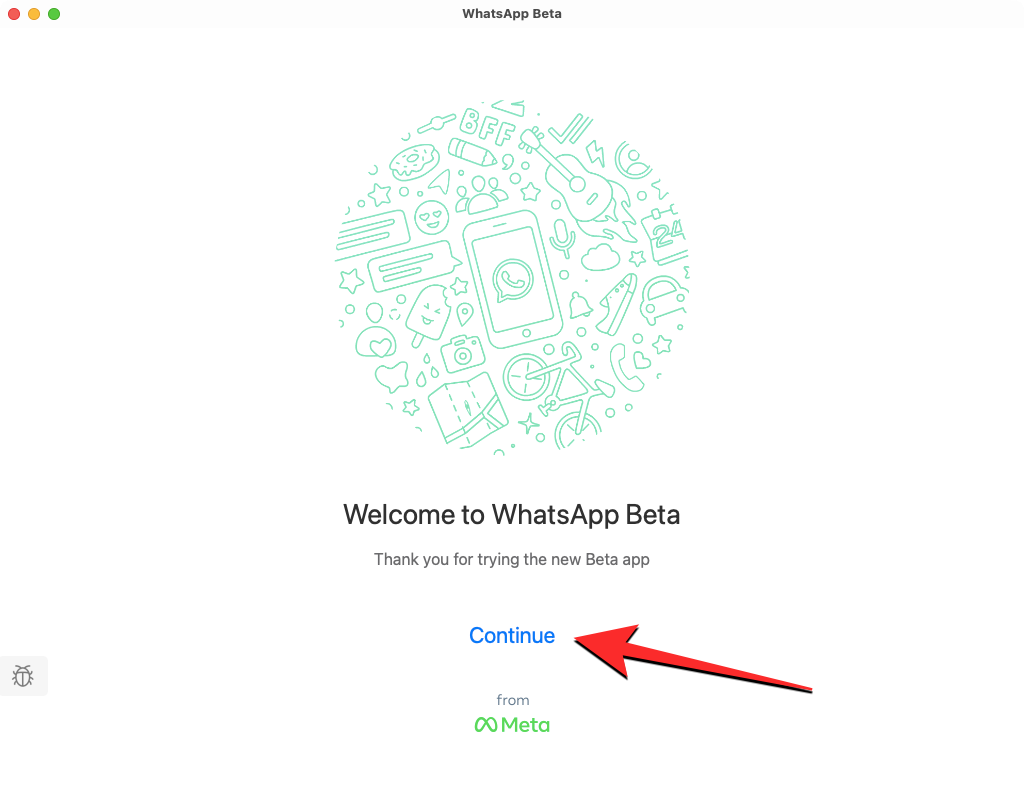
Once the app launches, you should see the Welcome to WhatsApp Beta screen. Here, click on Continue to proceed.
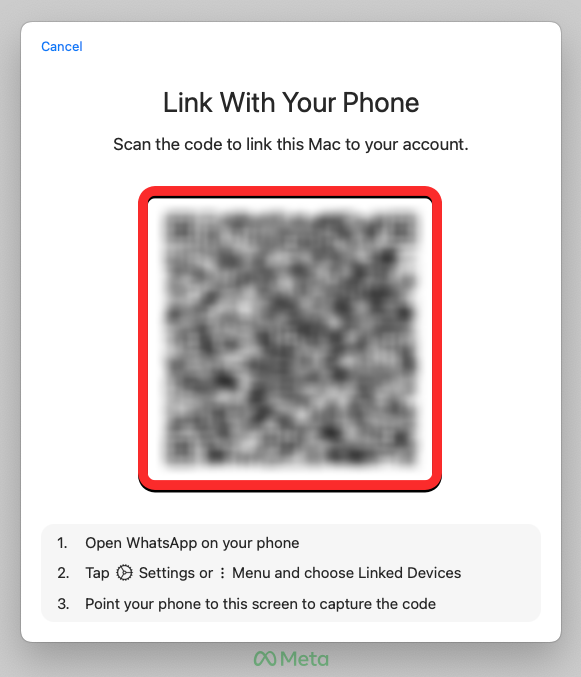
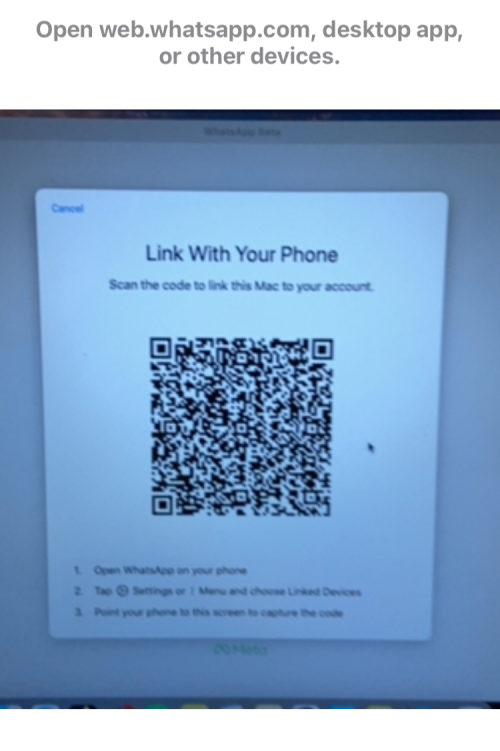
Now, you should see a QR code on the screen. This QR code is what allows your WhatsApp account on your phone to get added to the app on your Mac.
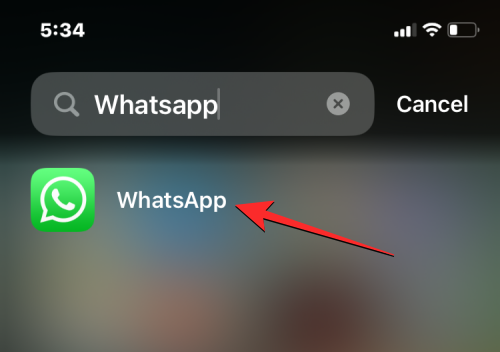
The next step is to open the WhatsApp app on your Android device or iPhone.
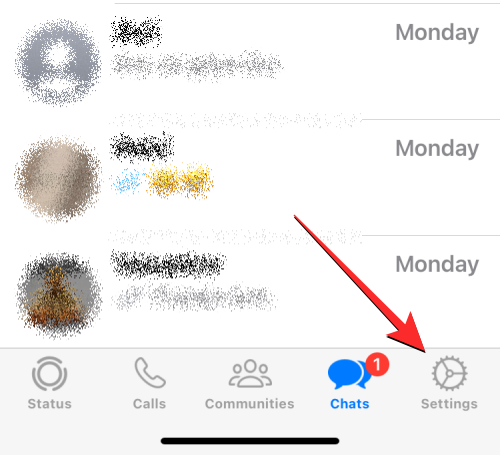
When the app opens on your phone, tap on the 3-dots icon at the top right corner on Android or tap on the Settings tab at the bottom right corner of your iPhone.
On Android, when an overflow menu opens on the screen, tap on Linked devices.
On iOS, select Linked Devices from the Settings screen.

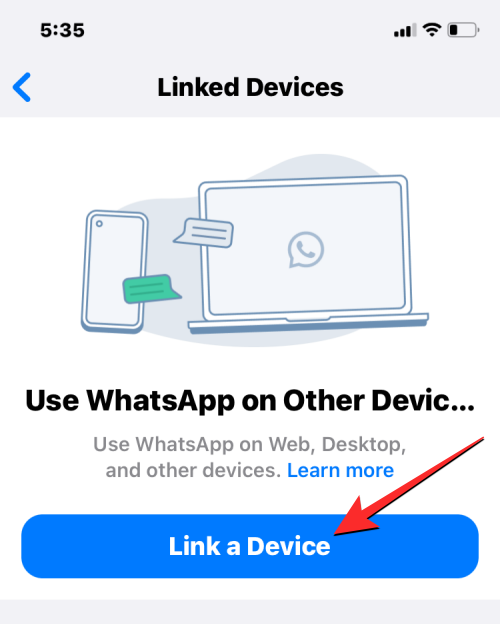
Inside the Linked Devices screen, tap on Link a Device.
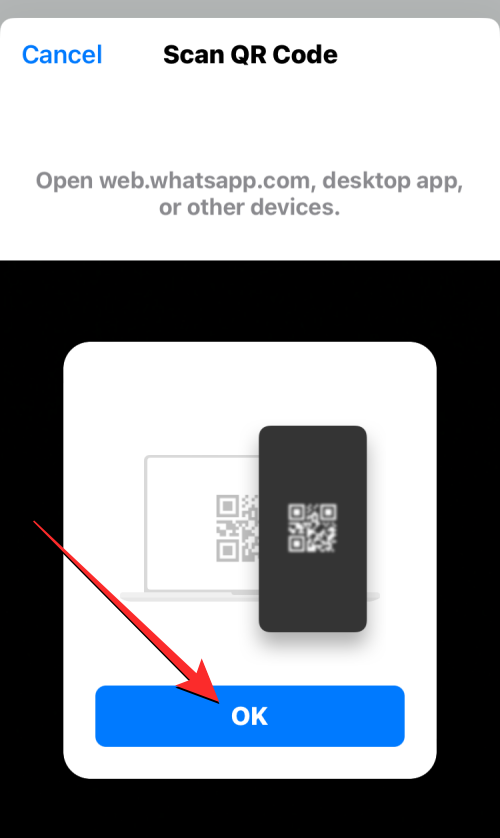
In the Scan QR code screen that appears, tap on OK.
You should see your camera viewfinder in a square box. Now, point your phone’s main camera to the code on your Mac so that the WhatsApp app on your phone can capture the code and read it.
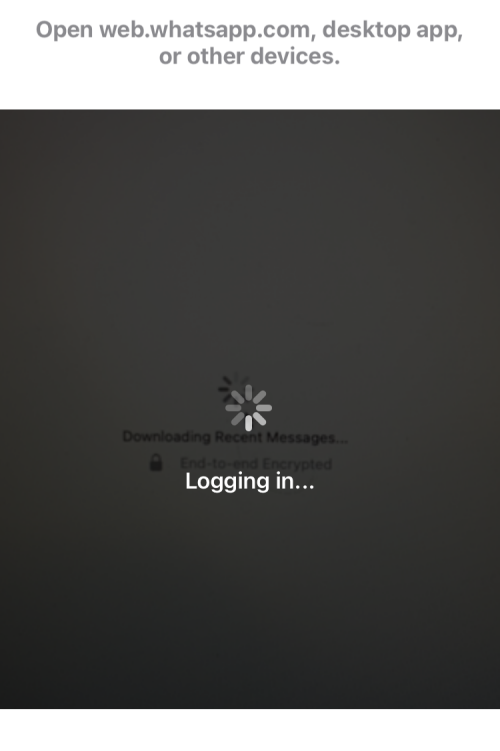
When your phone successfully reads the code, it will vibrate and show you the “Logging in” message on the screen.
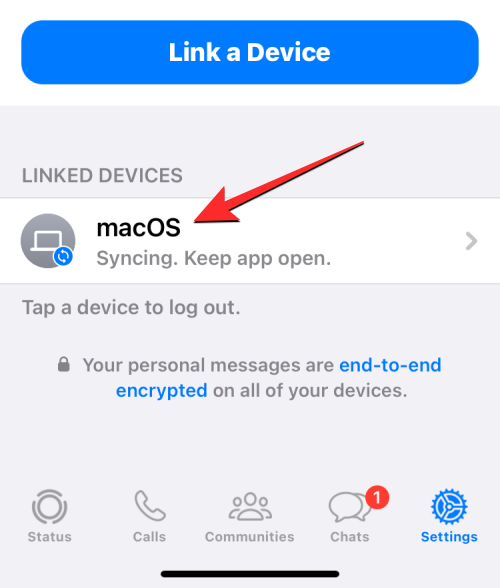
Once you’re fully logged in to the WhatsApp app on your Mac, the iOS app will show “macOS” listed under the Linked Devices section inside Settings > Linked Devices.
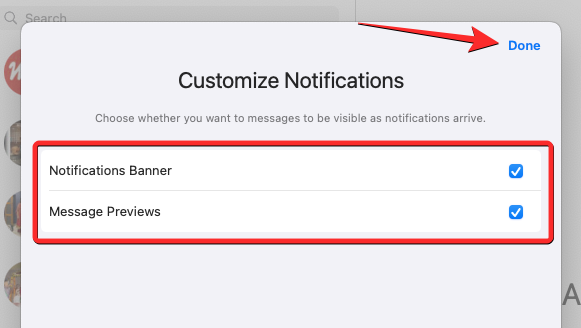
On your Mac, you should see the Customize Notifications window on top of the WhatsApp widow. From here, you can disable notification banners and message previews by unchecking their boxes on the right-hand side or leaving them enabled if you’re okay with it. Once you’ve configured how you want to receive notifications from WhatsApp on your Mac, tap on Done at the top right corner of the Customize Notifications window.
WhatsApp is now successfully installed on your Mac and you can start using it to send messages.
Related: How to Zoom In and Zoom Out on Mac
How to use WhatsApp on Mac
Once you’ve installed and logged into your account on WhatsApp, the app should be open on your Mac’s Dock at all times and you can open it from there.
If you can’t find the WhatsApp app on Dock at the bottom, you can launch it by searching on Spotlight or from the Launchpad screen.
When you open the new WhatsApp on your Mac, you will see a three-panel window on the screen.
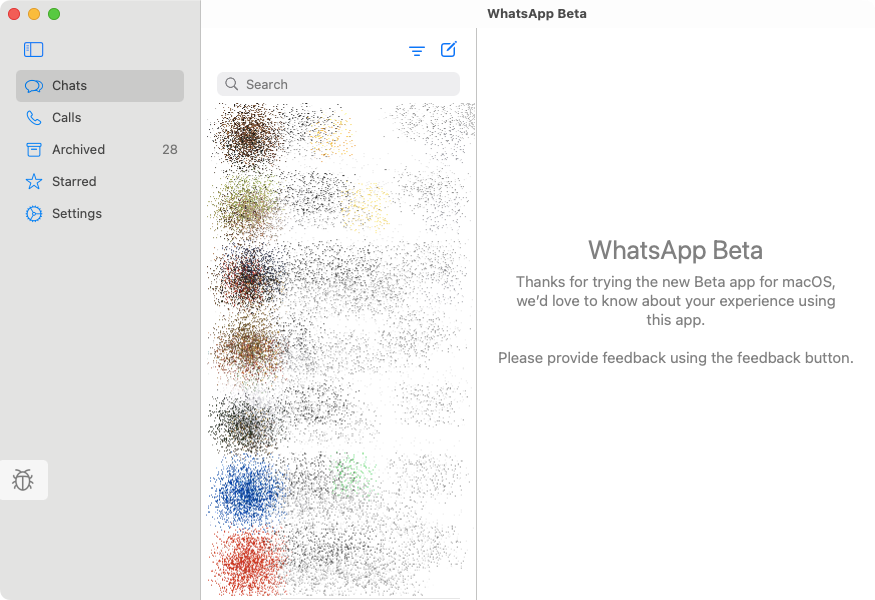
On the left-most panel, you will see different tabs to access your Chats, Calls, Archived (messages), Starred (messages), and Settings. The subsequent panels on the middle and right side will then show you chats by default or the content from the selected tab from the left panel.
Open chats and send messages
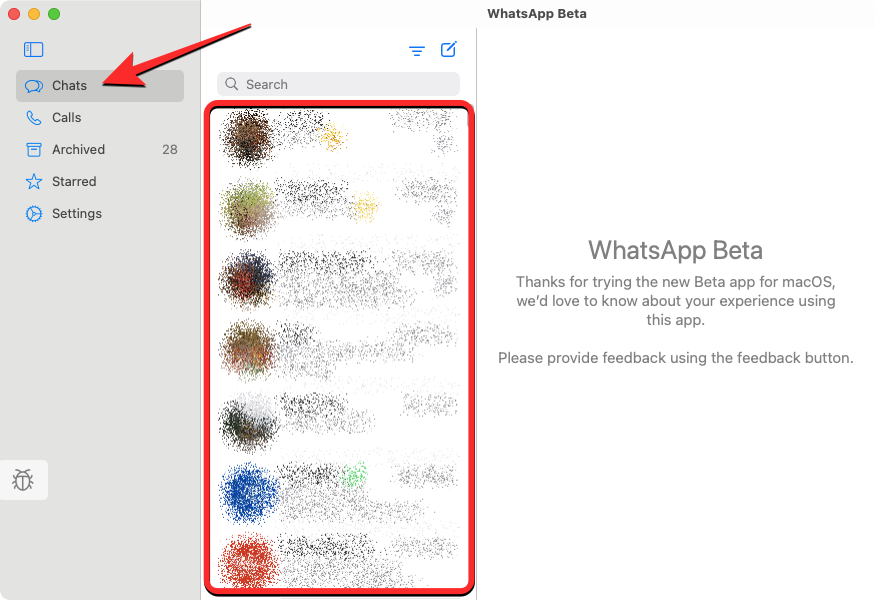
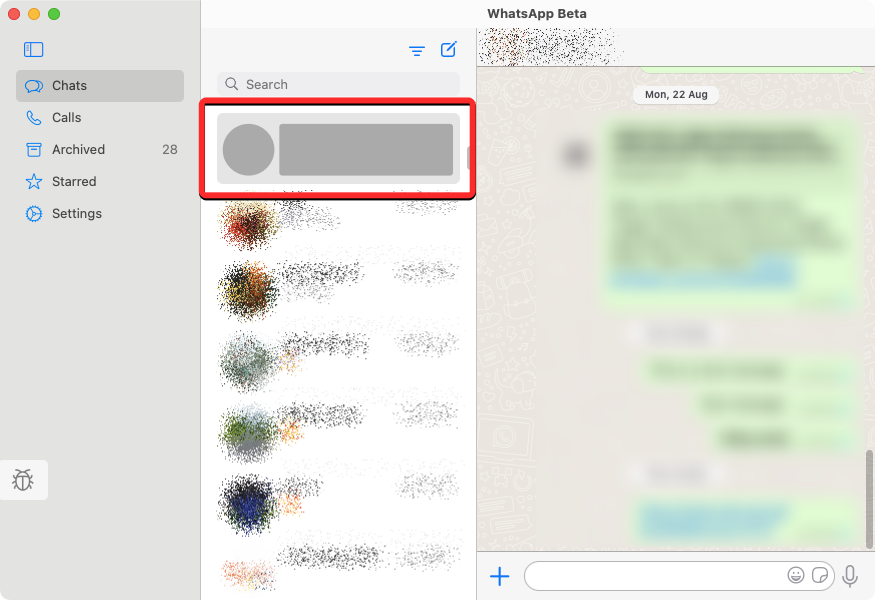
To load all of your visible chats, click on the Chats tab from the left sidebar. Now, you should see a list of all the conversations on the middle panel.
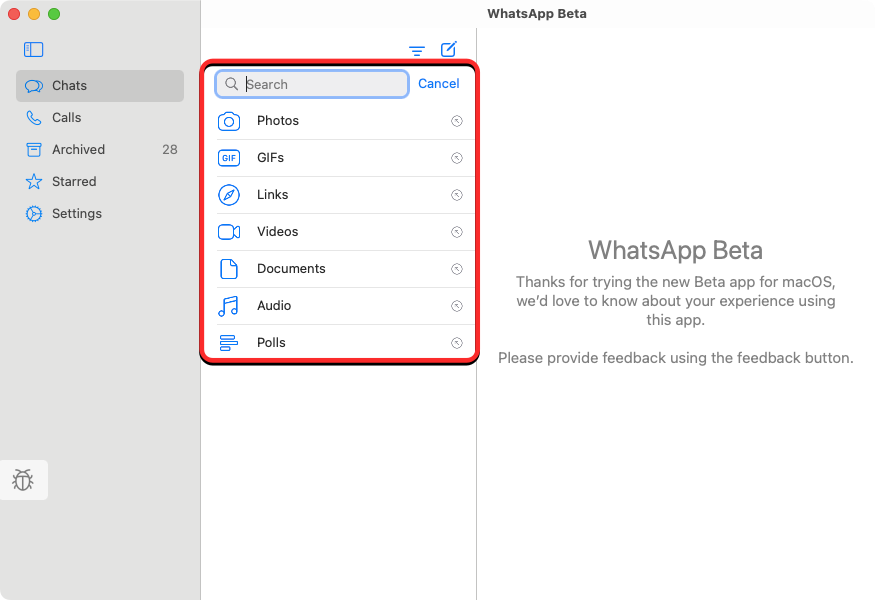
You can scroll through your conversations on the middle panel to view older chats or use the search bar at the top to check for messages from a specific contact or ones containing certain keywords. When you click on the search bar, you can individually look for photos, links, documents, GIFs, audio, and polls you have shared or received on WhatsApp.
Additionally, you can sort your conversations list by clicking on the Filter icon at the top.
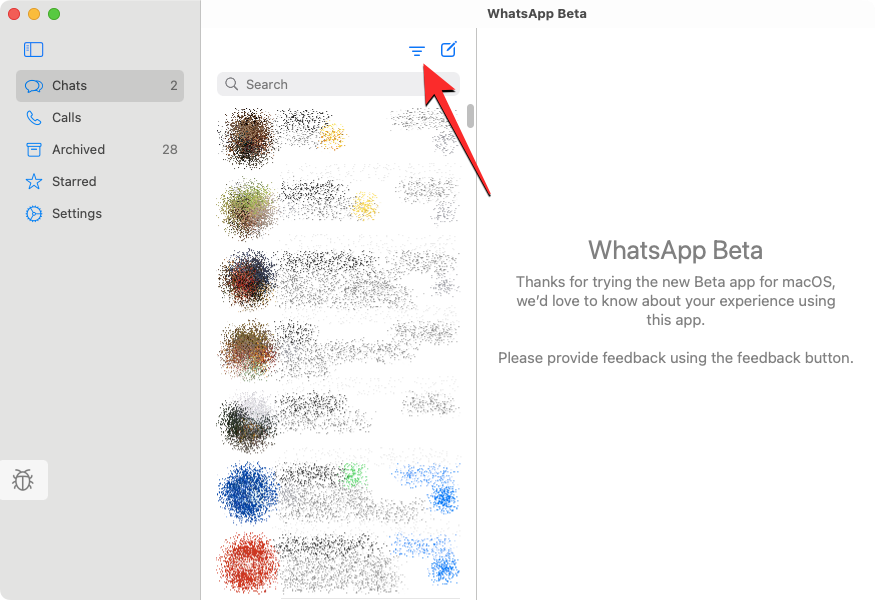
When you click this option, WhatsApp will only show chats you haven’t opened on the screen. To go back to viewing all your chats, click on the Filter icon again.

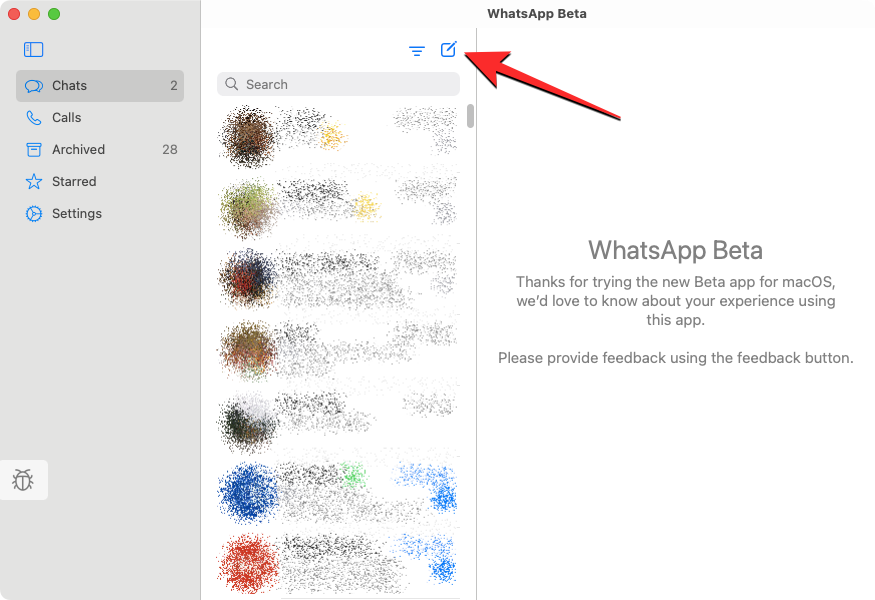
To create a new message for someone, click on the New message icon at the top right corner of the middle panel.
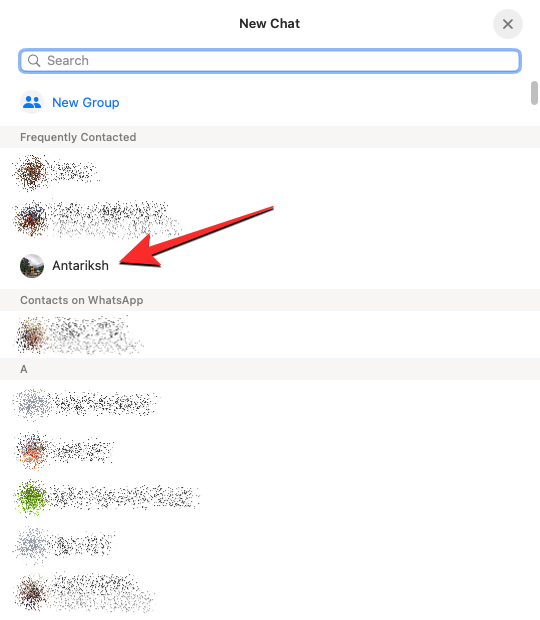
In the New Chat window, scroll through your list of contacts or groups and select the chat or person you want to send a message to.
When you open a conversation, all the past messages in the conversation should be visible on the right-most panel. When a chat is open on the right panel, you will see all the messages inside it. To view older messages in a selected chat, scroll upwards on this panel.
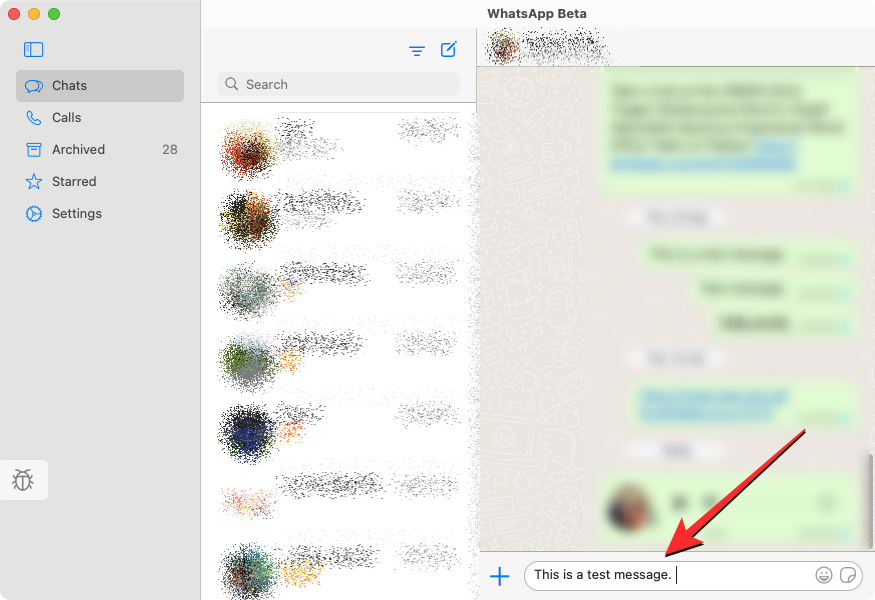
From here, you can send messages to someone by clicking on the text box at the bottom of this panel and typing the message you want to send.
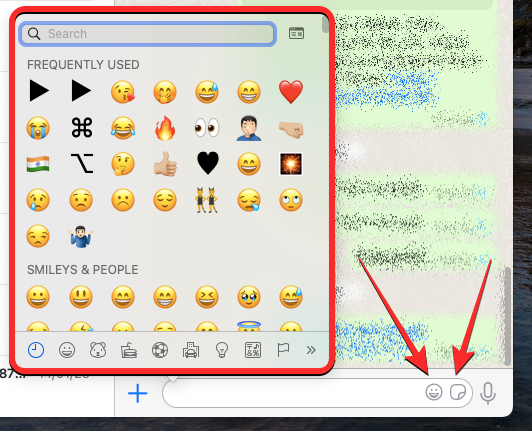
You can also add emojis and stickers to the text by clicking on their respective icons at the bottom right corner of the screen.
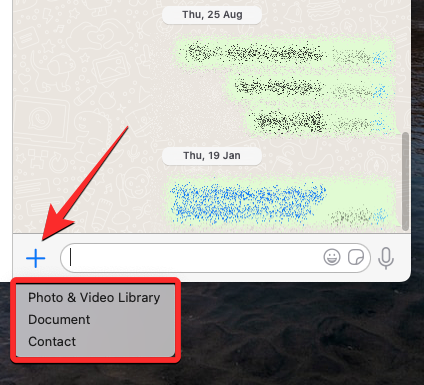
You can also share files from your Mac by clicking on the + icon on the left side of the text box and selecting a photo, video, document, or contact you want to share.
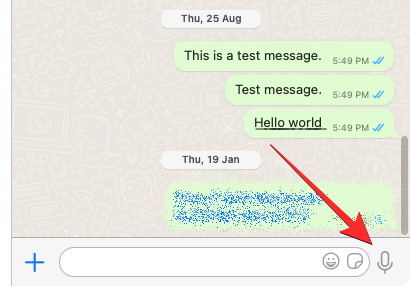
The new WhatsApp on Mac app also allows you to send voice messages to your contacts. To send a voice message, click on the Microphone icon at the bottom right corner.
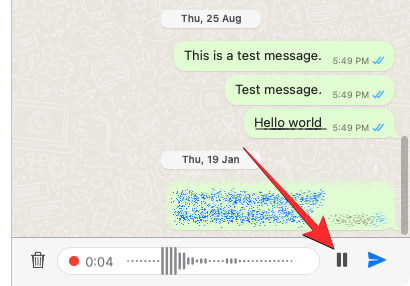
If the app has been granted microphone access, WhatsApp should now start recording the audio from your Mac’s mic. This will be evident when you see a recorder bar appear in place of the text box at the bottom. When you’re done recording your voice, you can click on the Pause icon to stop the recording.
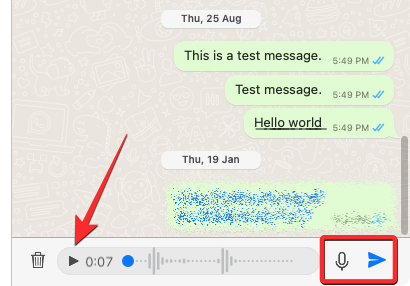
From here, you can either share it directly to the chat by clicking on the Send button or resume the recording again by clicking on the Microphone icon. You can also preview your voice by clicking on the Play icon on the left.
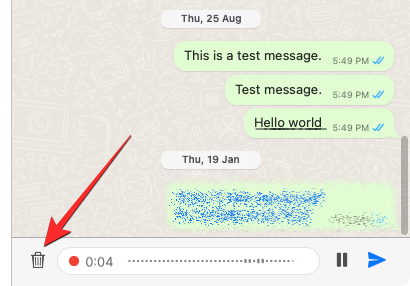
You can discard a voice recording by clicking on the Trash icon on the left side of the recorder bar.
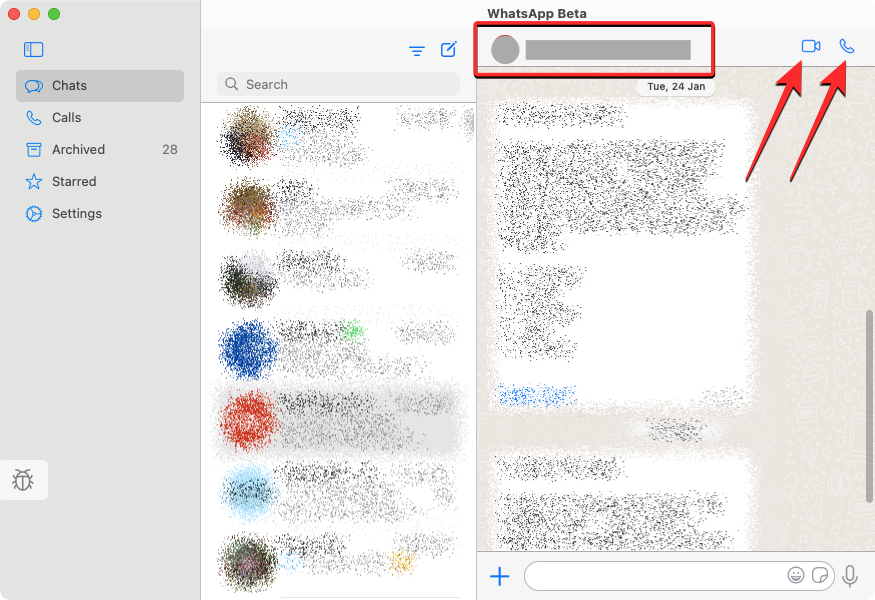
At the top of the selected conversation, you get quick access to call the contact via a video or voice call. You can also click on the contact’s name at the top to access more info.
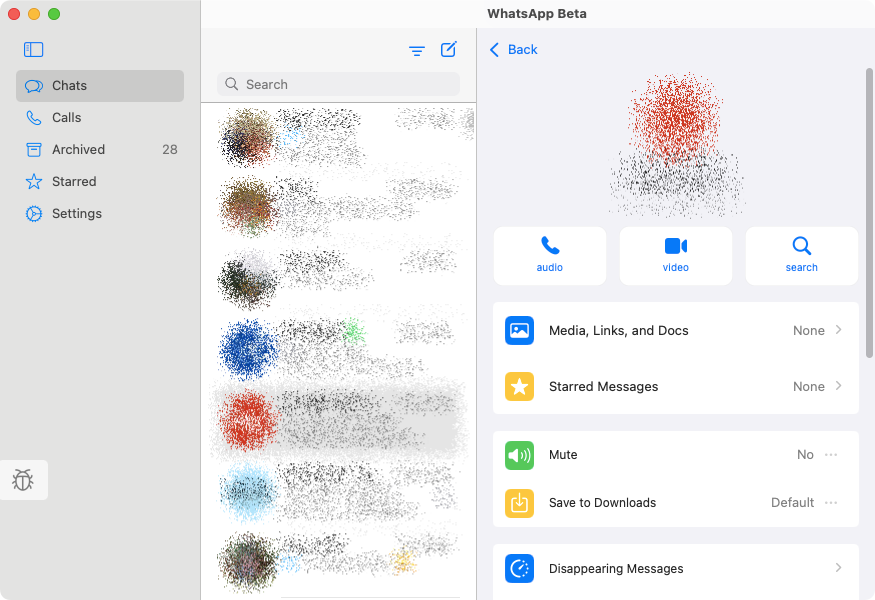
When the contact’s info screen shows up, you can access the media shared in the conversation, check for starred messages, or search the conversation for keywords.
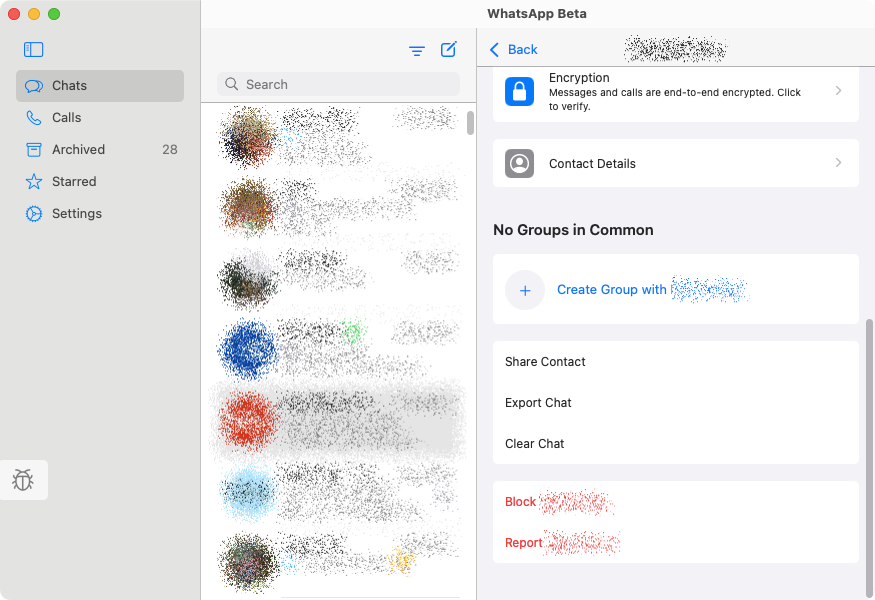
You can scroll down on this screen for other actions sharing contact, clearing or exporting the chat, or blocking the contact from messaging you.
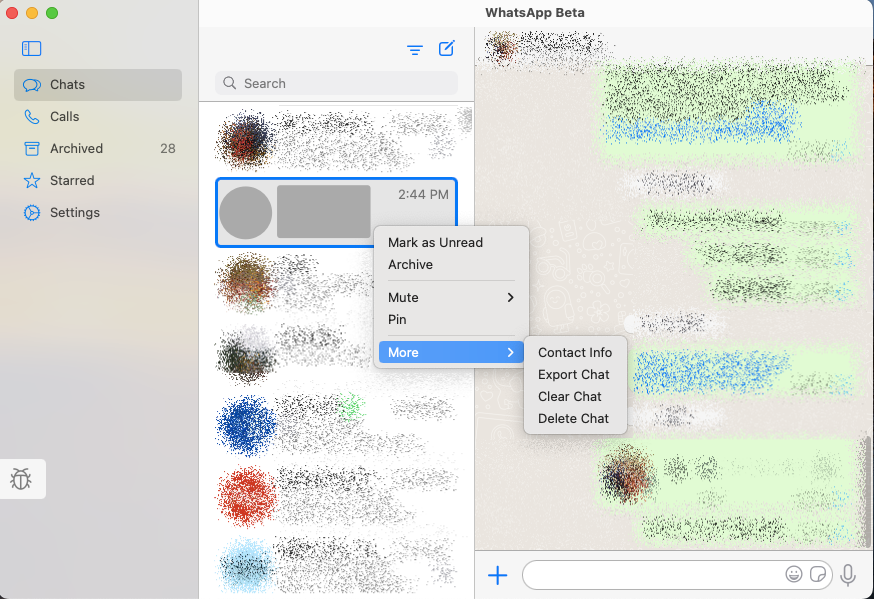
WhatsApp also lets you access certain actions as shortcuts when you right-click on a conversation on the middle panel. When you do that, you will have options to archive, mute, and pin messages or mark them as unread. You can also export, clear, or delete chats by right-clicking on them, clicking on More, and selecting your desired action.
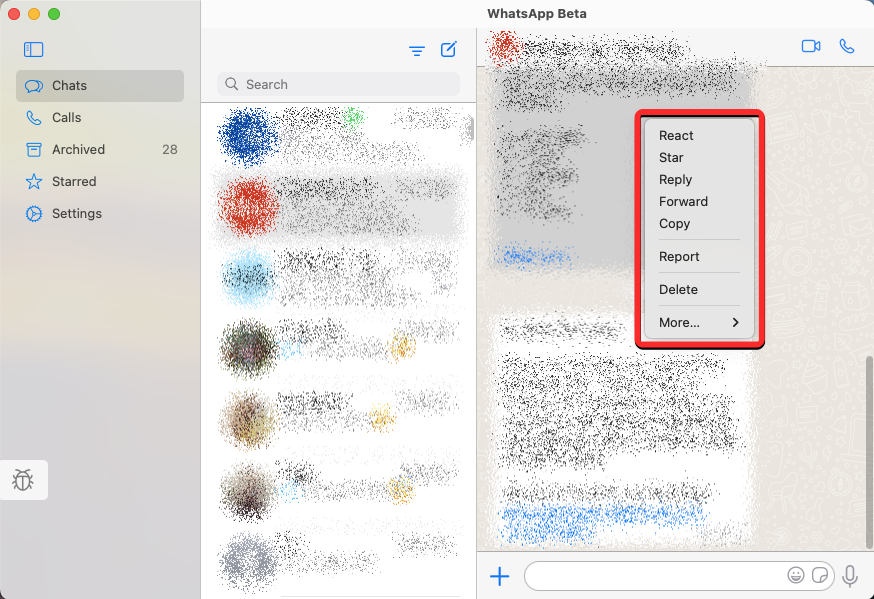
This right-click action also applies to messages in a conversation. When you right-click on a particular message inside a conversation, you get options to react, star, reply, forward, or copy the selected message.
Make calls and view your WhatsApp call log
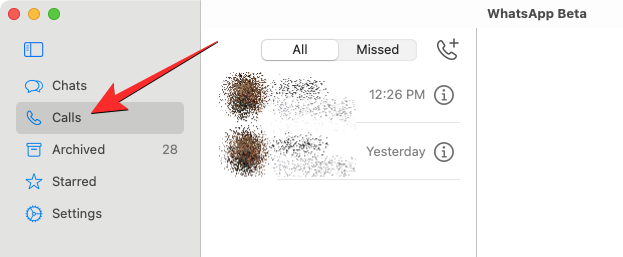
To make calls and access your call list, click on the Calls tab on the left panel. When you do that, you should be able to see the people you made or received calls from within the Mac on the middle panel.
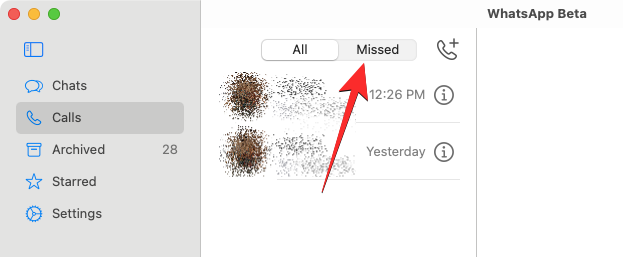
At first, this list would show as empty since the app will only reveal calls you made or received on your Mac, not the previous calls you made on WhatsApp on your phone. The middle panel will show all of your calls by default but if you choose to view only the calls that didn’t go through, you can click the Missed tab at the top.
To call someone from your call log, right-click on their name from the list and select Voice Call or Video Call.

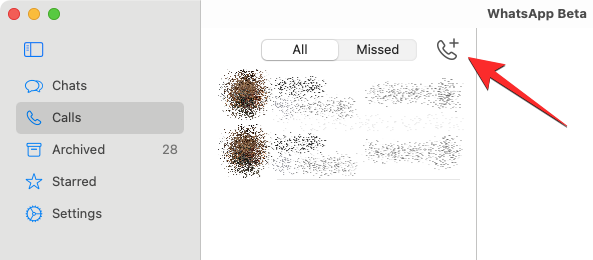
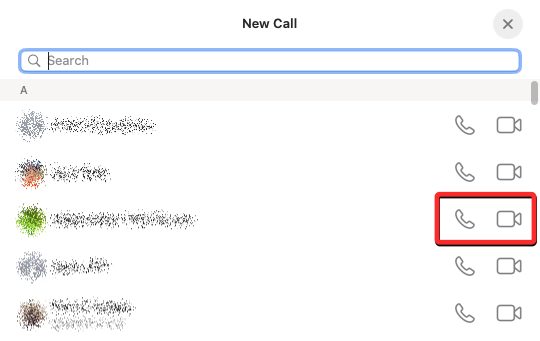
To make a call to someone not visible on this list, click on the Phone icon (with a + sign).
In the New Call window, scroll down and locate the person you want to call. When you find this person, click on the Phone icon to make an audio call or on the Camera icon to make a video call.
When you do that, the call should commence and you should see the call screen on top of the WhatsApp window.
Access your archived messages on WhatsApp
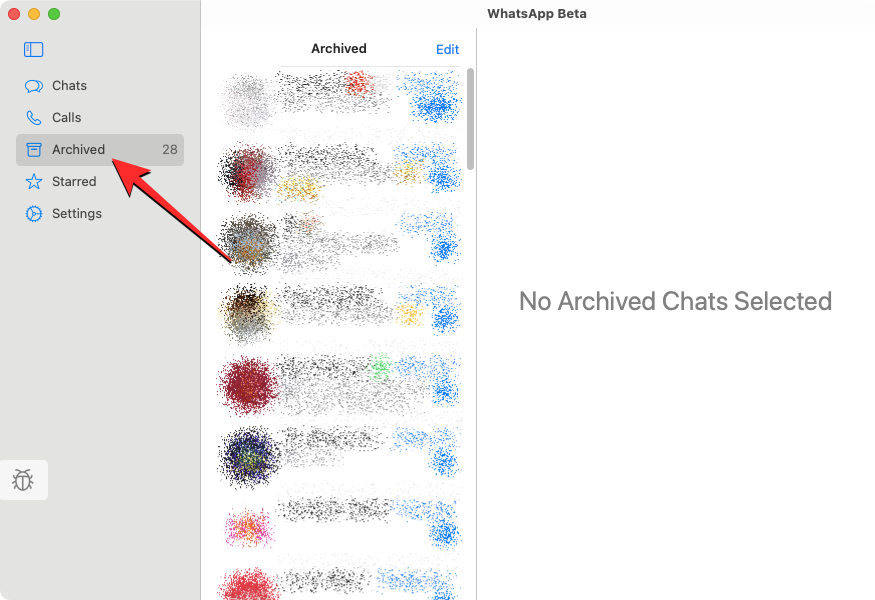
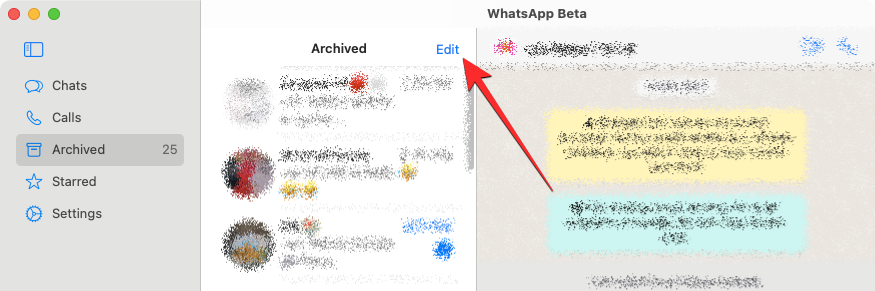
Unlike calls, any messages you archived on WhatsApp on your phone will also appear on the app’s Mac client. To access these messages, click on the Archived tab on the left sidebar inside WhatsApp. When you select Archived, you should see a list of chats you archived in the past.
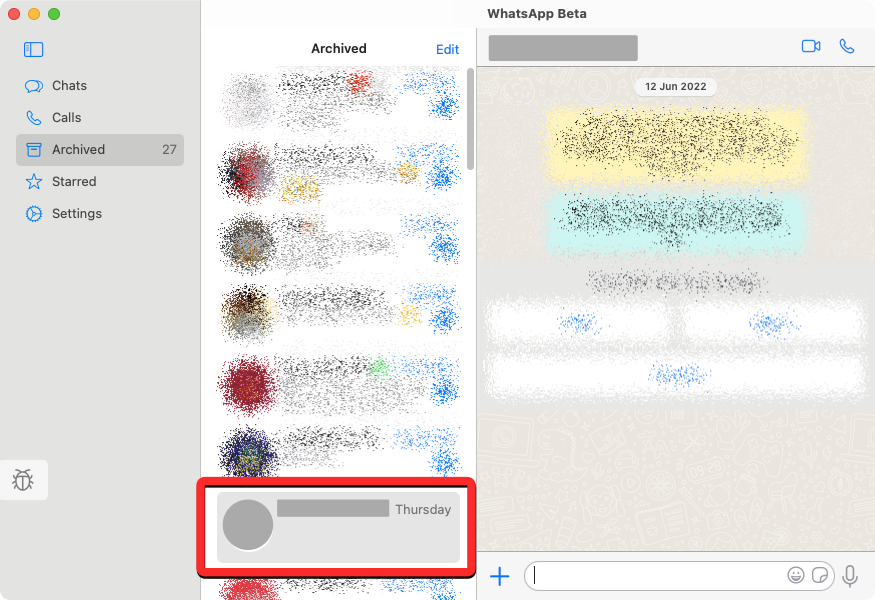
You can click on any of the archived chats from this list to check out messages inside the conversation. The select conversation will then open on the right panel, just like any other chat on the app.
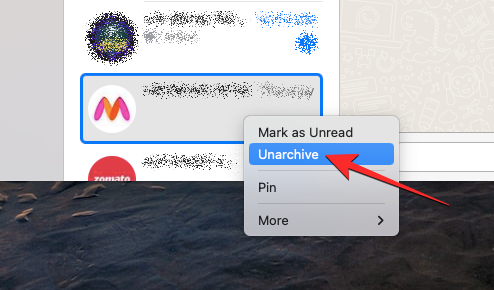
If you no longer wish to keep a conversation archived, you can right-click on the conversation from the middle panel and select Unarchive.
If you wish to unarchive multiple chats from this screen, click on Edit at the top right corner of the middle panel.
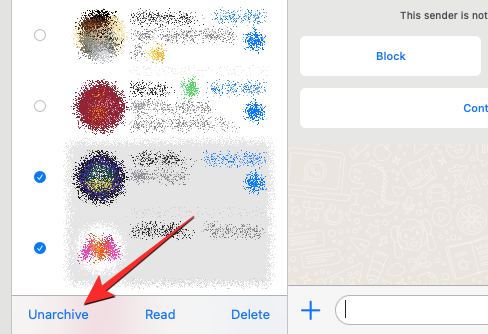
When the chat list goes into edit mode, select the chats you want to unarchive. Once you’ve selected the desired chats, click on Unarchive at the bottom left corner of the middle panel. Optionally, you can also delete the selected conversations or mark them as read from the same edit screen.
View messages you starred on WhatsApp
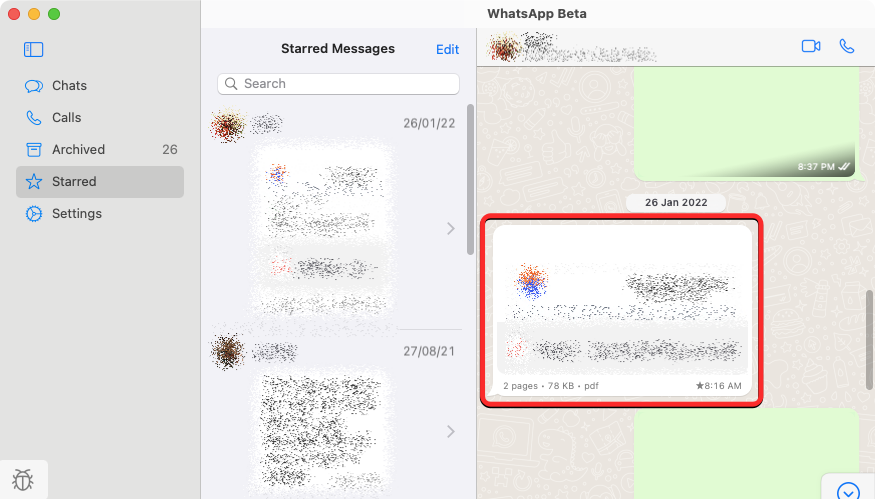
Inside WhatsApp, click on the Starred tab on the left sidebar to check out the messages you starred in the past.
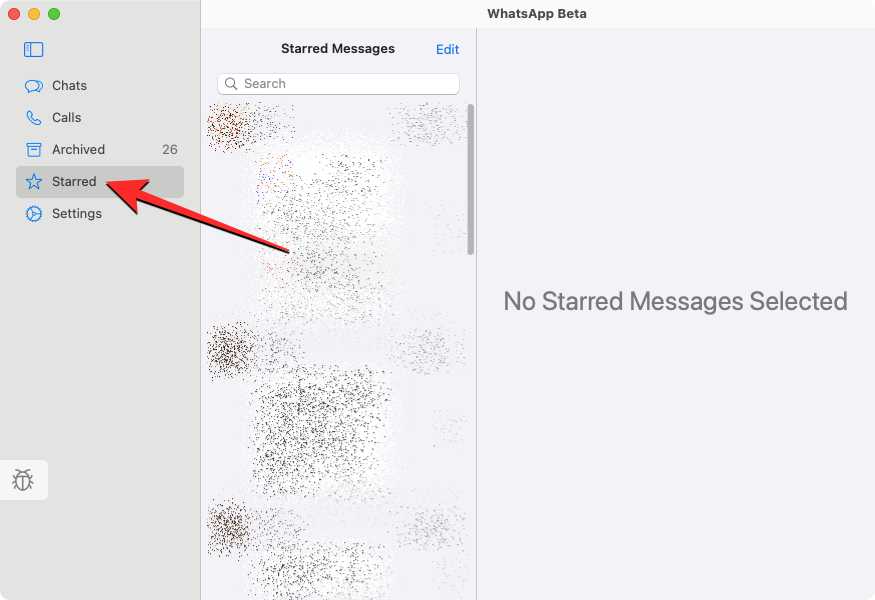
This will open a list of all of your starred messages on WhatsApp in the middle panel. You can scroll down on this list to look at older starred messages. If you want to locate a starred message inside its original conversation, click on the rightward-facing arrow on the right side of the message.
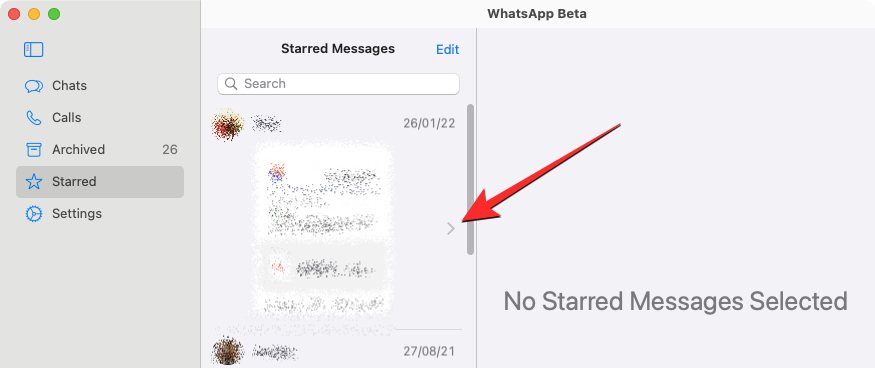
When you do that, you should see where the message appeared inside the conversation on the right panel.
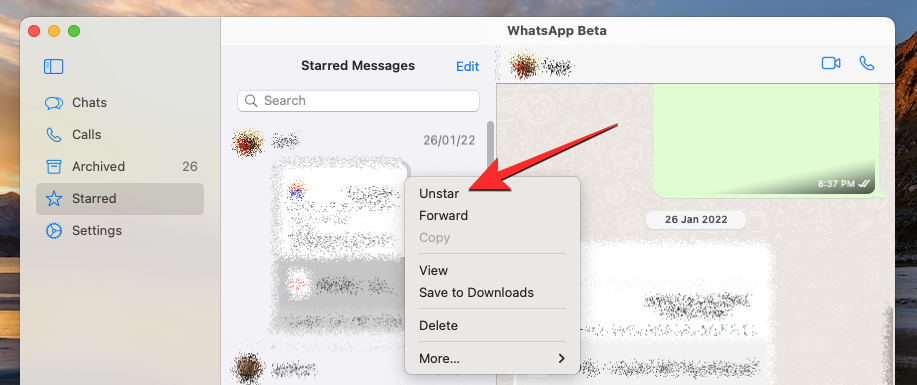
You can unstar messages from this list by right-clicking on them and selecting Unstar from the overflow menu.
How to change WhatsApp Settings on Mac
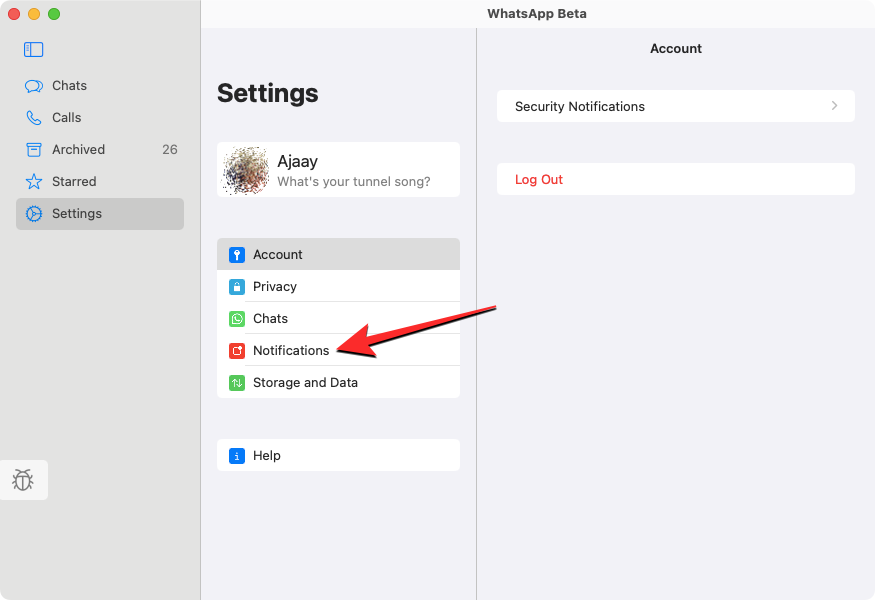
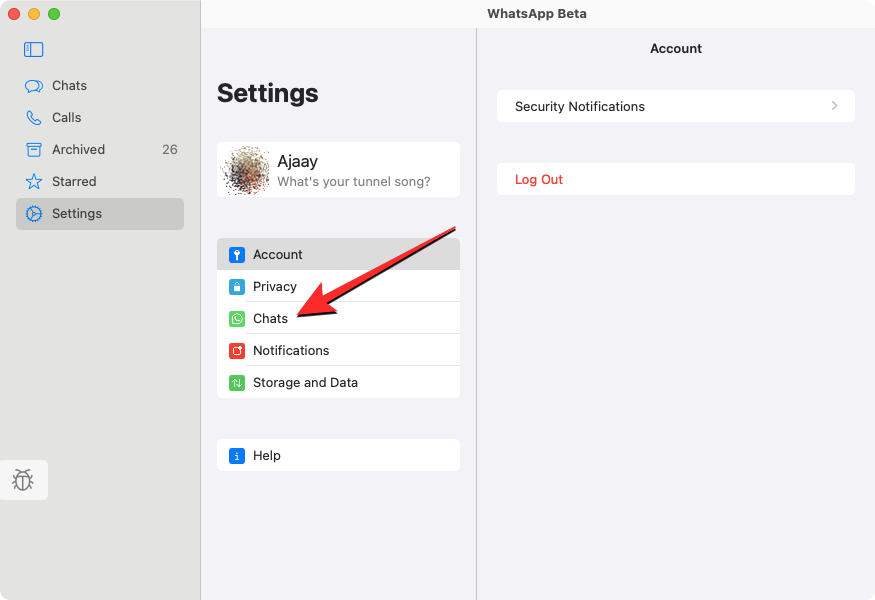
Similar to its iOS app, the Settings screen on the native WhatsApp app on Mac will look and feel familiar. You can access it by clicking on the Settings tab on the left panel. When you do that, you should see more options on the middle and right panels.
Modify your WhatsApp profile
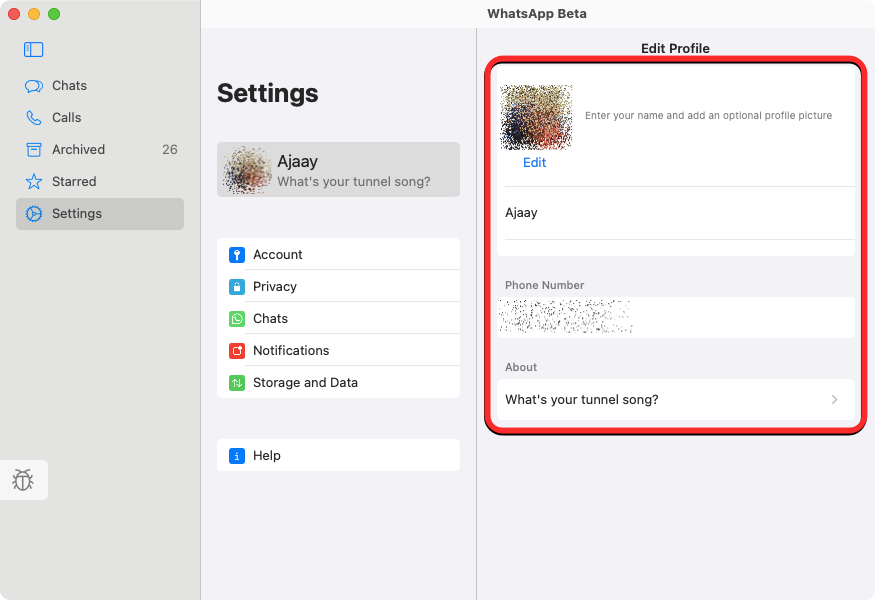
Inside WhatsApp’s Settings screen, you can change how your profile looks to others on the app in the same way you would on a phone. You can change your profile picture, name, and the “About” section and update them to something new.
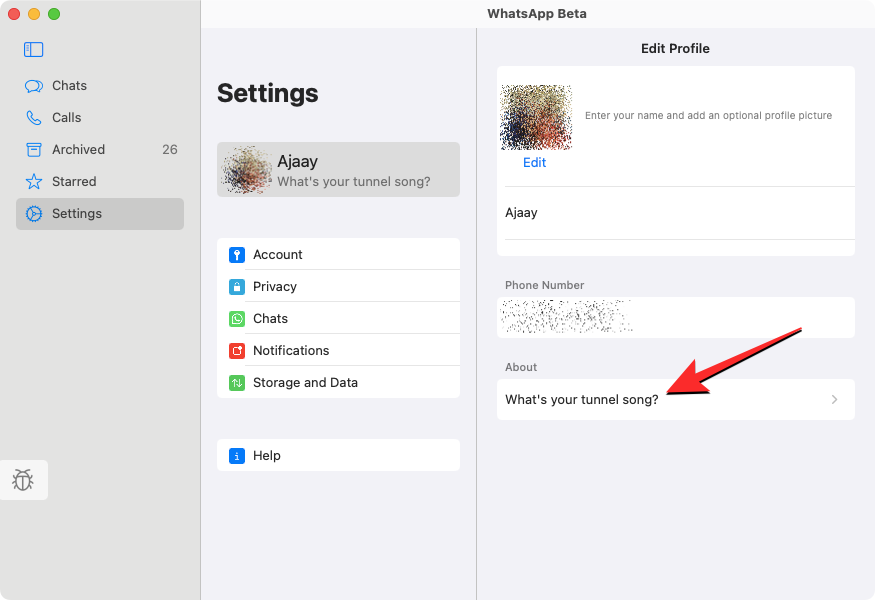
To modify your WhatsApp profile on a Mac, click on your name card at the top of the Settings page on the middle panel.
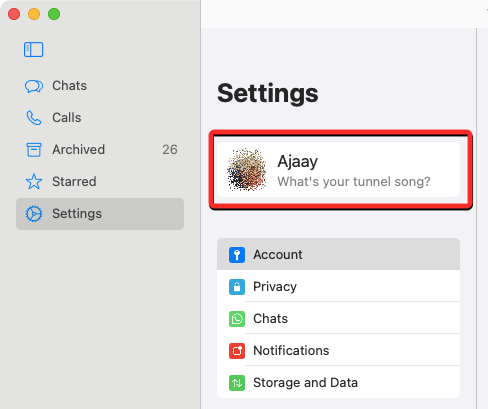
When you do that, you should see your profile details appear on the right. Inside the Edit Profile panel is where you can make changes to your profile.
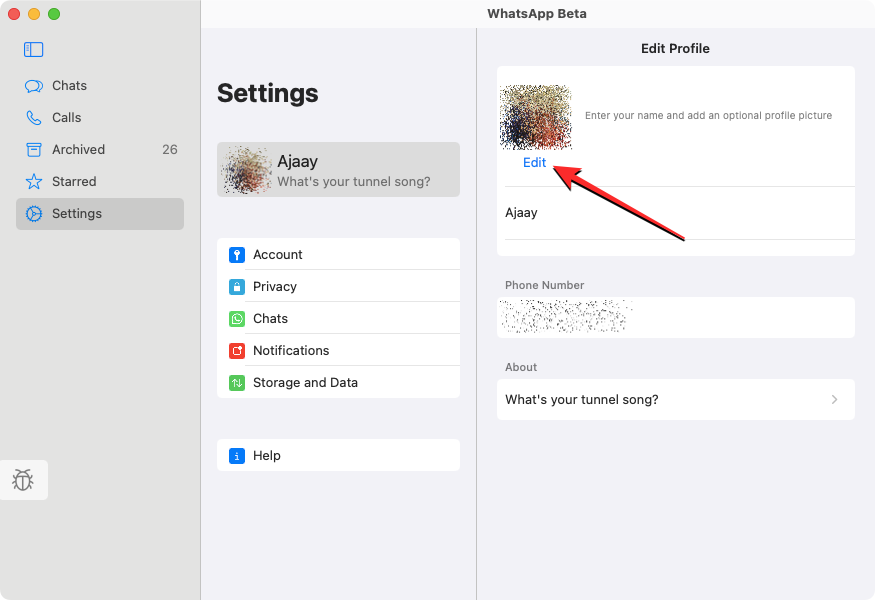
On this screen, you can change your profile picture by clicking on Edit under the current picture thumbnail.
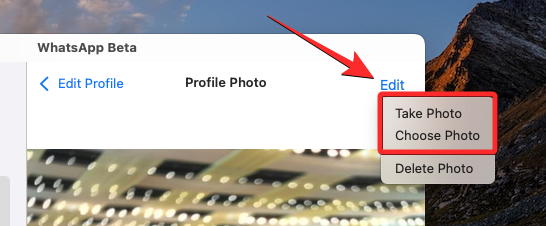
When your existing profile picture loads up in full view, click on Edit at the top right corner and select Take Photo or Choose Photo. You can then either capture a new photo from your Mac’s camera or upload one from your storage. You can also choose Delete Photo to remove the current picture from your profile.
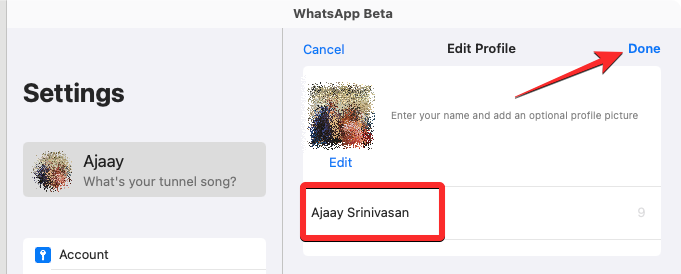
You can change your WhatsApp name by clicking on your current name and replacing the text with the name you want to enter.
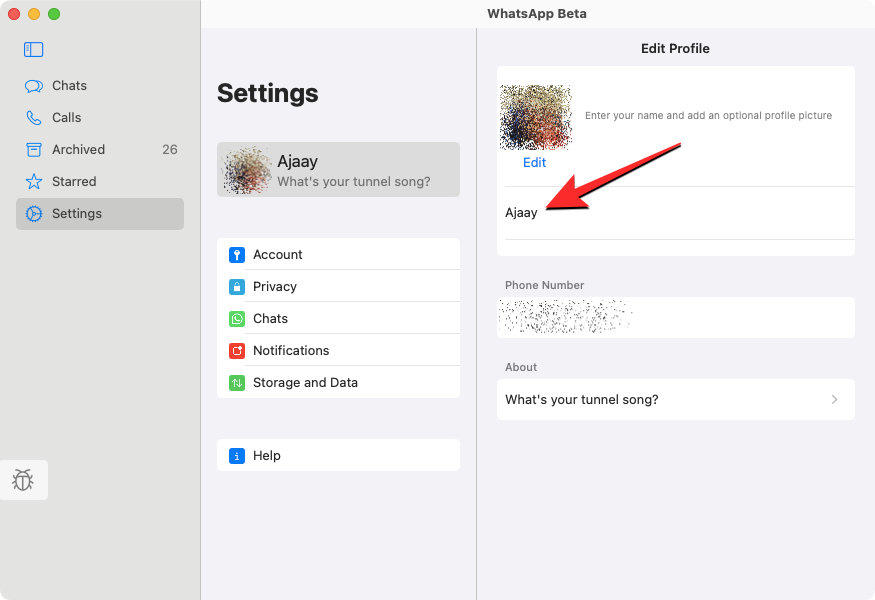
You can enter a name with up to 20 characters and once ready, then click on Done at the top right corner.
You can change the About section by clicking on the text box under this section.
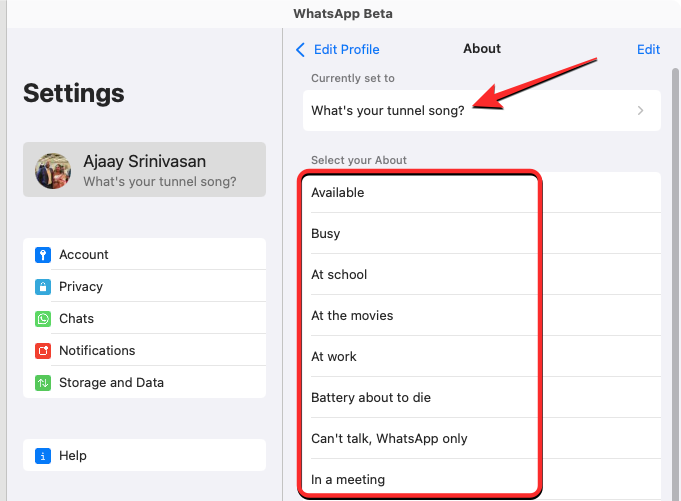
In the About screen that appears, select from the list of options within the “Select your About” section. If you wish to replace your existing text with a custom one, click on the “Currently set to” text box.
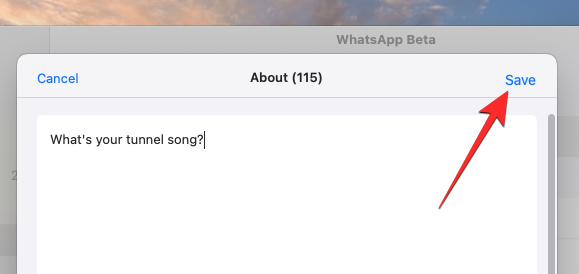
In the window that appears, enter the name text you want to show on your profile and then click on Save at the top right corner.
Make changes to your privacy
You can your privacy settings including who can view your last seen, profile picture, about, and the people you’ve blocked by clicking on Privacy inside the Settings panel.
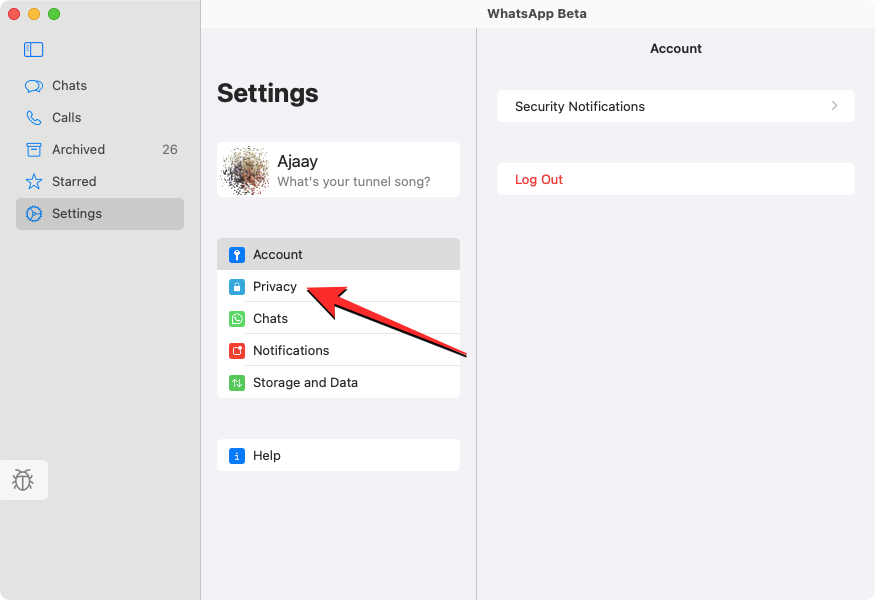
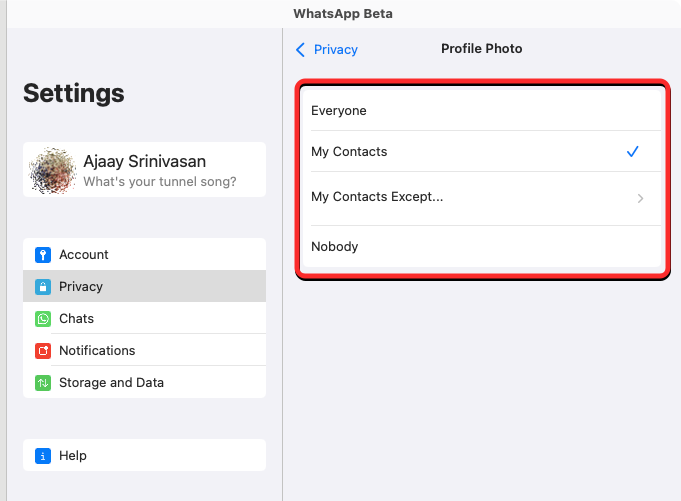
Inside the Privacy panel, you can then click on any of these sections to modify them to your privacy preferences – Last Seen & Online, Profile photo, About, and Groups.

Regardless of the section you select, you can choose one of the following options to configure your account’s privacy.
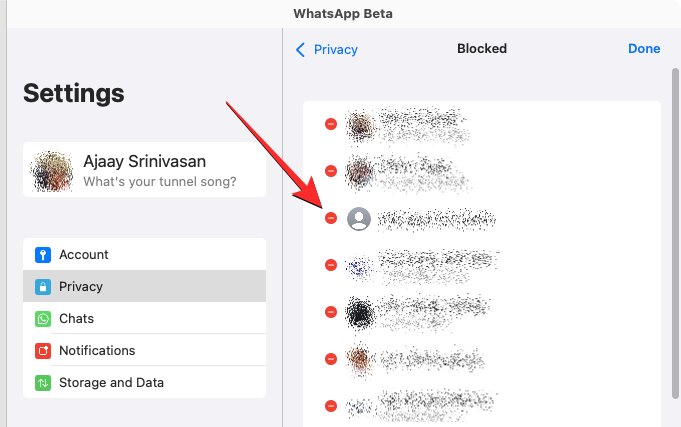
Inside the Privacy panel, you can also check out the people you’ve blocked on WhatsApp. To do so, click on Blocked inside the Privacy panel.
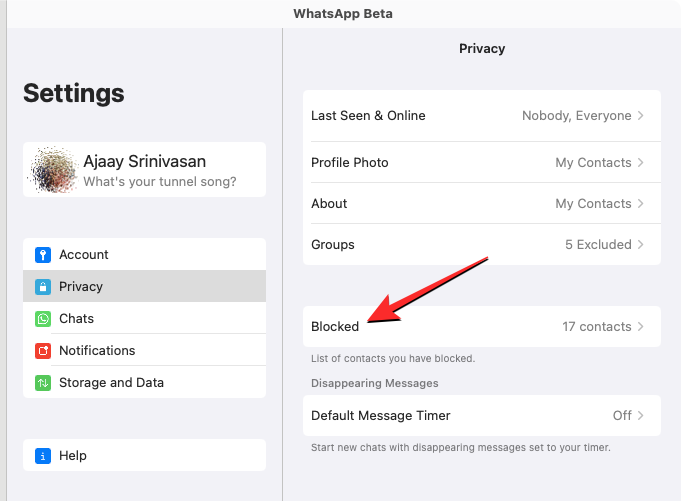
In the Blocked panel that appears, you will see a list of people you blocked in the past on WhatsApp. To unblock anyone from this list, click on Edit at the top right corner.
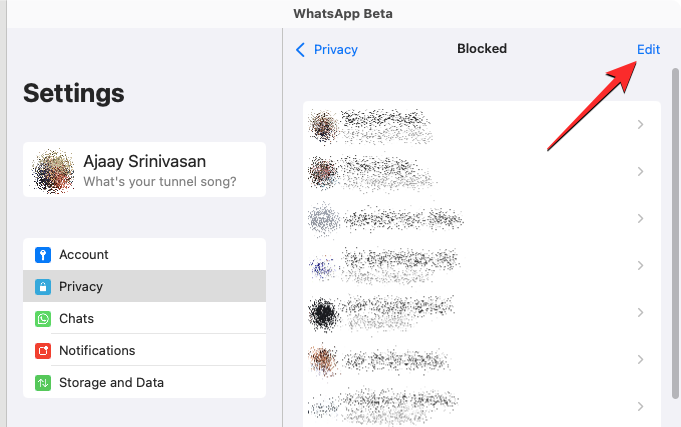
When the Blocked panel goes into edit mode, click on the red minus (-) icon on the left side of the contact you want to unblock.
To confirm your action, click on Unblock on the right side of the contact.
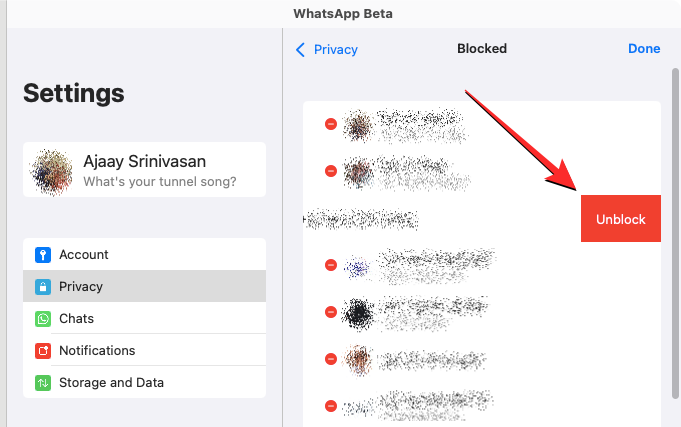
You can repeat the above step to unblock multiple contacts from this list and once you’ve restored the blocked contacts, click on Done at the top right corner.
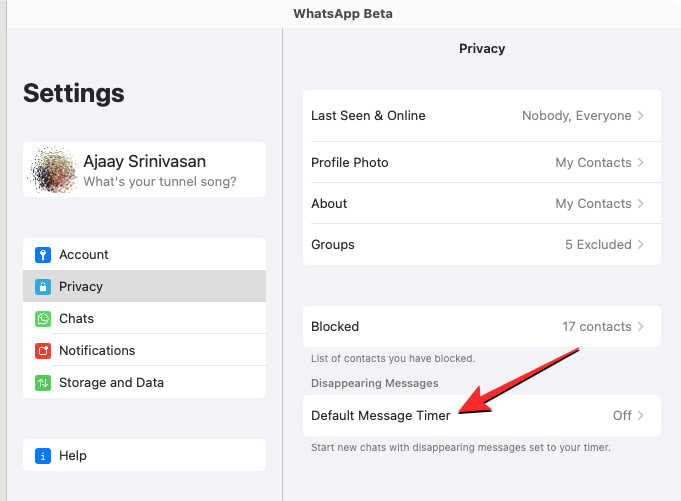
Inside the Privacy panel, you can also enable disappearing messages for new chats on WhatsApp. This way, messages you send or receive on a new chat will be deleted after a specific time. To enable disappearing messages, click on Default Message Timer under “Disappearing Messages”.
In the Default Message Timer panel that appears, select a duration after which you want messages to get deleted from individual chats.
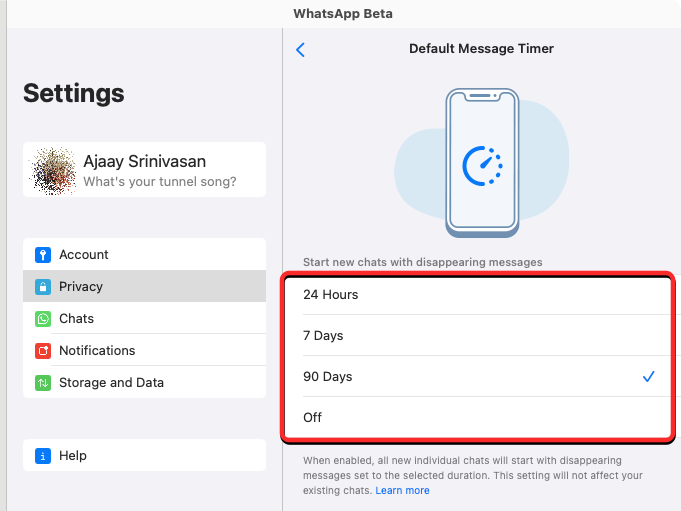
This will not affect your existing messages and they will continue to stay on your chat history for as long as you want to keep them.
Change how you receive WhatsApp notifications on Mac
Like on your phone, the new WhatsApp app for Mac also lets you configure how you receive notifications on your computer. You can modify your notification settings by clicking on Notifications inside the Settings panel.
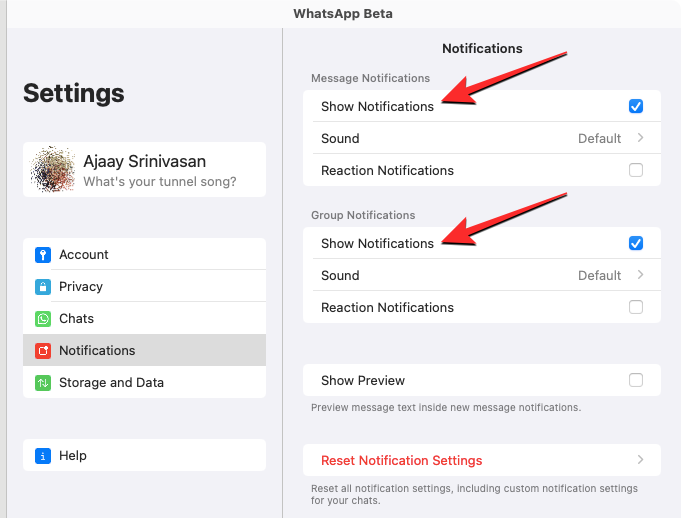
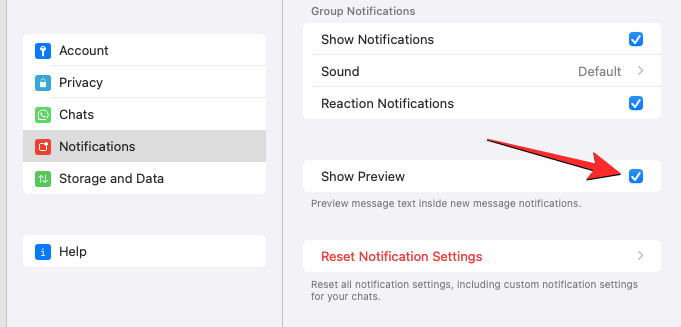
This will open the Notifications panel on the right where you can change how you receive messages and group notifications on your Mac. To enable notifications for all messages in a chat, check the Show Notifications boxes under “Message Notifications” and “Group Notifications”.
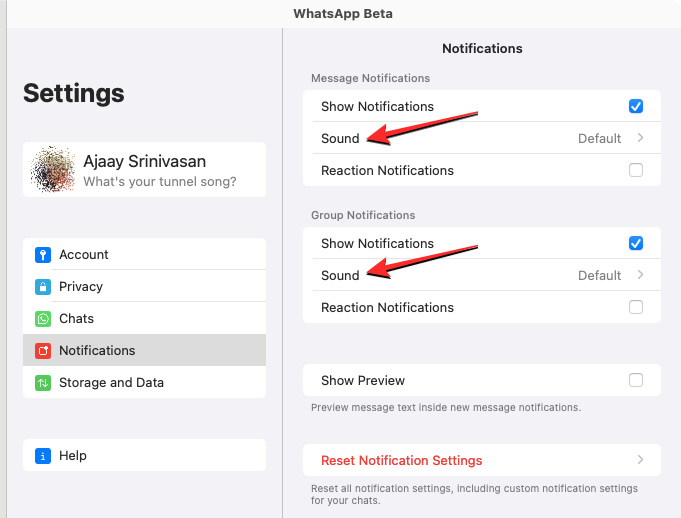
You can enable/disable alert tones for messages you receive by clicking on Sound and choosing the preferred option.
To get notified everyone someone reacts to your messages, check the Reaction Notifications boxes on both sections.
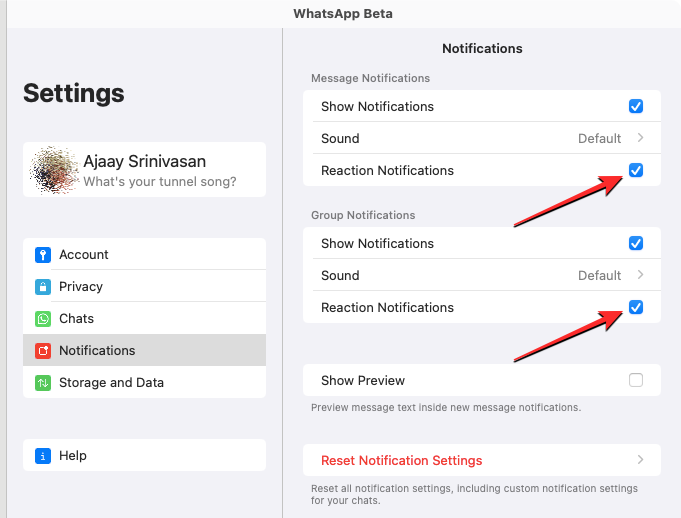
WhatsApp notifications will appear as a banner by default on a Mac. If you want the notification banner to preview the message you received, you can check the Show Preview box.
View your network and device storage
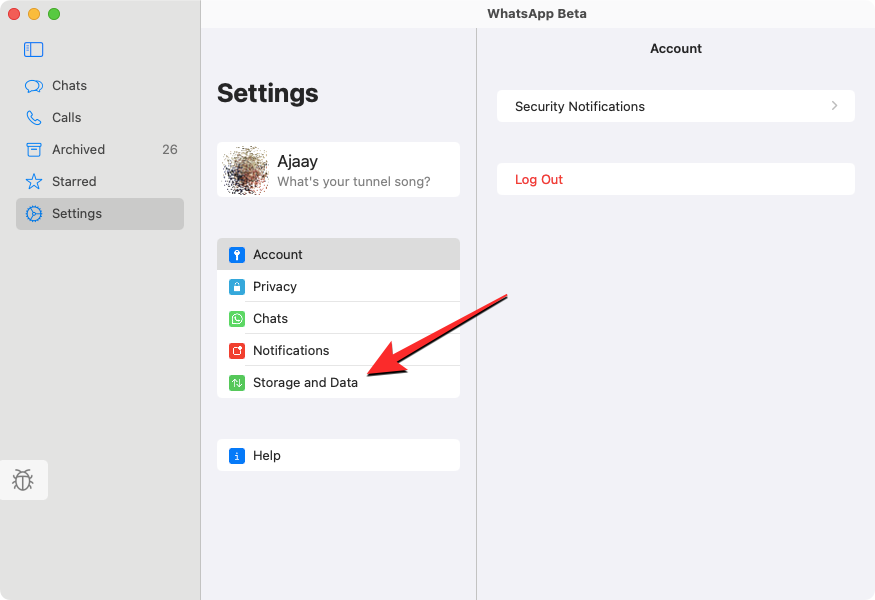
You can check how much data has been consumed or stored by WhatsApp on your Mac by clicking on Storage and Data inside the Settings panel.
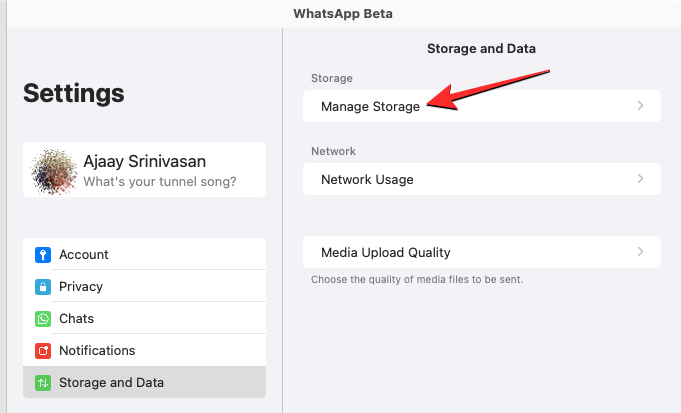
In the Storage and Data panel, click on Manage Storage to view the data that’s stored from your chats on the Mac.
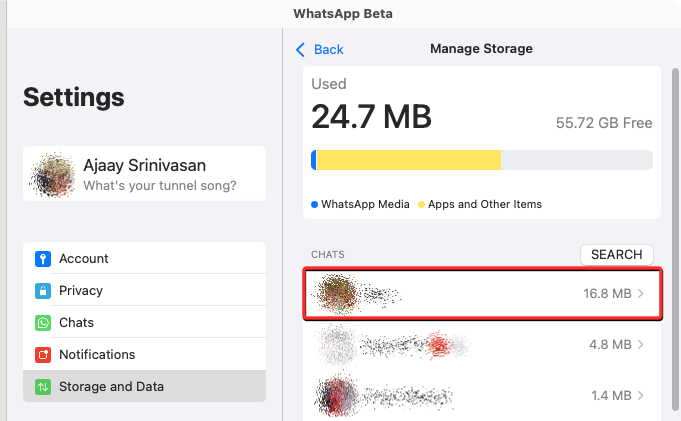
You will see the size of data that’s stored by WhatsApp on your Mac at the top of the Manage Storage panel followed by the list of chats from where media has been saved. You can view the media from any of these chats or delete it by clicking on a specific chat.
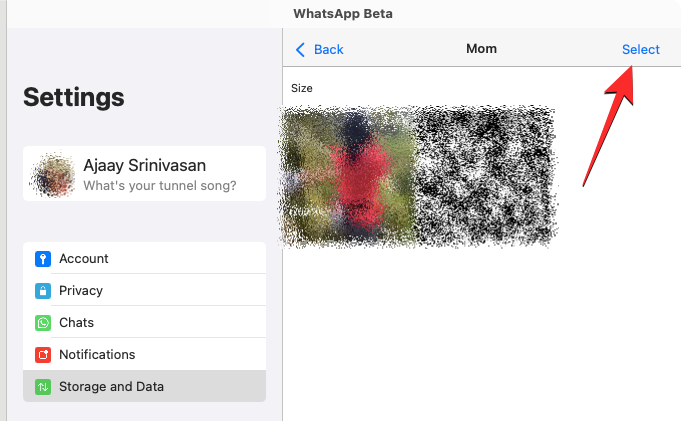
On the next screen, you will see the media that was shared in the selected chat. To delete items from this screen, click on Select at the top right corner.
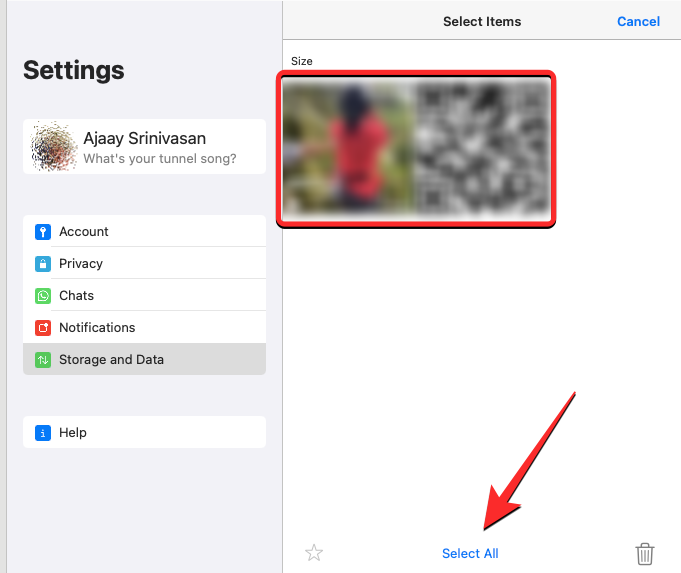
Now, select the items you want to delete or click on Select All at the bottom to mark all items on the screen.
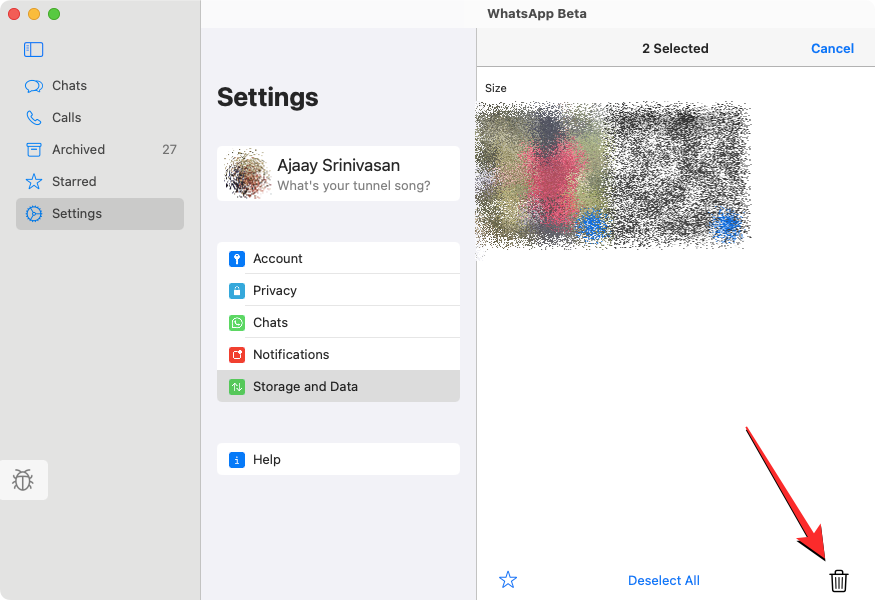
When the media you want to delete has been selected, click on the Trash icon at the bottom right corner.
You will see a prompt asking you to confirm your action. To proceed, click on Delete Items.
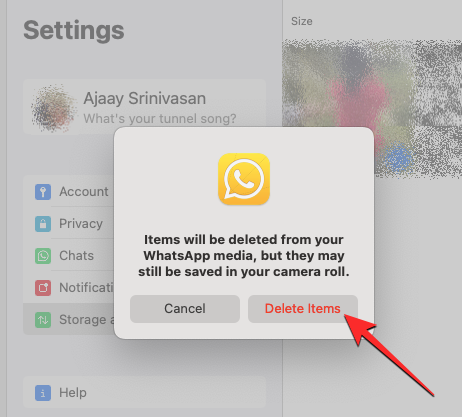
The selected items will be deleted from the specific conversation. You can repeat these steps to delete media from other conversations as well.
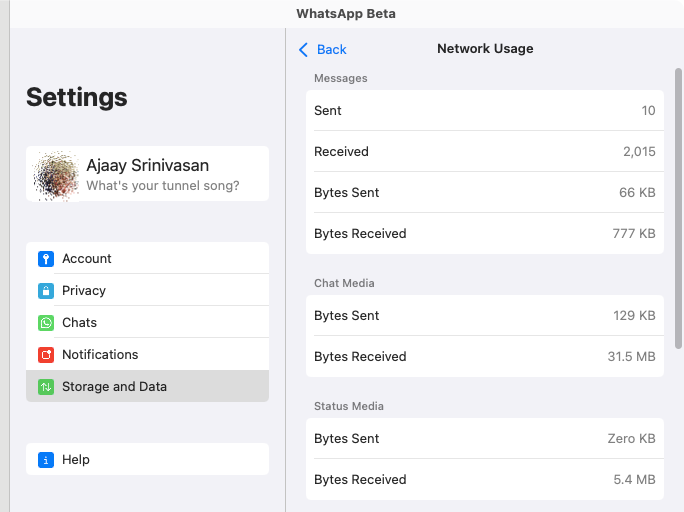
Inside the Storage and Data panel, you can check how much data the app has consumed since you installed it by clicking on Network Usage under “Network”.
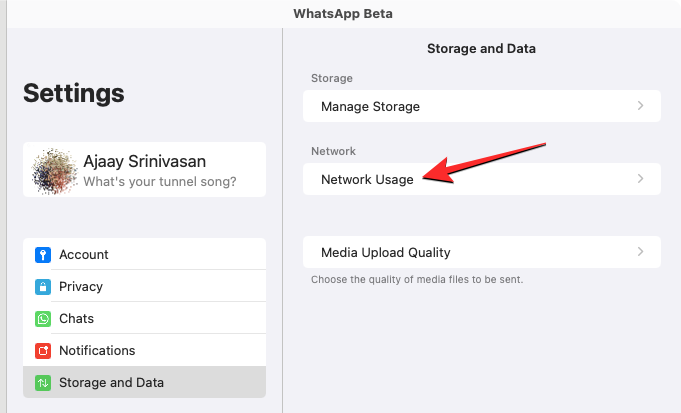
On the next panel, you should see the full details of the amount of data consumed and how it was used.
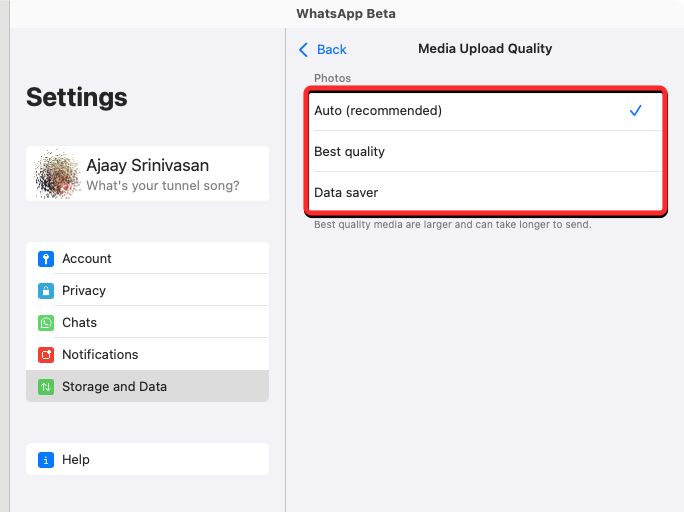
You can change the default upload quality for pictures and videos you share on WhatsApp by clicking on Media Upload Quality inside the Storage and Data panel.
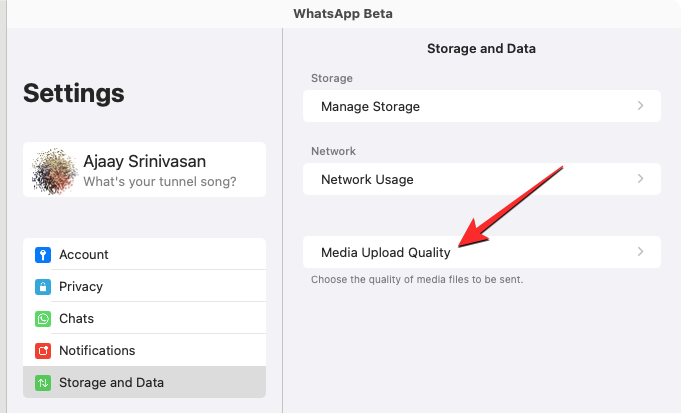
On the next screen, select your preferred quality from the following options.
Export, Clear, or Delete all your chats
WhatsApp’s Mac app also offers users a way to export an individual chat or clear/delete all existing chats from their account. To access these options, click on Chats inside the Settings panel.
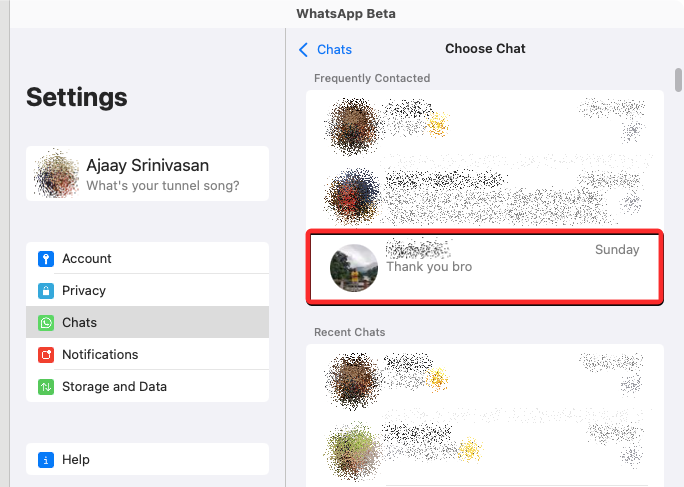
In the Chats panel that appears on the right, click on Export Chats to save individual chats as a text file on your Mac.

On the next screen, select a chat you want to export from the list of conversations visible.
You will see a prompt on the screen asking whether or not you want to save media in addition to your messages. Select your preferred option from this prompt to proceed.
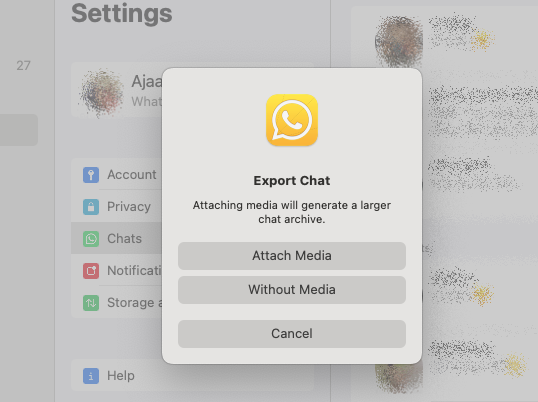
The exported chat will be saved as a ZIP file inside the Downloads folder and it will contain all the media in its original format and your text messages in TXT format.
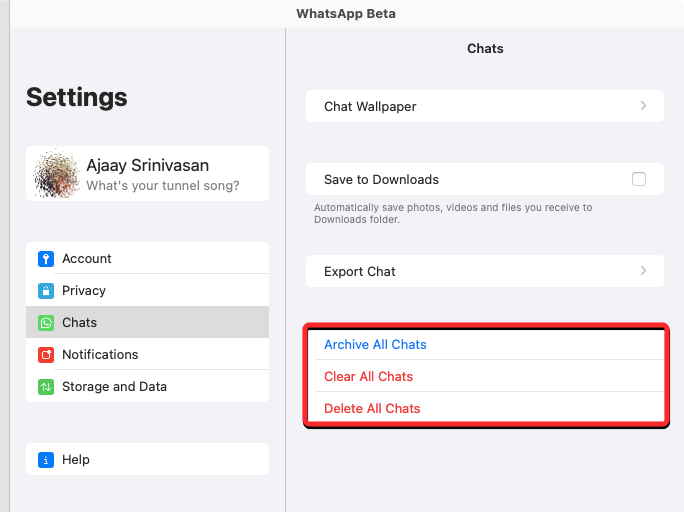
If you wish to use WhatsApp from scratch, you can choose any of these options inside the Chats panel – Archive All Chats, Clear All Chats, or Delete All Chats.
How to log out of your WhatsApp account on Mac
When you no longer want to use the WhatsApp account on your Mac, you can log out from it to unlink your account on the Mac. There are two ways to log out of WhatsApp on a Mac – from the Mac or the connected phone.
Log out from the Mac
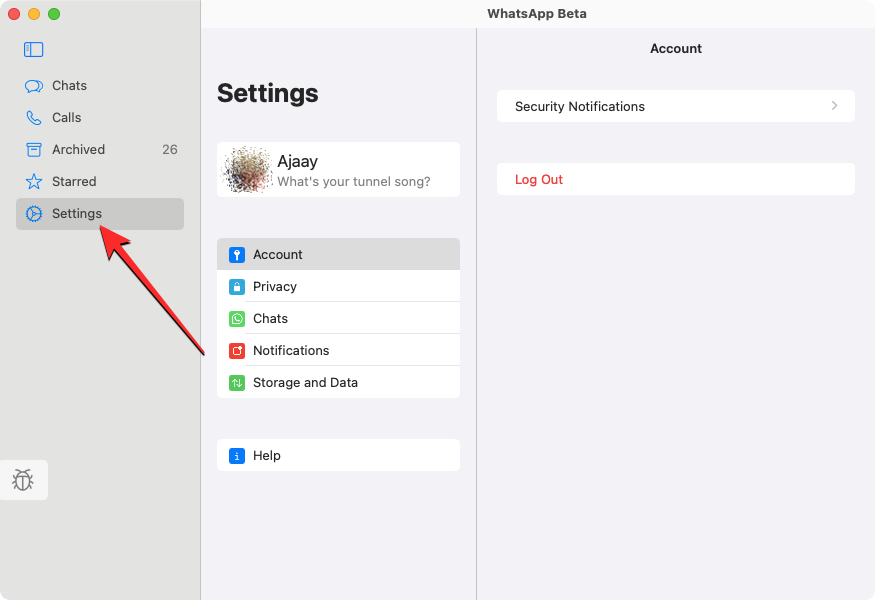
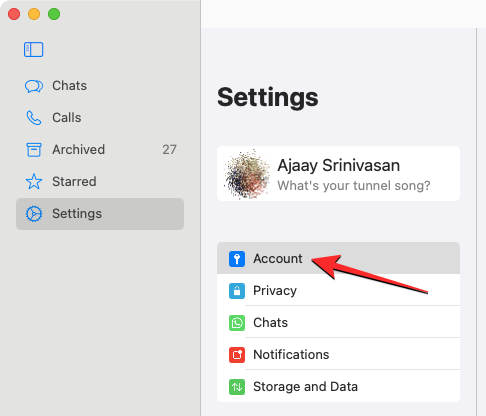
The easiest way to log out of your WhatsApp account on the Mac is by opening the WhatsApp app on macOS. Inside WhatsApp, click on the Settings tab on the left panel. When the Settings screen appears on the middle panel, click on Account.
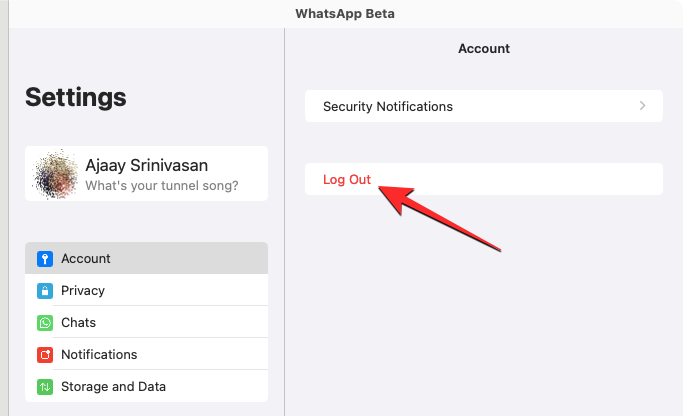
On the right panel, click on Log Out to unlink your WhatsApp account from the Mac.
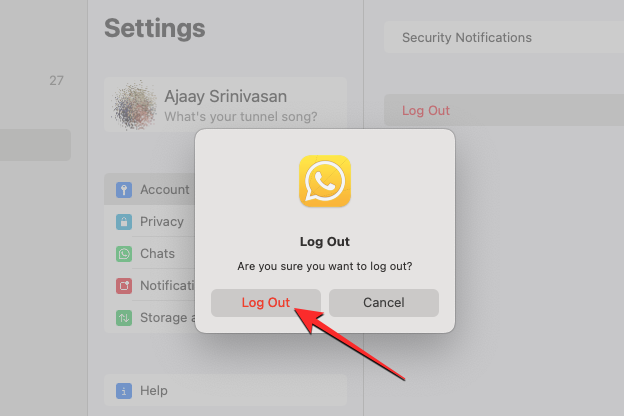
You will need to confirm your action by clicking on Log Out from the prompt that appears on the screen.
Log out from your phone
You can also log out of your WhatsApp account on the Mac by unlinking it from your WhatsApp account on your phone. For this, open the WhatsApp app on iOS or Android.
Inside WhatsApp, tap on the 3-dots icon at the top right corner on Android or tap on the Settings tab at the bottom right corner of your iPhone.
On Android, when an overflow menu opens on the screen, tap on Linked devices. On iOS, select Linked Devices from the Settings screen.
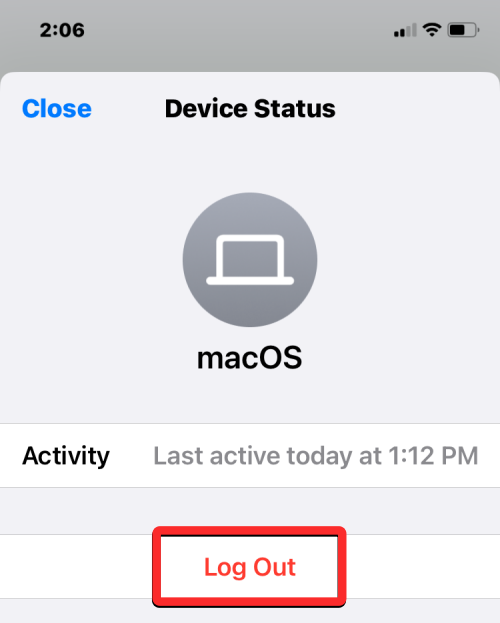
Inside the Linked Devices screen, tap on macOS.
In the Device Status screen that appears, tap on Log Out.
You will now be logged out of your WhatsApp account on the Mac.
Can you use the WhatsApp Mac app without your phone?
Yes. The new native app for WhatsApp on Mac is designed to run by itself without connecting your phone to any network.
Before this, the older WhatsApp app, just like the web version, relied on your phone’s internet connectivity to show you the same messages on the Mac. If your phone got disconnected, the app would then cease to show newer messages or stop you from sending new messages from the Mac.
With the new WhatsApp app, you can now send and receive messages from within your Mac without needing your phone to stay online. You can even make audio and video calls to someone or receive them directly on the Mac without your phone.
For how long can you use the WhatsApp Mac app without a phone?
You can use the native WhatsApp app on your Mac without your phone as soon as you link your account to the Mac client. WhatsApp allows you to use the Mac client as a standalone app for up to 14 days. This means, your linked devices (including your Mac) will be logged out if your phone hasn’t been online for over 14 days. If you occasionally connect your phone to the internet, you can continue using the WhatsApp on Mac app without your phone for an indefinite period, provided that your phone stays online at least once in two weeks.
That’s all you need to know about downloading and installing WhatsApp on a Mac.


Discussion