Have you ever wanted to use your pics from the latest trip and create a video out of them without a fuss, using the Android device in your hand right now? Well, you are not alone. There are many people out there, who want to create a happening video but are just unaware of the method. Don’t worry! We are here to help you.
Videos – slideshow of photos — are engaging and more interesting than the usual set of photos, and leave a much long lasting effect on anyone you share it with. After all, after adding some music to the best collection photos that appear one after another in a duration you set, is bound to impress anyone — it’s a complete treat to watch, that’s both time-saver and easy to follow.
What was possible only on the desktop few years back is now easily accomplished on Android. Many apps on Google Play Store (Quik, VideoShow, VivaVideo, PowerDirector) allow you to create a video from your photos, but in our books, VideoShow tops the list.
Although being a free App, it is loaded with features. While the app allows you to create videos with no time limit, it also generates videos with no watermark. Win win!
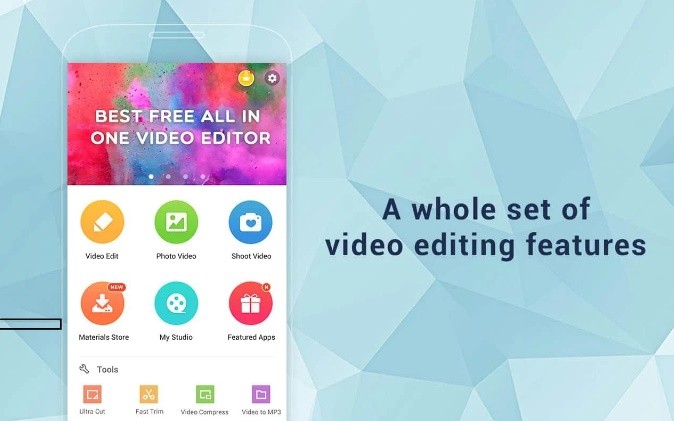
VideoShow is an all in one video editor app having all the features that you need to make an awesome video, besides featuring galore of other options related to videos, like, compressing a video, creating MP3 out of it, etc.
However, if you don’t want extra features and are content with simple and stylish video slideshow creation, you should look at Quik app, wherein it’s infinitely easy to remove watermark without from settings itself, while export options are better too.
Guide to create video slideshow
To make a Video from the photos, follow these steps:
Step 1. Open VideoShow App.
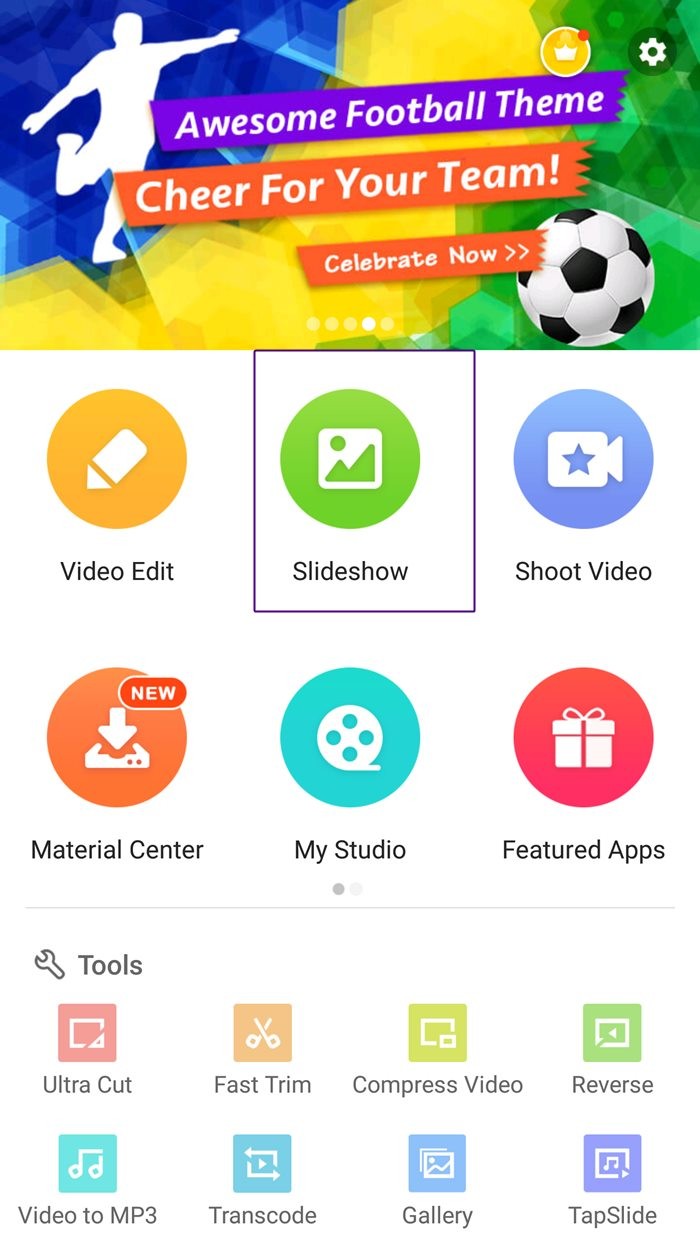
Step 2. The home screen of the App gives you multiple options to create a video.
- Video Edit: Use this option to edit an existing video.
- Slideshow: Use it to create video from your photos. That’s what we’re excited about, truth be told.
- Shoot Video: With this option, you can shoot a new video and edit it.
- Material Center: Material Center lists all of the themes, music, effects. Stickers, and fonts that are available for download. You can then use them to boost your video.
- My Studio: The videos that you make with this app and the drafts of the videos are available in My studio.
→ Since we have to make a video from the Photos, select the second option i.e. Slideshow.
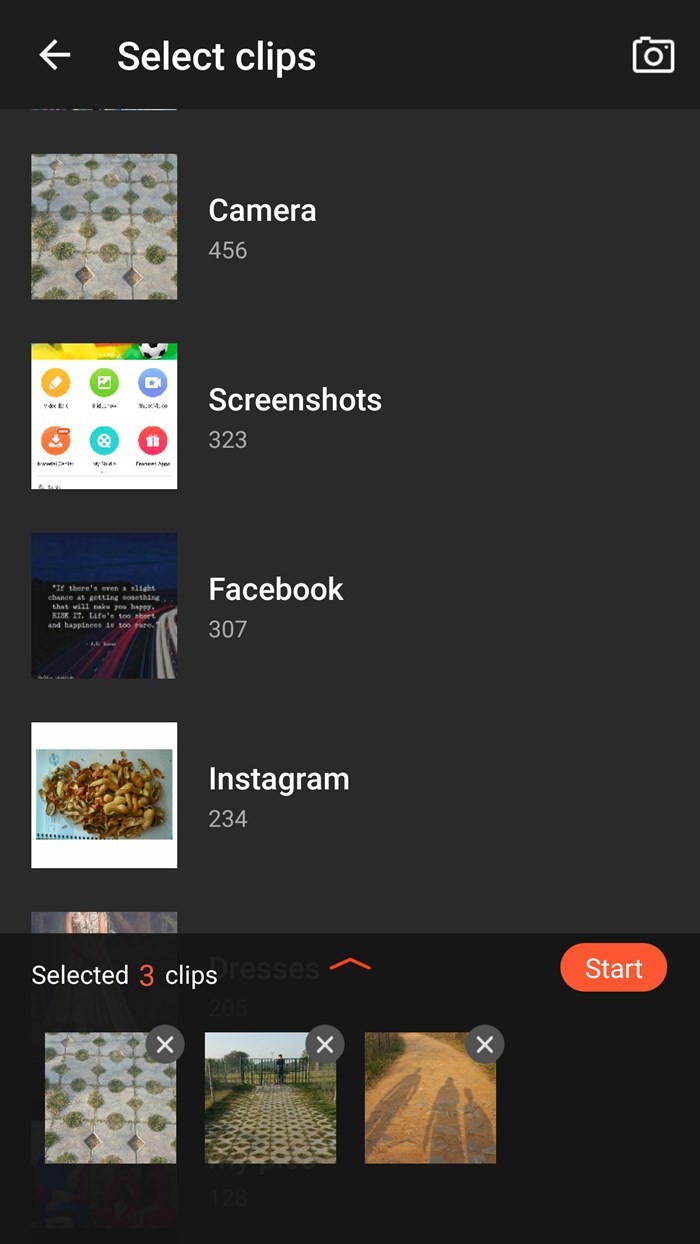
Step 3. The app will show all your images organized under different folders. Tap the photos to select them. When you tap the photos, you will find them in the bottom selection bar. To remove a photo from the selection, tap the cross button at right top of the photo in the bottom bar.
Step 4. Once you are happy with your selection, tap the start button at the bottom. The generated video will play automatically with the default music of the App.
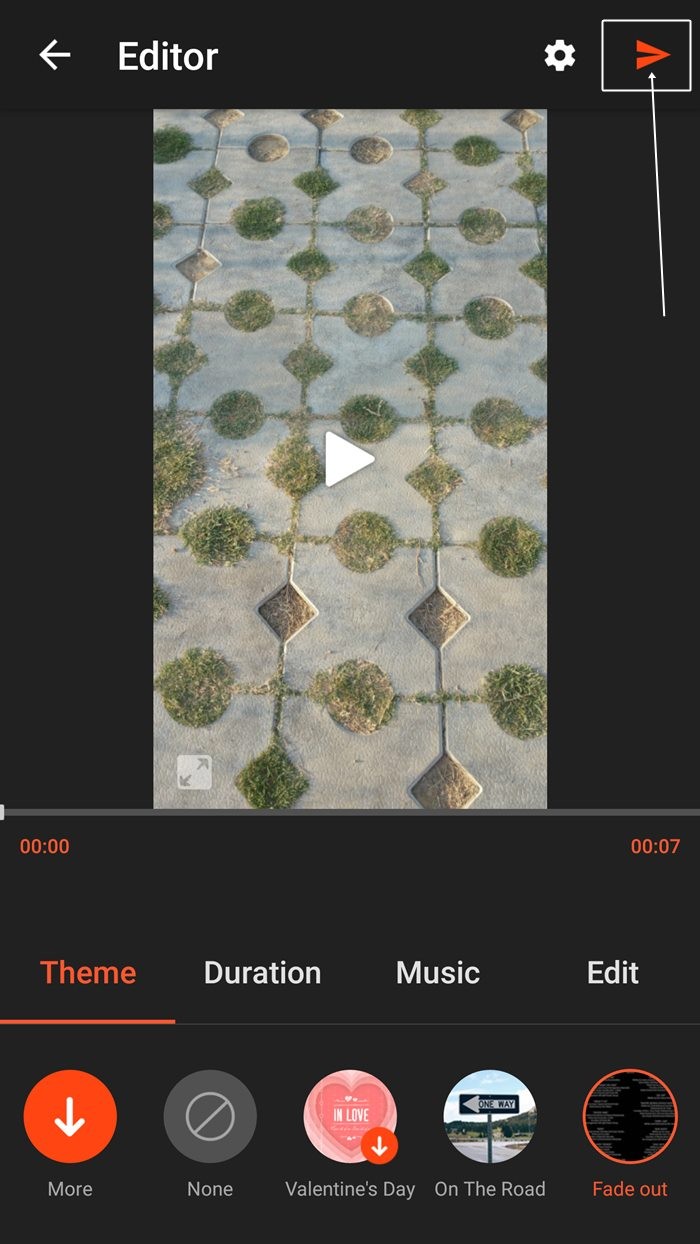
Step 5. If you are satisfied with the video, tap the next button at the top right corner to reach export screen. You can save the video to your gallery or directly share it with other apps – YouTube, Facebook, Instagram, WhatsApp etc.
However, if you want to modify the video and add your own music, or change the duration of clips or add a theme or add subtitles you can also do that using this app.
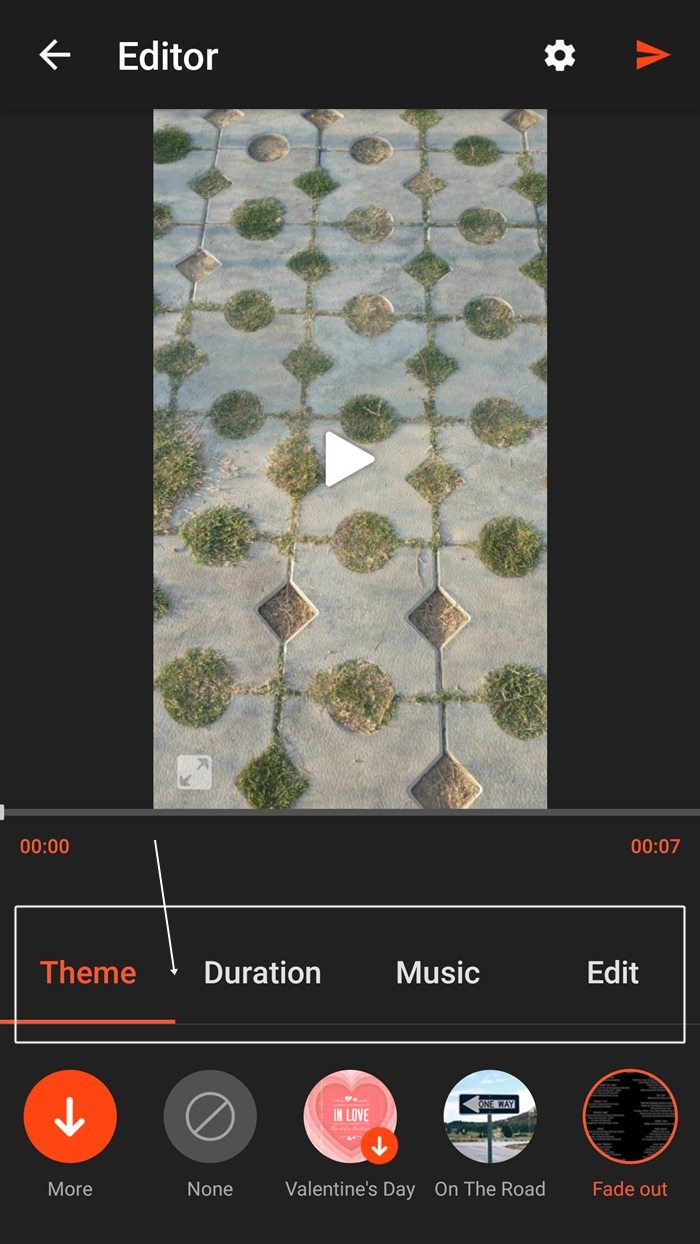
After selecting the photos, when your video loads in the App, you will find multiple options below the video.
- Theme: Theme allows you to add styles/effects to your video. In addition to that, you can also add Prologue and Epilogue to the video (We, however, like the styles provided in the Quik App.) To add a theme, just tap on a particular theme.
- Duration: Duration allows you to change the duration of the clips. The time you choose is applied to all the photos of the video. (You can change the duration of individual clips/photo In the Edit option)
- Music: Use this option to add music to your video. By default, the app will add the sound track of the theme, which will be visible under the music tab. Tap it to change the music of your video. You can download music from the app, or you can add your own music.
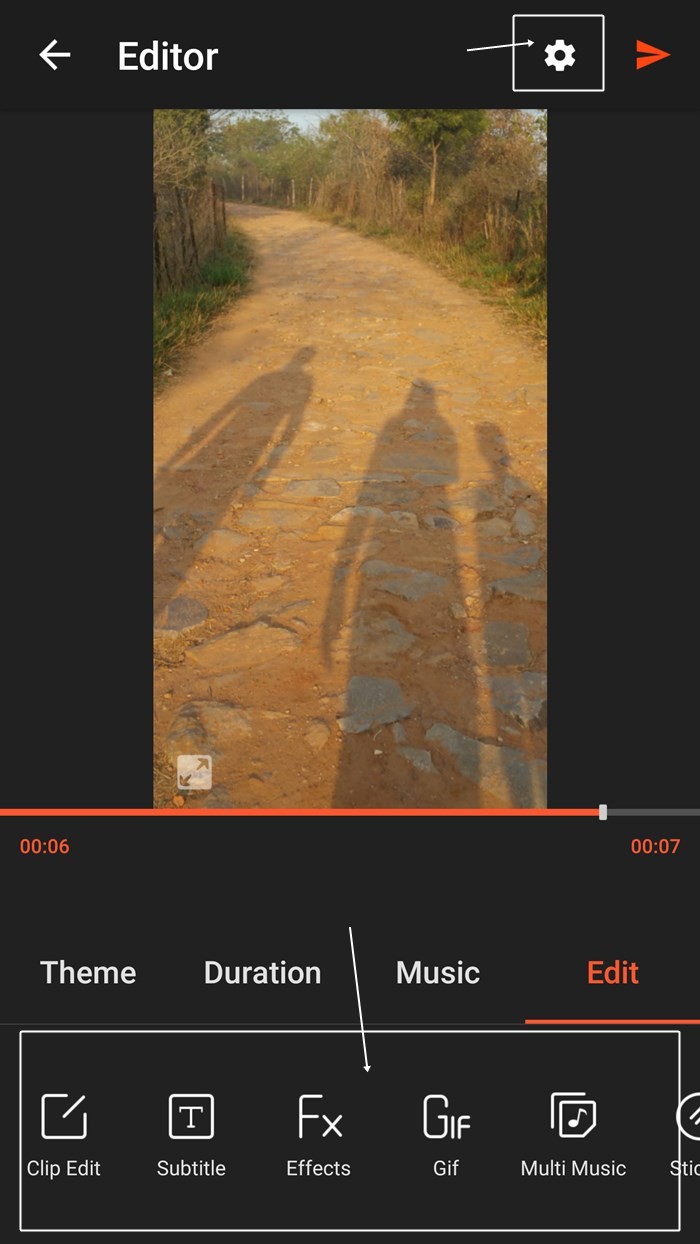
- Edit: The Edit tab further includes multiple options like Clip Edit, Effects, Sticker, Filter, sound etc. some of which are explained below.
- Clip Edit: Use this option to edit the clips individually. You can remove the photos, change their duration, rotate them, and zoom them here.
- Subtitle: With this option, you can add subtitles/text/caption to your videos. Select the time where you want to add the text and hit the plus button.
- Transition: Use this option to add a transition effect to your photos.
- Sound: You can record your voice and add it to your video using this option.
You can also change the resolution and background of your video. To do so, hit the setting button next to the ‘Send’ button at the top right corner.
When done, hit the ‘Send’ button to process to next screen, which allows you to export the video, which includes saving it on the device’s storage, or send directly to social apps.
Step 6. Select the ‘Save to Gallery’ option to save the video on device storage. It will show up in your Gallery/Photos app. You can watch it from there as many times as you like, and also share it from there.
However if you wish to share it on WhatsApp, or Facebook, you can do so too. Just select the app you want to share it on form the list of apps listed there.
That’s it.
Some tips on using VideoShow app
- In order to remove the ‘Made with VideoShow’ watermark at right bottom of the video which is applied by default in free version of the app, you can install the ‘sponsored app’ the VideoShow app asks you to install in order to get remove watermarking for 7 days. You should notice it when exporting the video.
- You can share your video or export it again form the ‘My Studio’ option on main screen, which keeps track of all editing you have done.
- In order to apply different effects, head to ‘My studio’ section in main screen of the app, and switch to ‘My drafts’ tab. Here, press the options button (3 dots), and select copy to create a quick copy of the draft, so that you can apply different effects, and don’t have to select the photos and stuff again.
So, try it. And do let us know how does it go for you? We would love to hear your thoughts on it.


