What to know
- Fantastical lets you connect existing calendar accounts from File > Settings > Accounts.
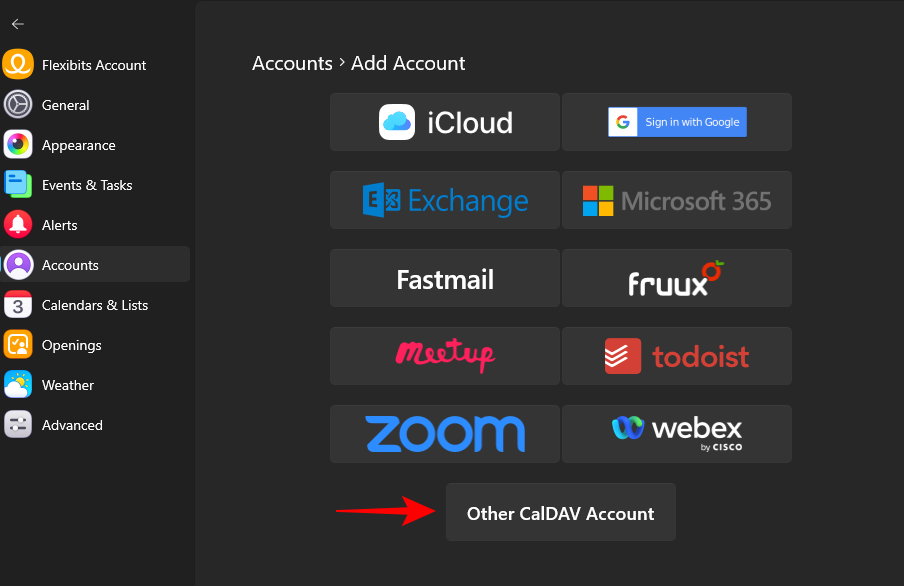
- You can connect your Google, iCloud, Exchange, Microsoft 365, Fastmail, Fruux, Meetup, Todoist, Zoom, and Webex, as well as other CalDAV accounts.
- You can view or hide connected calendars in Fantastical’s calendar view by enabling or disabling it from Accounts, or view or hide a calendar’s sections from Calendars & Lists.
The Fantastical app lets you connect your existing calendar accounts and bring them all under a single roof. Once an account is connected, you can view its events in Fantastical, as well as enable or disable it with ease. If you’ve recently hopped on to the Fantastical bandwagon, here’s how you can connect your existing calendar accounts to Fantastical on Windows.
Connect existing calendar accounts to Fantastical
Although a Flexibit account with a subscription is recommended to get all the features of the Fantastical app, you don’t need it to add multiple calendar accounts. Here’s how to connect and import existing calendars from the most popular services.
Connect Google, Fastmail, Meetup, Zoom, and other accounts
- Click on More options in the top left corner (hamburger icon), then select File > Settings.
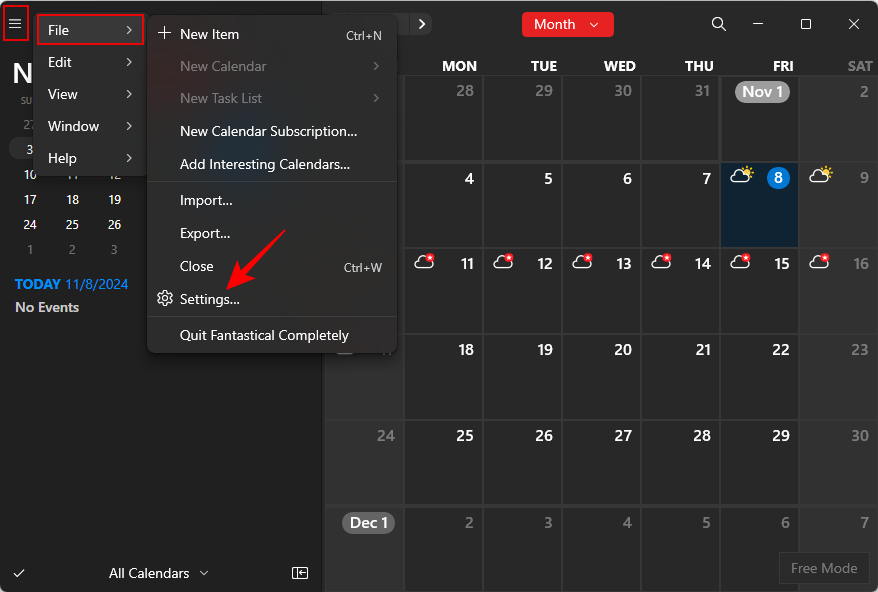
- In the Settings window, select Accounts.
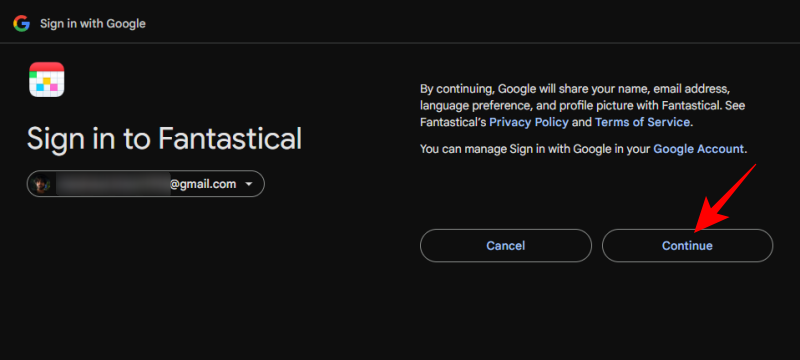
- Here, you’ll find a bunch of accounts that you can sign in to and import the calendars associated with them. Some of these, like Google, Fastmail, Meetup, and Zoom will lead directly to a browser window for authentication.
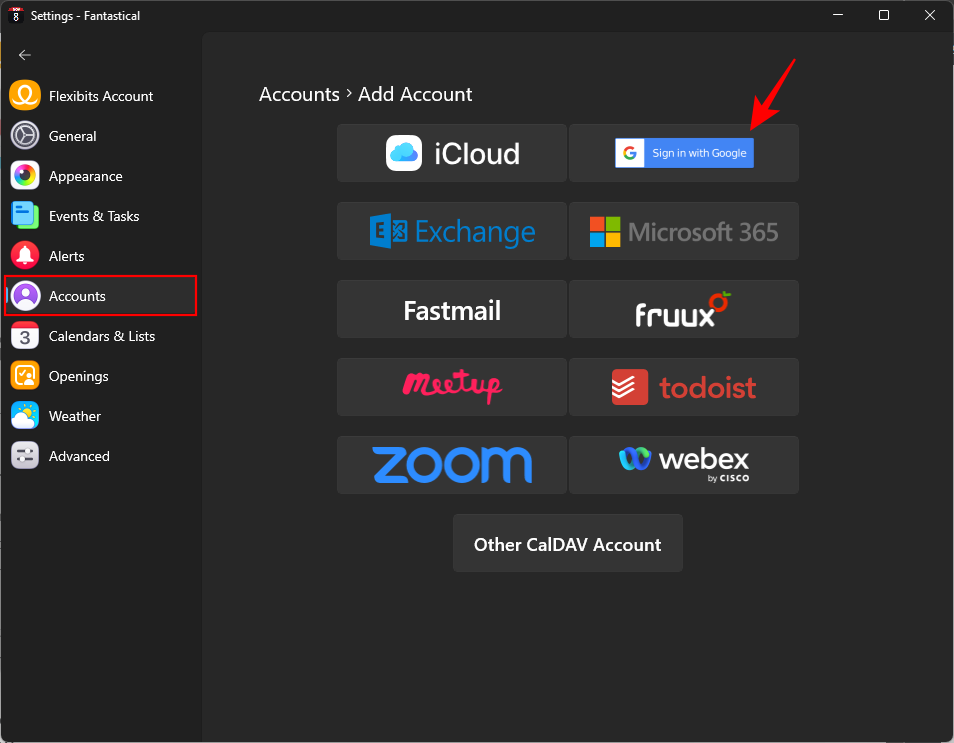
- We’re using our Google account as an example.
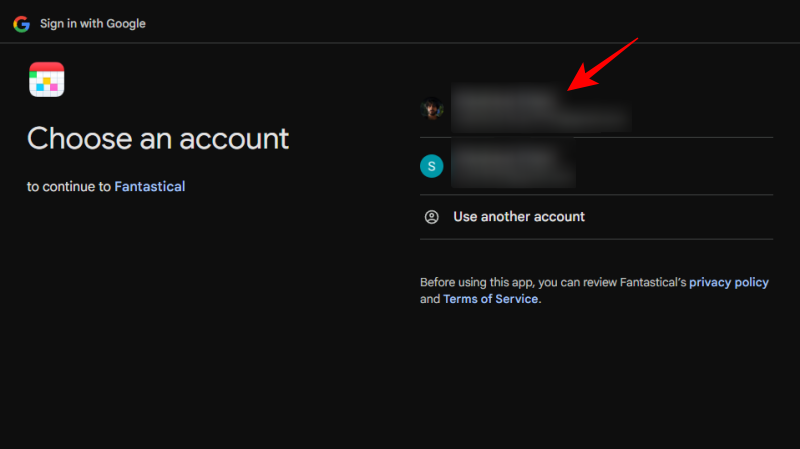
- Click Continue.
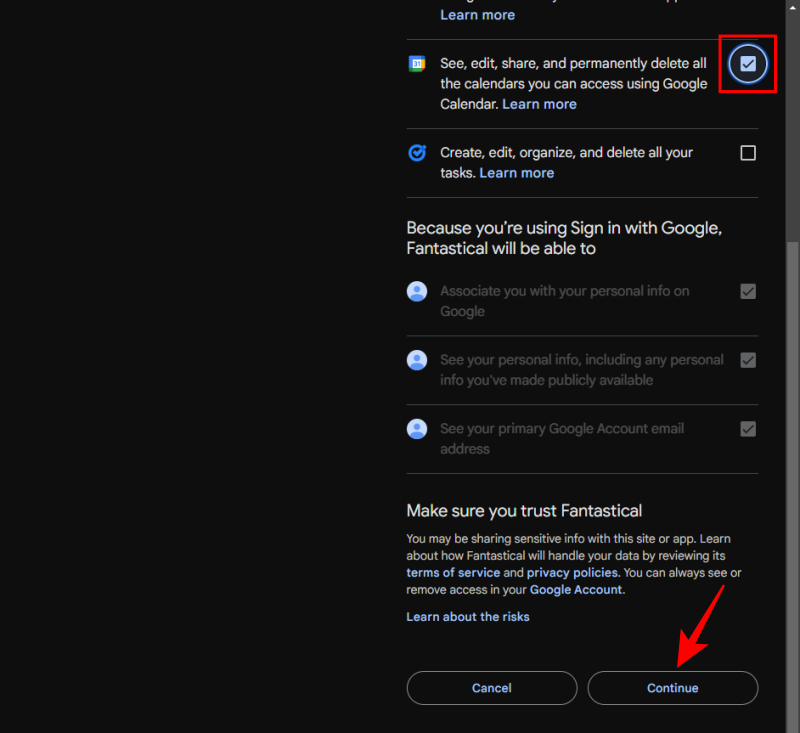
- Here, make sure to give Fantastical permission to “See, edit, share…. the calendars you can access using Google Calendar.” Depending on what you want to be able to do with the Google account on Fantastical, you may want to give further permissions to Fantastical. Then click Continue.
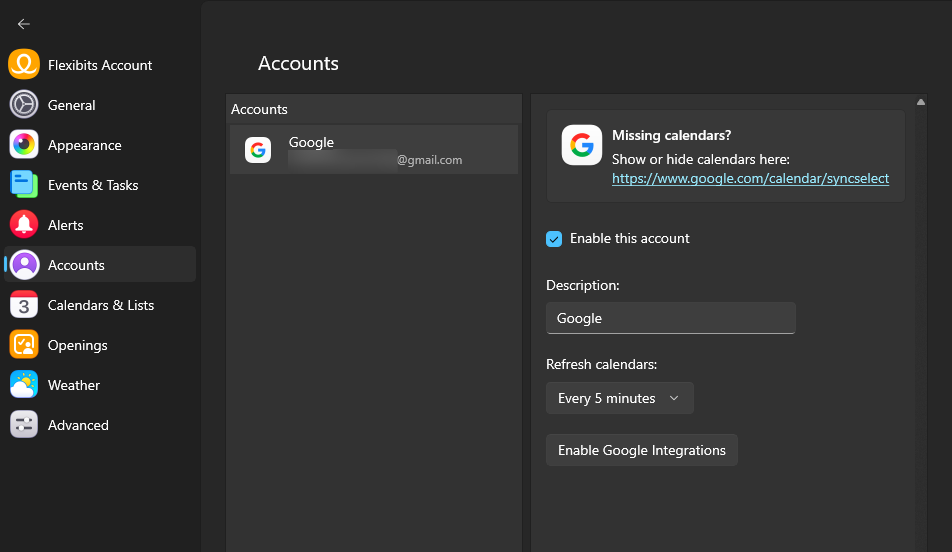
- Once the authorization is complete, you’ll see your Google calendar linked to Fantastical.
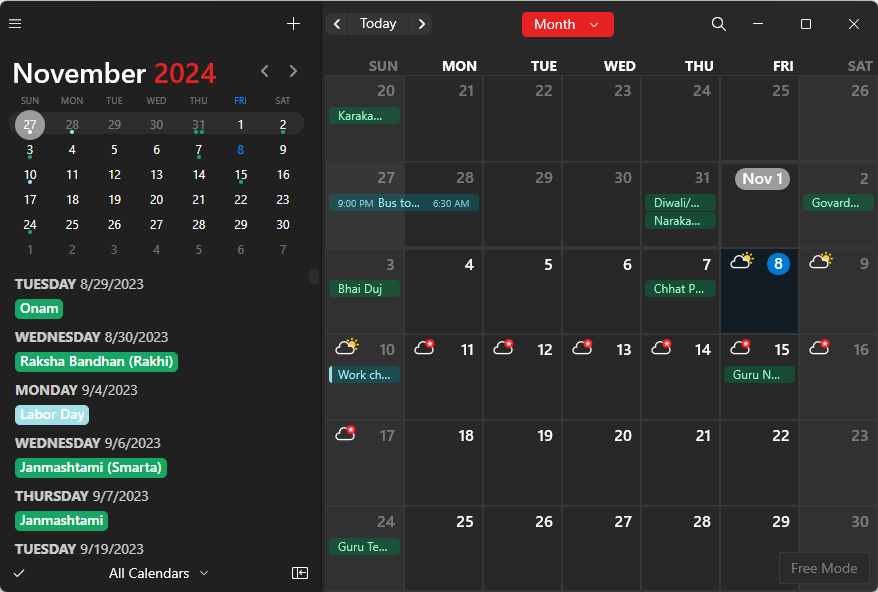
- Go to the main Fantastical window to view the events from your Google calendar.
Connect iCloud calendars
Connecting your iCloud account requires an additional step in order for Fantastical to access its calendar. Here’s how to go about it.
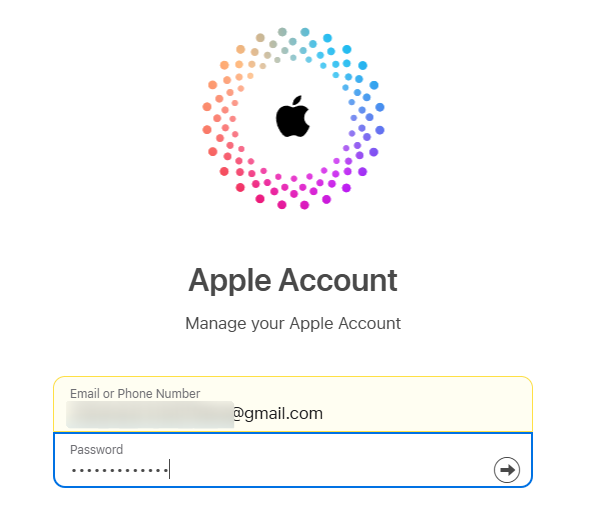
- In a browser, sign in to your Apple Account.
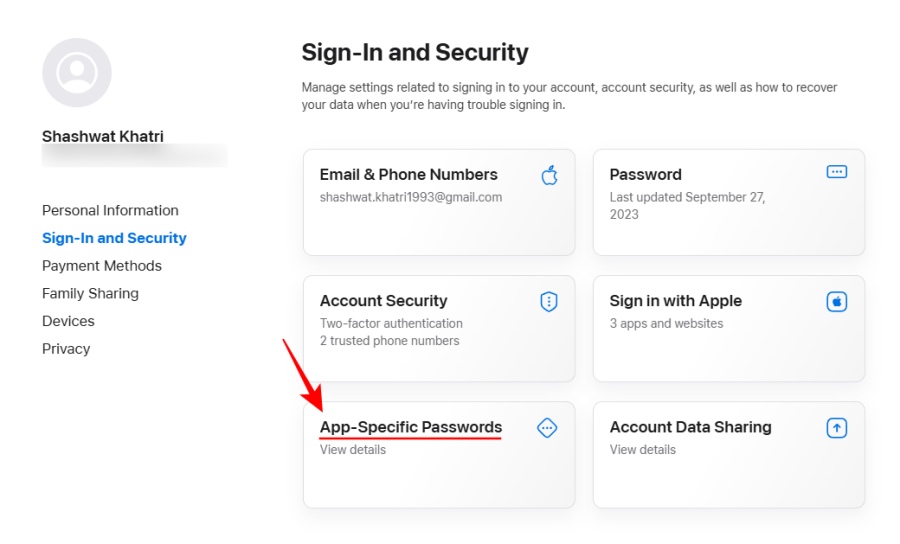
- Once you’re signed in, select Sign-in and Security. Then click on App-specific passwords.
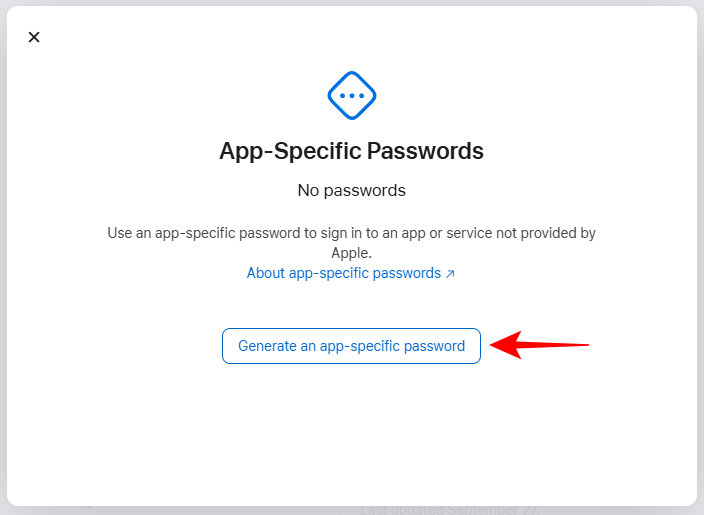
- Click Generate an app-specific password.
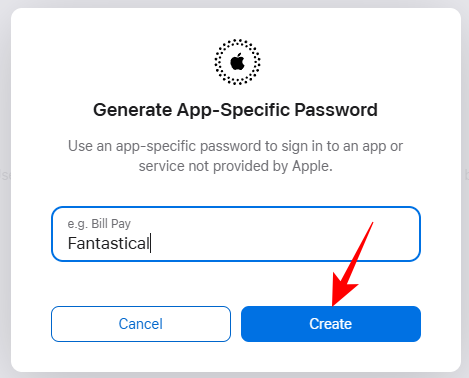
- Give the password a title so you can easily find it later from your Apple Account. This could be anything. But for easier identification later, it’s best to type Fantastical or something similar. Click Create.
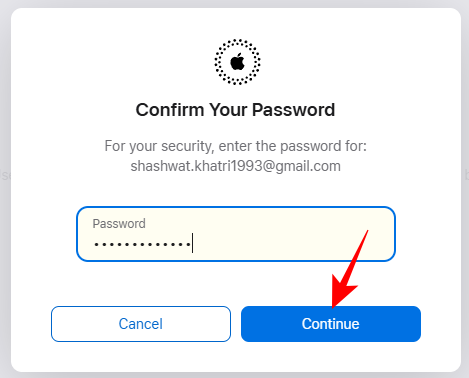
- Now enter your Apple Account password and click Continue.
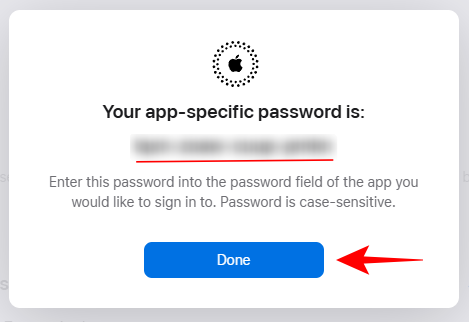
- Take note of your password and click Done.
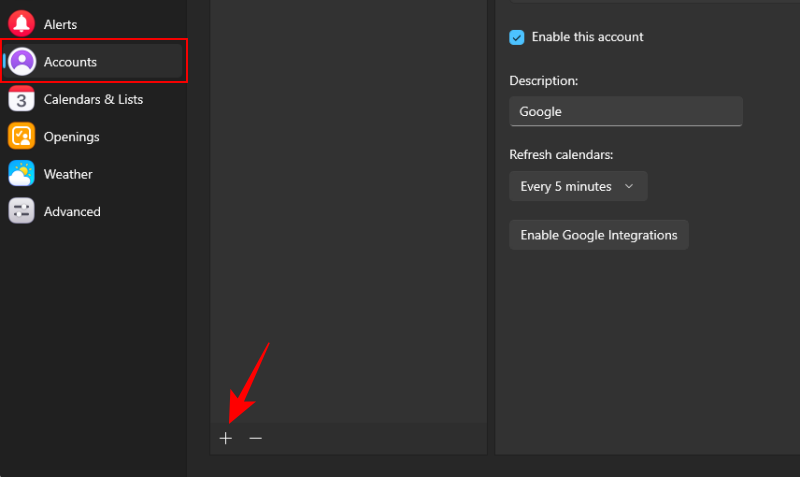
- Now open the ‘Accounts’ section of Fantastical as shown before. Here, click on + to add an account.
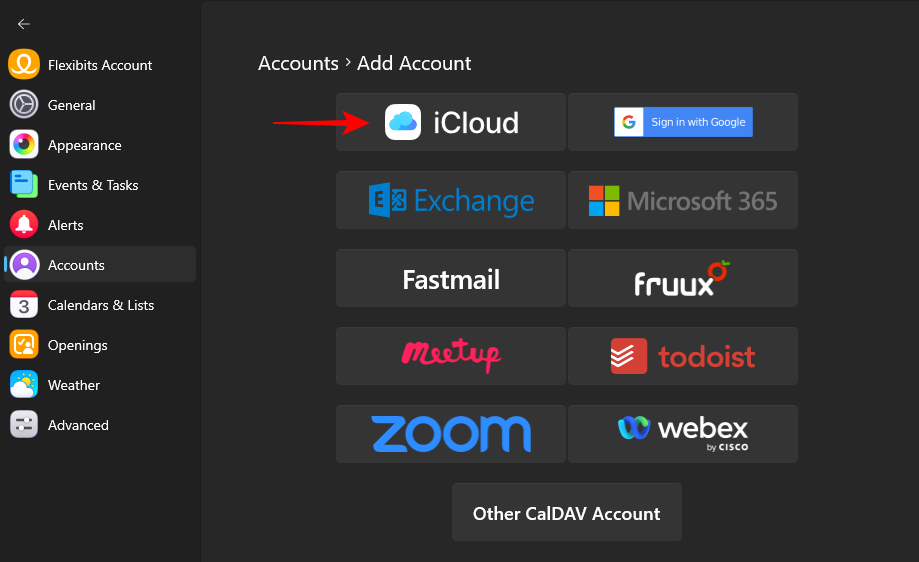
- Select iCloud.
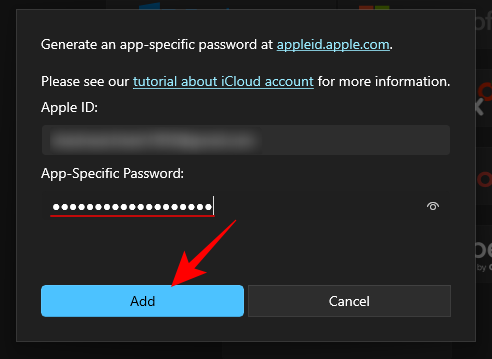
- Enter your Apple Account ID, and then paste the app-specific password that was generated. Once done, click Add.
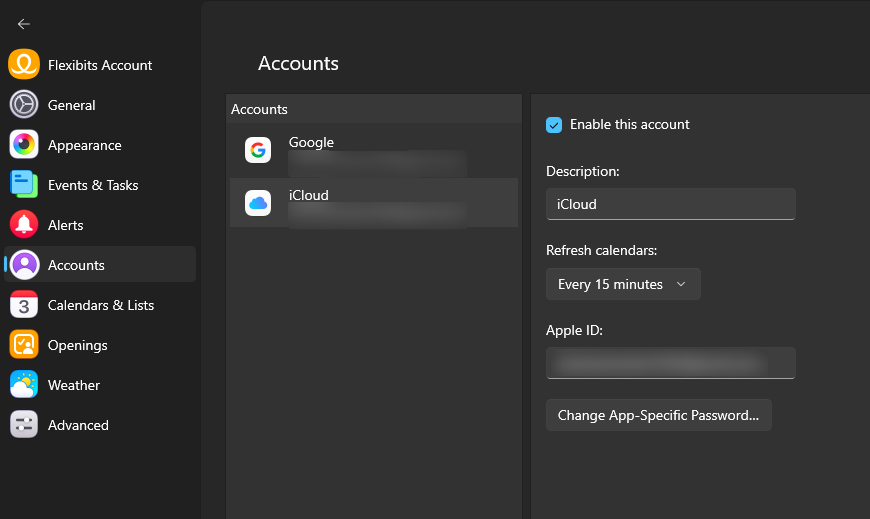
- Once connected, you’ll see iCloud in the Accounts section.
Connect Microsoft
Microsoft 365 and Exchange accounts will require you to enter your Microsoft email with before proceeding. Here’s how to go about it:
- In Fantastical’s Account Settings window, click +.

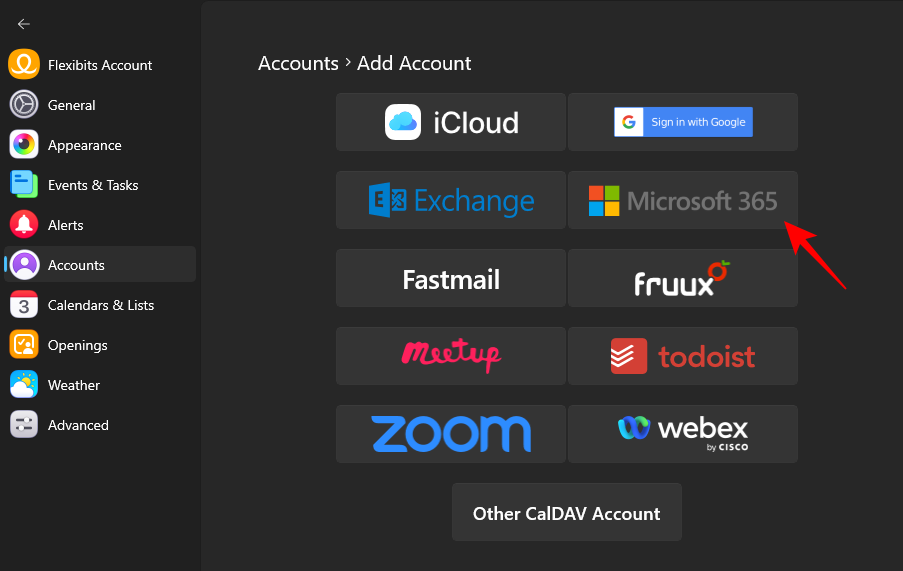
- Select which Microsoft-based account you want to connect.
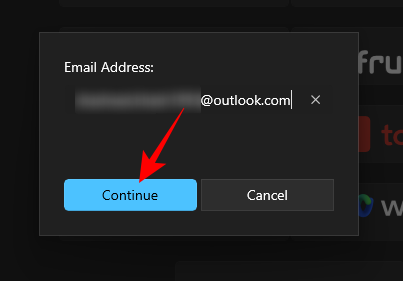
- Enter your email address and click Continue.
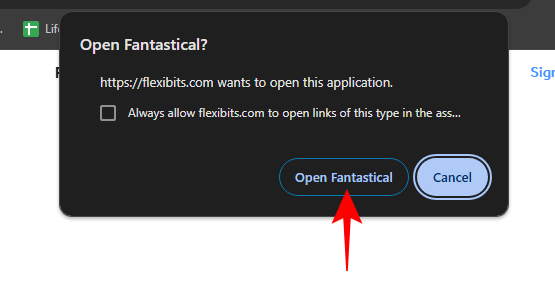
- Log in to your Microsoft account if you’re not already. Once you’re logged in to your Microsoft account, and the authorization is complete, click Open Fantastical in the dialog box.
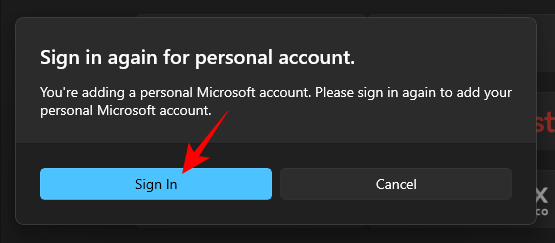
- If you’re connected to a personal MS account, you’ll be asked to Sign in again.
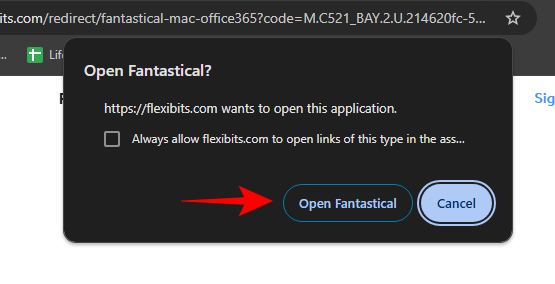
- As before, sign in and click Open Fantastical in the dialog box.
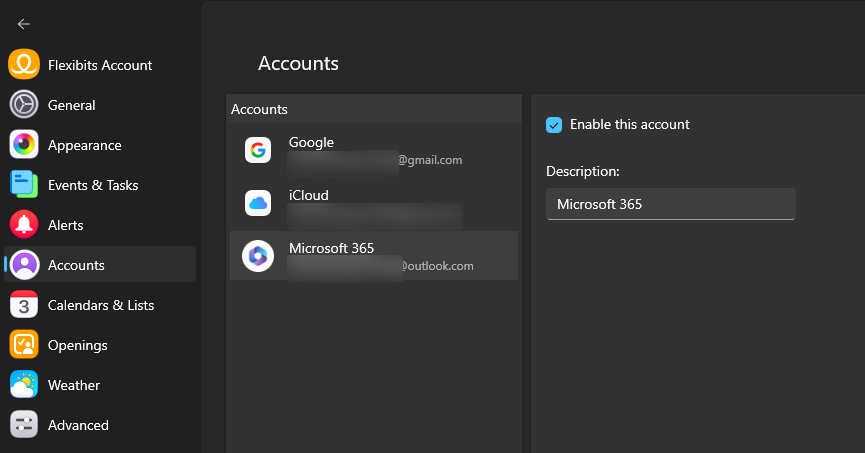
- Your Microsoft account will now be connected and its calendar events available in Fantastical.
Apart from the accounts mentioned, if you have any other calendar service, you can use the “Other CalDAV Account” option that lets you enter the username, password, and server address to connect your account.
Hide or view calendars linked to other accounts
If you have multiple accounts connected to Fantastical, you may get multiple events appearing on Fantastical’s ‘All Calendars’ view. But you can easily hide them from view. Here’s how:
- Open the Accounts tab in Fantastical’s Settings window.
- Select an account whose calendar you want to hide.
- Then uncheck Enable this account.
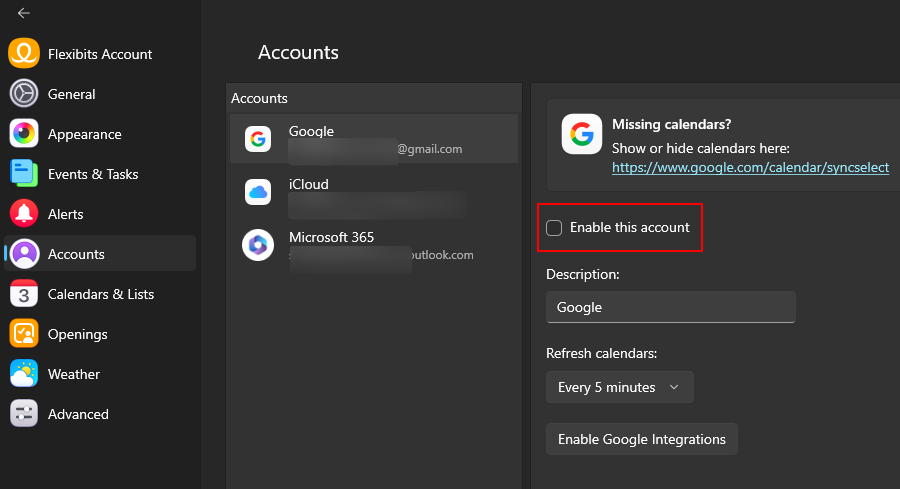
- And just like that, that calendar will be hidden from Fantastical’s calendar.
- Hidden calendars will be marked grey.
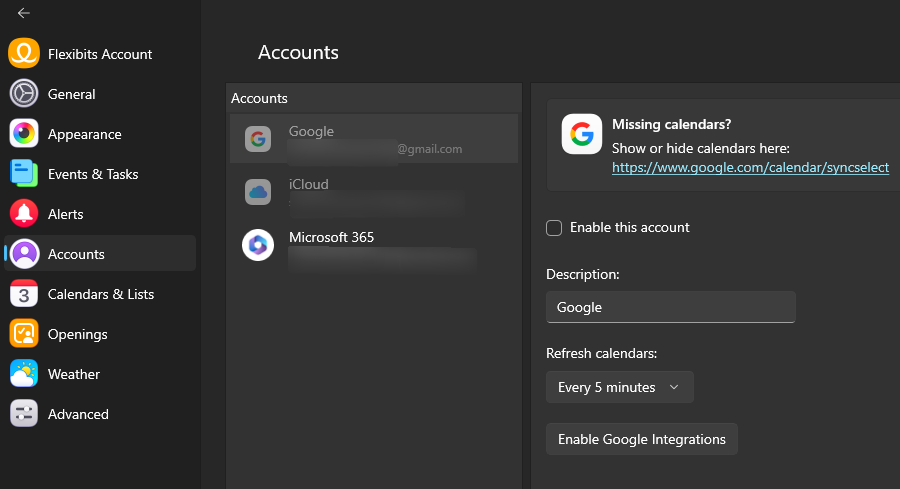
- Whenever you need to view it again, simply place a check next to ‘Enable this account’ again.
Hide or view different sections from linked calendar accounts
Calendars from different accounts are linked to your default ‘Calendar set’ on Fantastical, but they’re hidden by default. If the calendar itself is enabled (as shown earlier), you’ll be able to view their tasks, birthdays, holidays, and other events in your default calendar set. Here’s how:
- Open Fantastical’s Settings and click on Calendars & Lists.
- Then select your Calendar set.
- On the right, you’ll see all the calendars that are enabled. But none of these appear in the calendar view by default.
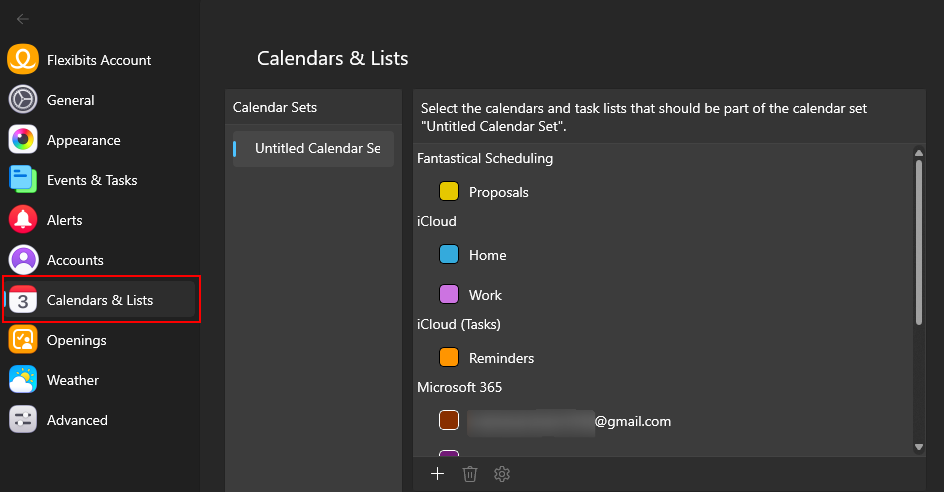
- To change this, place a check next to the different calendar sections that you want in your Calendar set.
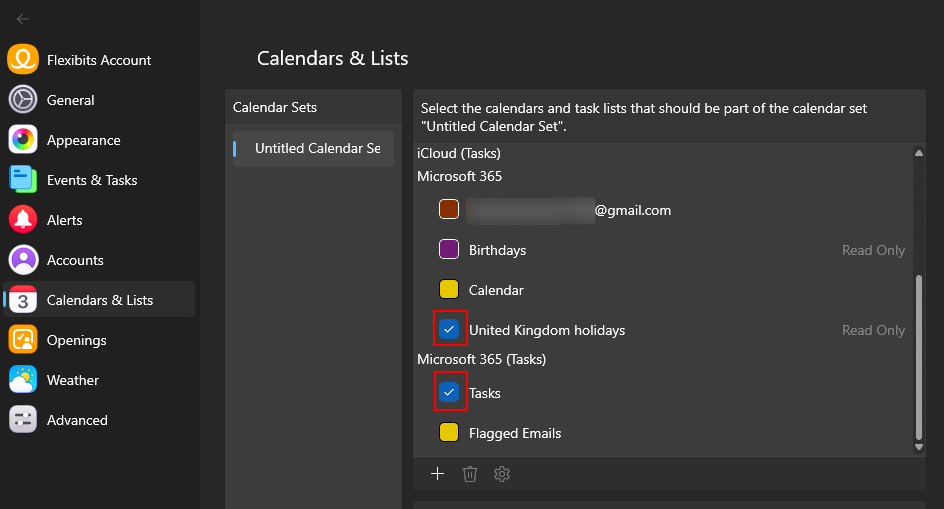
- And just like that, these sections will appear in the selected calendar set.
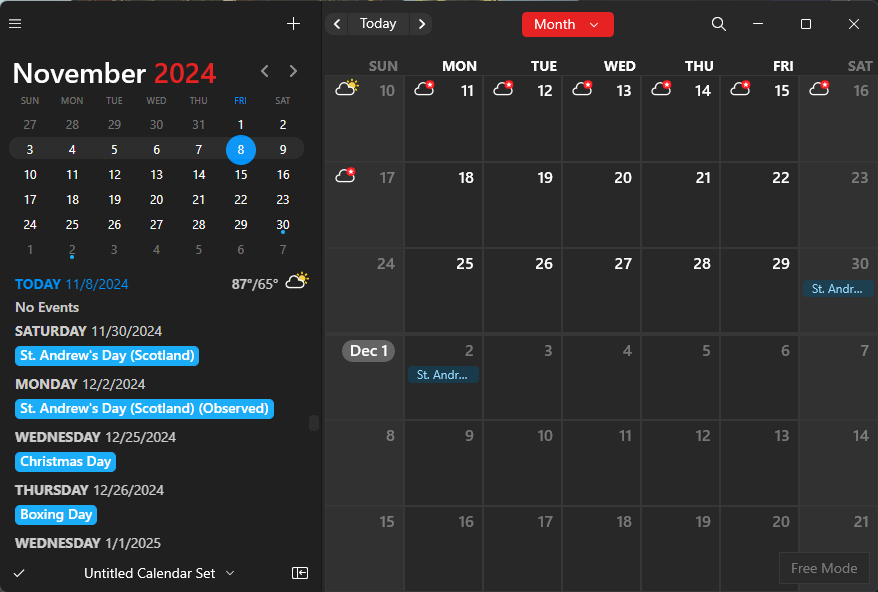
So these were the ways that you can connect your existing calendar accounts from popular services as well as manage how they appear in the Fantastical app. You can also add curated calendar subscriptions using Fantastical’s Interesting Calendars features.


