Update (February 25, 2016): A new kernel is available from developer Manh_IT, called SpaceX (we’ve featured it many a times earlier too for different Samsung devices), which also roots your Note 5, and its installation is more easier than the previous root solution. This doesn’t require you to install TWRP recovery as it’s installable via Odin.
Here is our how to root Galaxy Note 5 on Marshmallow method. This requires TWRP recovery, which is also provided below, along with a full guide to install both root and TWRP.
What’s more cool about this trick is that this fixes the deep sleep issue — by default, Samsung gets you deep sleep feature with the firmware, which improves battery life, but this feature gets broken upon rooting and such. However, the method take care of that.
Once you have completed the procedure below, your Galaxy Note 5 will have root access, and also TWRP 3.0.
To verify root access, use the root checker app. Do let us know if you face any issues over Note 5 Marshmallow root given below. Be sure to do this exactly as said below.
Galaxy Note 5 Marshmallow Root
→ Note that this is only for Marshmallow update on Note 5. For Lollipop version, see Note 5 root here.
METHOD 1: TWRP and Skyhigh kernel
Downloads
- Note 5 TWRP Recovery 3.0 — Link
- Note 5 Marshmallow root kernel — Link
- SuperSU root tool — Link
- Odin PC software — Link
→ Check the official page here for the newer version of root kernel, and say thank to its developer for his cool work.
Supported devices
- Samsung Galaxy Note 5, model no. SM-N920C
- Don’t try on any other device whatsoever!
Important: Check your device’s model no. on its packaging box, or in Settings > About device. BTW, be sure to use an app like Droid Info to make sure that your device’s model no. is the one given above. If you don’t see the same model no. and codename, then DO NOT try this on your device.
Warning!
Warranty may be void of your device if you follow the procedures given on this page. You only are responsible for your device. We won’t be liable if any damage occurs to your device and/or its components.
Backup!
Backup important files stored on your device before proceeding with the steps below, so that in case something goes wrong you’ll have backup of all your important files. Sometimes, Odin installation may delete everything on your device!
Step-by-step Guide
Step 0. Make sure you have enabled the OEM Unlock. For this:
- Go to Settings > About phone, and then tap ‘Build number’ 7 times or until you see the ‘you’re now a developer’ message pop up.
- Now go back to Settings, and into Developer options. Now, look for OEM Unlock, and select it using its toggle button.
Also, if you used any other method to root your Note 5 Marshmallow update earlier, it best to install the Marshmallow update firmware again. Download the Note 5 Marshmallow firmware here and install it before using the guide below.
Step 1. Download TWRP, root kernel, SuperSU and Odin file from above.
→ Transfer the root kernel and SuperSU file to your Galaxy Note 5. Keep Odin and TWRP file on PC.
Step 2. Install Galaxy Note 5 driver (method 1 there!) first of all. Double click the .exe file of drivers to begin installation. (Not required if you have already done this.)
Step 3. Extract the Odin file. You should get this file, Odin3 v3.10.6.exe (other files could be hidden, hence not .
Step 4. Disconnect your Galaxy Note 5 from PC if it is connected.
Step 5. Boot Galaxy Note 5 into download mode:
- Power off your Galaxy Note 5. Wait 6-7 seconds after screen goes off.
- Press and hold the three buttons Power + Home + Volume down together until you see warning screen.
- Press Volume Up to continue to download mode.
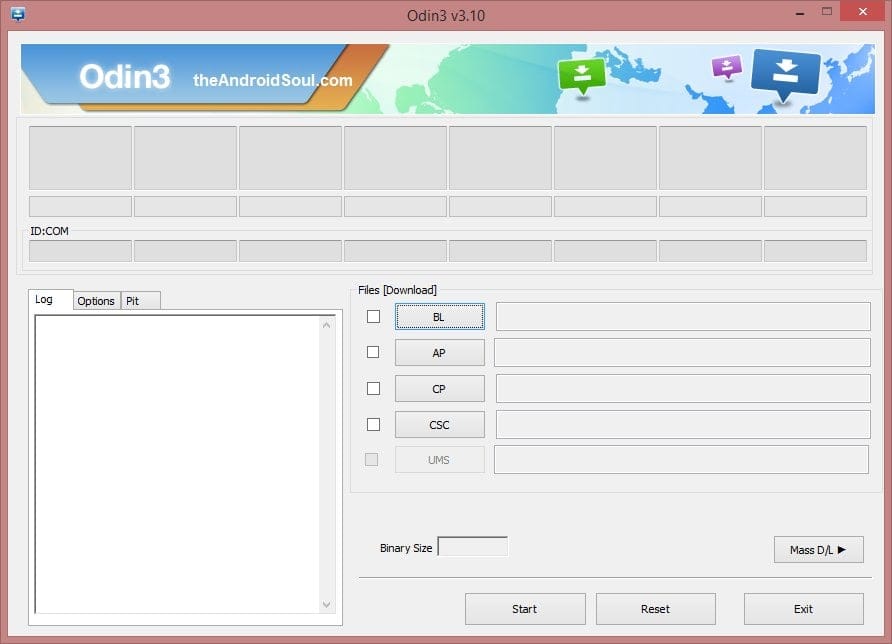
Step 6. Double click on extracted file of Odin, Odin3 v3.10.6.exe, to open the Odin window, as shown below. Be careful with Odin, and do just as said to prevent problems.

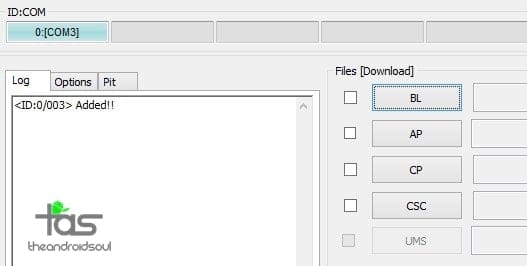
Step 7. Connect your Galaxy Note 5 to PC now using USB cable. Odin should recognize your Galaxy Note 5. It’s a must. When it recognizes, you will see Added!! message appearing in the Log box in bottom left, and the first box under ID:COM will also show a no. and turn its background blue. Look at the pic below.

- You cannot proceed until Odin recognizes your device and you get the Added!! message.
- If it doesn’t, you need to install/re-install drivers again, and use the original cable that came with device. Mostly, drivers are the problem.
- You can try different USB ports on your PC too, btw.
Step 8. Load the TWRP file into Odin. For this, click the AP button on Odin and the select the TWRP file in .TAR format.

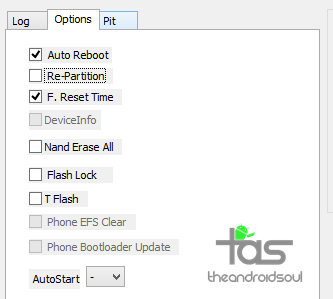
Step 9. Make sure Re-partition checkbox is NOT selected, under the Options tab. Don’t use PIT tab either. Go back to Log tab btw, it will show the progress when you hit start button in next step.

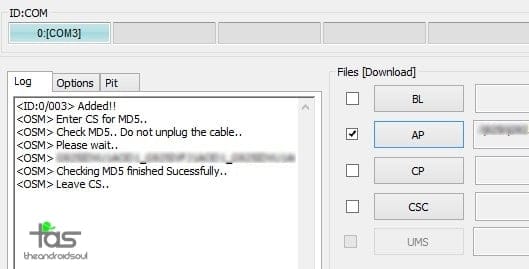
Step 10. Click the Start button on Odin now to start flashing the TWRP on your Galaxy Note 5. Wait till installation is finished, after which your Galaxy Note 5 will reboot automatically. You’ll get PASS message as show below upon successful installation from Odin.
- If Odin gets stuck at setup connection, then you need to do this all again. Disconnect your device, close Odin, boot device into download mode again, open Odin, and then select the TWRP and flash it again as said above.
- If you get FAIL in the top left box, then also you need to flash the firmware again as stated just above.

Step 11. With TWRP installed, it is now an easy job to root the device. Reboot into recovery mode to access TWRP recovery.
- Power off your Galaxy Note 5. Wait 6-7 seconds after screen goes off.
- Press and hold the three buttons Volume up + Home + Power together until you see Samsung logo on the screen.
→ Alternate method if you cannot power off your device. Do this if your Note 5 fails to boot properly after installing TWRP, which is not a problem.
- Press and hold Volume down and Power button together to force restart the device, and right when screen goes off for restart, press and hold the Home + Volume up and Power button together to access TWRP recovery you had just installed. You would see TWRP written upon doing this correctly. If not done properly, device will try to reboot normally and you will see Samsung logo instead of TWRP.
Step 12. In TWRP, tap on Install button, and then select the kernel file. Then do the swipe action at bottom to install the kernel. Tap on Back button to go back to main screen of TWRP.
Step 13. Now, install the SuperSU file the same way you installed the kernel using the install button.
Step 14. Tap on Reboot System button to restart your Note 5, which will now have root access on Marshmallow build N920CXXU2BPB6. Your PB6 build is 100% rooted now.
→ That’s it. Enjoy the TWRP and root access on your Galaxy Note 5!
To access TWRP recovery, you have to reboot into recovery mode:
- Power off your Galaxy Note 5. Wait 6-7 seconds after screen goes off.
- Press and hold the three buttons Volume up + Home + Power together until you see Samsung logo on the screen.
If you need any help with this, let us know via comments below and we will try our best to help you out.
METHOD 2: SpaceX kernel
The Downloads section for Method 2 is below, providing for two files that are required under this method. Please go through other sections like ‘Supported devices’, ‘Warning!’ and ‘Backup!’ above as they are not reproduced again for Method 2 but apply fully.
Downloads 2
- Note 5 Marshmallow root SpaceX kernel — Link
- Odin PC software — Link
- SuperSU App
→ Check the official page here for the newer version of root kernel, and say thank to its developer for his cool work.
Step-by-step Guide 2
The guide for Method 1 above totally works under Method 2, it’s just than in place of installing TWRP, you have to install the SpaceX kernel directly using Odin (only step 8 above changes). So, here is a modified guide below. It’s easy.
Step 1. Download the Space X Kernel and Odin file from above.
Step 2. Do steps 0 to 10 (except step 1) of Method 1 guide above. Take care to select the SpaceX kernel file in step 8 above in place of TWRP file, as we don’t need TWRP anymore. Once your step 10 is done, your device will reboot and will have root access available. But you need to do step 3 below first.
Step 3. Install SuperSU app using its APK. Download and transfer the APK to your Note 5, and then install it by just tapping on it using any file explorer, including Samsung’s own My Files.
Step 4. Now, look for SuperSU app on your Note 5. This manages root permissions. You can verify root access with this android app.
→ Let us know via comments section below if you need any help with this.
Via UpInTheAir and Manh_IT

![Galaxy Note 5 Marshmallow Root and TWRP 3.0 [N920C]](/content/images/wp-content/uploads/2016/02/note-5-marshmallow-root.jpg)


Discussion