What to know
- PowerToys new feature ‘Workspaces’ lets you set up and save apps in custom layouts so you can later open them all with a single click.
- Create a Workspace from PowerToys > Workspaces > Launch editor > Create workspace. Set up the apps in the configuration that you want to save. Then click Capture.
- Available via PowerToys v0.84.0 and above, Workspaces minimize the time it takes to routinely open the same apps in the same layout everyday.
PowerToys is one of the most useful multi-utility app that fills in the feature gaps left by Windows and empowers the user to do more. And now a recent update has added a new Workspaces feature that lets you capture a set of applications in custom positions and configurations that you can launch with a single click.
Creating workspaces proves to be a real time saver, especially when you have to launch specific apps routinely. Here’s everything you need to know to enable and create Workspaces.
Requirements
Make sure you’ve installed PowerToys, which you can do from Microsoft’s website as well as the Microsoft Store. If you already have PowerToys, update it from General > Check for updates. Workspaces is part of v0.84.0 and above.
Text Guide
- Open PowerToys. Scroll down on the left and select Workspaces.
- Here, make sure Enable Workspaces is toggled on.
- Check out the default ‘Activation shortcut’ which is
Win+Ctrl+`You can change it if you like. - Click on Launch editor to open Workspaces editor (or press the Activation shortcut).
- Click on Create Workspace.
- Your whole desktop will be bounded by a red border.
- Open the apps you want to set as your workspace and set them in the position and configuration of your liking. Minimized apps will be saved too, so make sure you only have those apps open (minimized or not) that you want to save to the workspace.
- Once done, click on the Capture button.
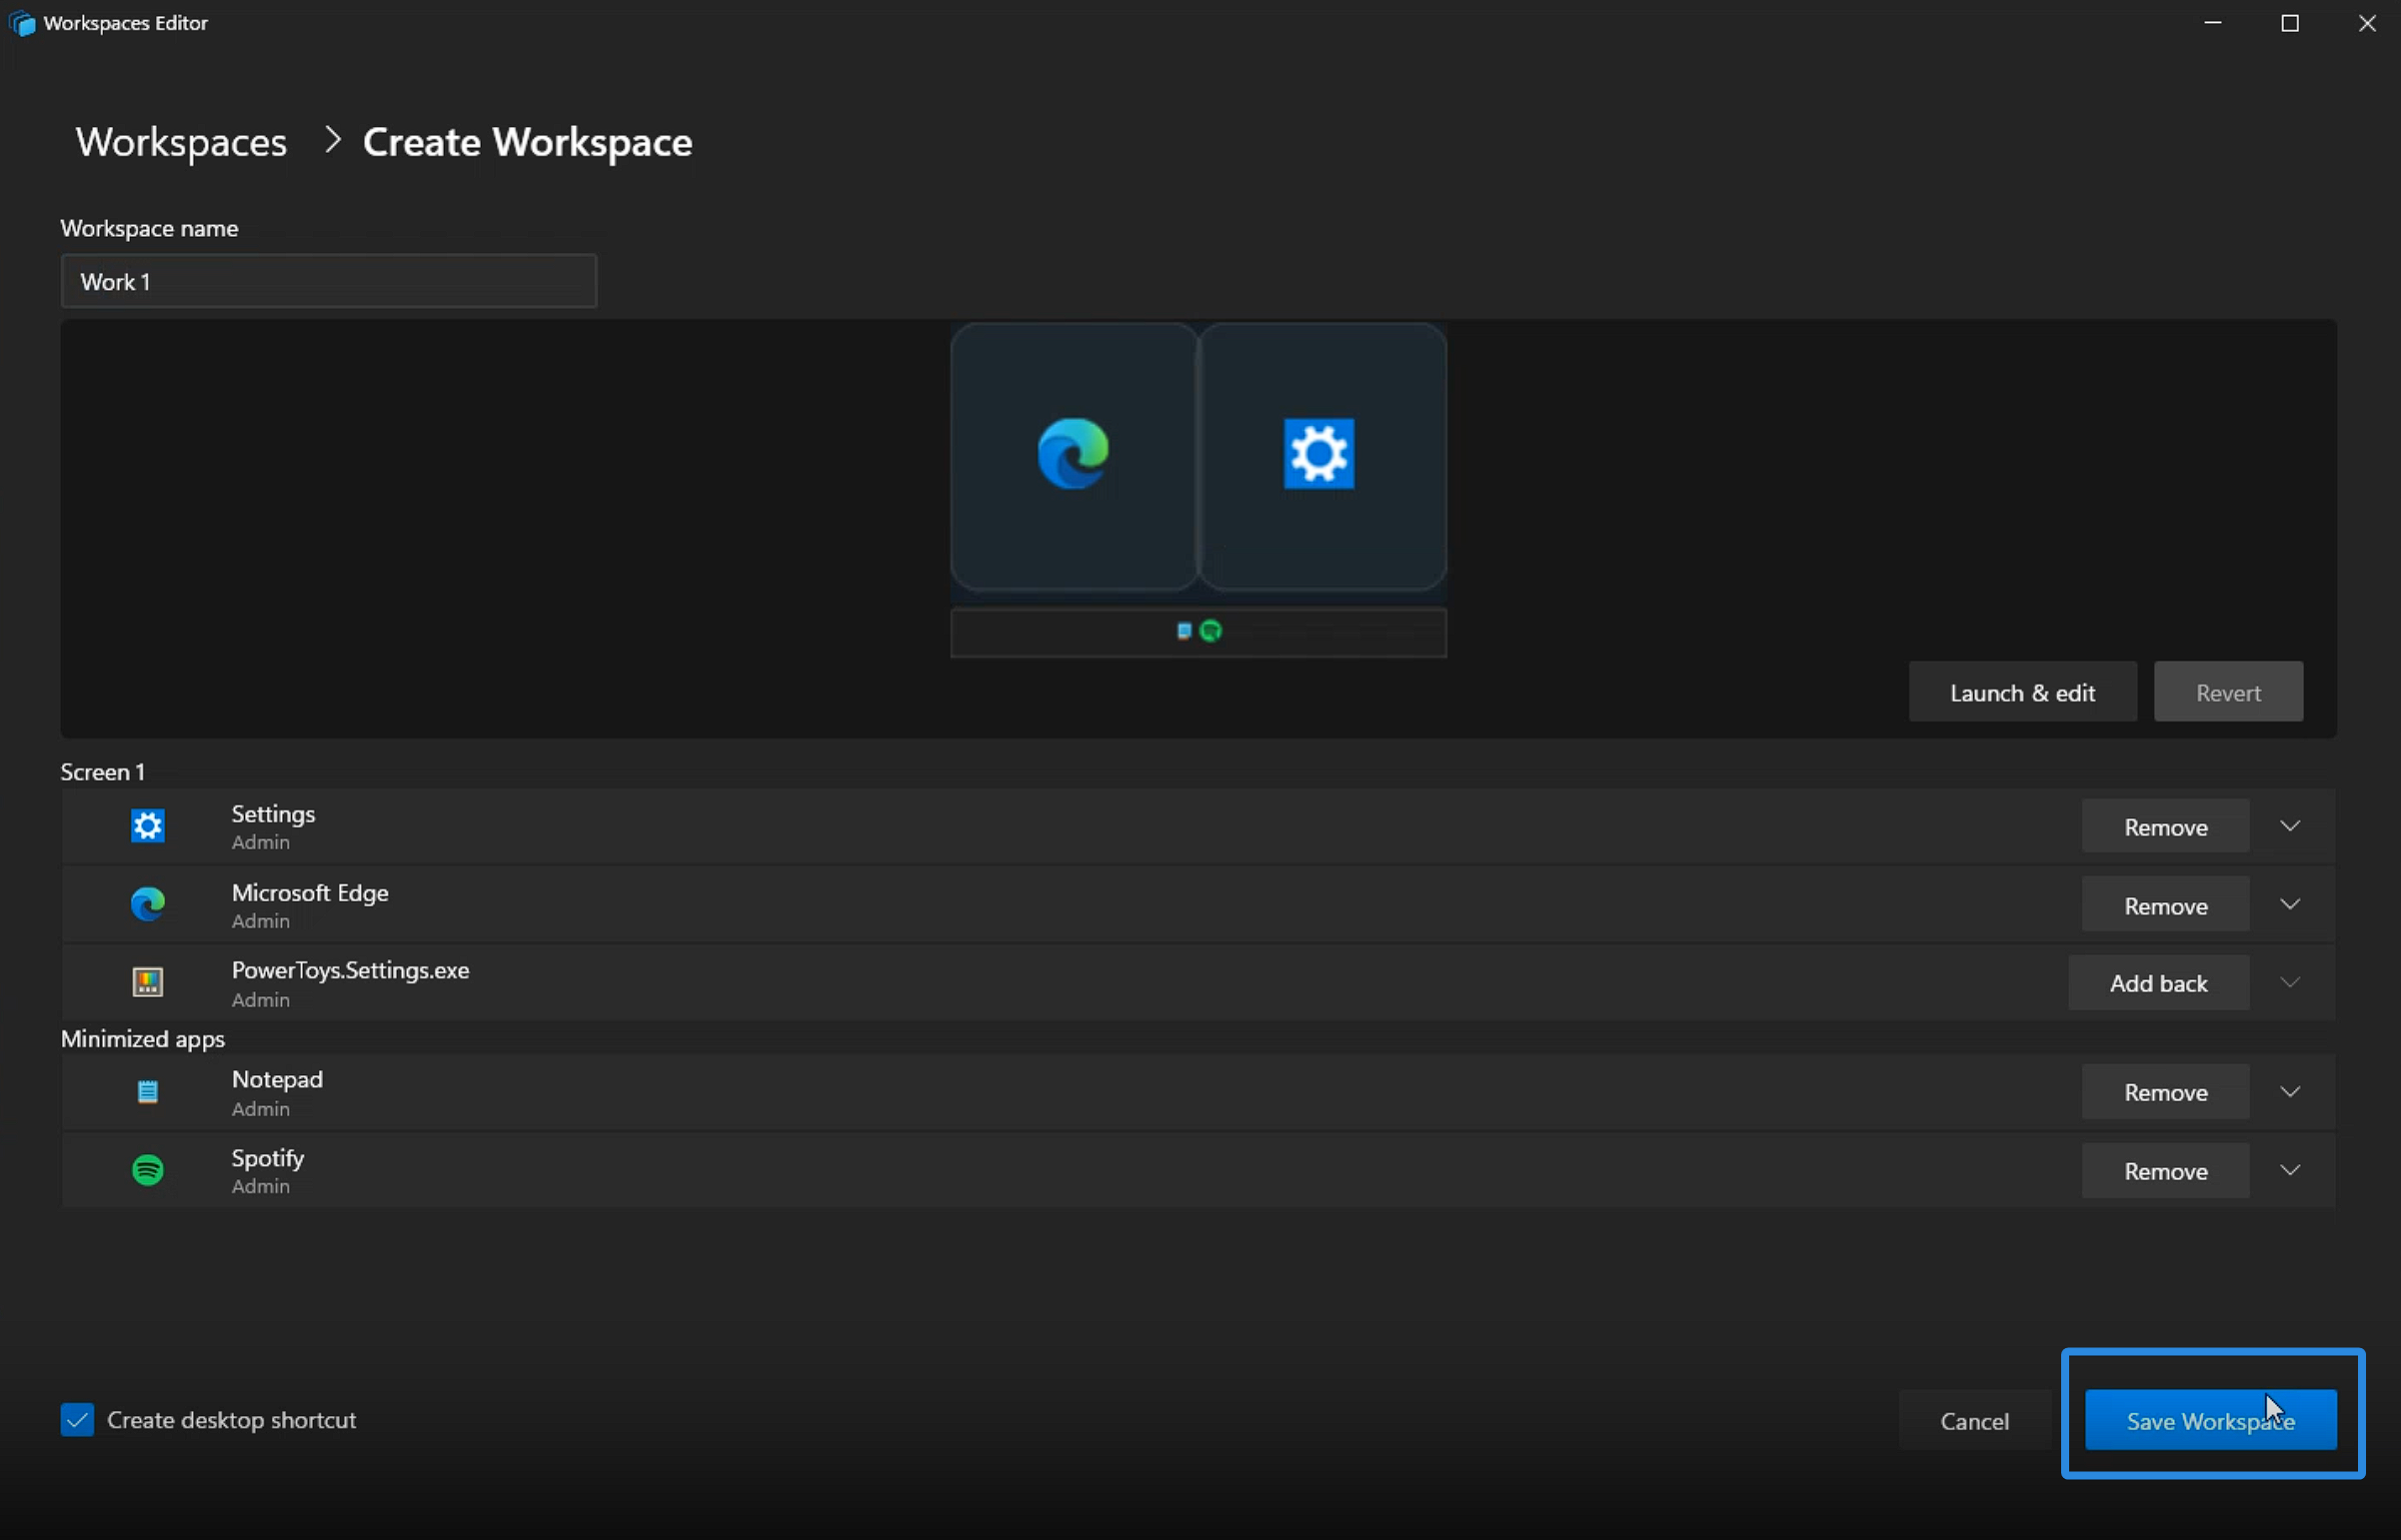
- All your apps will be captured in the layout they were in. Remove any apps that you don’t want in your workspace.
- Name your ‘Workspace’.
- Click on Create desktop shortcut for easy access later.
- Once done, click Save Workspace.

Image: NerdsChalk
Video Guide
Here’s a video guide for your reference. Go full screen for a better view:
And that’s it! Open the saved workspace to launch all your saved apps and get ready to work.
Workspaces even supports multiple monitors, which means you can position your apps on different screens.


Interesting first attempt by Microsoft, but AlomWare Toolbox has done it better for years now. They call it “PC States”.