What to know
- Google Passkeys can be removed from devices you no longer own to invalidate them from being used with your account.
- To delete a device from Google Passkeys, go to google.com > your account picture > Manage your Google Account > Security > How you sign in to Google > Passkeys > X icon to delete unwanted device > Remove.
Google Passkeys is an alternative to passwords that you can use to sign in to your Google Account using your fingerprint, face scan, or screen lock on different devices. You can add multiple devices to Google Passkeys to make signing into your account easier by bypassing your second authentication.
If you no longer own the device that was previously used as a passkey signed into Google, you can remove it to invalidate the passkey for use with your Google Account. In this post, we’ll explain all the ways you can delete a device from Google Passkeys.
to delete a device from Google Passkeys.
Related: How to Share Your Google Passkey
How to delete a device from Google Passkeys [2 methods]
There are two ways you can delete Google Passkeys from your device.
Method 1: On PC
You can delete a device’s passkey by visiting your Google account settings on any authorized device. As long as you can sign into your account and access your account settings, you can remove the passkey for any authorized device.
- Open google.com on a web browser and log into your account if needed.
- Now click on your account picture in the top right corner.

- Click Manage your Google Account.

- Now click on Security in the left sidebar.

- Click on Passkeys under How you sign in to Google.

- You will now be asked to verify your identity. Click Continue.

- Choose your preferred method to verify your passkey. As we have our phone registered for a passkey, we will click Use a phone or tablet.

- If you choose the same, scan the presented QR code with an authorized device.

- Approve the request on your authorized device, and you should now be presented with the Passkeys page.

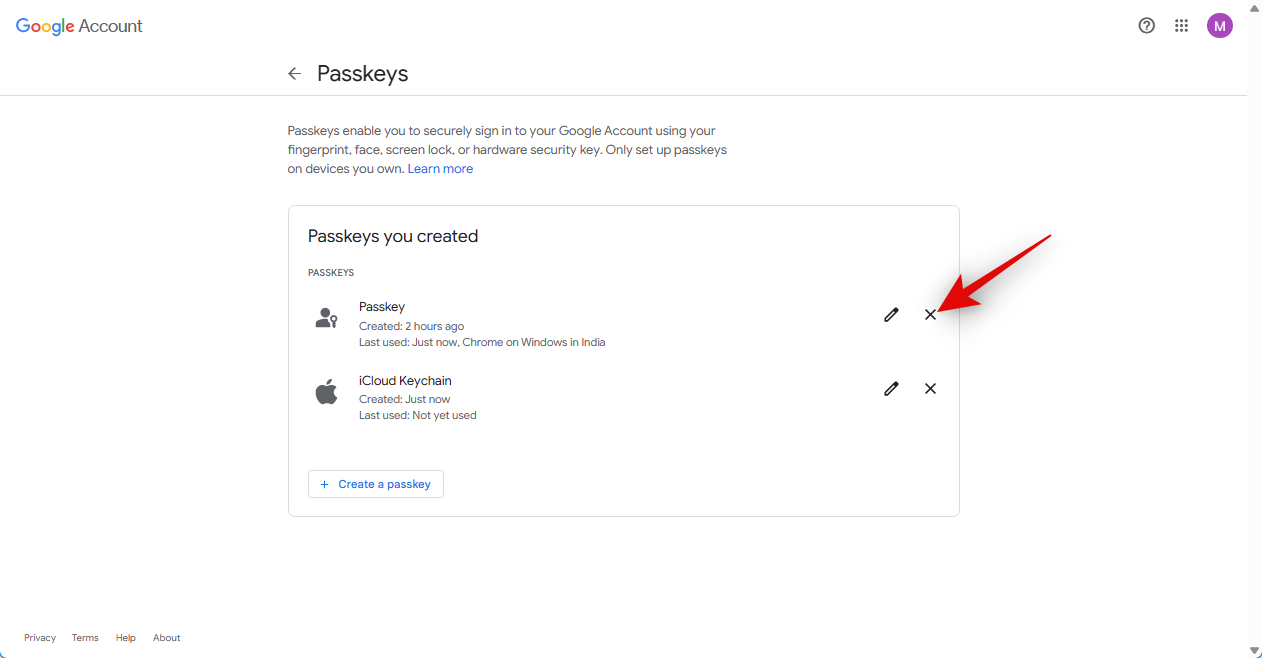
- Click the X icon beside a passkey you wish to delete.
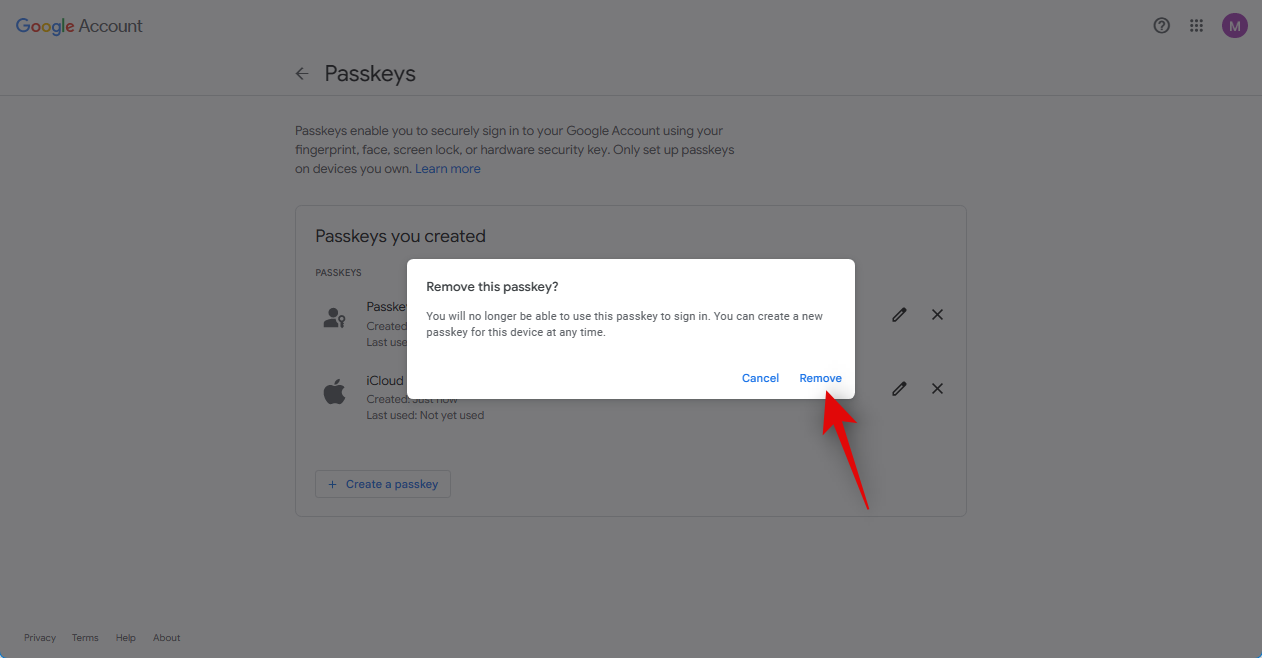
- Click on Remove to confirm your choice.
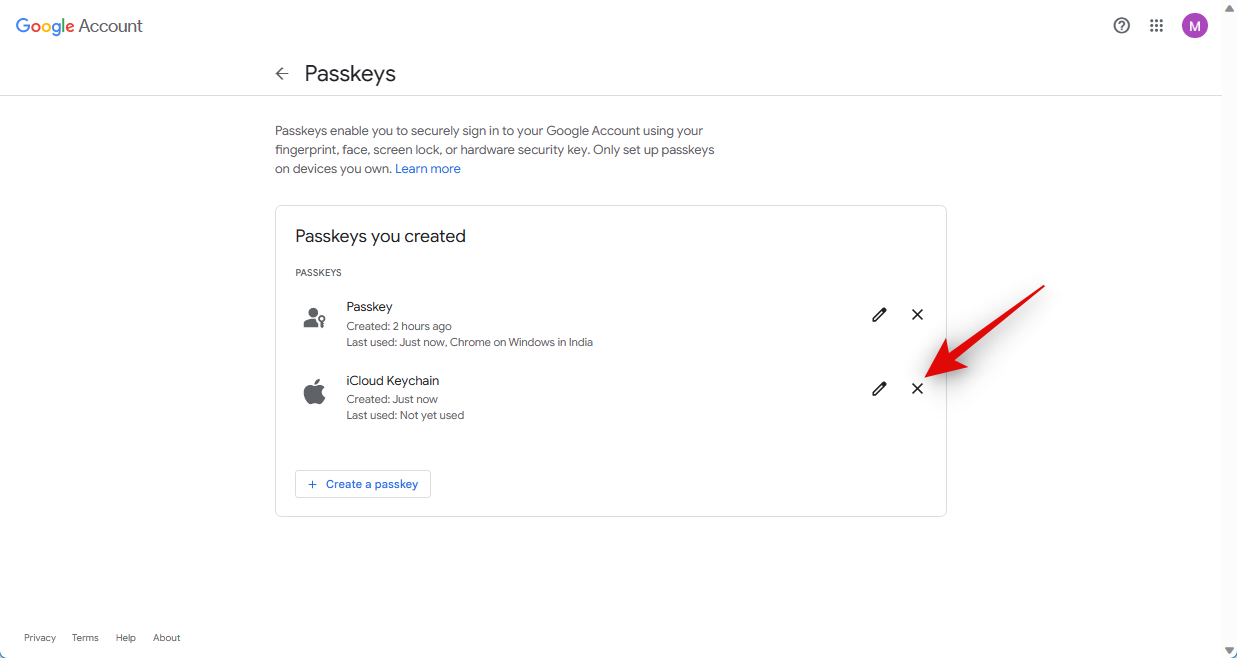
- Repeat the step above to remove any additional passkeys you wish to remove.
And that’s how you can remove and delete passkeys for a device.
Method 2: On a phone
Follow the steps below to remove a passkey for a registered device using your mobile phone.
- Open a web browser app on your phone and visit google.com.
- Log into your account if needed and then tap your profile icon in the top right corner.

- Tap Manage your Google Account.

- Swipe on the options at the top and tap on Security.

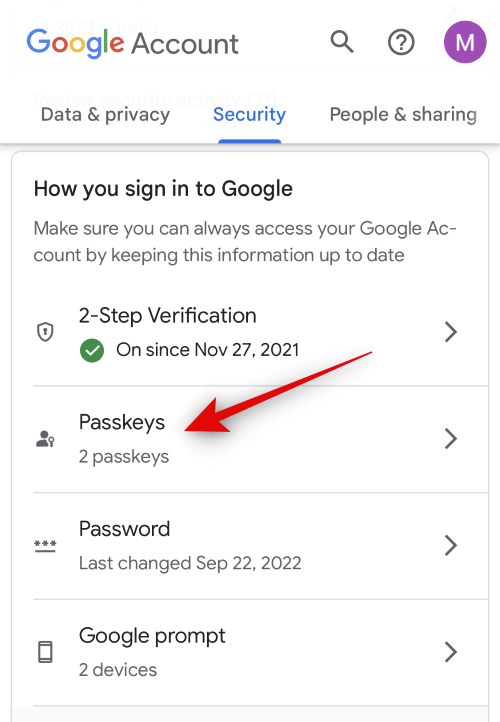
- Scroll down and tap on Passkeys.
- Type in your password or use your passkey to verify your identity.

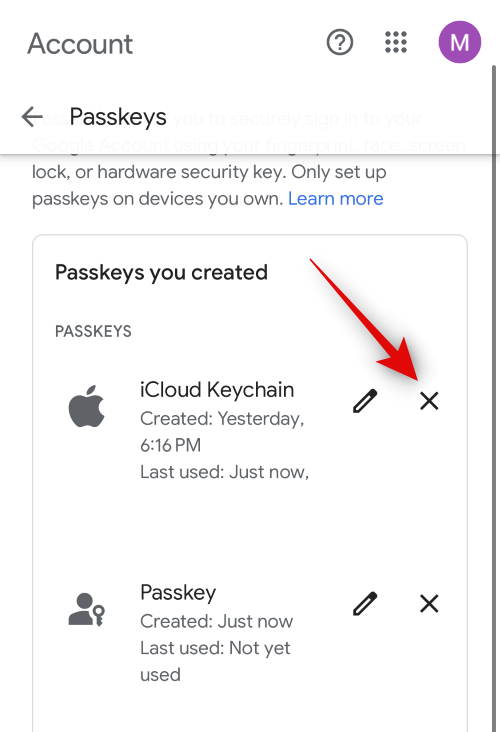
- Once signed in, you will be presented with the Passkeys page. Tap on the X icon beside the passkey you wish to remove.
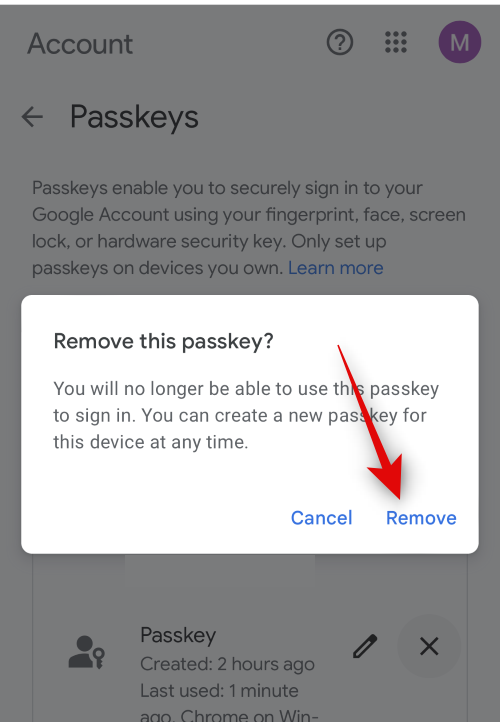
- Tap Remove to confirm your choice.
- Now repeat the steps above for any additional registered passkeys that you wish to remove.

And that’s how you can use your mobile device to remove passkeys for authorized devices.
Related: How to create a Google Passkey
FAQs
Here are a few commonly asked questions that should help you get updated with the latest information.
How is Passkeys different from passwords?
Google worked with FIDO Alliance and other tech giants to develop Passkeys. Instead of traditional passwords, Passkeys generate two different keys for your account. One is a cryptographic key that is personal to you and your device and is stored on your authorized device. The second one is a public key stored on Google’s servers.
When a login request is created, your authorized device will solve a unique challenge to generate a unique and temporary signature which is then verified against the public key stored by Google. If things match up, then your login request is approved instantly.
Can I use Google Passkey with password managers?
Password managers such as Dashlane or 1PassWord do support Passkey compatibility.
We hope this post helped you easily remove passkeys for authorized devices from your Google account. If you have any more questions, or face any issues, feel free to reach out to us using the comments below.


