

What to know
- You can create a GIF directly from your iPhone camera using the Shoot a GIF shortcut.
- To make a GIF, go to the Shoot a GIF shortcut widget > tap on the Shutter button repeatedly to capture multiple frames > Share > Save Image.
- Check out the post below to learn the step-by-step guide.
There are fun ways to use the Shortcuts app on your iPhone. One of them is to create a GIF image of the pictures you capture on your iPhone camera in real-time. In this post, we will help you set up a shortcut on iOS so that you can create a GIF directly from your iPhone camera without needing a third-party app.
How to create a GIF from your iPhone camera quickly
Before you can create a GIF from your iOS camera, you need to download the Shoot a GIF shortcut on your iPhone and then you can use it to record a GIF.
Step 1: Add Shoot a GIF shortcut to your iPhone
- Download the Shoot a GIF shortcut on your iPhone using this link. Shortly, the Shoot a GIF shortcut will load up inside the Shortcuts app on your iPhone.
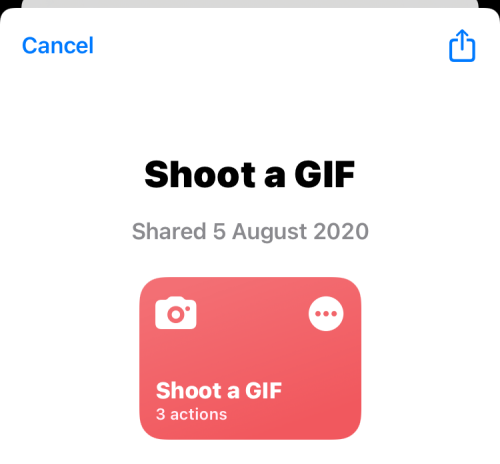
- On this screen, tap on Add Shortcut at the bottom to add it to your iPhone.

- The new shortcut will now be accessible inside the My Shortcuts tab on the Shortcuts app.

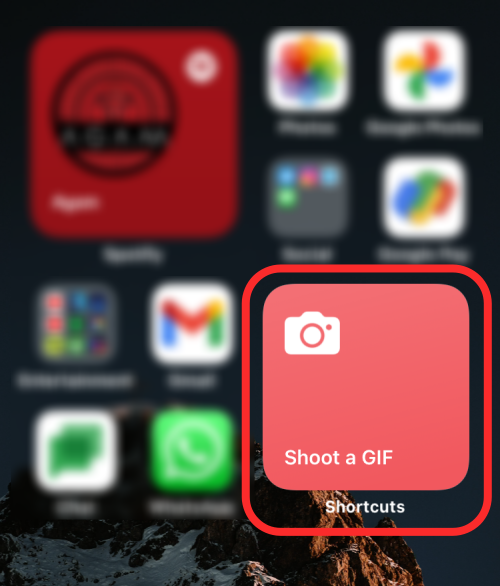
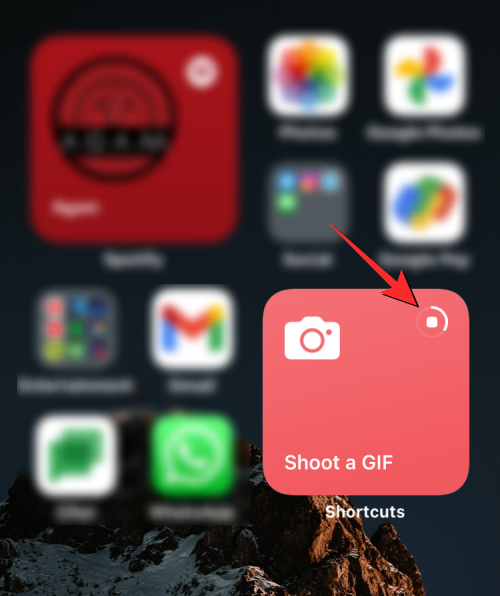
- You can also add this shortcut to your iPhone’s Home Screen as a widget by long-pressing on an empty area, tapping on the + icon, choosing Shortcuts from the list of apps, and then adding the widget of this shortcut.

- Once you add the Shoot a GIF widget to your Home Screen, it will look something like this.
Step 2: Create a GIF using this shortcut
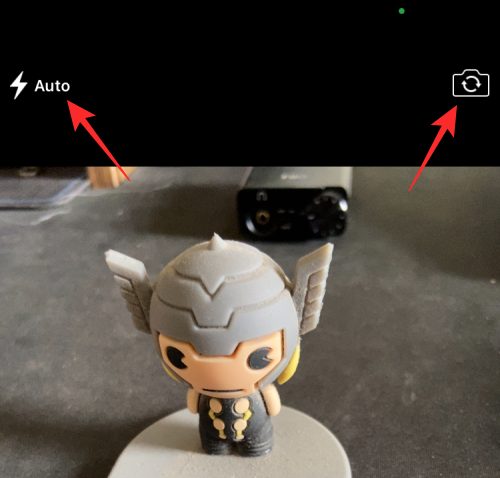
- To create a GIF from your camera, tap on the Shoot a GIF widget on your Home Screen or launch it from the Shortcuts app.
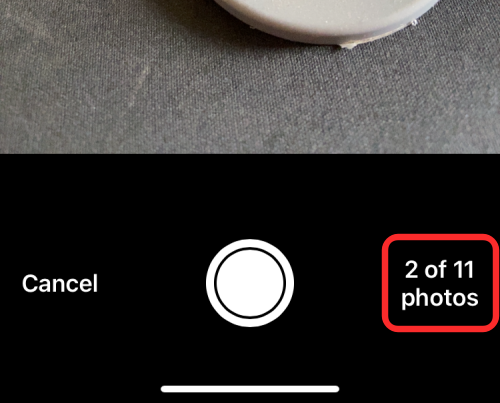
- When you do that, the camera viewfinder will appear on the screen. By default, your rear camera will be available for the shots with the flash set to “Auto” but you can switch any of these settings by tapping on them on the screen. What you cannot change on this screen is the number of photos that will be captured for the GIF which is set at 11 photos. This number can, however, be altered inside the Shortcuts app which we will explain in the next section.
- If you’re satisfied with the configuration, you can start capturing photos for the GIF by tapping on the Shutter button at the bottom center.
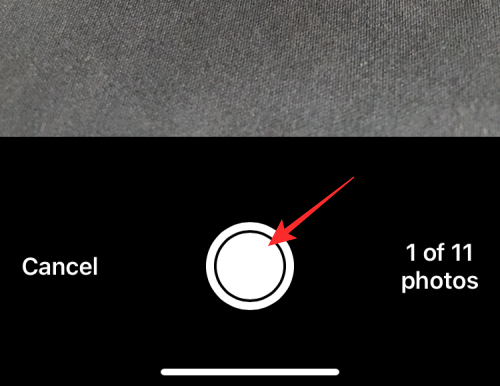
- You can then tap on the Shutter button to capture other objects or the same object in motion, however, you wish to create the GIF. As you keep capturing more photos, the viewfinder will show you a count of the number of pictures that have been clicked out of the total ones.
- Once all pictures have been captured, the viewfinder will be minimized and you’ll now see the Shoot a GIF shortcut processing the GIF.
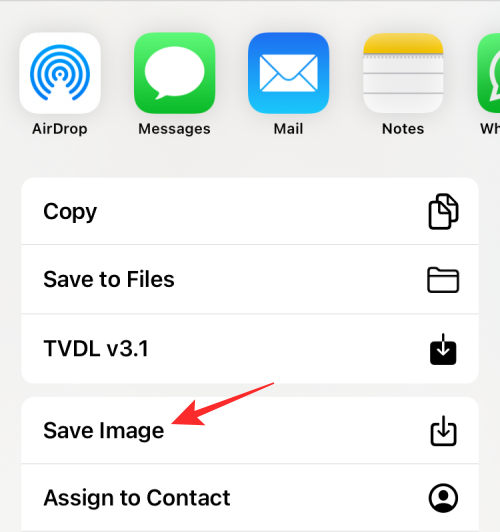
- When your GIF is ready, it will appear as an image on the screen. To save this GIF, tap on the Share icon from the top right corner.

- In the iOS Share sheet that appears, select Save Image to store and access this GIF inside the Photos app.
Step 3 (Optional): Modify the GIF to your desired setting
The Shoot a GIF shortcut that we use above creates a GIF image by capturing a total of 11 photos from your camera and looping it with 0.25 seconds per photo. If that’s not the desired configuration that you want to create a GIF with, you can modify the shortcut on your iPhone by following the steps below.
- Open the Shortcuts app and tap on the 3-dots icon inside the Shoot a GIF shortcut box.

- When the shortcut loads up on the next screen, tap on the right-facing arrow inside the “Take photo with Back camera” box to expand its options.
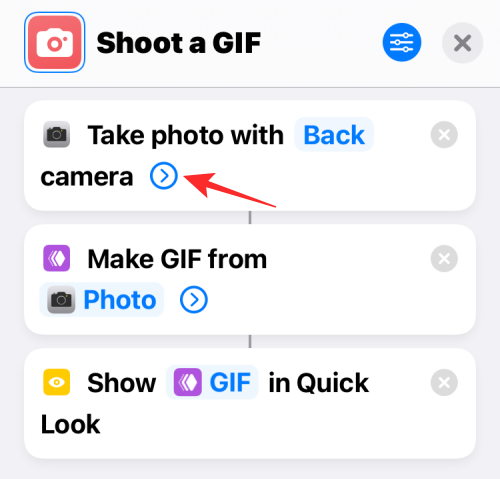
- Now, you can customize the number of photos that you want to capture for the GIF by tapping on the ‘-‘ or ‘+’ icons adjacent to the Take Photos option. More photos mean you can show more content inside the GIF but you can reduce this number if you don’t want to create a longer GIF.

- Now, you can tap on the right-facing arrow inside the “Make GIF from a Photo” box to expand its options.

- When this section expands, tap on the Seconds Per Photo option to change the time from 0.25 seconds to something else. When you lower this value, the GIF you create will have faster-moving frames but if you wish to delay the time between two frames, you can increase this time value. Here, you can also toggle GIF looping and auto-resizing on/off.

- Once you’re done modifying the shortcut’s settings, tap on the X icon at the top right corner to save changes.

- You can then follow the instructions from the previous section to capture a GIF from your camera with the new settings in place.
That’s all you need to know about creating GIFs from your iPhone camera.


Discussion