Windows 11’s recent release has brought along numerous changes and one of them has been how the OS handles Bluetooth profiles in general. This has improved the compatibility with Airpods which now allow you to use your mic and control playback using gestures right out of the box.
Sadly, the connection between the two is as finicky as ever and if you have been facing connection issues on Windows 11, then you are not alone. Here’s all you need to know about fixing the Airpods connection issues on Windows 11.
What has changed for Airpods in Windows 11?
Windows 11 now manages your Airpods profiles automatically right out of the box. This means that when you connect Airpods to your PC with Windows 11, they no longer show up with two headset profiles; one for Stereo Audio and one for Mono Audio with a mic. These profiles are longer available in any app and the OS seems to be smartly switching between the both depending on your needs and requirements.
The process of switching, however, is still in the testing phase, to say the least with glitches occurring now and then when you need to switch between profiles the most. A good example of this is how the Airpods are used and show up when making video calls on your PC. In our cases, the buds would switch to Mono Audio for mic use and simply refuse to switch back to Stereo audio. The only fix for this was to reconnect, put the buds back in the case and take them out a few seconds later, or to simply keep using Mono Audio in video calls.
How to fix Airpods connection issues with Windows 11 or 10
1. Connect Airpods again manually

Before we get on to the fixes, we recommend you read more about how you should be reconnecting your Airpods to Windows 11 once you have paired them. As you might have noticed, Airpods now efficiently reconnect to Windows 11 whenever the case is opened, however, this is only until you connect Airpods to another device. Once connected, Airpods will no longer connect with your Windows 11 device even if you have the case open and try to connect manually.
The trick here is that you need to enter pairing mode on your Airpods and then hit ‘Connect’ in the Settings app. Hold down the Setup button at the back of your Airpods with the lid open until you see a flashing white light. This means you have entered the pairing mode and you can now hit ‘Connect’ on your PC.
You won’t have to remove and re-pair Airpods every time on your PC when reconnecting, but you will have to enter pairing mode on Airpods to reconnect. In addition to this, if you do not connect Airpods to another device, then you can simply enjoy an automatic connection when you open the Airpods lid with Bluetooth turned on, on your PC.
2. Re-pair your Airpods
To re-pair your Airpods make sure you have restarted your PC and Bluetooth is turned on, on your PC. Now open the lid of your Airpods case and hold down the ‘Setup’ button at the back until the light starts flashing ‘White’. This means you have entered the pairing mode on your Airpods and you can now use the guide below to pair them with your PC.
Press Windows + i on your keyboard and click on ‘Bluetooth and devices’ on your left.

Click on ‘Add device’ at the top.

Now click on ‘Bluetooth’.

Click on ‘Airpods’ once they show up in the list.

Click on ‘Done’ once the pairing process finishes.

Your buds should now be automatically paired and if everything worked as intended, then you should now be able to use Airpods with your Windows 11 PC without any issues.
3. Ensure the correct output and input devices have been selected
Let’s ensure that you have the correct output-input devices selected in Windows 11 when you have your AirPods connected to your PC. This is a simple check, but if you use multiple Bluetooth and Audio output devices with your system then this could be an issue for you.
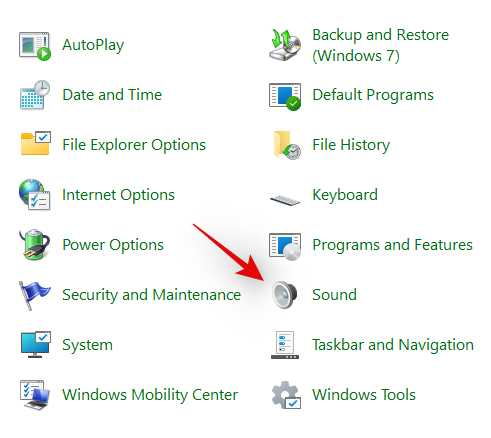
Press Windows + i on your keyboard and click on ‘Sound’ on your right.

Now click and select ‘Headphones’ under ‘Output’.

Similarly, select ‘Airpods’ under your ‘Input’ section if you have multiple Input devices connected to your system. If not, the Airpods mic should be selected by default.

Now launch the Start menu, search for ‘Control Panel’ and launch the same from your search results.

Click on the drop-down menu in the top right corner and select ‘Large icons’.

Now click on ‘Sound’.
Click and select ‘Airpods’ and then click on ‘Set Default’ at the bottom of your window.

Switch to the ‘Recording’ tab at the top by clicking on the same.

Select AirPods again and click on ‘Set Default’.

Click on ‘OK’ to close the window.

If Airpods were your default device in all these places then you have passed this check and continue with the guide. However, if Airpods weren’t selected as the default device, then we recommend you do the same and try using your Airpods before proceeding with the guide.
4. Ensure that Airpods show up in Devices and printers
Despite Microsoft’s numerous efforts, somehow Devices and Printers remains the Settings page where you can properly manage all your connected devices without any issues. A common issue affecting BT devices in Windows 11 is where the devices will show up as connected in the Settings app but won’t be available on the Devices and Printers page. A restart usually fixes this issue but if your Airpods fail to show up indefinitely, then you could be facing driver or pairing issues. We recommend you use the guide below to check for Airpods.
Launch the Start menu, search for Control Panel, and launch the same from your search results.
Click on the drop-down menu in the top right corner of your screen and select ‘Large icons’.
Now click on ‘Devices and Printers’ from the list.

Check for Airpods in this list, if found click and select the same and press Alt + Enter on your keyboard.

Now switch to the ‘Hardware’ tab and check for any conflicting driver. You should see a ‘?’ or a hazard sign beside each conflicting driver.

If you find any such issues then you will have to completely remove Airpods from your system and re-pair your device.

If however, Airpods show up without any driver conflicts then you can use the other fixes in this list to fix your issue. We recommend you try a re-pair nonetheless as it is known to fix most connection issues on Windows 11.
5. Remove hidden entries
We now recommend you remove any hidden entries for Airpods from the Device Manager. This was a known issue in Windows 10 which still seems to exist in Windows 11. Removing hidden entries should help your OS default to the correctly installed device which should help you get everything back up and running on your system again. Use the guide below to get you started.
Press Windows + X on your keyboard and select ‘Device Manager’.

Now click on ‘View’ at the top.

Select ‘Show hidden devices’.

Double click and expand your Bluetooth adapter. In our case, it shows up simply as ‘Bluetooth’. If you find any greyed-out entries related to ‘Airpods’, then right-click on it.

Click on ‘Uninstall device’.

Click on the same again to confirm your choice.

The selected device will now be uninstalled from your system. Repeat the steps above to remove any other greyed-out devices related to Airpods from your PC.
As a precaution, look for other Bluetooth devices and adapters on your PC as well especially if you use external Bluetooth adapters. If you find any then repeat the steps above for any Airpods related devices installed on your PC.
Once removed, restart your system for good measure. You can now try using/reconnecting Airpods again and they should work as intended without any issues.
6. Remove device completely
If removing hidden entries did not work for you or if you did not find any hidden entries for Airpods, then we now recommend you completely remove and re-pair Airpods on Windows 11. Use the guide below to get you started.
6.1 Remove from Devices and Printers
Launch the Start menu, search for Control Panel and launch the same from your search results.
Once launched, click on the drop-down menu in the top right corner of your screen and select ‘Large icons’.
Now click on ‘Devices and Printers’.
Right-click on ‘Airpods’ and select ‘Remove device’.

Confirm your choice by clicking on ‘Yes’.

Airpods will now be removed from your device. We now recommend you remove all subsequent Airpods entries from the Device Manager using the guide below.
6.2 Remove from Device Manager
Let’s remove Airpods from Device Manager on your system. Use the guide below to get you started.
Press Windows + X on your keyboard and select ‘Device Manager’.
Now click on ‘View’ at the top.
Select ‘Show hidden devices’.
Double click and expand your Bluetooth adapter. In our case, it shows up simply as ‘Bluetooth’. If you find any greyed-out entries related to ‘Airpods’, then right-click on it.
Click on ‘Uninstall device’.
Click on the same again to confirm your choice.
The selected device will now be uninstalled from your system. Repeat the steps above to remove any other greyed-out devices related to Airpods from your PC. Similarly, look for Airpods under the following categories as well. If found, right-click and remove the device from your PC as shown above.
- Audio inputs and outputs
- Sound, Video and Game controllers
- Other devices
- Xbox 360 Peripherals

Once removed we recommend you move to the next step and restart your PC.
6.3 Restart your PC
At this point we recommend you restart your PC. This will help remove any cached drivers, refresh and restart BT services as well as clean up all the necessary data from Airpods stored on your PC. Once you have restarted your PC, you can re-pair Airpods using the guide below.
7. Update BT drivers
Bluetooth exploits are quite common nowadays and apple releases multiple firmware updates for all their devices regularly as well. This means that you might be facing a driver and firmware conflict where the current firmware of your Airpods is incompatible with your older Bluetooth driver version.
We recommend you check for any driver updates or use your OEM support website to get the latest drivers for your Bluetooth Adapter. You can also check for optional driver updates within Windows 11 by going to Settings > Windows Update > Advanced options > Optional updates > Driver updates.

8. Disable Wireless iAP service
Wireless iAP service allows you to use Voice Commands and speech recognition with Windows 11. However, this uses large amounts of bandwidth and is a known cause of connection issues on Windows 11. If you do not use Voice Commands with your PC then we highly recommend that you disable the Wireless iAP service using the guide below.
Launch the Start menu and search for the Control Panel to get you started.
Click on the drop-down menu in the top right corner and select ‘Large icons’.
Click on ‘Devices and printers’.
Select ‘Airpods’ and hit Alt + Enter on your keyboard.

Switch to the ‘Services’ tab by clicking on the same at the top of the window.

Disable ‘Wireless iAP’ service by unchecking the same.

Click on ‘OK’ once you are done.

9. Disable Remote Control
Windows 11 now has native playback support for all Airpods gestures and this is great news. In our initial testing, we were able to control playback in all popular web apps for media consumption like YouTube, Twitch, Discord, and more. The controls also worked well with native apps for Spotify, Apple Music, Deezer, and more. However, these playback controls run a Remote connection service that causes connection issues on Windows 11 especially if you own Airpods (Gen 1) or Airpods (Gen 2). Use the guide below to disable these services and fix connection issues on your system.
Note: Needless to say, you will lose out on the ability to use playback gestures with Windows 11.
Launch the Start menu, search for ‘Control Panel’, and launch the same from your Search Results.
Click on the drop-down menu in the top right corner and select ‘Large icons’.
Once selected, click on ‘Devices and Printers’.
Now select Airpods and hit Alt + Enter on your keyboard.
Click and switch to the ‘Services’ tab at the top.
Now uncheck the boxes for the following services.
- Remote Control
- Remotely Controllable Device

Click on ‘OK’ once you are done.

We now recommend you restart your PC just to be safe and test your Airpods again. If everything went correctly, then you should no longer face connection issues with Airpods on your Windows 11 PC.
11. Disable Telephony Service (if you want Audio Output only)
Launch the Start menu, search for ‘Control Panel’ and launch the same from your Search results.
Click on the drop-down menu in the top right corner of your screen and select ‘Large icons’.
Click on ‘Devices and printers’.
Click and select ‘Airpods’ from your devices and press Alt + Enter on your keyboard.
Switch to the ‘Services’ tab by clicking on the same at the top of your screen.
Uncheck the box for ‘Handsfree Telephony’.

Click on ‘OK’ to save the changes.

The audio should now automatically switch and start using the Stereo audio which should help you get high-quality audio when using Airpods.
12. Disable Absolute Volume
If you are facing low-volume issues or intermittent connection when using Airpods, then we recommend you disable Absolute Volume for BT devices on your system. This setting helps with proper control of the volume for BT audio devices remotely on modern devices but it causes issues with certain unique devices that use different or older protocols much like the Airpods. Disabling Absolute Volume should help solve connection and volume issues on your system. Here’s how you can disable it on your system.
Press Windows + R on your keyboard, type in the following, and hit Enter.
regedit

Locate the following location in the registry editor. You can also copy-paste the path given below in your address bar at the top.
Computer\HKEY_LOCAL_MACHINE\SYSTEM\ControlSet001\Control\Bluetooth\Audio\AVRCP\CT

Double click on ‘DisableAbsoluteVolume’ on your right.

Set the ‘Value data’ as ‘1’.

Click on ‘OK’ once you are done.

Absolute Volume is now disabled on your system and we now recommend you restart your system at the earliest. You can then re-pair Airpods with Windows 11 and you should no longer face connection issues on your system.
2. Reset your Airpods
This can be inconvenient as you will have to re-pair your Airpods with every device you own however, this is a known fix for most issues that you might be having with Audio or Connection on Windows. Resetting your Airpods will allow you to start afresh and pairing them first with Windows should help get everything working as intended. Use the guide below to reset your pair and then connect it to Windows using the guide above.
Note: Make sure you remove Airpods from your PC as a device. We recommend you use the guides in this post to remove it from the Control Panel first and then subsequently from the Device Manager (if it shows up).

Resetting Airpods is a fairly simple process, place your Airpods in the case and leave it alone for a few minutes. Now come back, open the lid and hold down the Setup button at the back of your Airpods for around 15 seconds. You should then see the light flash Amber and then white. Now close the lid, enter pairing mode and try connecting them to your Windows 11 PC as a fresh device. If everything goes correctly, you should have audio and connection working on your device. You can now use the guide above to configure your Airpods as intended.
If you’re still facing Connection issues with Airpods then it’s time we try some troubleshooting. We first recommend you perform the checks below to ensure that everything has been set up properly on your system.
Note: We recommend you have your Airpods connected and paired to your PC to perform these troubleshooting fixes as intended.
Facing issues in Video calls? Here’s all you need to know
This is quite finicky and depends on your BT driver version and whether you are using Windows 11 or Windows 10. If you are using Windows 10 then Airpods will show up as two different devices, one called ‘Airpods hands-free’ and the other called ‘Airpods stereo’. If you have the latest PC compatible with Windows 11 running the same, then in most cases Airpods will now show up as one device with smart switching already enabled. However, if you have an older BT adapter or older BT drivers then it will indeed show up as two devices on your system as well.
The trick here is to select ‘Airpods hands-free calling’ when trying to use Airpods in video conferencing apps if you have two devices. If you have one, then you re-enable the Telephony service if you had disabled it earlier. Subsequently, you will have to increase your Mic levels to get manageable audio quality on your system. We tested the following video conferencing apps with Airpods (Gen 1) and here’s how the experience went.
We tested Google Meet first where Airpods showed up as three different devices, for both audio and video. Selecting either did absolutely nothing. The audio output and input defaulted to the right earbud and no amount of tinkering got either the input or output to switch over.
We then tested Microsoft Teams and things were similarly disappointing. Teams does a great job of automatically switching between stereo and mono audio on its own when you speak or listen, that is until it doesn’t happen too often. The mic then simply stops working and toggling the Mute button does seem to fix this after the first or second try. In the worst cases, you will have to put the buds back in the case, wait a few seconds, and wear them again to get everything working. This doesn’t sound bad, but if you’re having to do this every 10 minutes then the Airpods aren’t simply worth using. It would be better to have a single bud that works flawlessly than having two buds that rarely work. We’re sure that this is fairly new and Microsoft is looking to improve this over time.
We hope this guide helped you fix connection issues with Airpods and Windows 11. If you face any more issues, feel free to drop additional information in the comments section below.