

Google Sheets provides the ability to create drop-down lists that can be used to add preset data or values to cells. By using drop-down lists, people who are part of the spreadsheet won’t need to manually enter data. With this feature, you can ensure that everyone enters only the data that you have assigned to the cells, and nothing else.
In the following post, we’ll help you create a drop-down list, edit it, and remove it on Google Sheets.
How to add a drop-down list in Google Sheets [2 methods]
You can create a drop-down list inside a cell on Google Sheets and add values to it by following the steps below.
Method 1: Using Google Sheets on the web
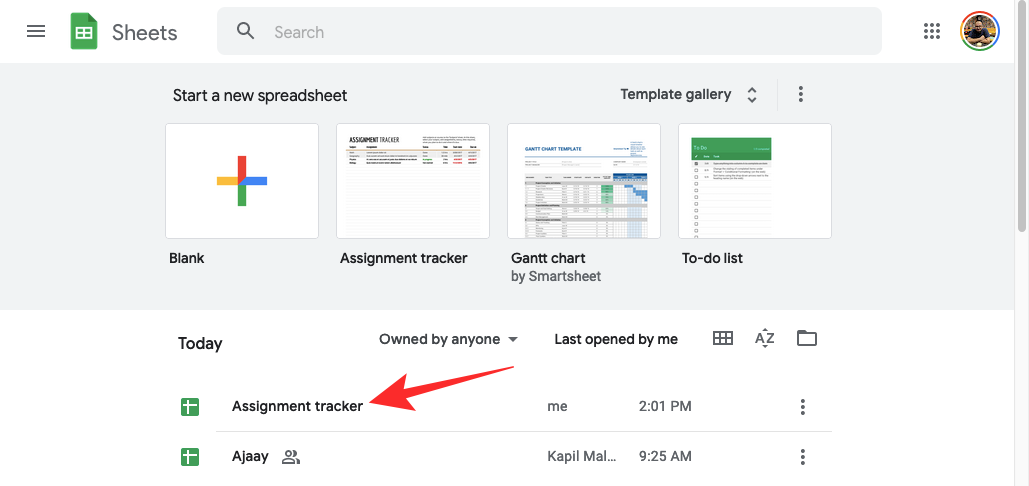
- To add a drop-down list to a cell, go to Google Sheets on a web browser on your computer and open a spreadsheet where you want to add the list.
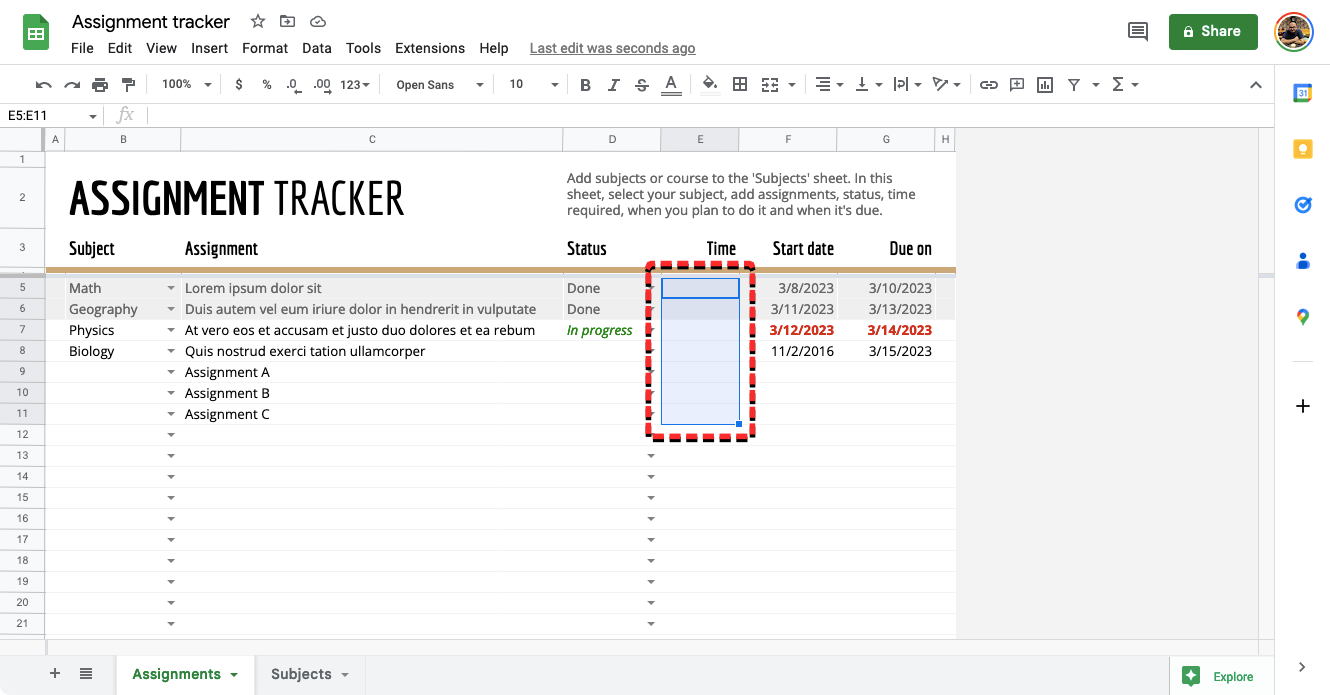
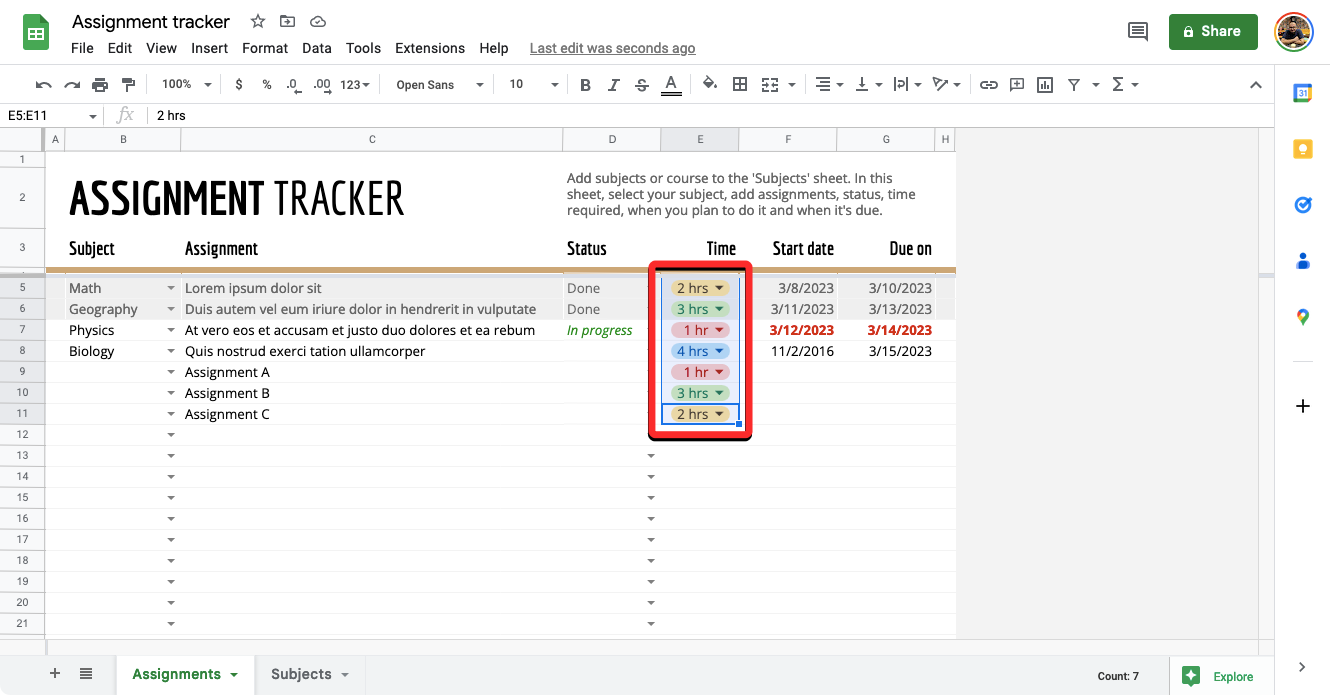
- When the spreadsheet opens, click on the cell where you want to add the drop-down list. You can select multiple cells to create a drop-down list with the same set of data. Once you’ve selected the cells where you wish to host a dropdown list, right-click on any of the selected cells.
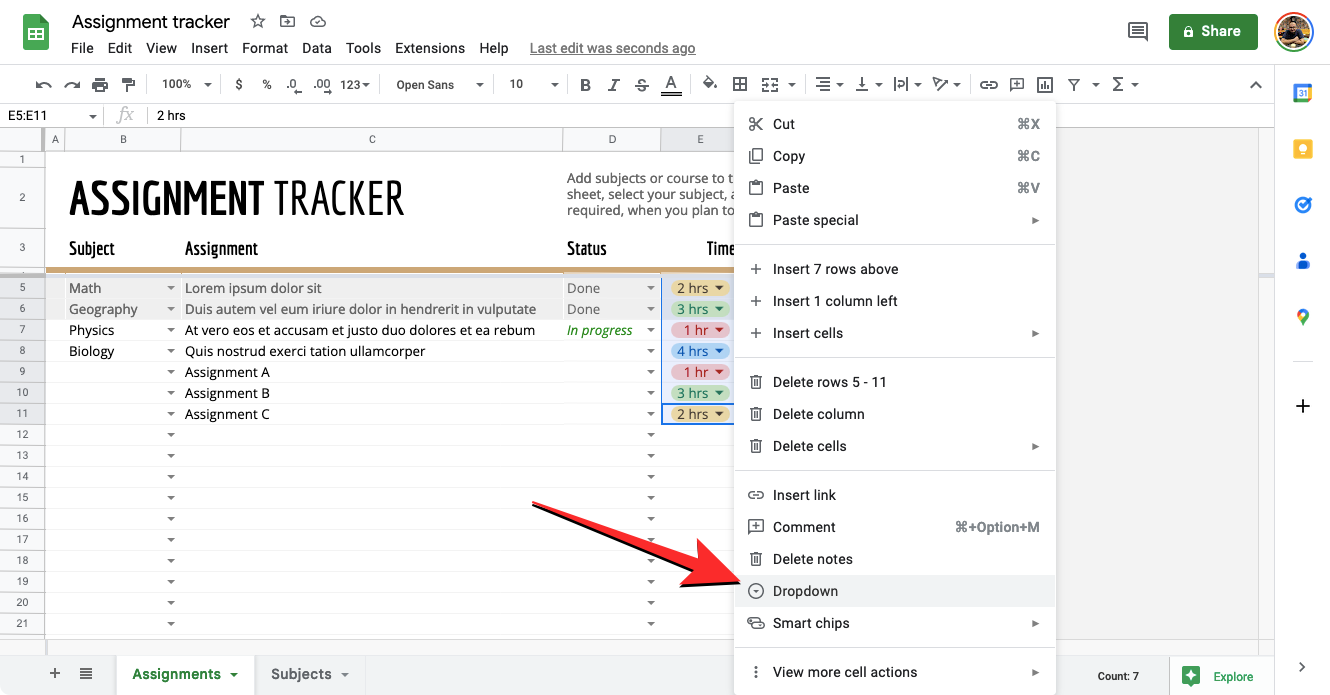
- From the list of options that appear on the screen, select Dropdown.

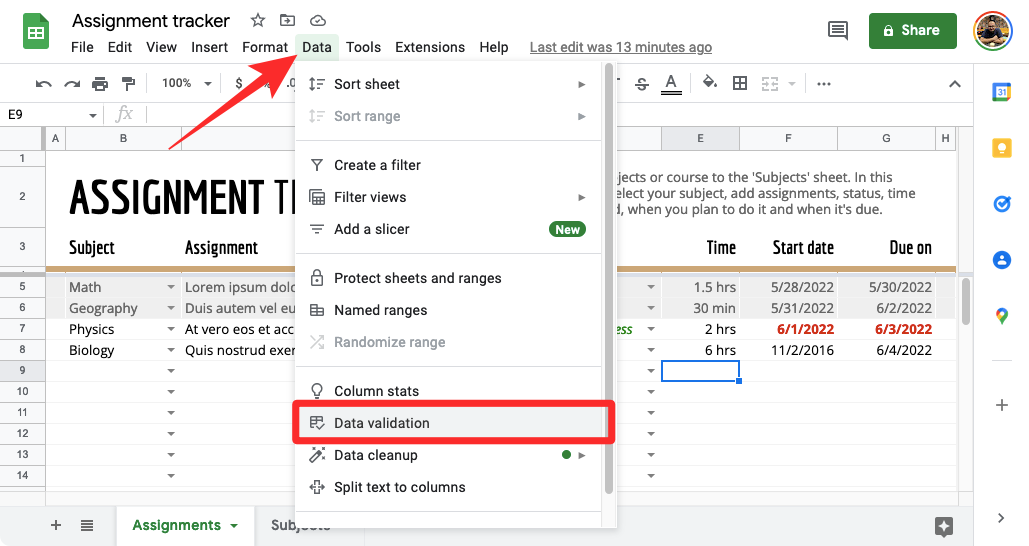
- There’s an alternate way to create a dropdown list on Google Sheets. For this, select the cells where you want to host the dropdown list, click on the Data tab from the toolbar at the top, and select Data Validation from the menu.
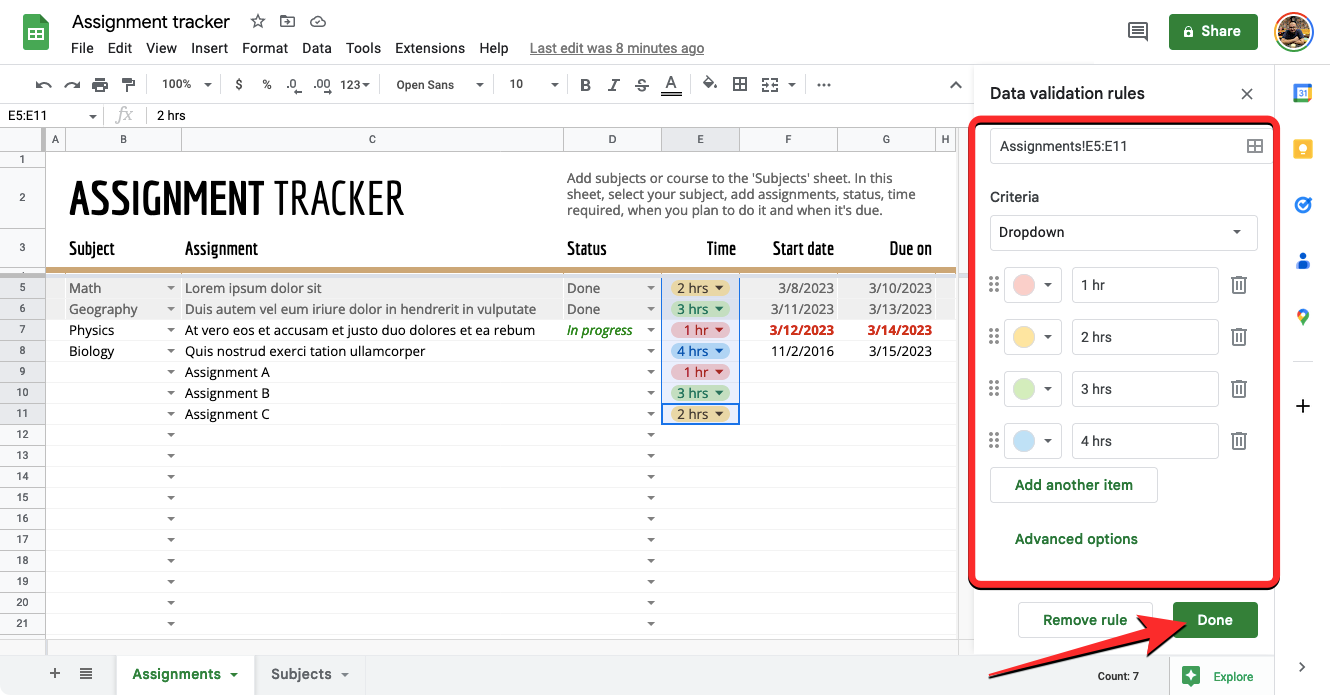
- You’ll now see a Data validation rules sidebar on the right-hand side of the screen.
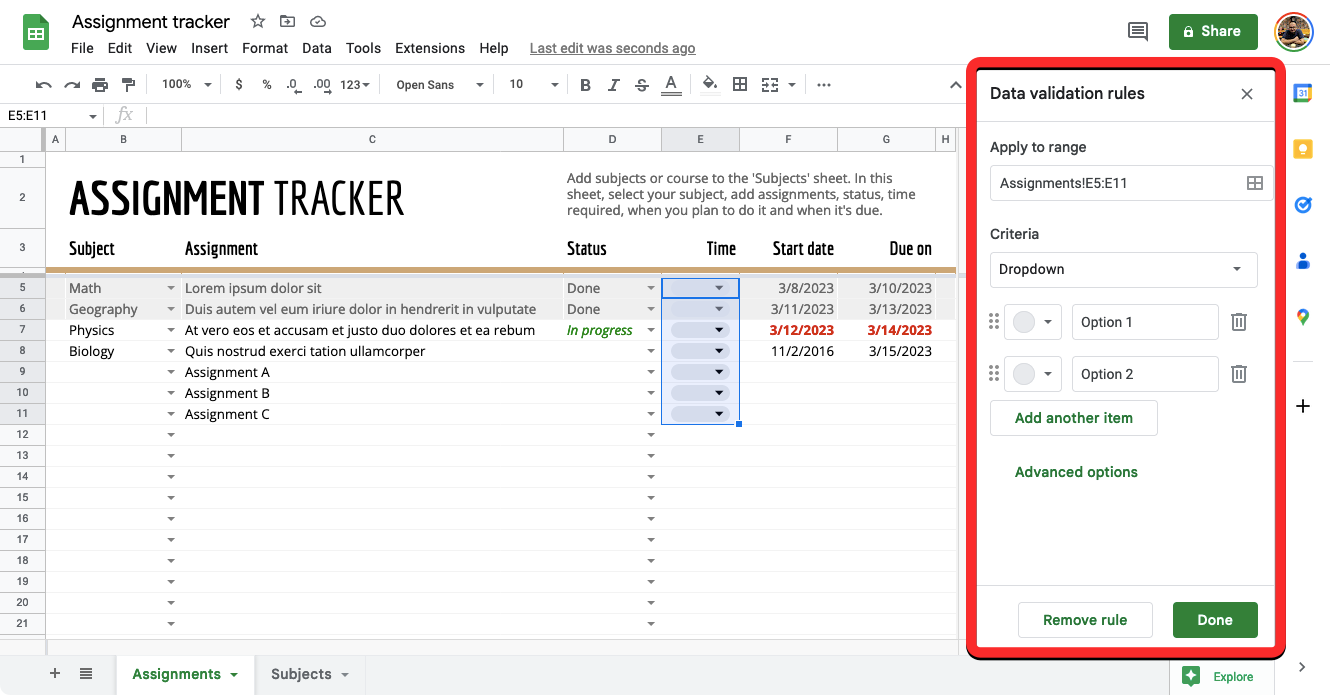
From here, you can make the following modifications to the Dropdown list:
- select a range to apply a dropdown list to within the sheet.
- Add a Criteria that includes the list of options that can be entered inside the selected cells.
- Insert a help text when the cell is clicked.
- Select a response for when invalid data is entered into the cells.
- Change the display style of the dropdown list.
Set range
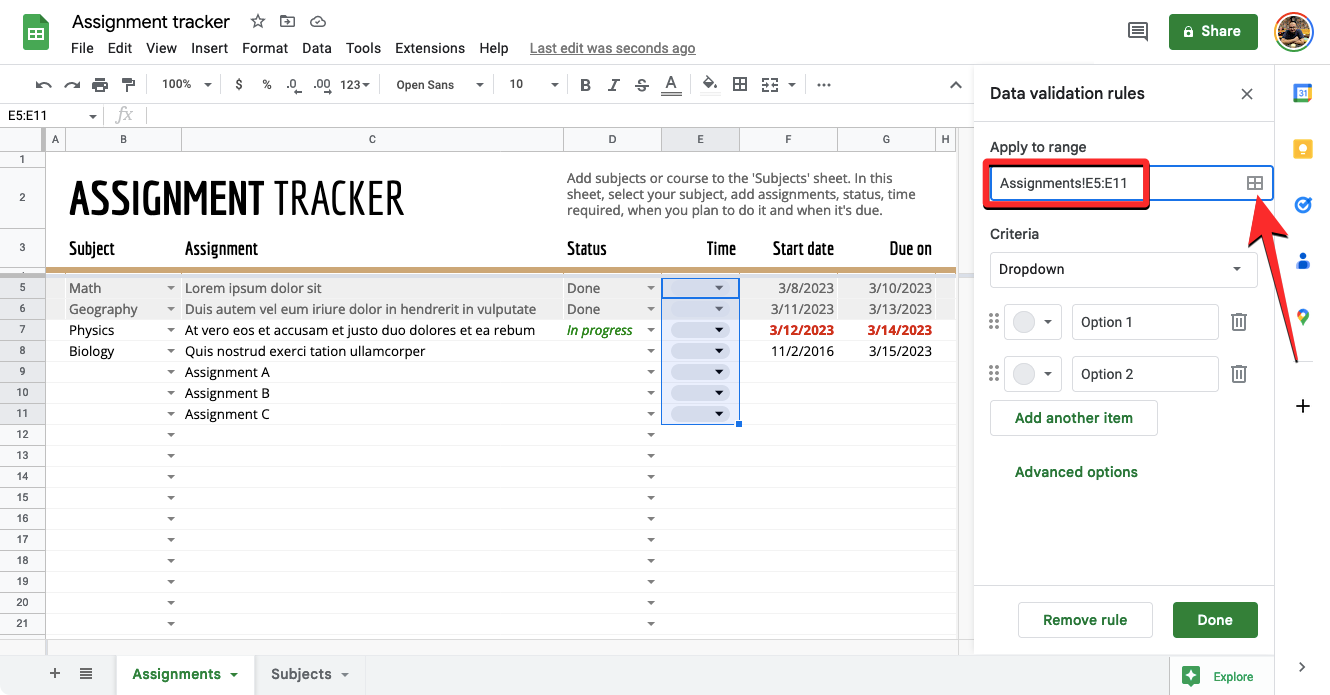
- Inside this sidebar, you’ll see the location of the cells you selected visited inside the Apply to range box at the top. You can skip this section if you’ve already chosen the desired range of cells where you want to host dropdown lists.
- If you wish to change the selected range of cells or add a new range, click on the grid icon inside the Apply to range field.
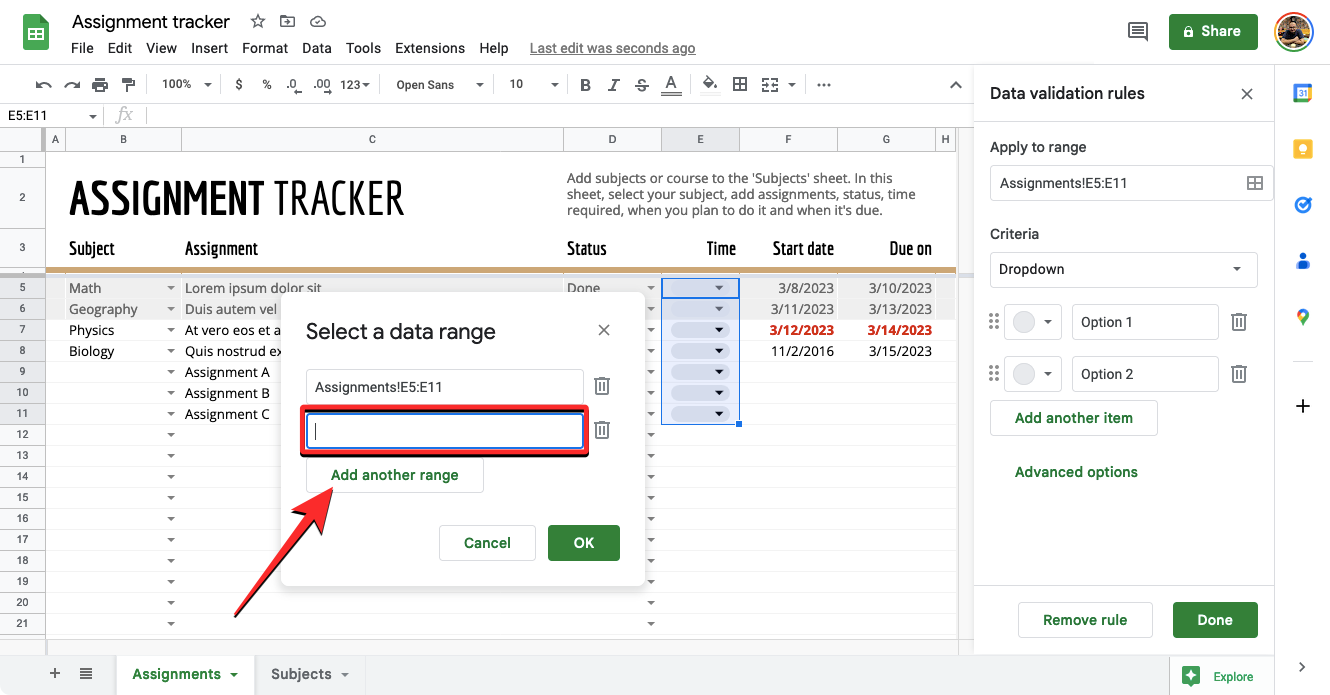
- In the Select a data range box that appears on the screen, edit the range box manually by typing the cell locations after the “!” sign.
- If you wish to keep the current cell range and add a new one, click on Add another range and type the desired cell range in the text field that appears on this box. Once you’ve configured the cell ranges, click on OK.
Set criteria
This is the section where you decide what values are available as options inside the drop-down list. Here, you can manually enter the options that you want inside the dropdown list or specify the range of cells inside the same sheet or workbook from where you can choose the values or options.
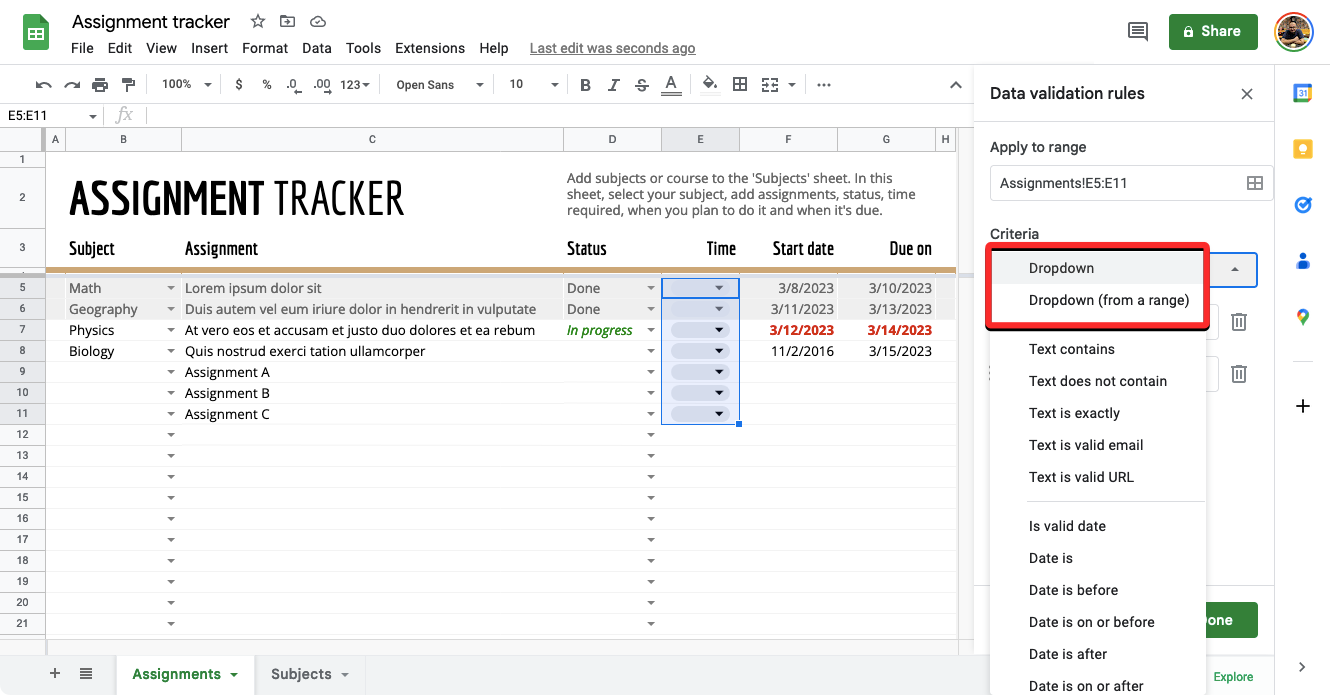
Although you’ll see a ton of options inside the Criteria box, you can only choose two of them to create a drop-down list – Dropdown and Dropdown (from a range).
Option 1 – Dropdown
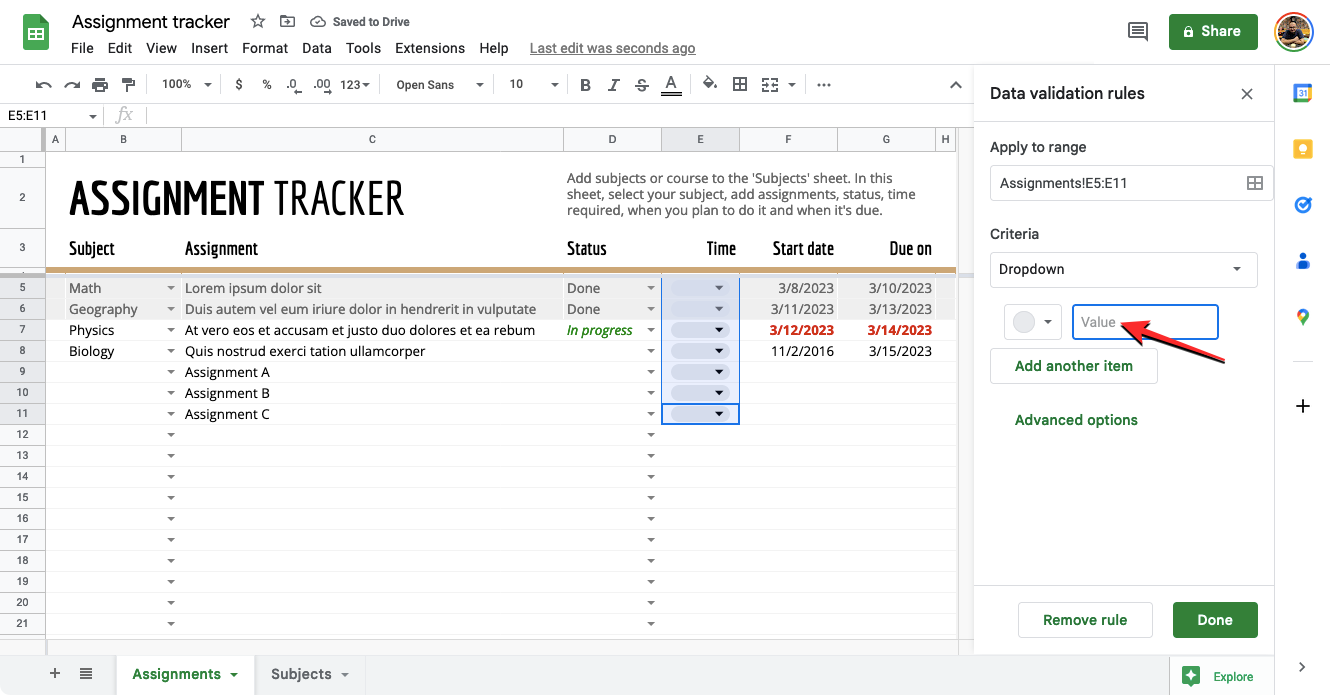
With this option, you can insert any kind of data of your choice into the drop-down list you’re going to create. These may include both numbers or texts and you will have to manually enter these values yourself inside the box that appears next to “Dropdown”.
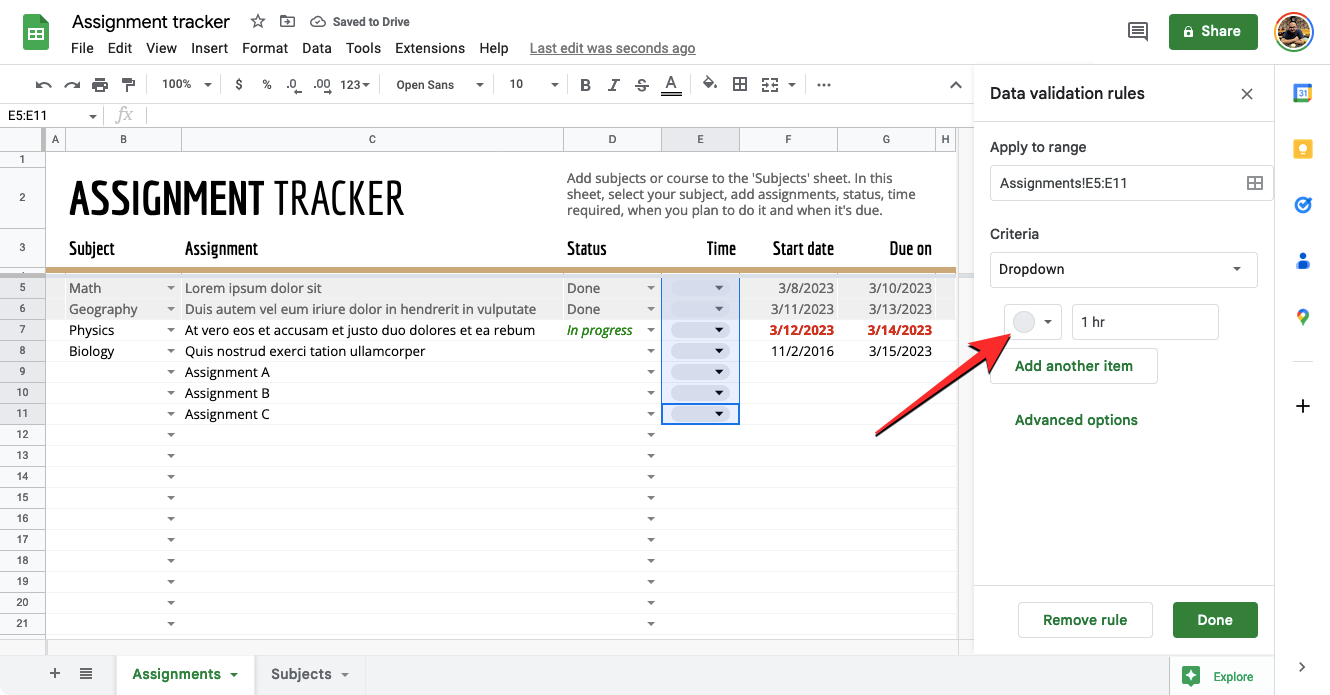
- To enter a value, type the words, numbers, or characters you want to create an option for the dropdown list inside the “Value” text field.
- You can also configure a value with its color by clicking on the grey circle on the left-hand side of a value.
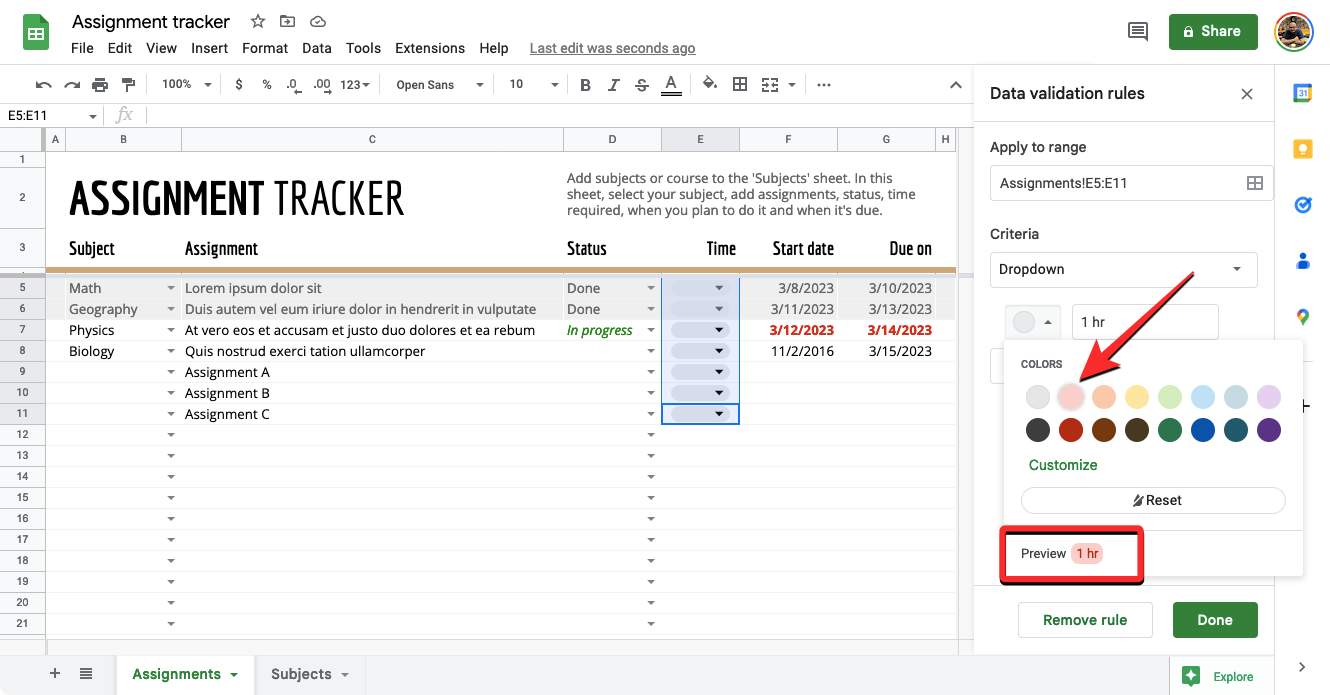
- In the color palette that shows up, select a color for the value you entered from the available options. When you choose a color or hover over it, you should see its Preview inside the Colors box.
- Now that you’ve added a custom value for the dropdown list, you can click on Add another item to add more values with different colors.
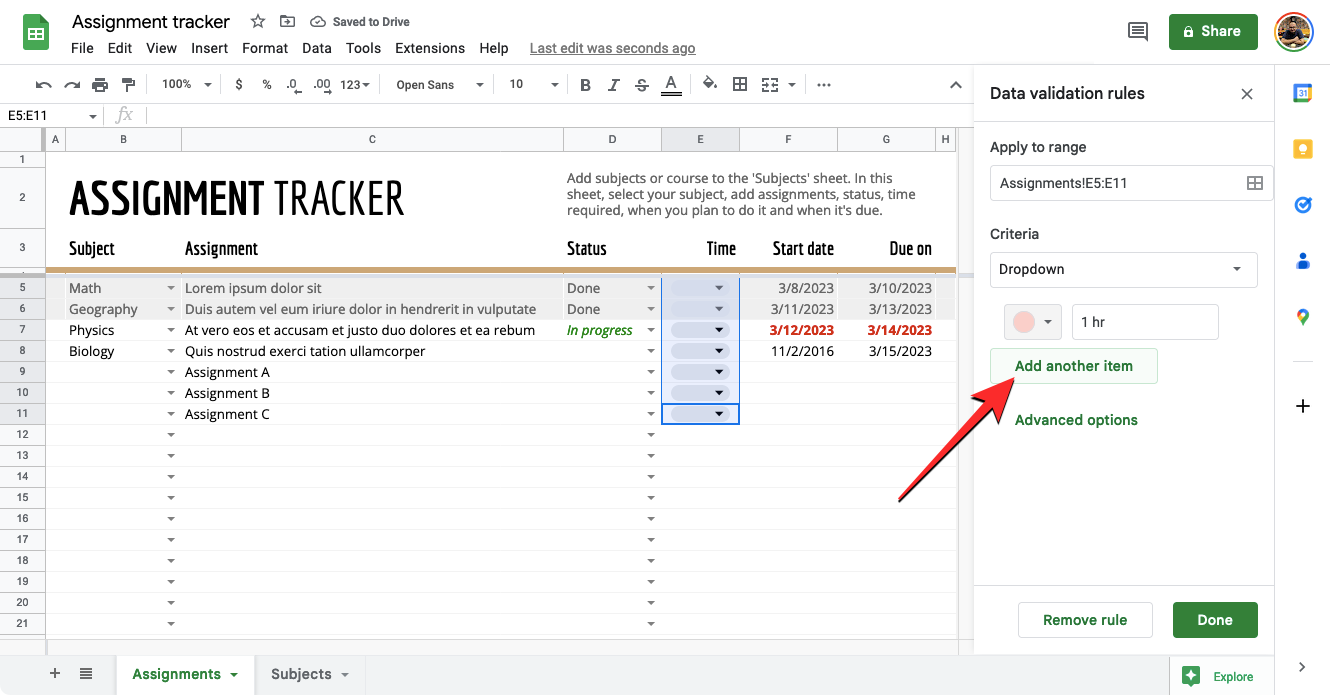
- Once you’ve customized your dropdown list with a bunch of values, the Criteria section should look something like this.

Option 2 – Dropdown (from a range)
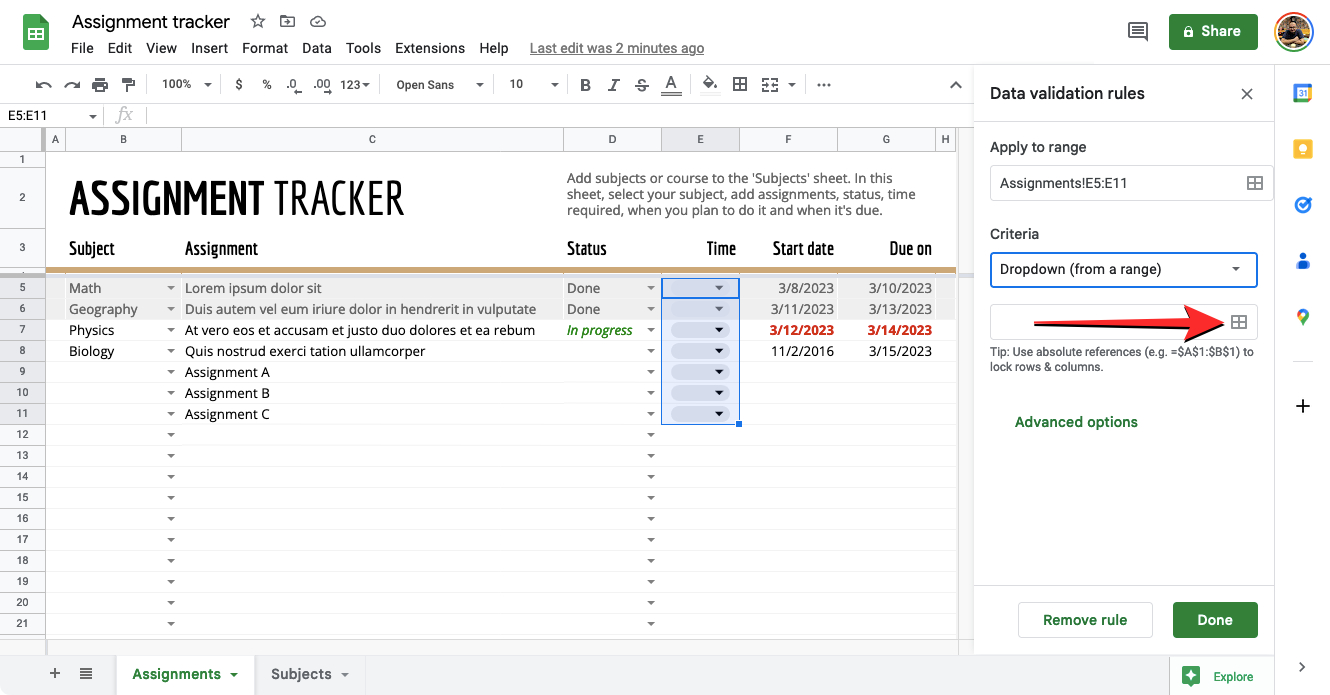
- When you select this option, you’ll be able to create a drop-down list with values that are already present somewhere in the sheet or some other sheet inside the same workbook.
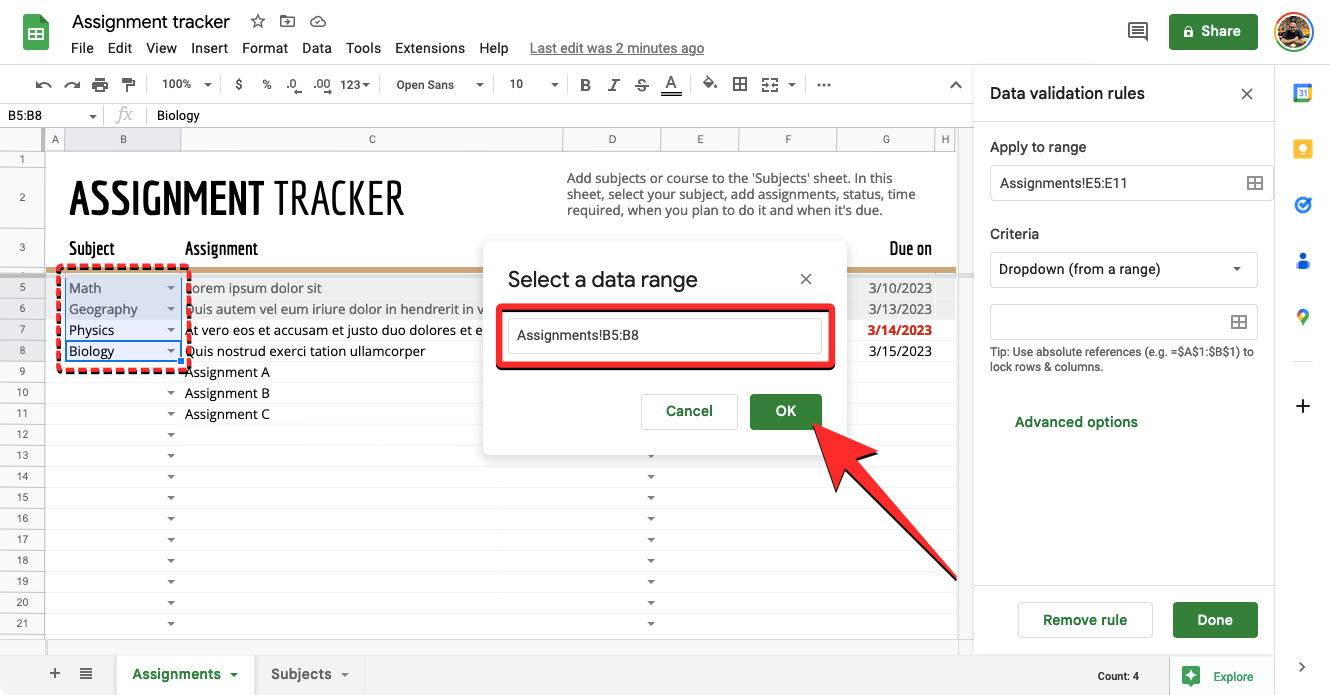
- After you select this option, you need to enter the location in the sheet which you want to get the desired values from. In this instance, we want to extract values from cells B5-B8 on the “Assignments” sheet. For that, we type “Assignments!B5:B8” inside the box under “Dropdown (from a range)”.

- If you wish to manually select the range of cells you want to extract values from, click on the grid icon inside the text field under “Dropdown (from a range)”.
- You should now see the Select a data range box appear on the screen. Now, drag through the range of cells you want to extract value from within the sheet. When you select a cell range, it should appear inside the Select a data range box. If you’re satisfied with your selection, click on OK.
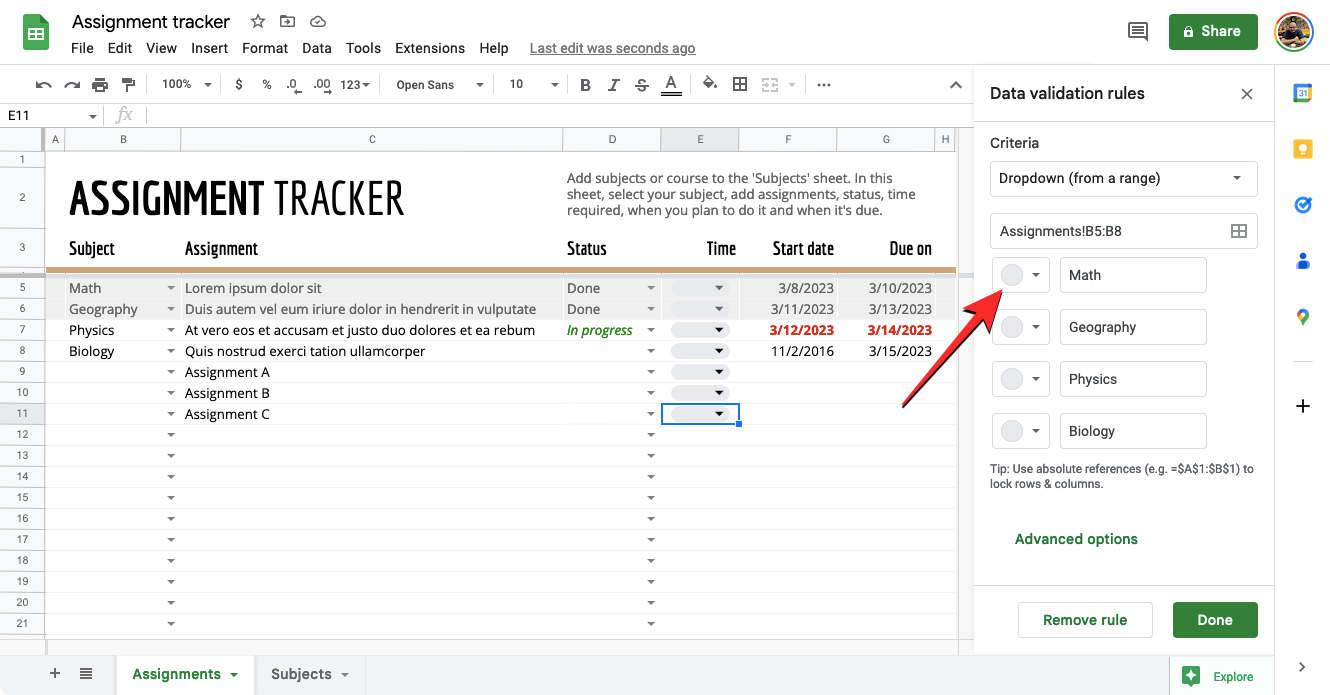
- When you do that, you should see the extracted values from other cells appear as options inside the Criteria section. Similar to the Dropdown option, you will be able to choose a custom color for a selected option by clicking on the grey circle on the left-hand side of a value.
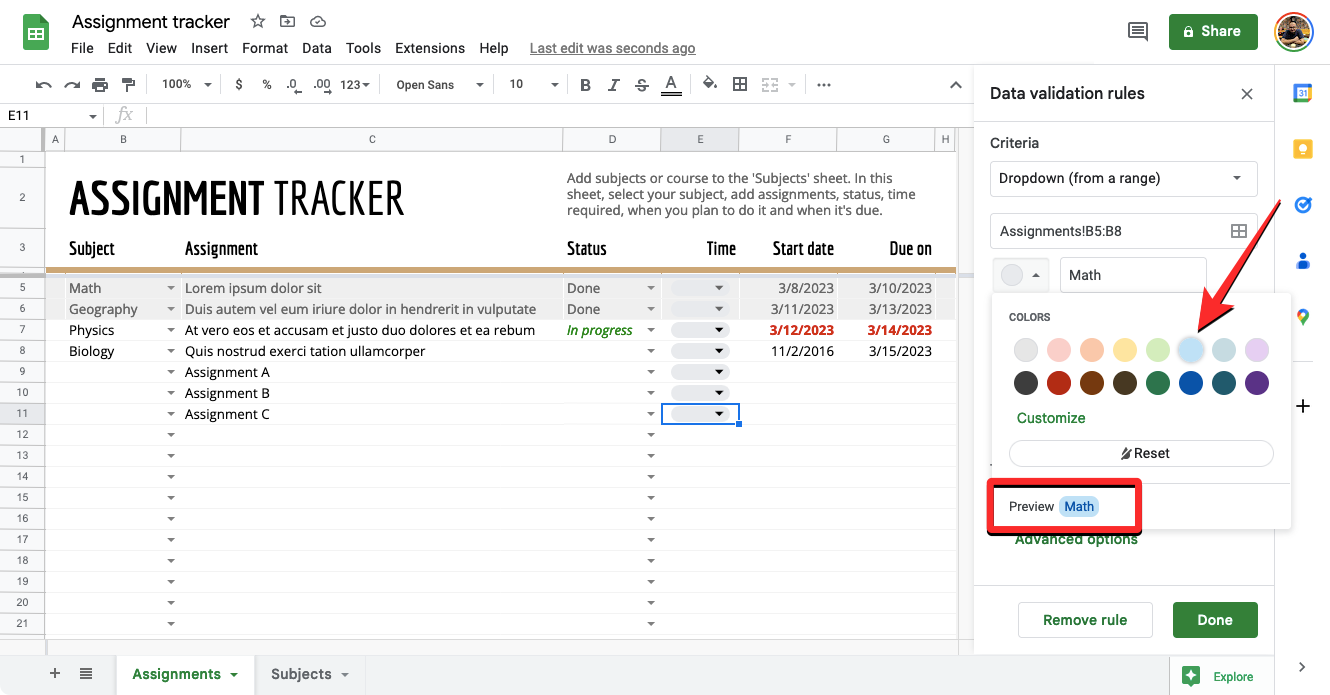
- In the color palette that shows up, select a color for the value you entered from the available options. When you choose a color or hover over it, you should see its Preview inside the Colors box. Similarly, you can apply various colors to different values inside the Criteria section.
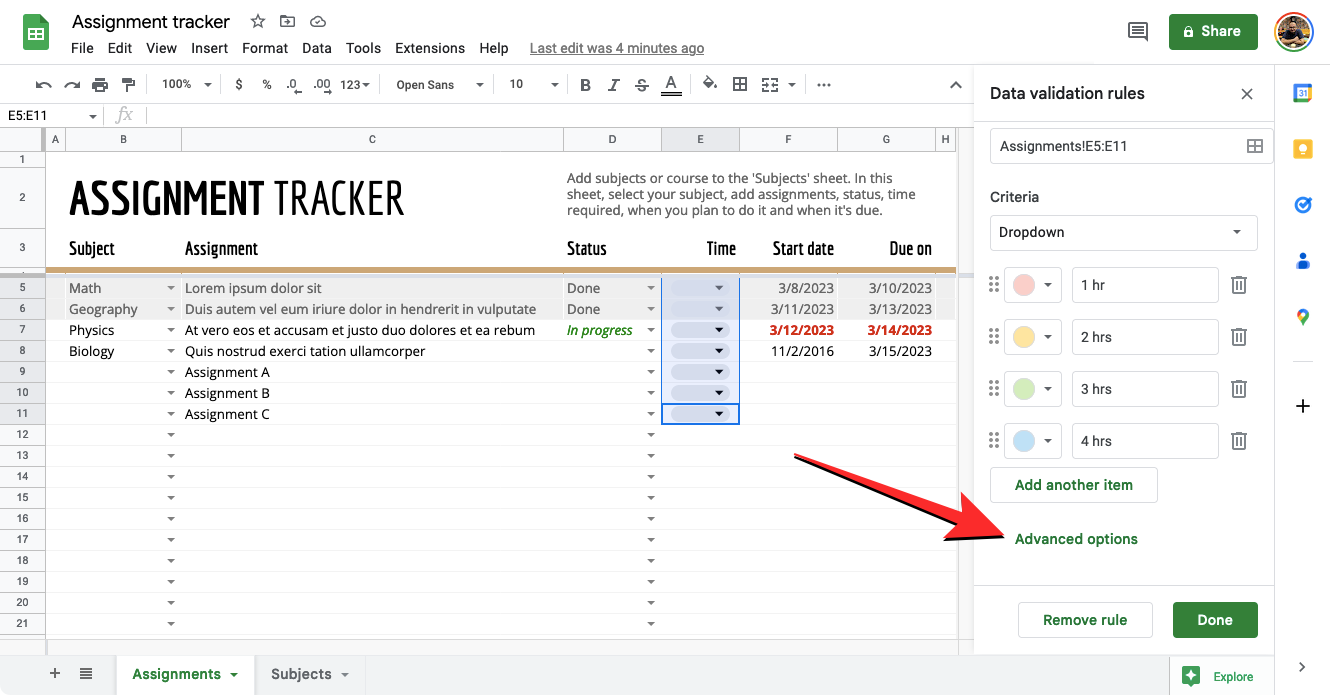
- Once you’re done modifying the list of options inside your dropdown list, you can click on Advanced options to customize it further.
Enable help text
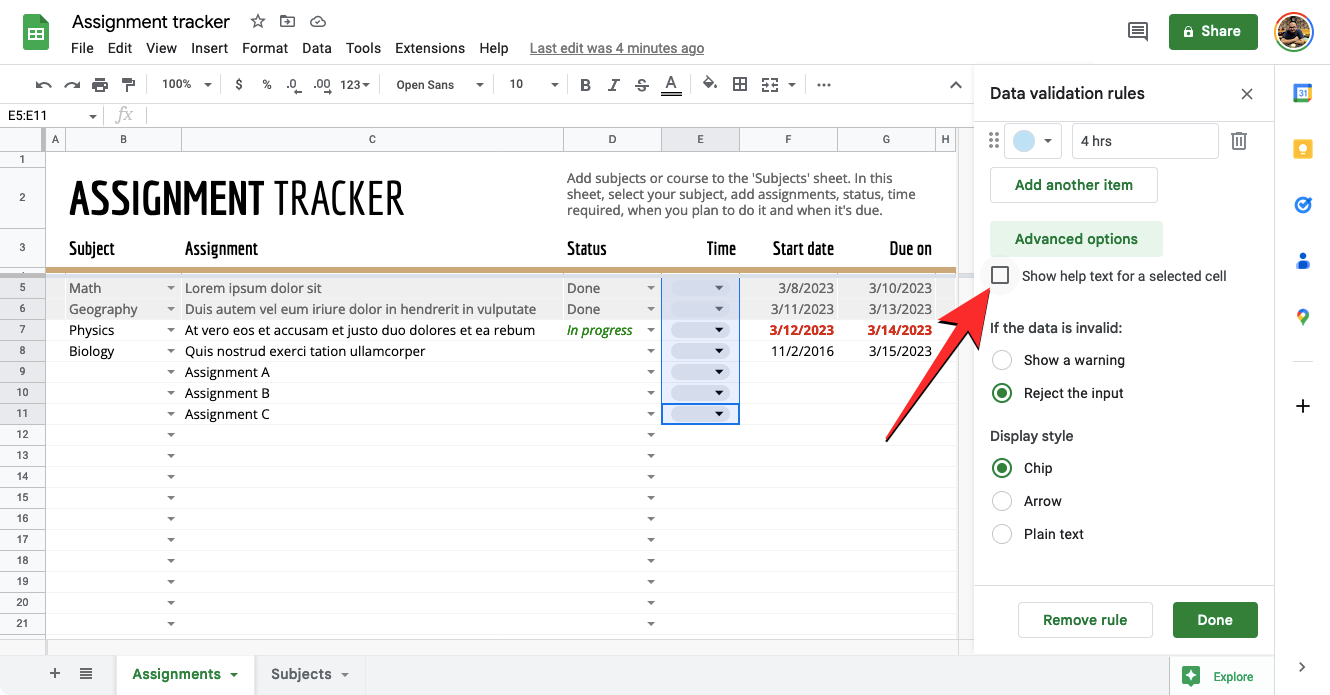
- When you click on Advanced options, you’ll see a Show validation help text box at the top. When enabling this option, you will be able to add an explanation as to what users are supposed to do with the drop-down list.
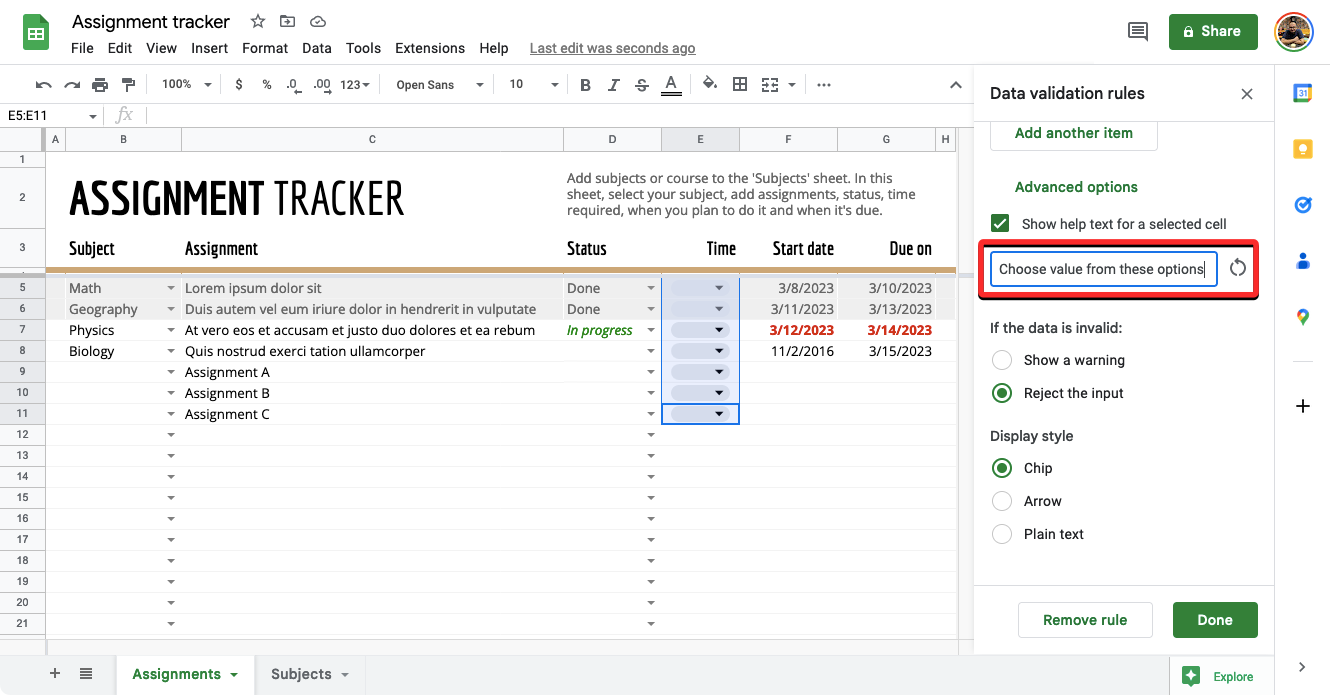
- Once the Show validation help text box is checked, you should see a text box appear below where you can add a note to explain what users can enter inside the selected cell.
Set message for invalid data
- When you create a dropdown list for a particular cell, the cell won’t accept values that you manually enter inside it.
- To make sure a valid value is entered, you can either choose to show a warning or reject the entered value when someone enters invalid data for the cell.
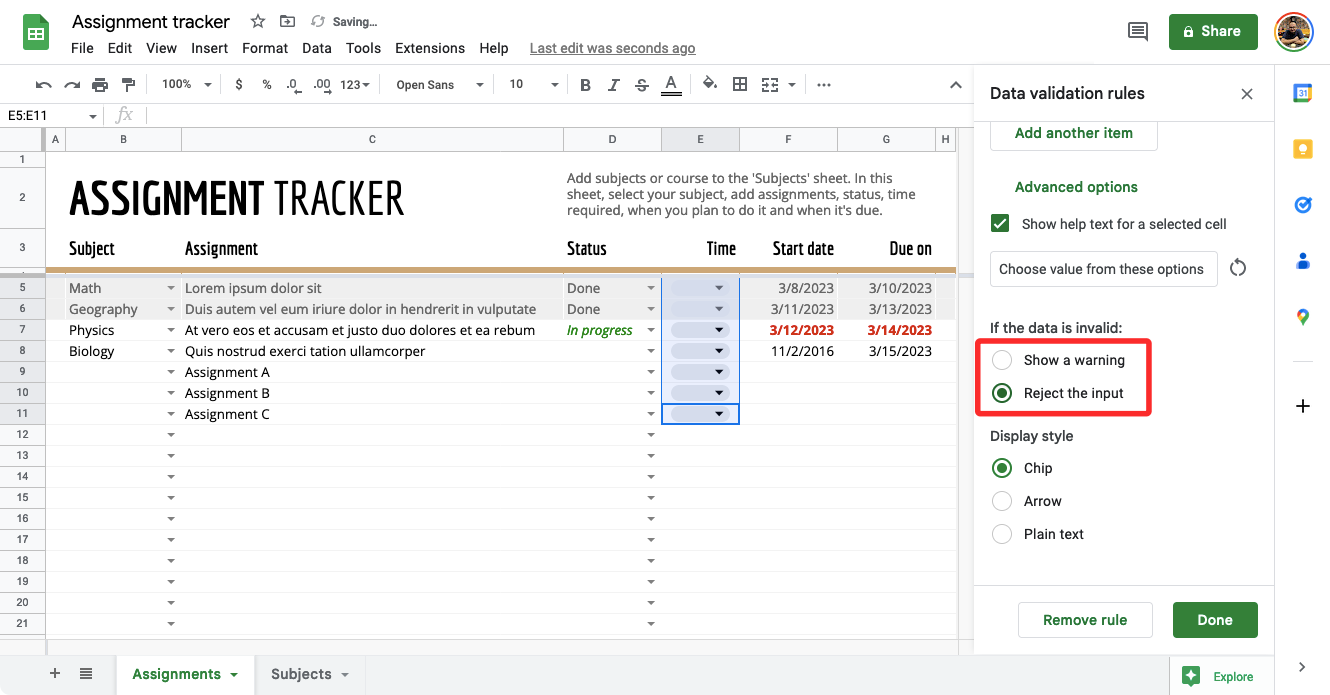
- You can choose your desired option inside the “If the data is invalid:” section from any of these options:
Show a warning to alert users about an invalid entry
Reject the input to prevent invalid values from being added to the cell.
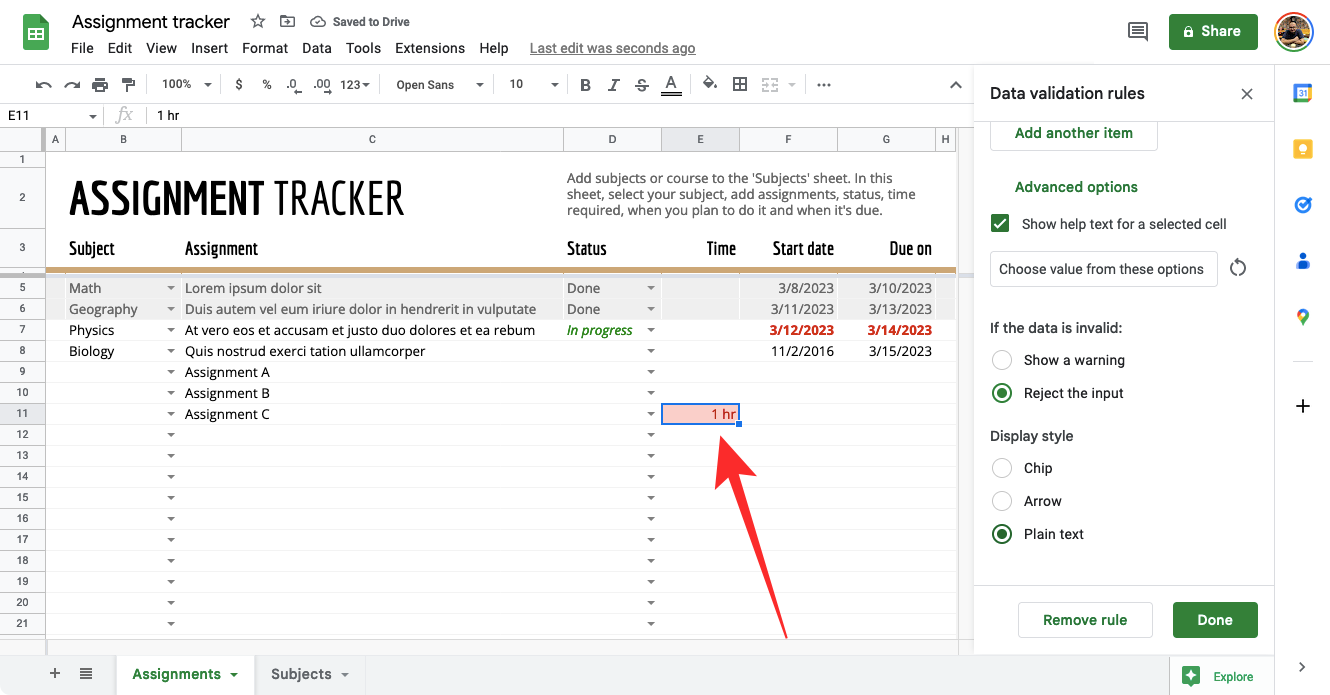
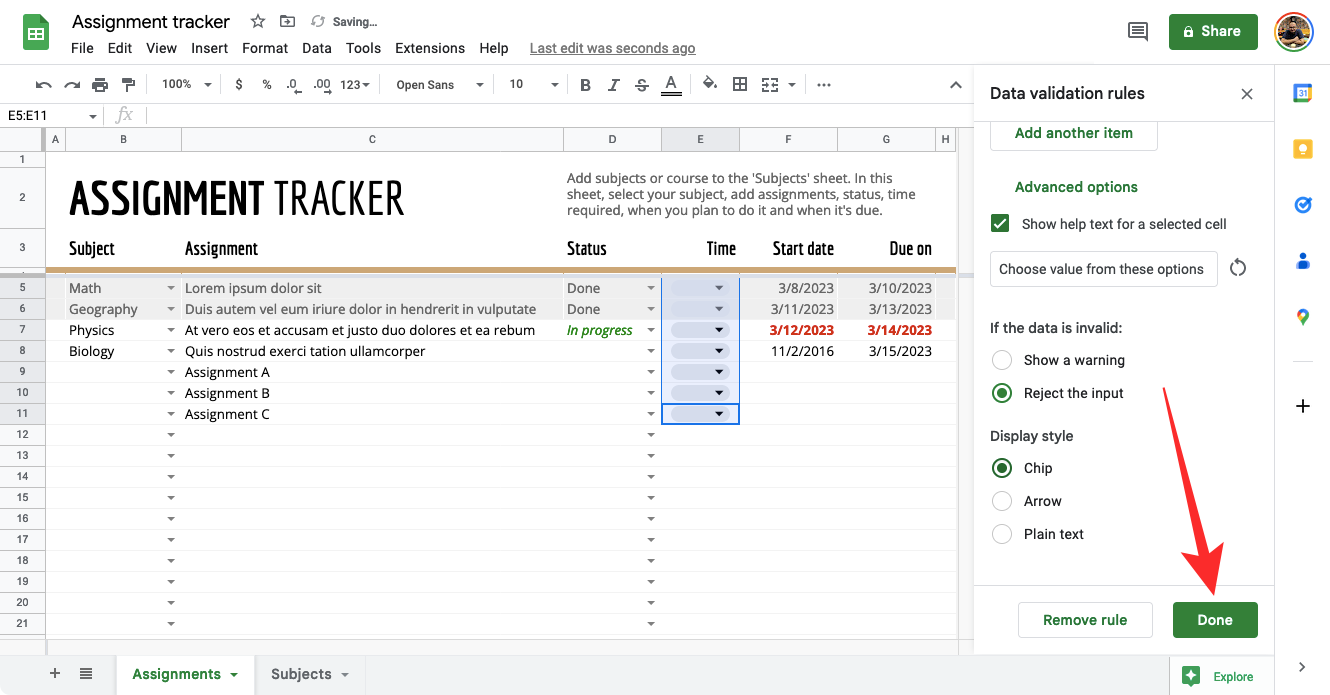
Set display style
You can choose from 3 different display styles to change the appearance of the dropdown list on Google Sheets.
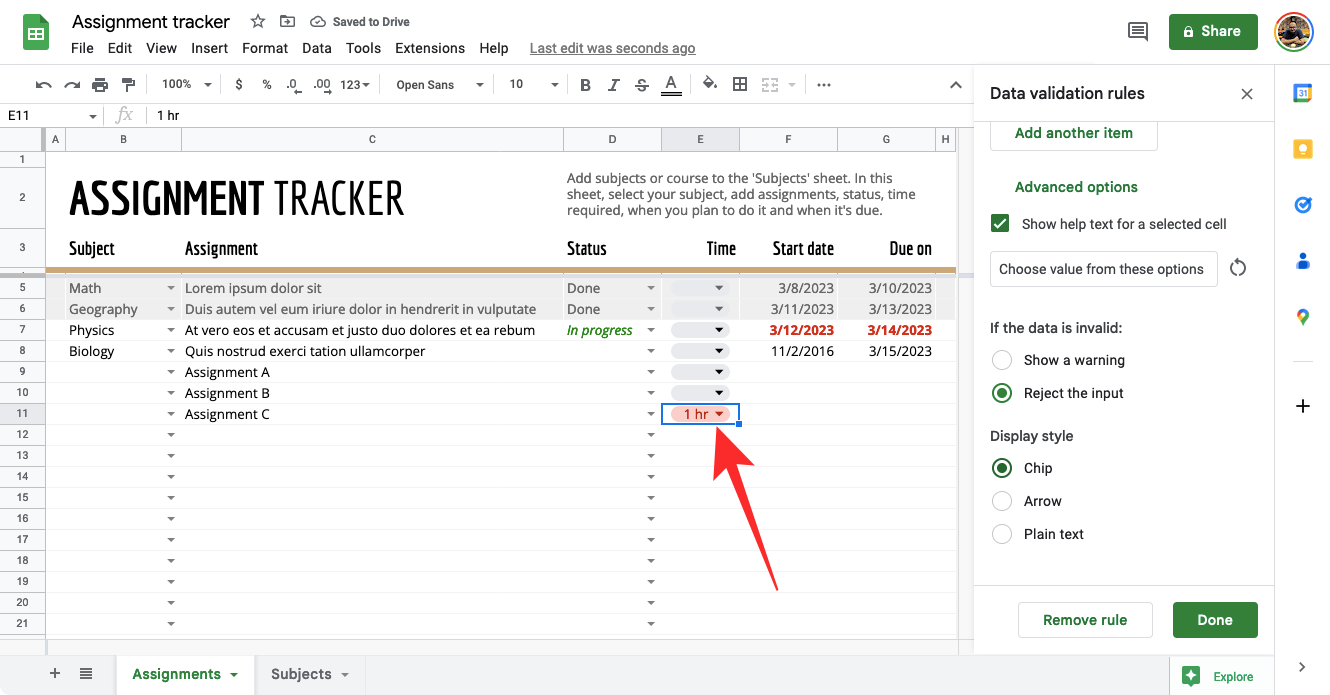
Option 1 – Chip
- When you select this option, cells with dropdown will be visible inside the spreadsheet as a pill-shaped bar.
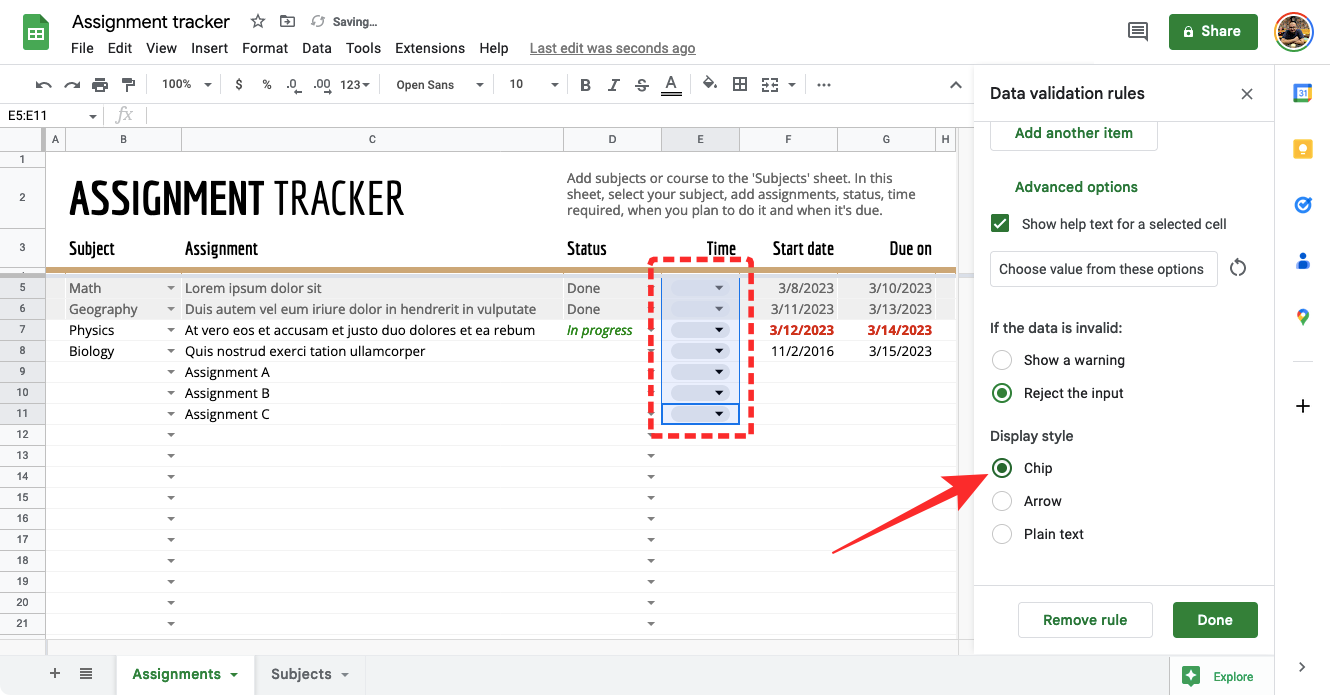
- If you’ve configured values with different colors on the values chosen, the pill’s color may change accordingly.
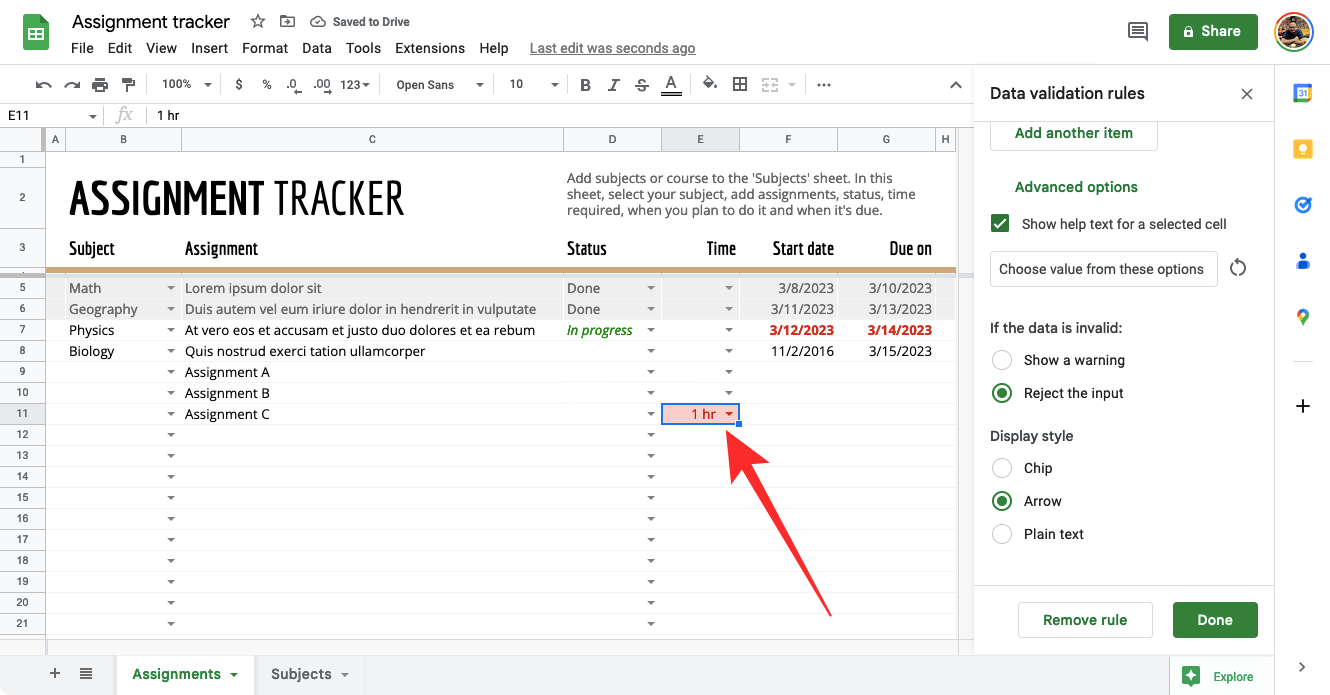
Option 2 – Arrow
- With this option selected, you can distinguish a cell with a dropdown list from other cells by looking for a downward-facing arrow icon on its right-hand side. You can click on this icon to select a value from the dropdown list.
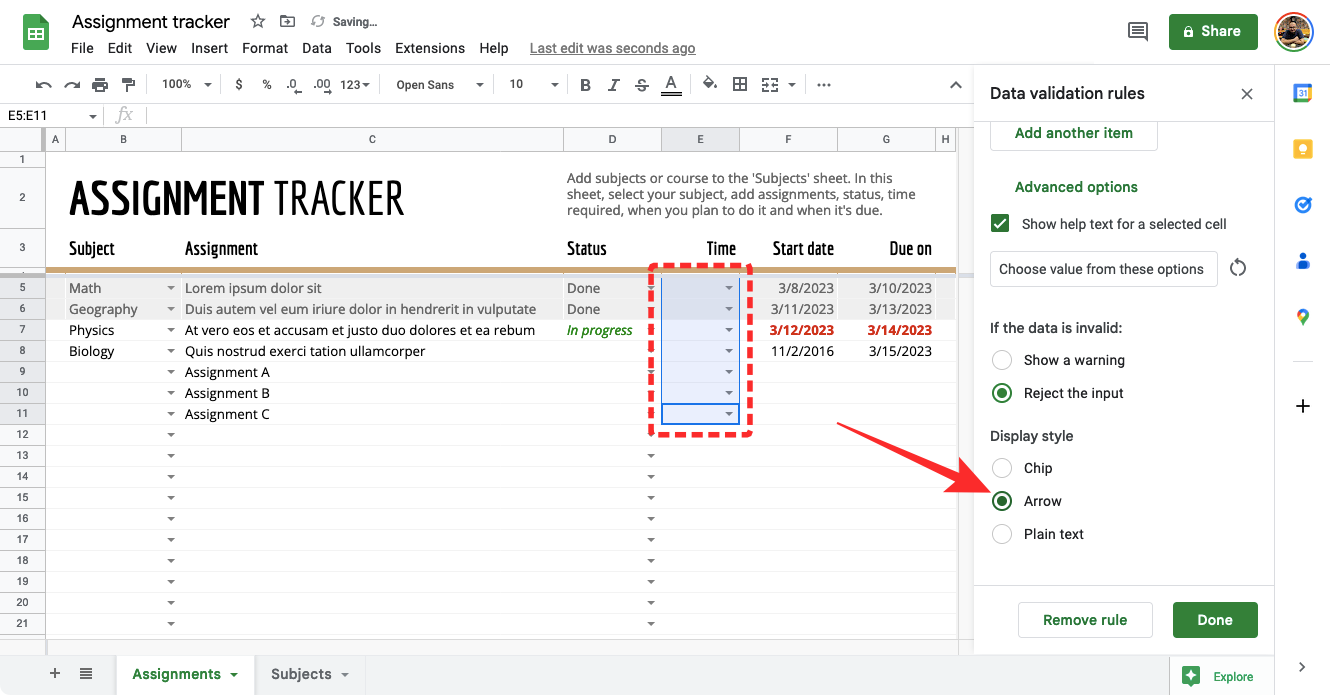
- If you’ve configured values with different colors on the values chosen, the cell’s color may change accordingly.
Option 3 – Plain text
- If you don’t want a clear indication of which cells have been configured with dropdown lists, you can choose this option and the selected cells will appear like any other cells on the spreadsheet. To access the dropdown list in this style, you will have to double-click on a cell.
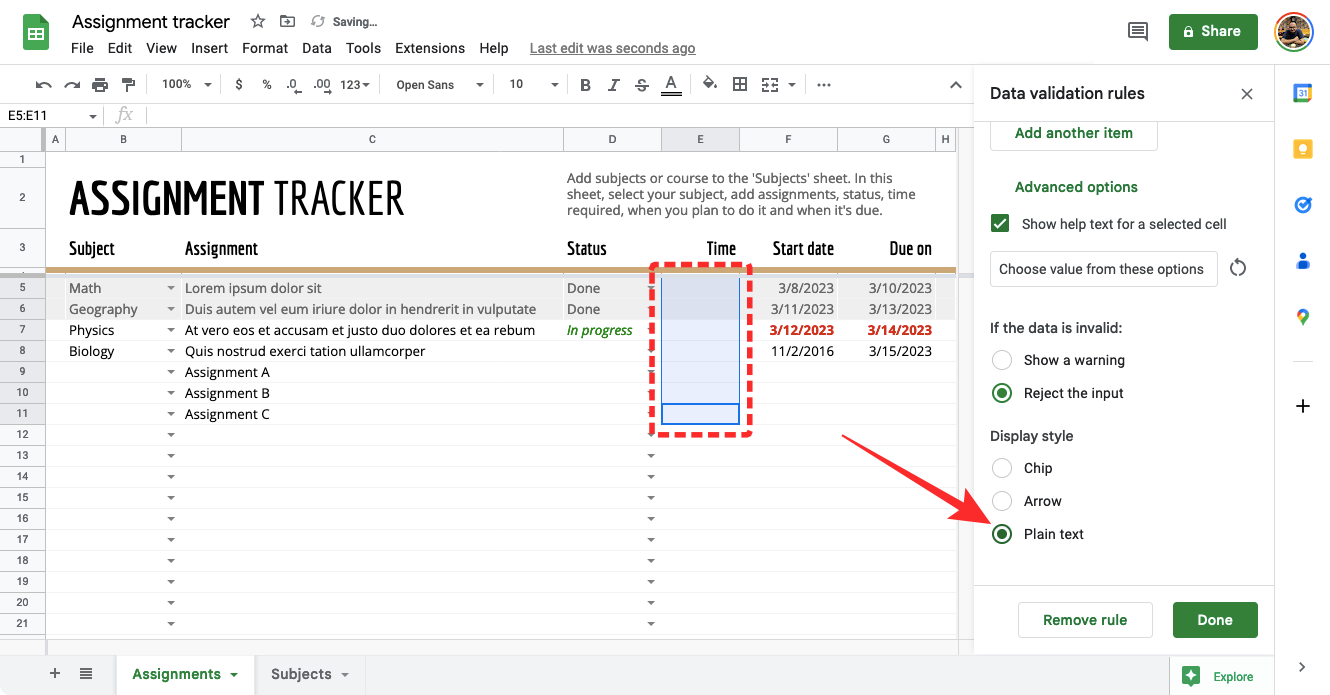
- If you’ve configured values with different colors on the values chosen, the cell’s color may change accordingly.
- Once you’ve added all the necessary details to create a drop-down list, click on Done at the bottom right corner of the Data validation rules sidebar.
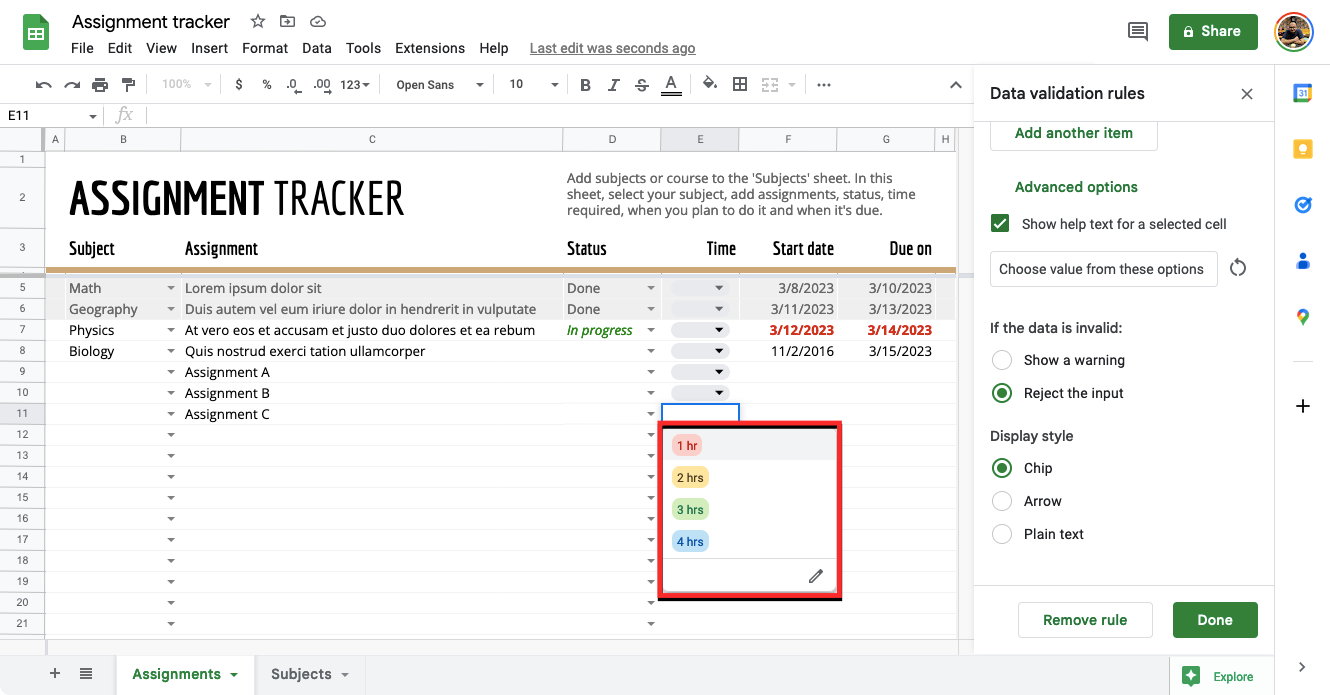
- You should now see the drop-down list appear inside the selected cells on Google Sheets in your chosen style. To enter a value for this cell, click on the chip or arrow icons and select the value that’s available from the list of options.
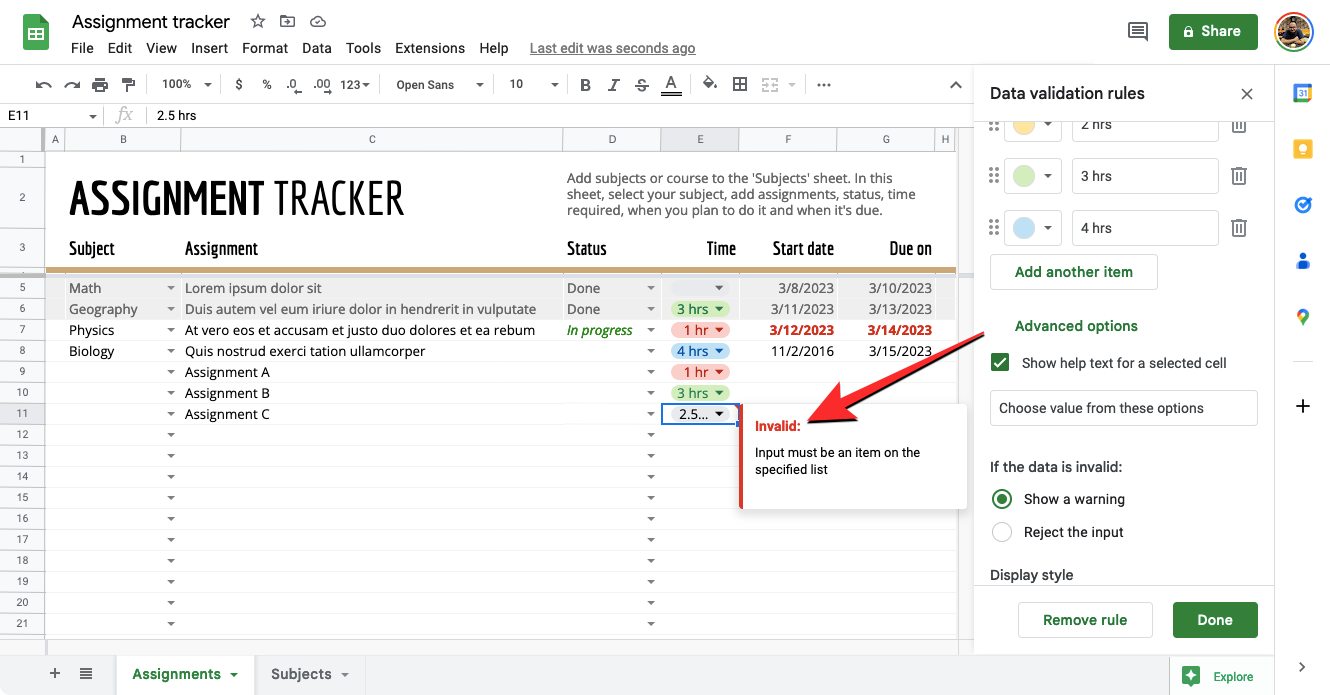
- If you enter a value that hasn’t been assigned to the drop-down list, you’ll see a red mark inside the cell and when you hover over this cell, you should see the Invalid error message that reads “Input must be an item on the specified list”.
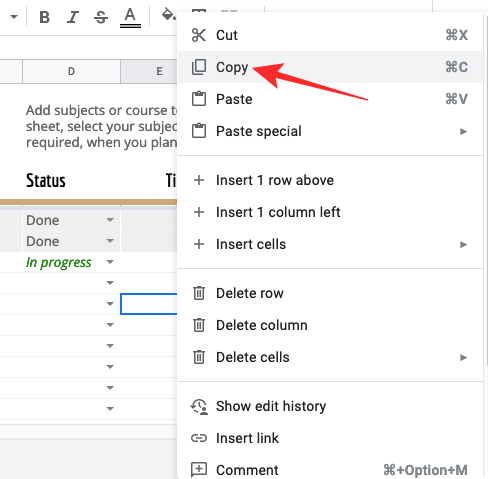
- If you’re satisfied with a drop-down list and want to duplicate the same list on other cells, right-click on the cell where you created it and select Copy.
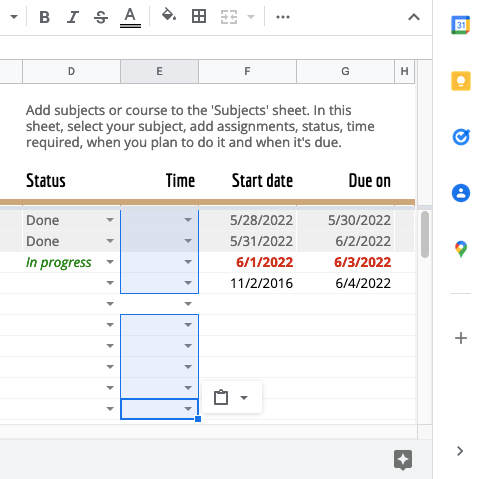
- You can now select all the cells you want to paste the list on and then use the Cntrl (CMD) + V shortcut to duplicate the drop-down list in the selected cells.
Method 2: Using the Google Sheets app on Android
Like on the web, you can create a drop-down list using the Google Sheets app on your Android phone. Unfortunately, iPhone users miss out on this feature as the Google Sheets app on iOS doesn’t offer a Data Validation option to create and modify drop-down lists on a spreadsheet.
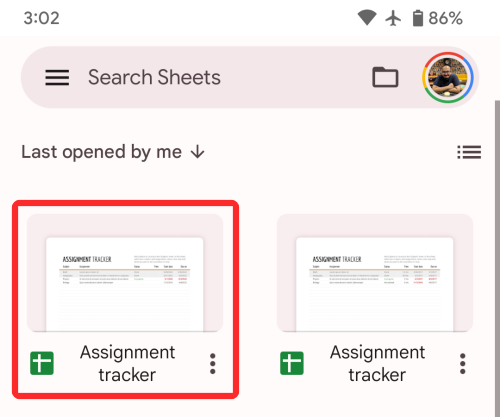
- To create a drop-down list, launch the Google Sheets app on Android and open a spreadsheet you want to create it on.
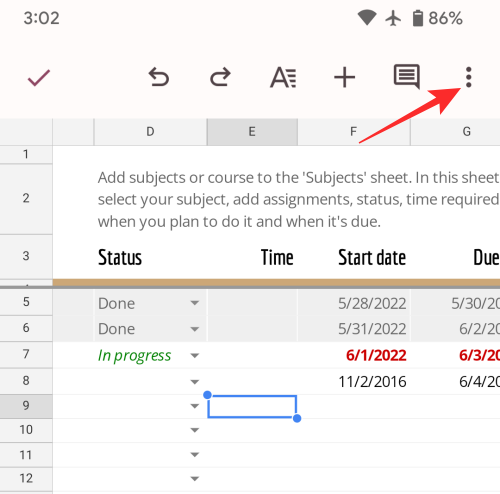
- When the spreadsheet opens, tap on a cell you want to create a drop-down list on.

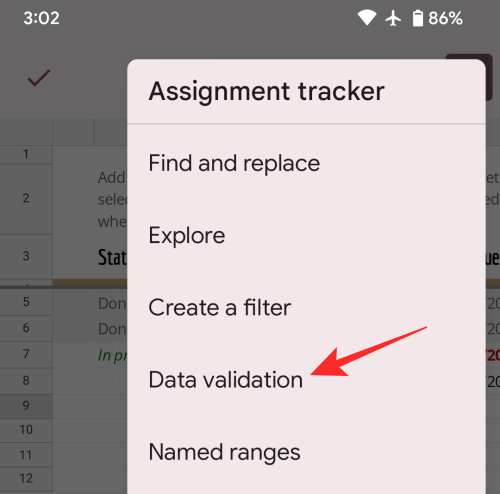
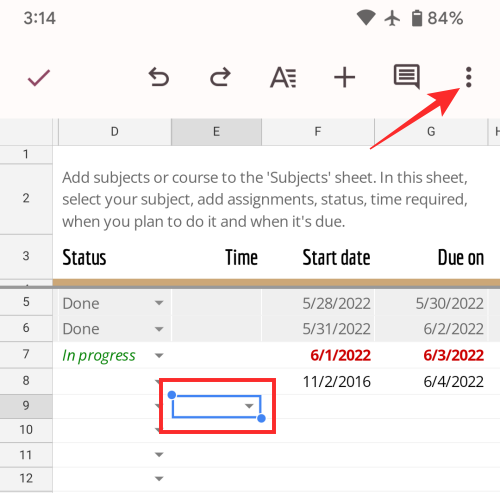
- With a cell selected, tap on the 3-dots icon at the top right corner.
- In the overflow menu that appears, select Data Validation.
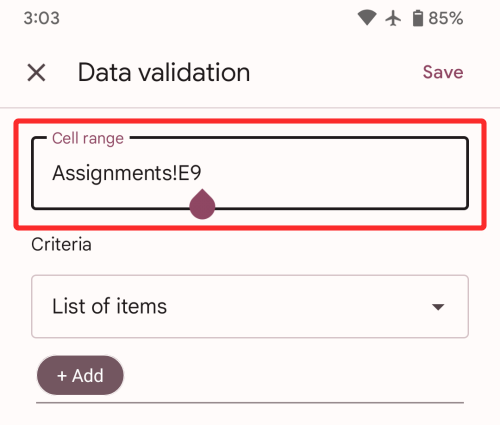
- You should now see the Data Validation screen which offers a bunch of sections you may need to configure.

Set range
Inside this box, you’ll see the location of the cell that you selected. If you selected multiple cells from the sheet, you should see a range of cells that were selected to create a drop-down list.
Set Criteria
As explained above, this option lets you assign values to the drop-down list you’re about to create. You can choose from the two options below to create a list:
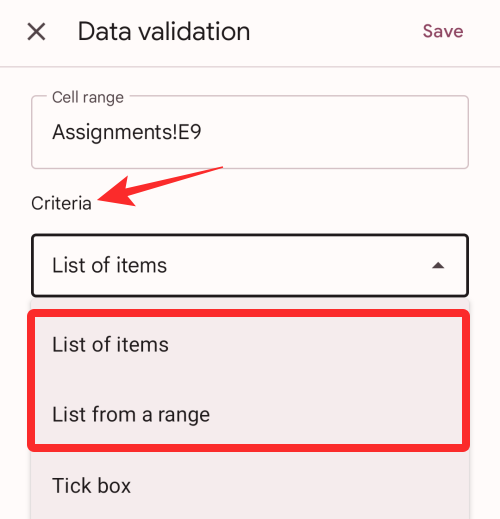
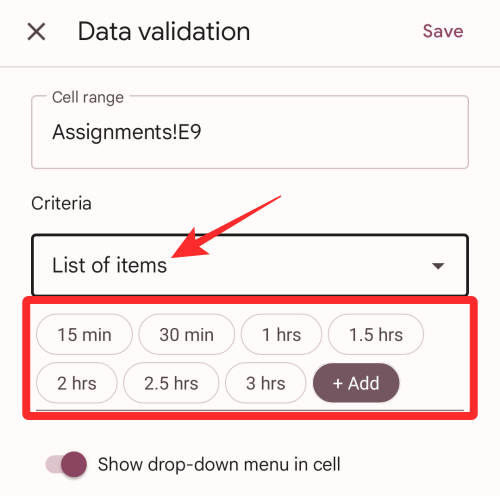
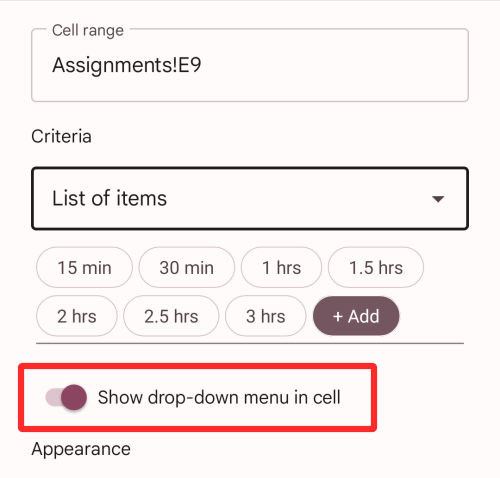
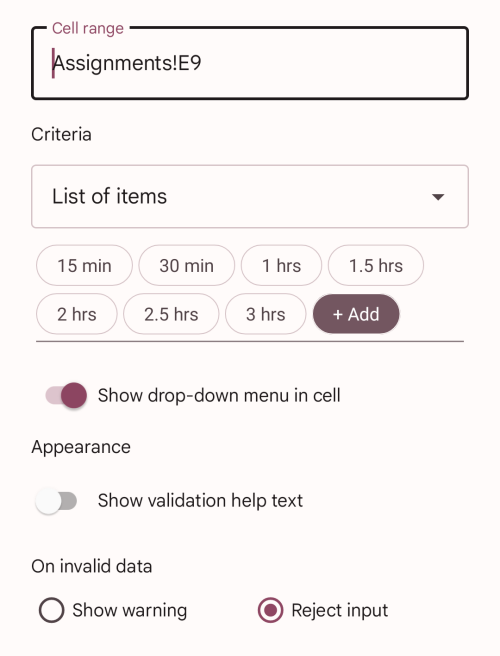
- List of items: With this option, you can insert any kind of data including texts or numbers of your choice into the drop-down list. When selected, you will have to manually enter the values yourself inside the “List of items” box. You can add any number of letters words, or numbers as options inside the drop-down list but remember to separate the values with a comma, not spaces. With the option selected, tap on Add and type the items you want to be available as options inside the drop-down list.
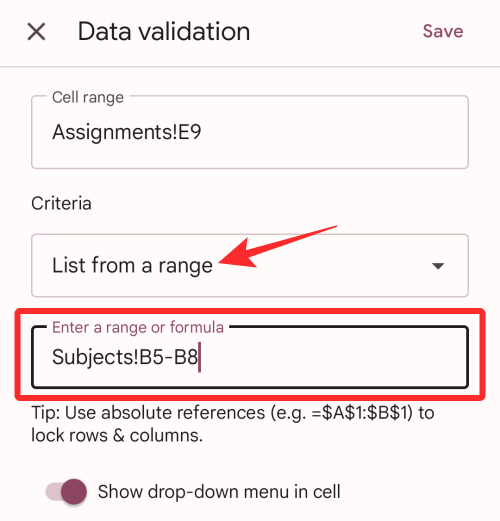
- List from a range: With this option, you can create a drop-down list with values that are already available somewhere in the sheet or workbook you’re working on. When you select List from a range, you will have to manually enter the locations of cells in the sheet from where you want to extract the values. For instance, you can enter “Subject!B5:B8” inside the box if you wish to take values from cells B5-B8 on the “Subject” sheet.
Show drop-down menu in cell
If you wish to see a down arrow inside the cell where you created a drop-down list, you can turn on the Show drop-down menu in cell toggle. If not enabled, others working on the sheet won’t be able to notice if and where you have placed a drop-down list.
Appearance
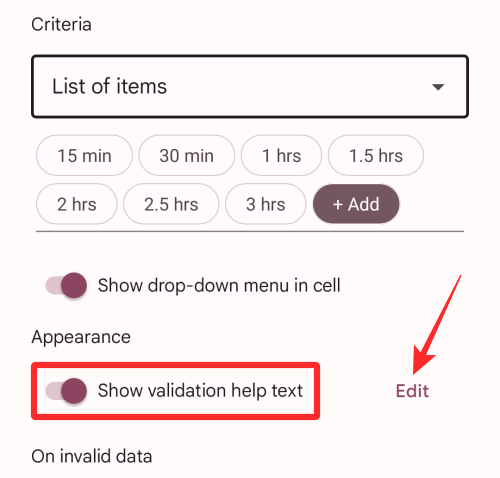
- If you wish to add a note to explain what users can enter inside a cell where you created a drop-down list, you can turn on the Show validation help text toggle under “Appearance”. Once enabled, tap on Edit on the right-hand side of this toggle to create a note.
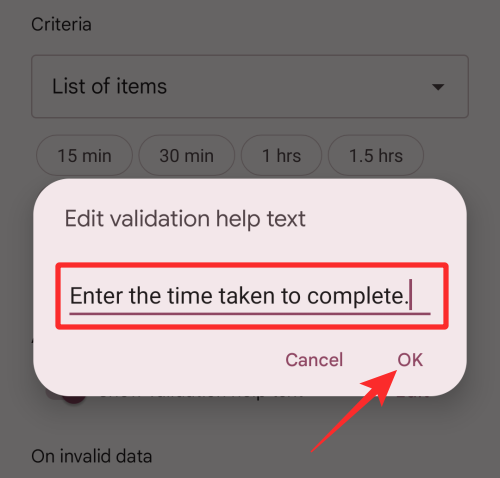
- You’ll now see a dialog box on the screen where you can enter the desired text that you need to explain to users. Once you’ve added a note, tap on OK to confirm.
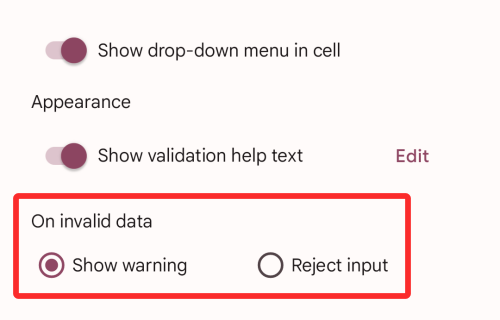
On invalid data
When the value someone enters doesn’t match any of the characters or numbers that were pre-assigned to a cell’s drop-down list, you’ll need to choose what the Sheets can show or do in such a situation.
- You can either choose Show warning to let users about the invalid entry straight away or select Reject input so that the spreadsheet doesn’t accept the value they tried to add to the cell.
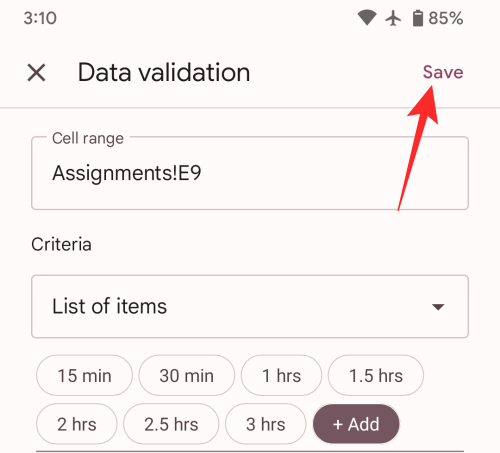
- Once you’ve added all the necessary details to create a drop-down list, click on Save at the top right corner of the Data validation screen.
- The drop-down list will now appear inside the selected cell inside Google Sheets and you should see a down arrow inside it.
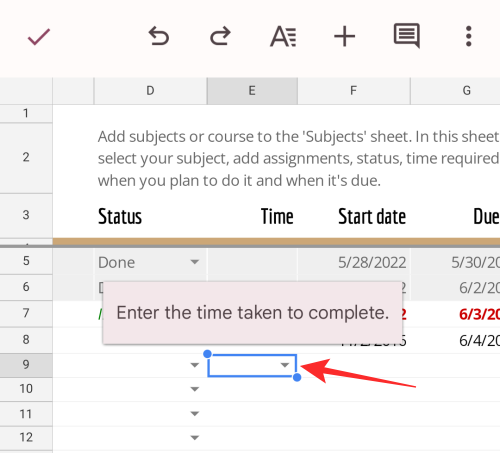
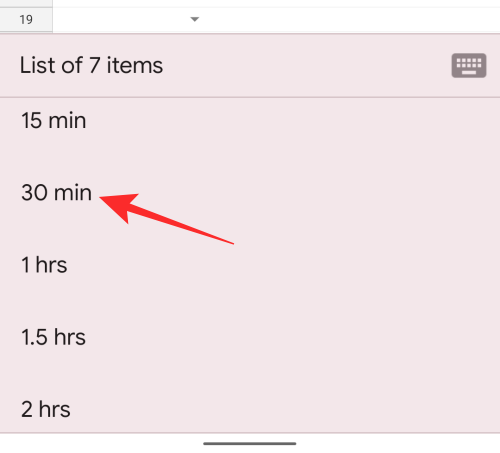
- To enter a value for this cell, tap on this down arrow and select the value that’s available from the list of options.
How to edit a drop-down list on Google Sheets [2 methods]
You can modify the values available inside the drop-down list in a cell at any time by following the steps below.
Method 1: Using Google Sheets on the web
- To make changes to a cell with a drop-down list, open the spreadsheet and select the cells whose values you want to change.
- Once the cells are selected, right-click on them and select Dropdown from the list of options.
- You’ll now see the Data validation rules sidebar appear on the right-hand side. Here you can make all the desired changes inside the Apply to range, Criteria, and Advanced options sections.
- Once all settings have been modified, click on Done to confirm the changes.
The drop-down list will now be updated with the newer values and settings that you applied recently.
Method 2: Using the Google Sheets app on Android
You can edit a cell you have previously created a drop-down list on your phone.
- Open the spreadsheet on the Google Sheets app on Android and tap on the cell you want to edit.
- With the cell selected, tap on the 3-dots icon at the top right corner.
- In the overflow menu that appears, select Data Validation.
- You’ll now see the Data Validation screen showing you the current configuration of the cell. You can modify any of its values inside the Cell range, Criteria, On invalid data, and Appearance sections to your preferred setting.
- Once you’ve made all the necessary changes, tap on Save at the top right corner to confirm them.

The drop-down list will now be updated with the newer values and settings that you applied recently.
How to delete a drop-down list on Google Sheets [2 methods]
If you no longer want others to enter values from a drop-down list on Sheets, you can follow the steps below to get it done.
Method 1: Using Google Sheets on the web
- To remove a drop-down list from a cell, open the desired spreadsheet inside Google Sheets and select the cell you want to remove the drop-down list from.
- Once the cells are selected, right-click on them and select Dropdown from the list of options.
- You’ll now see the Data validation rules sidebar appear on the right-hand side. Here, click on Remove rule at the bottom of the sidebar to delete the list from the selected cells.
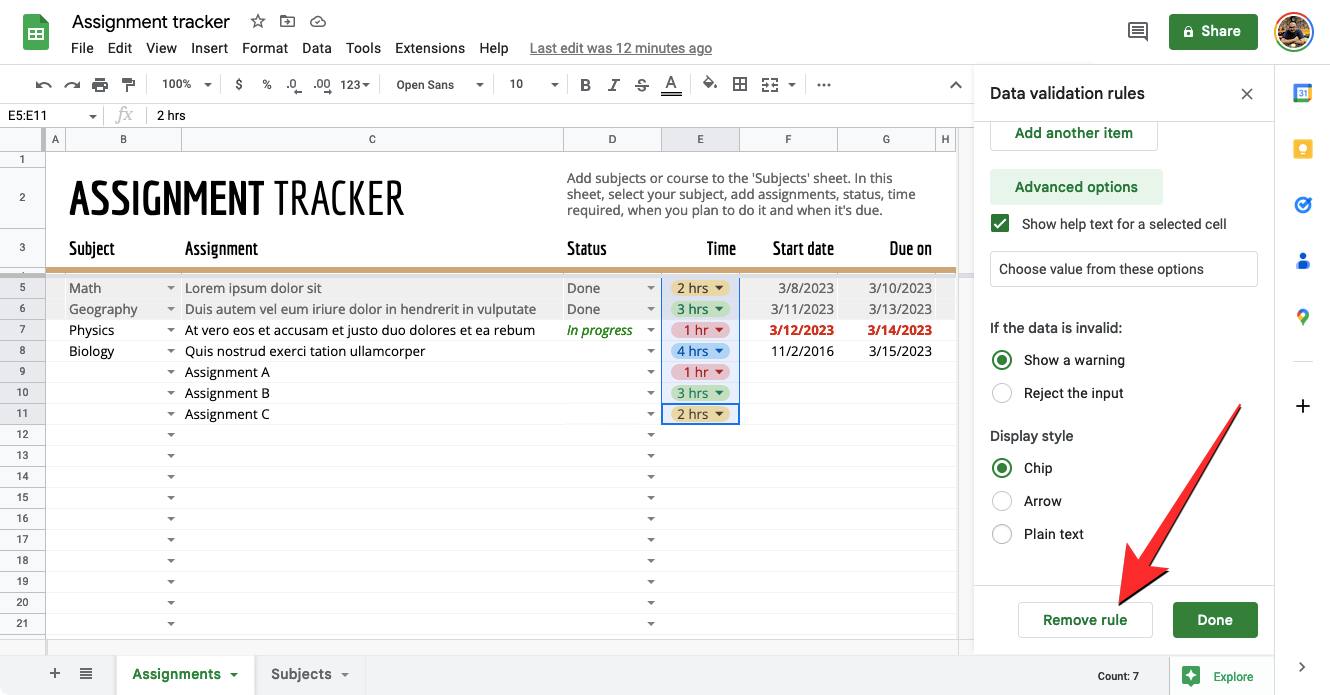
When you do that, the drop-down list will instantly vanish from the sheet.
Method 2: Using the Google Sheets app on Android
You can remove a drop-down list from a cell on your phone at any time as long as you’re doing it on Android.
- To delete a drop-down list, open the Google Sheets app and select a spreadsheet you want to edit.
- When the spreadsheet loads up, tap on a cell you want to remove the drop-down list from.
- With the cell selected, tap on the 3-dots icon at the top right corner.
- In the overflow menu that appears, select Data Validation.
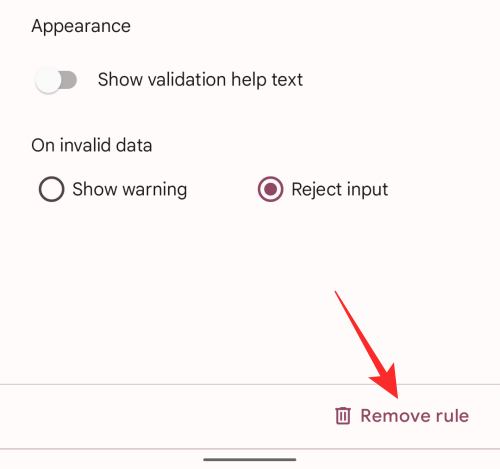
- You’ll now see the Data Validation screen showing you the current configuration of the cell. To delete the drop-down list, tap on Remove rule from the bottom right corner.
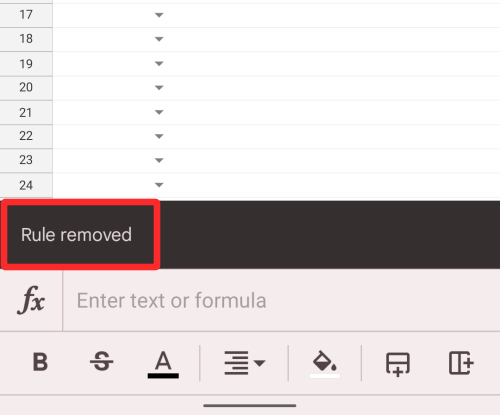
- You’ll now see the “Rule removed” banner appear at the bottom which indicates that the selected cell will no longer host the drop-down list inside it.
I cannot add a drop-down list on the Sheets app on my iPhone. Why?
Adding a drop-down list is only available when using Google Sheets’ web client and its app on Android. iPhone users of the Google Sheets app won’t be able to create or modify drop-down lists because Google hasn’t configured its iOS app with such a feature. If you’re using the Google Sheets app on iOS and you want to create a drop-down list, we suggest you use a computer for this.
If you’re using Google Sheets on Android or the web and you’re unable to add or make any changes to drop-down lists inside a spreadsheet, then it’s likely that you don’t have the necessary privileges to edit the file. In such cases, you can request the file’s owner to grant you editing rights to the spreadsheet if you want to create drop-down lists.
Why should you use drop-down menus on Google Sheets?
If you’re wondering why you’d need to use a drop-down list inside Sheets, here are some reasons why:
- Helps users fill up cells easily as they may need to select a pre-assigned input as a value. This also makes it a faster way to fill up cells in a spreadsheet.
- Helps avoid typos in responses.
- It’s a great way for the creator to ensure the data added to the sheets by others is exactly what they expected.
- Organizers can create drop-down lists to gather feedback from users.
- Lists can also be beneficial when asking for status reports on tasks.
- Can be used to create multiple-choice questions that people can answer directly from their spreadsheet.
That’s all you need to know about using drop-down lists on Google Sheets.


Discussion