To complete the “Digging Deeper” quest, deploy into the Hallowgrove map, navigate to the blue exclamation point on your map, and interact with the glowing icon inside the misty shack to register the investigation.
The “Digging Deeper” quest in Mistfall Hunter asks you to investigate a designated area within Hallowgrove, a dark forest extraction map filled with hostile creatures and roaming players. Because the map is inconsistently named “Hallowgrove” in quest text and “Hollow Grove” in some menu resources, players often get confused about where to go.
Once you deploy, your goal is to reach a specific waypoint, climb into a misty shack, and interact with a glowing icon while surviving the shared PvPvE environment. Here is how to get it done.
- Deploy into Hallowgrove and resolving battle prep blocks
- Reaching the investigation waypoint while avoiding PvP
- Investigating the misty shack and clearing enemies
- Do you need to extract to secure quest progress?
- Next steps and adjacent Hallowgrove mechanics
- How to investigate the designated location in Hallowgrove
- Frequently Asked Questions
Deploy into Hallowgrove and resolving battle prep blocks
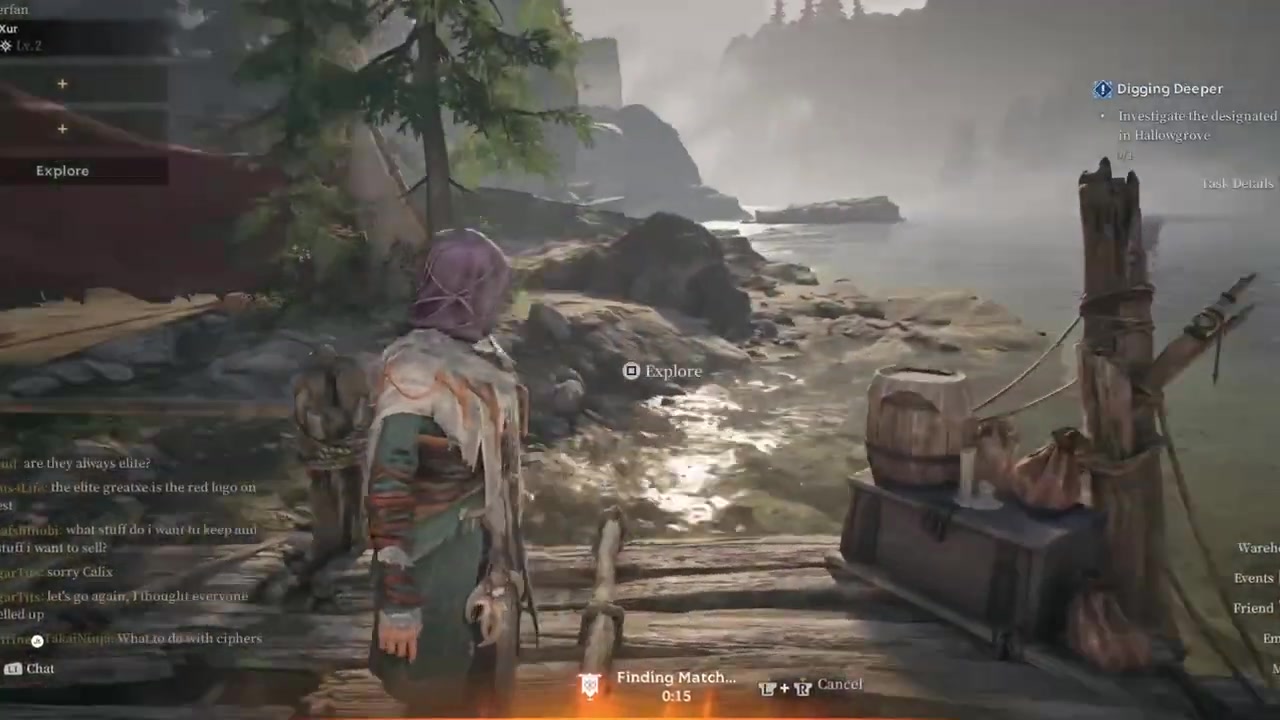
To start the match, head to the docks and interact with the prompt to explore. Select Hallowgrove (or Hollow Grove, depending on your menu text) as your target map. If a Battle Prep menu appears and blocks matchmaking, it means your inventory contains items that are not allowed in this specific match type.
Open your inventory, remove the disallowed gear or consumables flagged by the menu, and the matchmaking process will begin automatically. Once the match loads, you will spawn at a random location on the map, so your route to the objective will vary every time.
Reaching the investigation waypoint while avoiding PvP
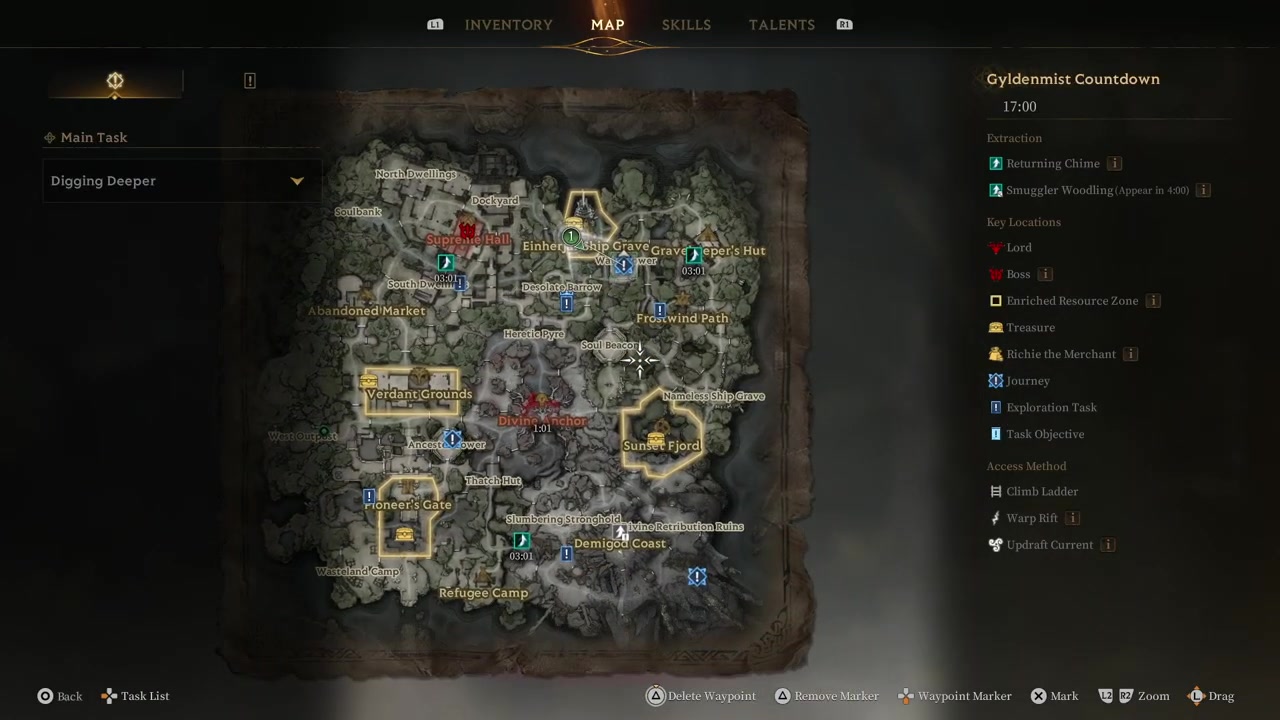
After loading in, open your tactical map. Look for a blue exclamation point marking the “Digging Deeper” objective. You can set this marker as a waypoint to track it through your HUD. The distance to this marker depends entirely on your spawn point.
Because Hallowgrove is a shared PvPvE extraction space, you will likely encounter other real players on your way to the objective. You can differentiate real players from AI bots by checking for name tags above their heads and watching for human-like movement patterns. Bots tend to move rigidly, while players are far more erratic and skilled.
Investigating the misty shack and clearing enemies
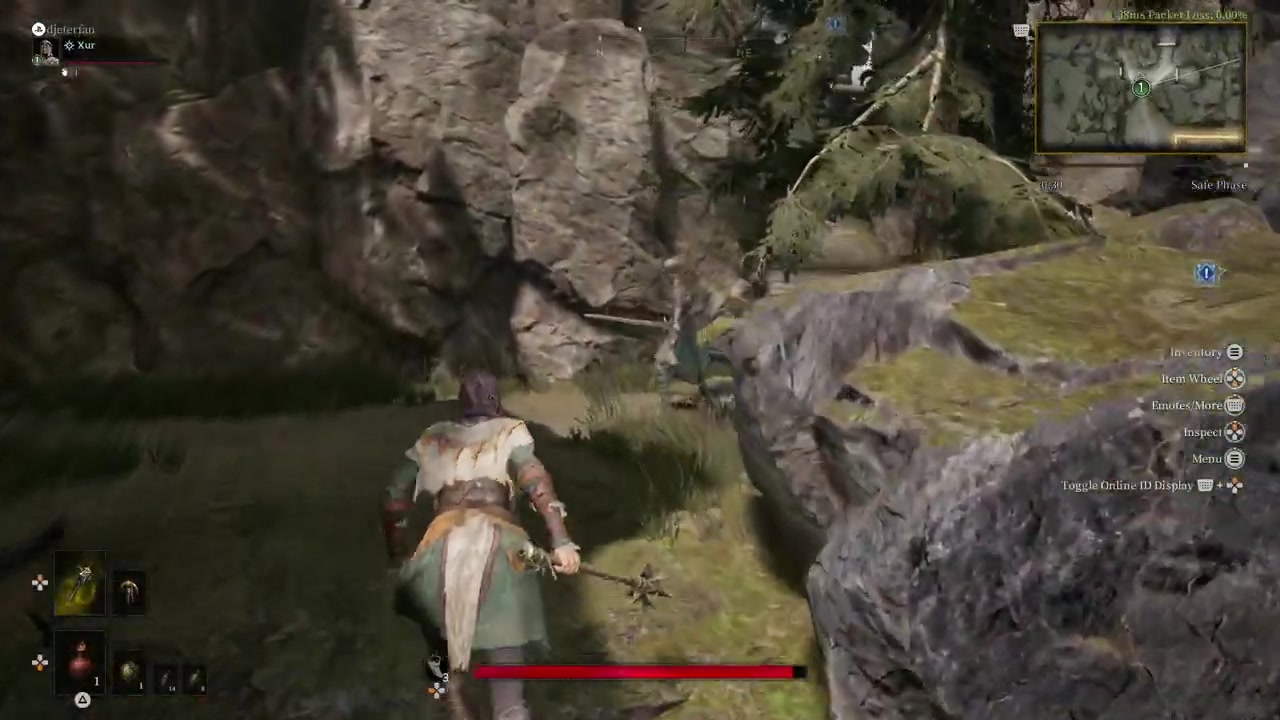
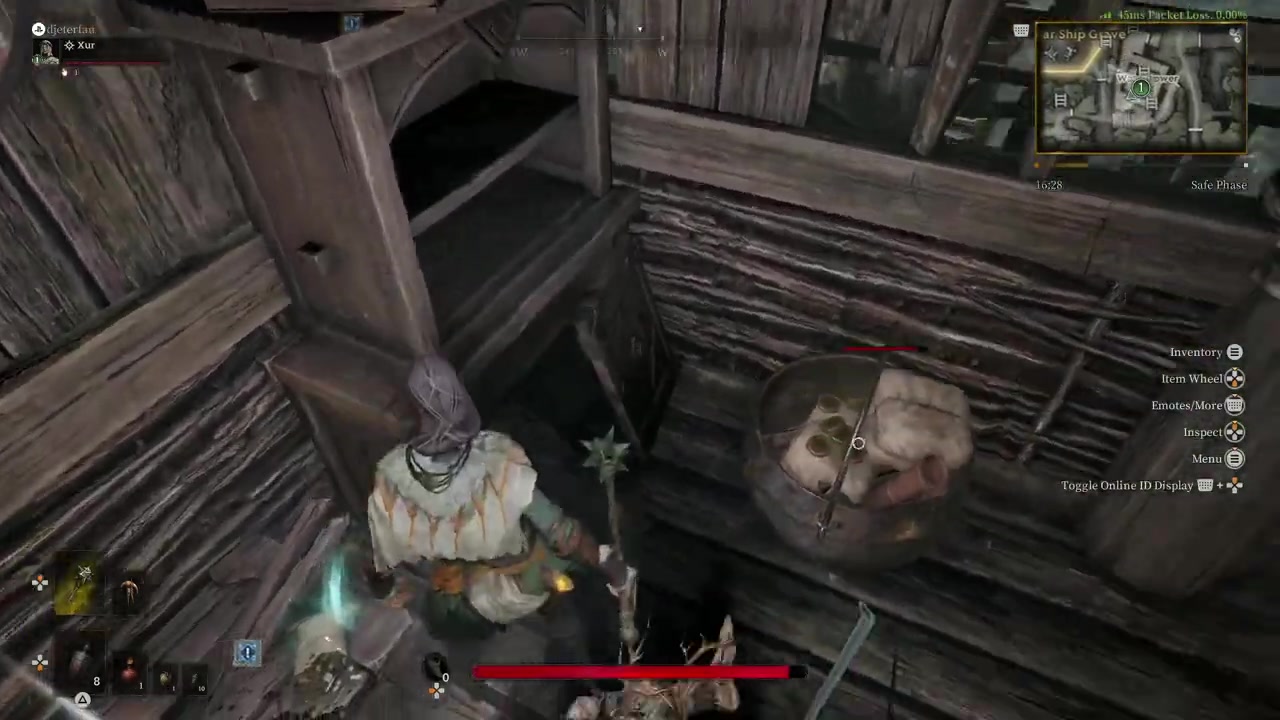
When you arrive at the waypoint, you will find a misty shack. The actual objective point is not on the ground level—you have to climb up top inside the structure to reach it.
Be prepared for a fight, as there are usually enemies blocking the area around the chest. These enemies cannot be avoided because they physically guard the objective. Clear them out, then approach the glowing icon. Interact with it to trigger the investigation prompt. Once the interaction registers, the objective will auto-complete.
Do you need to extract to secure quest progress?
There is conflicting information on whether a safe extraction is required. Early gameplay footage shows the quest auto-completing immediately upon interacting with the glowing icon, without forcing the player to exfil out of the match safely. However, other reports claim that because this is an extraction RPG, dying after investigating might cause you to lose your quest progress.
Next steps and adjacent Hallowgrove mechanics
Once “Digging Deeper” is complete, you will likely move on to related quests in the same area, such as “The Way Out” and “Tracing the Trail,” which require you to meet with NPCs like Pip and rely heavily on understanding the extraction loop.
To extract safely from Hallowgrove, players need to use specific mechanics. You can locate and defeat a rare monster called the Returner Woodling to obtain a Soul of Return, or use a Returning Chime to summon a Hallowgrove Woodling, create a Soul Tree, and call an extraction point near it. Additionally, be wary of the Gyldenmist-laden ruins scattered across the map, as this hazard spreads madness and corruption that can quickly end your run.
How to investigate the designated location in Hallowgrove
STEP 1/8
Select Hallowgrove at the docks

Head to the docks, hit explore, and select Hallowgrove as your map to start matchmaking.
STEP 2/8
Clear disallowed items from inventory
If the Battle Prep menu appears, remove any flagged items from your inventory so matchmaking can begin.
STEP 3/8
Open your map and find the blue waypoint
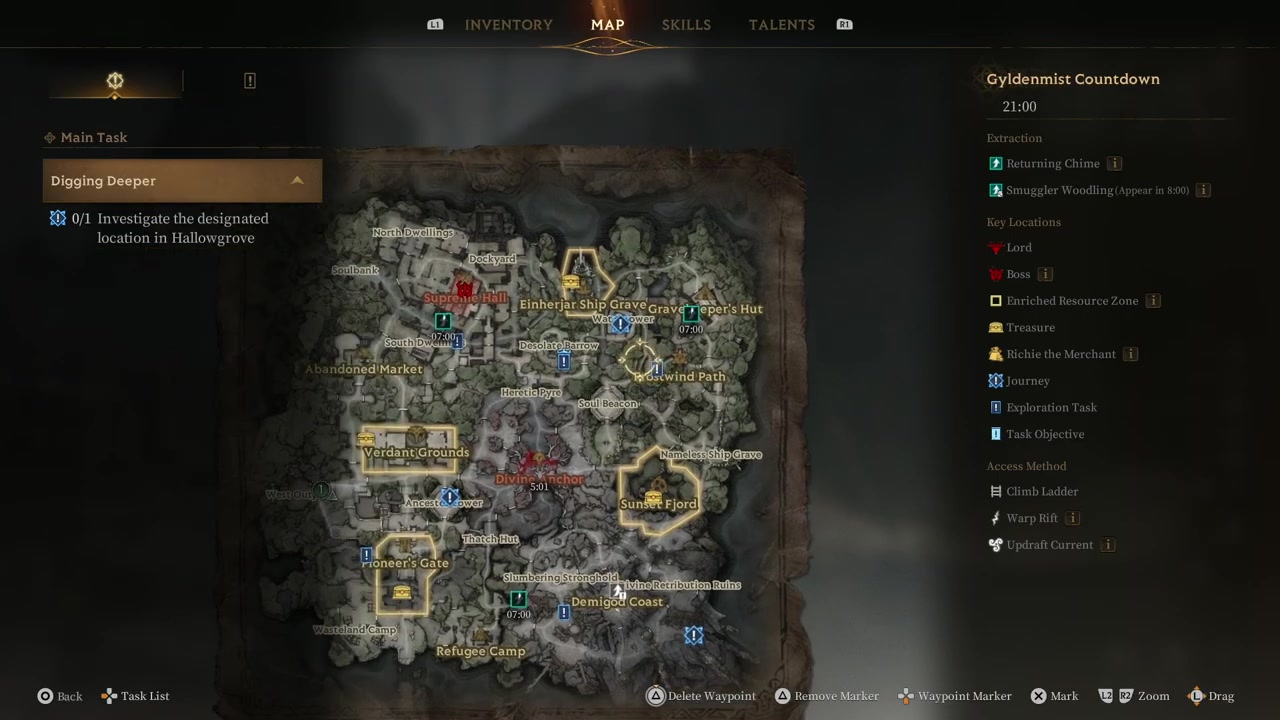
Load in, open your map, and look for the blue exclamation point marking the Digging Deeper objective.
STEP 4/8
Set the investigation waypoint

Set the blue exclamation point as your waypoint so you can track it through your HUD.
STEP 5/8
Navigate to the waypoint and avoid players
Sneak past or fight real players on your way, as dying will cause you to lose all your gear.
STEP 6/8
Climb to the top of the misty shack
Arrive at the waypoint and climb up top inside the misty shack to reach the objective area.
STEP 7/8
Fight the enemies blocking the chest
Take out the unavoidable enemies guarding the chest so you can safely reach the icon.
STEP 8/8
Interact with the glowing icon
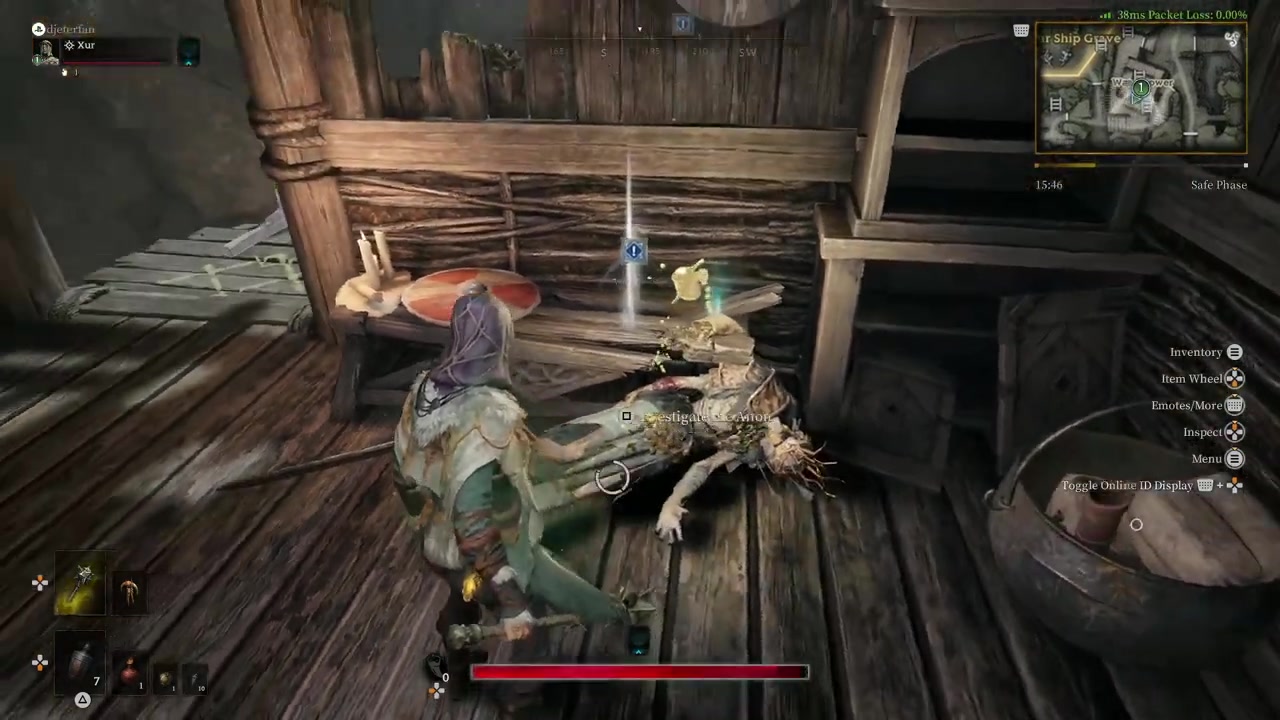
Investigate the glowing icon to register the objective and auto-complete the quest.
Set the blue exclamation point as a waypoint immediately after spawning so you can chart the fastest, safest route before running into other players.
Video help
Frequently Asked Questions
Is Hallowgrove the same as Hollow Grove?
Yes. The map is inconsistently named “Hallowgrove” in quest text and “Hollow Grove” in some menu resources. The official spelling has not been confirmed, but they refer to the same dark forest extraction map.
Do I need to extract safely to complete the Digging Deeper quest?
This is currently unconfirmed. Gameplay footage shows the quest auto-completing the moment you interact with the glowing icon, without requiring a safe exfil. However, other reports suggest dying after investigating might void your progress, so extracting is the safer bet.
What happens if I die on the way to the investigation point?
If you go down, you will lose all the gear you have earned during the match and respawn with weaker equipment. Because Hallowgrove is a PvPvE extraction map, you must either sneak past or fight other hunters to avoid this.
Where exactly is the investigation location in Hallowgrove?
The exact location varies by match, but it is marked by a blue exclamation point on your map. In gameplay, it was located in the northeastern end, inside a misty shack that requires you to climb to the top to reach the glowing icon.