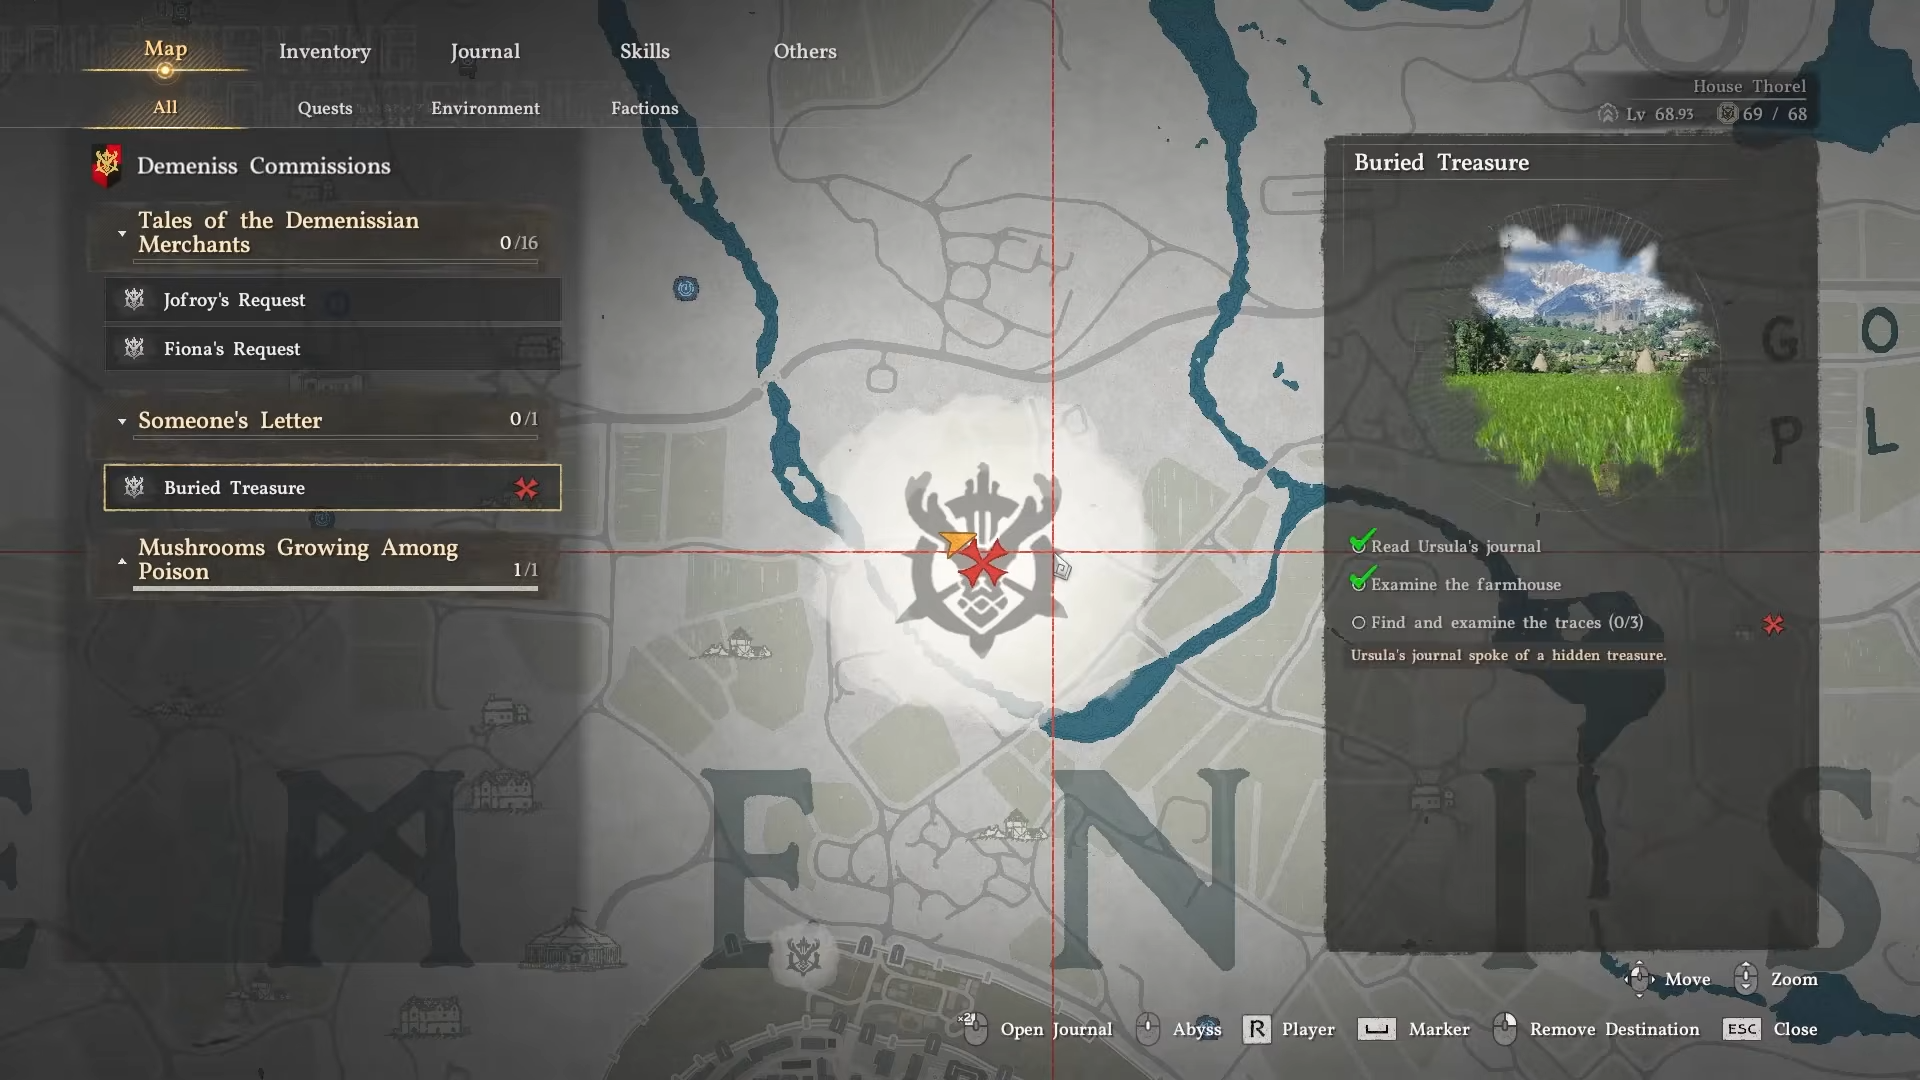
Ursula’s buried treasure in Crimson Desert is hidden in a secret room under the bridge of Demeniss Castle, and it contains the Black Sun shield plus a Palmar Pill.
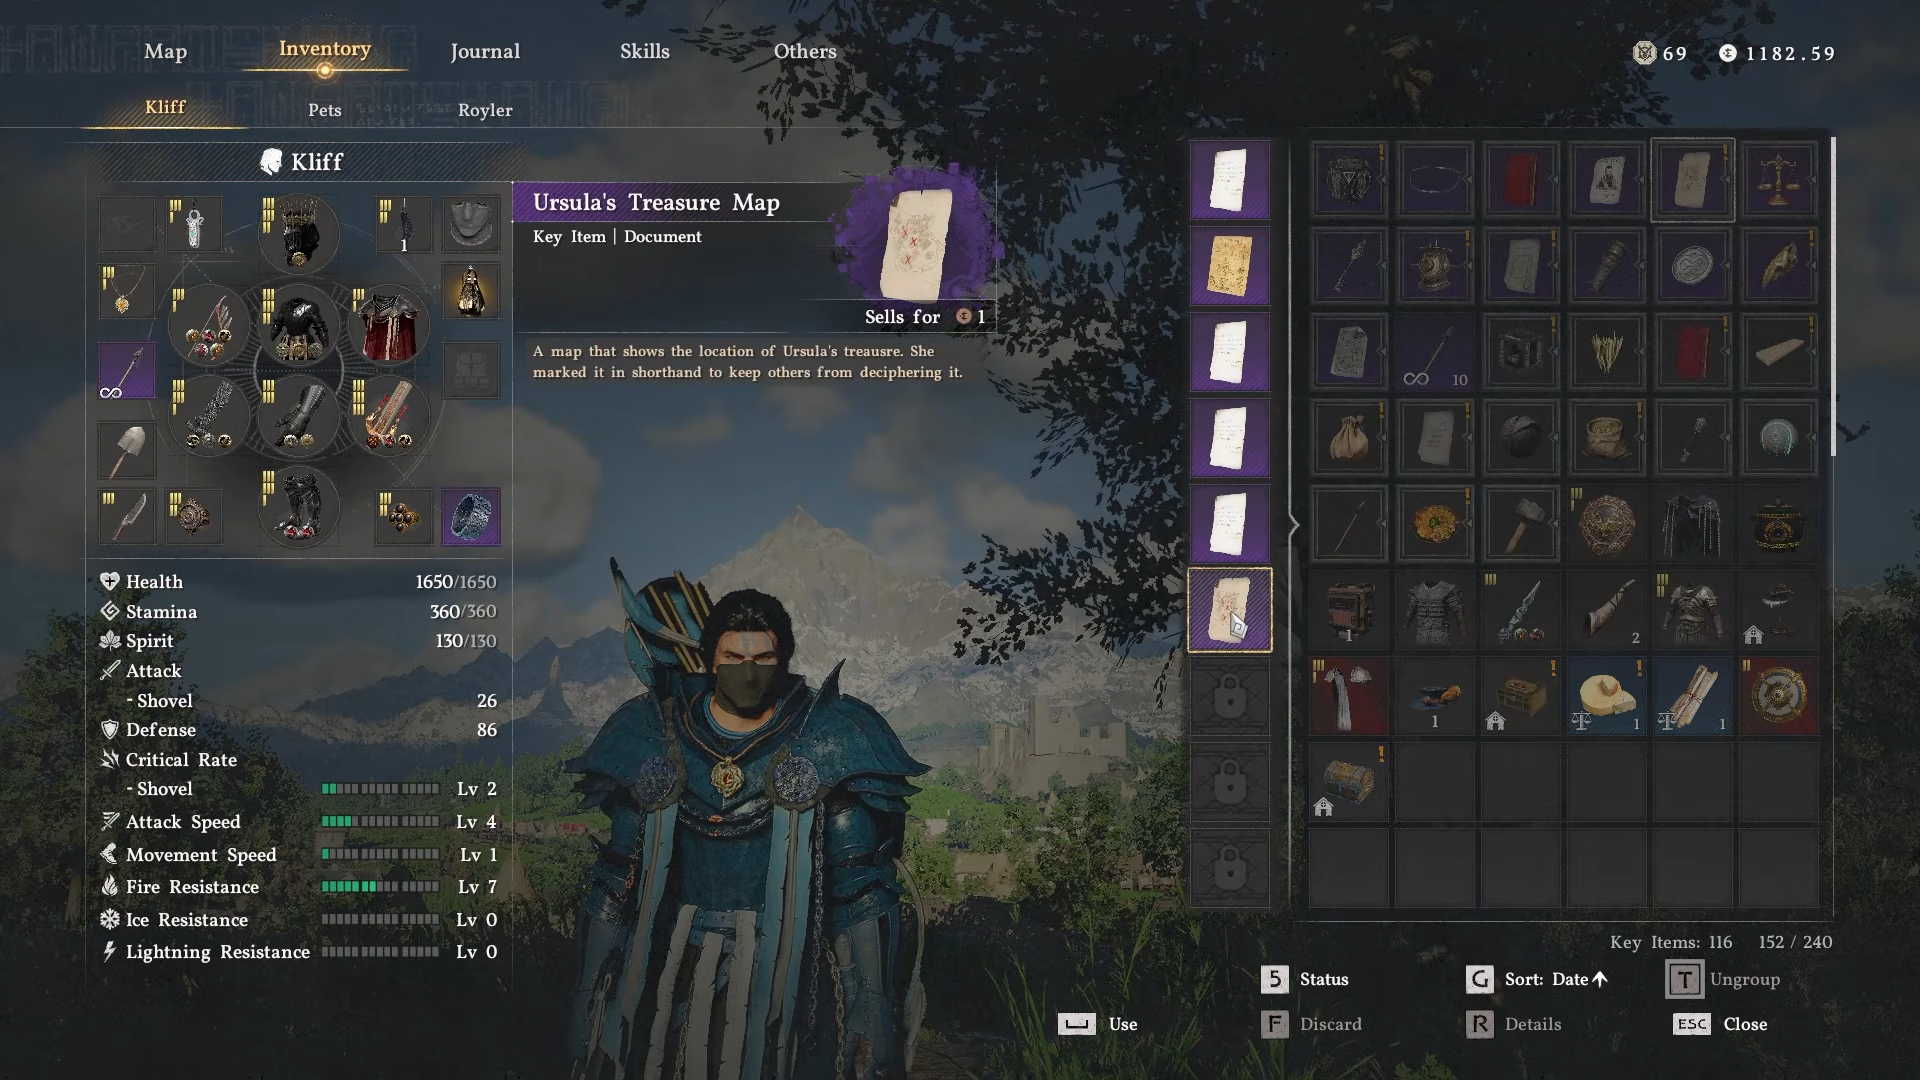
How to get Ursula’s treasure map
Step 1: Get Ursula’s Journal (quest trigger)
-
First, complete the Bounty Notice – Ursula contract in Demeniss and turn her over to the authorities.
-
Afterward, you’ll receive Ursula’s Journal, which unlocks the Someone’s Letter / Buried Treasure questline.
Step 2: Head to Sundell Farm and grab the map
-
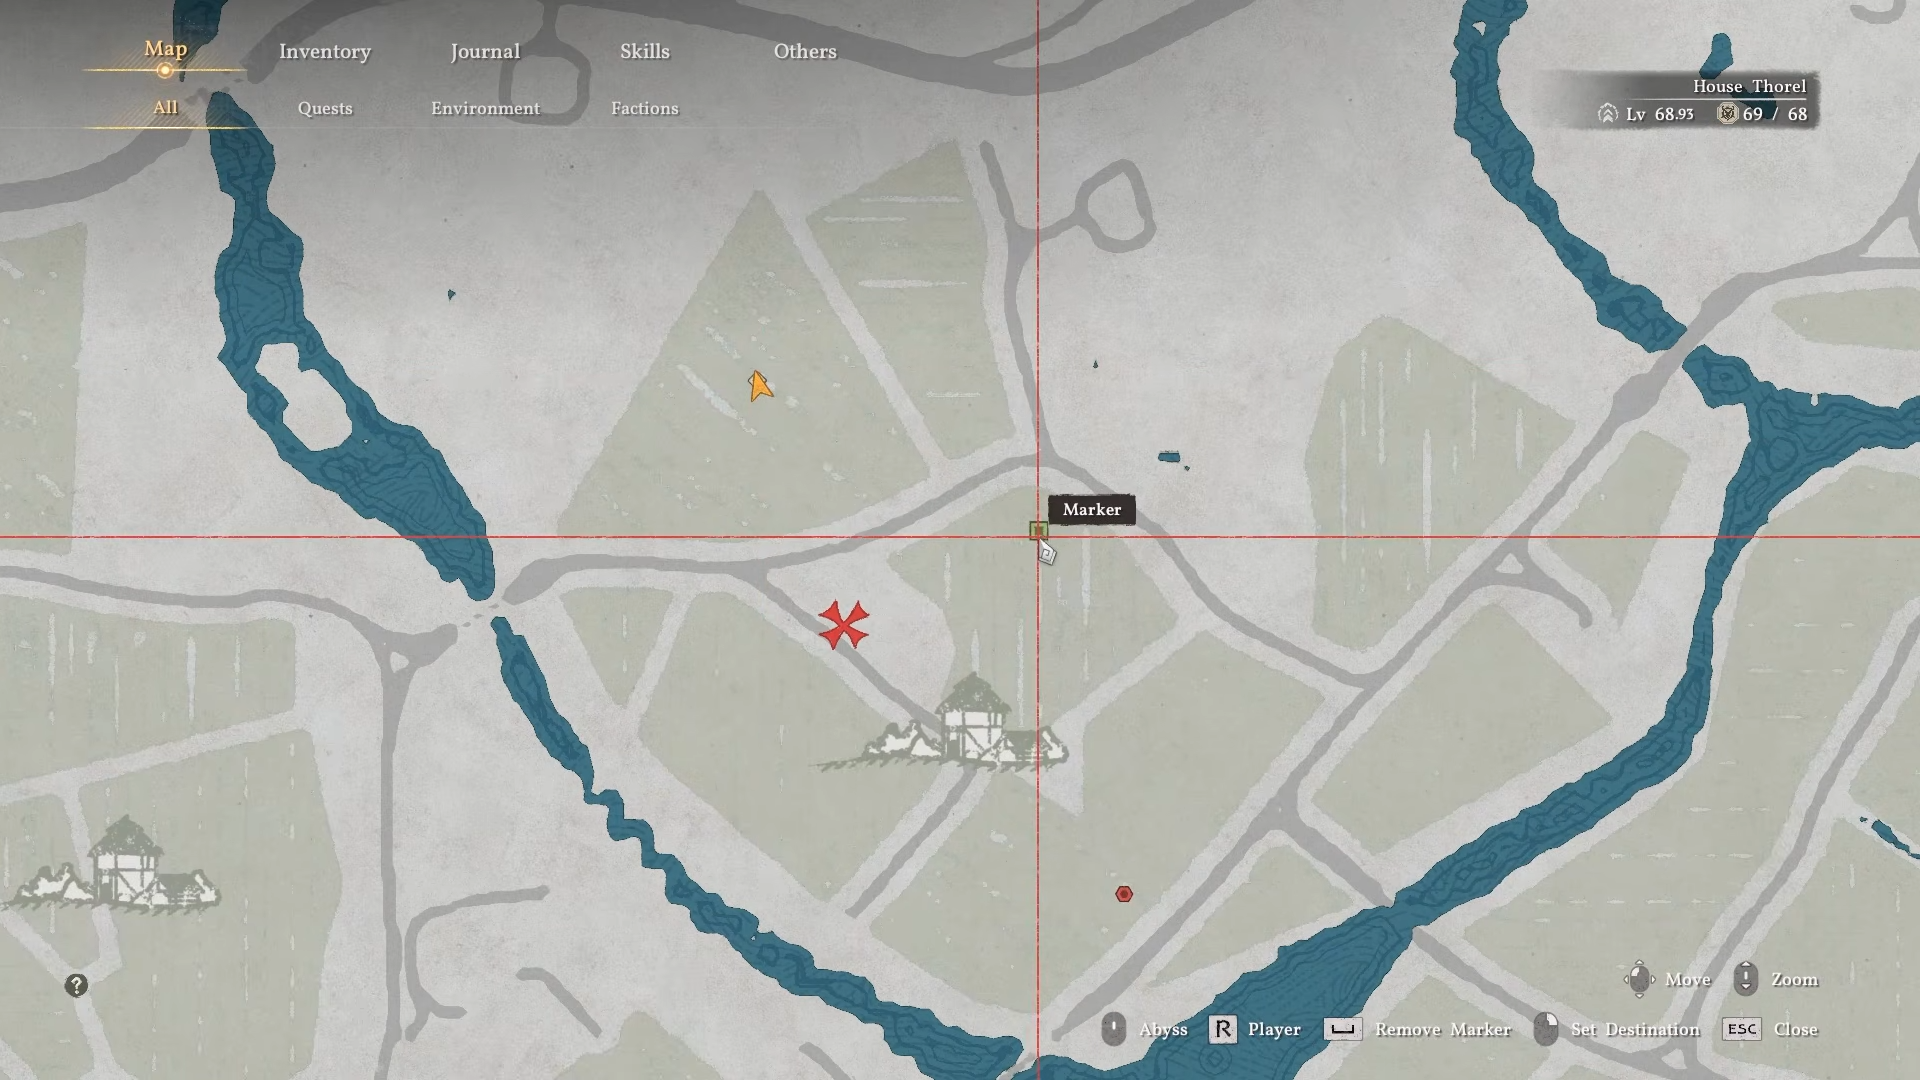
Go to Sundell Farm, near Demeniss; look for the farmhouse marked with a quest icon.
-
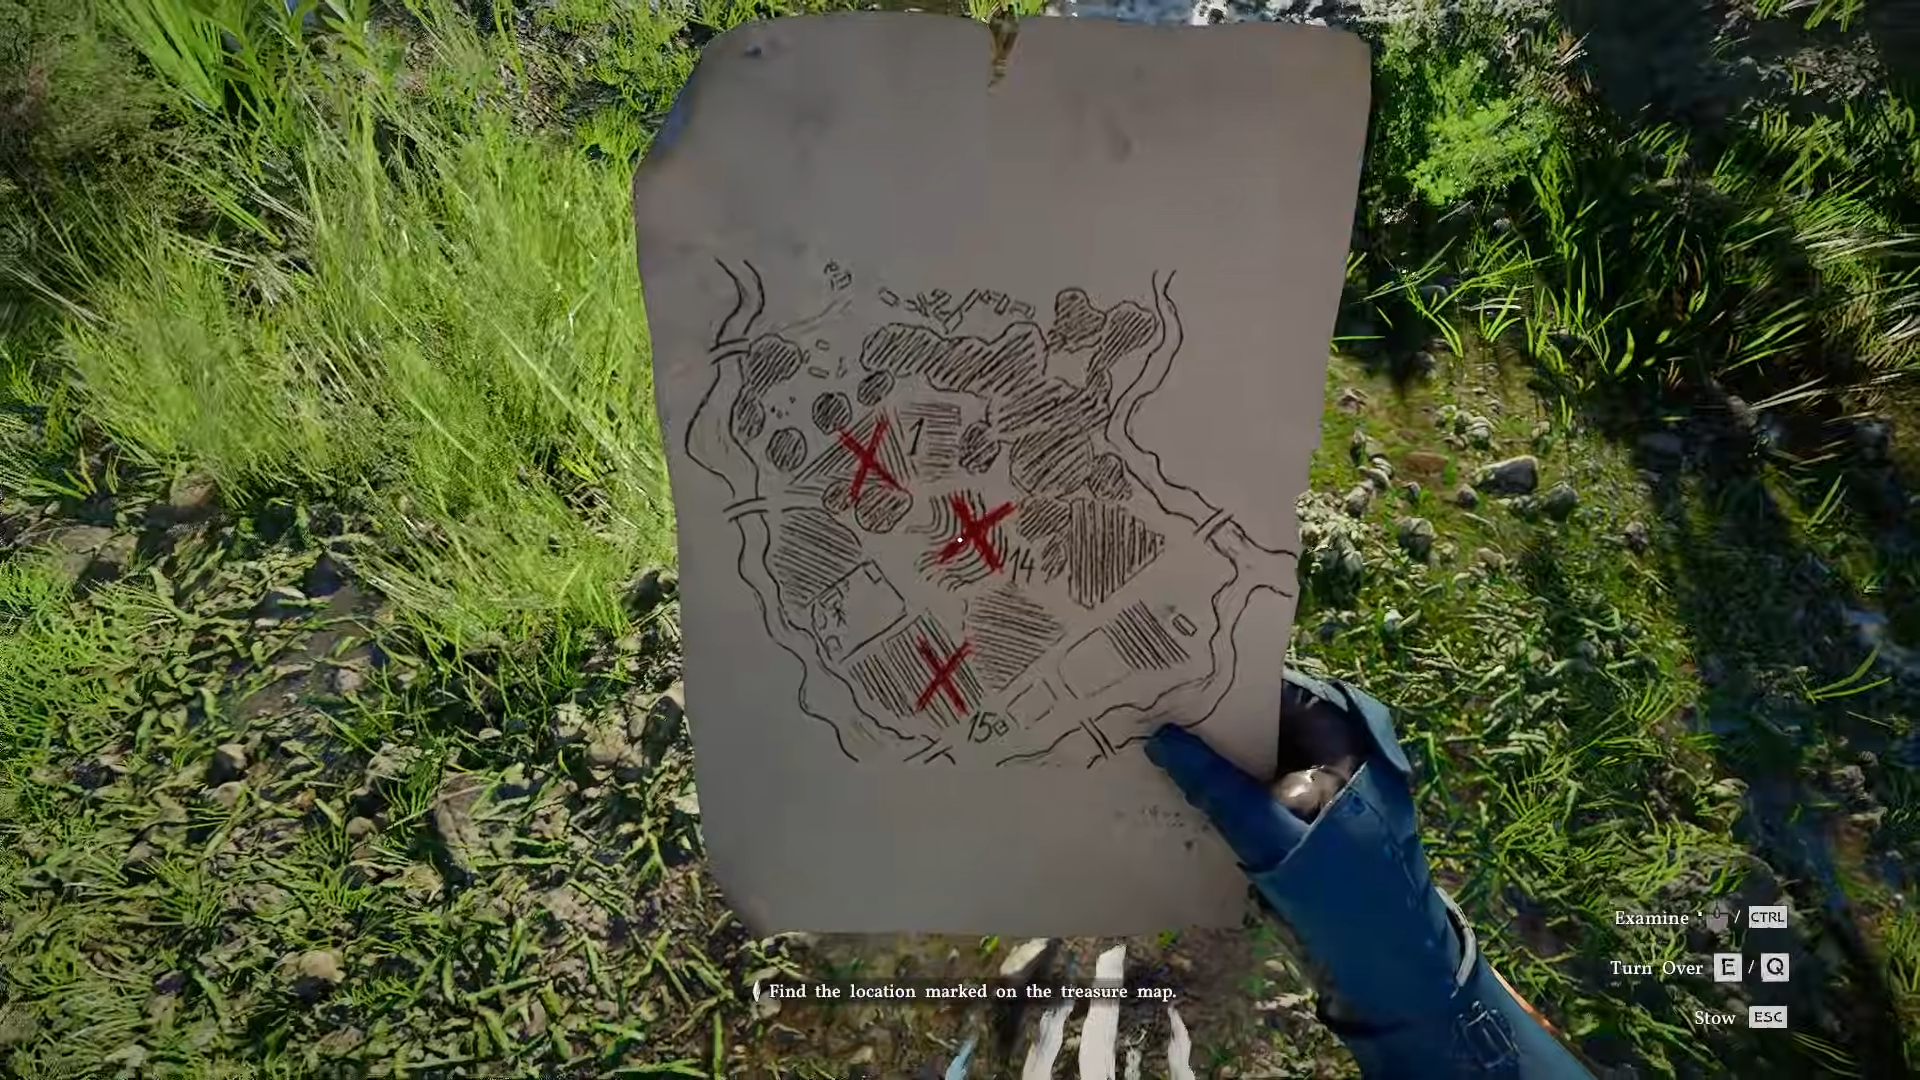
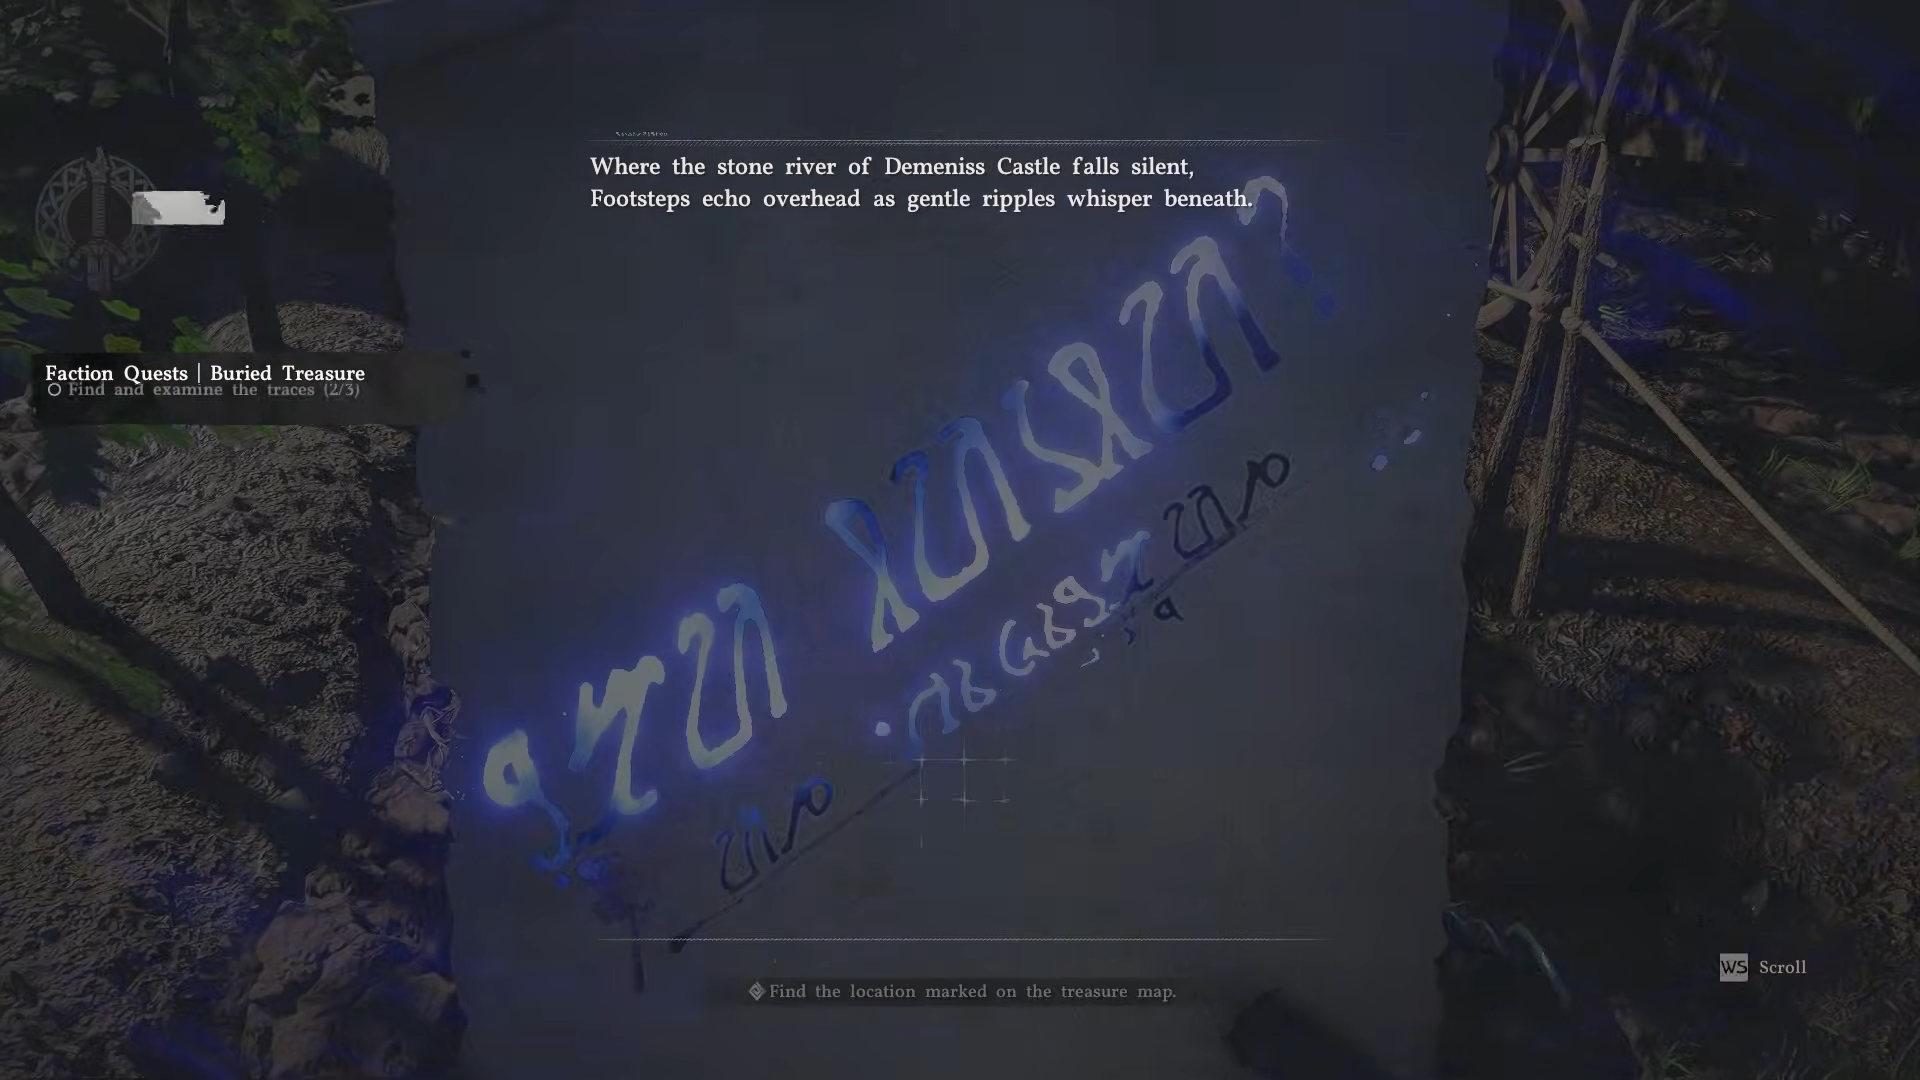
Enter the house and examine the table inside to pick up Ursula’s Treasure Map; this will visually mark three digging spots in a nearby field.
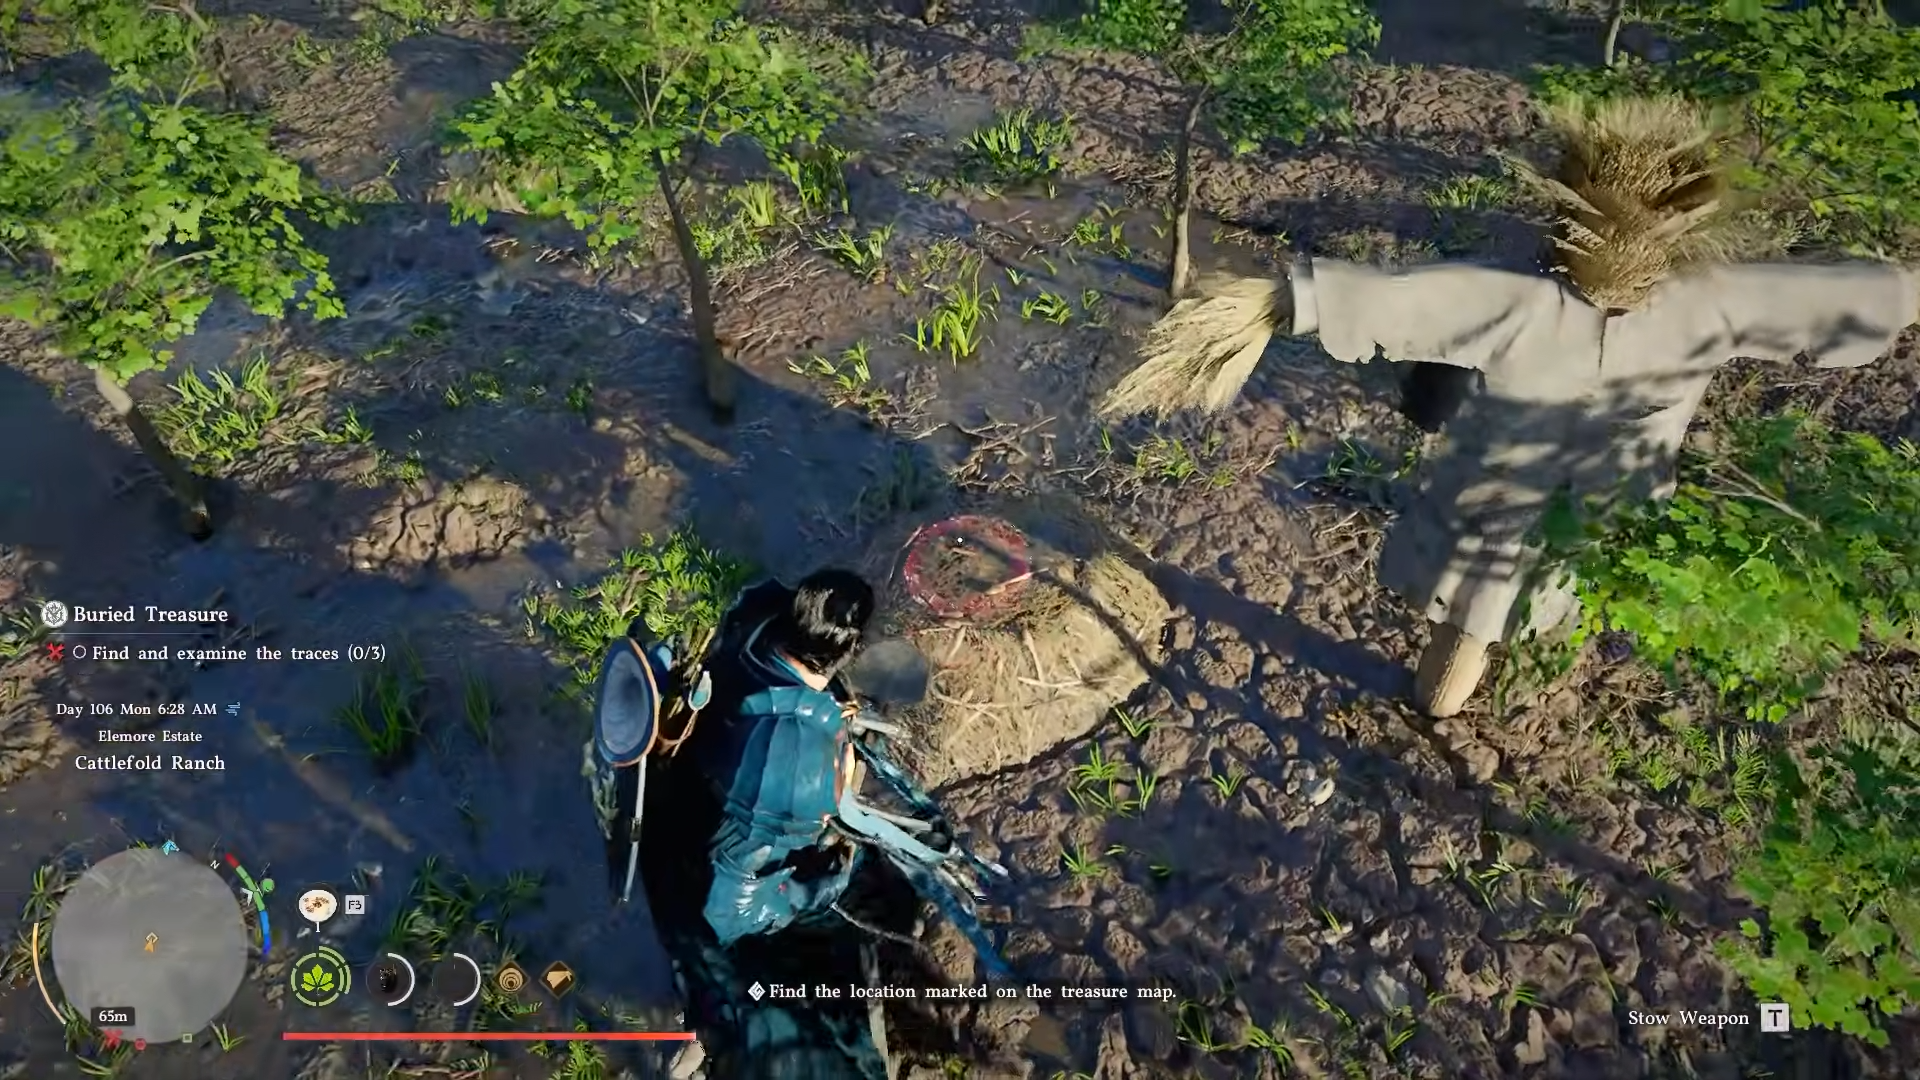
Finding and examining the three traces
Step 3: Get a shovel (if you don’t have one)
-
You’ll need a Shovel to dig up the three notes.
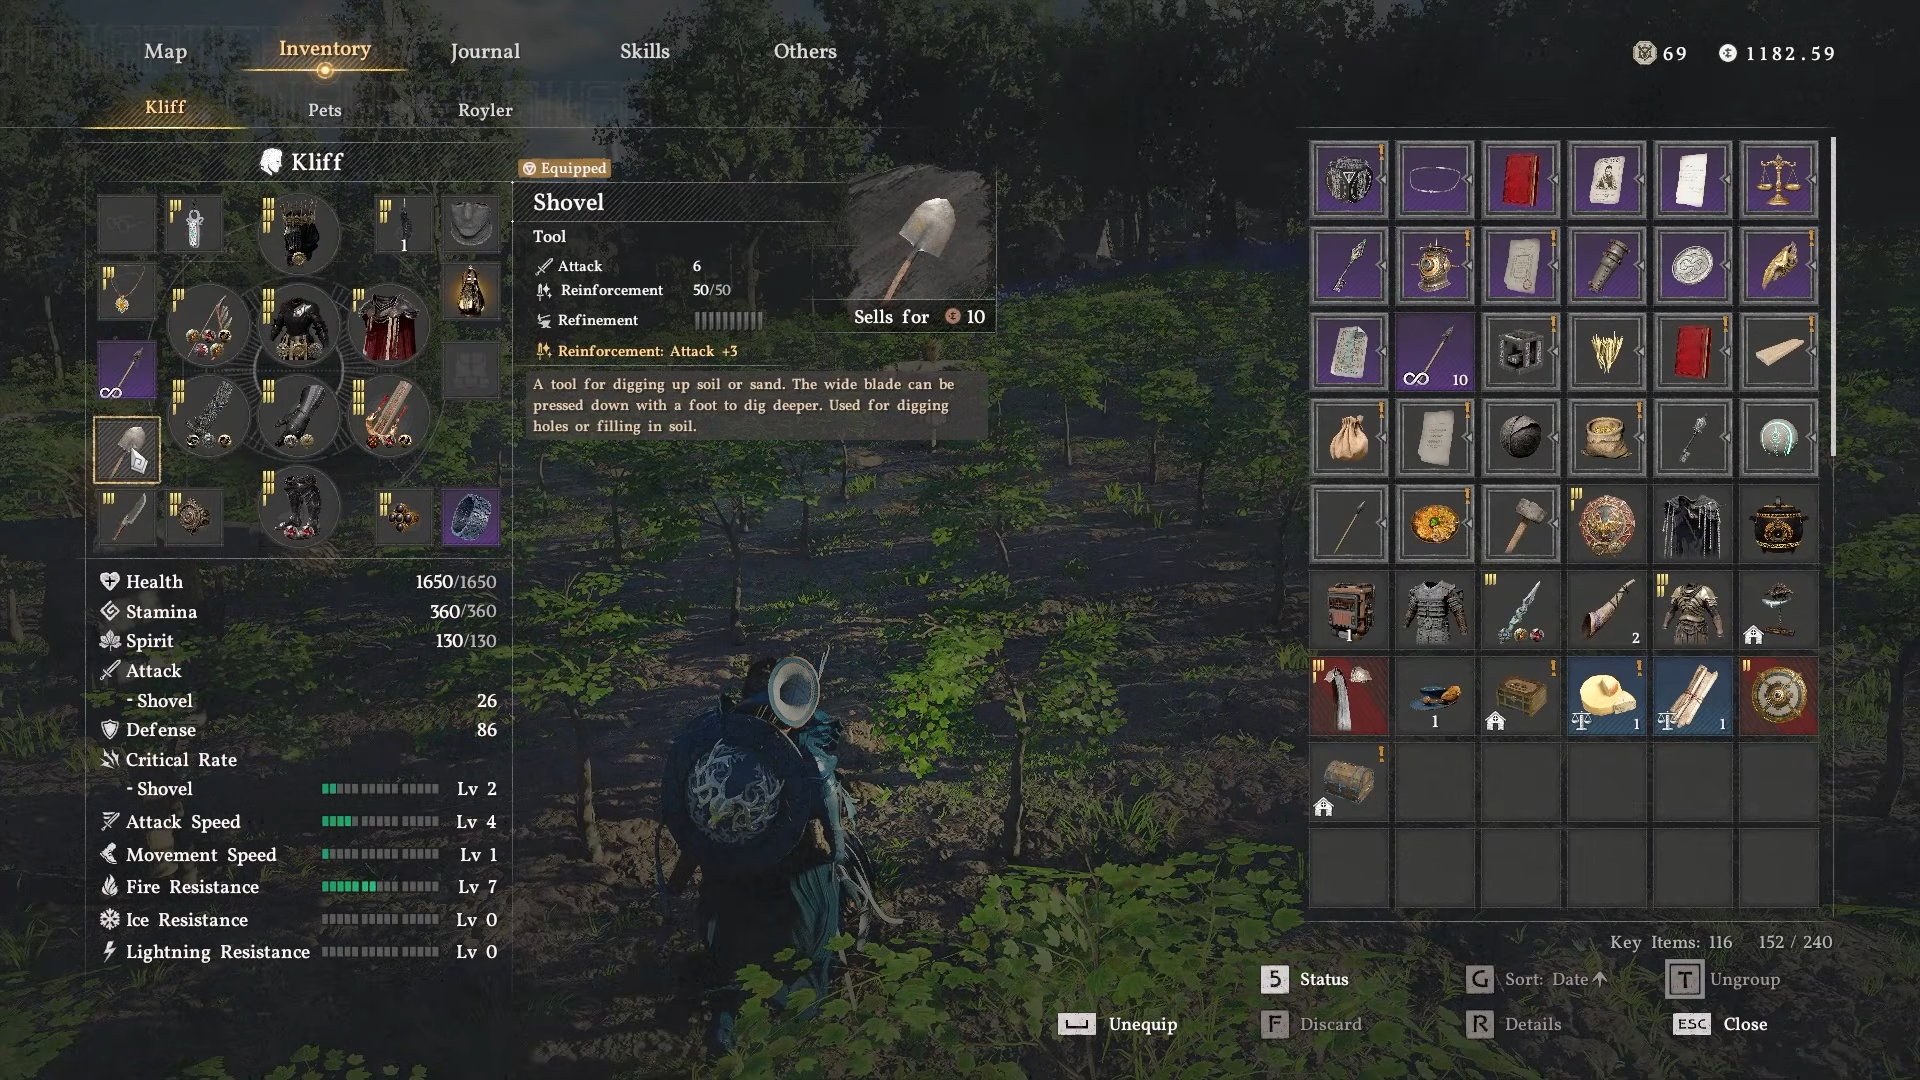
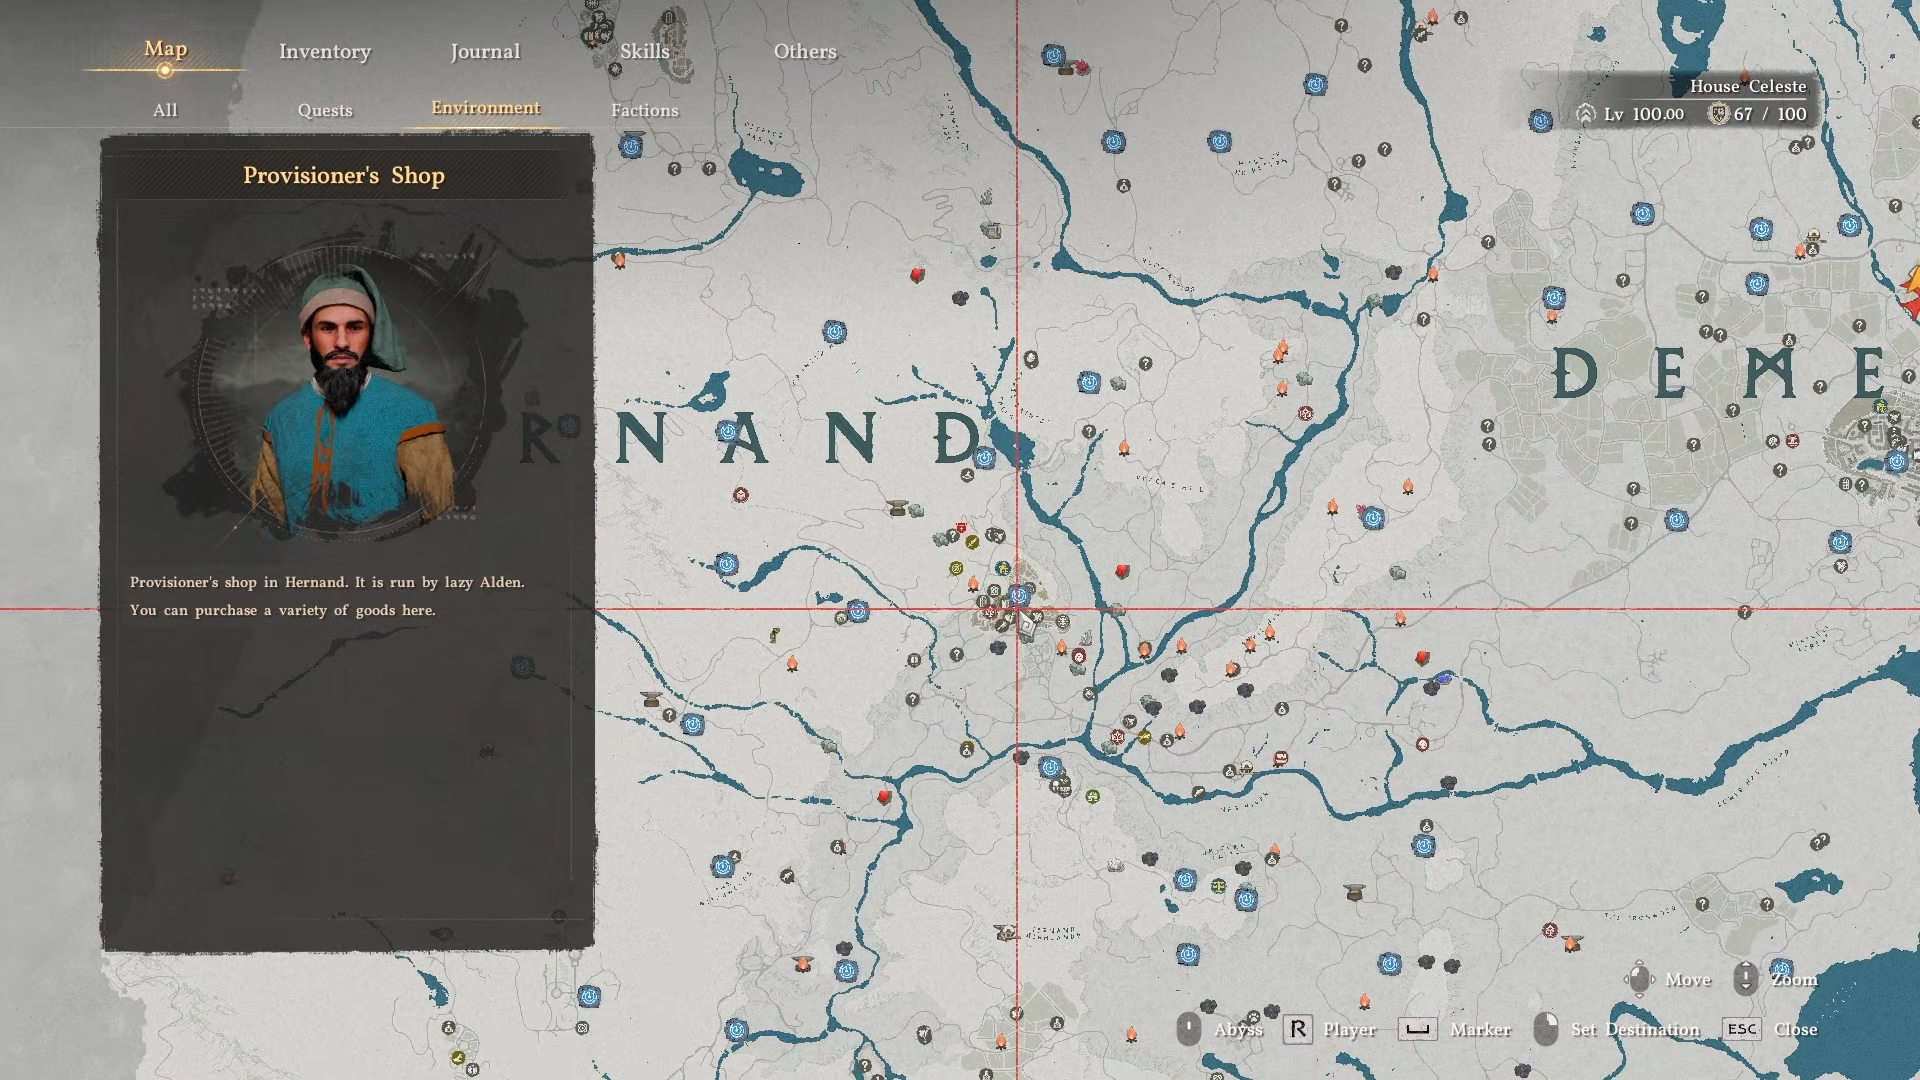
- If you don’t have one, buy it from a provisioner shop (for example the one near Hernand) or scavenge it around the farm.
-
Once equipped, keep the shovel in your hands so you can use the “Shovel” / “Aim+Shovel” prompt when you see suspicious mounds.
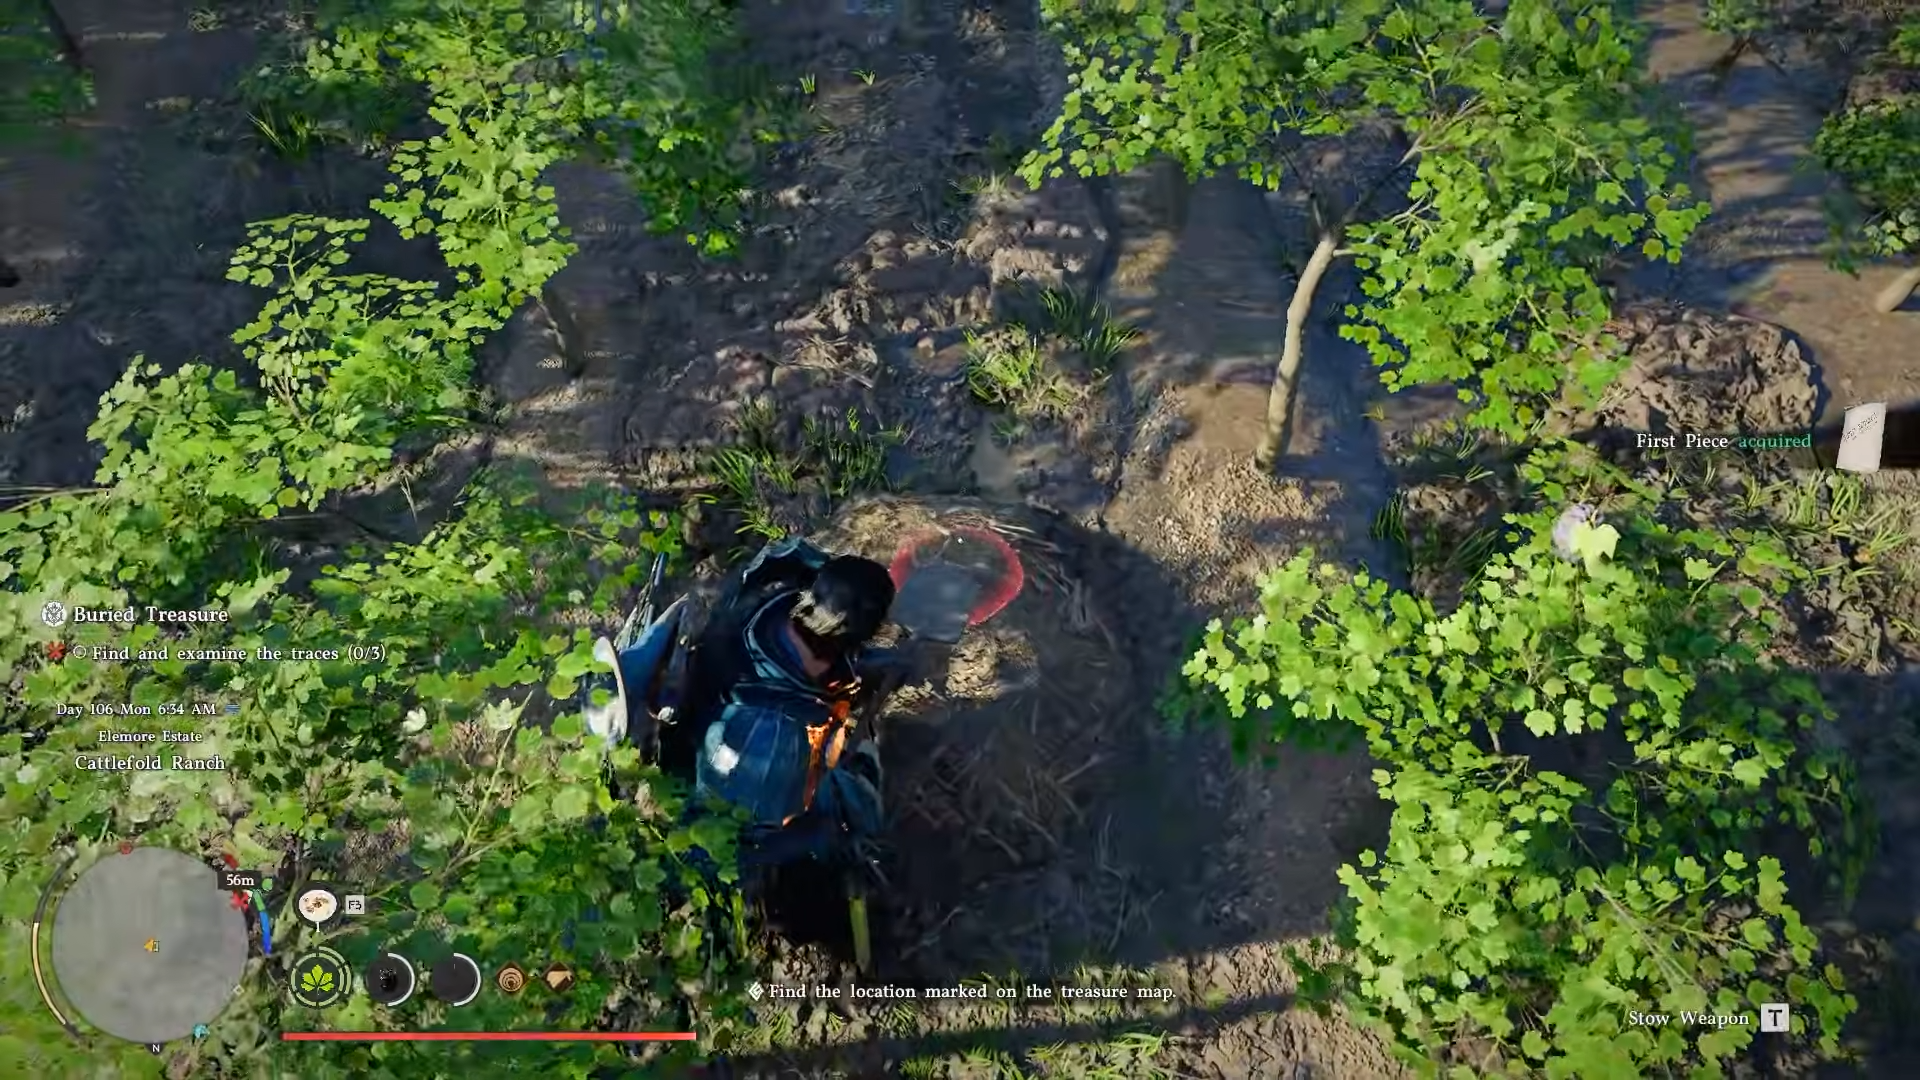
Step 4: Trace #1 (First Piece)
-
The First Piece is buried in the northwest field.
-
Near a scarecrow in the middle of that plot.
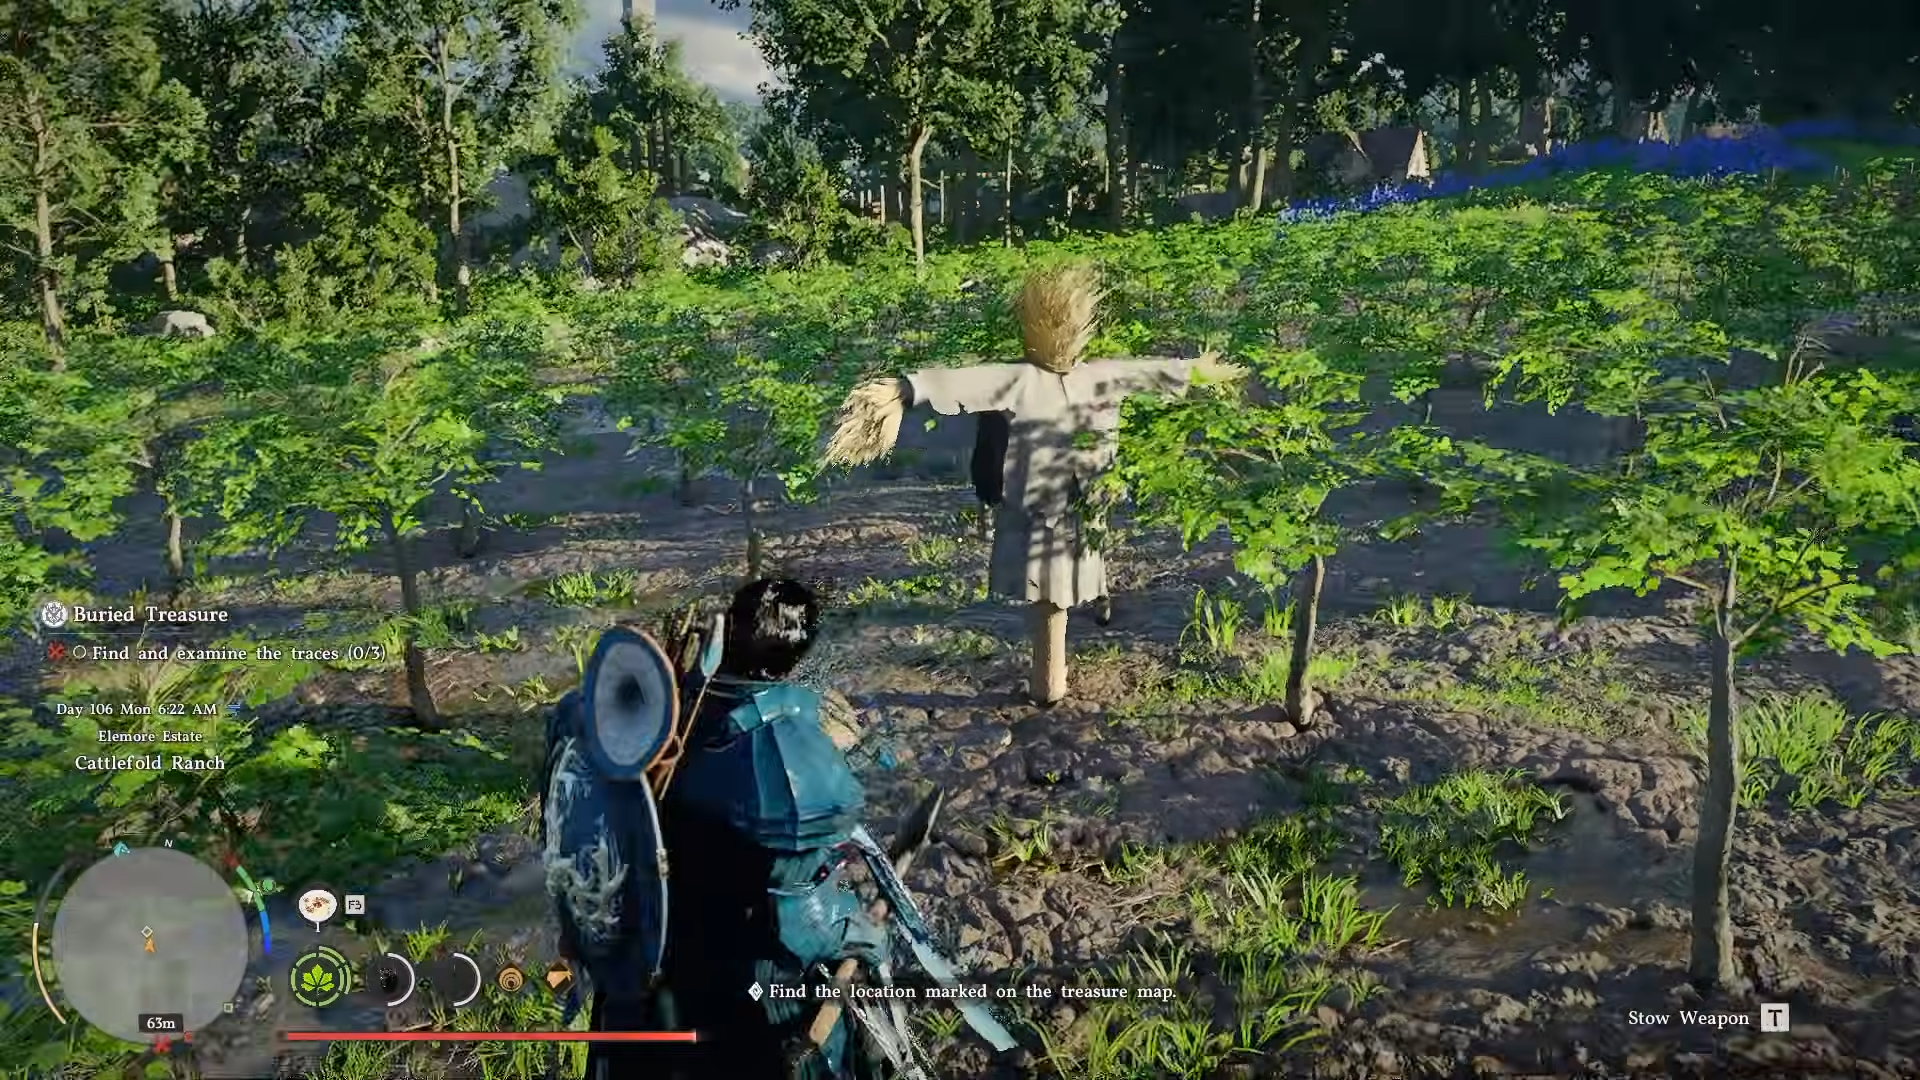
-
Deploy your shovel, aim at the small mound, and dig.
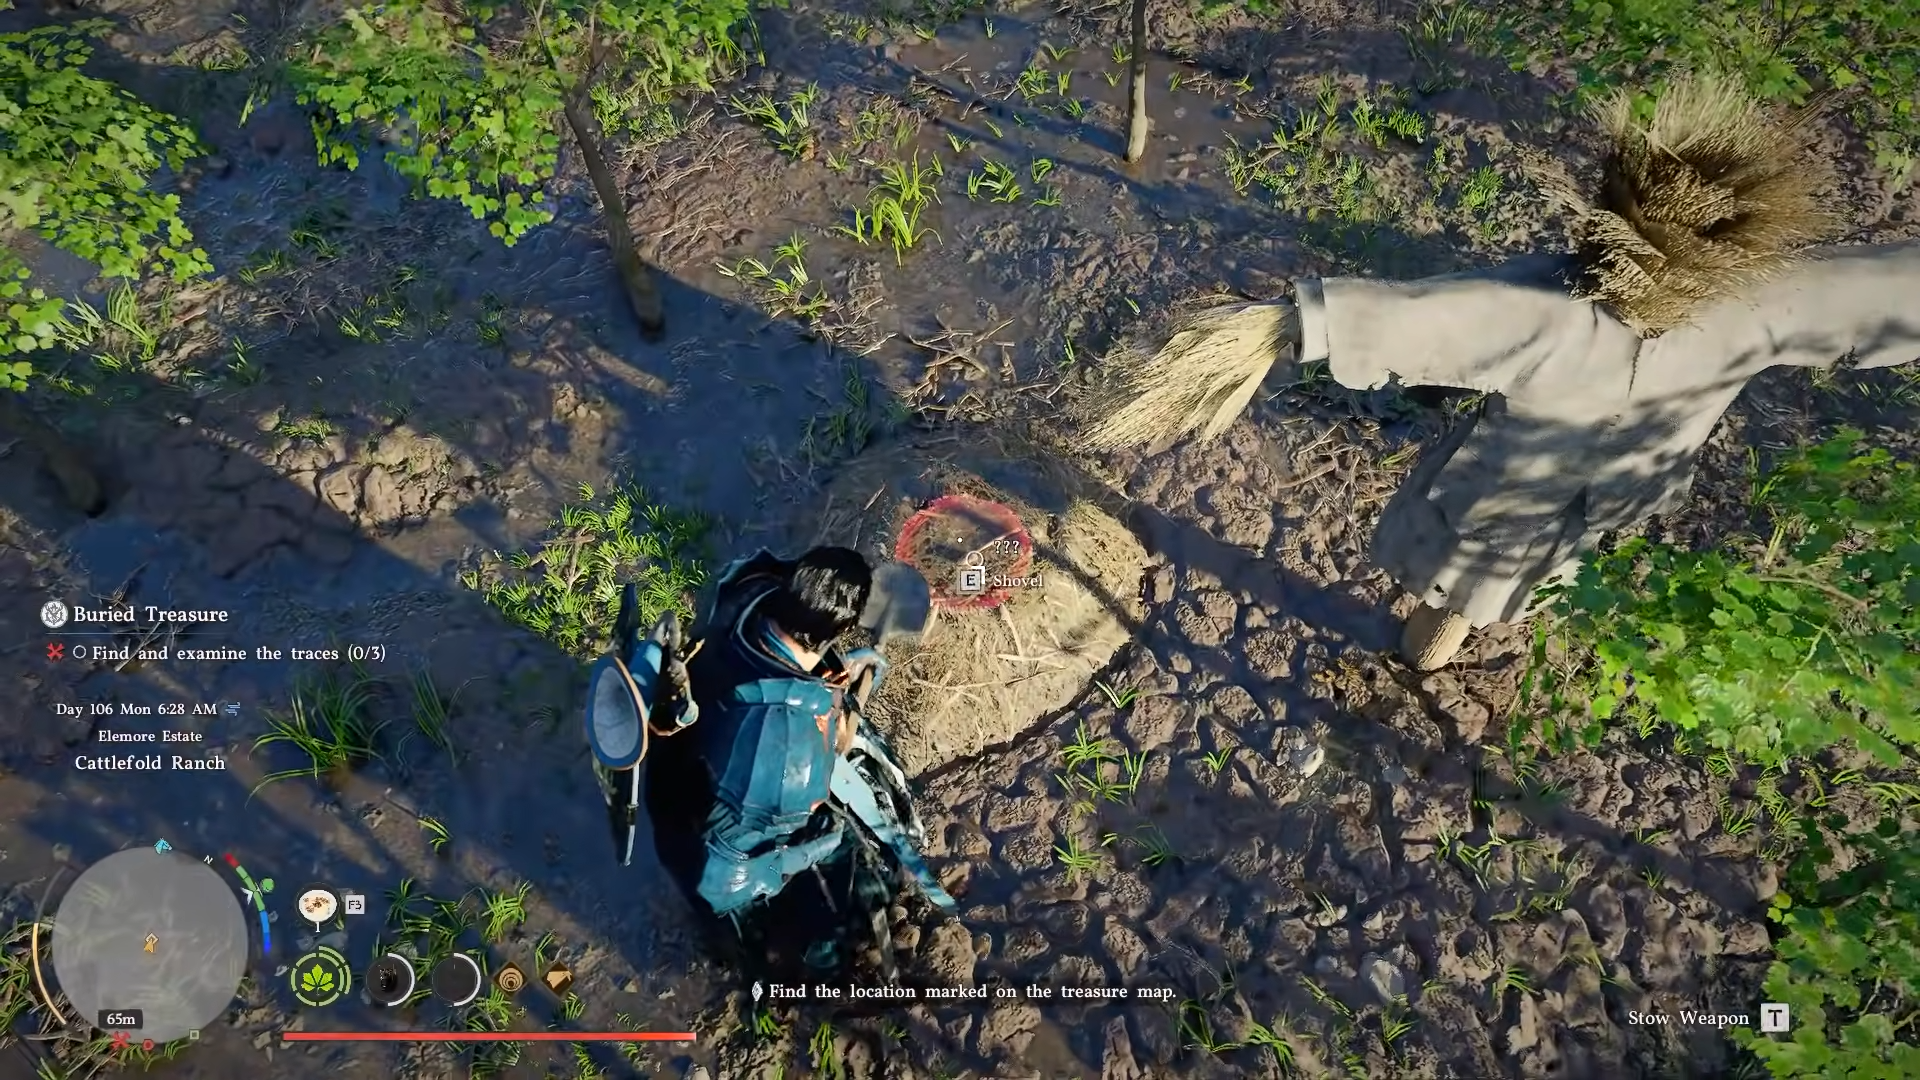
-
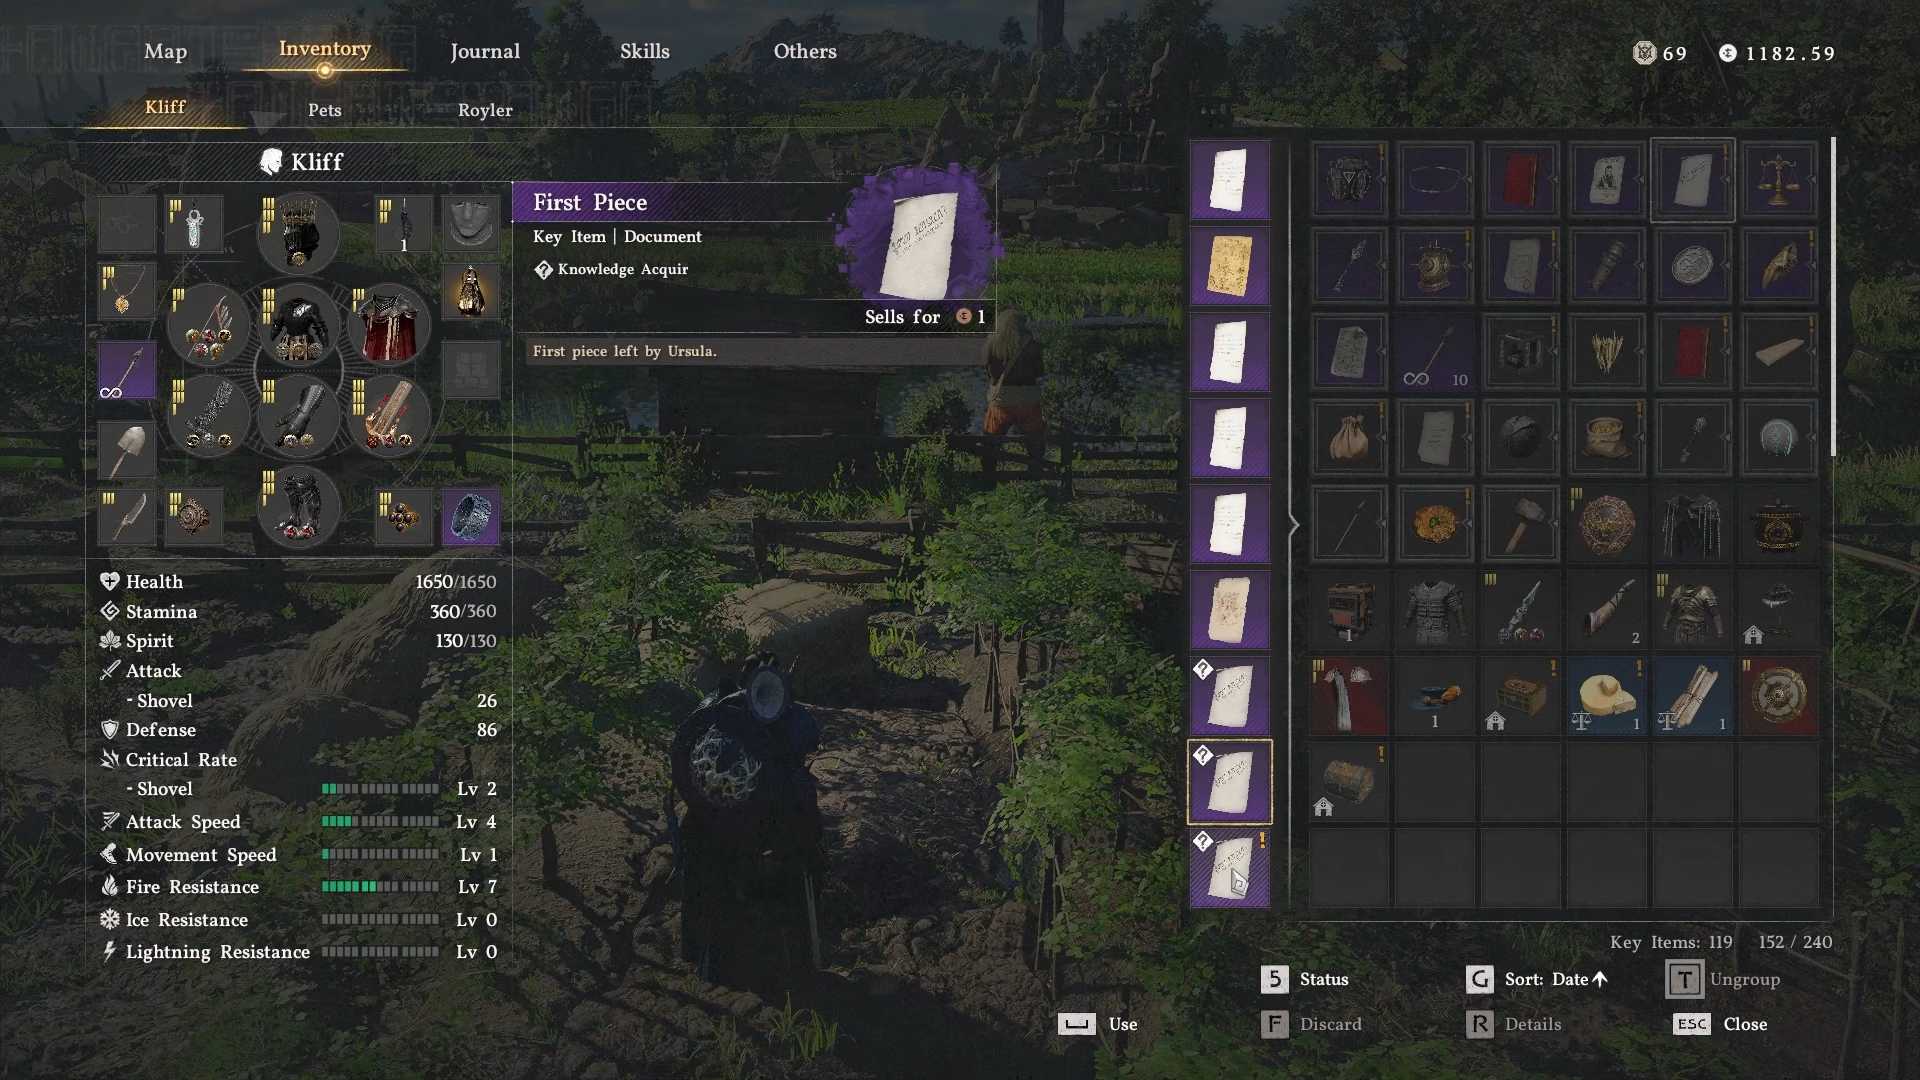
Then open your inventory and read the “First Piece” note to “examine” it and progress.
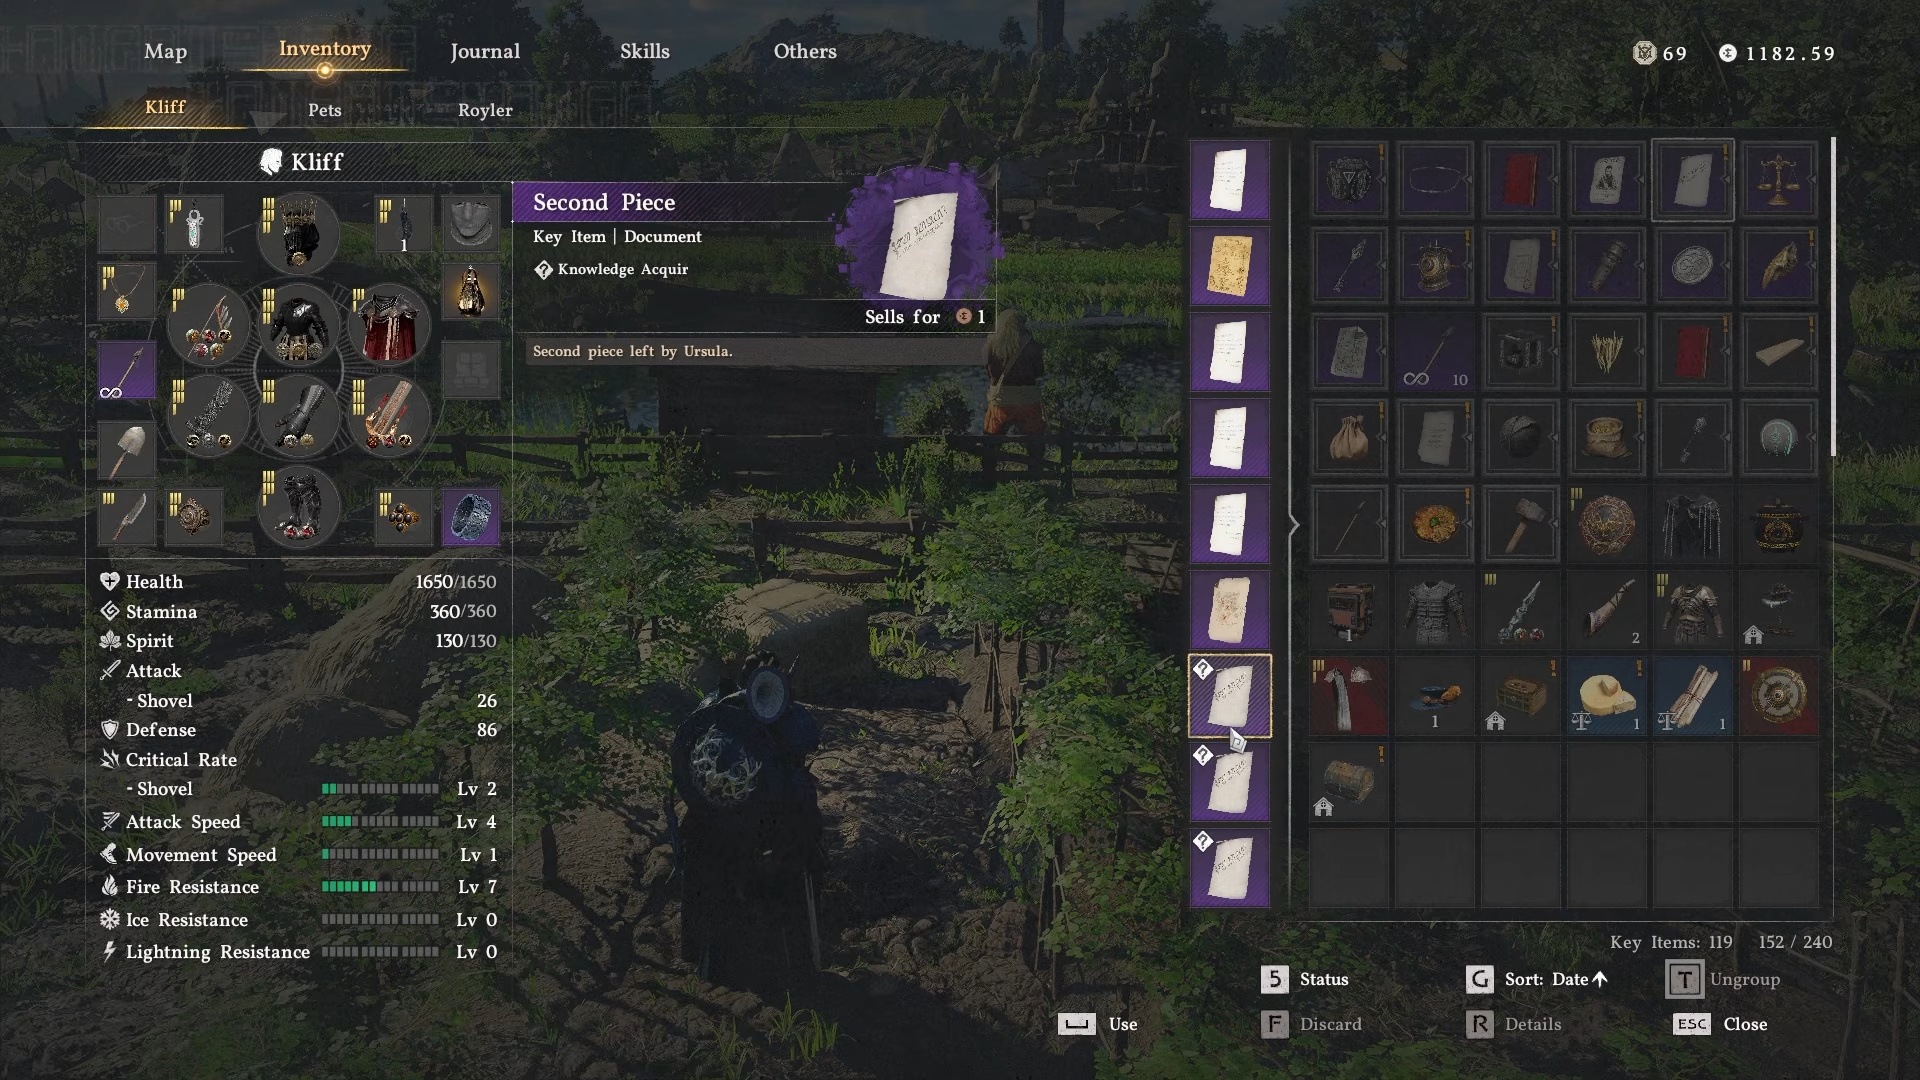
Step 5: Trace #2 (Second Piece)
-
The Second Piece is just north of the central field, in a slightly raised area visible on the treasure‑map overlay.
-
Again, use the shovel on the mound, loot the note.
-
And read it in your inventory so the objective registers as examined.
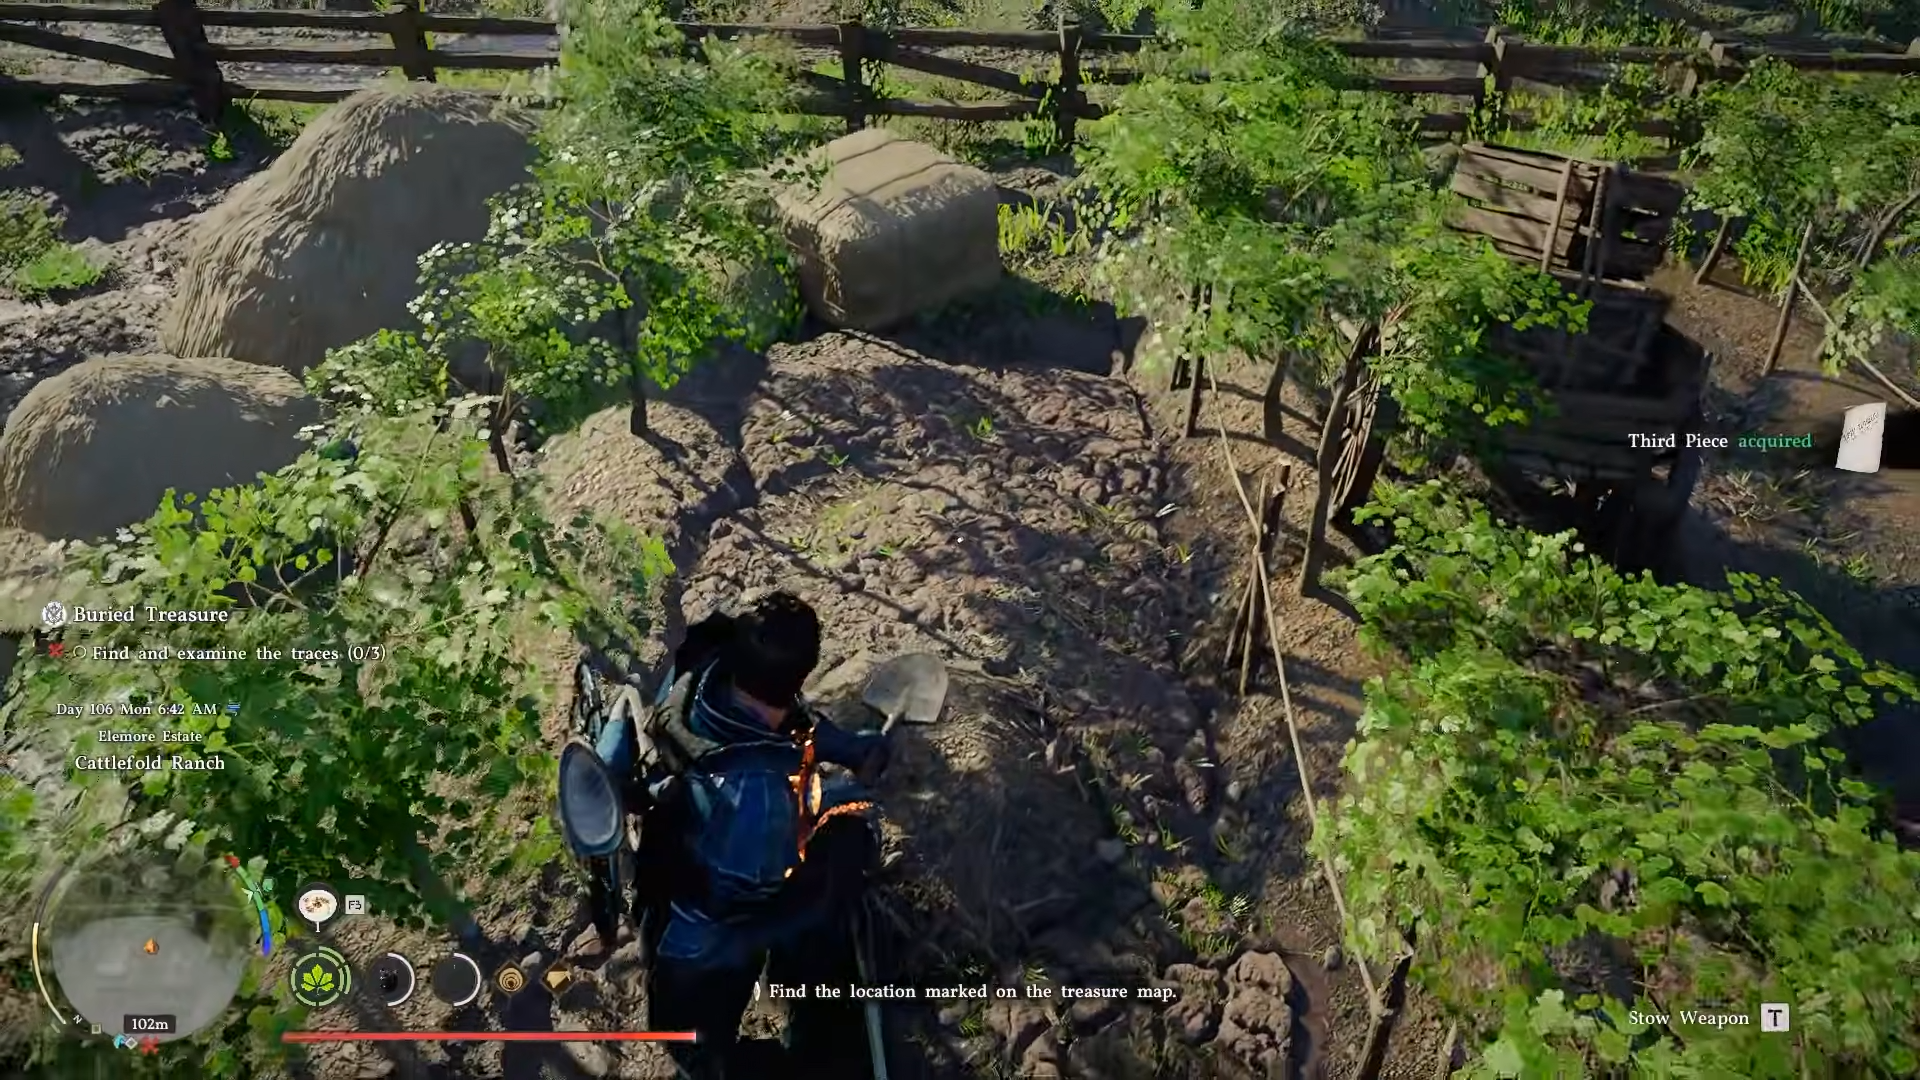
Step 6: Trace #3 (Third Piece)
-
The Third Piece lies on the south side of the southern field, close to the fence marking the edge of the farm.
-
Dig at the mound, pick up the note.
-
And read it in your inventory.
-
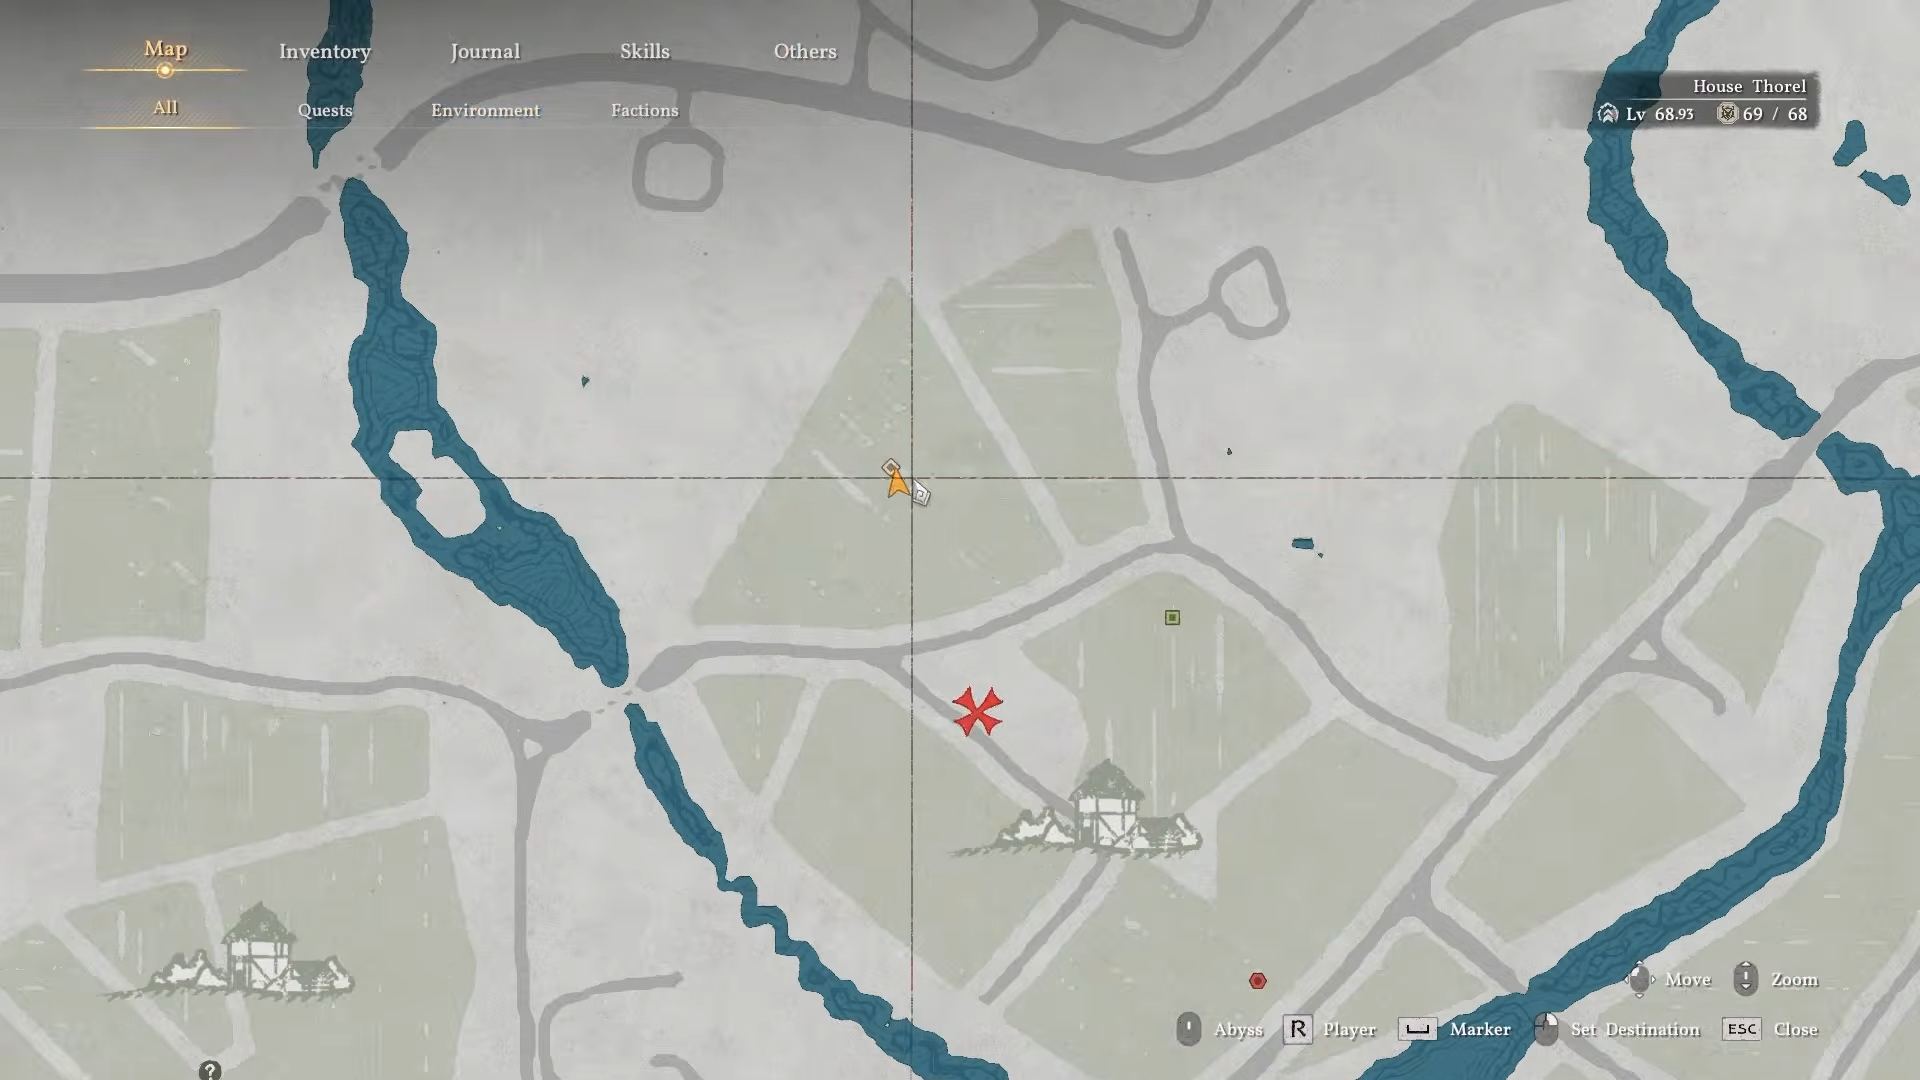
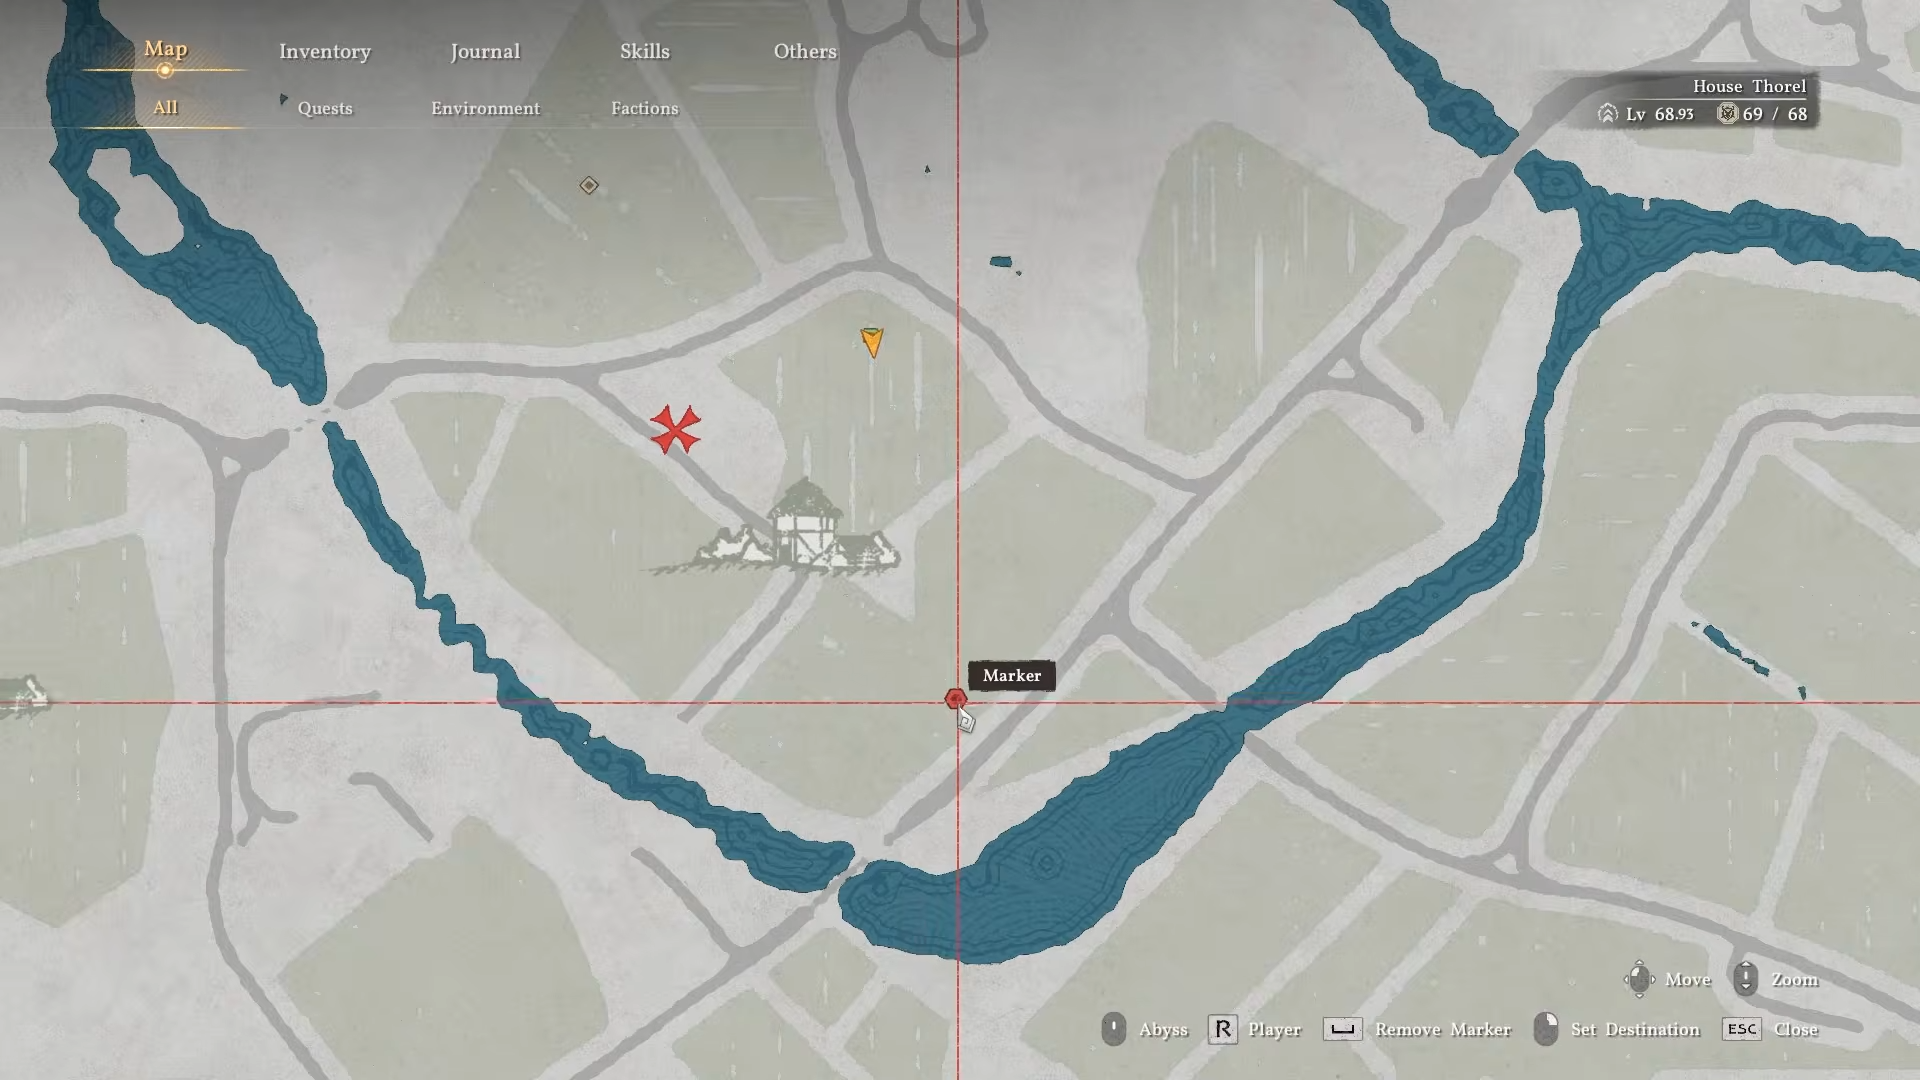
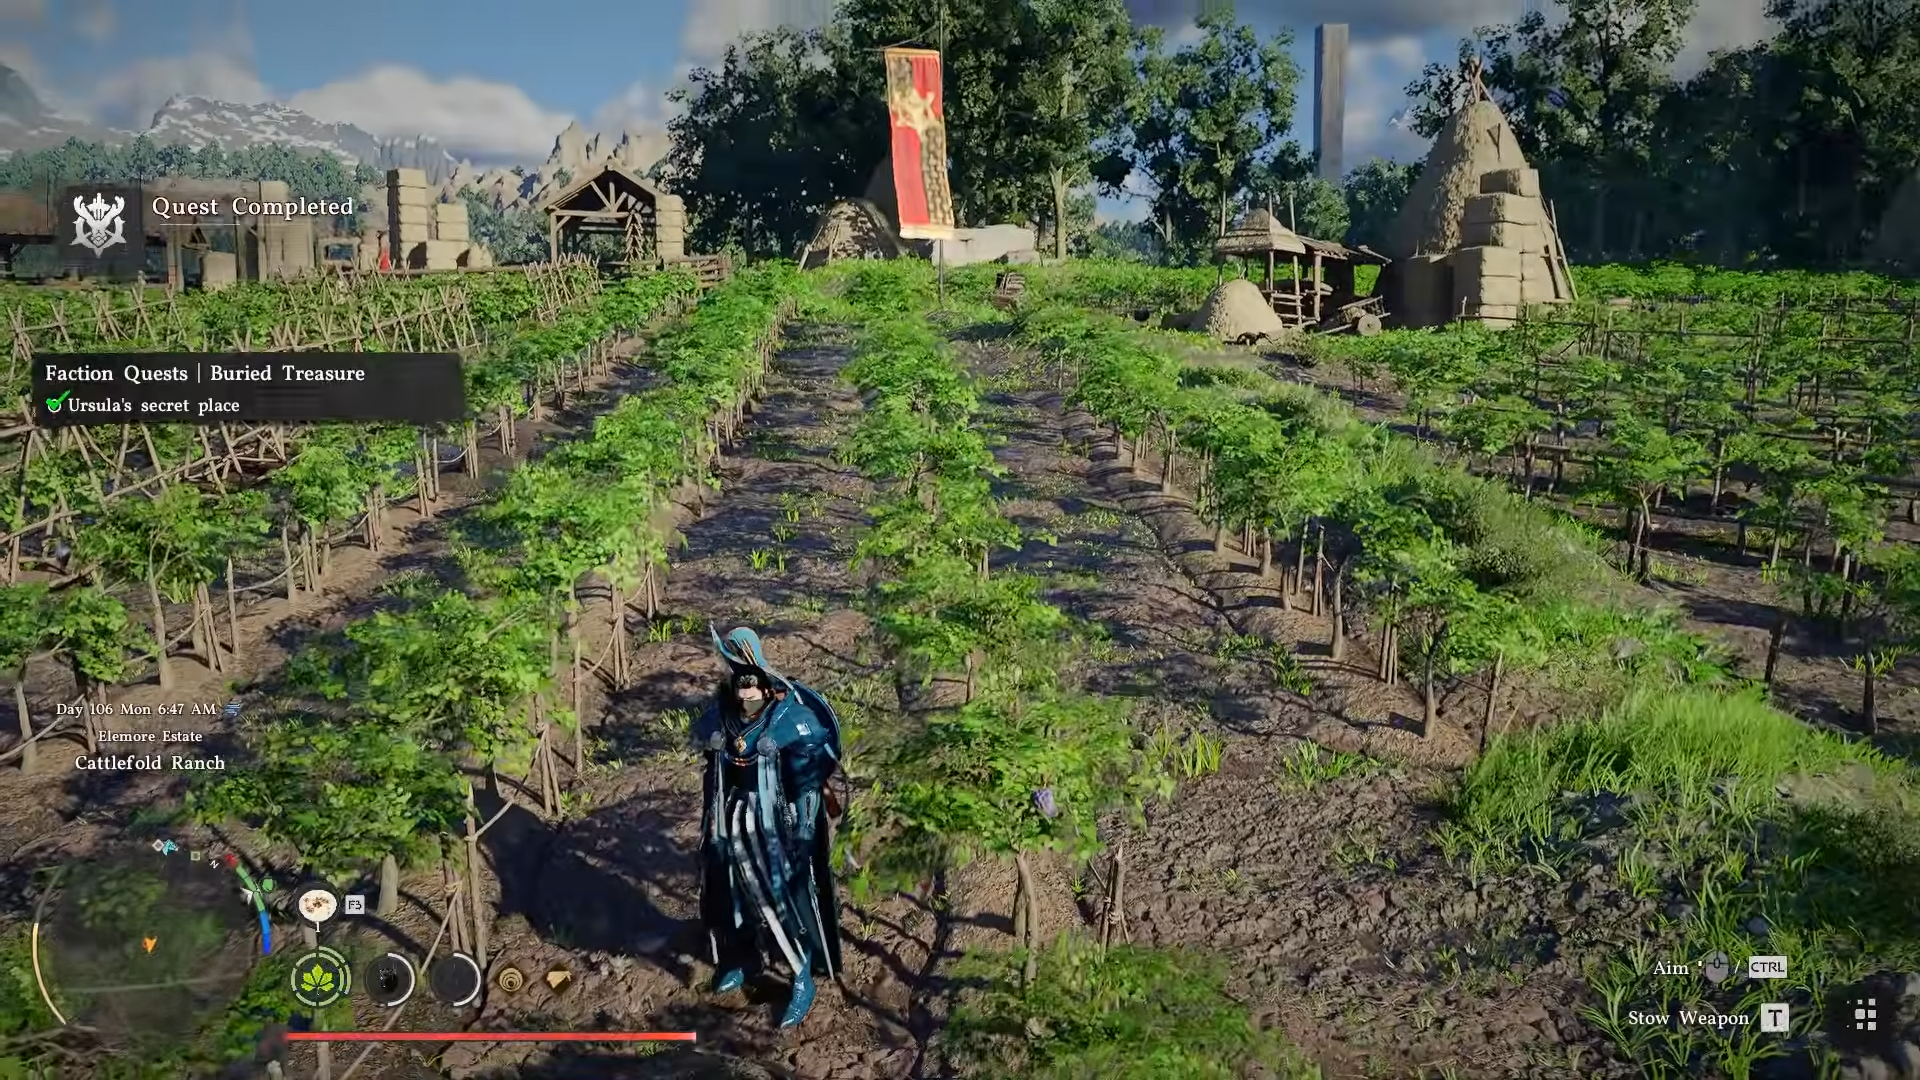
Once all three traces are examined, the map will explicitly mark “Ursula’s secret place” near Demeniss Castle.
Step 7: Move to Demeniss Castle bridge
-
Fast‑travel or run to Demeniss Castle and head to the main bridge over the water; the secret chamber is just underneath this bridge structure.
-
If you’ve already found the chest, you may see a small chest icon on the bridge; if not, use the map marker from the third trace.
Step 8: Climb the middle pillar and use abilities
-
Under the bridge, climb the wall of the middle pillar until you reach the section with a slightly different‑looking panel in the masonry.
-
With the Resist button held, press the Force Palm ability into the wall; the panel will rotate and open, dropping you into a hidden chamber with a lootable treasure chest.
Step 9: Loot the chest and finish the quest
-
Open the chest to claim the Black Sun shield and a Palmar Pill; this also completes the Buried Treasure objective if the quest is active.
-
Even if you skipped the quest, you can still pick up the shield and then manually complete the quest later via the journal, provided the three traces have been read.
Critical mistakes to avoid
-
Not reading the notes in inventory – digging the three traces is useless if you don’t open each one and “examine” it; the quest will stall at 0/3 even though you’ve already dug.
-
Missing the correct pillar – the secret chamber is only on the middle pillar under the main bridge; climbing the side pillars or upstream/downstream stones will not trigger the rotating panel.
-
Trying without Force Palm – if you haven’t unlocked Force Palm, the wall interaction will fail; make sure this ability is enabled before attempting the rotating‑wall trick.