What to know
- You can record gameplay using the in-game Photo Mode’s video feature.
- The recording system allows free camera movement and adjustments while filming.
- Captured clips are automatically saved to your in-game album.
- You don’t need external recording software for basic gameplay capture.
If you’ve been exploring the vibrant world of Neverness to Everness, you’ve probably noticed how cinematic everything feels. From city streets to high-speed chases, the game practically invites you to capture and share your experience. Fortunately, the built-in recording feature makes this incredibly easy once you understand how it works.
Below is a complete, updated guide that walks you through everything you need to know about capturing videos in NTE, along with useful tips to improve your recordings.
| Feature | Details |
|---|---|
| Access Point | In-game main menu |
| Mode Used | Photo Mode (Video toggle) |
| Recording Type | Free camera cinematic capture |
| Storage Location | In-game album |
| Controls During Recording | Camera movement, angle adjustments, filters |
| External Tools Needed | Not required |
How photo mode works in Neverness to Everness
The video recording system is built into the same toolset as Photo Mode, which means you’re not just recording raw gameplay—you’re creating controlled cinematic footage. This gives you more flexibility compared to standard screen recording tools, especially when you want dramatic angles or smooth camera movement.
Once you activate video mode, you are no longer limited to your character’s perspective, allowing you to reposition the camera and capture scenes from unique viewpoints. This is especially useful for content creators or players who enjoy storytelling through gameplay clips.
How to record a video in NTE
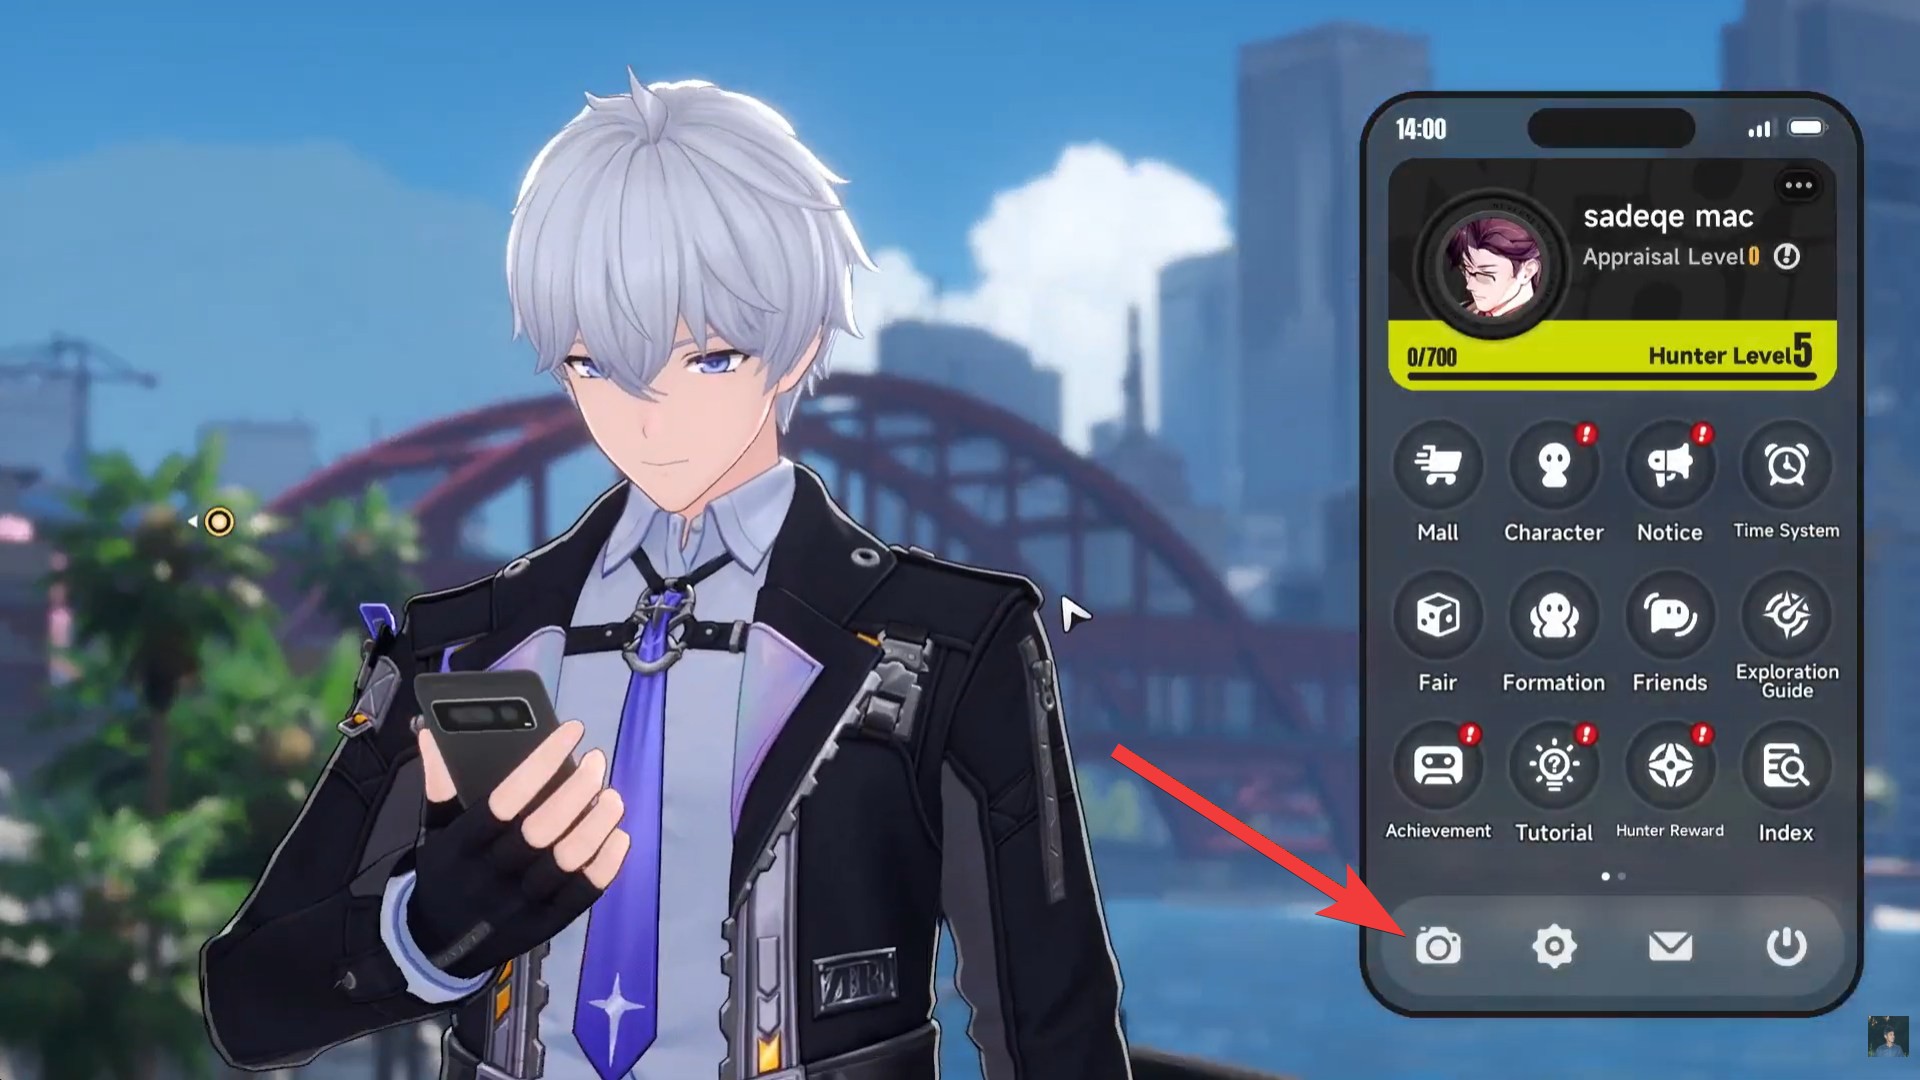
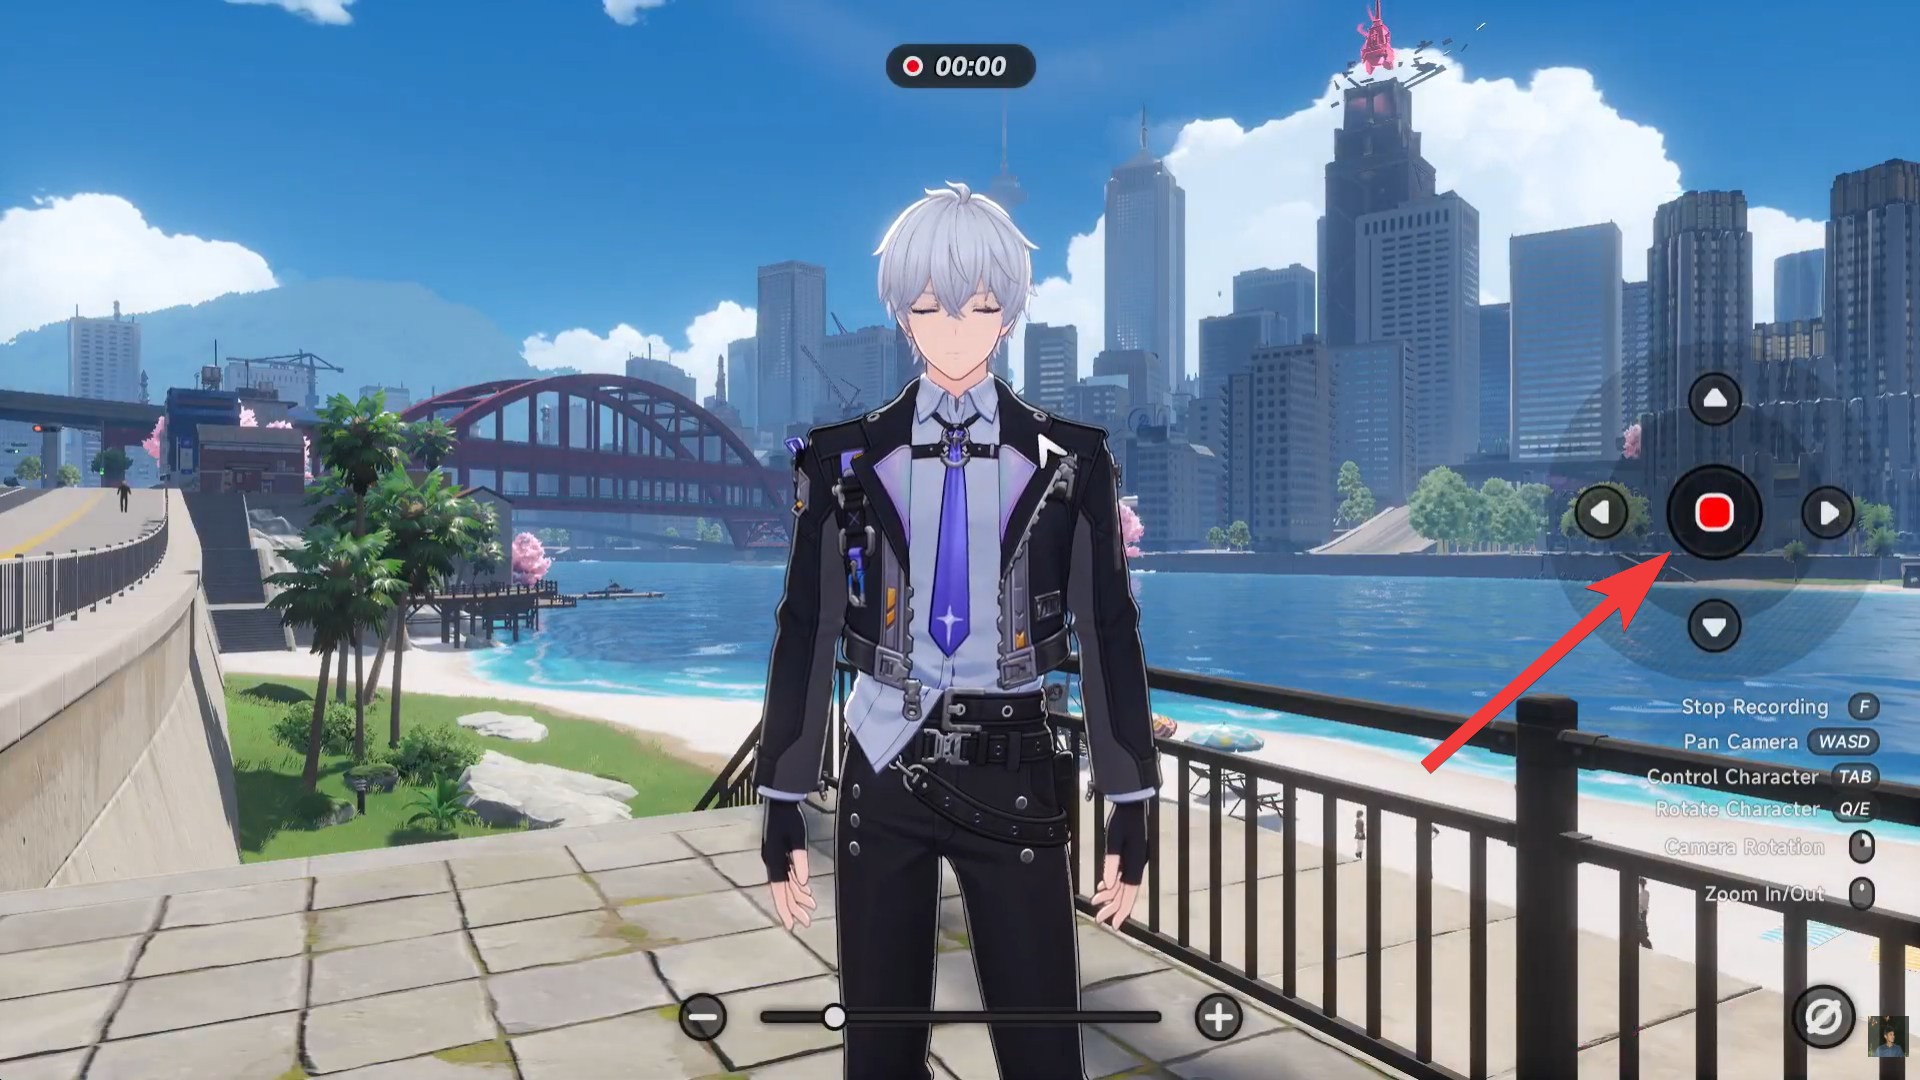
Step 1
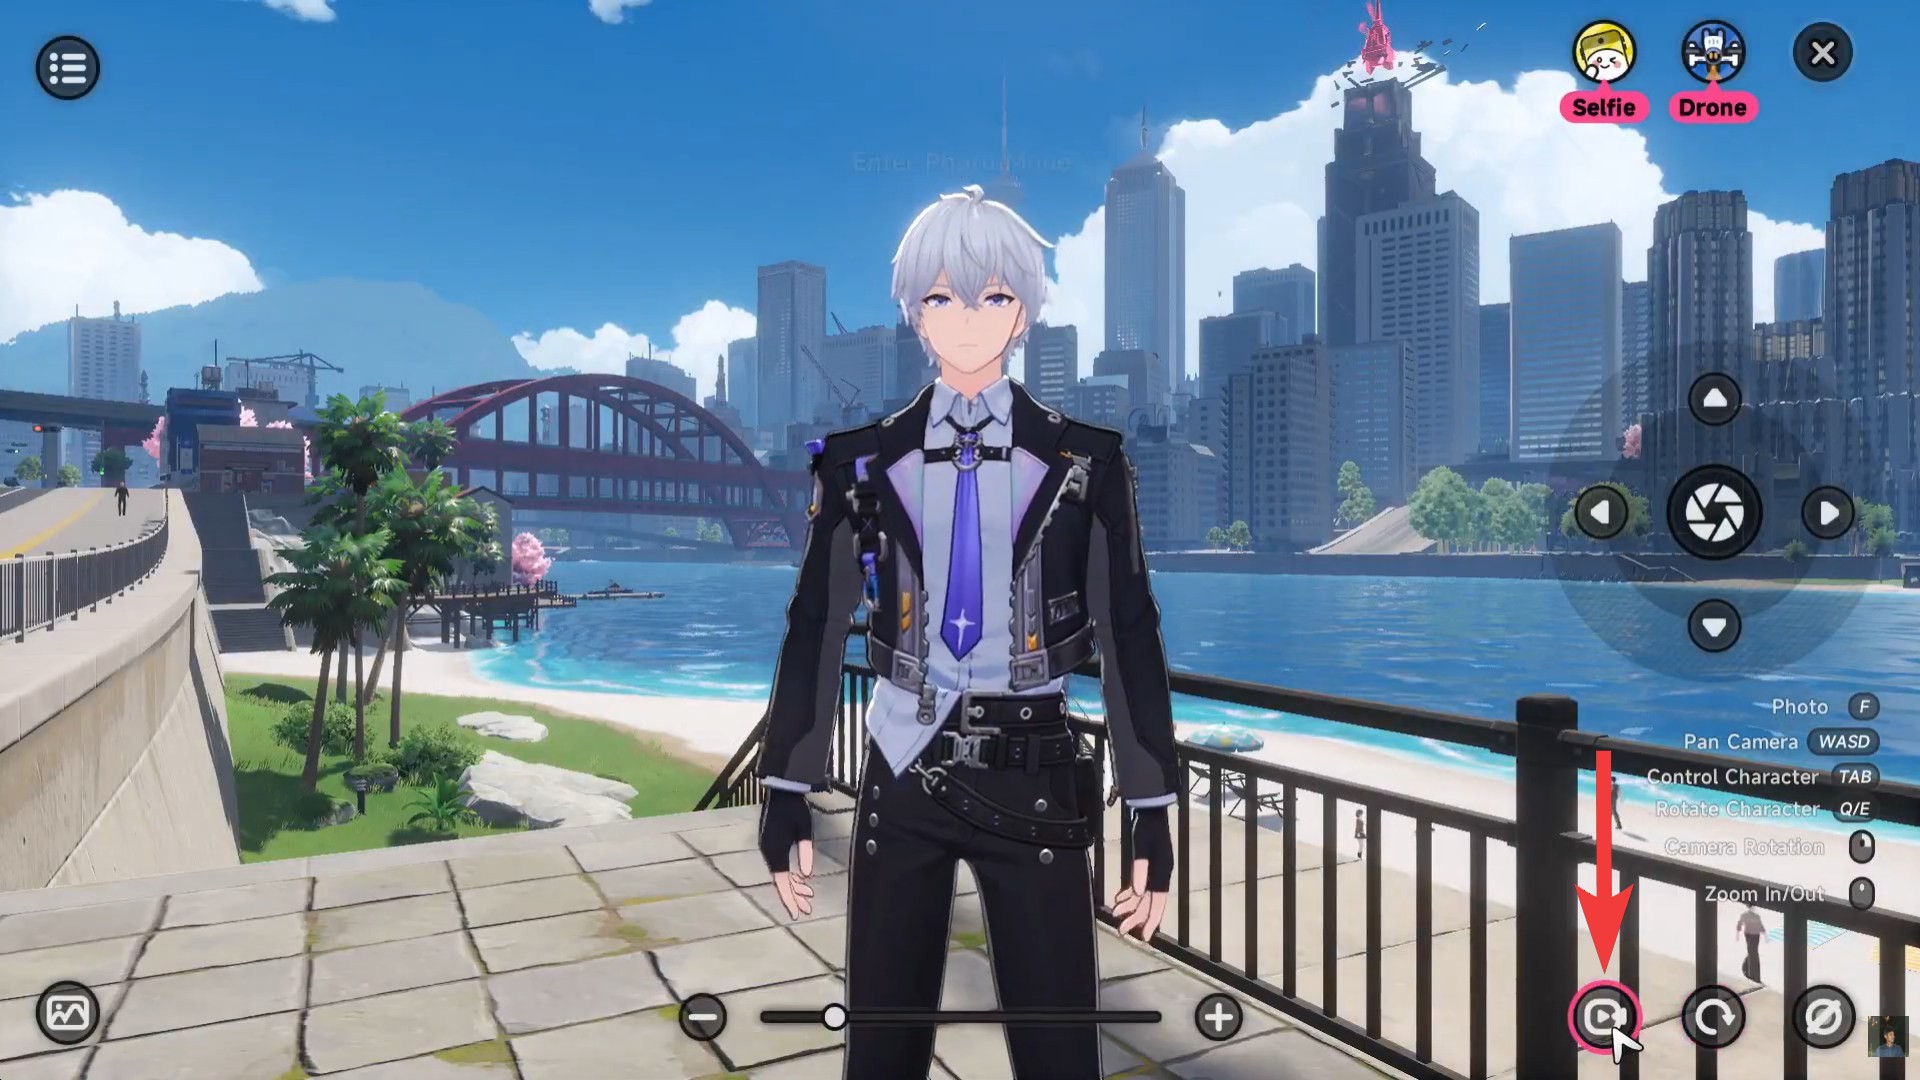
Open the main menu while in-game. This is your starting point for accessing all capture tools, including Photo Mode. Select Photo Mode as the Camera icon from the available options. This switches your interface into a dedicated capture environment where you can adjust visuals and camera settings.
Step 2
Toggle from photo mode to video mode. This is a crucial step, as the default setting is still image capture. Look for the toggle option and switch it to video.
Step 3
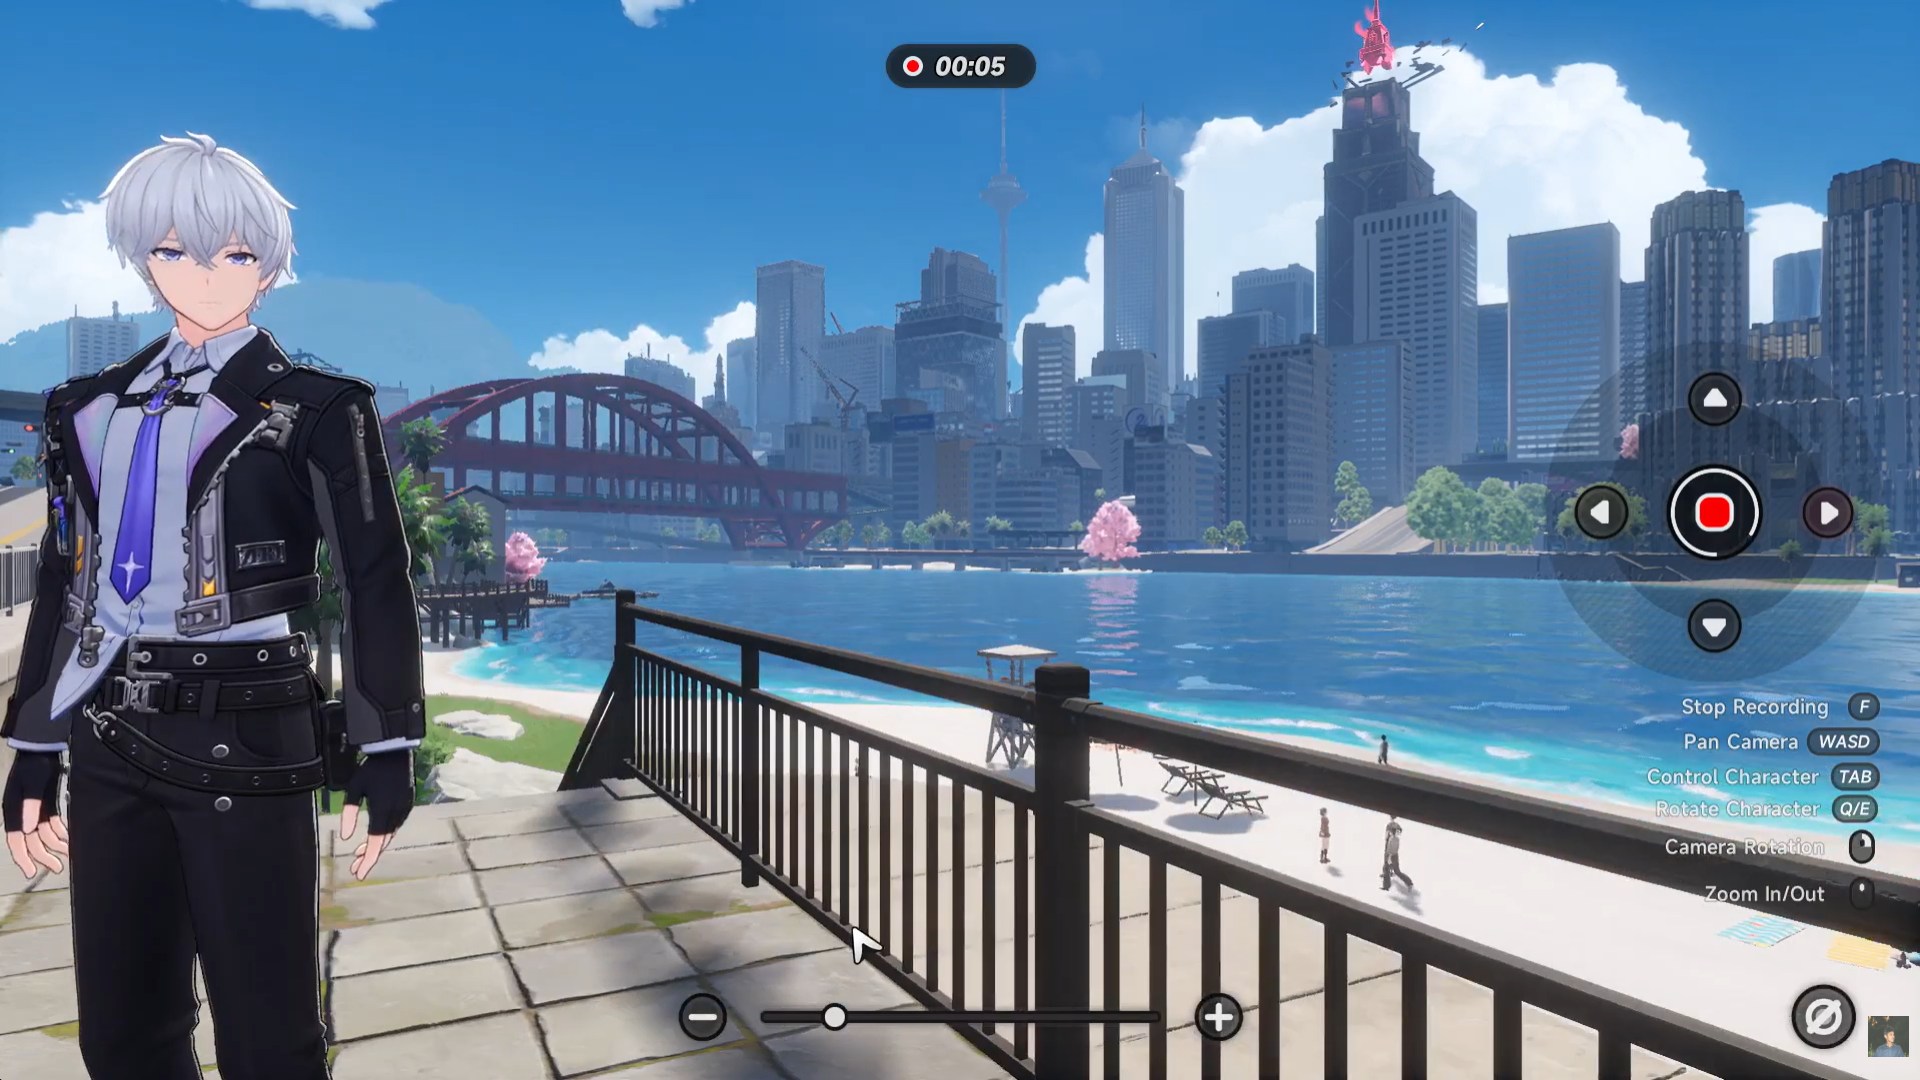
Press the record button to begin capturing footage. Once recording starts, the system begins saving everything in real time.
Step 4
Move freely and adjust the camera. You can explore, rotate angles, zoom in or out, and experiment with framing while recording continues.
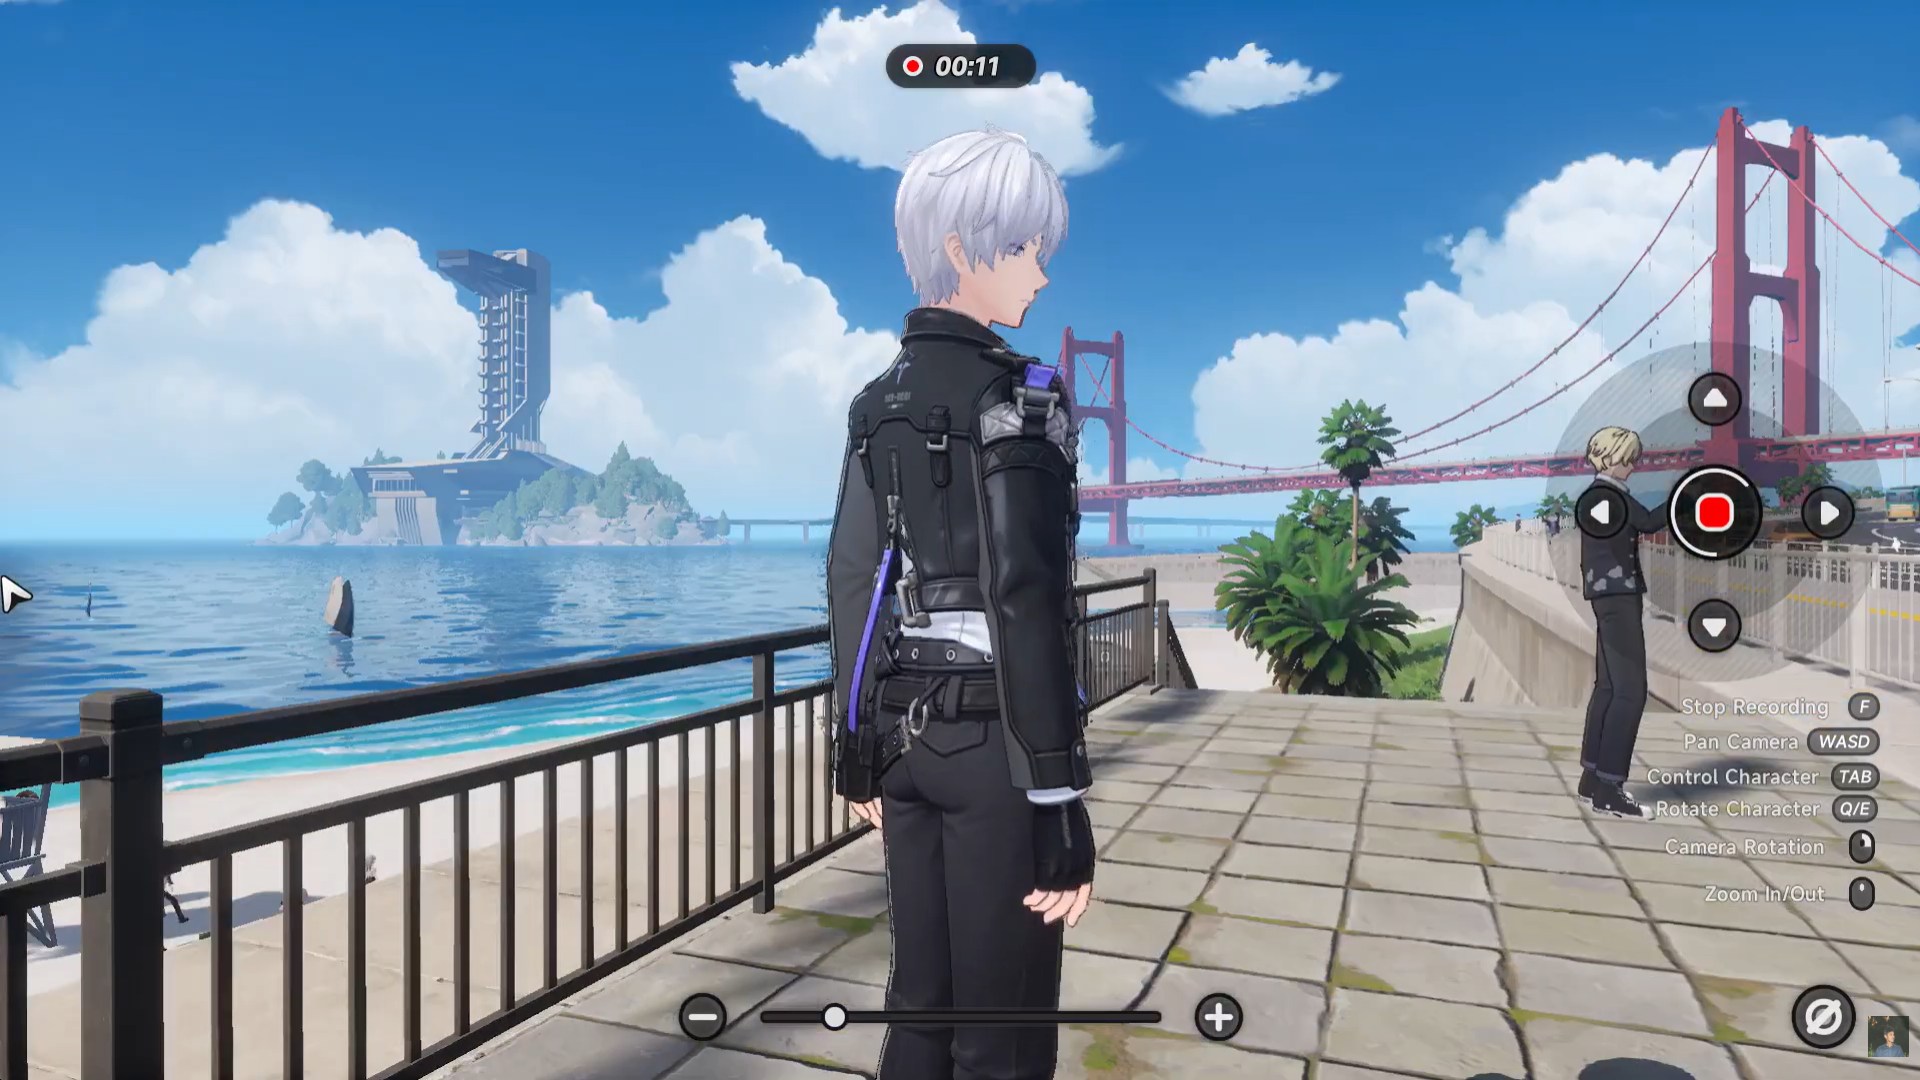
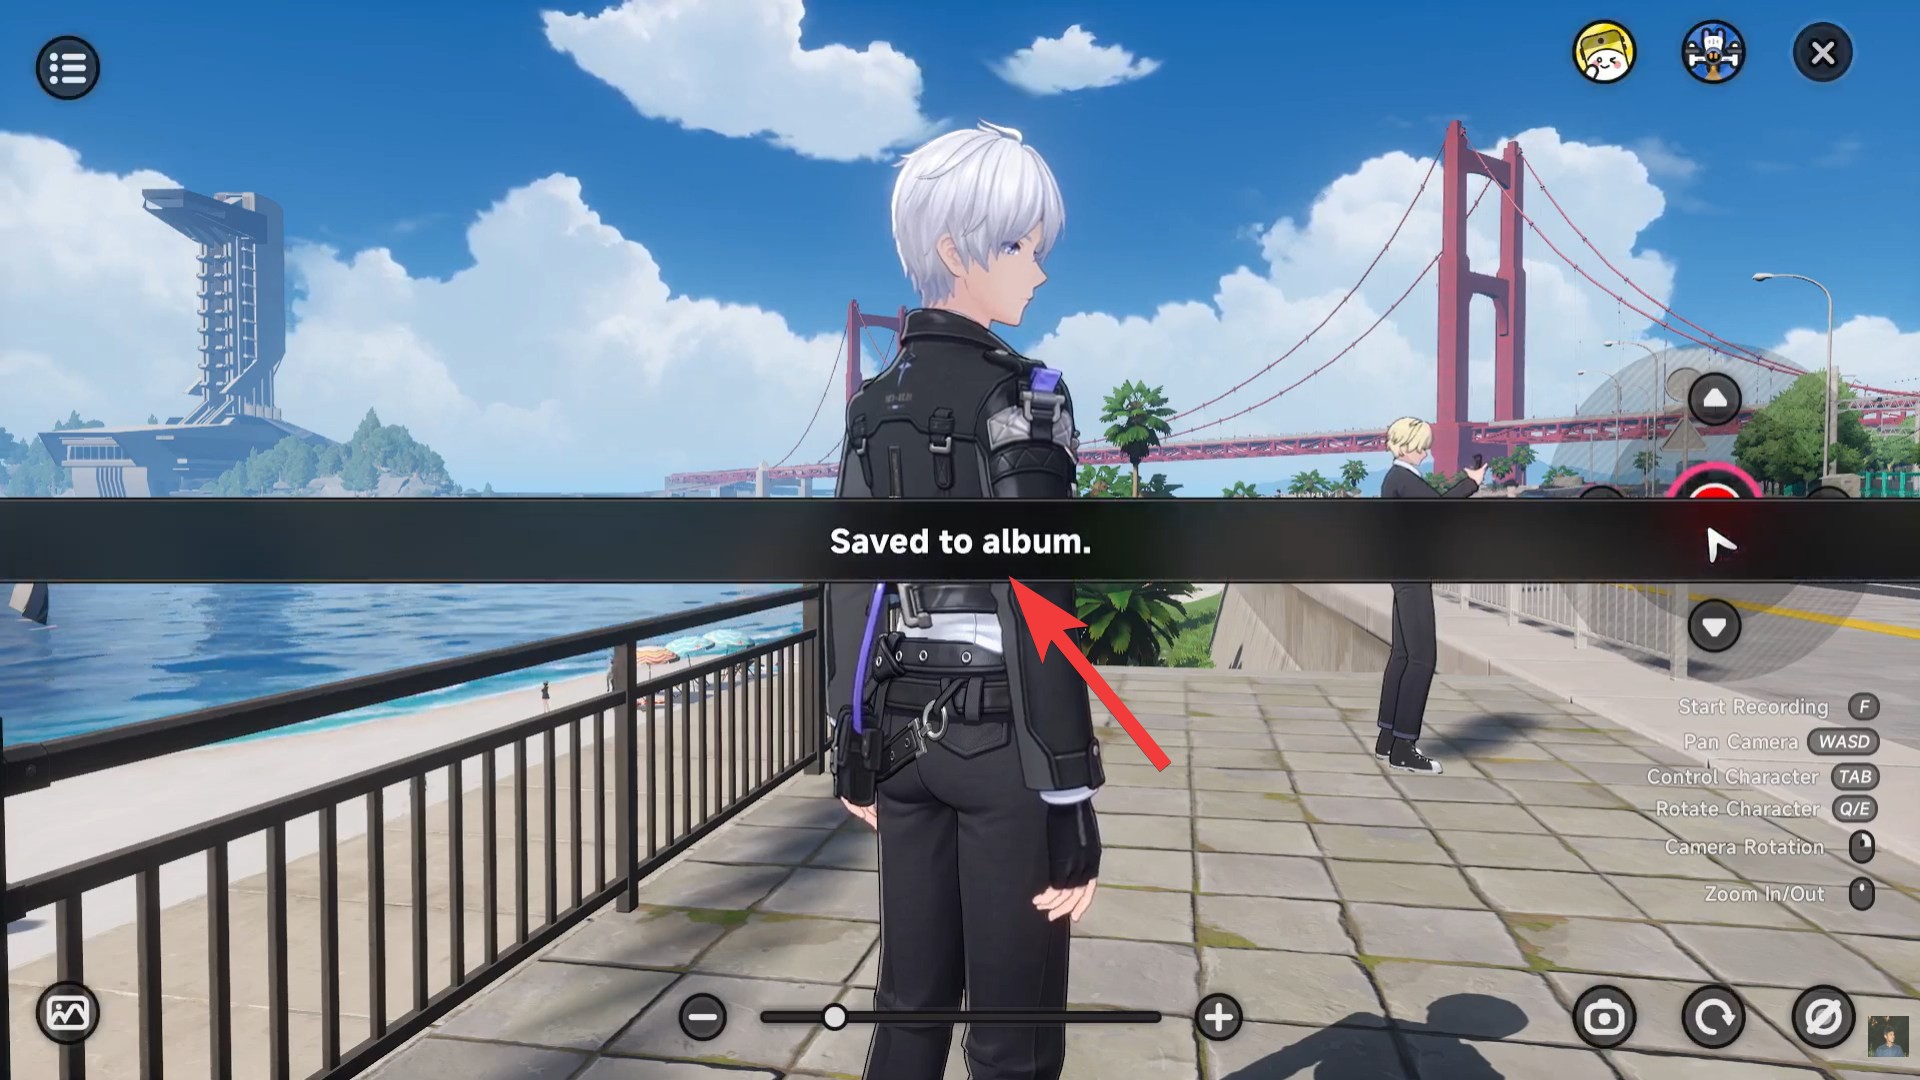
Stop the recording when you’re done. Your clip is automatically saved to the in-game album, making it easy to review or export later.
Where your recorded videos are saved
After recording, your clips are stored in the in-game album system. This acts as a gallery where all your photos and videos are organized.
From there, you can review your footage and decide whether to keep or delete it. Depending on your platform, you may also be able to access these files through your device’s storage system, making sharing much easier.
Tips to make your recordings look better
Recording is simple, but creating high-quality footage takes a bit more intention. Using camera movement wisely can completely change how your video feels, especially when you’re capturing action or scenic environments.
Try slowing down your camera movements to avoid shaky visuals. Smooth pans and steady framing make your clips feel more cinematic and polished. You should also experiment with lighting and time-of-day settings if available, as these can dramatically improve the final look.
Another important factor is timing. Recording during key gameplay moments—like chases, combat sequences, or story events—makes your clips more engaging. Instead of recording randomly, think about what kind of scene you want to capture.
Why you should use the built-in recorder
While external recording software can capture raw gameplay, the in-game video system gives you creative control that external tools simply don’t offer. You can pause, reposition, and frame your shots exactly how you want, which is ideal for creating cinematic content.
Additionally, using the built-in feature reduces performance strain. This means smoother gameplay and more stable recordings, especially on lower-end systems.
Recording gameplay in Neverness to Everness is surprisingly powerful once you get the hang of it. The combination of free camera control, built-in tools, and easy saving makes it accessible for both casual players and content creators.
If you take a little time to experiment with angles and movement, you can turn simple gameplay moments into cinematic clips worth sharing. Whether you’re documenting your progress or creating content, this feature adds a whole new layer to your experience.
The tips on capturing video in that setting seem useful. What gear do you recommend for the best quality?