X, formerly Twitter, is a powerful platform for sharing your thoughts, engaging in discussions, and staying updated with the world. However, not everyone wants their posts to be visible to the public. Making your Twitter account private can give you greater control over who sees your posts and interacts with you. This article provides a detailed guide on making your Twitter account private and what you need to know about it.
How to make your X (twitter) account private
Here’s how to take your X account private.
Mobile guide: Make X account private using the app on iPhone or Android
Video Guide:
Step-by-step guide with screenshots:
Step 1: Launch the Twitter app on your smartphone and log in to your account if you haven’t already.
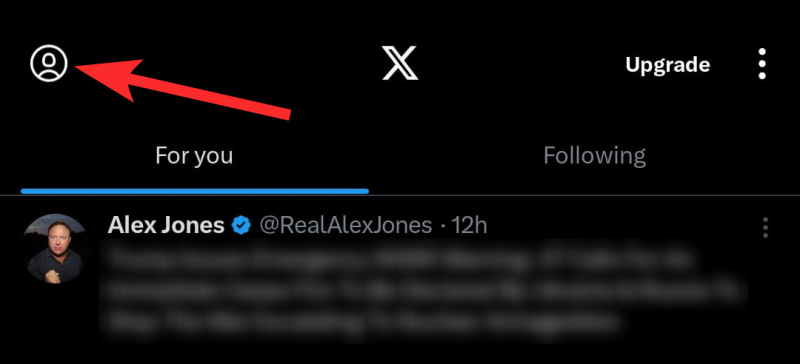
Step 2: Tap your profile picture in the top-left corner to open the navigation menu.
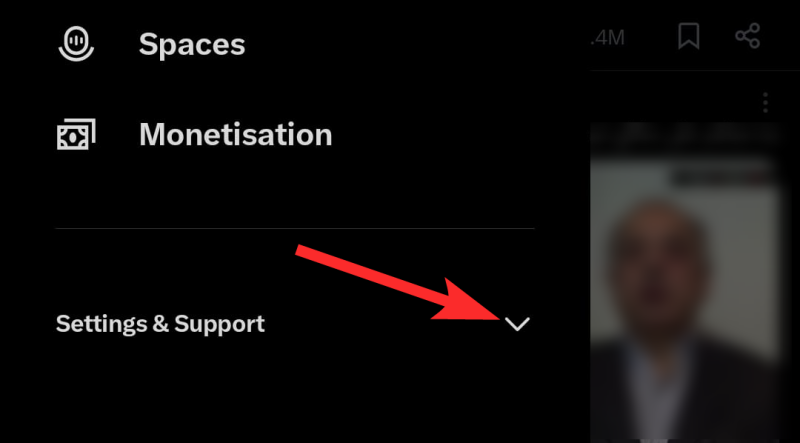
Step 3: Click on drop-down menu of Settings and Support.
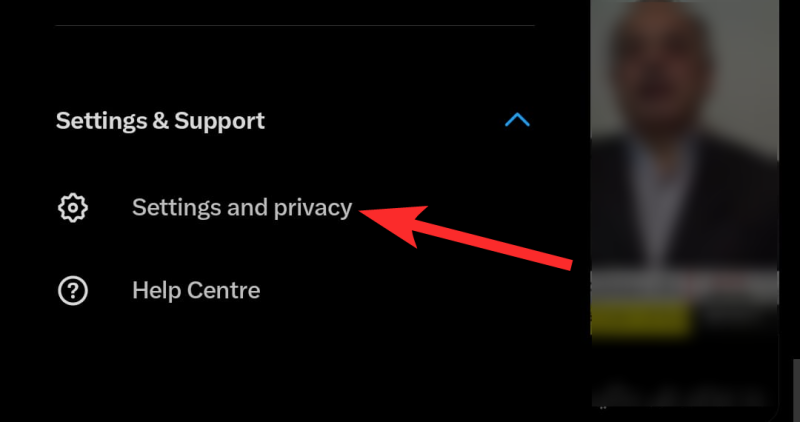
Step 4: From there, select Settings and privacy.
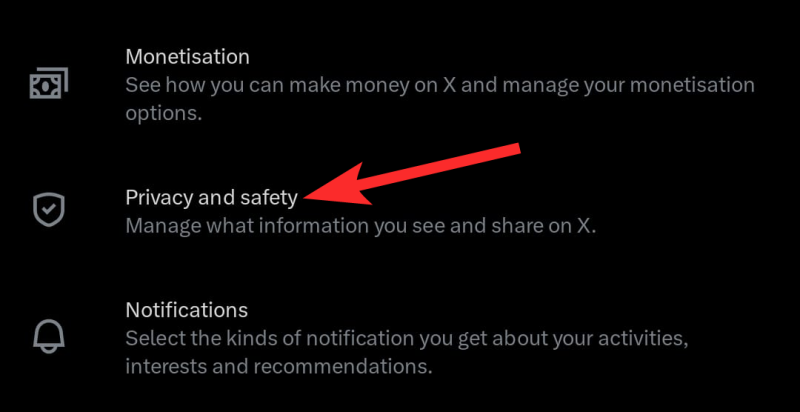
Step 5: In the settings menu, tap Privacy and safety.
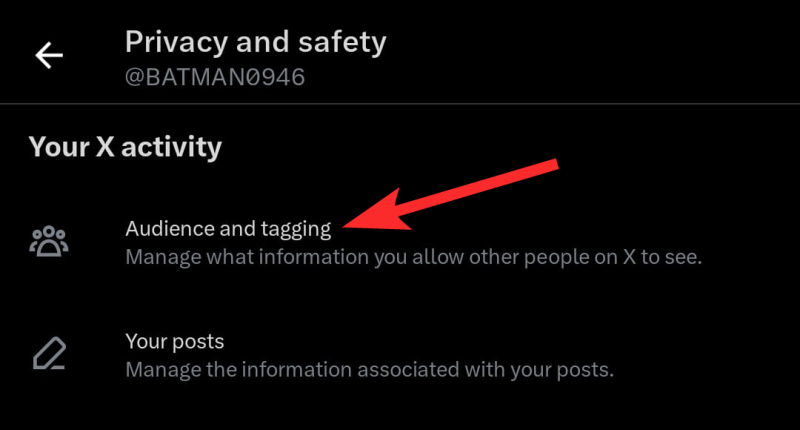
Step 6: Select Audience and tagging.
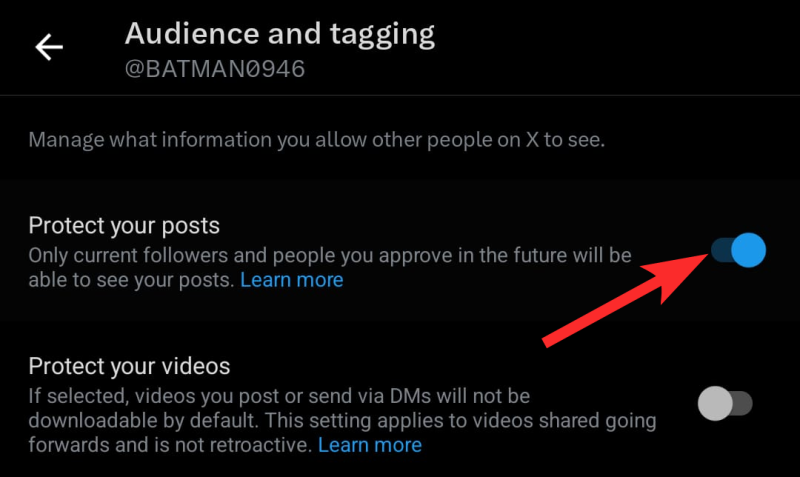
Step 7: Now, you’ll see an option labeled Protect your Posts. Toggle this option on. Once enabled, your posts will only be visible to your approved followers.
PC guide: Make X account private using x.com on PC
Video Guide:
Step-by-step guide with screenshots:
Step 1: Visit X.com and log in to your account.
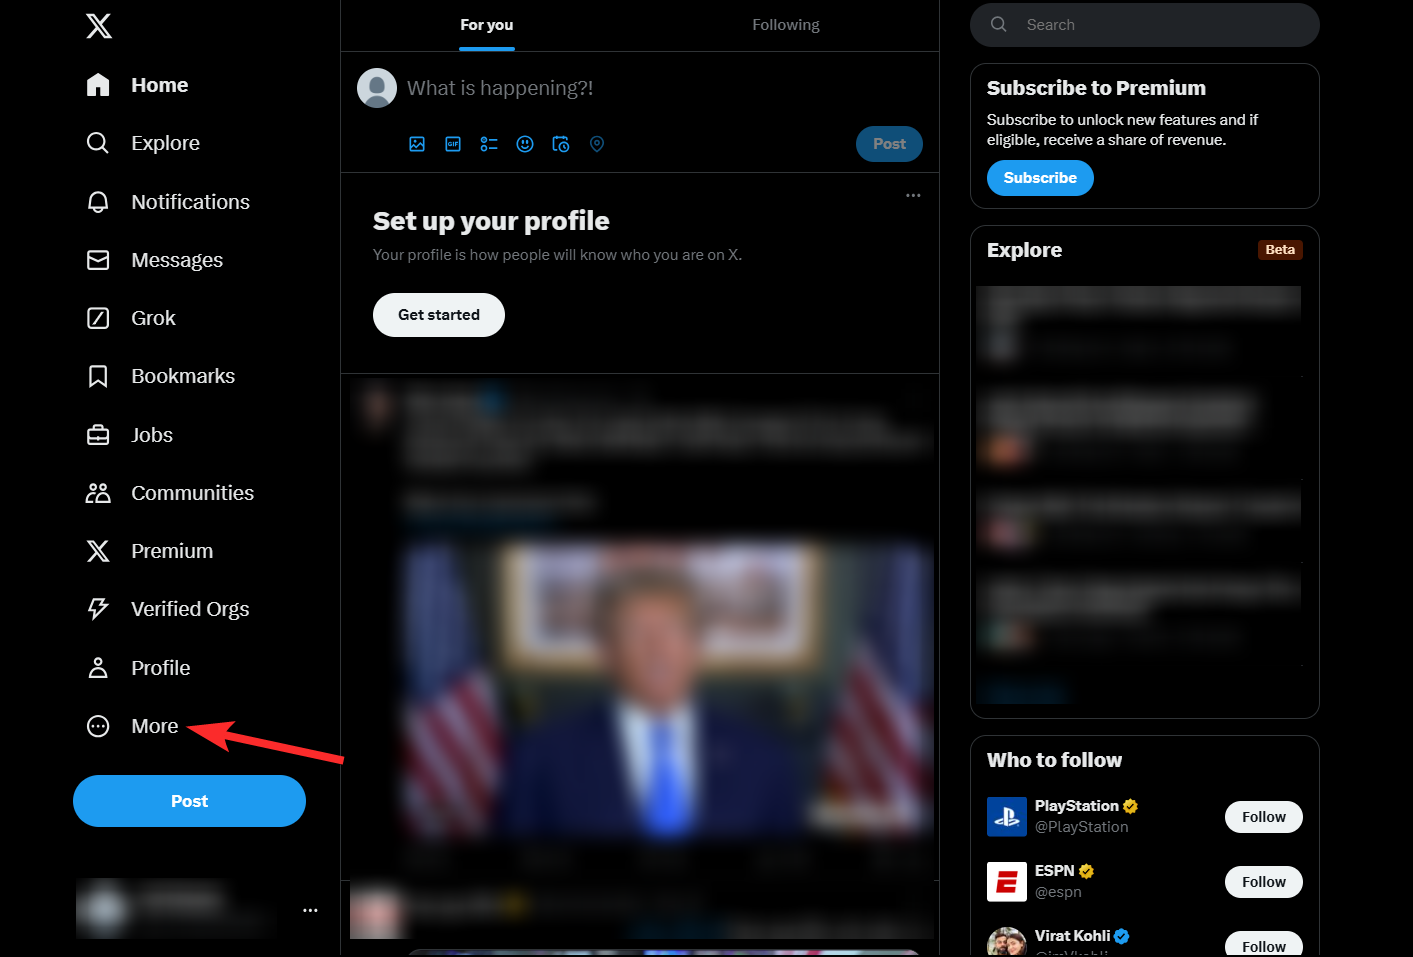
Step 2: Click on the More option in the left-hand menu.
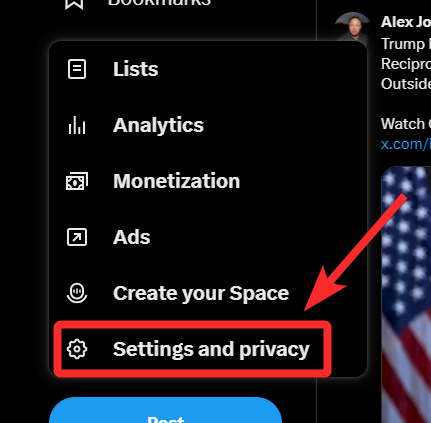
Step 3: From the dropdown, select Settings and privacy.
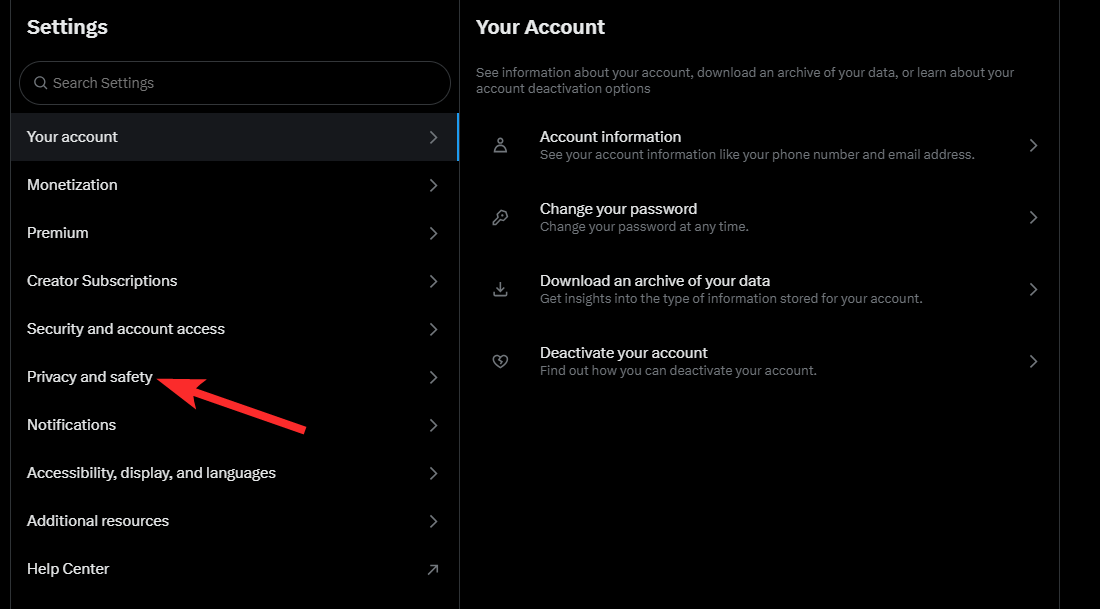
Step 4: In the settings menu, click on Privacy and safety.
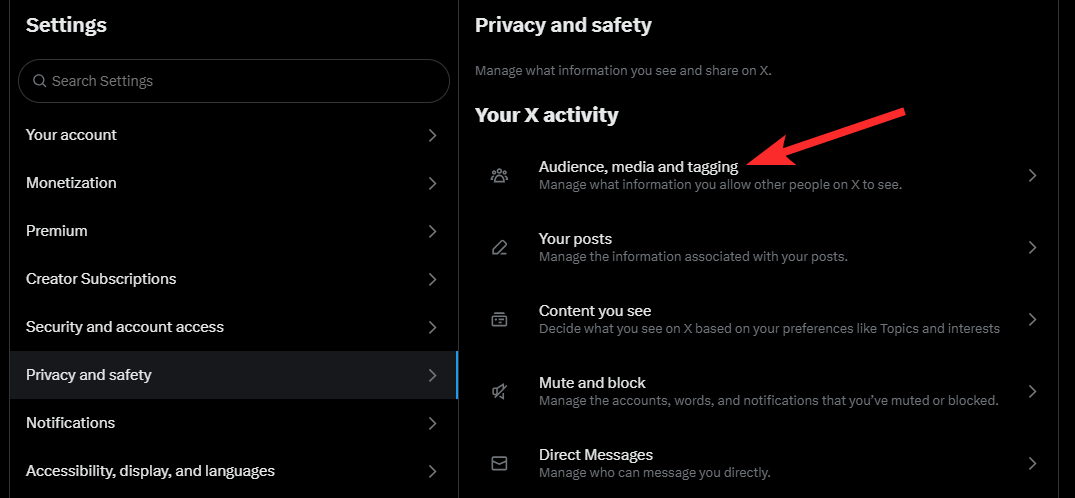
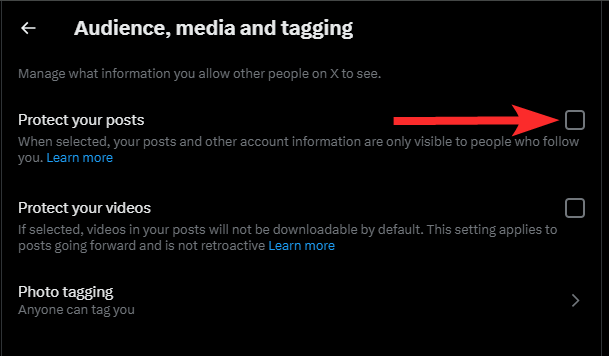
Step 5: Select Audience, media and tagging.
Step 6: Check box in front of Protect your Posts.
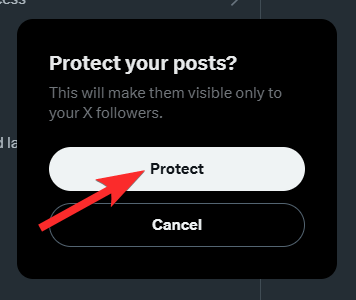
Step 7: A confirmation popup will appear—click Protect to confirm.
Things to keep in mind when you make your X account private
- Post Visibility:
- Your posts will only be visible to your approved followers.
- Previously public posts will become private once the setting is enabled.
- Follower Approval:
- New followers must send you a request to follow your account.
- You’ll need to manually approve or deny these requests.
- Public Mentions and Replies:
- If you reply to a public account, only your approved followers can see your reply.
- Search Engine Results:
- Your posts will no longer appear in search results on platforms like Google or Bing.
- Direct Messages:
- Making your account private doesn’t affect your ability to send or receive direct messages.
How to revert back to a public account on X (Twitter)
If you decide later that you want your account to be public again, you can easily turn off the “Protect your Posts” setting:
Video Guide:
Step-by-step guide with screenshots:
Step 1: Go back to Settings and privacy.

Step 2: Click on Privacy and safety.

Step 3: Select Audience and tagging.

Step 4: Disable the Protect your Posts option.
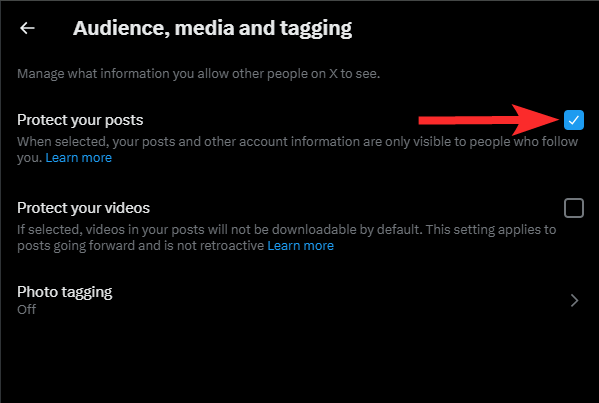
Note: Remember, once your account is public, any previously private posts will become visible to everyone.
FAQs
Can I make individual posts private?
No, Twitter does not allow individual posts to be private. Your entire account must either be private or public.
Will my followers be notified when I make my account private?
No, your followers are not notified when you switch your account to private.
Can people repost my private posts?
No, only you and your approved followers can see your posts. The repost function is disabled for private accounts.
What happens to my existing followers?
Your current followers will remain, but you can manually remove anyone by going to your followers list.
Your privacy is in your hands!
Making your Twitter account private is a simple yet effective way to control your online interactions and maintain privacy. Whether you’re looking to limit your audience or protect your content, this setting ensures that only the people you trust can see your posts. Follow the steps outlined above, and you’ll have a private Twitter account in no time.
By taking control of your Twitter privacy, you can enjoy a more secure and personalized social media experience!


