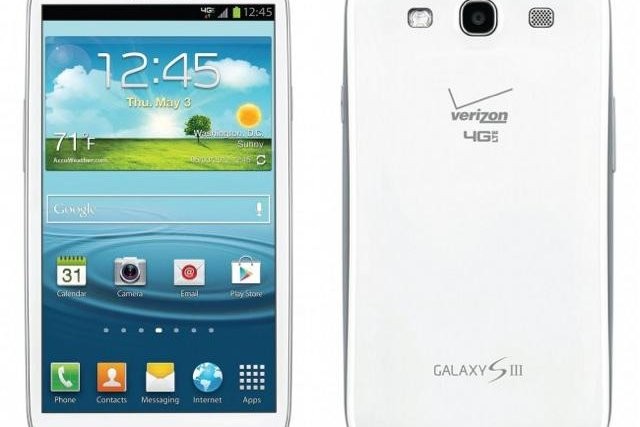
The Verizon Galaxy S3 has to be the most problematic variant of the Galaxy S3. If the locked bootloader on it wasn’t enough, many users have seen their Verizon Galaxy S3 get bricked and stop booting after trying to flash a custom ROM, making it a very expensive paperweight. Normally, the only way to fix this is to send the phone it to Verizon, and probably also pay the full price of the phone for a replacement.
However, thanks to XDA Recognized Developer PureMotive, we can now fix a bricked Verizon Galaxy S3 and get it running again just like new. The procedure involves flashing a few files that fix the device’s bootloader and make it work normally again, and the guide below will walk you through it with step-by-step-instructions.
Something important to note is that the procedure is quite long, and if not followed properly, it will not work. So read instruction carefully, twice if you have to, and your phone will be fixed and running again in no time.
Now let’s take a look at how the Verizon Galaxy S3 can be unbricked.
How to Unbrick Verizon Galaxy S3
- Download and install the drivers for the phone on the computer. Skip if you already have drivers installed.
Download Drivers - Download Odin 3.07, the software that we will use to unbrick the phone.
Download Odin | Filename: Odin307.zip - Extract the Odin307.zip file to a convenient location on the computer to get a folder named Odin307 with 4 files inside.
- Download the following files:
- VRALEC.bootchain.tar.md5
- BOOTLOADER_I535VRALF2_618049_REV09_user_low_ship.tar.md5
- stock.vzw_root66.7z.torrent
Open this file in a torrent application like µTorrent to download a file named stock.vzw_root66.7z. After downloading the stock.vzw_root66.7z file, extract it to get a file named stock.vzw_root66.tar (use a software like 7-zip to extract).
- Make sure phone is off. Boot into download mode. To do so, hold down the Volume Down, Home and then the Power buttons together until a Warning!! message is displayed on the screen. Here, press Volume Up to enter download mode. A green Android and the text Downloading will be displayed on the screen.
- Now, open Odin by clicking on the Odin3 v3.07.exe file in the Odin307 folder which you obtained after extracting Odin307.zip in step 3.
- In Odin, click on the PDA button, then select the VRALEC.bootchain.tar.md5 file that you downloaded in step 4.1.
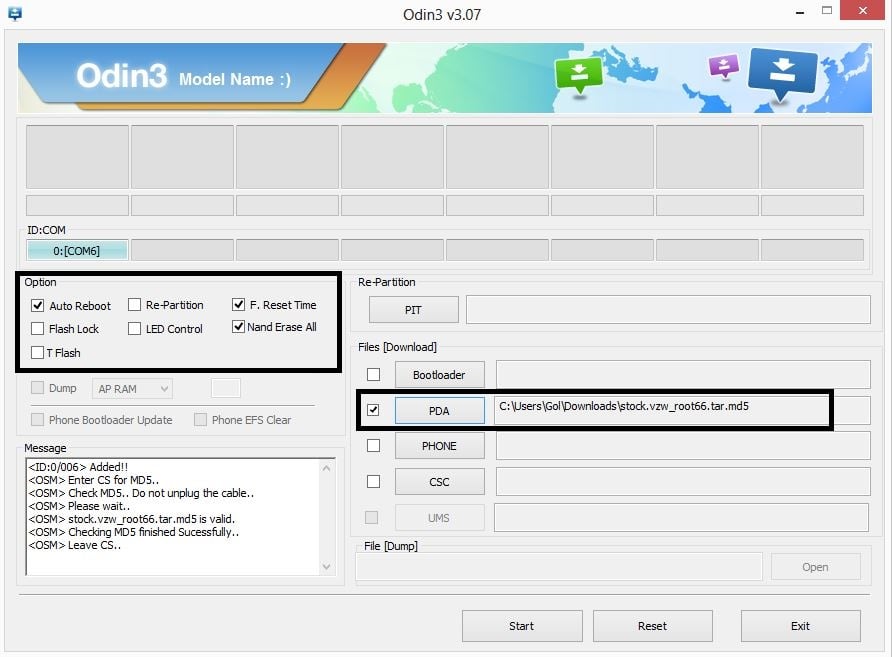
- [Important] Untick every option under the “Option” section (on the top left of Odin), except F. Reset Time. Check the screenshot below for reference.

- Then, connect the phone to the computer with the USB cable and wait for Windows to finish installing drivers. Odin will say Added!! in the message box on the bottom left if the phone is detected successfully. If not, make sure the drivers are installed and also try using a different USB port – preferably a USB port on the back if using a desktop computer.
- Click on Start to start flashing the VRALEC.bootchain.tar.md5 file on the phone.
- Wait till flashing is complete and you get a PASS message in Odin. When that happens, disconnect the phone from the computer, but DON’T turn it off and let it stay in download mode. Also close Odin.
- Reconnect your phone to the computer (while it is in download mode). Open Odin again.
- This time, click the PDA button and select the BOOTLOADER_I535VRALF2_618049_REV09_user_low_ship.tar.md5 file download in step 4.2.
- Also, again untick every option except F. Reset Time in Odin. Then, click on the Start button to start flashing the BOOTLOADER_I535VRALF2_618049_REV09_user_low_ship.tar.md5 file on the phone.
- When flashing is complete and you get a PASS message, disconnect the phone and close Odin. But keep the phone in download mode, don’t turn it off.
- Open Odin again and also reconnect the phone to the computer.
- Click the PDA file and select the stock.vzw_root66.tar file that you obtained in step 4.3.
- [Important] Select the following three options in Odin on the top left: Auto Reboot, F. Reset Time, Nand Erase All. Check the screenshot below for reference.

- Click Start to start the flashing process. Once the flashing is complete and you get a PASS message, the phone will automatically reboot. Disconnect the phone from the computer.
- The phone will still not boot up completely. Now, remove the battery on the phone, then re-insert it. Don’t turn it on.
- Now, boot into recovery. To do so, press and hold the Volume Up + Home + Power buttons together till the screen turns on, then let the buttons go. The phone will boot into recovery in a few seconds. You will see a few error messages in recovery, which is normal.
In recovery, use the volume buttons to scroll up/down and the home button to select options. - Select wipe data/factory reset, then select Yes on next screen to confirm. Wait a while till the data wipe is complete (this will NOT delete your personal files on the SD cards).
- Select wipe cache, confirm, then wait for cache wipe to be completed.
- Then, select reboot system now to reboot the phone.
- The phone will now boot up properly into Android and is fixed, and you will be able to use it now.
Your Verizon Galaxy S3 is now fixed, and has saved you from sending it in for repair to Verizon. Do let us know how the procedure works!


THANK YOU SO MUCH!!!!
THANK YOU SO MUCH!!!!
THANK YOU SO MUCH!!!!
Worked like a charm. Thanks very much!
Worked like a charm. Thanks very much!
Worked like a charm. Thanks very much!
My Odin downloads are Failing on my bricked VZW S3….
Any help will be greatly appreciated.
My Odin downloads are Failing on my bricked VZW S3….
Any help will be greatly appreciated.
My Odin downloads are Failing on my bricked VZW S3….
Any help will be greatly appreciated.
The problem now is… How do I stop it from looping the booting animation…
could you help me? Would this work with samsung galaxy GT-19300T or is it just with verizon?
Thanks, everything is fixed! One more thing… Is my device still rooted, I need CM10 😀
could you help me? Would this work with samsung galaxy GT-19300T or is it just with verizon?
Awesome, thank you!!!!
Awesome, thank you!!!!
Awesome, thank you!!!!
does it work on most samsung galxy models or just verizon?
why does it take so long for the utorrent is 2gb of data going to be enough?
does it work on most samsung galxy models or just verizon?
does it work on most samsung galxy models or just verizon?
why does it take so long for the utorrent is 2gb of data going to be enough?
why does it take so long for the utorrent is 2gb of data going to be enough?
i cant get the stock file to extract, any suggestions
i cant get the stock file to extract, any suggestions
i cant get the stock file to extract, any suggestions
Other than having to find the files to download myself, this was a true life saver. Thank you!!!
Other than having to find the files to download myself, this was a true life saver. Thank you!!!
Other than having to find the files to download myself, this was a true life saver. Thank you!!!
files are missing for “VRALEC.bootchain.tar.md5” and
“BOOTLOADER_I535VRALF2_618049_REV09_user_low_ship.tar.md5”. Where else can I find these files?
Found the files and tried but auth failed when installing “VRALEC.bootchain.tar.md5”. Am I doing something wrong?
What did you do after you received this message? – I just received the same fail.
here is what I got.
files are missing for “VRALEC.bootchain.tar.md5” and
“BOOTLOADER_I535VRALF2_618049_REV09_user_low_ship.tar.md5”. Where else can I find these files?
files are missing for “VRALEC.bootchain.tar.md5” and
“BOOTLOADER_I535VRALF2_618049_REV09_user_low_ship.tar.md5”. Where else can I find these files?
Found the files and tried but auth failed when installing “VRALEC.bootchain.tar.md5”. Am I doing something wrong?
What did you do after you received this message? – I just received the same fail.
Found the files and tried but auth failed when installing “VRALEC.bootchain.tar.md5”. Am I doing something wrong?
What did you do after you received this message? – I just received the same fail.
here is what I got.
here is what I got.
I am about to proceed with the unbricking, wish me luck! thanks for making an excellent guide.
I am about to proceed with the unbricking, wish me luck! thanks for making an excellent guide.