
What to know
- End‑game money is fastest by farming high‑value crops such as chirpy plum, trippy plum, and fluff bean instead of fiddling with lower‑tier options.
- Immortal seeds make this setup repeatable, letting you plug in new plants without constantly buying replacements.
- Keeping sprays and bees running cuts the effective labor down so you mostly just harvest and sell on a near‑daily cycle.
- Processing crops into jams or pickles is not worth the effort; selling raw outputs gives cleaner, faster returns.
Starsand Island has a very efficient way to stack coins once you reach the late‑game. The idea is simple – lean on top‑tier crops and immortal seeds, then let them run daily with minimal upkeep.
| Category | Details |
|---|---|
| Core strategy | Farm high‑value crops with immortal seeds, sell raw, no processing. |
| Best crops | Chirpy plum, trippy plum, fluff bean, zapped rice. |
| Price range | Around 4.90–505 coins per piece depending on crop. |
| Seed type | Immortal seeds to avoid repeat seed purchases. |
| Support mechanics | Sprinklers, sprays, bees, buff foods for faster harvest and growth. |
| Time to harvest | Roughly 2 days for a full field with enough bees. |
| Output scale | Thousands of coins per harvest, with 100K+ achievable at late‑game. |
How to set up your immortal crop zone
To get fast end‑game money, focus on building a dedicated field of the highest‑value crops that stay profitable without needing extra processing. The crops that stand out are chirpy plum, trippy plum, fluff bean and zapped rice. These all sell for roughly similar amounts per piece, but they differ in how easy they are to manage and whether they require trellises.

Trellis‑based crops are more tedious to maintain because they need additional structures and can be awkward to arrange in tight grids. For speed and simplicity, skip the trellis plants and stick to the crops that grow straight from the ground. That leaves you with chirpy plum, trippy plum, and similar high‑value options.
Plan a section of your farm that can be fully covered by sprinklers and long‑range sprays. If you have bees set up nearby, you can significantly shorten the perceived grow time by letting them pollinate and speed up crop maturity. With enough bees active, the entire field can be ready to harvest in about two days, after which you simply loot everything and sell in one go.
Best crops for end‑game coin
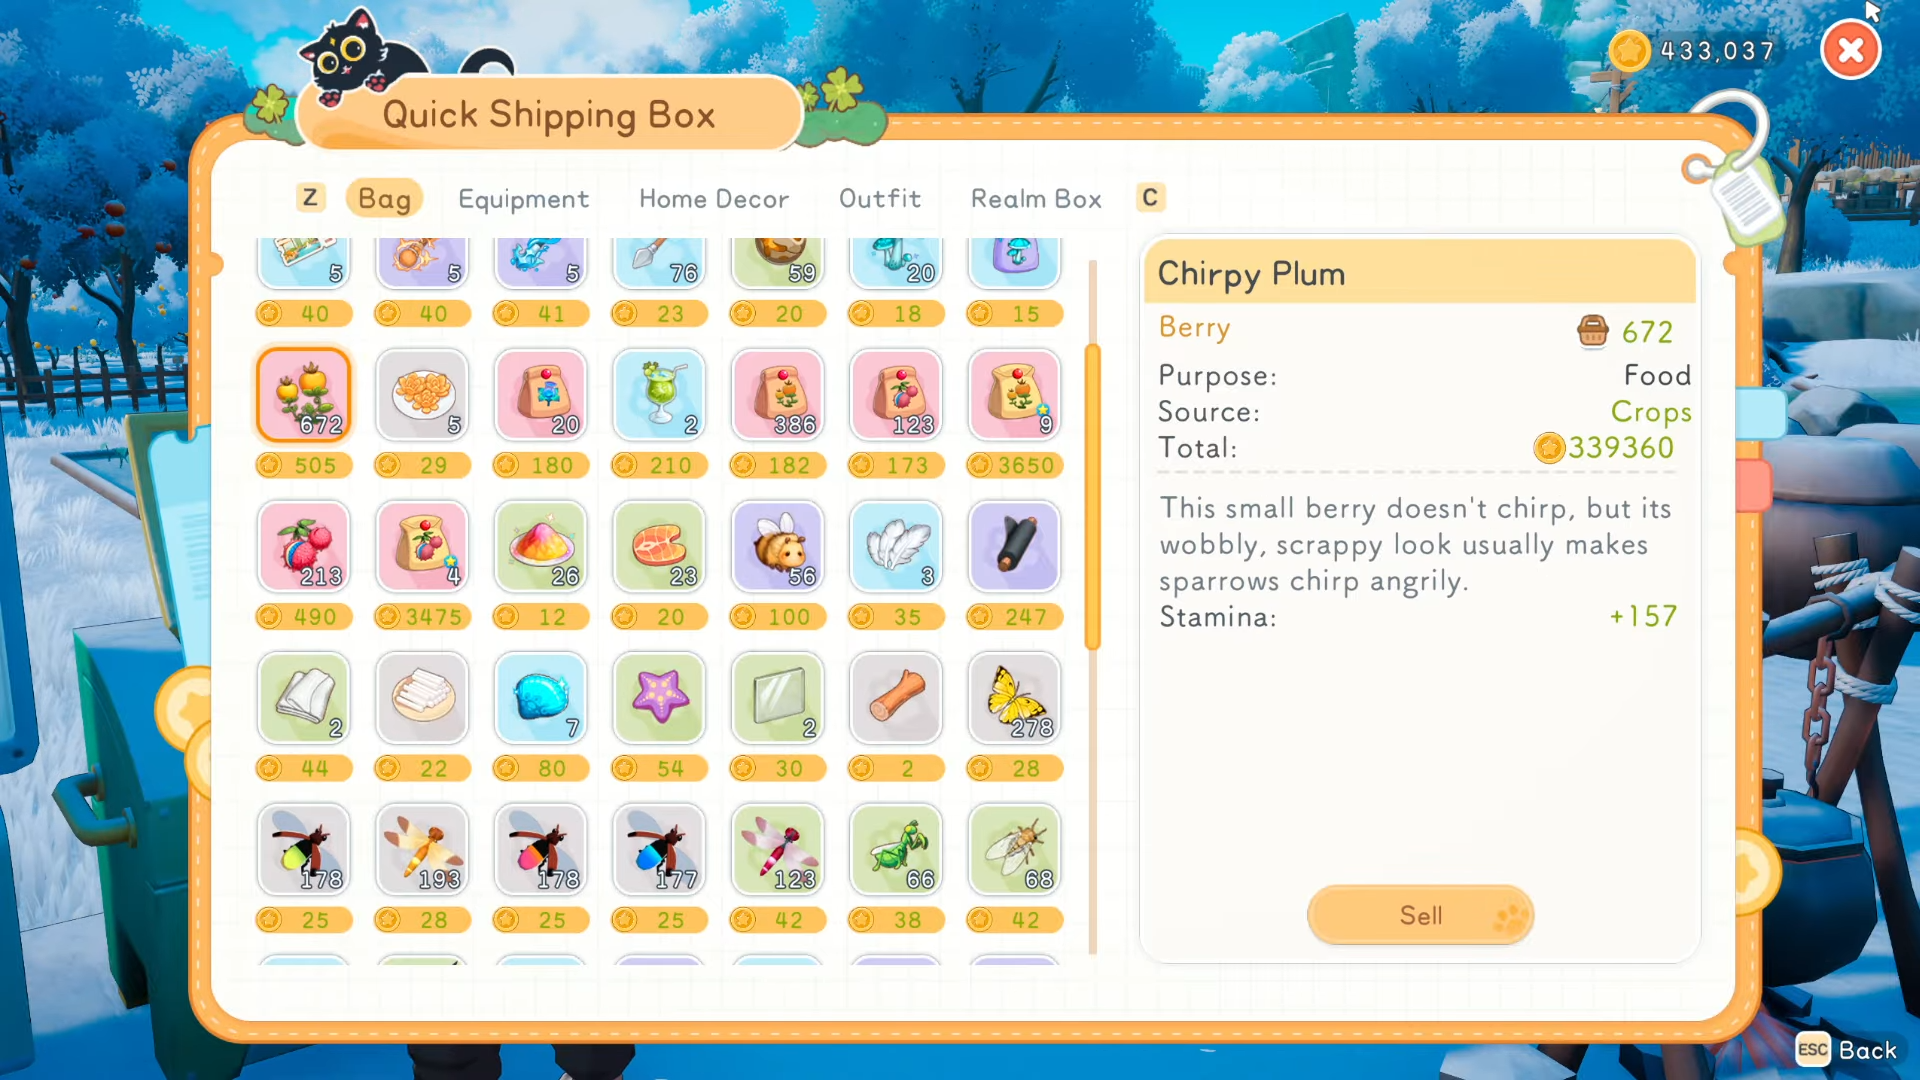
Among the top‑tier crops, chirpy plum is one of the most convenient: it sells for 500 coins per piece and does not require extra steps like jamming or pickling. Trippy plum is similarly strong, selling for about 505 coins per piece, while fluff bean comes in slightly lower around 4.90 coins per piece. Zapped rice in the rice paddies also performs well, with each piece worth roughly 593 coins.

All of these are better than the mushy or decorative crops that might look nice but do not pay as much per harvest. The idea is not to juggle five different premium crops at once; instead, choose one or two that suit your layout and then scale them up. A single large field of chirpy plums or trippy plums, backed by sprinklers and bees, will reliably out‑earn smaller, mixed plots.
Step by step: planting your immortal‑seed field
Step 1: Acquire immortal seeds
- Use the mirthshroom soup buff to increase your chances of dropping seeds and immortal seeds while harvesting existing crops; this buff can stack up to several levels.
- Focus on clearing fields that already have high‑value plants, since the seed‑per‑harvest rate is higher there, which naturally feeds more immortal seeds back into your inventory.

Step 2: Prepare the field
- Pick a flat, open area near your sprinklers or create a new zone that can be entirely covered by sprays so you do not have to manually water every tile.
- Clear rocks, stones, and obstructions so you can pack as many crop tiles as possible; density matters more than elaborate decorations at this stage.
Step 3: Plant in bulk
- Replace as many normal seeds as you can with immortal seeds so you only need to invest once per tile.
- Lay them out in neat rows that match your sprinkler coverage pattern, leaving one row free if you need to walk and harvest without trampling.

Step 4: Set up bees and sprays
- Place bumblebee hives close enough that their radius overlaps your field; a full hive can push enough pollination to speed up the grow cycle noticeably.
- Keep juices or buff foods on hand that improve your harvest speed or productivity, so the time you do spend actually harvesting is minimized.
Step 5: Establish a daily routine
- After each harvest, sell everything immediately instead of stockpiling or processing; this turns the loop into pure coin‑per‑day rather than inventory management.
- Once the field is fully grown again, repeat the cycle; at scale, a properly set up immortal‑seed field can clear well over 100,000 coins per major harvest depending on stack counts and crop type.
Why raw crops beat jams and pickles
Some players instinctively want to turn their crops into jams or pickles, but that layer of processing is generally not worth the effort. The additional time spent crafting, managing kegs or jars, and carrying extra ingredients eats into the profit margin. For many crops, the raw version is already close enough in value that the extra steps are not justified unless you need specific recipes or buffs.
By focusing on raw sales, the workflow becomes very simple: plant with immortal seeds, let sprays and bees do the work, harvest once the field is ready, and sell everything at once. This keeps your daily routine predictable and reduces clutter in storage.
Rewards and efficiency
The main reward from this setup is not a single lump sum, but a reliable, repeatable income stream. With one large immortal‑seed field of either chirpy plum or trippy plum, you can expect:

- A full harvest of hundreds of fruits per cycle, each selling for 500–505 coins.
- A stack‑value in the tens of thousands from a single clear, scaling into five or six figures per major harvest once the field is fully kitted out.
Because the crops are immortal and self‑replacing, the long‑term maintenance cost is close to zero beyond the initial seed investment and upkeep of your sprinkler and bee systems.
Make this your go‑to end‑game routine
For fast end‑game money in Starsand Island, a single, well‑optimized immortal‑seed field of high‑value crops is hard to beat. It requires one extended setup phase—obtaining seeds, arranging sprinklers, and placing bees—but after that, the work becomes almost mechanical: harvest, sell, wait, repeat.
If you want to expand beyond a single field, the next step is not to add more jams or pickles, but to build a second or third identical setup in a different area. This preserves simplicity while scaling your daily coin output linearly. With chirpy plum, trippy plum, and fluff bean as your main pillars, you can comfortably treat your farm as a near‑automatic money engine rather than a side activity.


