What to know
- Fabricator blueprints such as Rotor and Tube are found early in SMB “Purple Haze” outpost northwest of spawn, requiring combat and platforming.
- Unlock recipes by submitting blueprints at the Recipe Station alongside materials and Data Points to enable production lines.
- Key locations include Grey Owl for Stabilizer and Lemon Souls for Stator, with enemy waves scaling by distance.
- Blueprints are consumed on submission, so collect multiples if needed for duplicates or backups.
You’ll need fabricator blueprints to progress beyond basic crafting in StarRupture, turning raw ores into essential machine parts for factories and exports. These schematics hide in hostile outposts, pushing you to gear up with ammo and explore dangerous ruins.
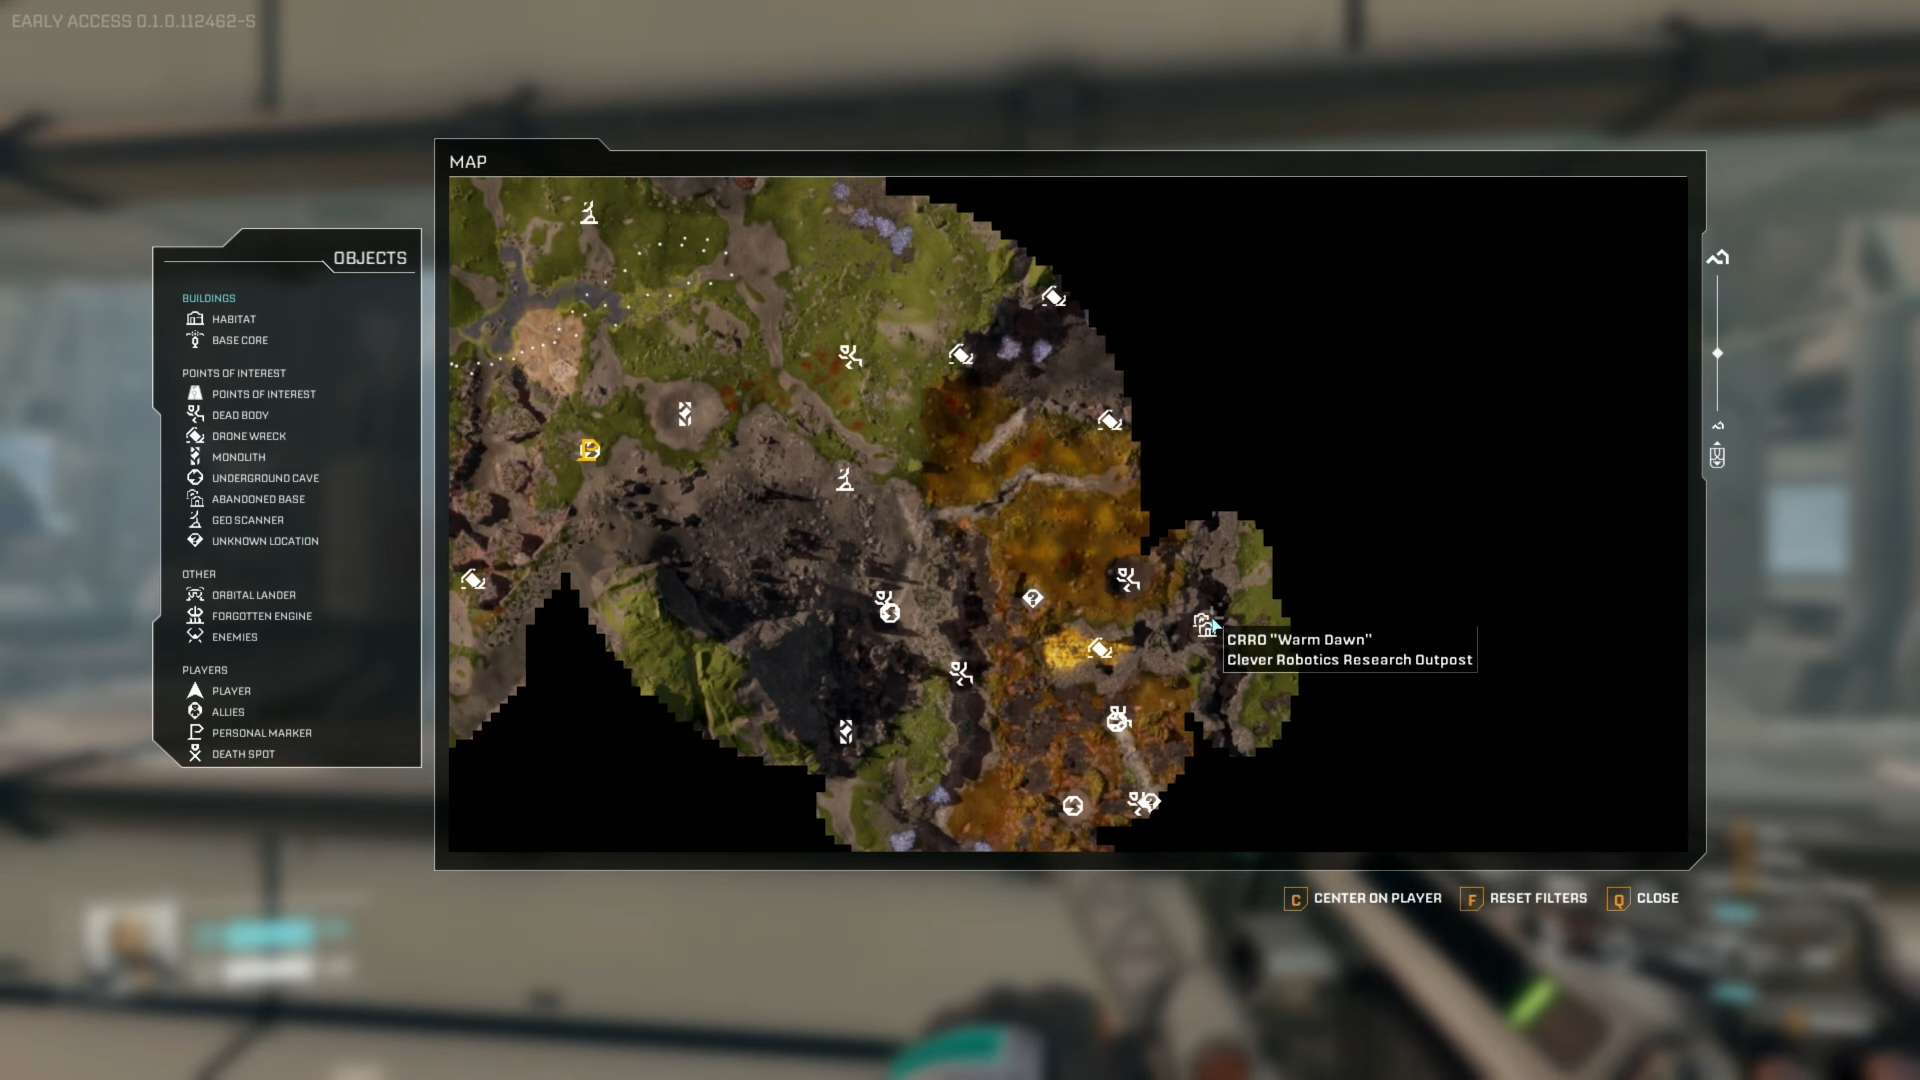
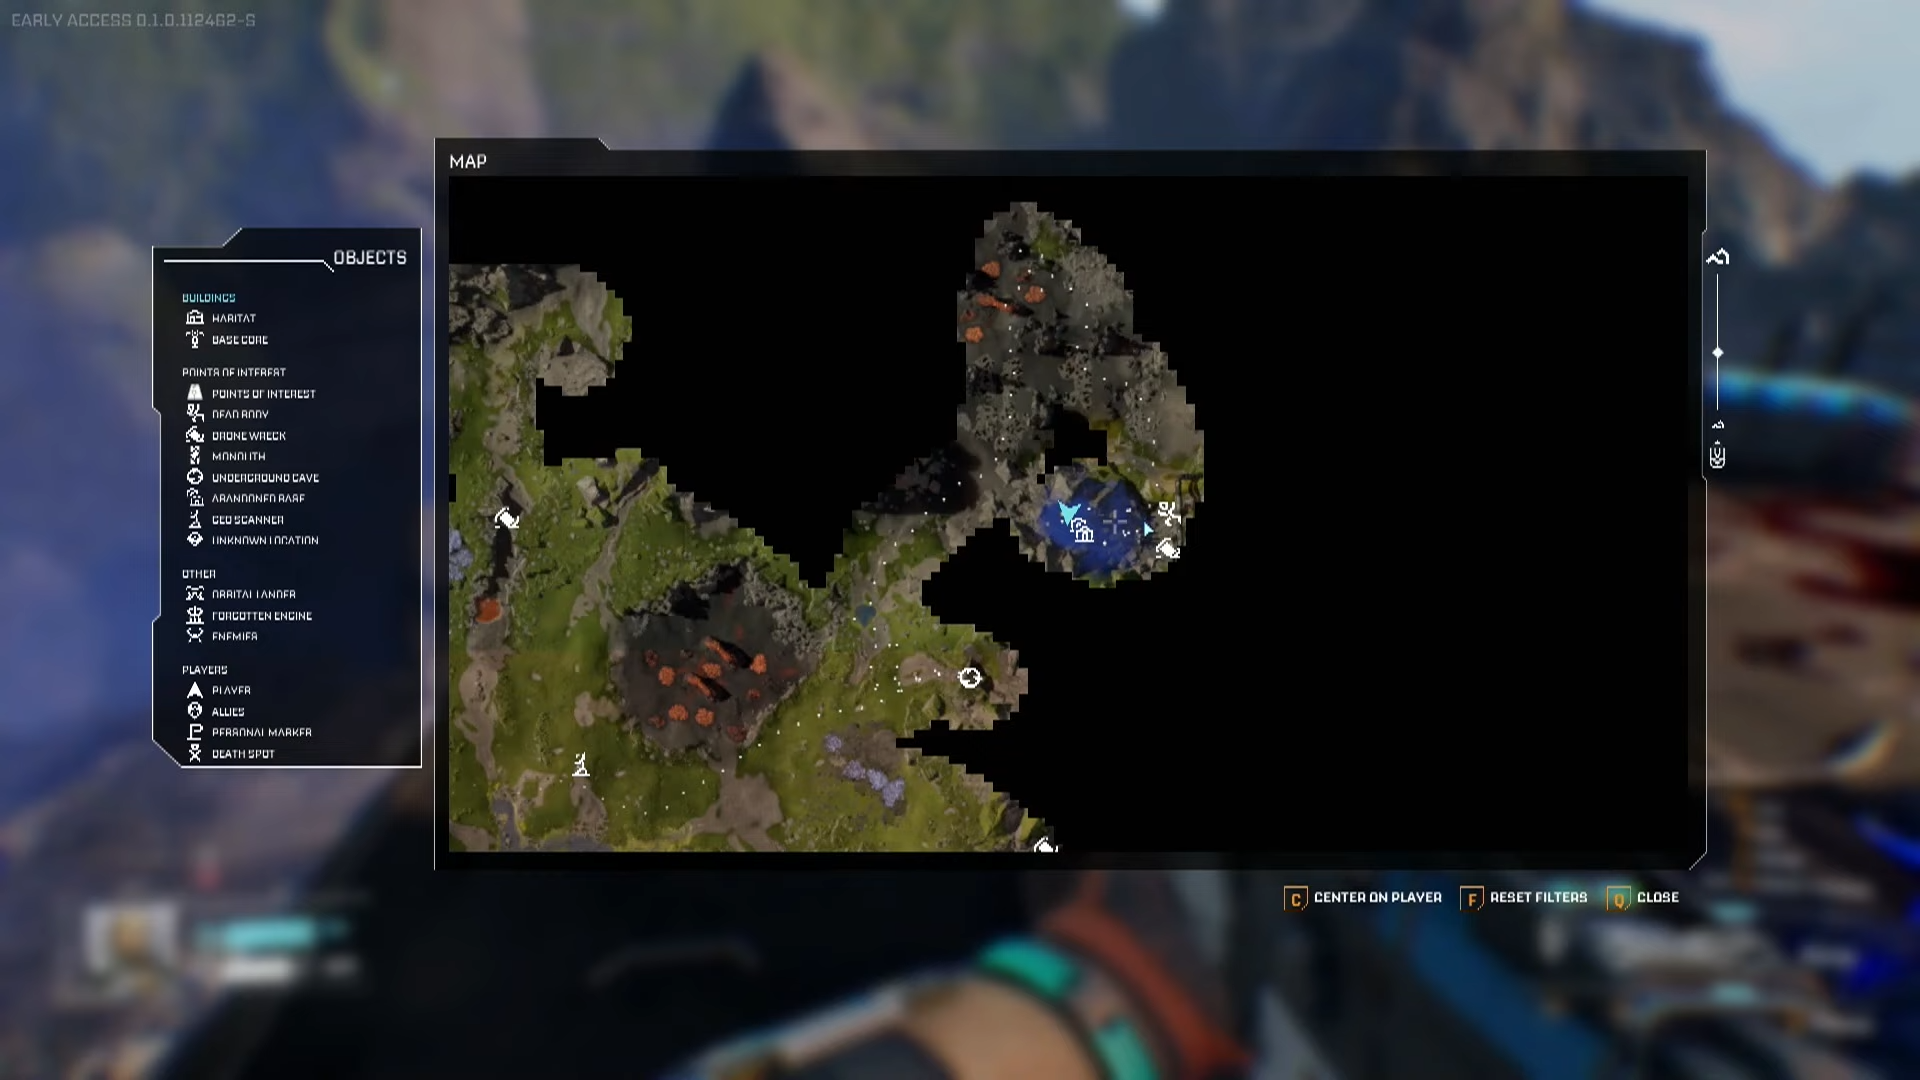
Fabricator blueprint locations
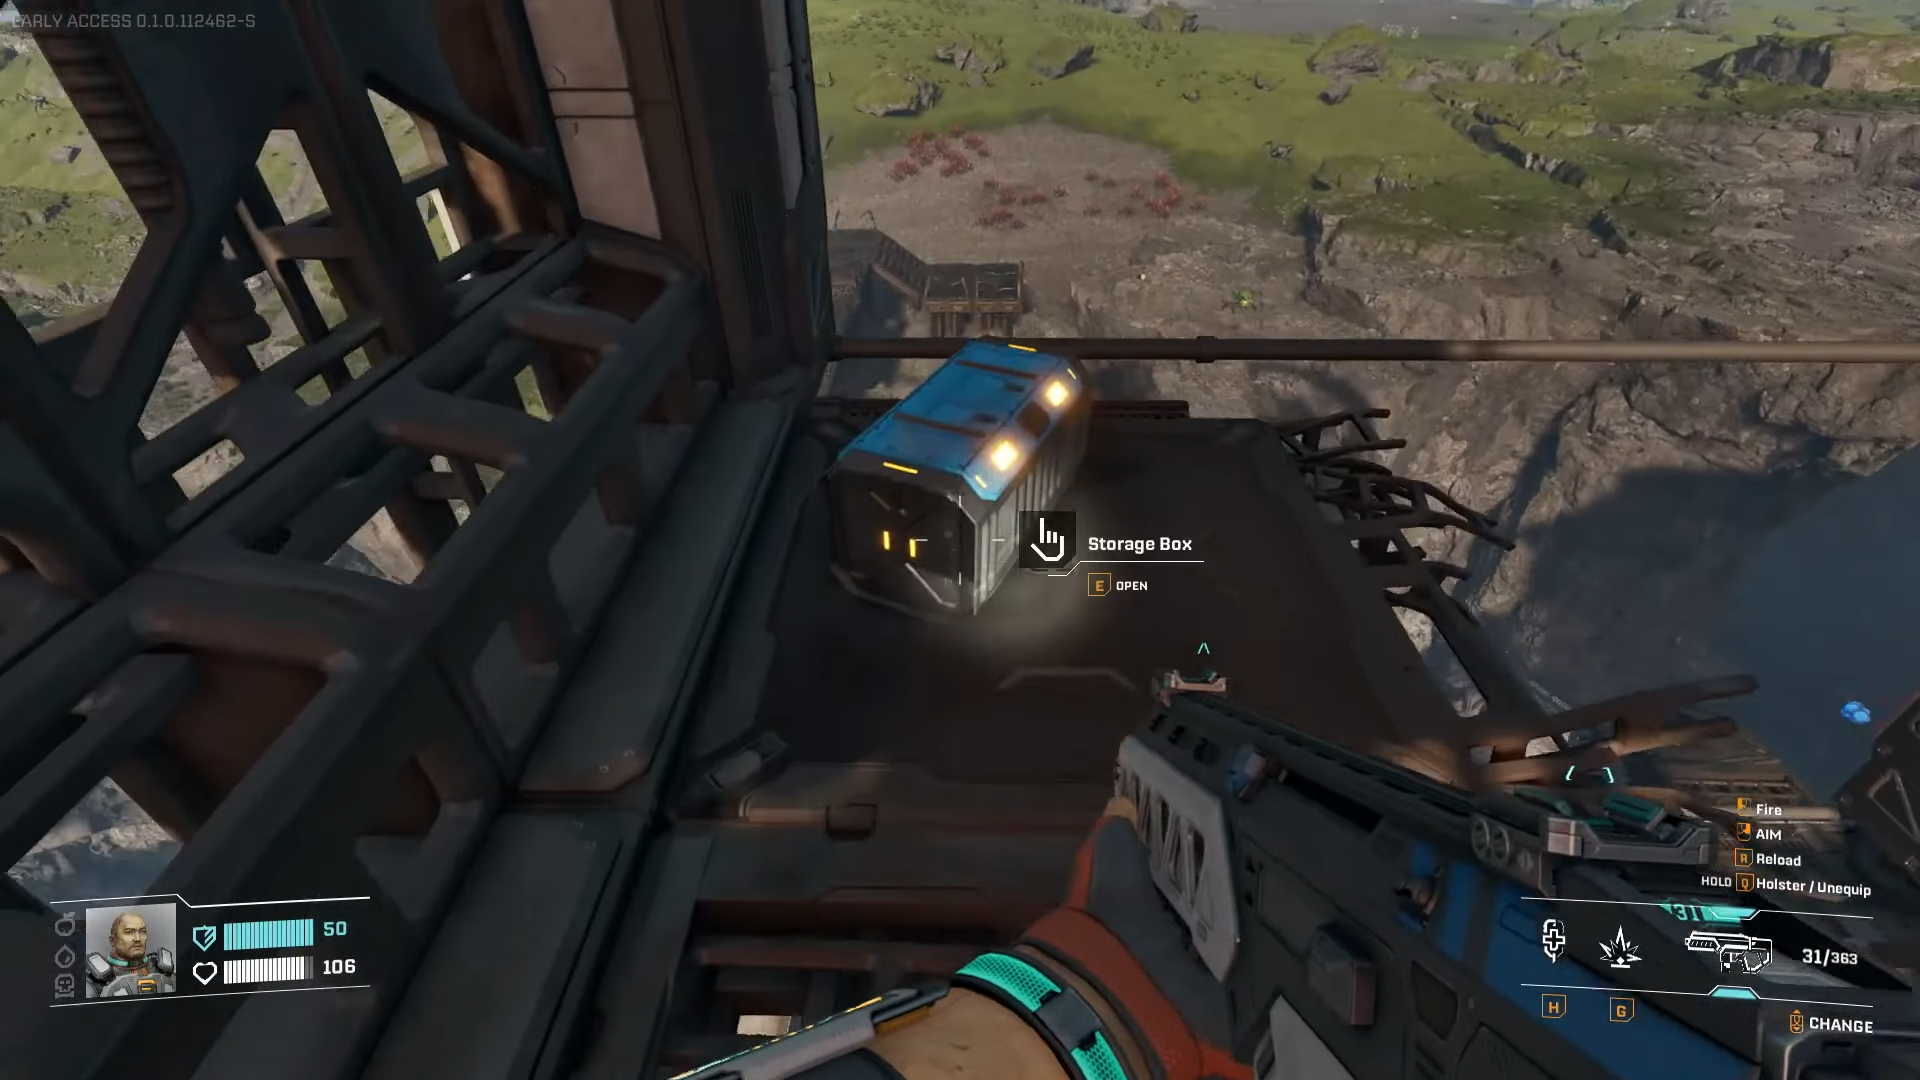
Blueprints spawn consistently in named abandoned bases marked by house icons on approach. Early ones like Rotor and Tube share chests, while later ones demand multi-step access.
| Blueprint | Primary Location | Direction from Lander | Access Notes |
|---|---|---|---|
| Rotor & Tube | SMB “Purple Haze” (Selenian’s Mining Base) | Northwest | Blue chest in rear building; climb rocks to reach upper floor (front door locked) |
| Stabilizer | CRO “Grey Owl” or Claywood Research Outpost | Northeast (mountain) | Located on tower top; reach via climbing near railing |
| Stator | GRO “Lemon Souls” | North | Jump across gap to access top floor |
| Electronics & Rotor (alt) | Unmarked ruin near Starry Night | West of crashed ship | Hidden ravine structure that blends into terrain |
| Valve & Electromagnetic Coil | CRFHSRB “Redleaf” | Northeast | Requires 4 keycards to open doors |
How to reach Purple Haze for Rotor and Tube
Head northwest from your lander to the SMB “Purple Haze” outpost, the most accessible fabricator blueprint site.
Craft a Reaper pistol and 300+ bullets first, as aliens respawn endlessly.
Step 1: Gear up and travel
Pack ammo, medkits, and a mining laser. Follow the path northwest past initial ruins until the house icon appears; expect patrols en route.
Step 2: Clear outer enemies
Eliminate visible aliens around outpost buildings to reduce spawns. Focus ranged threats first.
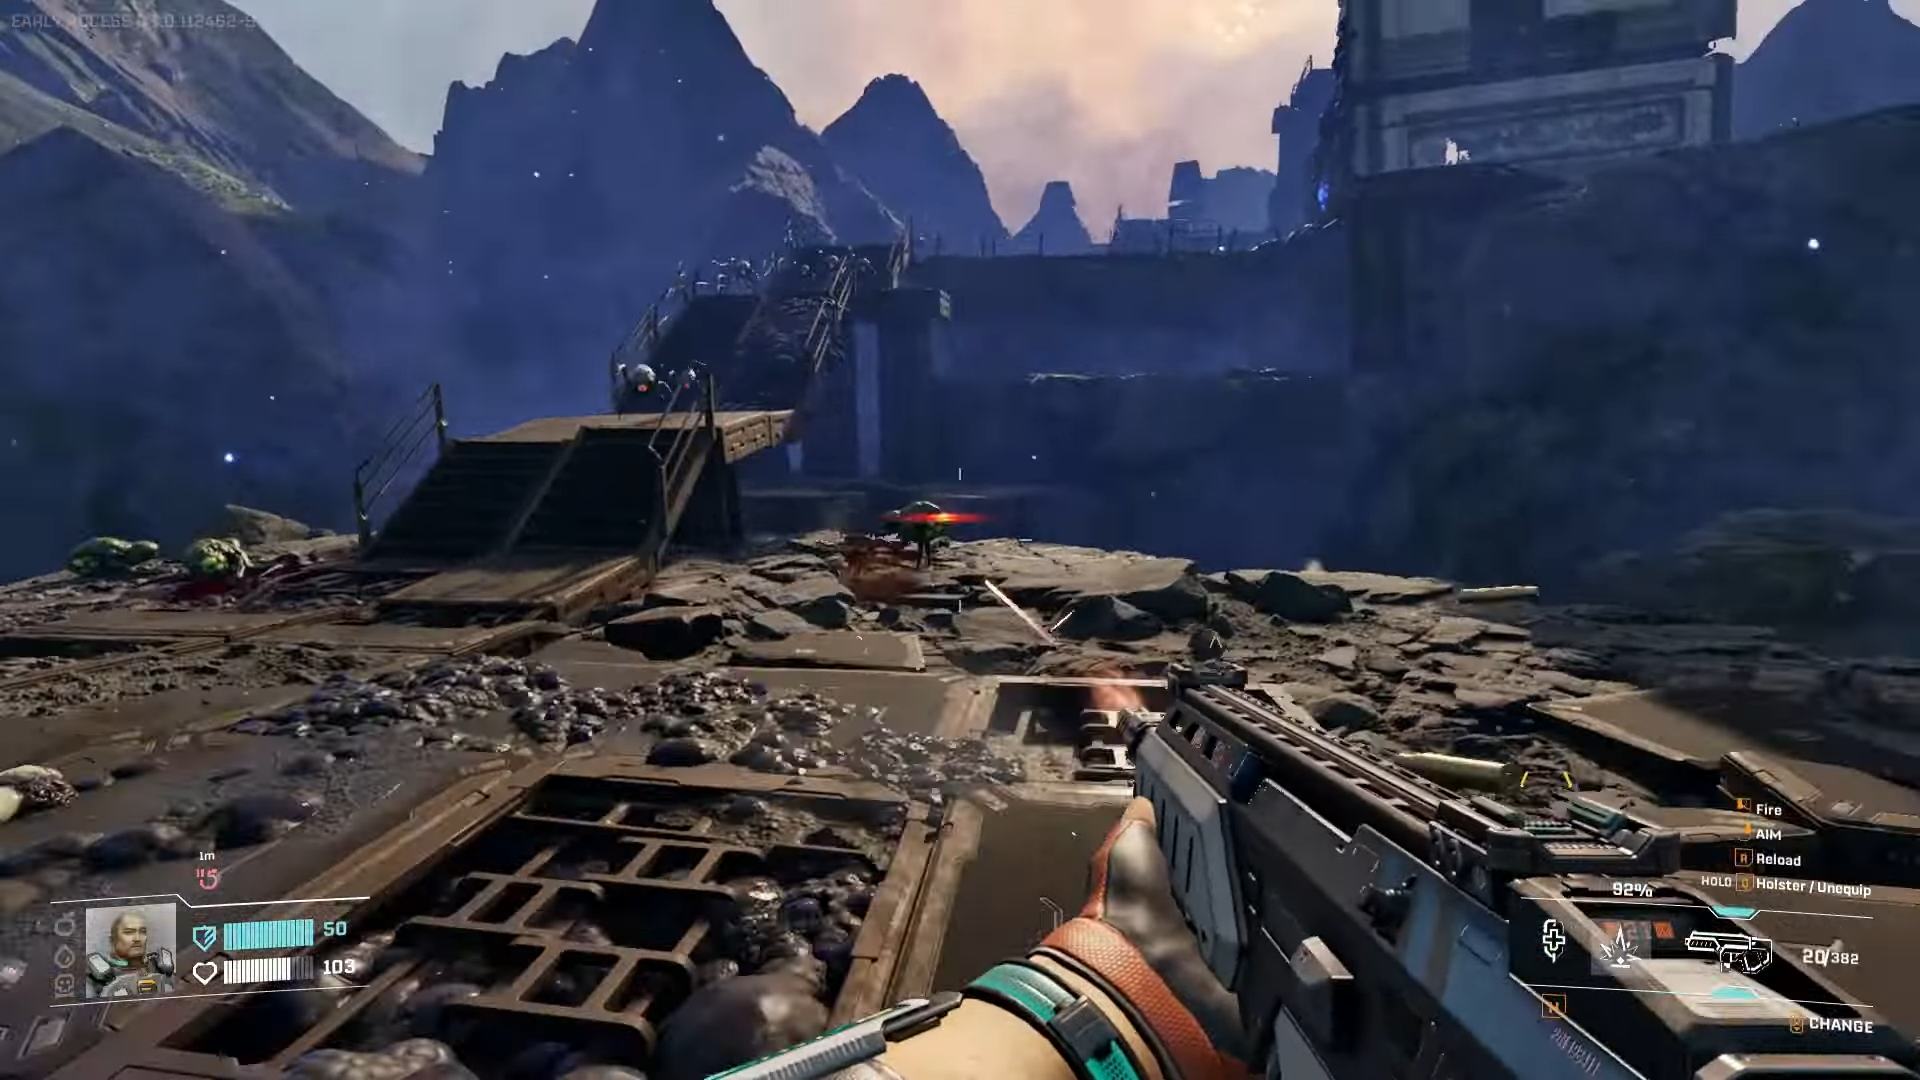
Step 3: Access the back building
Approach the two-story structure at the rear. Front door locks, so circle right to rocks.

Step 4: Climb and enter
Scale rocks to the upper floor balcony. Drop inside or jump gaps to reach the ground-floor blue chest.
Step 5: Grab and escape
Collect Rotor and Tube blueprints; a wave spawns immediately. Sprint out while shooting.

How to get Stabilizer blueprint at Grey Owl
Travel northeast to the mountain outpost CRO “Grey Owl.” Climb the tower for the chest near the railing.
Step 1: Navigate to site
Ascend slopes; watch for fall damage. Clear base perimeter.

Step 2: Scale the tower
Use natural ledges—no keys needed. Enemies inside trigger on ascent.
Step 3: Loot the chest
Blue chest sits exposed; grab Stabilizer and exfiltrate quickly.

How to unlock recipes after collecting
Return to base post-loot. Interact with Recipe Station near Fabricator.
Step 1: Prepare materials
Gather listed items like Titanium Rods and Data Points from mining.
Step 2: Submit blueprint
Select Fabricator recipe slot, insert blueprint and mats. It’s consumed on success.
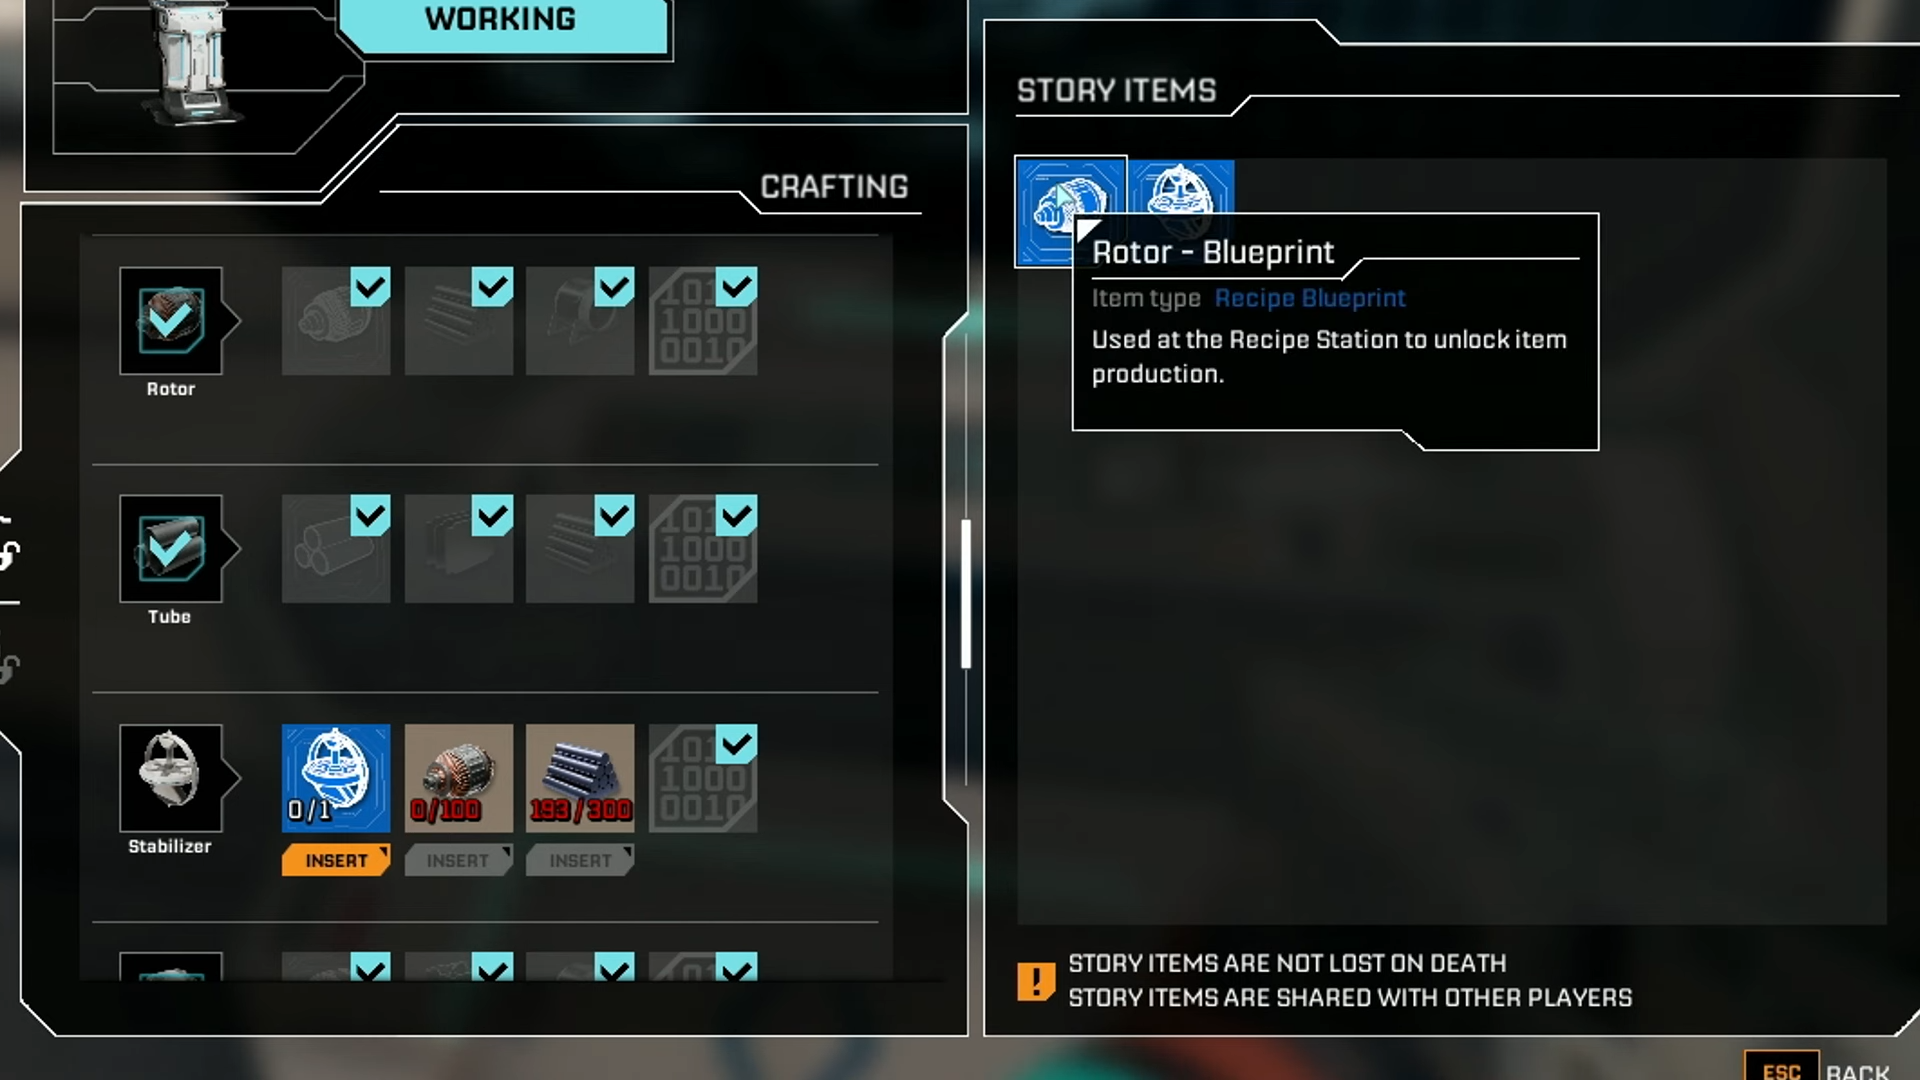
Step 3: Craft in Fabricator
Queue production; automate later with rails and extractors.
Mastering fabricator blueprints sets up automated factories, letting you focus on exploration and corporation contracts instead of manual grinding.