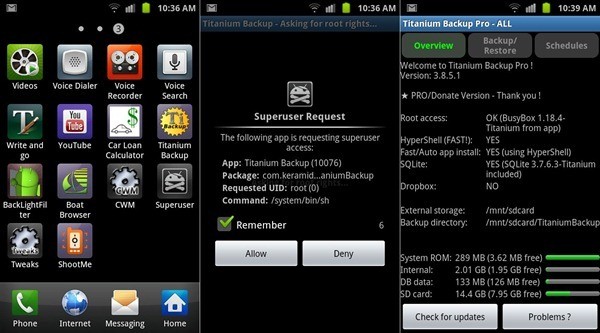
First of all if you are unaware about what rooting is, I will explain you in very short. Rooting is a process that allows users of mobile phones and other devices running the Android operating system to attain privileged control (known as “root access“) within Android’s Linux subsystem with the goal of overcoming limitations that carriers and manufacturers put on some devices. It is analogous to jailbreaking on devices running the Apple iOS operating system.
So, here is the guide on how can you root AT&T SGH-I727 SKYROCKET and make your phone eligible for all root applications making your device perform faster, smarter and better!
[error]This guide is applicable only for AT&T SGH-I727 SKYROCKET. If it’s not specified phone, simply don’t try this or anything discussed here on your android device; in fact, don’t even think about it if you care about your android device. Also note that rooting process may void your warranty unless you are able to ODIN back to Stock ROM.[/error]
[warning]The methods and procedures discussed here are considered risky and you should not attempt anything if you don’t know completely what it is. If any damage occurs to you or your device, we won’t be held liable. You only will be responsible, you’ve been warned!![/warning]
Before we get into process, download the following files you will need for rooting process:
Step by Step Guide:
- Before we begin with main process, make sure your device is recognized by your PC (Windows Platform). If not recognized, use USB DRIVERS you downloaded and install them via Device manager.
- Rename the Superuser file you downloaded — Superuser-3.0.6-efgh-signed.zip — to “Superuser.zip” and place it on your external SD card.
- Open ODIN executable file you downloaded and run it.
- Boot phone into bootloader mode. For this, turn off your phone and take out battery. Place battery back in and press both Volume Rockers: Vol Up + Vol Down. Plug in USB cable while holding volume rocker buttons. This will boot your phone in bootloader mode, and now it should be recognized in Odin. If it doesn’t get recognized, try again because it’s essential that your phone appears in Odin.
- Now, on Odin, click the PDA tab and select the CWM file you downloaded i.e. recovery.tar
- Don’t select/check/uncheck any other option
- Double check Step 5 and 6.
- Click START. Flashing will start.
- Once this flashing is complete, your phone will boot up.
- Unplug USB cable, turn off device and remove battery.
- Place battery back in and you need to boot in recovery mode this time. For this, hold both volume rocker buttons and press power button. Keep holding all three buttons until something appears on screen.
- Now, you see ClockWorkMod (CWM) recovery. Use Volume Up and Down keys to browse through options and power to select an options, while back key to go to previous screen.
- Then, select “install zip from sdcard”. Then, “choose zip from sdcard”.
- Choose “Superuser.zip” you placed earlier on sdcard and select “yes – ___” to flash it.
- If you get any error while flashing Superuser, flash it again.
- Reboot.
- That’s it your phone is now rooted your SkyRocket with custom recovery, that is CWM recovery, installed too. Have fun flashing!
You will be able to see and use “Superuser” app on your phone now.
Congratulations, you rooted your device successfully!


THANK YOU
Is Rooting going to erase my data from the phone?
Nope.
Ok great! Thanks.
It worked great. I followed the steps and my skyrocket is rooted. Thanks.
THANK YOU
Is Rooting going to erase my data from the phone?
Nope.
Ok great! Thanks.
It worked great. I followed the steps and my skyrocket is rooted. Thanks.
THANK YOU
Will this work for a Rogers SGH-i727r?
Will this work for a Rogers SGH-i727r?
Will this work for a Rogers SGH-i727r?
Is Rooting going to erase my data from the phone?
Nope.
Ok great! Thanks.
It worked great. I followed the steps and my skyrocket is rooted. Thanks.
Is Rooting going to erase my data from the phone?
Nope.
Ok great! Thanks.
It worked great. I followed the steps and my skyrocket is rooted. Thanks.
I have to ask if this works for Gingerbread 2.3.6 and how long do you hold the rocker switches and the power button? I can get it to flash the Samsung screen but after that it goes blank and the haptic feedback vibrates every 3-4 seconds but after a minute I don’t get another screen.
I have to ask if this works for Gingerbread 2.3.6 and how long do you hold the rocker switches and the power button? I can get it to flash the Samsung screen but after that it goes blank and the haptic feedback vibrates every 3-4 seconds but after a minute I don’t get another screen.
I have to ask if this works for Gingerbread 2.3.6 and how long do you hold the rocker switches and the power button? I can get it to flash the Samsung screen but after that it goes blank and the haptic feedback vibrates every 3-4 seconds but after a minute I don’t get another screen.
Clockworkmod (CWM) link doesn’t work. It takes me to LNX.lu/5yD. Do you have a different link like the ones through mediafire. Thanks.
Clockworkmod (CWM) link doesn’t work. It takes me to LNX.lu/5yD. Do you have a different link like the ones through mediafire. Thanks.
Clockworkmod (CWM) link doesn’t work. It takes me to LNX.lu/5yD. Do you have a different link like the ones through mediafire. Thanks.