Navigate out of Far Fields in Hollow Knight: Silksong with this guide. Learn how to unlock the Drifter’s Cloak and escape the looping paths of this eerie area.
What to know
- Far Fields location: An early-game area east of Deep Docks in Hollow Knight: Silksong.
- Why you’re stuck: You need the Drifter’s Cloak to ride wind currents and exit.
- Key quest: Completing the Flexile Spines Hunt unlocks the necessary ability.
- Exit options: Use the cloak to return to Deep Docks, access Bellway, or reach Greymoor.
Navigating the sprawling world of Hollow Knight: Silksong can feel like a puzzle, and Far Fields is one of those areas where you might find yourself circling endlessly. This guide walks you through the steps to escape Far Fields, helping you unlock the ability to glide and progress to new areas like Greymoor or Deep Docks.
Key progression requirements for Far Fields
Before you can fully exit the Far Fields, you’ll need to complete a few progression triggers:
- Defeat the roaming mini-boss – A hulking enemy patrols the central plains. Beating it opens a blocked passage on the eastern side.
- Unlock wind current traversal – Completing an NPC quest in this region grants access to wind currents that carry you across otherwise unreachable cliffs.
- Activate the stone marker – A hidden switch-like mechanism in the underground tunnels clears thorns blocking the southern exit.
Without hitting these triggers, most exits will remain blocked or loop you back into earlier sections.
Some users are really hard time with it.
Exit paths from the Far Fields
Once progression requirements are complete, you have multiple ways out:
- Eastern exit to Greymoor
- Opened after defeating the roaming mini-boss.
- Leads into a darker, denser zone with tighter combat encounters.
- Southern exit to The Lowlands
- Requires activating the underground stone marker.
- A quicker route that connects back toward earlier regions for supplies.
- Western exit (backtrack)
- Lets you return to Hunter’s March if you need to regroup.
- Useful if you want to prepare before tackling new zones.
- Northern exit to higher cliffs
- Only available once you unlock wind current traversal.
- Leads toward mid-game areas with stronger enemies and advanced upgrades.
How to leave Far Fields [Guide]
Far Fields, located east of Deep Docks and near Hunter’s March and Greymoor, is an early-game area in Silksong with a haunting aesthetic. Its lava currents and updrafts tease the possibility of upward movement, but without the right tool, you’ll loop back to the same spots. The key to leaving lies in acquiring the Drifter’s Cloak, which lets you ride wind currents to reach higher platforms and exits.
Step 1: Locate the Seamstress
To start, head to the southeast section of Far Fields, where you’ll find a large chamber with wooden platforms suspended by chains. Climb these platforms to reach a tent-like rest area. Inside, you’ll meet the Seamstress, a pivotal NPC who triggers the Flexile Spines Hunt quest. This quest is mandatory for progressing, as it unlocks the ability needed to escape. Speak to her to begin the hunt, which involves collecting 25 Spine Cores from specific enemies.
Step 2: Complete the Flexile Spines Hunt
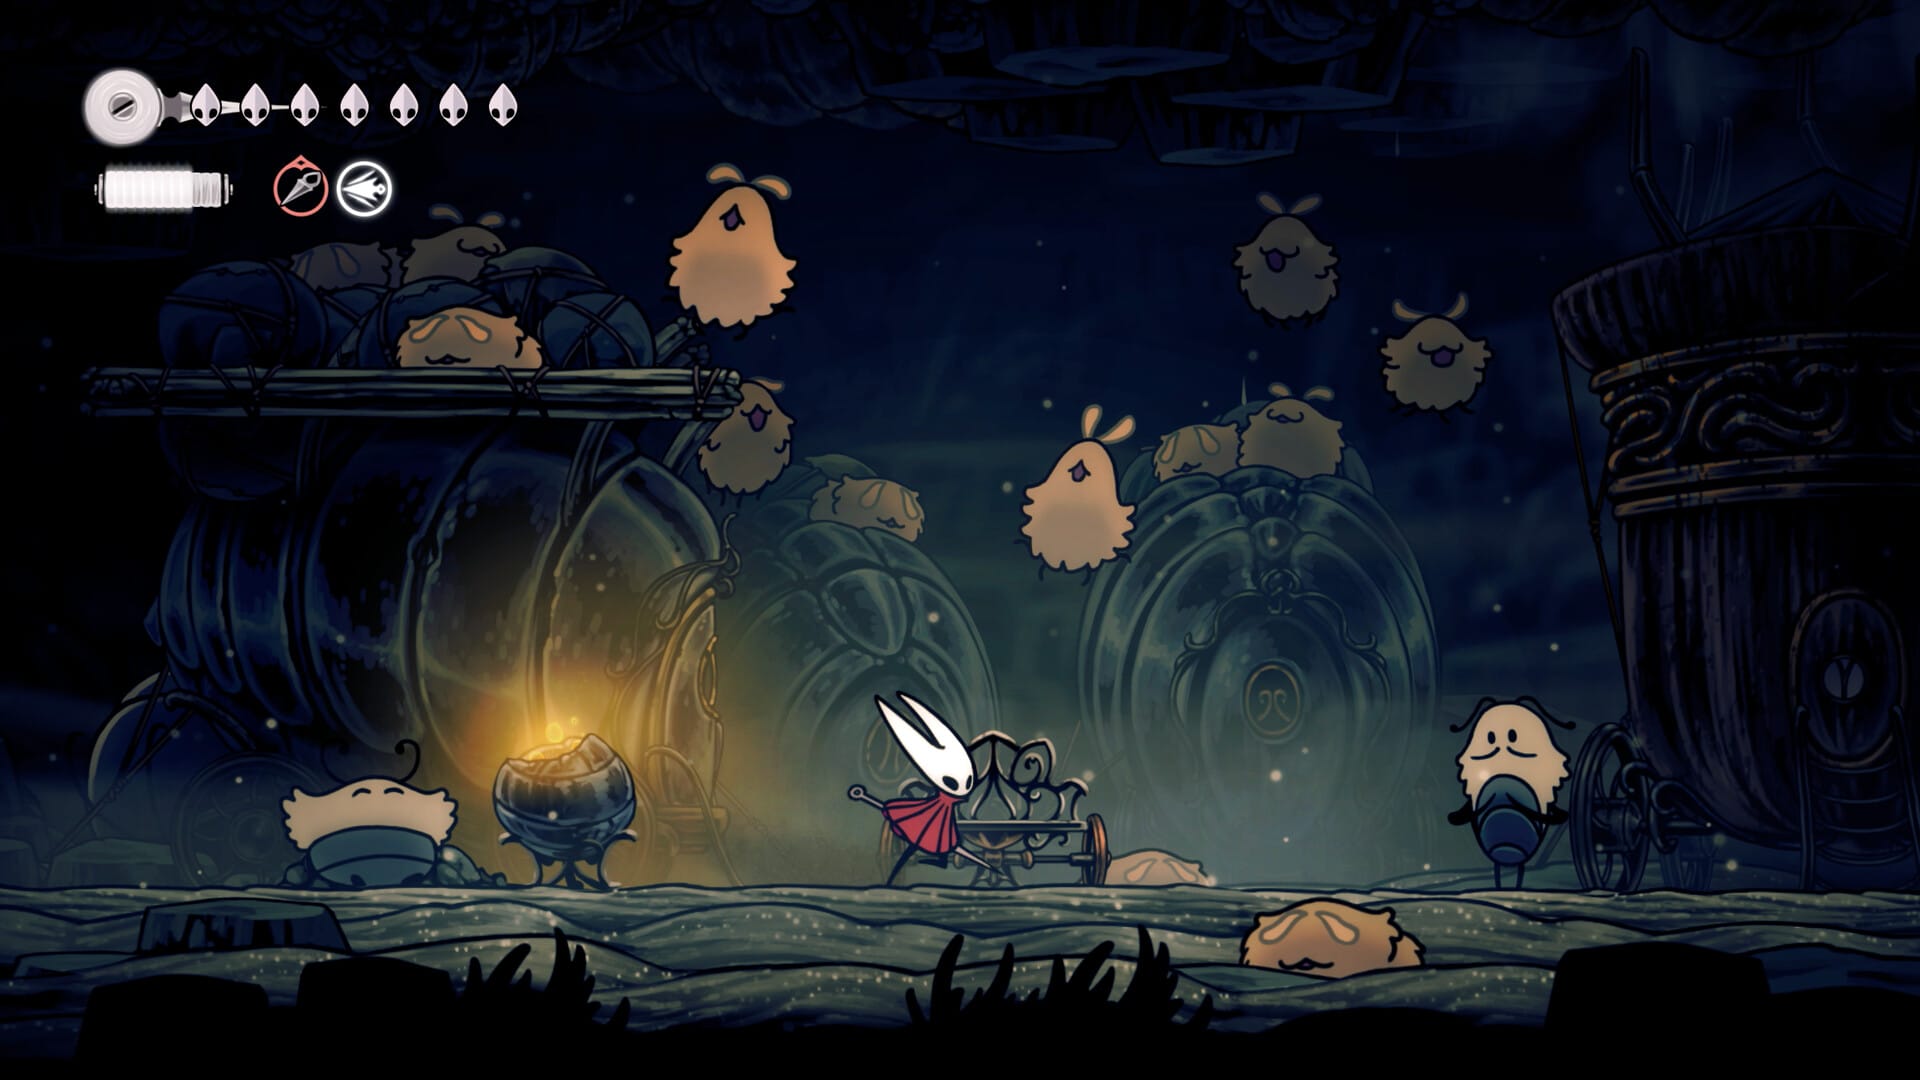
The Flexile Spines Hunt requires you to gather 25 Spine Cores from Hoker enemies, which are floating creatures that shoot spikes when attacked. These enemies are scattered throughout Far Fields, particularly near the Seamstress’s tent and in nearby caverns. Here’s how to collect the spines:
- Find Hokers: Head right from the Seamstress’s tent or explore eastward to locate Hokers. They’re easy to spot with their spiky appearance.
- Harvest Spine Cores: Attack a Hoker to make it fire spines in an arc. Wait for the spines to embed in the ground, then strike them with your Needle to collect a Spine Core. Each Hoker typically yields one core.
- Farm efficiently: Hokers respawn after you leave and re-enter an area, so you can loop through rooms to gather all 25 cores. Focus on Hokers above solid ground, as spines that hit other spikes may break.
- Return to the Seamstress: Once you’ve collected 25 Spine Cores, head back to the Seamstress. She’ll craft the Drifter’s Cloak, which grants you a double-jump and glide ability.
This step can feel tricky since the game doesn’t explicitly guide you to the quest. If you’re struggling to find Hokers, explore the areas right of the tent or check lower paths for more enemies.
Step 3: Use the Drifter’s Cloak to escape
With the Drifter’s Cloak equipped, you can now double-jump and glide, allowing you to ride Far Fields’ wind currents to reach new heights. This ability opens up multiple exit routes:
- Return to Deep Docks: Use the cloak to glide back westward, riding updrafts to access platforms leading to Deep Docks.
- Access the Bellway: From the lowest road in Far Fields, head left until you encounter the Fourth Chorus boss. Defeat it, then continue left to find a wind current. Glide up to reach the Bell Beast Bellway, a new path forward.
- Head to Greymoor: North of Far Fields, use the cloak to ride updrafts to platforms connecting to Greymoor, a neighboring area.
To maximize your time in Far Fields, consider an optional step: collecting a Mask Shard. From the Seamstress’s balloon, head right and ride a wind current upward. Break three explosive rocks (watch out for their blast radius) to reveal a path to the left. Inside, destroy a yellow bomb above with another wind current to uncover the Mask Shard, which boosts your health.
Tips to avoid getting stuck again
- Keep marking landmarks on your mental map, especially vertical shafts and unique rock formations.
- Prioritize NPC dialogue—often they hint at which direction progression lies.
- Don’t ignore underground sections; many exits require solving something below the plains.
- If you’re overwhelmed, backtracking west gives you a safe reset point without losing progress.
This part in the Far Fields made my heart DROP I thought I was stuck in a boss fight with nowhere to go 😂 pic.twitter.com/Le9Yp7S6f3
— 🍎 Anaïs 🌊 (@yorha_a01) September 5, 2025
Overcoming the frustration
Far Fields can feel like a trap due to its subtle design. The game’s Metroidvania style often leaves progression clues understated, which can make you feel lost. Many players report circling the area, unaware they need the Drifter’s Cloak. The key is to stay patient and methodical—once you know to seek out the Seamstress and complete her quest, the path forward becomes clear.
Optional tips for Far Fields
Before leaving, you might want to explore a bit more to make the most of your time here. Here are some quick pointers:
- Map acquisition: Visit Shakra in a cave to the right of the explosive rock area to purchase the Far Fields map for better navigation.
- Shell Shards: Break explosive rocks in the bottom right corner of certain areas to collect Shell Shards, useful for upgrades.
- Boss preparation: The Fourth Chorus boss, encountered en route to the Bellway, uses a directional slam, stage-wide swipe, and other attacks. Practice dodging and dashing to counter its moves effectively.
| Key Details | Description |
|---|---|
| Quest | Flexile Spines Hunt: Collect 25 Spine Cores from Hokers. |
| Reward | Drifter’s Cloak (grants double-jump and glide). |
| Exits | Deep Docks (west), Bell Beast Bellway (left after boss), Greymoor (north). |
| Optional Item | Mask Shard: Found above Seamstress’s balloon after breaking explosive rocks. |
What after Far Fields?
With the Drifter’s Cloak in hand, you’re free to leave Far Fields and explore Pharloom’s broader world. Whether you head to Greymoor for new challenges or backtrack to Deep Docks for unfinished business, the cloak’s glide ability opens up Silksong’s vertical exploration. Take a moment to decide which path aligns with your goals—collecting more items or pushing the main story forward. Either way, you’ve conquered one of Silksong’s trickier early hurdles.