The latest version of TWRP recovery, 2.8.7.0 is now available for download on Samsung Galaxy A3. The model nos. confirmed to work with the TWRP given here are A300H, A300F and A300FU. Plus, it’s been confirmed to work on Android 5.0.2.
Come 5.1.1, this TWRP might not work — at least that’s what our experience with Galaxy S6 TWRP recovery shows. But before you install TWRP recovery on your Galaxy A3, know that installing it will trip KNOX, meaning your Galaxy A3’s warranty will be void. Credit for Galaxy A3 TWRP goes to ivan-68, while thanks to Intel777chanel for sharing this.
Anyway, this TWRP is not an official version from the team, but it nevertheless works flawlessly when it comes to flashing zip and img files, while backup and restore aren’t a problem either. Moreover, doing any type of wipe action is fully working too, as also mounting partitions such as Systsem/Data/Cache/Extsdcard/etc.
But, right now, the Galaxy A3 TWRP recovery is unable to mount the device as MTP, meaning you won’t be able to transfer files from recovery mode. Another issue remains with ‘ADB sideload’ feature, bit we hope both of these will be fixed soon. Do check out whether any newer version of recovery is available at the development page linked in downloads section.
Downloads
- Galaxy A3 TWRP Recovery — Link | File: TWRP_2.8.7.0_A3_F-H-FU_5.0.2_v2.tar (12.7 MB)
- Odin PC software — Link | File: Odin3_v3.10.6.zip (1.6 MB)
→ Check the development page here for the newer version of TWRP recovery, if any, which may already have fixed the bugs mentioned above.
Supported devices
- SAMSUNG GALAXY A3, model no. SM-A300F/H/FU
- Don’t try on any other device whatsoever!
Instructions
Warning: Warranty may be void of your device if you follow the procedures given on this page. You only are responsible for your device. We won’t be liable if any damage occurs to your device and/or its components.
Backup important files stored on your device before proceeding with the steps below, so that in case something goes wrong you’ll have backup of all your important files. Sometimes, Odin installation may delete everything on your device!
Step-by-step Guide
Step 1. Download Odin and firmware file from above.
Step 2. Install Galaxy A3 drivers (method 1 there!) first of all. Double click the .exe file of drivers to begin installation. (Not required if you have already done this.)
Step 3. Extract the Odin file. You should get this file, Odin3 v3.10.6.exe (other files could be hidden, hence not visible).
Step 4. Disconnect your Galaxy A3 from PC if it is connected.
Step 4. Boot Galaxy A3 into download mode:
- Power off your Galaxy A3. Wait 6-7 seconds after screen goes off.
- Press and hold the three buttons Volume Down + Power + Home together until you see warning screen.
- Press Volume Up to continue to download mode.
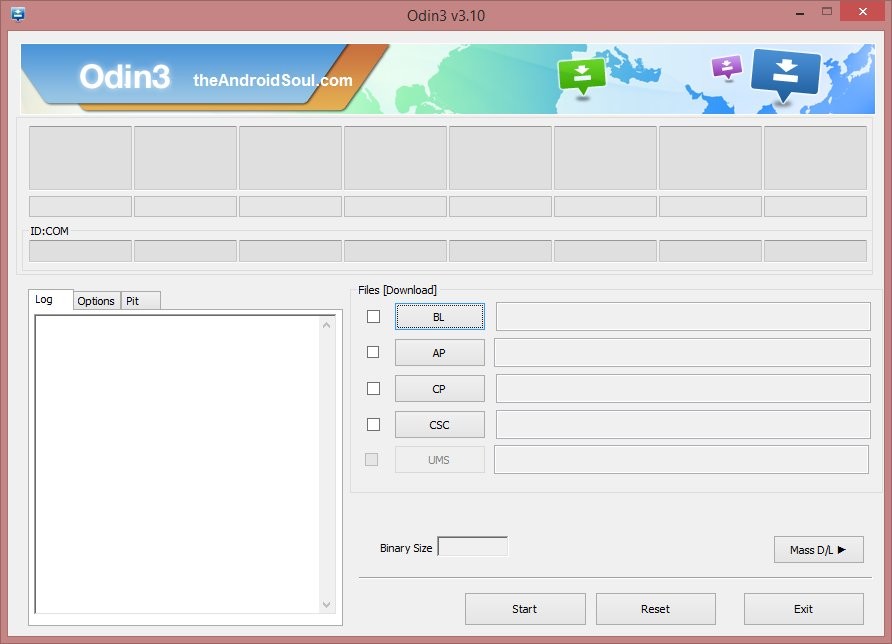
Step 5. Double click on extracted file of Odin, Odin3 v3.10.6.exe, to open the Odin window, as shown below. Be careful with Odin, and do just as said to prevent problems.
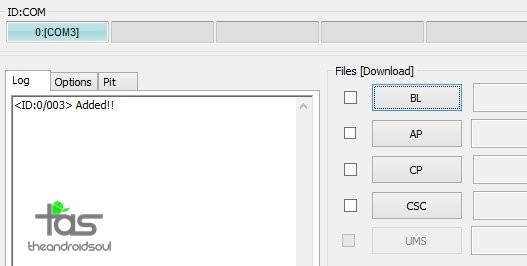
Step 6. Connect your Galaxy A3 to PC now using USB cable. Odin should recognize your Galaxy A3. It’s a must. When it recognizes, you will see Added!! message appearing in the Log box in bottom left, and the first box under ID:COM will also show a no. and turn its background blue. Look at the pic below.
- You cannot proceed until Odin recognizes your device and you get the Added!! message.
- If it doesn’t, you need to install/re-install drivers again, and use the original cable that came with device. Mostly, drivers are the problem.
- You can try different USB ports on your PC too, btw.
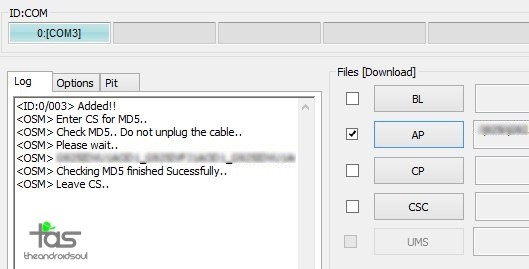
Step 7. Load the TWRP file into Odin. For this, click the AP button on Odin and the select the file: TWRP_2.8.7.0_A3_F-H-FU_5.0.2_v2.tar
- Info: When you load files, Odin checks the md5 of firmware file, which takes time. So, simply wait until that’s done and the firmware file is loaded. Don’t worry if Odin gets unresponsive for a while, it’s normal. Binary size will also show up in Odin.
Step 8. Make sure Re-partition checkbox is NOT selected, under the Options tab. Don’t use PIT tab either. Go back to Log tab btw, it will show the progress when you hit start button in next step.
Step 9. Click the Start button on Odin now to start flashing the firmware on your Galaxy A3. Wait till installation is finished, after which your Galaxy A3 will reboot automatically. You’ll get PASS message as show below upon successful installation from Odin.
- If Odin gets stuck at setup connection, then close Odin, disconnect your Galaxy A3, and do the whole procedure again.
- Or, if you get FAIL in the top left box, you need to try flashing again, as stated just above.
→ That’s it. Enjoy the TWRP recovery v2.8.70 on your Galaxy A3!
If you need any help with this, let us know via comments below and we will try our best to help you out.


That great… i need root for Samsung A300H help me!
That’s great… I need root for Samsung A300H 5.0.2 Help me! Thank U
That great… i need root for Samsung A300H help me!
That’s great… I need root for Samsung A300H 5.0.2 Help me! Thank U
Как удалить TWRP
Как удалить TWRP
I need for samsumg a300m, please give root or twrp for it.
This root works in a300m?
I need for samsumg a300m, please give root or twrp for it.
This root works in a300m?