Apple lets you create albums on your iPhone where you can add pictures, sort them, create slideshows, and share them with your friends and family. If you have an existing album but its name doesn’t reflect the content currently inside it, you can change the name of the album any time inside the Photos app.
In the following post, we’ll explain all the ways you can rename albums for your pictures on your iPhone.
How to rename albums on the Photos app on iPhone [3 methods]
If you wish to change the current name of an album inside the Photos app on your iPhone, there are many ways to do so. You can follow any of the following methods to rename an album on iOS and change it to something new.
Method 1: From the My Albums screen
You can rename an album on your iPhone directly from the My Albums screen on the Photos app.
- Open the Photos app on your iPhone.

- Inside Photos, tap on the Albums tab at the bottom.

- When the Albums screen loads up, tap on See All at the top right corner to load all the albums that have been created on your iPhone.

- This will open the My Albums screen which shows a list of albums that are available on your iPhone. To rename an album from this list, tap on Edit at the top right corner.

- When the list goes into edit mode, locate the album whose name you want to change. Once you find this album, tap on its album name.

- This should highlight the current name of the album in blue. Using the on-screen keyboard that appears at the bottom, type a new name for the selected album. When you’re done entering the new album name, tap on Done at the top right corner.

- The selected album will show the new album name inside the Albums screen.
Related: 4 ways to turn off Find My iPhone on iCloud
Method 2: By long-pressing on an album
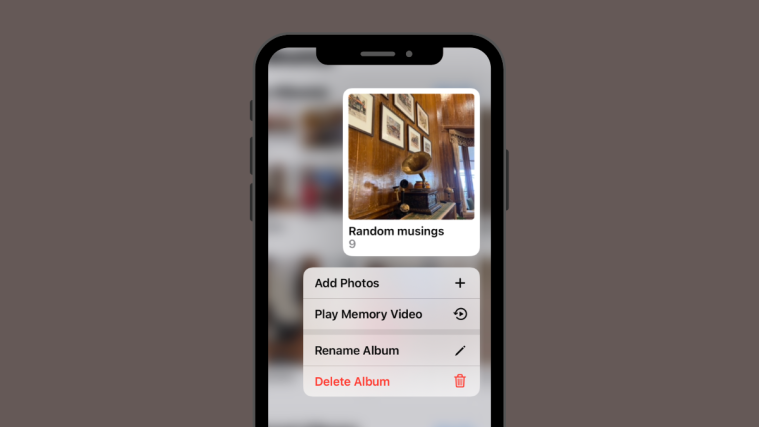
Albums inside the Photos app can also be renamed using actionable shortcuts that appear upon long-pressing an item from the Albums screen.
- To change an album’s name using this method, open the Photos app on your iPhone.

- Inside Photos, tap on the Albums tab at the bottom.

- When the Albums screen loads up, long-press on the album whose name you want to change.

- In the overflow menu that appears, select Rename Album.

- You’ll now see the Rename Album box appear on the screen.

- Here, clear the existing name from the text box and type a new name for the album using the on-screen keyboard. Once you’ve entered the new name, tap on Save.

- The selected album will now have the new name you applied on the Albums screen.

Related: How to clear space on iPhone [AIO]
Method 3: By opening an album
You can also change the name of an album after you open it inside the Photos app.
- Open the Photos app on your iPhone.

- Inside Photos, tap on the Albums tab at the bottom.

- When the Albums screen loads up, tap on an album you want to rename. If you cannot find the album on the current screen, tap on See All and then select the album you want to rename on the next screen.

- When the selected album opens on the next screen, tap on the 3-dots icon at the top right corner.

- In the overflow menu that appears, select Rename Album.

- You’ll now see the Rename Album box appear on the screen. Here, clear the existing name from the text box and type a new name for the album using the on-screen keyboard. Once you’ve entered the new name, tap on Save.

- The selected album will now have the new name you applied on the Albums screen.

Related: How to Use iCloud Shared Photo Library on iPhone
How to rename an album on the Google Photos app
If the album you want to rename isn’t present on the native Photos app but was created inside Google Photos, you can change its name on the latter in the same manner as above.
- Open the Google Photos app on your iPhone.

- When the app opens, tap on the Library tab at the bottom right corner.

- Inside the Library tab, tap on an album you want to rename from the “Albums” section.

- This will open the selected album on the next screen. On this screen, tap on the 3-dots icon at the top right corner.

- In the popup screen that opens at the bottom, select Edit album.

- The album will now go into edit mode. In this mode, tap on the name of the album at the top.

- When you do that, the on-screen keyboard will open at the bottom. You will first have to clear the existing name of the album before entering a new name for it. After you’ve entered the new name for the album, tap on the tick mark at the top left corner to save changes.

- The new name will now be applied to the selected album on Google Photos.

That’s all you need to know about renaming albums on an iPhone.
RELATED


