- What to know
- How to allocate stats for maximum tankiness
- How to set up your Samurai/Fukuroku armor and weapons
- How to configure the optional Ninja/Anari setup
- How to choose guardian spirit and core defensive effects
- How to pick Samurai skills for a tank playstyle
- How to set up Ninja skills for optional utility
- How to use clan buffs for extra tankiness and damage
- How to choose Omiyo and Soul Cores for defense and healing
- How to configure axe martial arts for elemental pressure
- How to configure dual sword skills for defense and multi-element coverage
- How to build the Amrita absorption healing engine
- How to play fights with the Fukuroku tank build
- Rewards and benefits of using this tank setup
- How to reach the locations where this build shines
What to know
- This build focuses on maximum damage reduction, toughness and nonstop self-healing through Amrita absorption.
- You can run almost any weapon, but axe and dual swords make the most of its elemental and tank tools.
- Core sets are Fukuroku for tank stats and Tatanashi for extra damage reduction and weight-based damage bonuses.
- The setup leans on extraction and Amrita gain to keep your HP topped off while you stay aggressive.
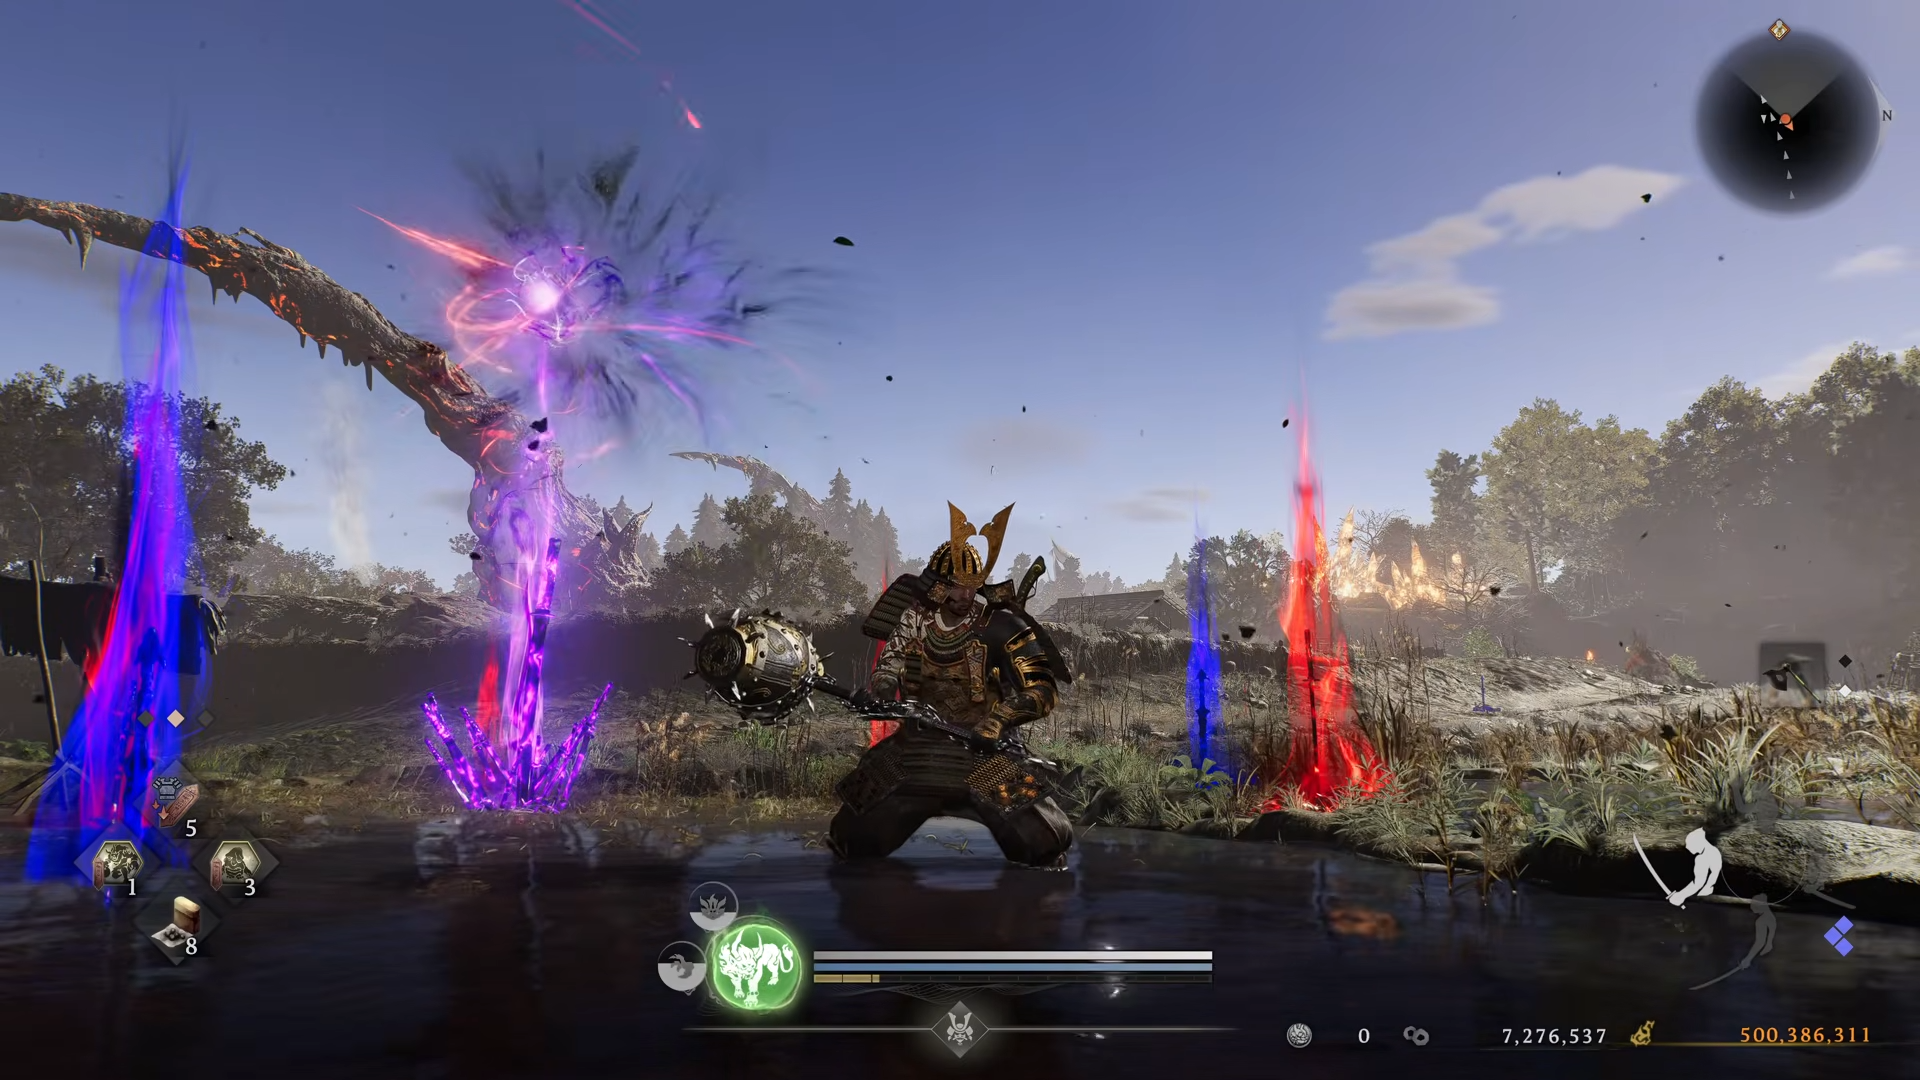
In Nioh 3, this Fukuroku tank setup is designed so you can stay in the fight, soak hits comfortably and still deal solid damage while rotating through weapon skills.
| Aspect | Details |
|---|---|
| Core concept | Extreme tank build with stacked damage reduction and Amrita-based self-healing |
| Main armor sets | Fukuroku set plus Tatanashi (God of War Looks Down) pieces |
| Primary stats | Constitution and Heart maxed first, with some Stamina for gear requirements |
| Playstyle focus | Constant attacking, rotating martial arts, building versatility stacks |
| Main weapons | Axe and dual swords (though any weapon can work) |
| Key defenses | Flat damage reduction, elemental damage reduction, extra defense and toughness while attacking |
| Main healing engine | Life recovery on Amrita absorption on every armor piece, plus Amrita gain on strong attacks |
| Extra layers | Guardian spirit, soul cores, clan buffs and Omiyo to reduce damage while attacking and boost survivability |
| Optional path | Anari/Ninja setup in the back pocket for elemental application when needed |
How to allocate stats for maximum tankiness
Your stat spread is built around health, ki and meeting heavy gear requirements.
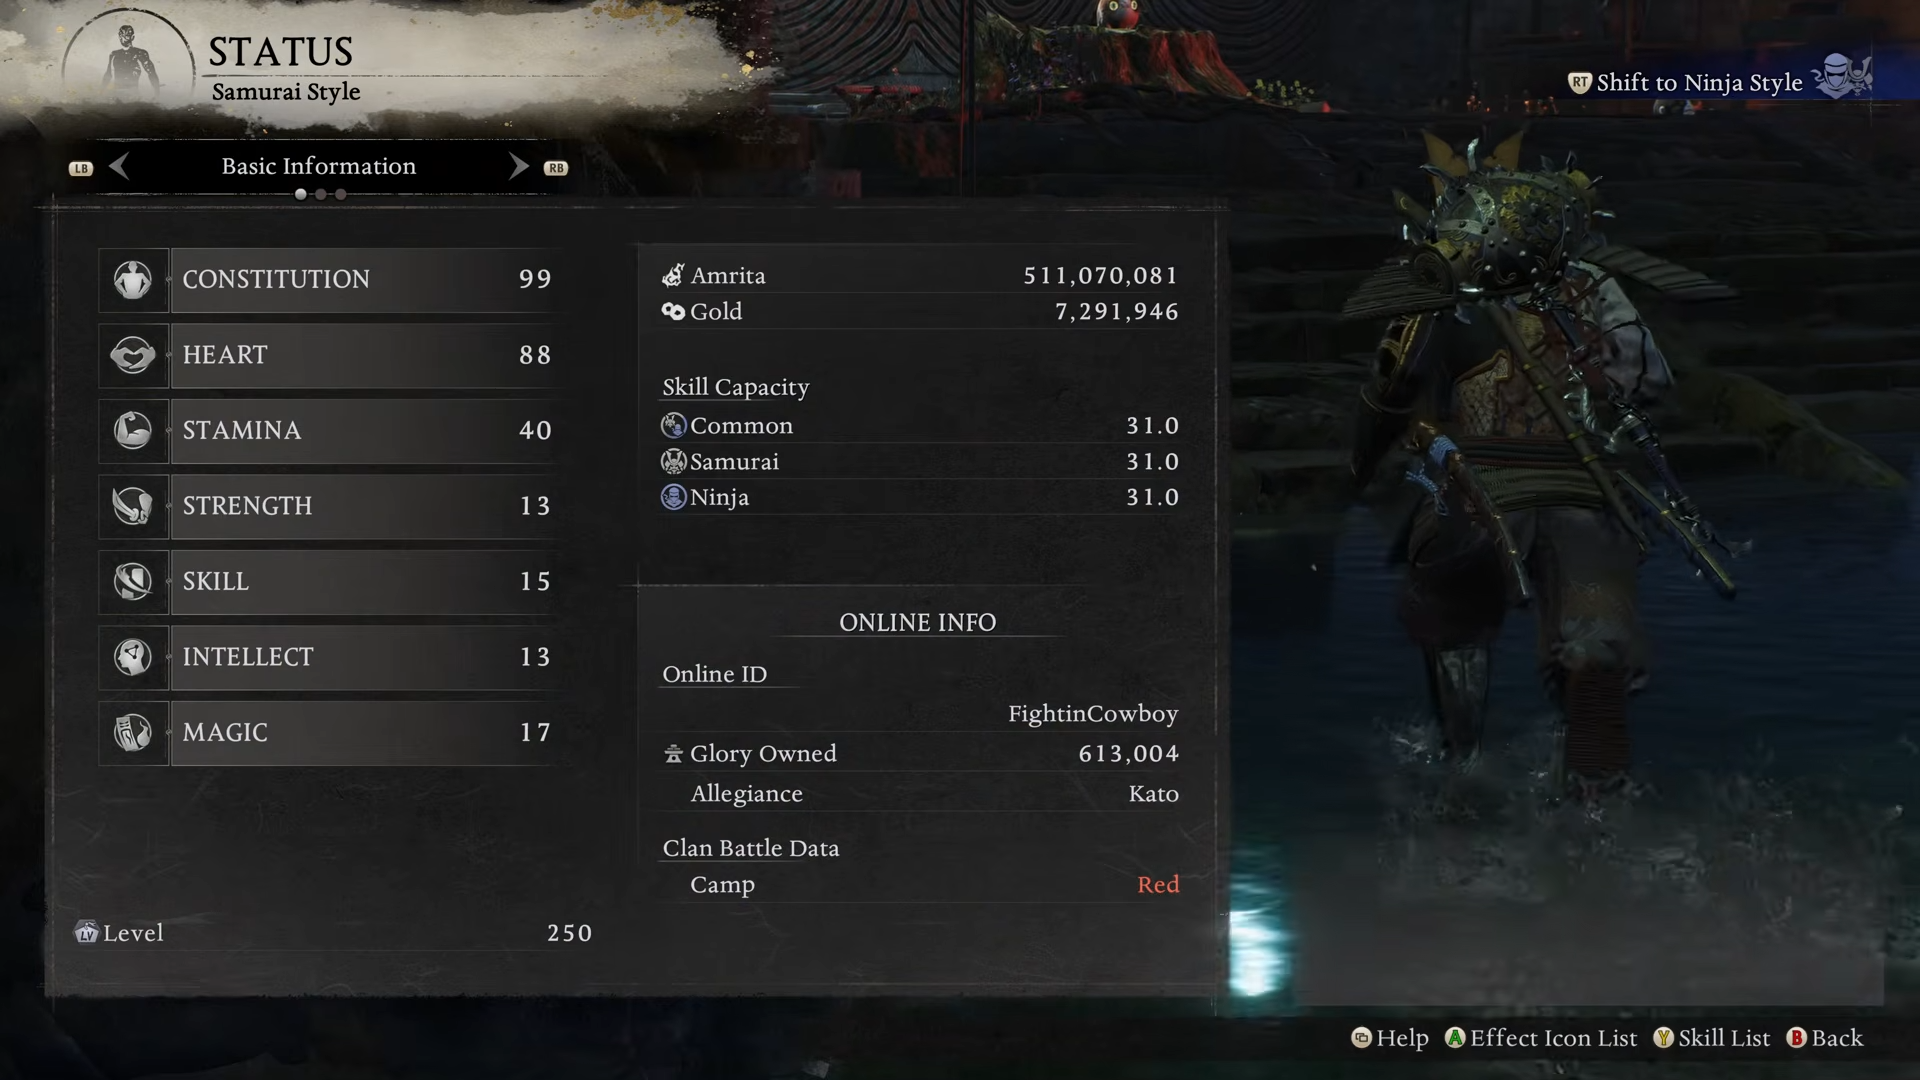
- Push Constitution to 99 early so you gain huge life and scale attack with the Fukuroku damage bonus based on Constitution.
- Raise Heart to around the high 80s to keep your ki pool large enough for nonstop attacking and martial art rotations.
- Get Stamina to about 40 so you can equip heavy armor pieces and Tatanashi comfortably.
- Keep Strength, Skill, Intellect and Magic at modest values, just enough to meet weapon and armor requirements while not diluting your main investments.
With this allocation, your health and ki are maximized, and your damage is further boosted by both Constitution and equipment weight scaling from your armor sets.
How to set up your Samurai/Fukuroku armor and weapons
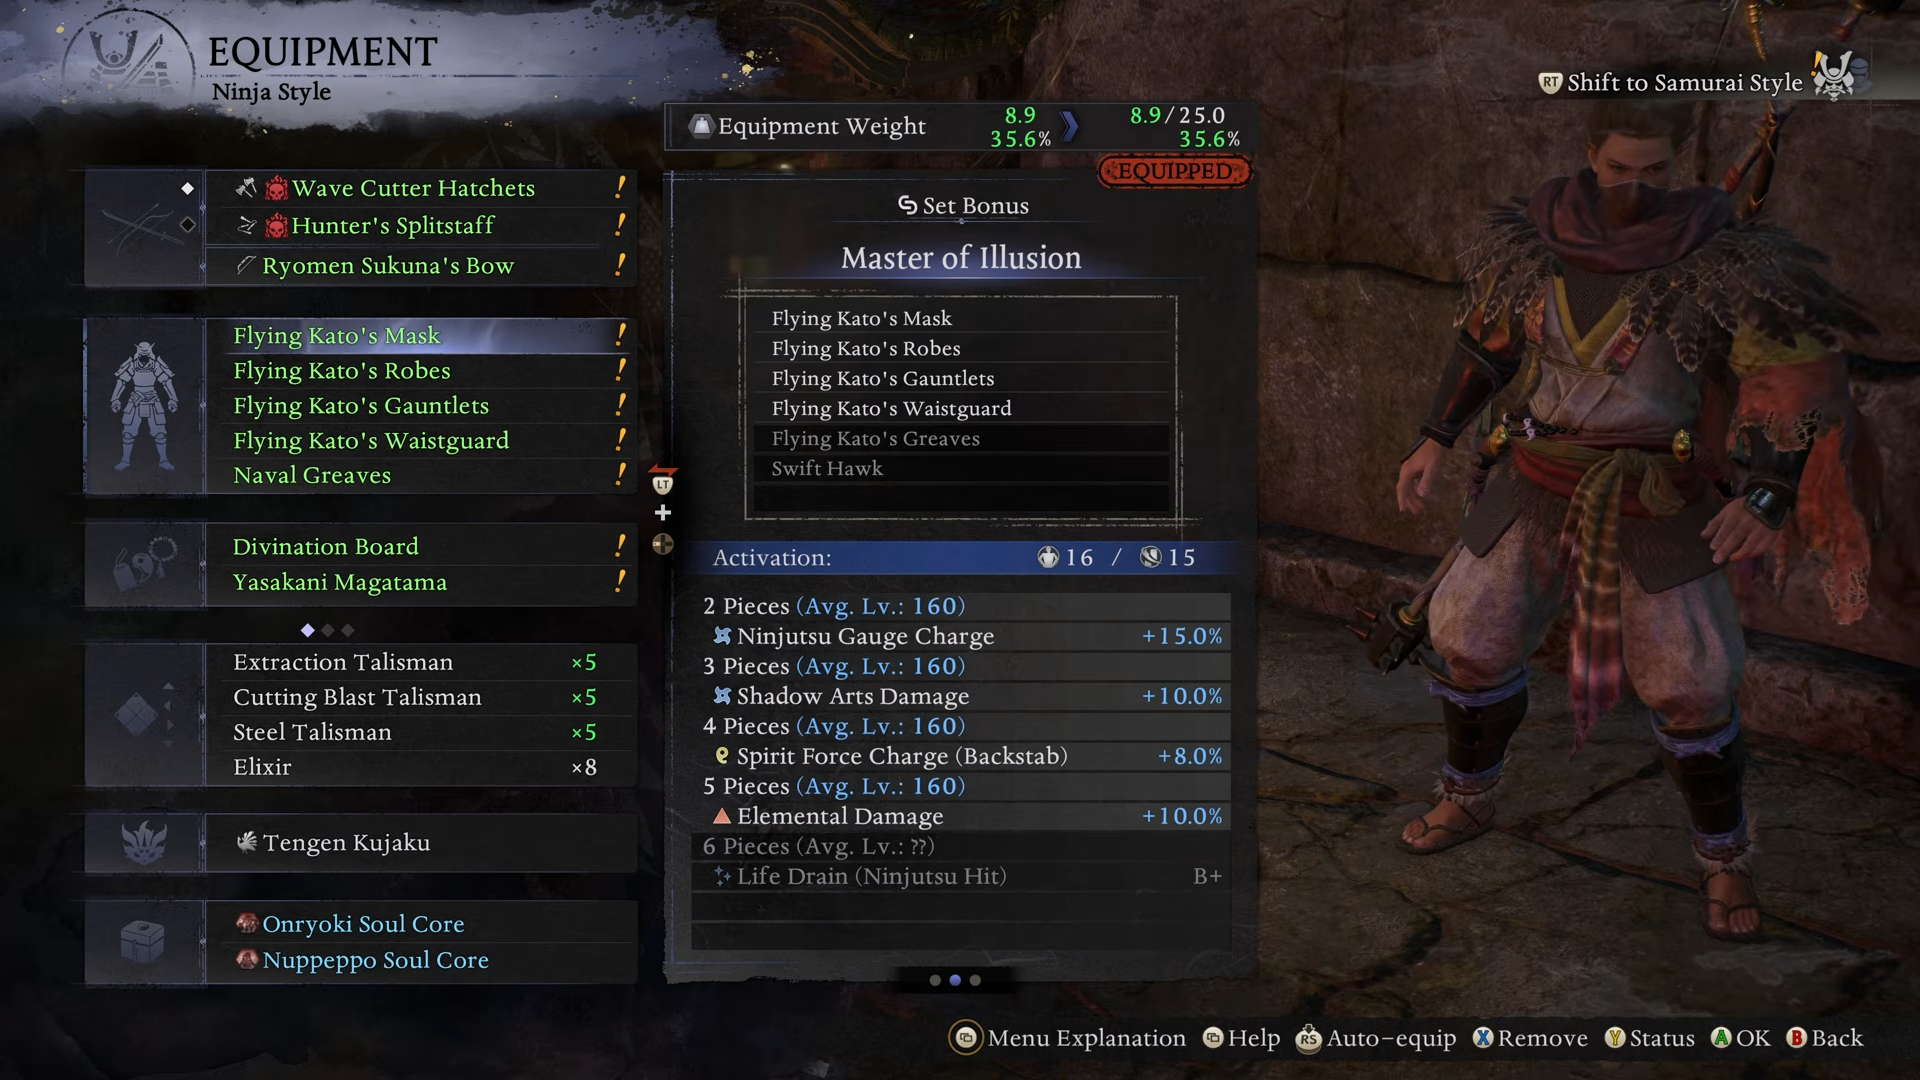
The backbone of this tank build is the combination of Fukuroku and Tatanashi.
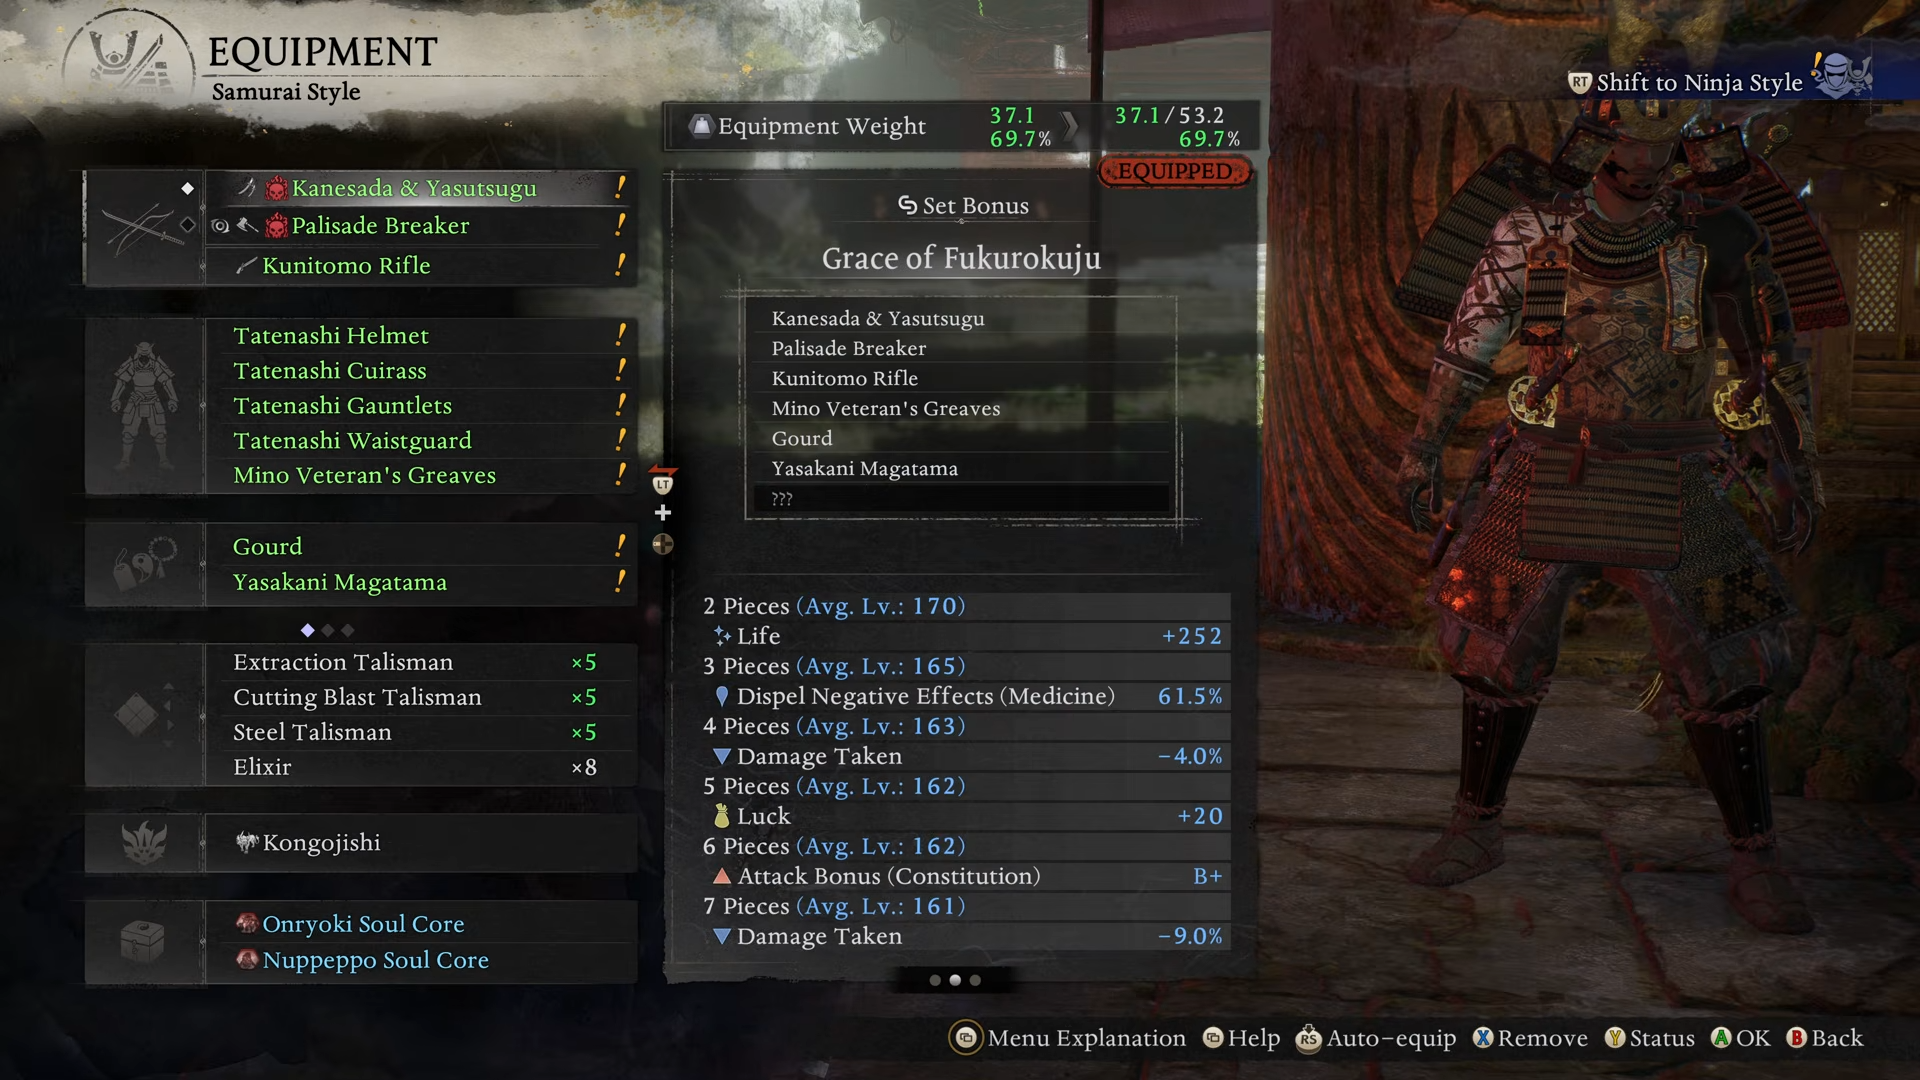
- Equip multiple pieces of the Fukuroku set, including armor and accessories, to get:
- Bonus life.
- Damage taken reduction.
- Some luck.
- An attack bonus scaling from Constitution.
- A flat 9% damage reduction from set bonuses.
- Add four pieces of Tatanashi (God of War Looks Down), which provide:
- Projectile damage taken reduction.
- Additional damage taken reduction.
- A damage bonus based on your total equipment weight.
- Even more damage taken reduction at higher set tiers.
- Reduced elemental damage taken.
- Put Fukuroku on your ranged slot (like a rifle) and on accessories to secure your set counts cleanly.
For weapons:
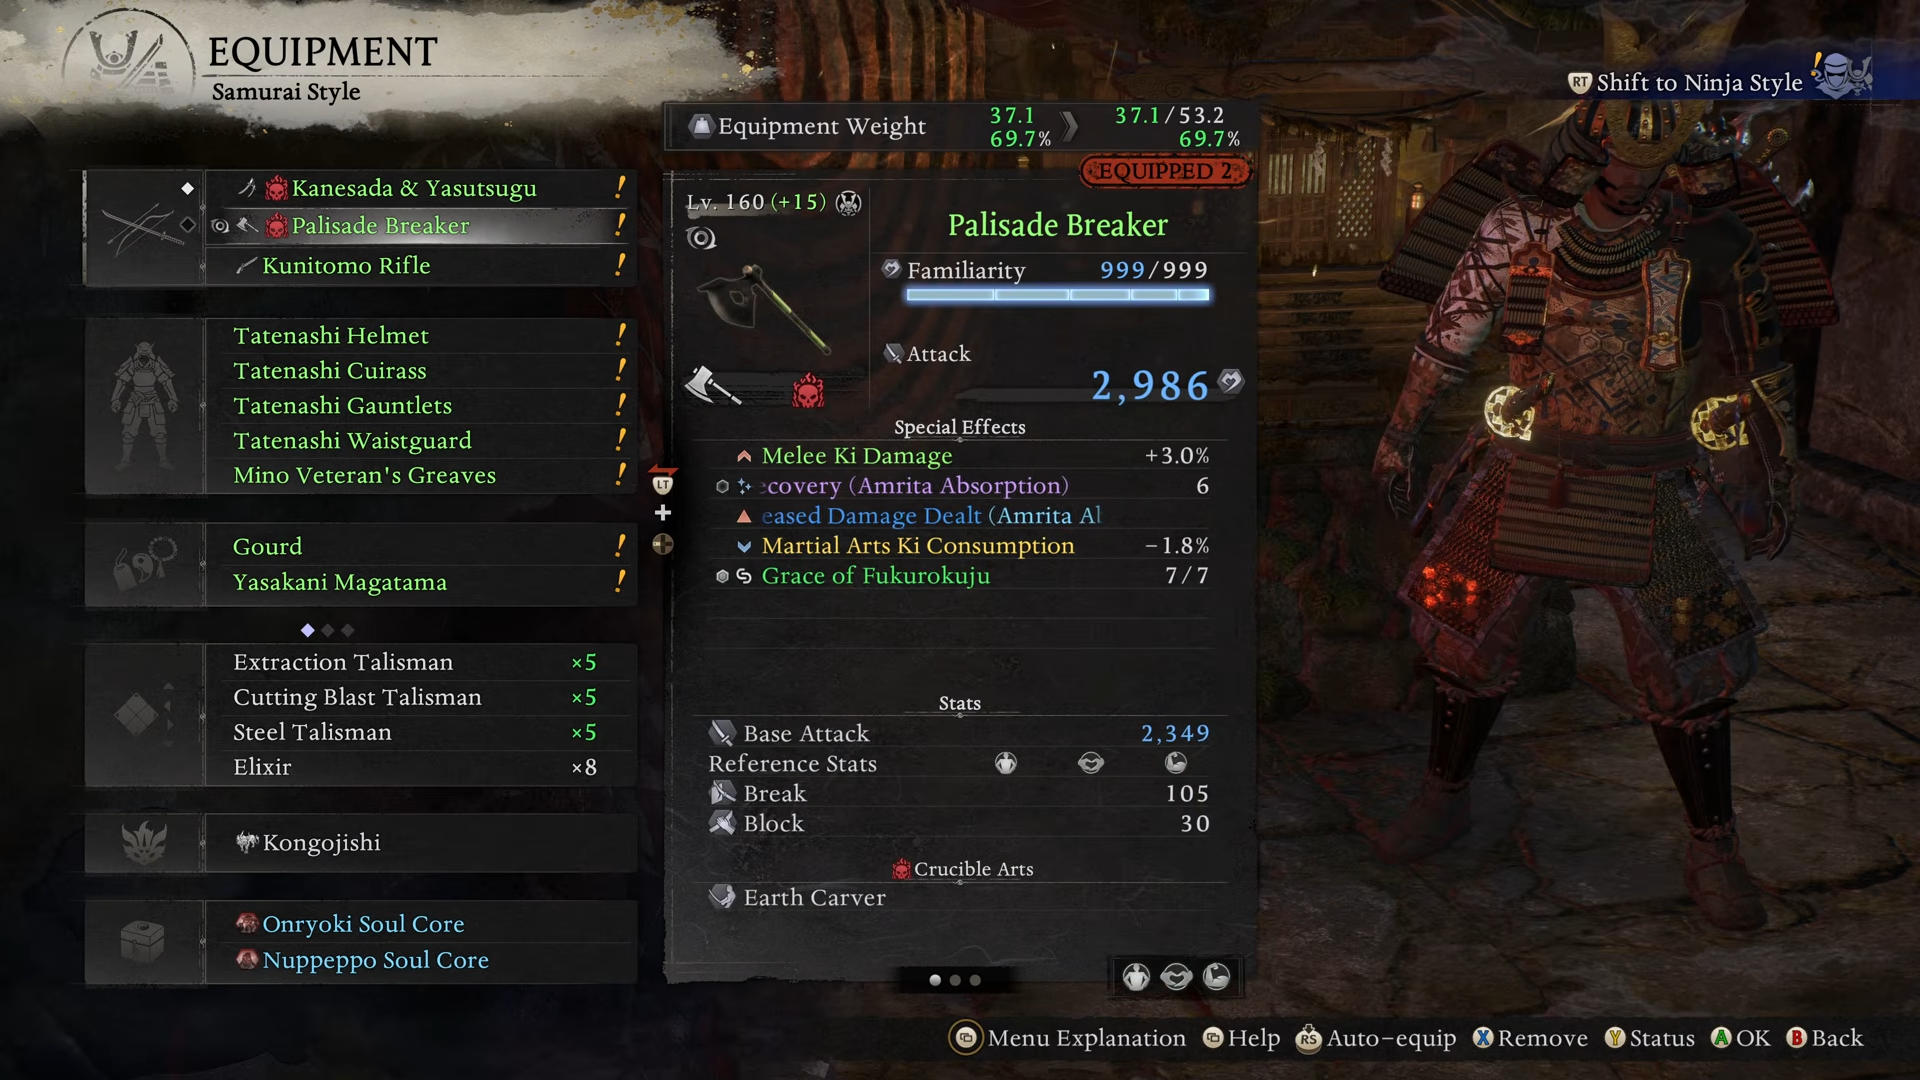
- You can run almost any weapon you like thanks to the defensive focus.
- Axe works especially well with its powerful elemental martial arts and natural synergy with tank play.
- Dual swords are also excellent, particularly because of their access to a very strong defensive passive and cheap martial arts rotation.
With this mix, you end up with very high total damage reduction, increased defense and toughness while attacking, and strong mitigation against elemental damage.
How to configure the optional Ninja/Anari setup
While this is fundamentally a Samurai-focused build, you keep an Anari-style ninja setup available for extra elemental application.
- Maintain the Anari Kato gear and ninjutsu from your previous setup as an alternate configuration.
- Use it primarily when you want to quickly inflict multiple elements through ninjutsu instead of relying purely on weapon skills.
- Treat this as a secondary style: you mainly stay on the Samurai/Fukuroku tank layout, only dipping into Anari when you want extra elemental procs.
This way, you still enjoy the full tank benefits while being able to apply statuses more flexibly when needed.
How to choose guardian spirit and core defensive effects
Your guardian spirit supports your role as a front-line tank that is constantly mid-attack.

- Use Kongojishi as your main guardian spirit to gain:
- A significant life boost.
- Around 12% damage taken reduction while attacking.
- A damage dealt buff that triggers whenever you successfully deflect.
- Since you get that deflect-based increased damage from the guardian spirit, you do not need to pick up a separate skill for it in your tree.
Kongojishi reinforces the core idea: you are at your tankiest when you stay in the enemy’s face and keep attacking.
How to pick Samurai skills for a tank playstyle
Your Samurai tree focuses on raw defense, damage reduction while attacking, and Amrita generation for healing.
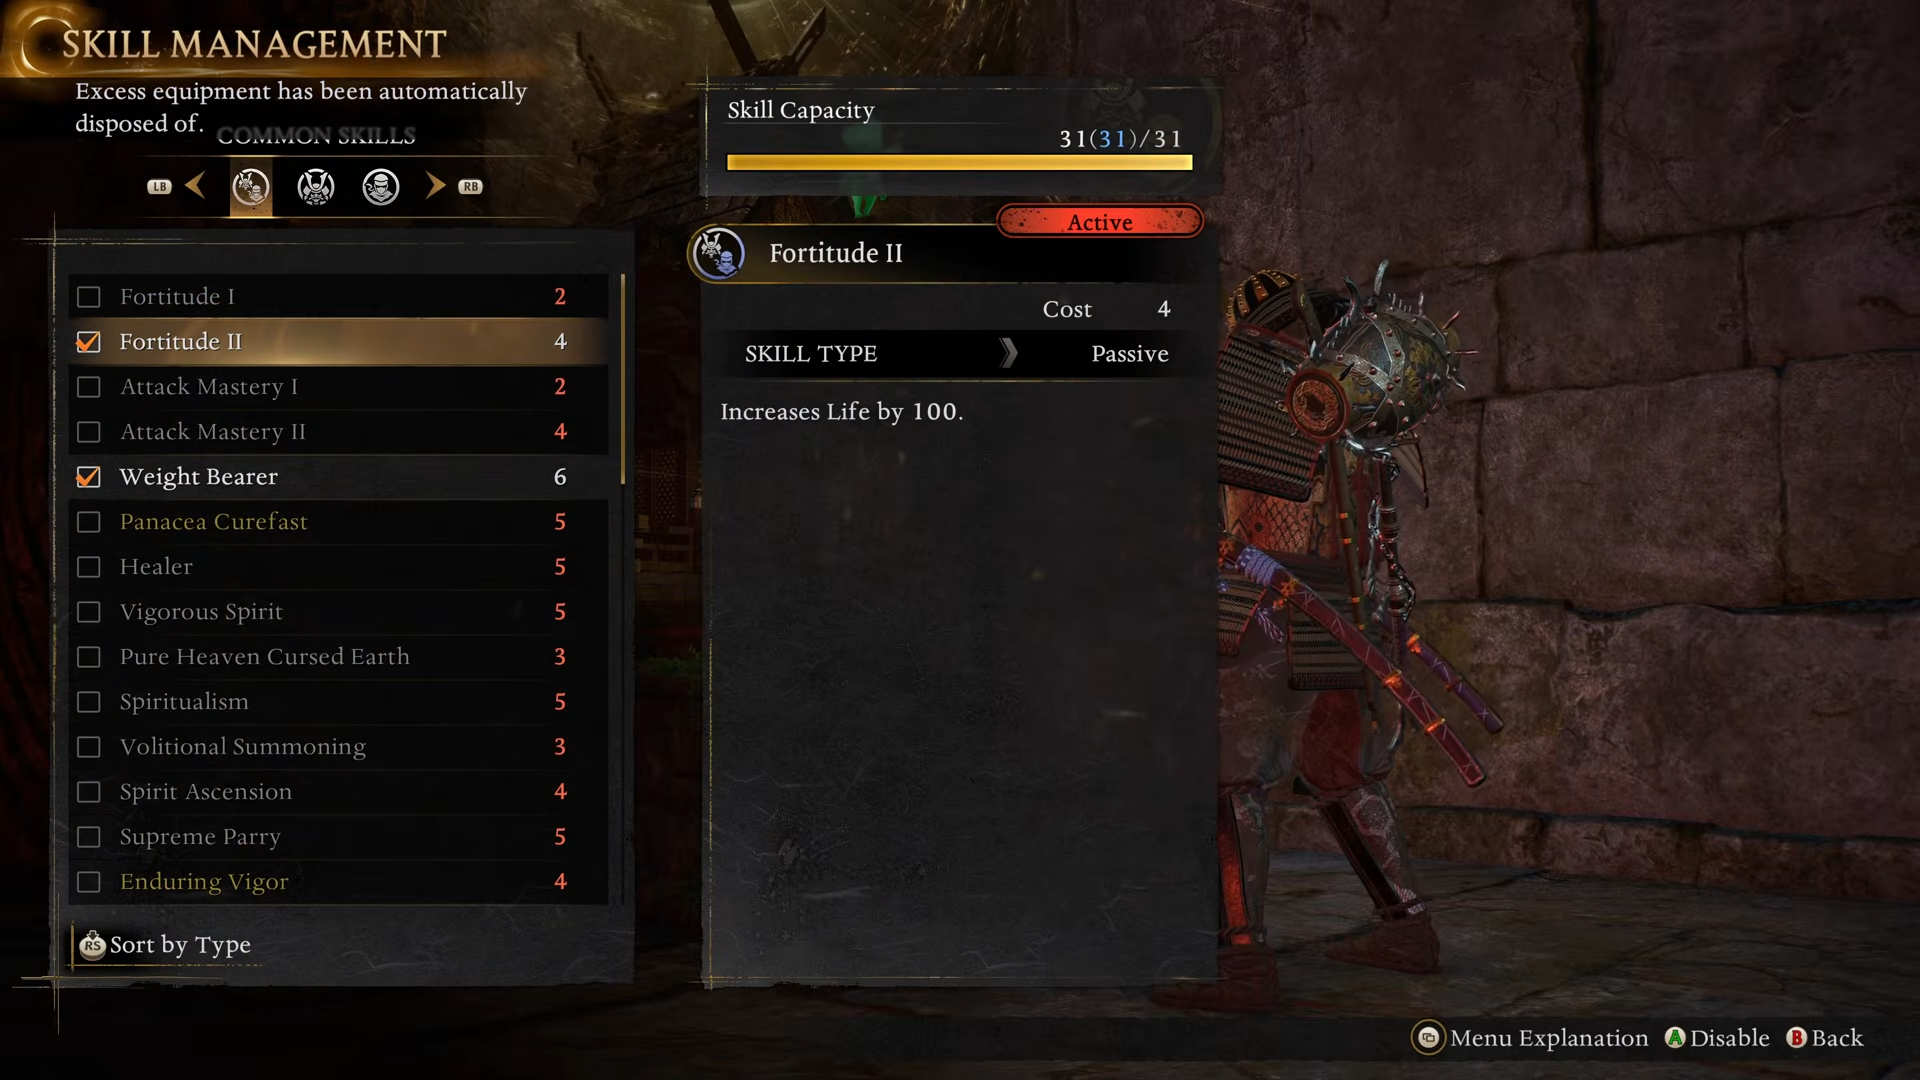
- Grab Fortitude to gain flat extra life.
- Take Weight Bearer to support the heavy gear weight of Fukuroku and Tatanashi.
- Pick Enduring Destruction so that when you burst break an enemy, they receive a damage taken increase debuff.
- Unlock Versatility, which:
- Rewards you for using different martial arts in succession.
- Can reach around 35–40% total damage increase once fully stacked.
- Encourages you to cycle through multiple skills instead of repeating just one.
- Pick Key Sapping Followup to help deplete enemy ki more effectively.
- Take Amplification to extend your buff durations, which is important since your buffs come out more slowly without Omiyo Awakening.
For general Samurai skills:
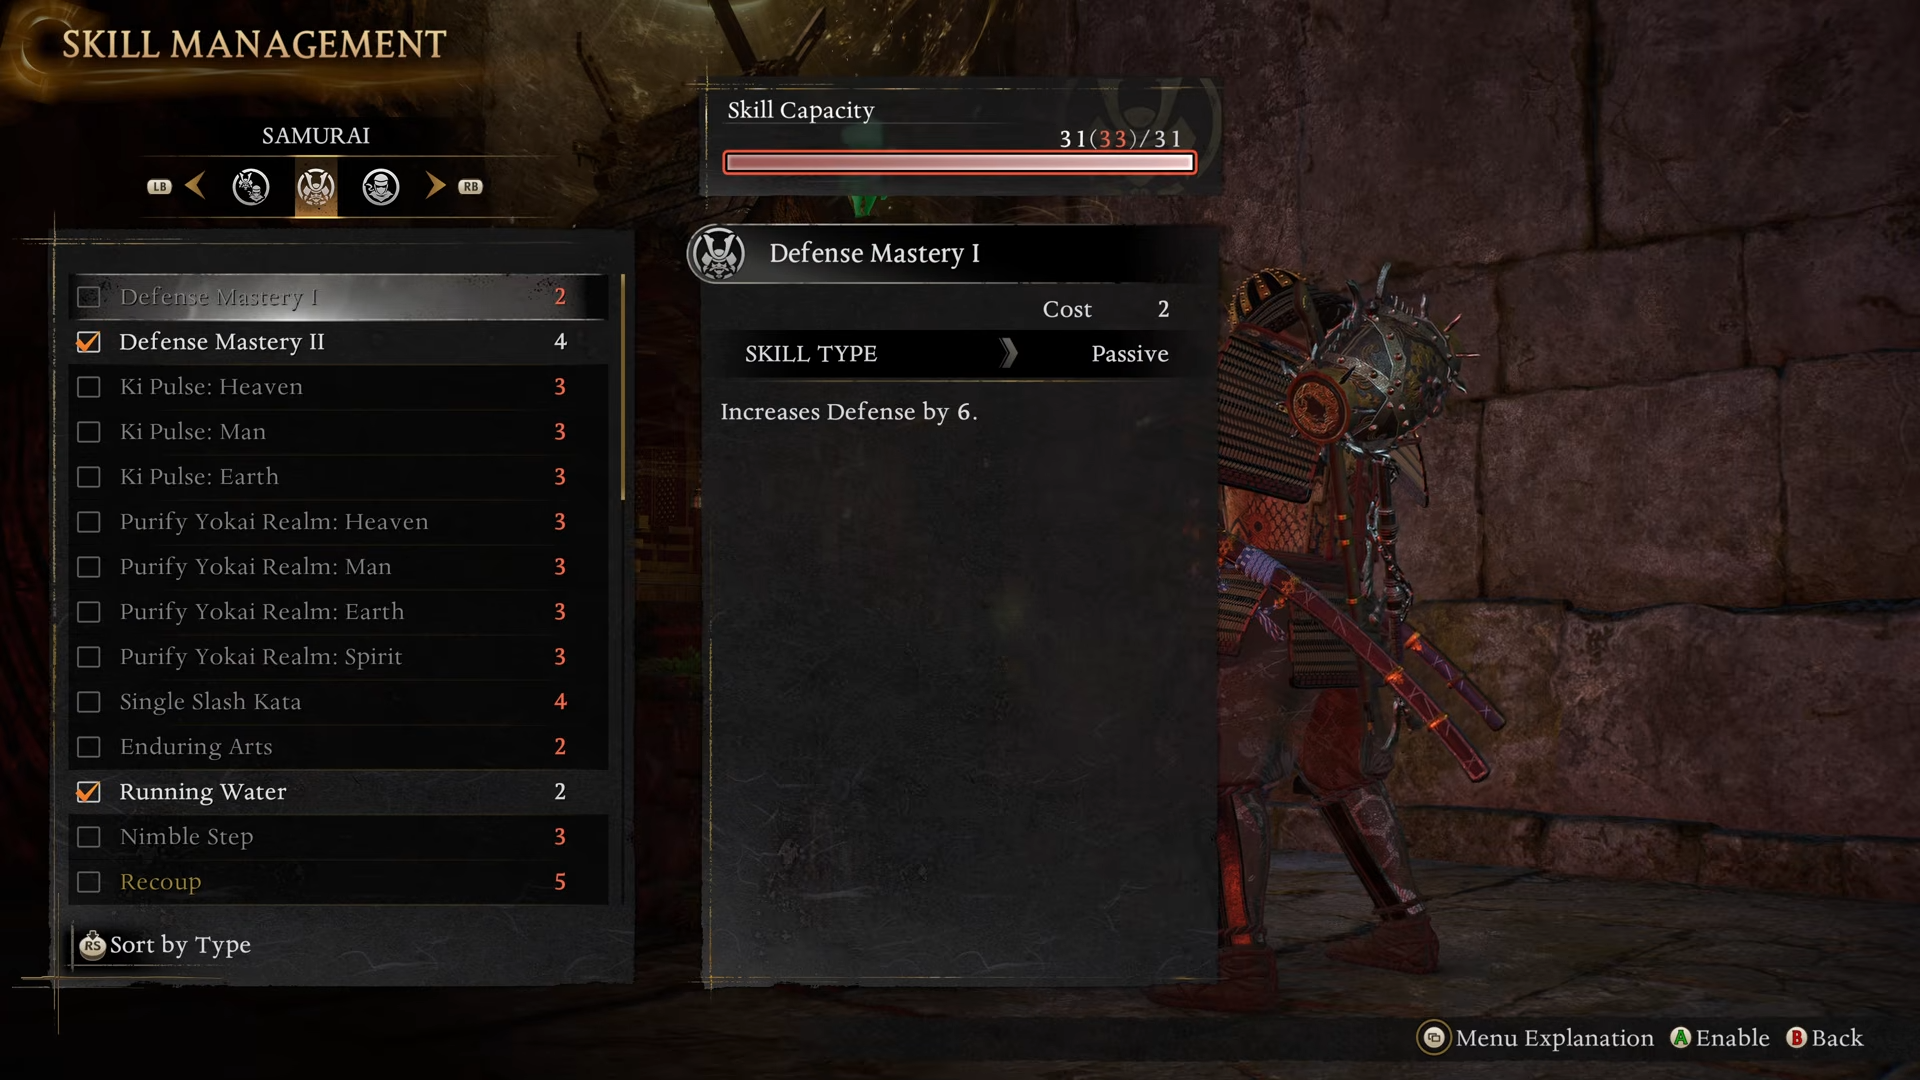
- Get Defense Mastery 2 for increased base defense.
- Take Running Water for better evasion options.
- Use Samurai’s Cloak to reduce damage taken from ranged attacks.
- Pick Unshakable to reduce damage while you are attacking, a perfect fit for this constantly-aggressive setup.
- Select Double-edged Arts to increase your damage while your proficiency buff is active.
- Take Invigorating Arts to boost your Amrita gain, which is crucial for your healing engine.
- Add Destructive Arts to increase elemental damage by about 10%, boosting your elemental weapon skills further.
These choices together make you much harder to kill while your damage remains very respectable through versatility and elemental bonuses.
How to set up Ninja skills for optional utility
If you keep the ninja side of the build, it mostly mirrors a prior Anari-focused configuration.
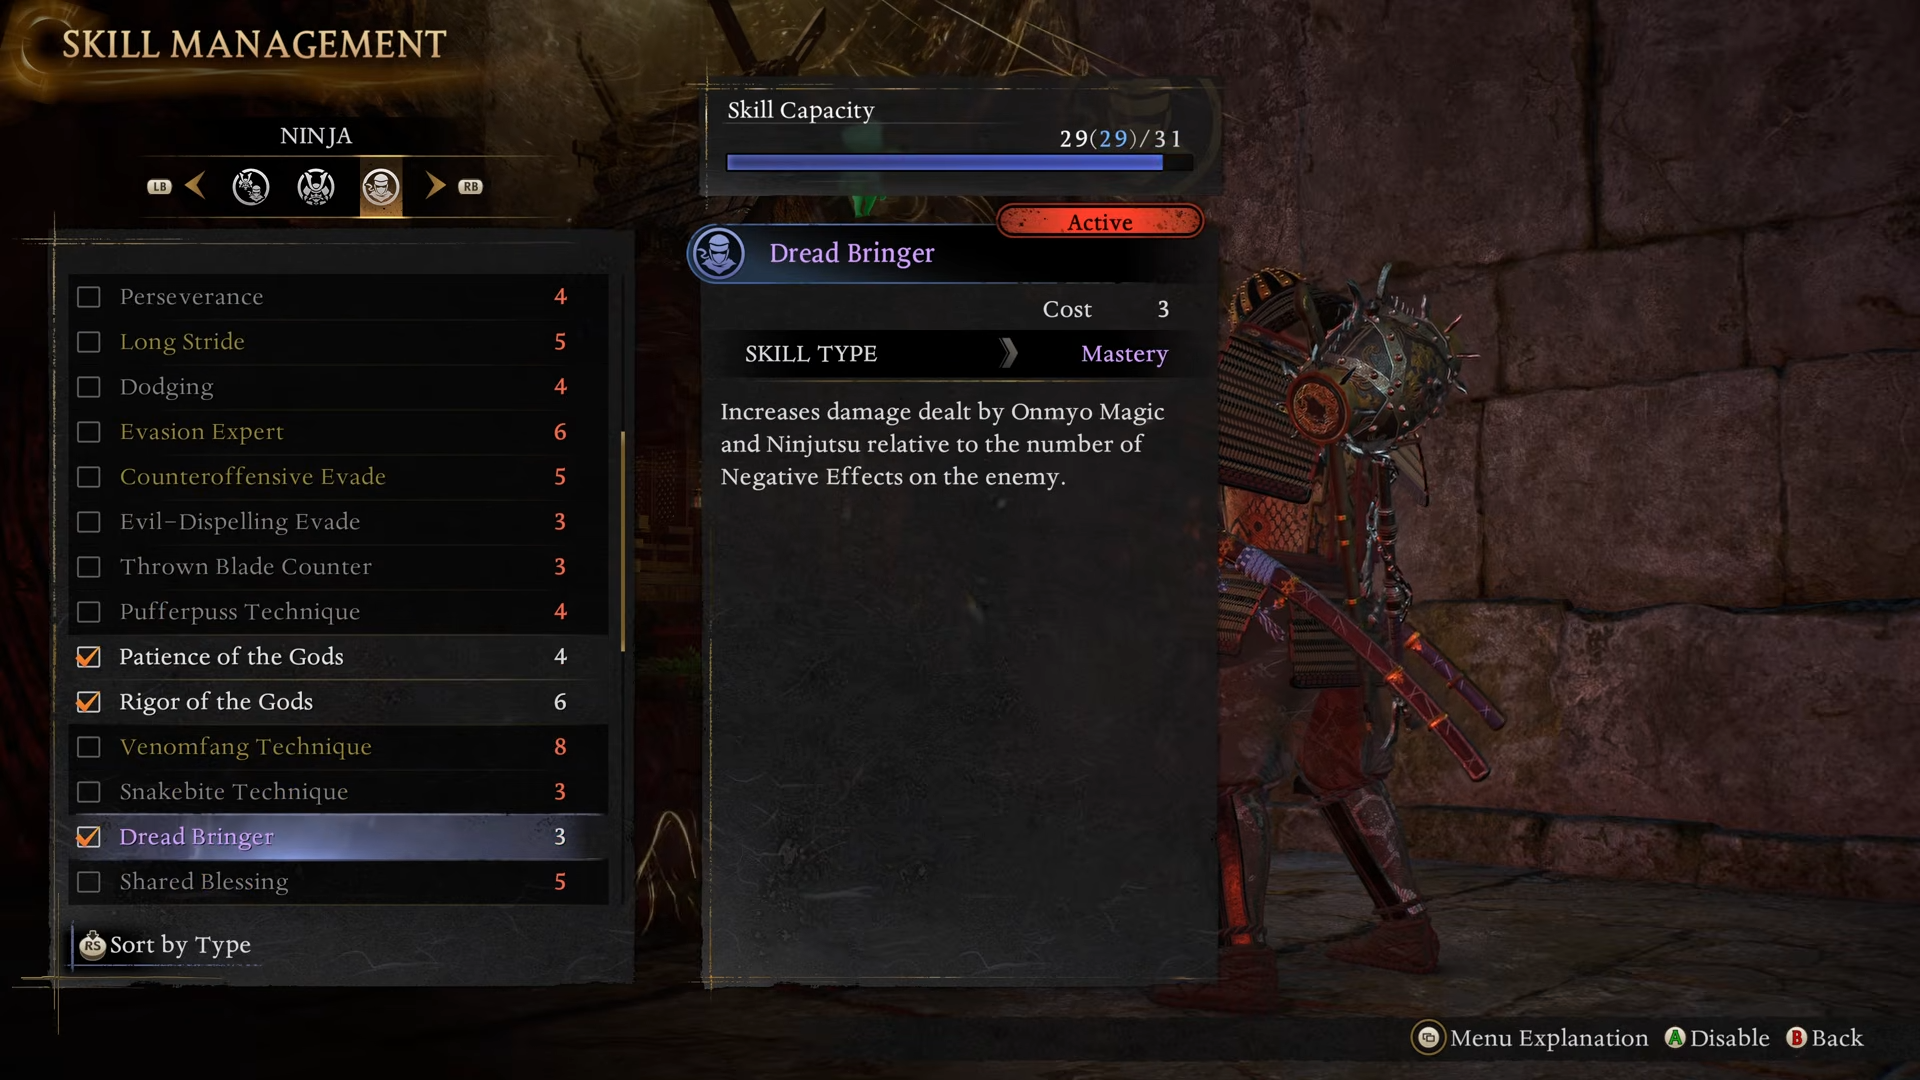
- Take Patience of Gods and Rigor of Gods to support your ninjutsu-heavy side when you swap to it.
- Use Dreadbringer and Cultivation Link as part of that ninjutsu kit.
- Include Wrathful for more offensive punch.
- Keep Illusory Dragon mainly as a backup option rather than a core element.
In this tank setup you are not heavily leaning on ninjutsu, but having the tools available keeps your elemental options wide open when needed.
How to use clan buffs for extra tankiness and damage
Even after being nerfed, certain clan choices still give strong benefits for this build.
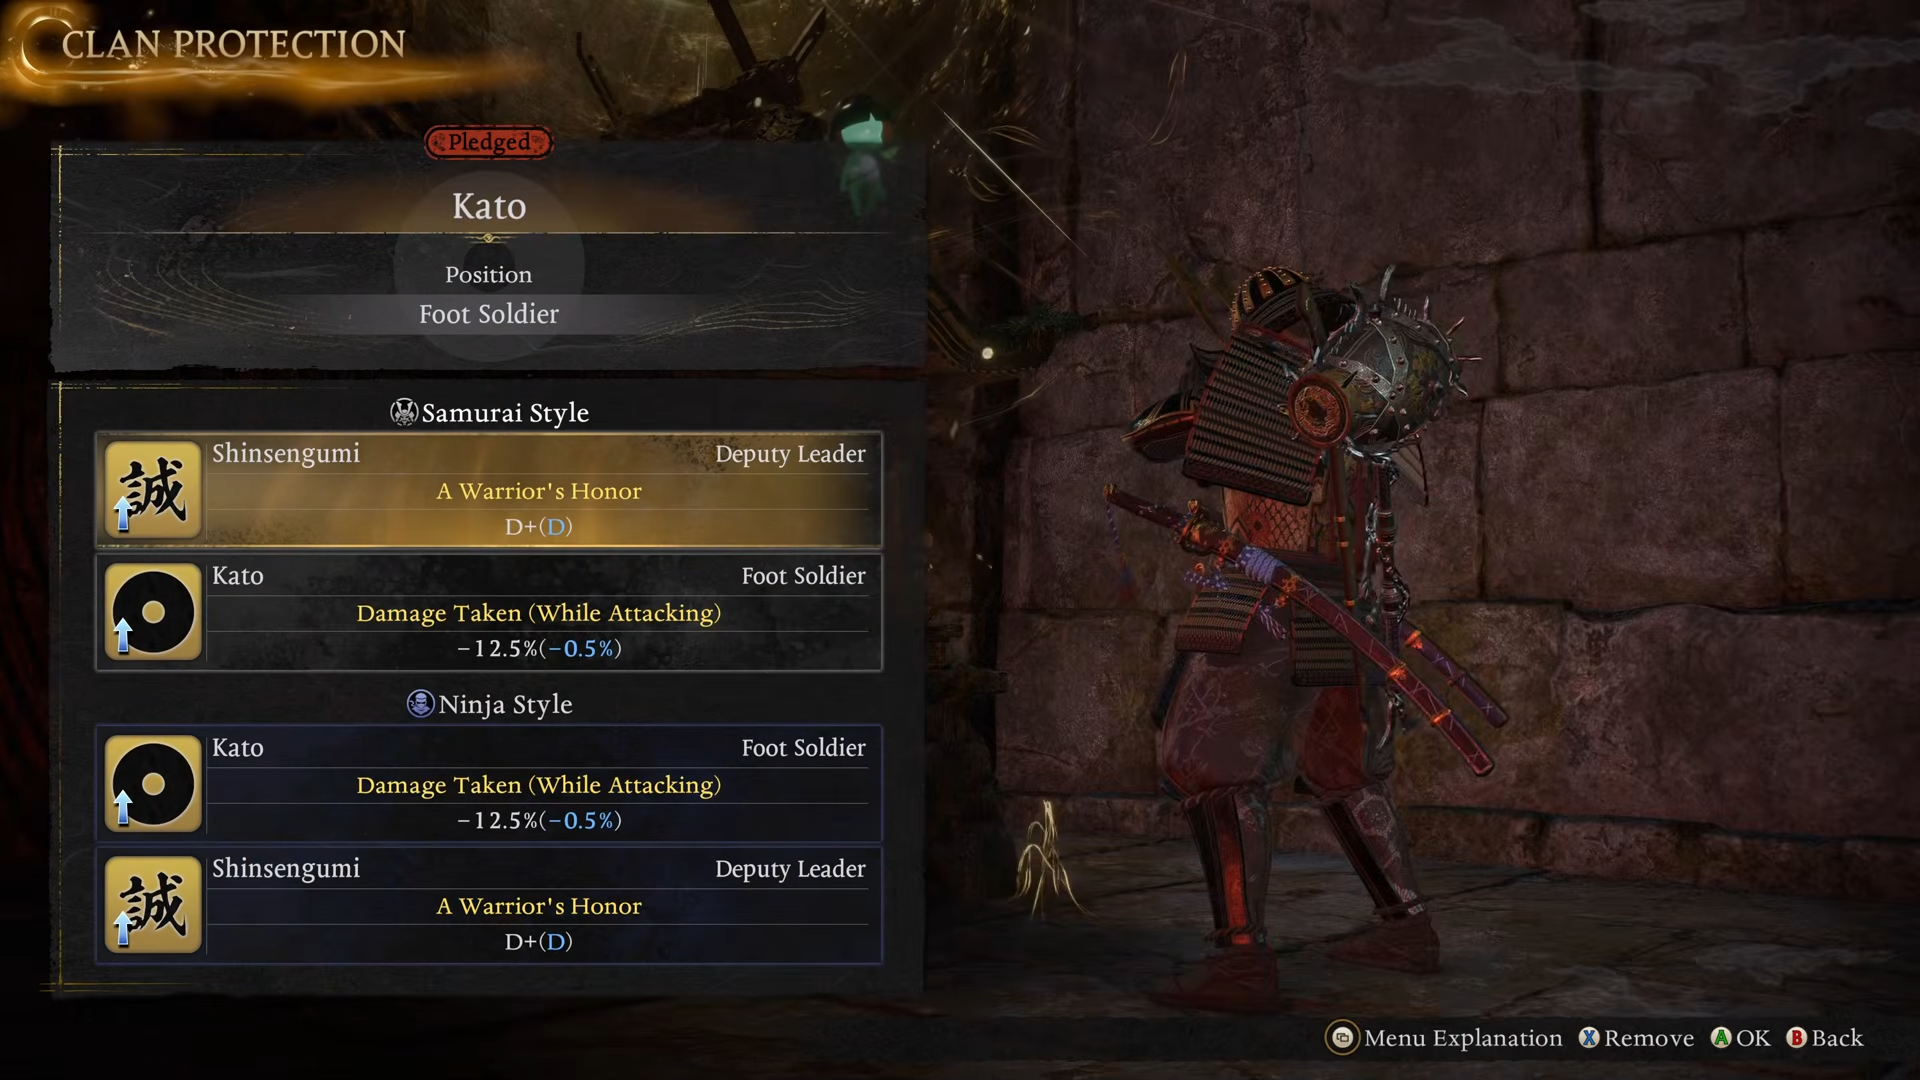
- Choose Shinsengumi (Deputy Leader) for:
- An offensive buff as long as you stay in combat.
- Higher vulnerability from behind, which matters less because you are generally facing enemies.
- Stack this with Kato, which gives:
- Damage taken reduction while attacking, around 12.5% at baseline.
- The potential to scale even higher as you invest more time into leveling the clan buff.
These two together multiply your natural tankiness with even more mitigation and extra damage output when you do what you are supposed to be doing anyway: standing your ground and fighting.
How to choose Omiyo and Soul Cores for defense and healing
Your Omiyo and soul cores reinforce mid-attack mitigation and life recovery.
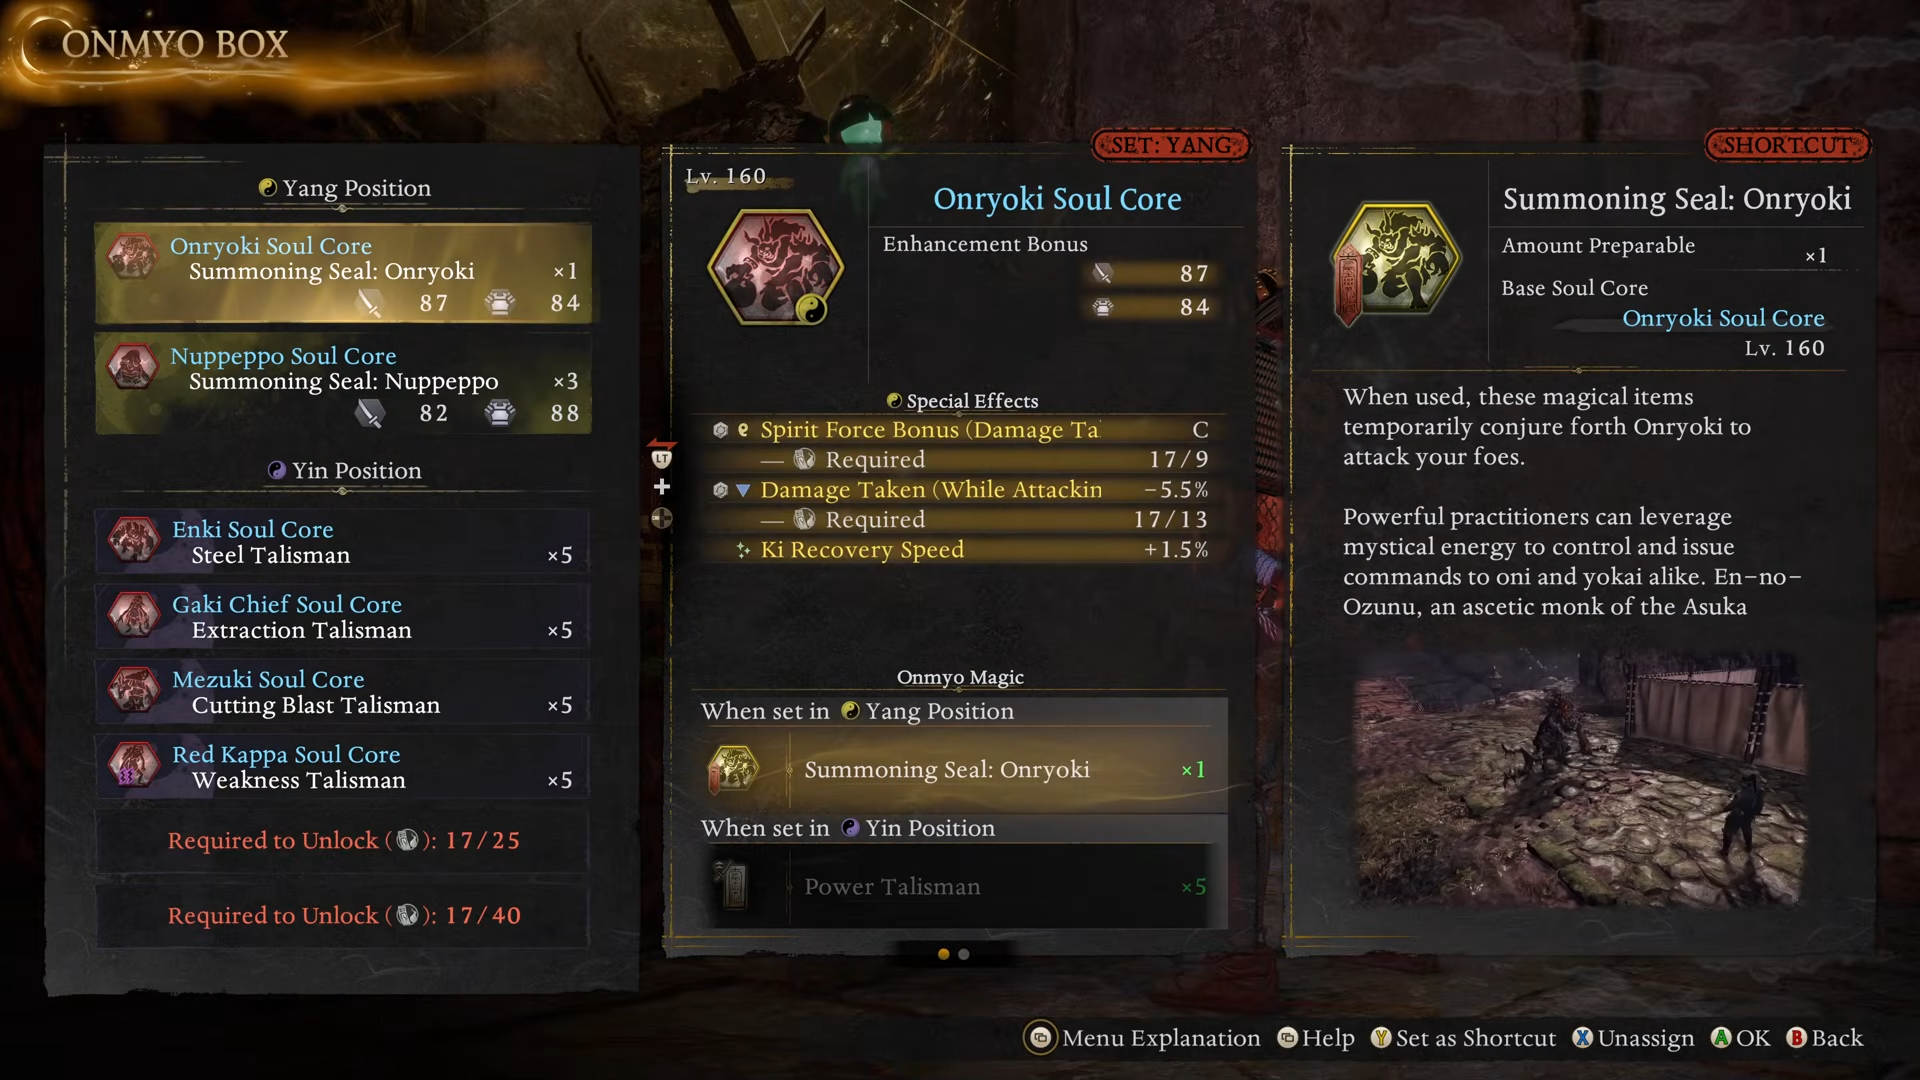
- Use Enroki as a core:
- Grants spirit force bonuses based on damage you take.
- Reduces damage taken while you are in the middle of your attacks.
- Fits perfectly with the idea of tanking hits without backing off.
- Slot Nuwo as another core:
- Provides flat extra life.
- Adds life recovery based on the embraces of your gear, which ties into your focus on sustained healing.
- Take Enki for access to Steel Talisman, further reinforcing your physical defense.
- Use Gaki Chief for Extraction, which lets you generate Amrita whenever you attack, feeding your Amrita-absorption healing loop.
- Slot Mizuki for Cutting Blast, which plays nicely with combos that begin with heavy attacks, giving you an easy source of extra damage.
- Use Red Cappy for a reliable Weakness debuff, reducing enemy defenses and letting you hit harder.
Together, these choices reduce incoming damage, increase your health pool and enhance your ability to convert combat actions into healing.
How to configure axe martial arts for elemental pressure
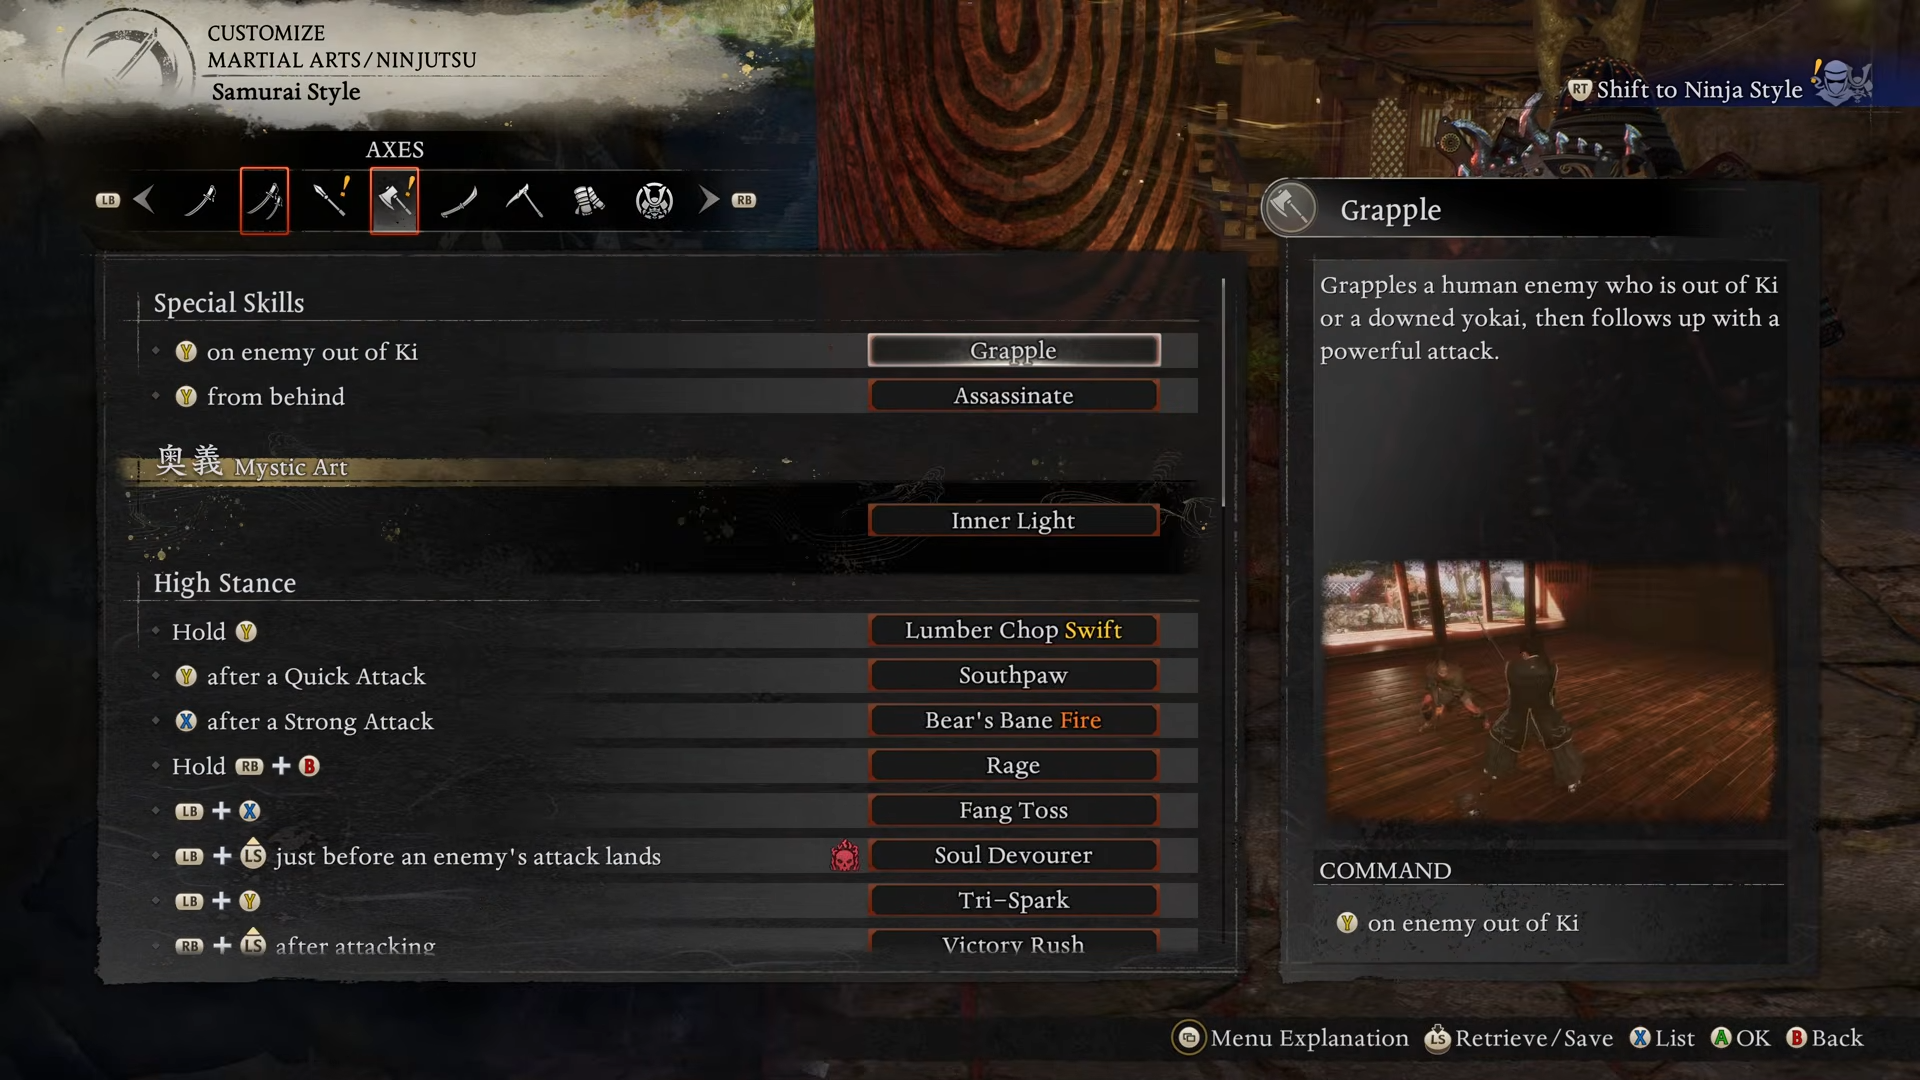
Axe is one of the best weapons to showcase this build because it layers elements on top of raw tank play.
- On your stance enhancement, consider:
- Intensity, which offers a straightforward offensive boost.
- Or Inner Light, which has grown more appealing in this setup since it works passively during long boss and Crucible fights, essentially becoming a free persistent bonus.
- Use Bear’s Bane Fire as a key elemental skill:
- Applies fire reliably.
- Deals strong damage and helps build up burn on enemies.
- Equip Titanic Strength with a water element:
- Applies water and further slows down and weakens enemies once the status builds up.
- Use Mad Spinner Wind:
- Adds wind damage on top of your other elements.
- Gives you a rapid-hitting skill that benefits from all your tanky mitigation while you stay in place spinning.
With fire, water and wind all covered in your axe kit alone, you can proc multiple elements efficiently just by rotating through your martial arts.
How to configure dual sword skills for defense and multi-element coverage
Dual swords are a great secondary weapon here, giving you even more elemental options and a powerful defensive toggle.
- Use Raijin with lightning:
- Applies lightning status.
- Rounds out your elemental coverage beyond the axe’s options.
- Slot God of Wind Pierce with wind:
- Continues your wind coverage on a different weapon.
- Offers quick, multi-hit pressure.
- Use Twin Dragons Water with a water element:
- Stacks water status from a fluid dual-sword combo.
- For defensive passives, choose between:
- Firm Resolve, which gives a very large defensive boost when using dual swords. It can reach around an additional 30% defense, making you incredibly hard to kill.
- Momentum, which reduces the ki cost of your abilities and makes it cheaper to rotate through multiple martial arts for versatility stacks.
If you want to lean even harder into defense, Firm Resolve makes your dual-sword stance extremely sturdy. If you prefer smoother combo flow and faster versatility stacking, Momentum is the better fit.
How to build the Amrita absorption healing engine
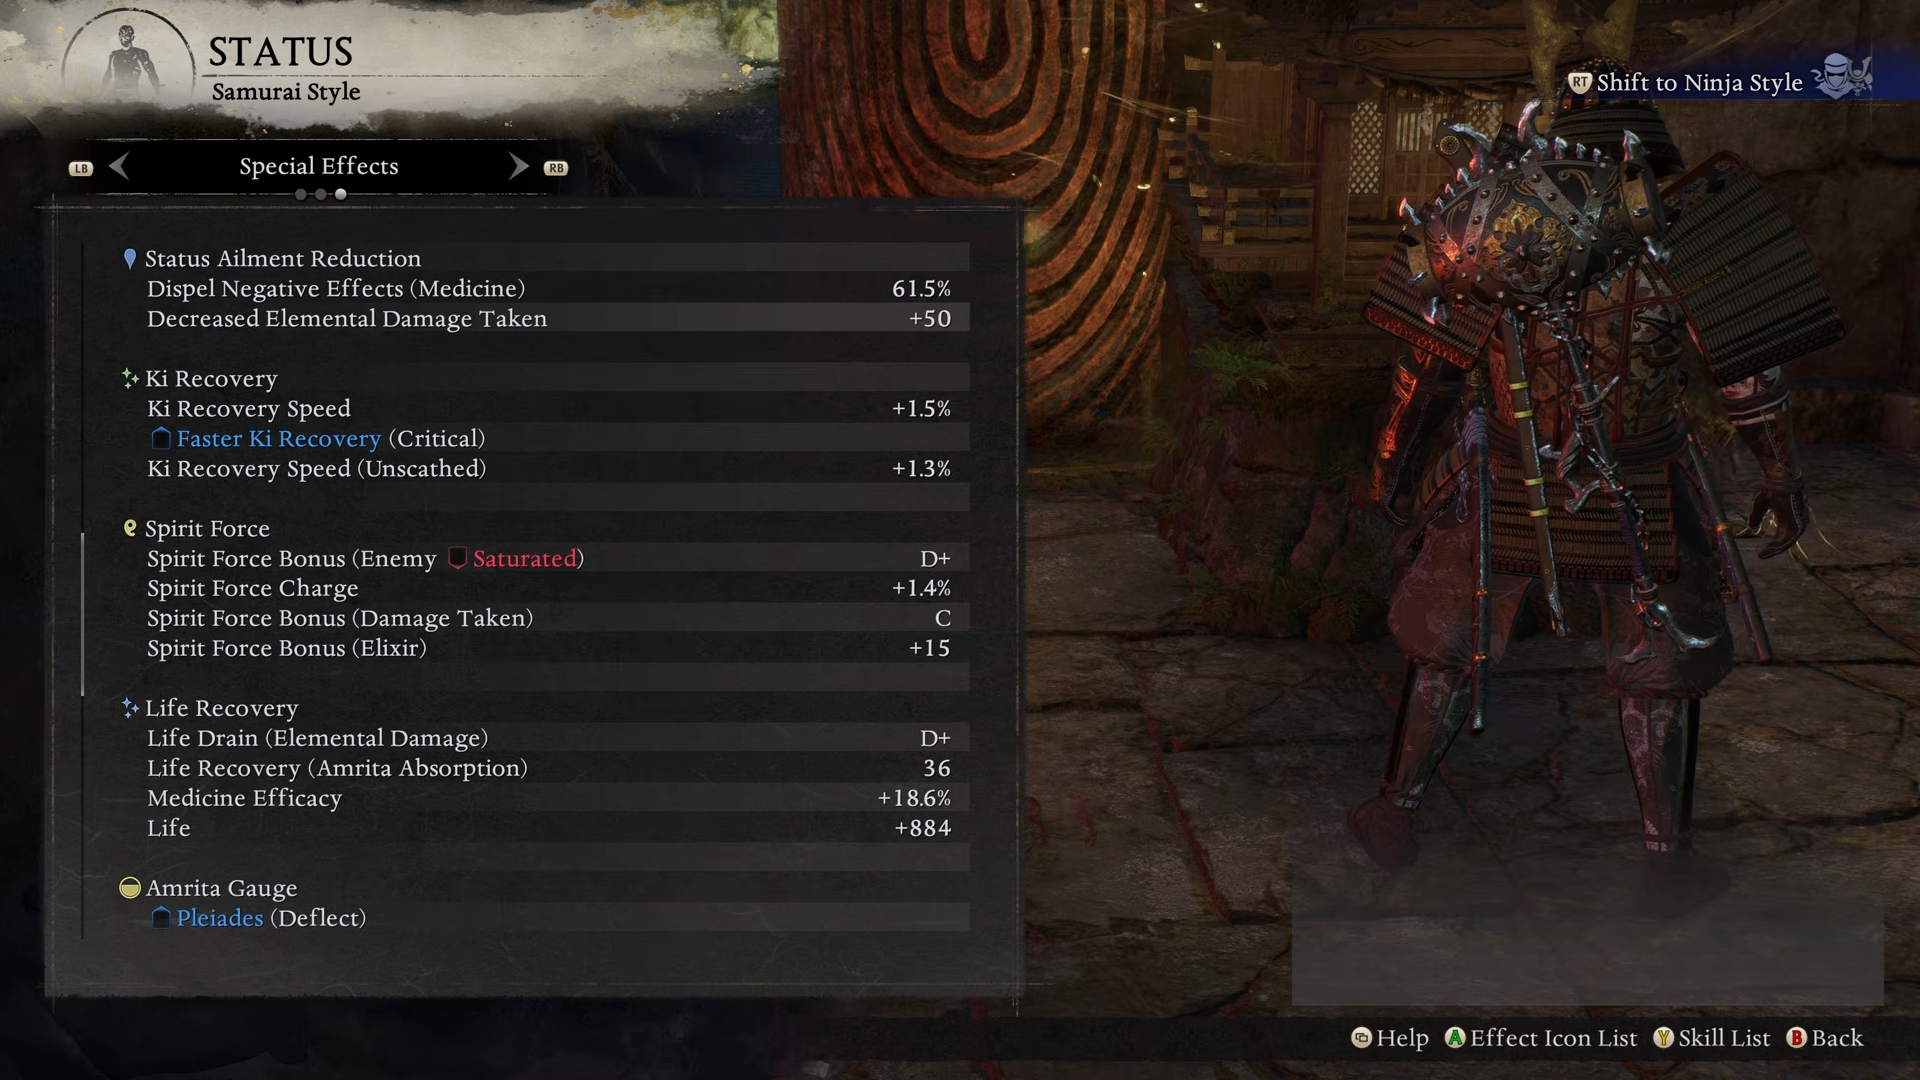
The real heart of this tank setup is how it turns Amrita absorption into constant self-healing.
- Put Life Recovery on Amrita Absorption on every single armor piece:
- Each time you gather Amrita, you heal.
- With all pieces stacked, each absorption can return a large chunk of HP.
- On your chest piece, add Gain Amrita on Strong Attack:
- Whenever Extraction runs out, you can spam strong attacks to generate Amrita directly.
- This keeps your Amrita flow steady even without the talisman active.
- Combine this with Extraction from Gaki Chief:
- While Extraction is active, every hit generates Amrita.
- With life recovery tied to Amrita absorption, simply attacking refills your health bar.
You can optionally push this further by using a mermaid-related soul core that grants Life Leech Talisman, adding yet another source of self-heal. However, in practice, the base build is already so tanky and self-sustaining that you do not really need the extra life leech unless you just want overkill.
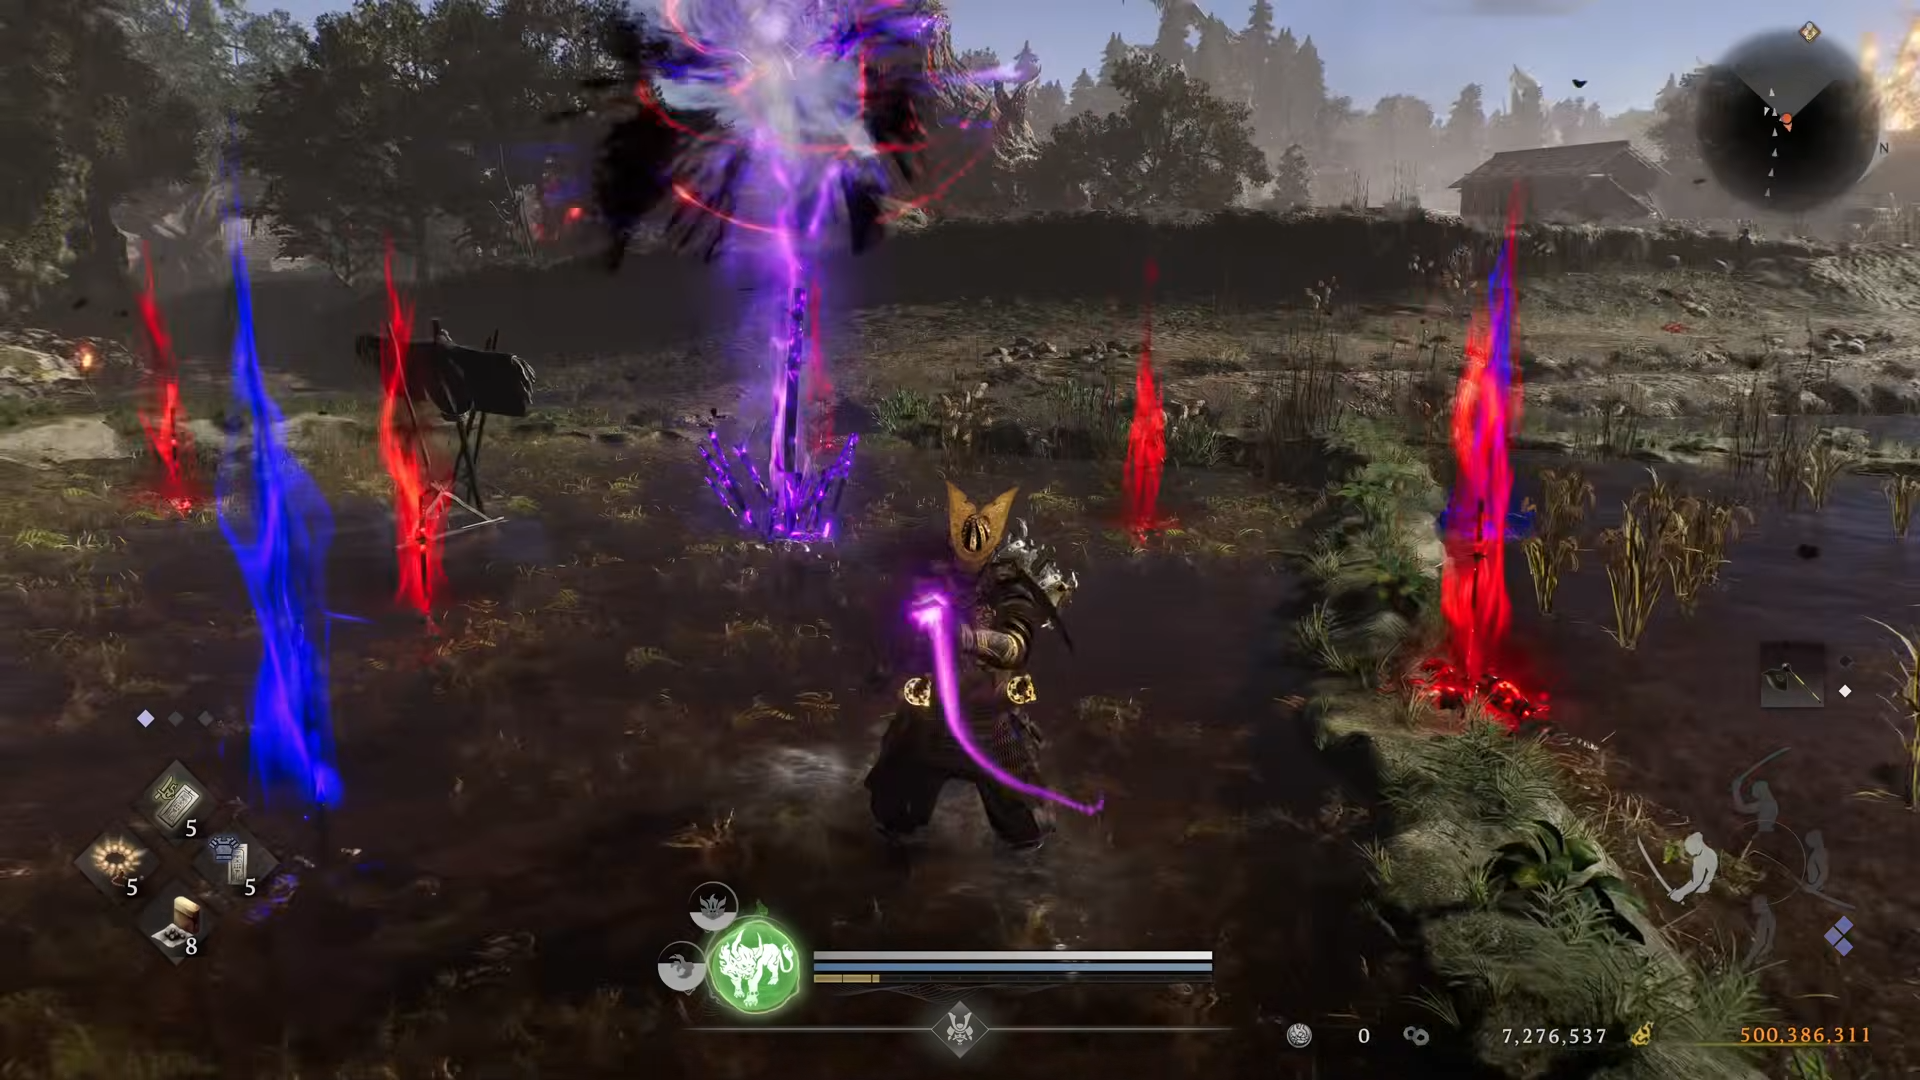
How to play fights with the Fukuroku tank build
In real combat, your role is to hold your ground and rotate through skills rather than fish for one-shots.
- Before a major boss or Crucible encounter:
- Activate your core buffs such as Steel Talisman and Extraction.
- Prepare any elemental tools you want to lean on at the start of the fight.
- During the fight:
- Stay aggressive and keep attacking to maintain your damage reduction while attacking bonuses.
- Rotate through different martial arts to build and maintain Versatility stacks.
- Use your elemental axe or dual-sword skills (Bear’s Bane Fire, Titanic Strength Water, Mad Spinner Wind, Raijin Lightning, Twin Dragons Water, etc.) to apply multiple statuses.
- Use deflects when possible to trigger your guardian spirit’s damage buffs, but do not over-prioritize them at the expense of your normal pressure.
- If buffs fall off:
- Refresh Extraction and your main defensive Omiyo when safe.
- If Extraction is down and you are low on Amrita, spam strong attacks to trigger Gain Amrita on Strong Attack and refill through your absorption healing.
- Against weaker enemies:
- Do not bother with your full buff suite.
- Rely on your natural tankiness, life recovery on Amrita absorption and core set bonuses to bulldoze through them.
In long Crucible fights and boss rushes, you will see that your health rarely dips below half as long as you keep attacking and maintaining your Amrita engine.
Rewards and benefits of using this tank setup
While it is not a quest with standard game rewards, this build offers a set of clear in-game benefits once you put it together.
| Reward type | Benefit you gain |
|---|---|
| Survivability | Very high effective HP through flat damage reduction, elemental reduction and extra toughness while attacking |
| Sustain | Continuous self-healing from stacked Life Recovery on Amrita Absorption and Extraction-driven Amrita gain |
| Damage output | Strong, consistent damage through Constitution-based attack bonus, weight-scaling damage bonus and Versatility stacks |
| Elemental pressure | Easy access to fire, water, wind and lightning through axe and dual-sword skills, plus optional ninjutsu |
| Ease of use | Flexible weapon choice, forgiving play because you can tank mistakes and keep learning weapon move sets |
| Late-game viability | Performs well in Crucible fights and boss rushes where repeated hits and long engagements are common |
How to reach the locations where this build shines
This tank setup really comes into its own in late-game areas like Crucibles and boss-rush style encounters, where you are often fighting in tight arenas or open fields full of aggressive enemies and have little room for mistakes; anywhere you are forced to stay in close range for extended periods, this build lets you hold the line, soak hits and keep pressuring without constantly backing off to heal.
If you prefer a safer, more methodical approach over all-in burst damage, this Fukuroku and Tatanashi tank setup gives you room to learn, experiment and stay alive even in Nioh 3’s most punishing locations; once everything is in place, you will find yourself spending far more time pressing the attack and far less time worrying about your health bar.


