- What to know
- Stats that make it work
- Weapons, armor, and accessory picks that fit the playstyle
- Locations for skill texts
- How to set up common skills for survivability and faster buffing
- How to set up Ninja Style skills that power the build
- How to choose Talon skills and Martial Arts for pressure and gap closing
- How to run Ninjutsu without turning it into your main damage source
- How to pick Guardian Spirits for melee, range, and Samurai fallback
- How to set up Soul Cores for quick-attack damage, defense, and utility
- How to set Titles for ki, mobility, and breaking enemies
- How to play Ferocious Claws in real fights
- Rewards
- Where this build goes next as you progress
What to know
- You’re building around Talons in Ninja Style for short animations, combo cancel options, and high mobility.
- Your main scaling stat is Intellect, with small early investments into Heart for extra ki.
- Gear choices prioritize dodge ki consumption, backstab damage, and ki recovery so you can keep pressure up.
- You push damage by applying multiple ailments (via talismans and shuriken) to trigger Confused for bigger damage and slower enemy ki recovery.
Fast, aggressive, and beginner-friendly, Ferocious Claws is a Ninja Style Talons build in Nioh 3 that wins by staying close, breaking enemy ki fast, and stacking multiple status effects. You’ll play this like a relentless close-range skirmisher: burst in, shred ki with fast strings, re-position with dodges, and keep status pressure rolling so enemies crumble before they can stabilize.
| Part | What to use | What you’re aiming for |
|---|---|---|
| Main weapon | Talons (any good one you find or craft) | Melee bonuses, life drain, effects that match your sustain/damage style |
| Main style | Ninja Style | Mobility, fast combos, backstab-focused offense |
| Secondary style | Samurai Style (minimal use) | Style shift burst break damage, then swap back |
| Core stat focus | Intellect first | More damage, longer status durations |
| Secondary stats | Heart early; later Heart + Stamina | More ki for dodge-heavy play, plus survivability later |
| Ninjutsu | Fire Shuriken, Poison Shuriken, plus utility | Apply Scorch/Poison over time, finish combos, create space |
| Magic | Invest for more talisman slots | More buffs, more elements, more flexibility |
| Key gameplay loop | Close distance → fast Talons pressure → stack ailments | Confused uptime, ki breaks, safe aggression |
Stats that make it work
Intellect is your priority because Talons scale with it, it boosts your damage, and it also prolongs status effects so your buffs/debuffs stay relevant longer. You’ll also want around 10–15 points in Heart early because you’re dodging constantly, and more ki makes the whole build smoother.
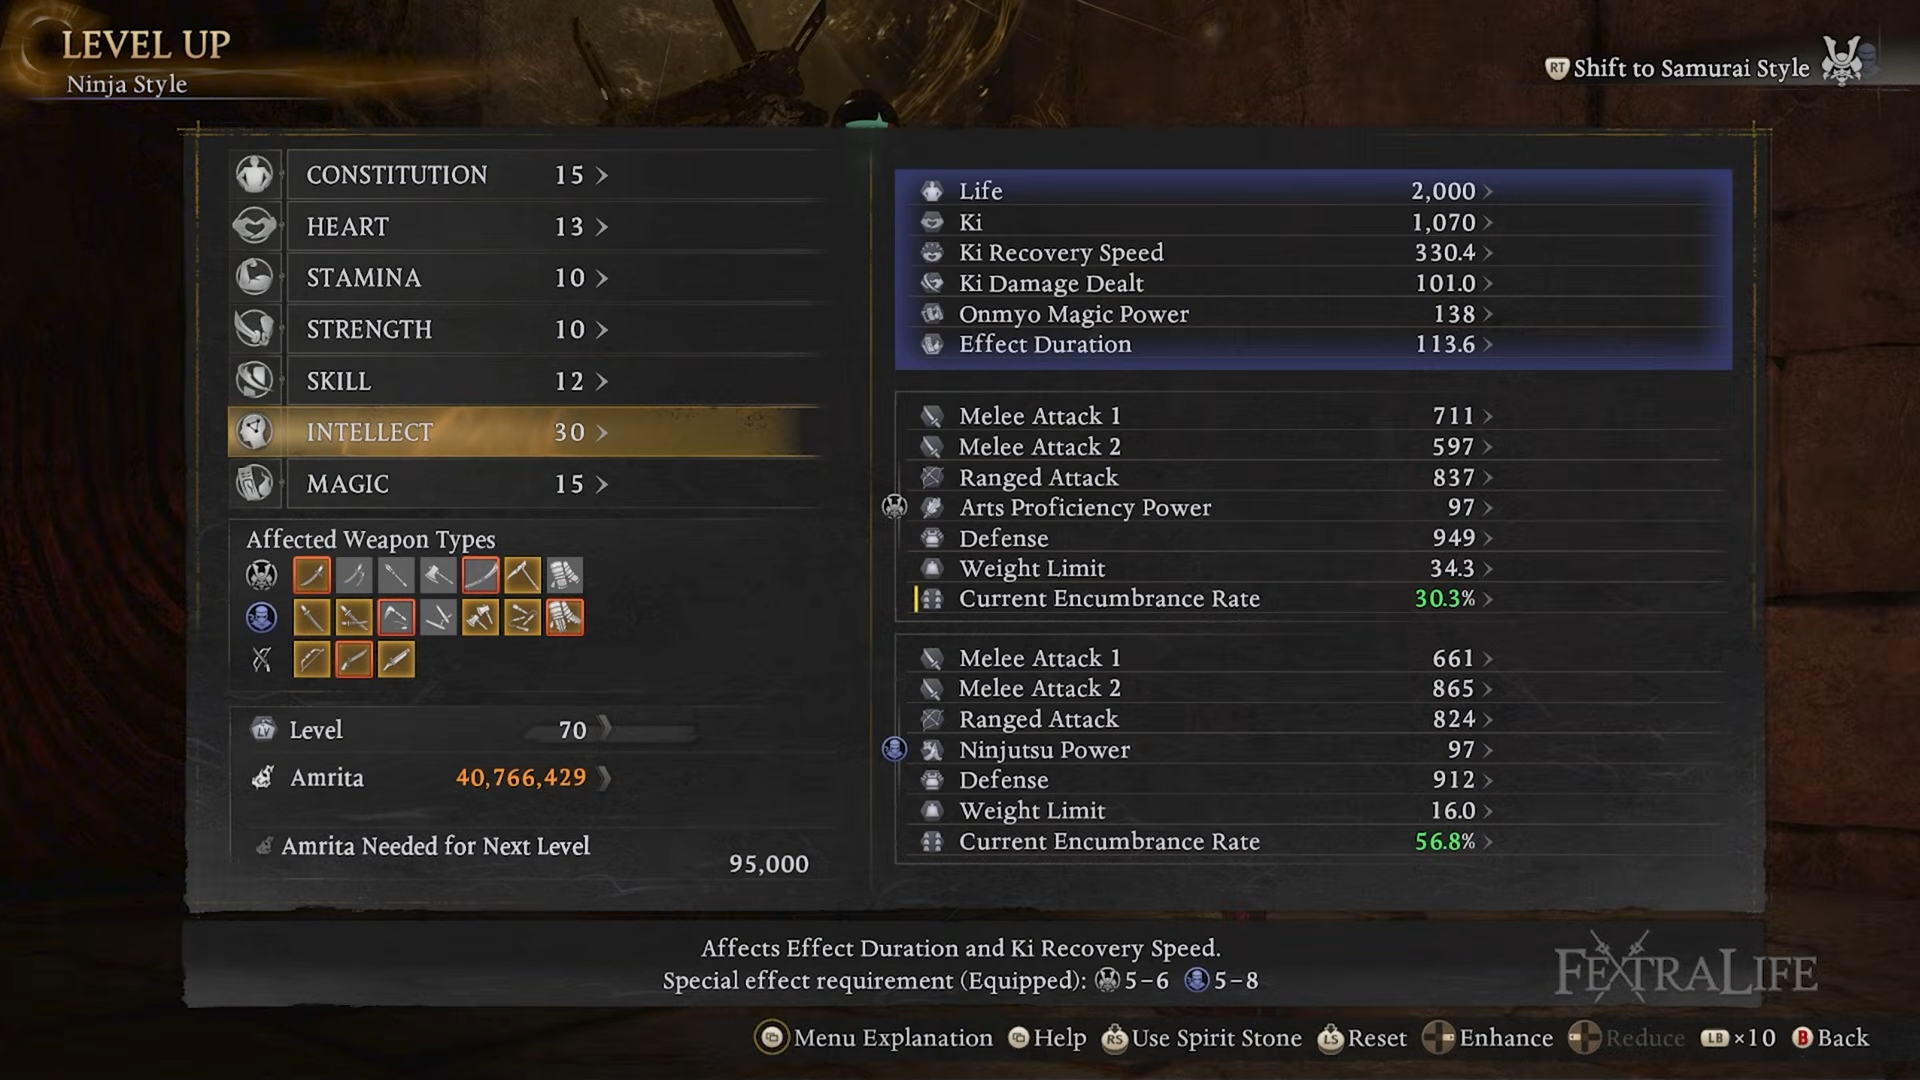
For Stamina, Strength, and Skill, put only the minimum required to activate special effects on the equipment you’re wearing. Magic doesn’t scale your Talons damage directly here, but it’s still valuable because it increases your talisman slots, giving you more tools to buff, imbue elements, and adapt.
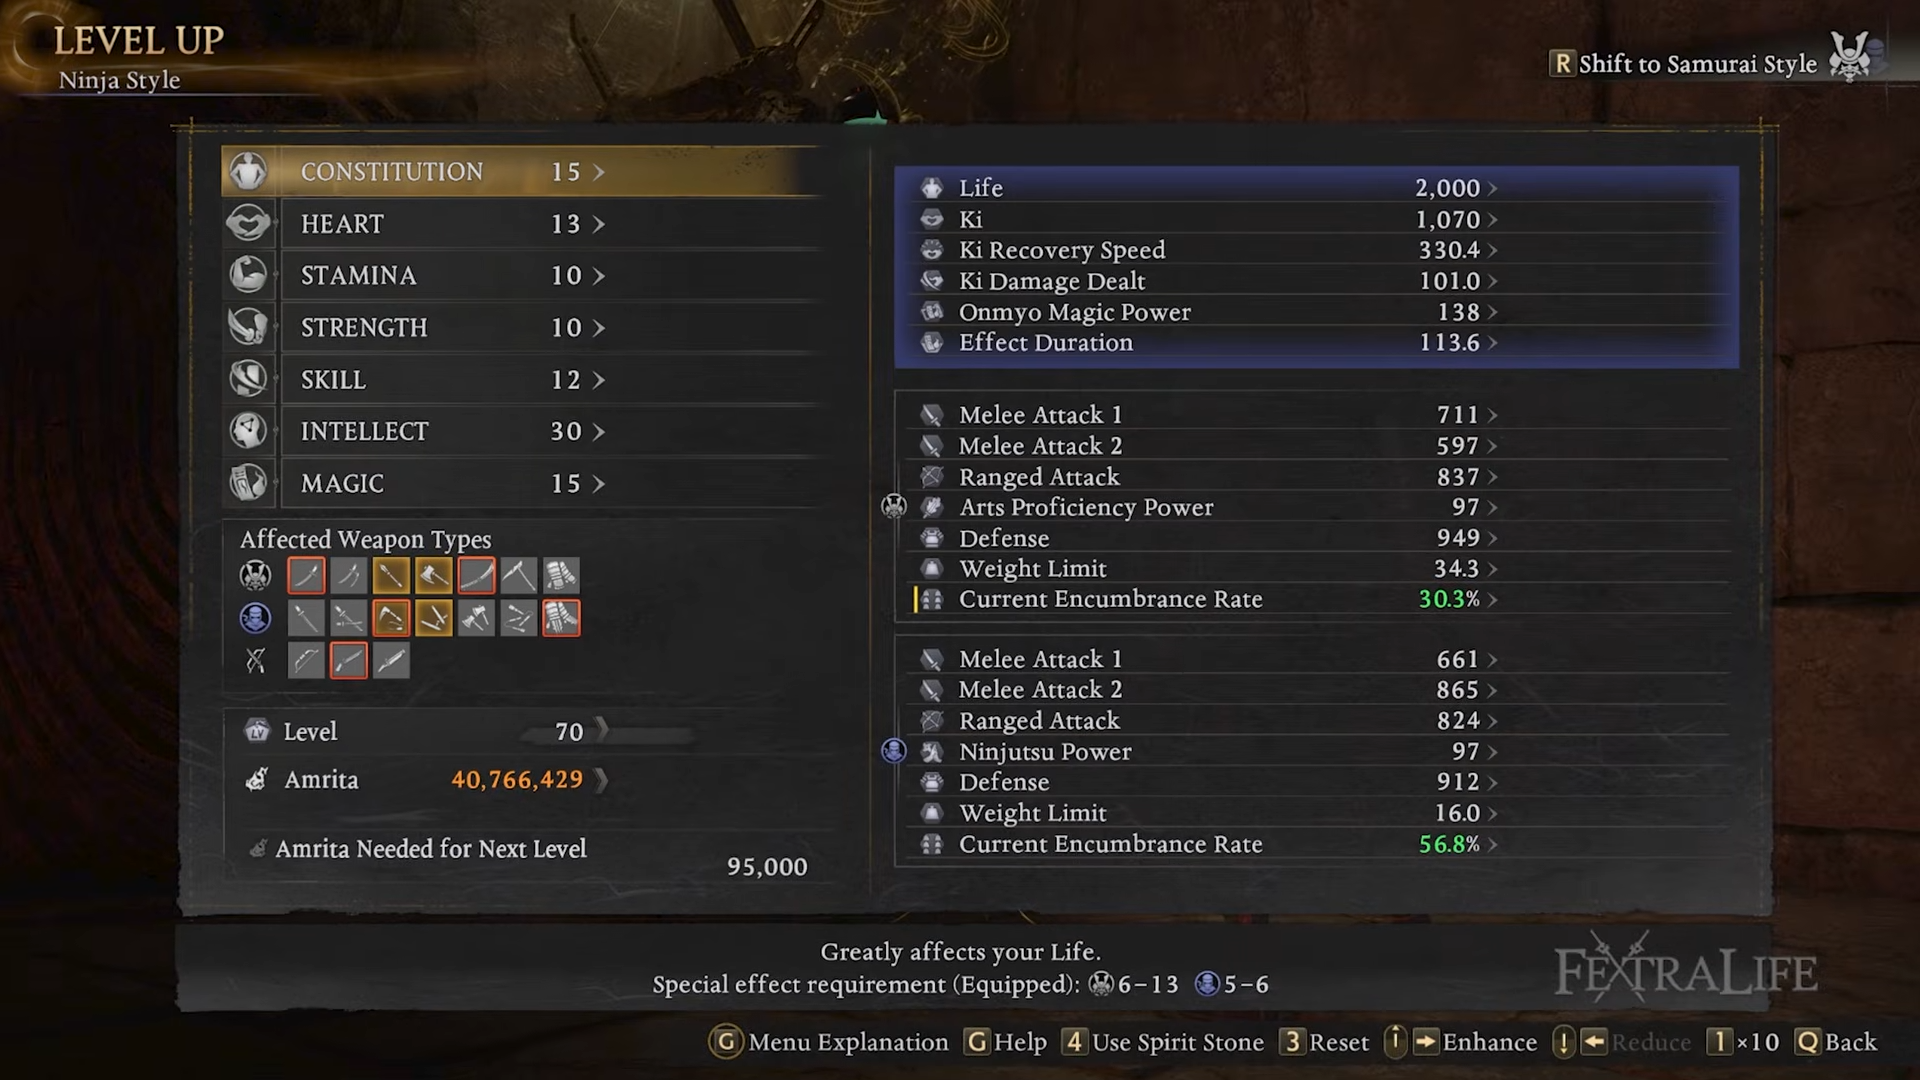
Constitution isn’t a damage stat for this setup, but pushing it to around 15 by roughly level 70 is a practical survivability cushion so you’re less likely to get deleted by a single heavy hit or a grab.
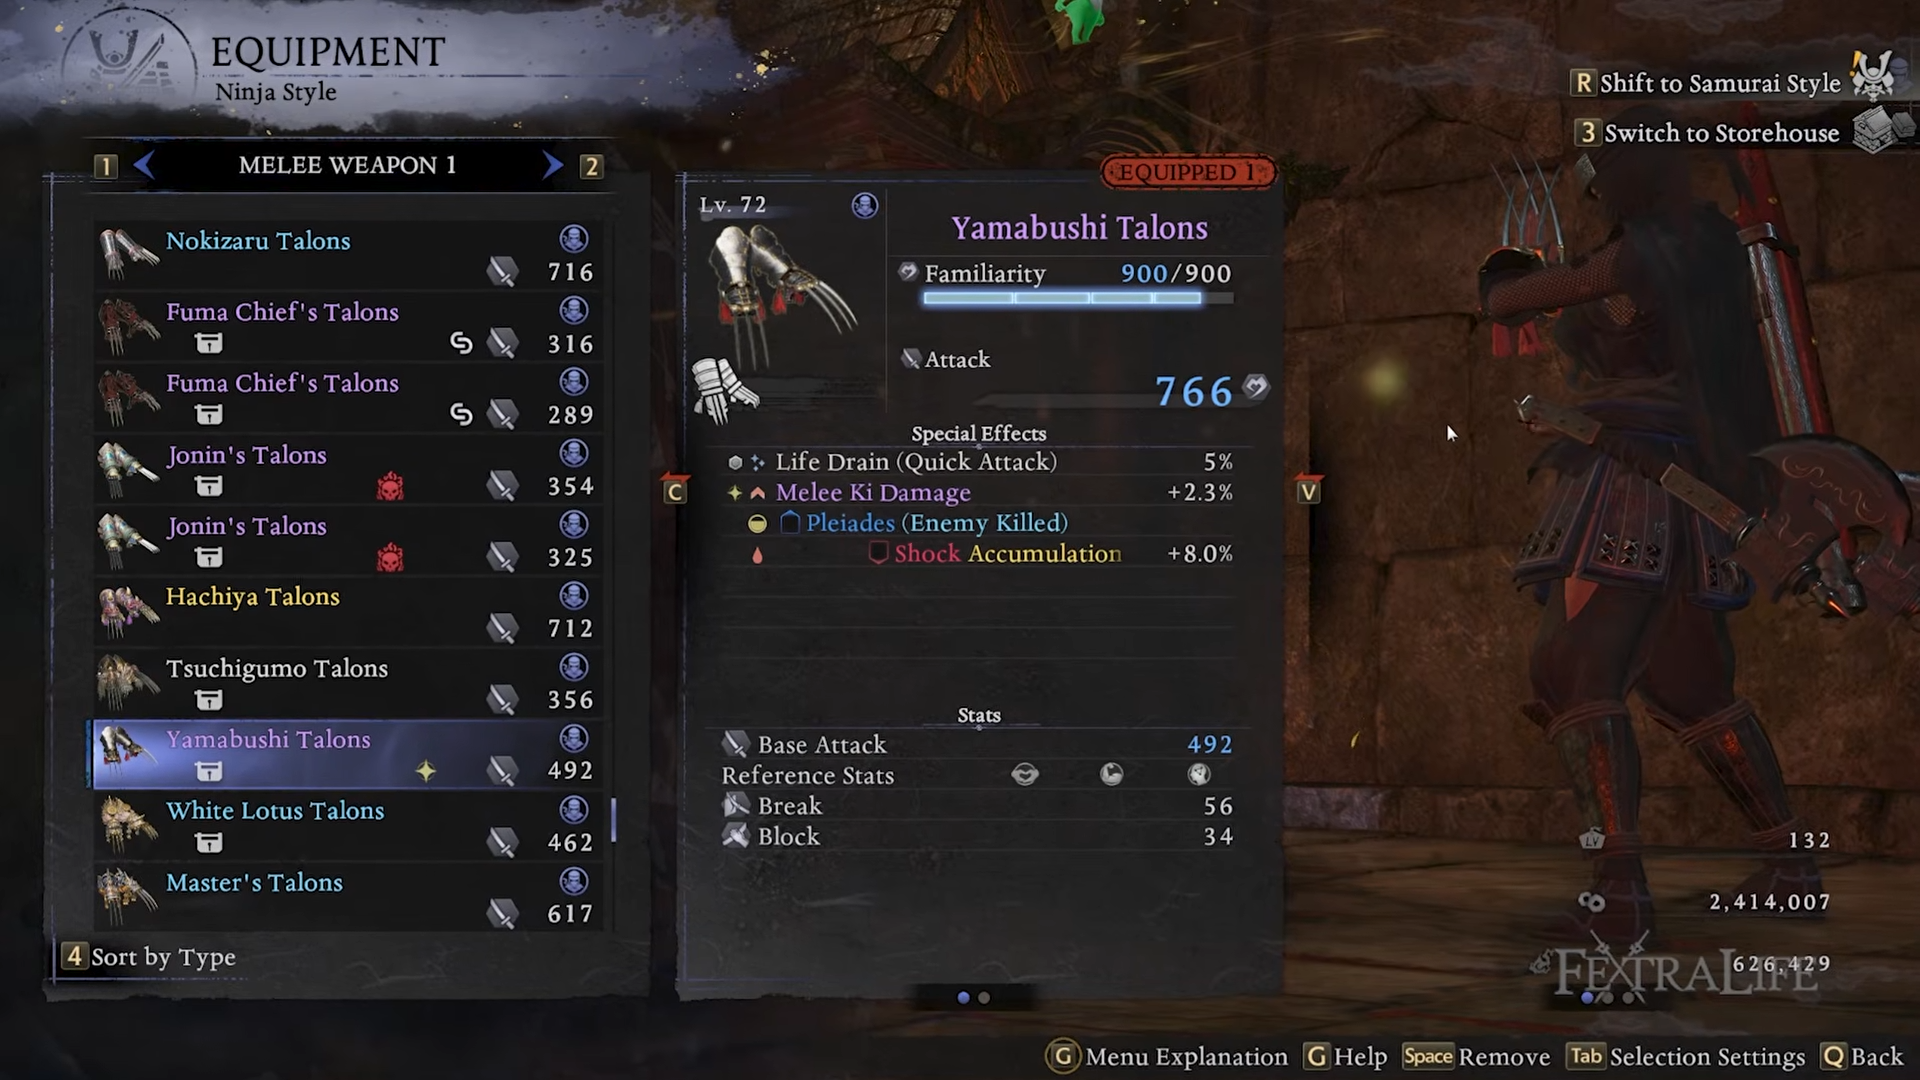
Weapons, armor, and accessory picks that fit the playstyle
Use Talons as your main weapon type, but don’t lock yourself into a specific named pair early; the build works with whatever strong Talons you’ve found or crafted. Focus your weapon special effects on things that directly support how you fight, especially melee bonuses and life drain for sustain.
On the Samurai side, the weapon choice isn’t central; any weapon type that scales with Magic (like Sword or Switchglaive) works because you’re mainly style shifting for a burst break window and then returning to Ninja Style.
For armor, you have two main directions:
- Lighter option: Heir’s Shinobi Garment pieces for reduced dodge ki consumption, which is excellent for a ki-hungry, dodge-heavy Ninja approach.
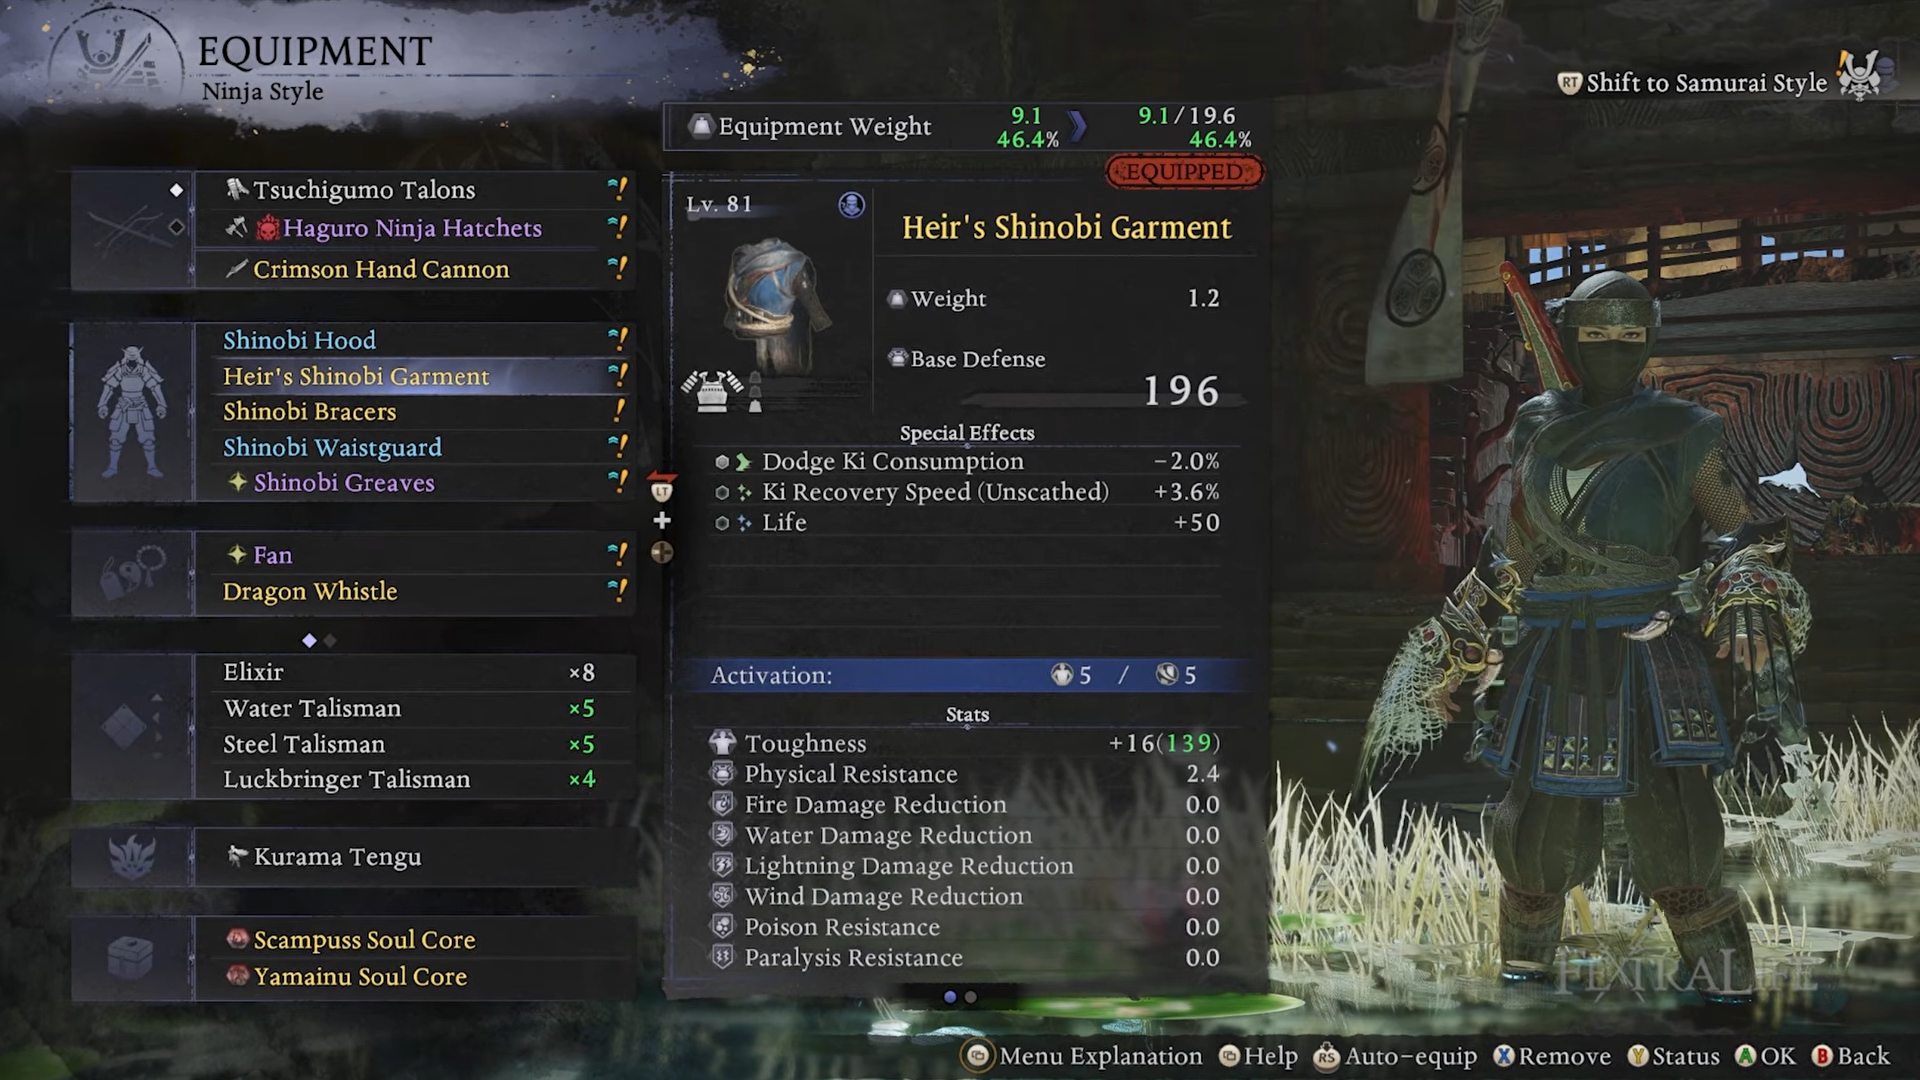
- Heavier damage option: Shinobi gear pieces that boost backstab damage (great for Ninja Style), but be careful because going too heavy can push you into slow agility if you exceed 70% encumbrance.
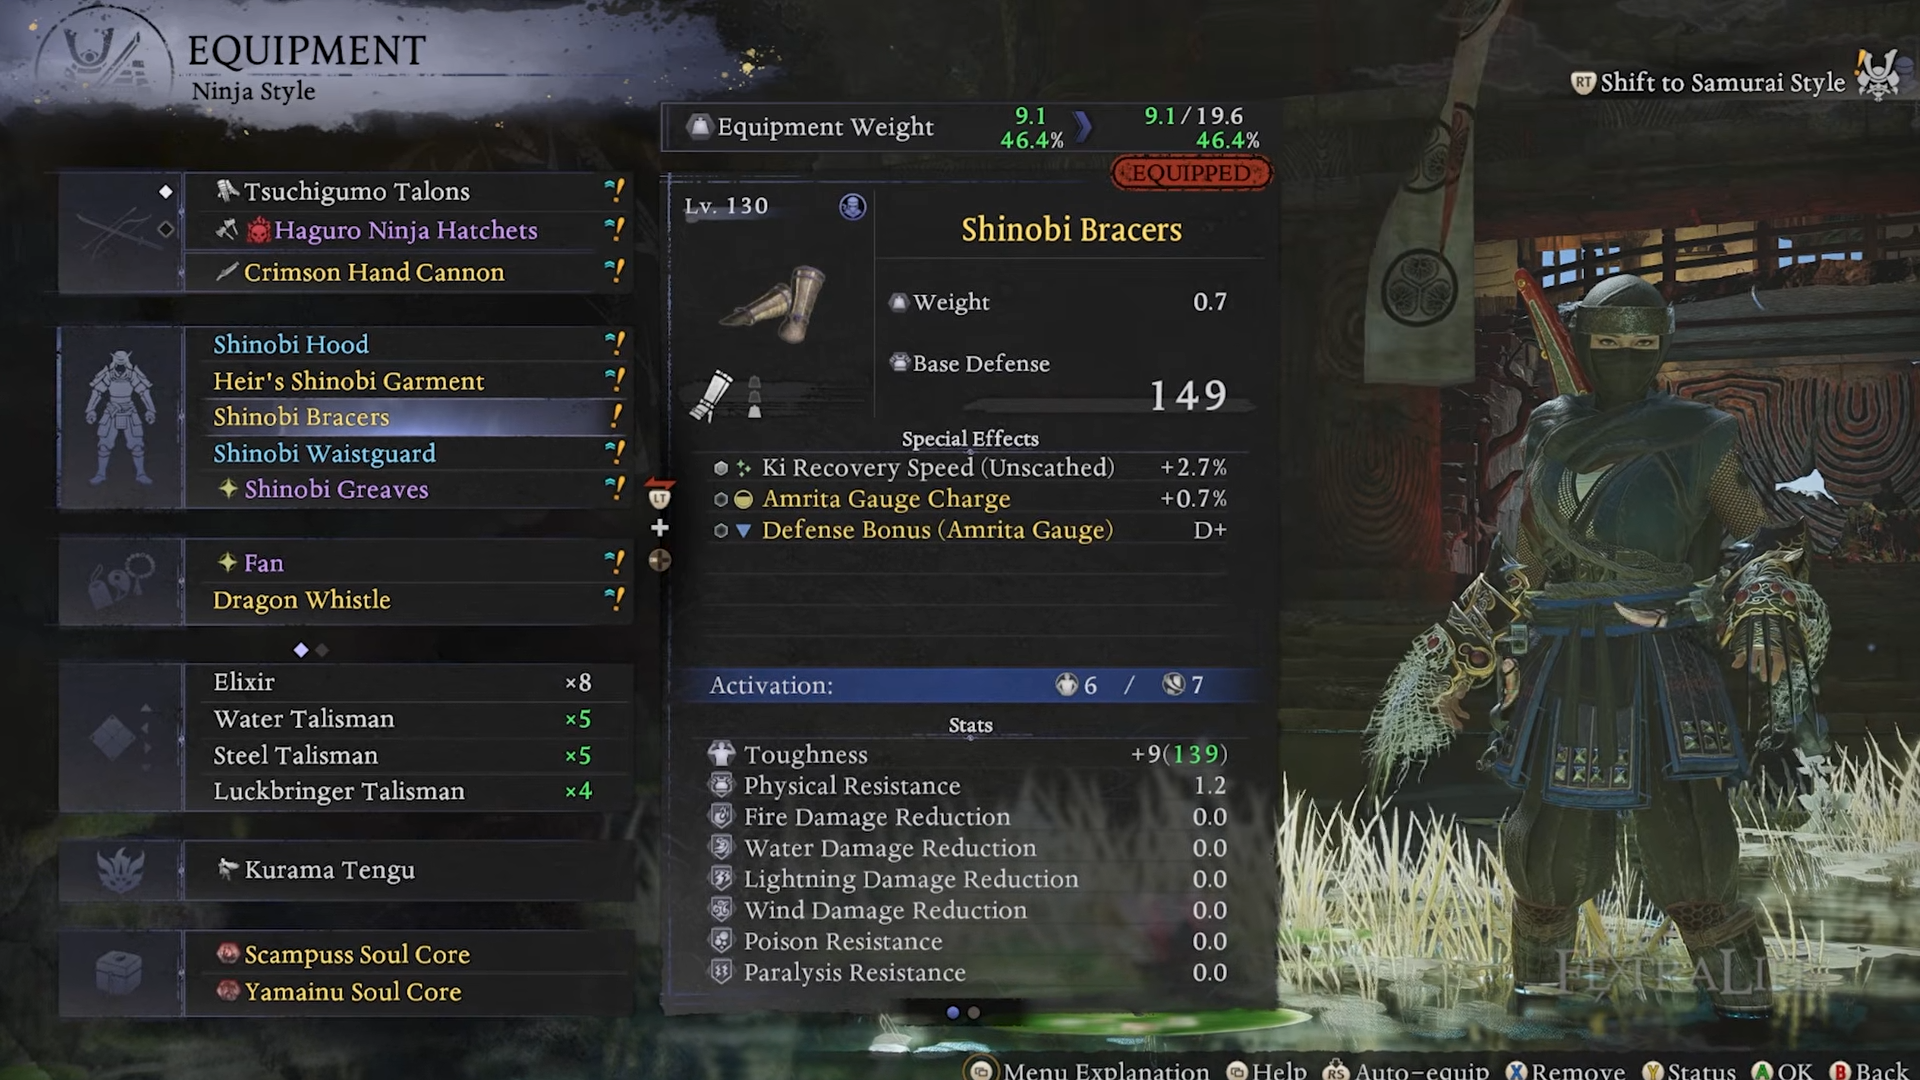
A strong middle path is mixing these sets so you stay between 30% and 70% encumbrance, keeping good mobility while still raising damage. For survivability, look for armor effects like life recovery after evasion or life recovery on amrita absorption, because Talons generate amrita quickly—especially against yokai—thanks to their rapid hit rate.
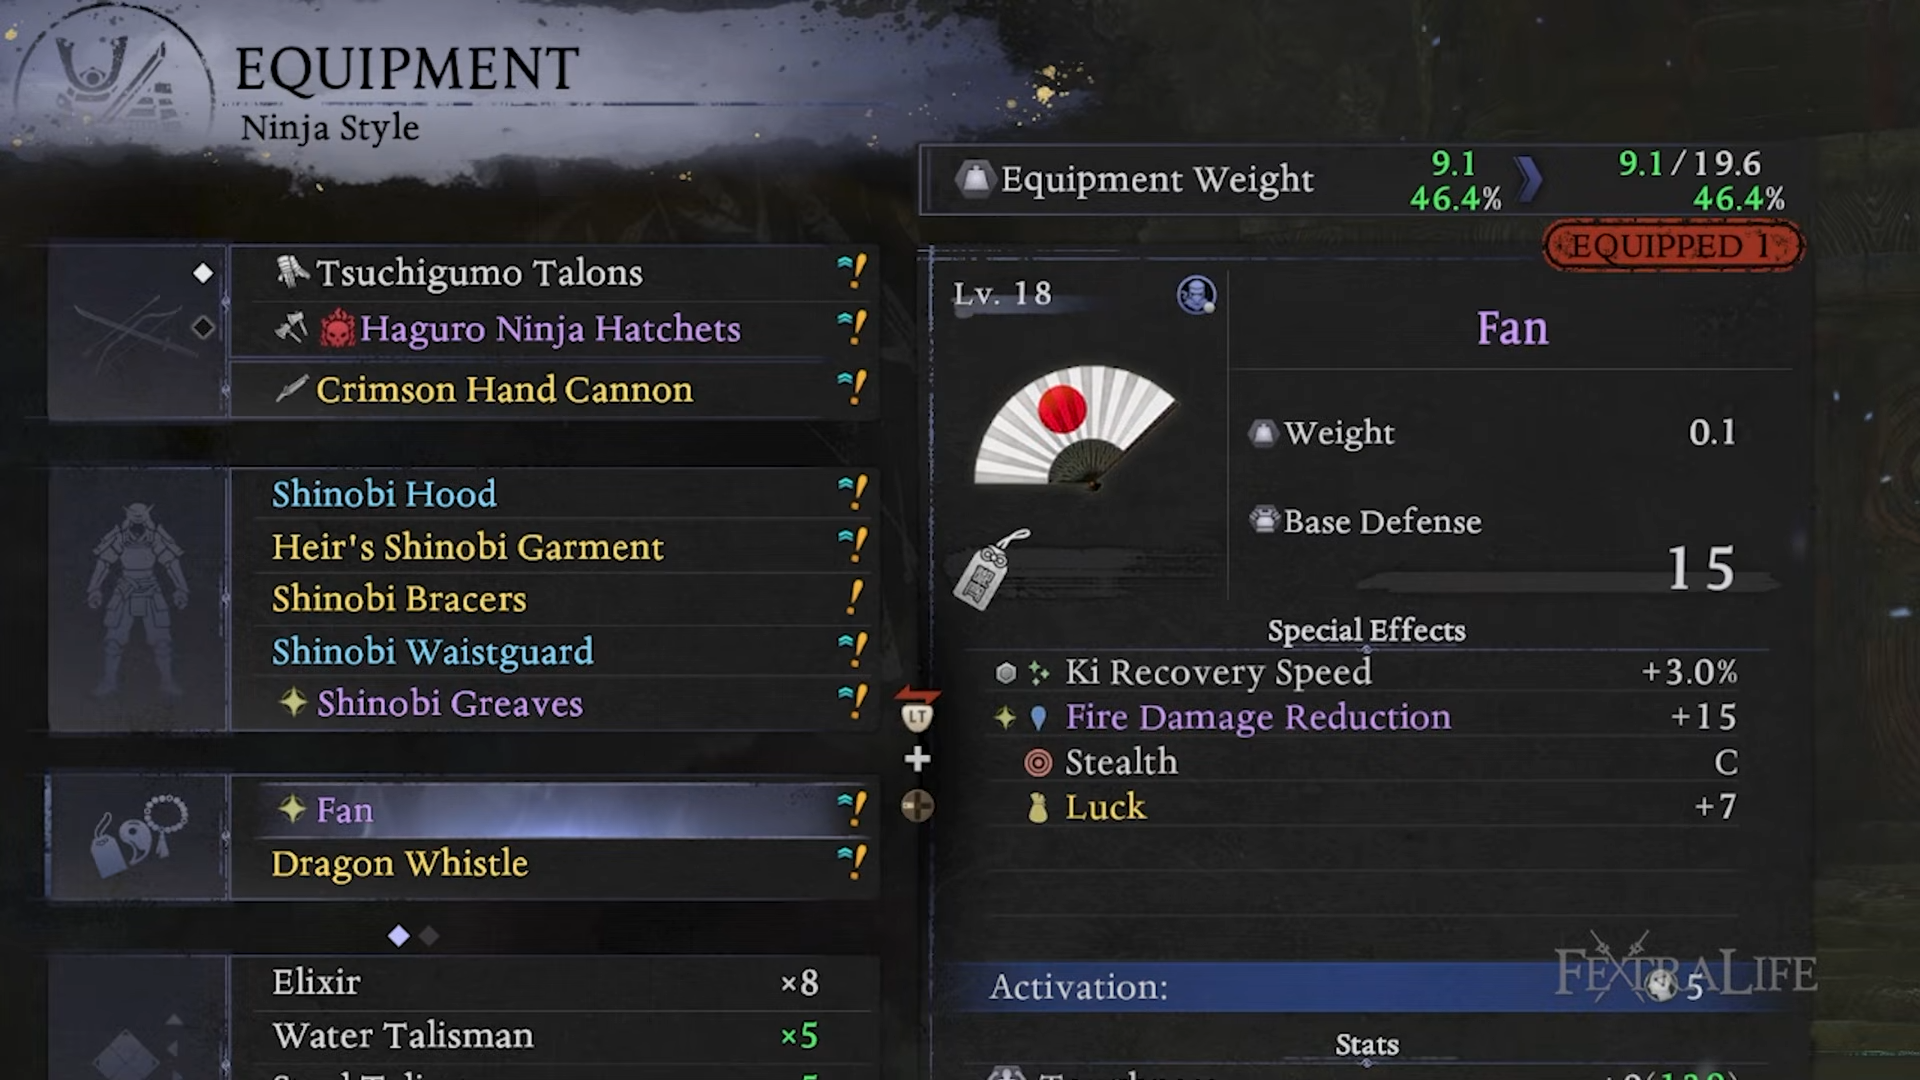
For an accessory, White Fan is a solid pick for ki management due to increased ki recovery speed, and you can lean into secondary effects like luck if you want better gear drops as you progress.
Locations for skill texts
Several skill texts are tied to specific mission areas and landmarks, including the Cursed House in the Funa Okayama area, Matsua Taisha Shrine in Sageno (Hyen era), Hamamatsu and Lake Hamana for Fortitude texts, Mysaka (after draining the lake) for a backstab sustain skill, Mika Tagahhara for a damage skill text, and Hamamamasu Hill plus the Mika Tagara Junction Shrine area for a chest-based technique.
How to set up common skills for survivability and faster buffing
Step 1: Take Repel Expert for safer burst breaks
This increases survivability by extending your successful burst break window, which helps a squishier build stay alive while playing aggressively.
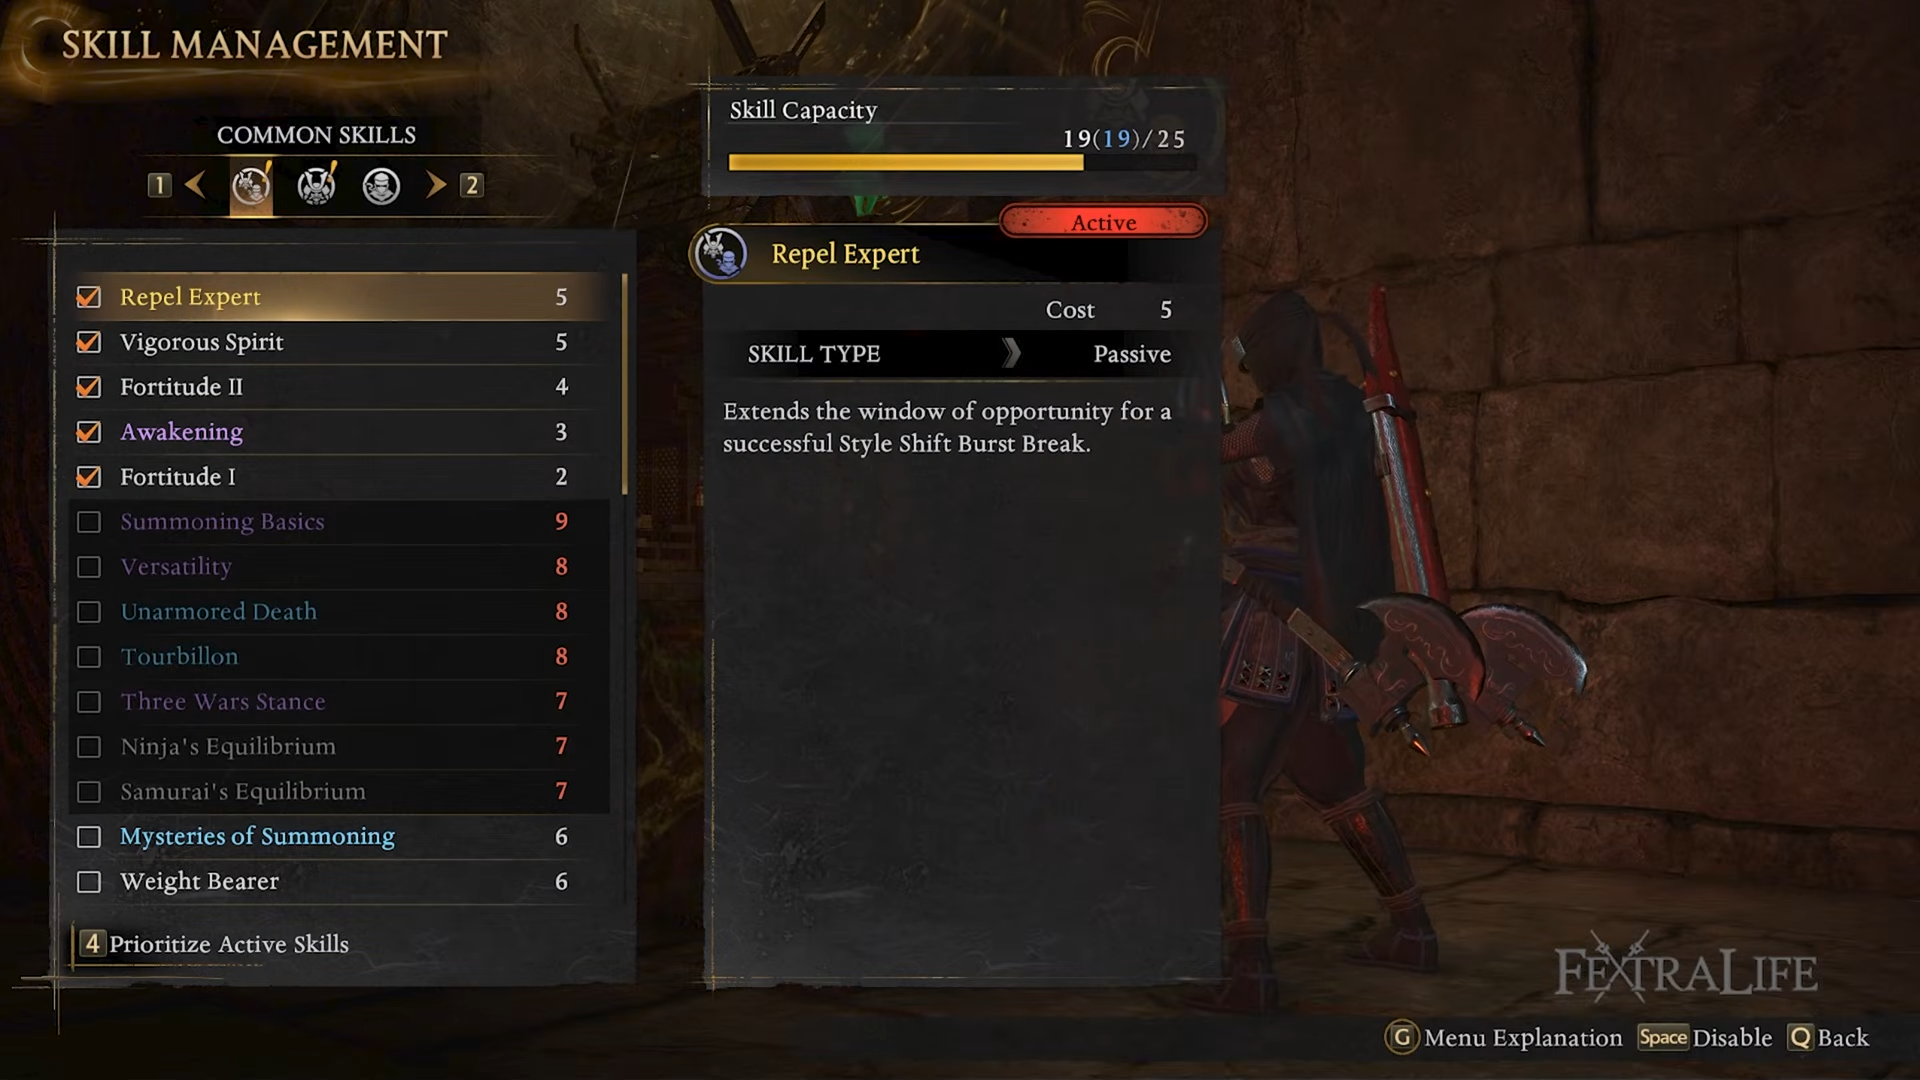
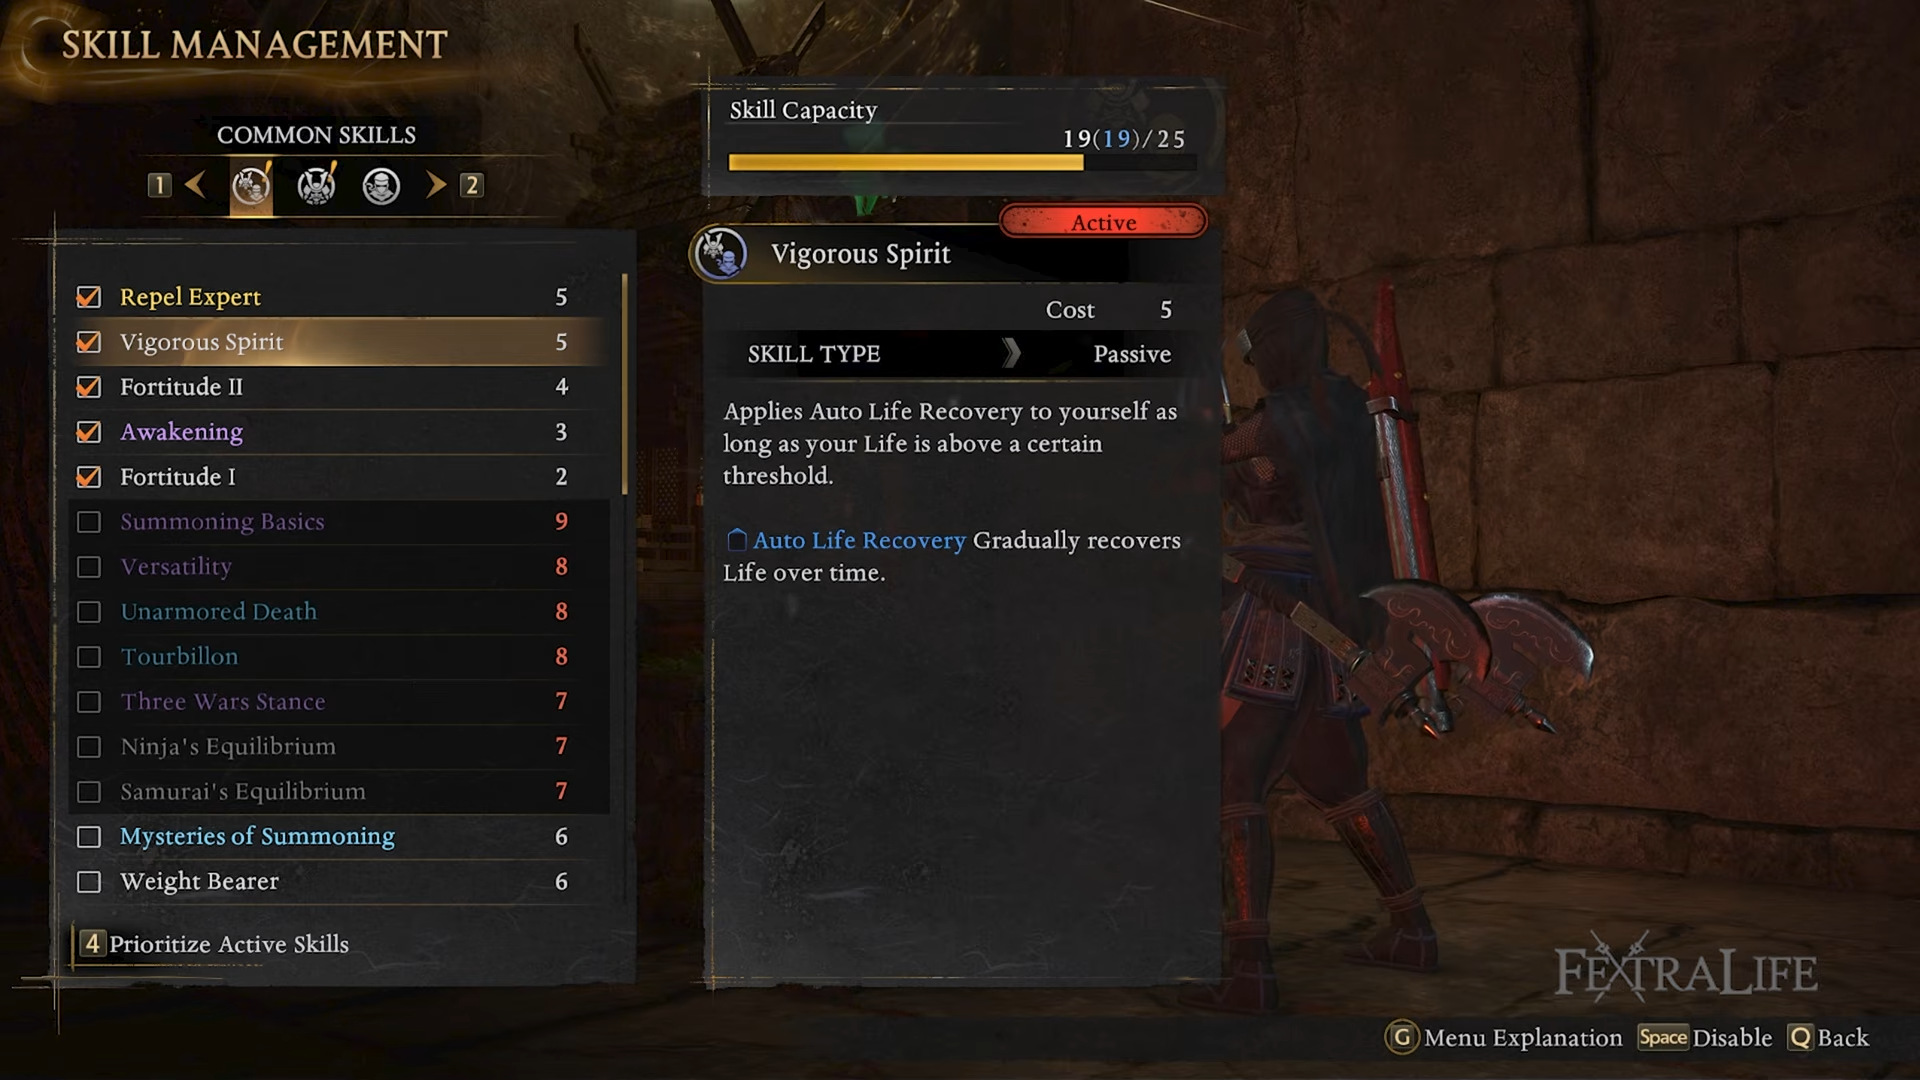
Step 2: Add Vigorous Spirit for passive sustain
It applies auto life recovery as long as you stay above a certain threshold, reducing how often you need to burn elixirs when you’re not in danger.
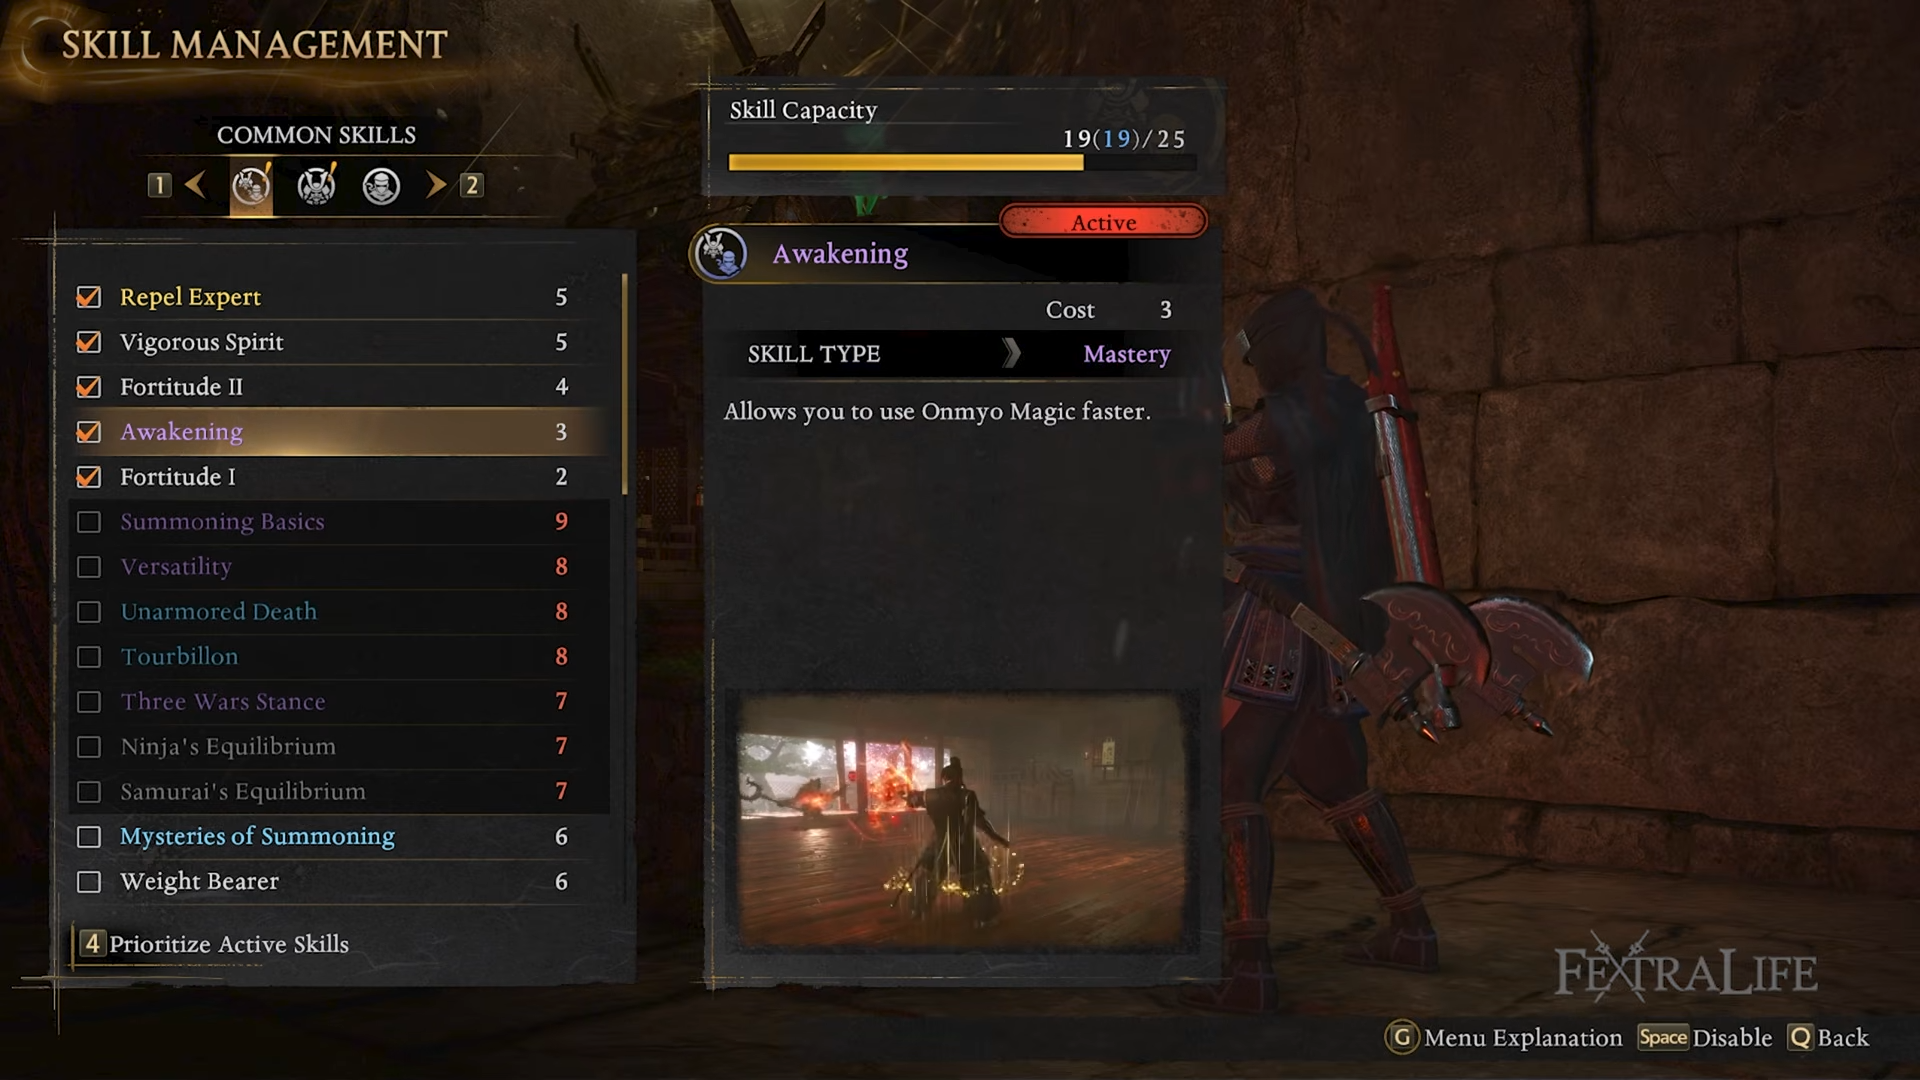
Step 3: Pick Awakening so magic casting stays snappy
Since you’ll use magic talismans to buff your attacks, faster casting helps reduce downtime while refreshing buffs.
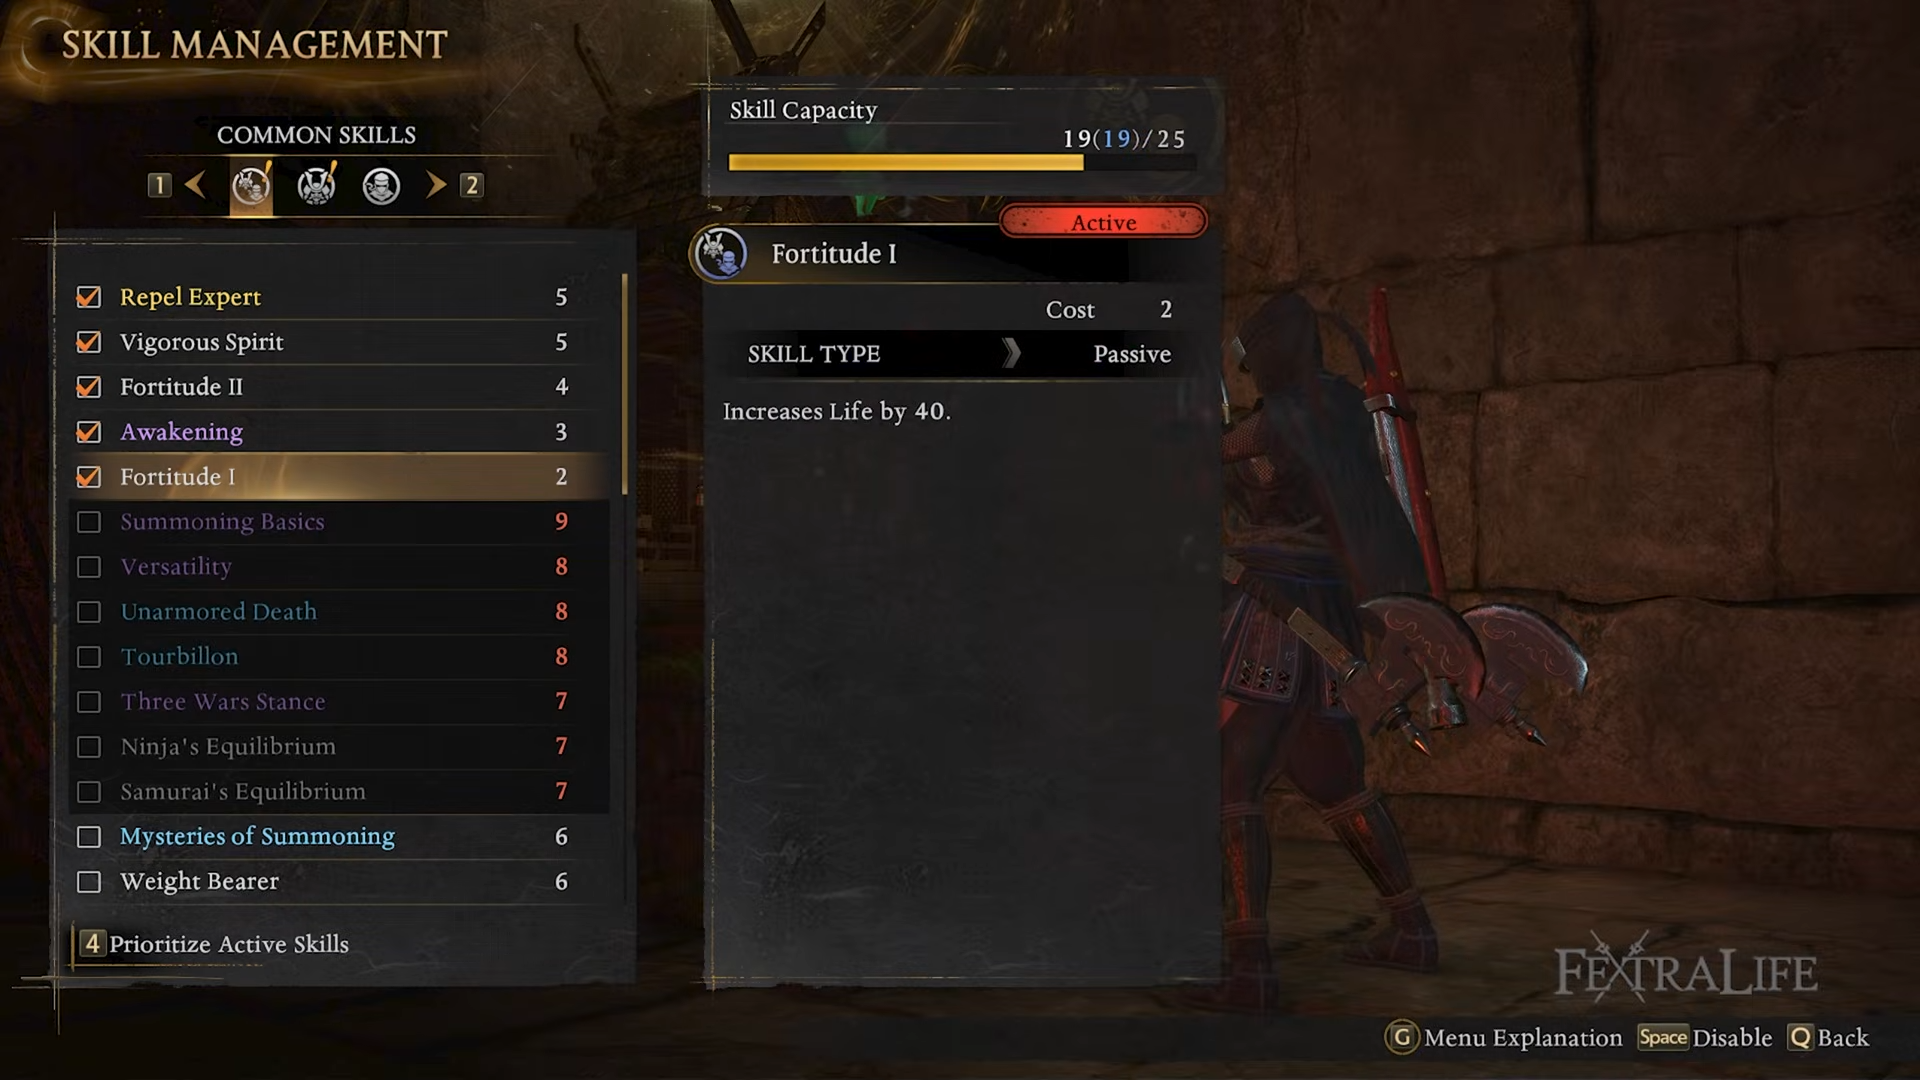
Step 4: Fill with Fortitude and/or Attack Mastery based on comfort
Fortitude is especially valuable here because your gear path tends to have lower defense, so extra life points matter.
How to set up Ninja Style skills that power the build
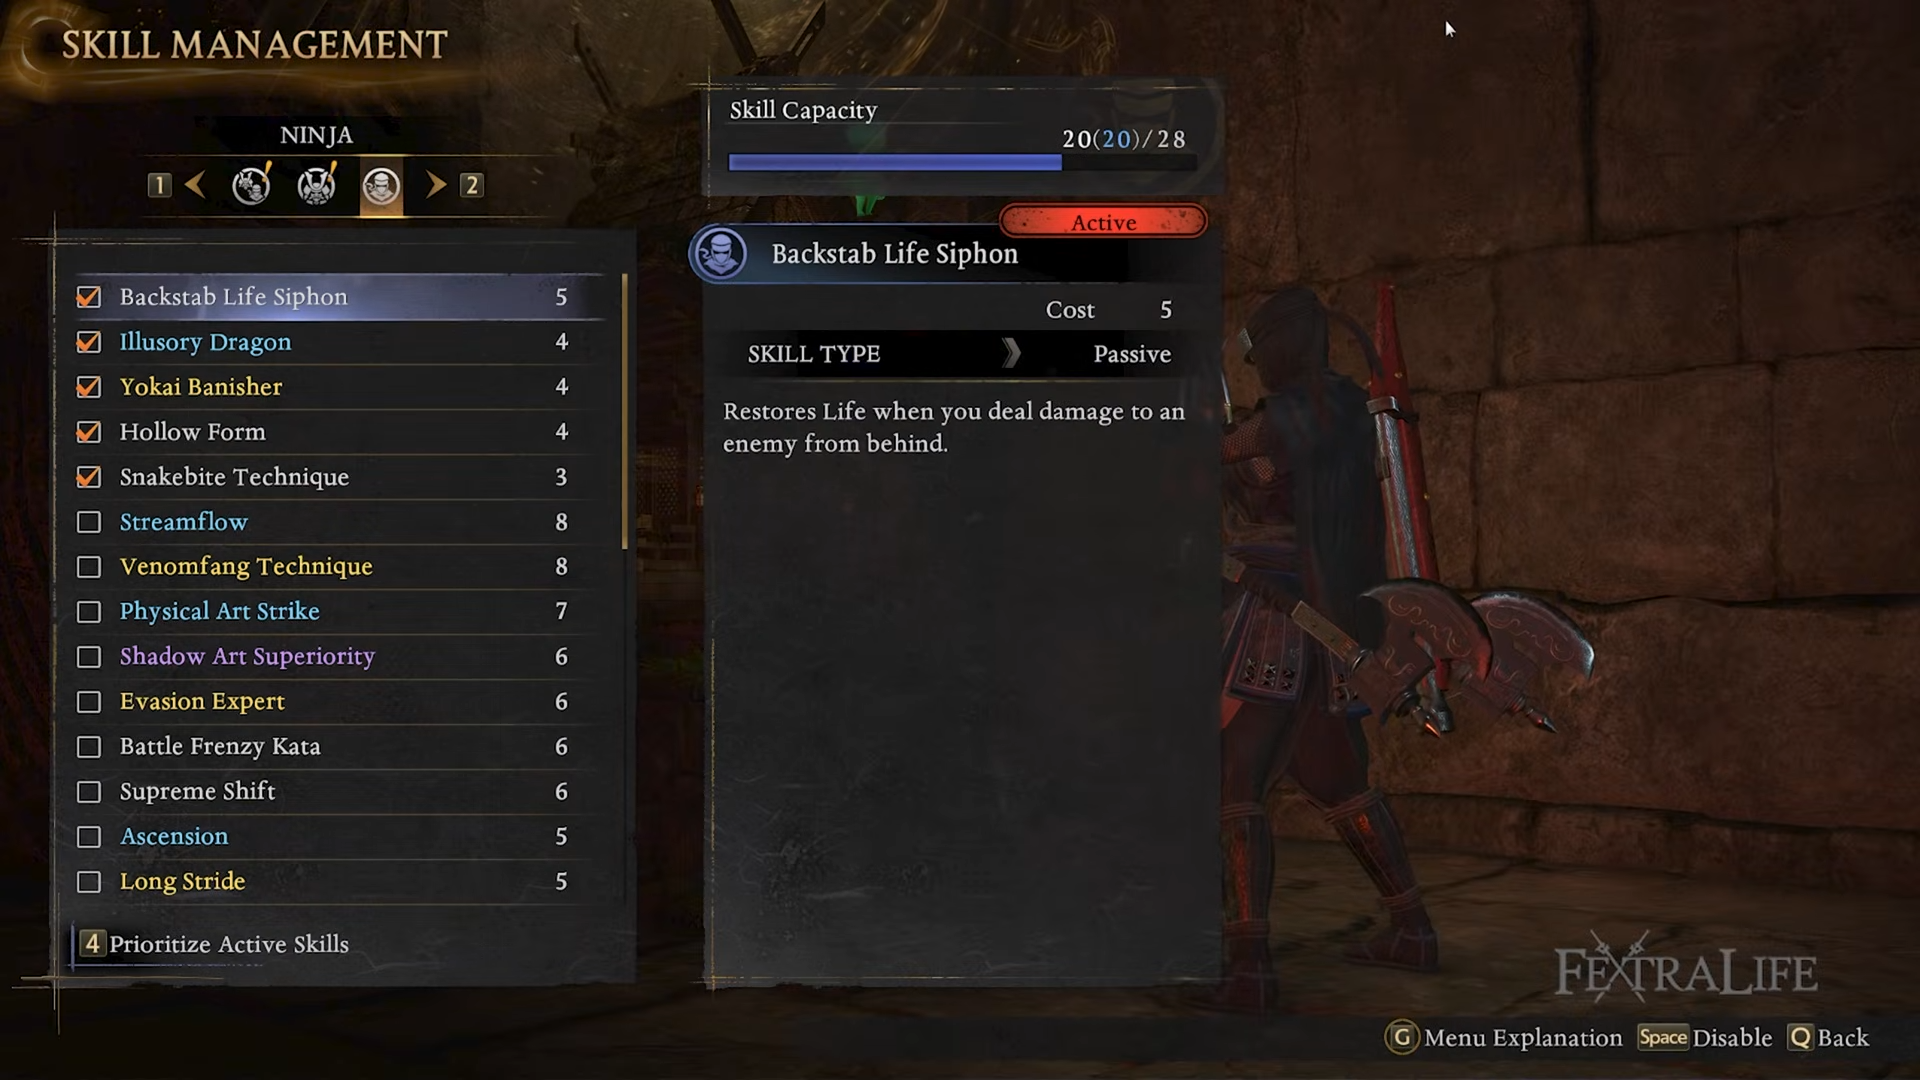
Step 1: Unlock backstab sustain with Backstab Life Siphon
This gives you life restoration when you deal damage from behind, which synergizes naturally with Ninja positioning and backstab opportunities.
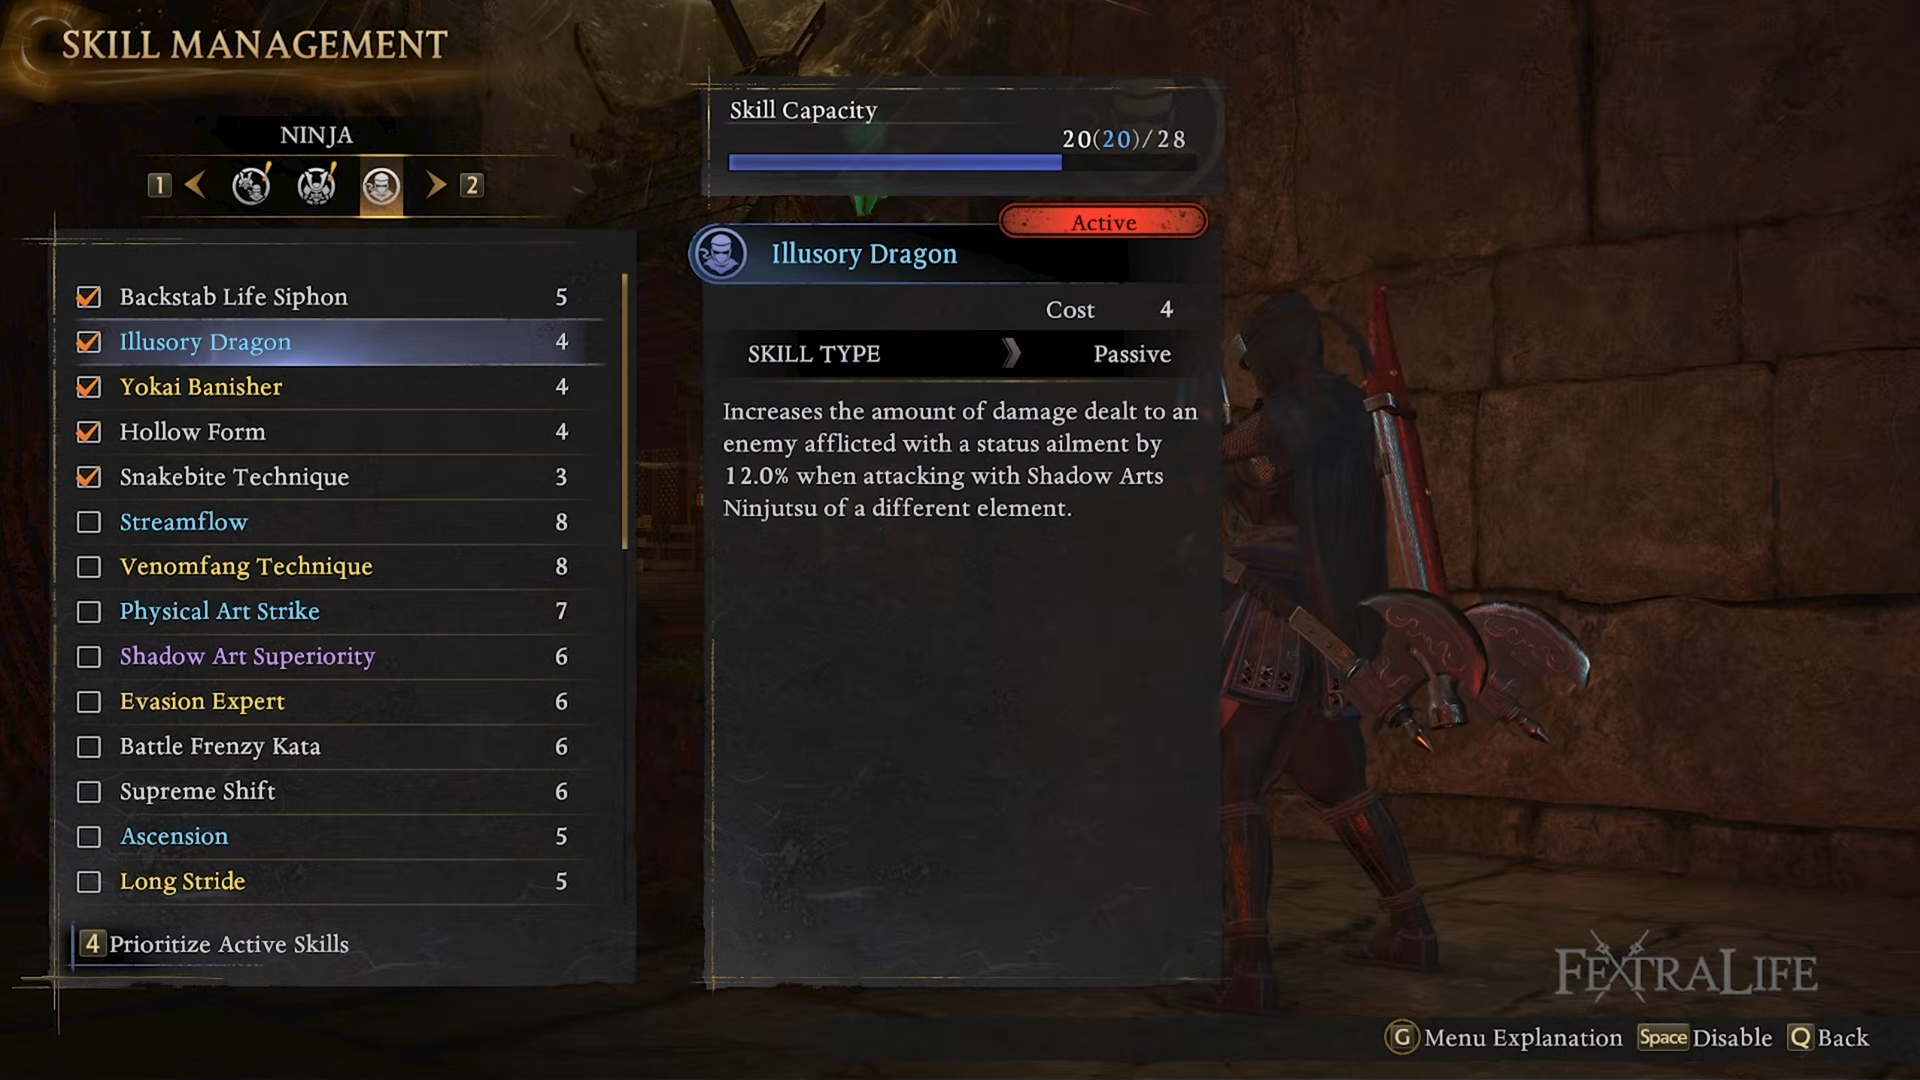
Step 2: Take Illusory Dragon for a status-driven damage spike
You’ll deal 12% more damage to enemies afflicted by a status ailment, which fits perfectly with your shuriken + elemental talisman plan.
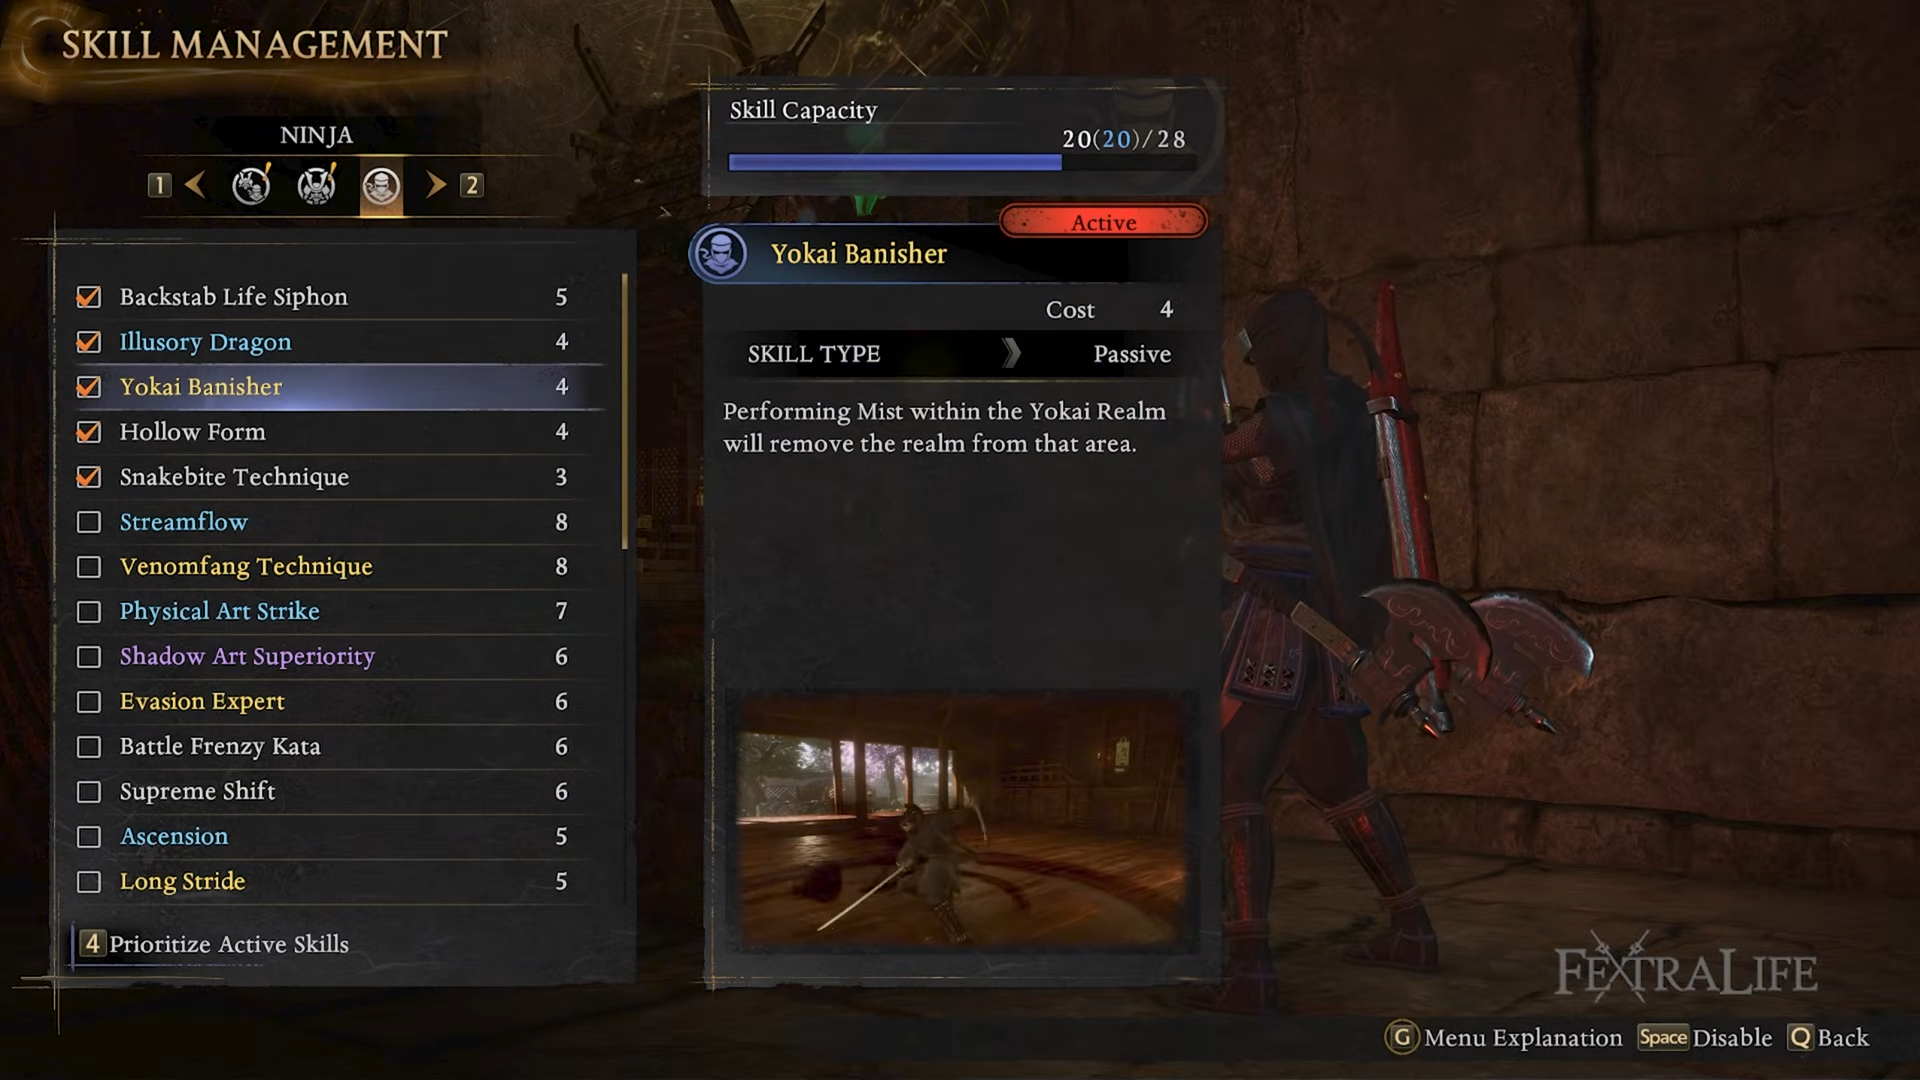
Step 3: Grab Yokai Banisher for smoother realm control
This lets Ninja Style dispel Yo-kai realms without swapping to Samurai, keeping your tempo and pressure consistent.
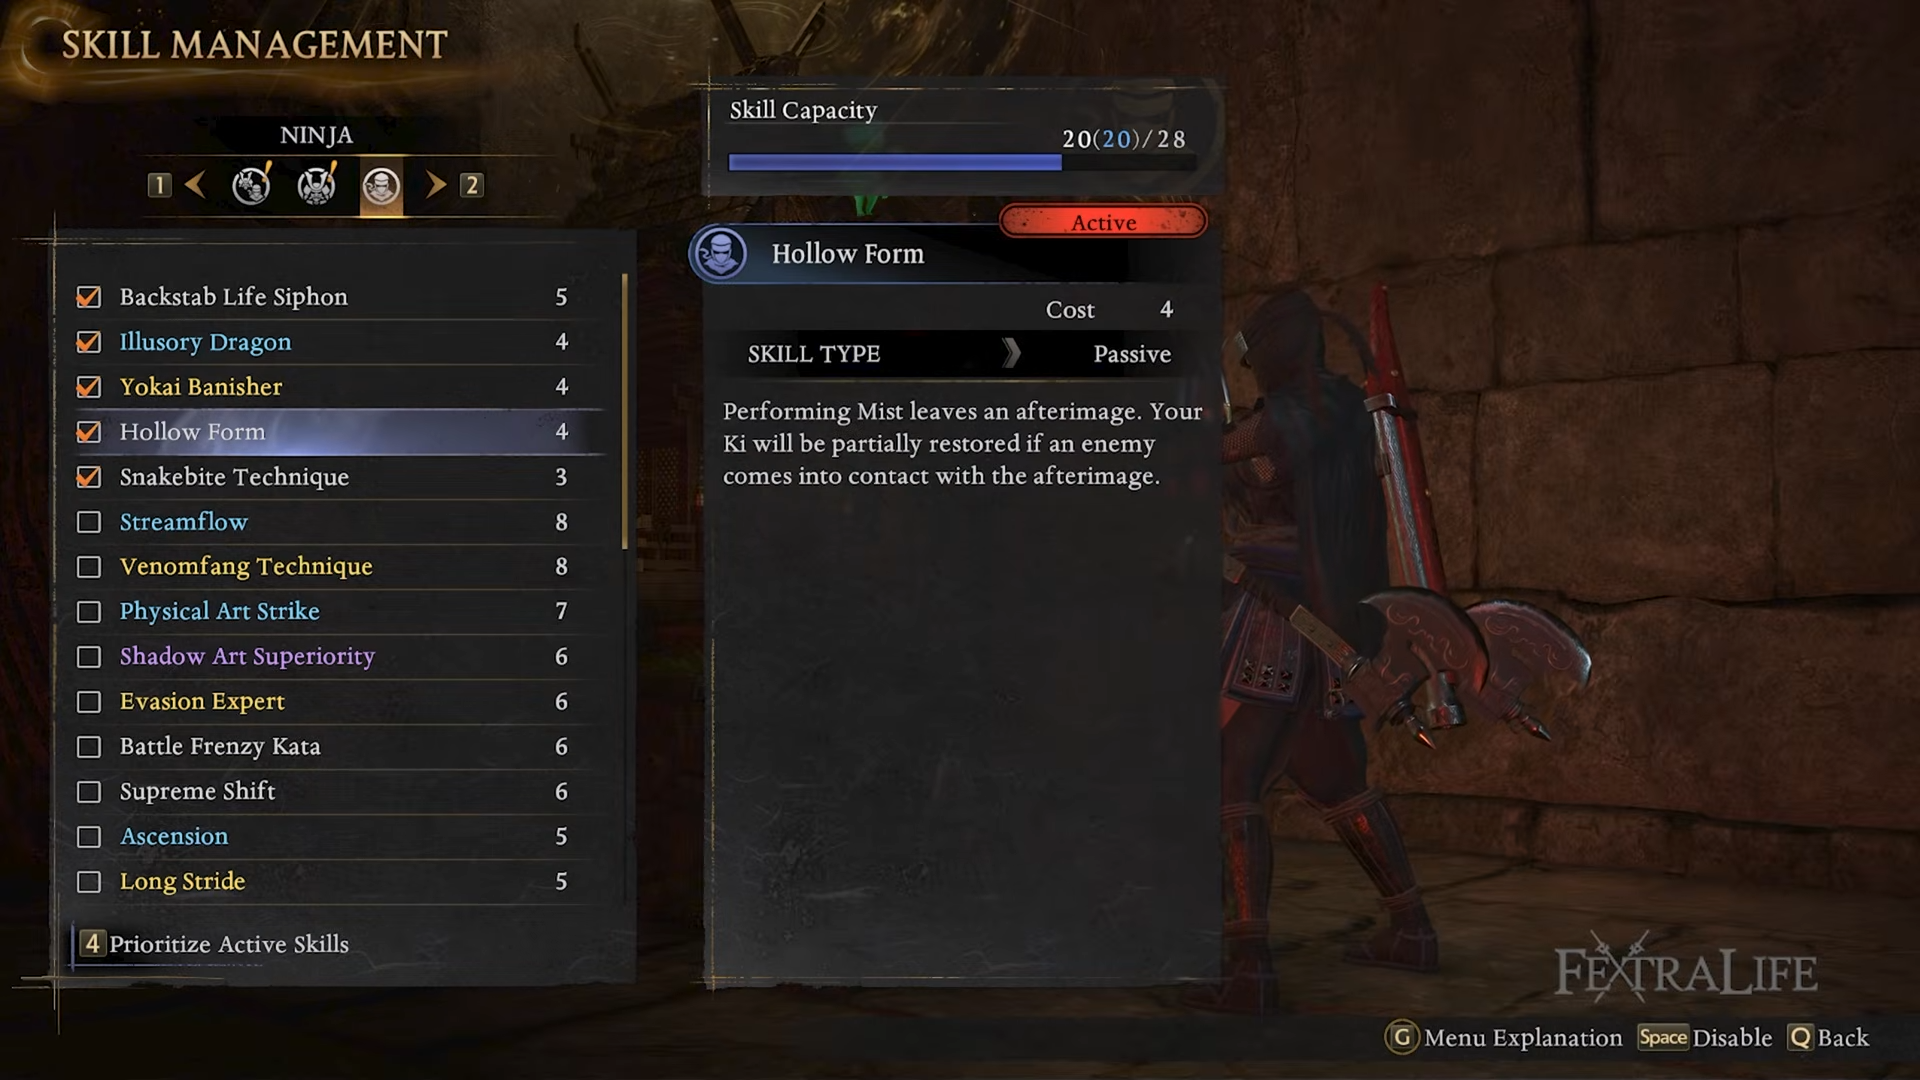
Step 4: Use Hollow Form to improve ki management during evasions
It enhances your mist by leaving an afterimage; if an enemy touches it, you partially restore ki, which helps you keep moving and attacking.
Step 5: Add Snakebite Technique to strengthen damage-over-time pressure
It increases damage-over-time you inflict by 16%, reinforcing the build’s plan of stacking ailment pressure while you shred ki in melee.

How to choose Talon skills and Martial Arts for pressure and gap closing
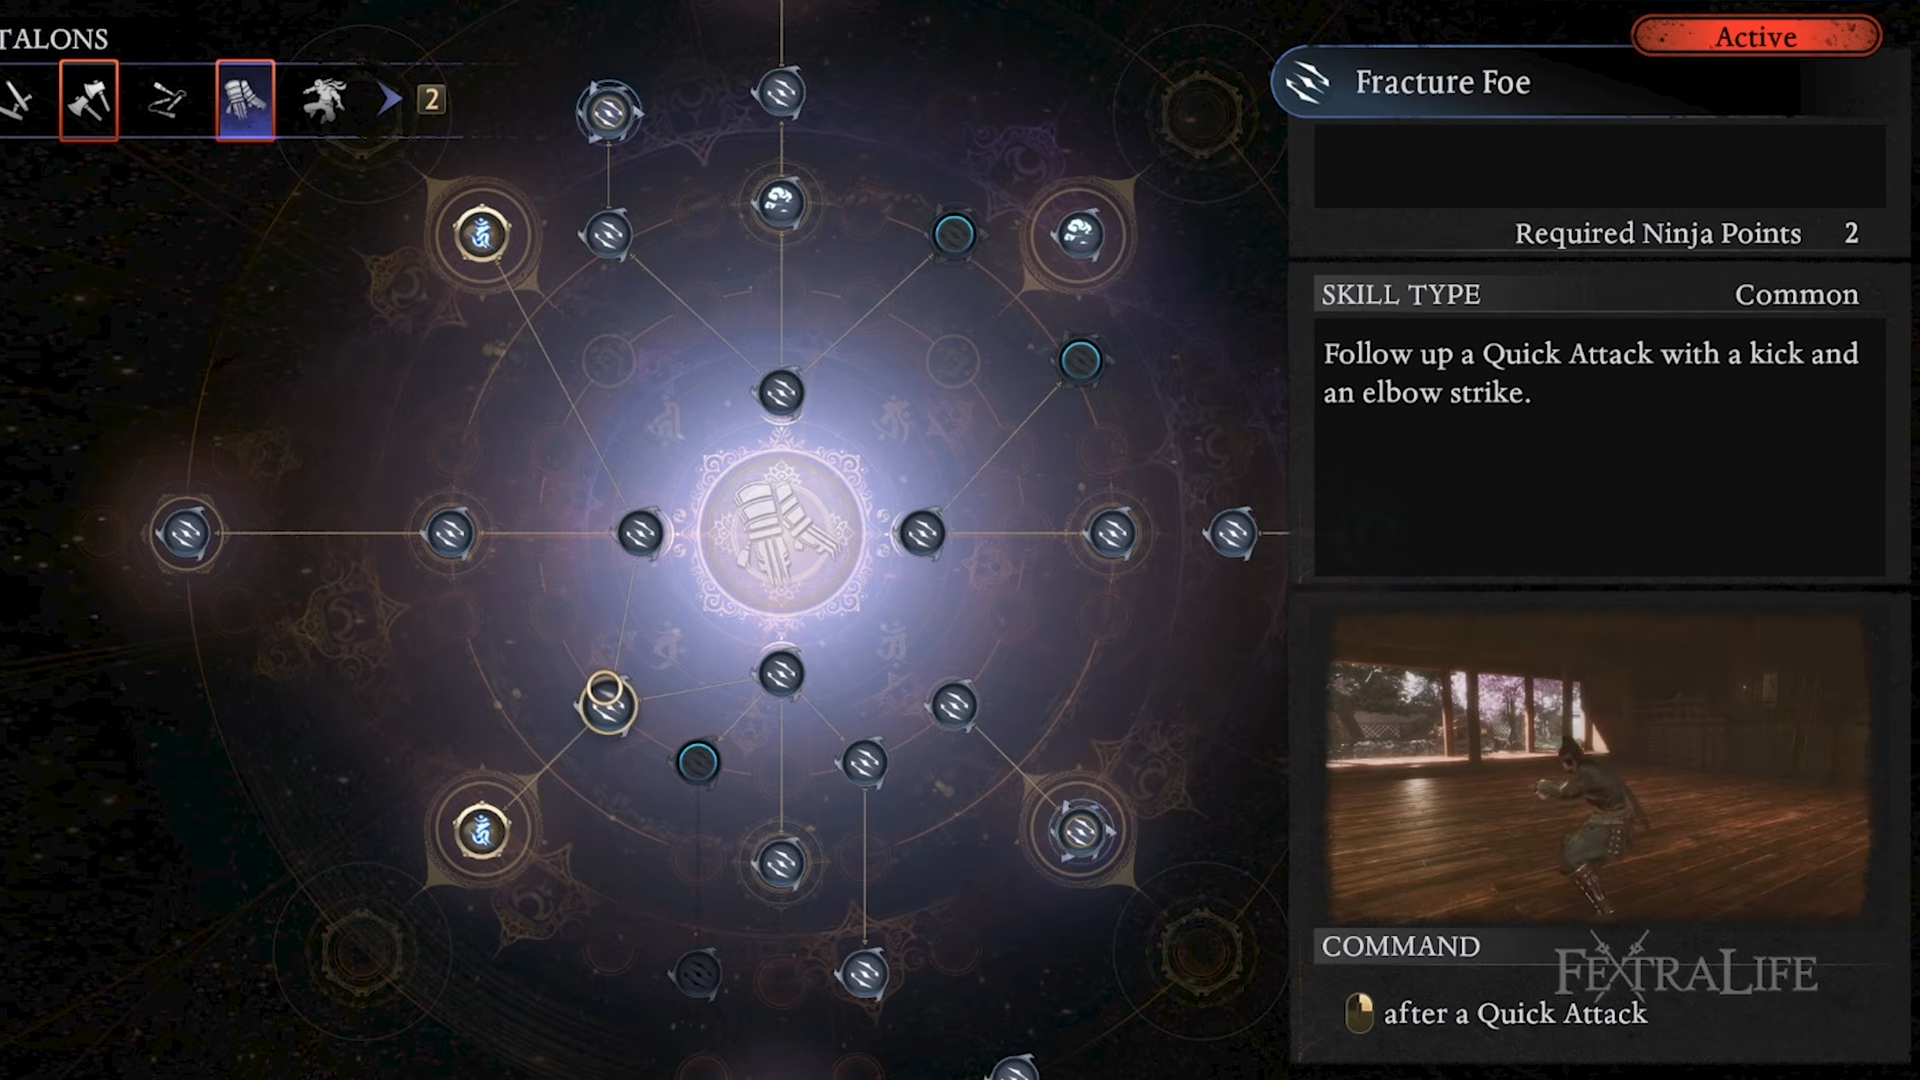
Step 1: Use Fracture Foe for heavy ki damage
It gives you a quick-attack follow-up with a kick and elbow strike; it’s fewer hits than some alternatives, but it hits ki hard and helps break defenses.
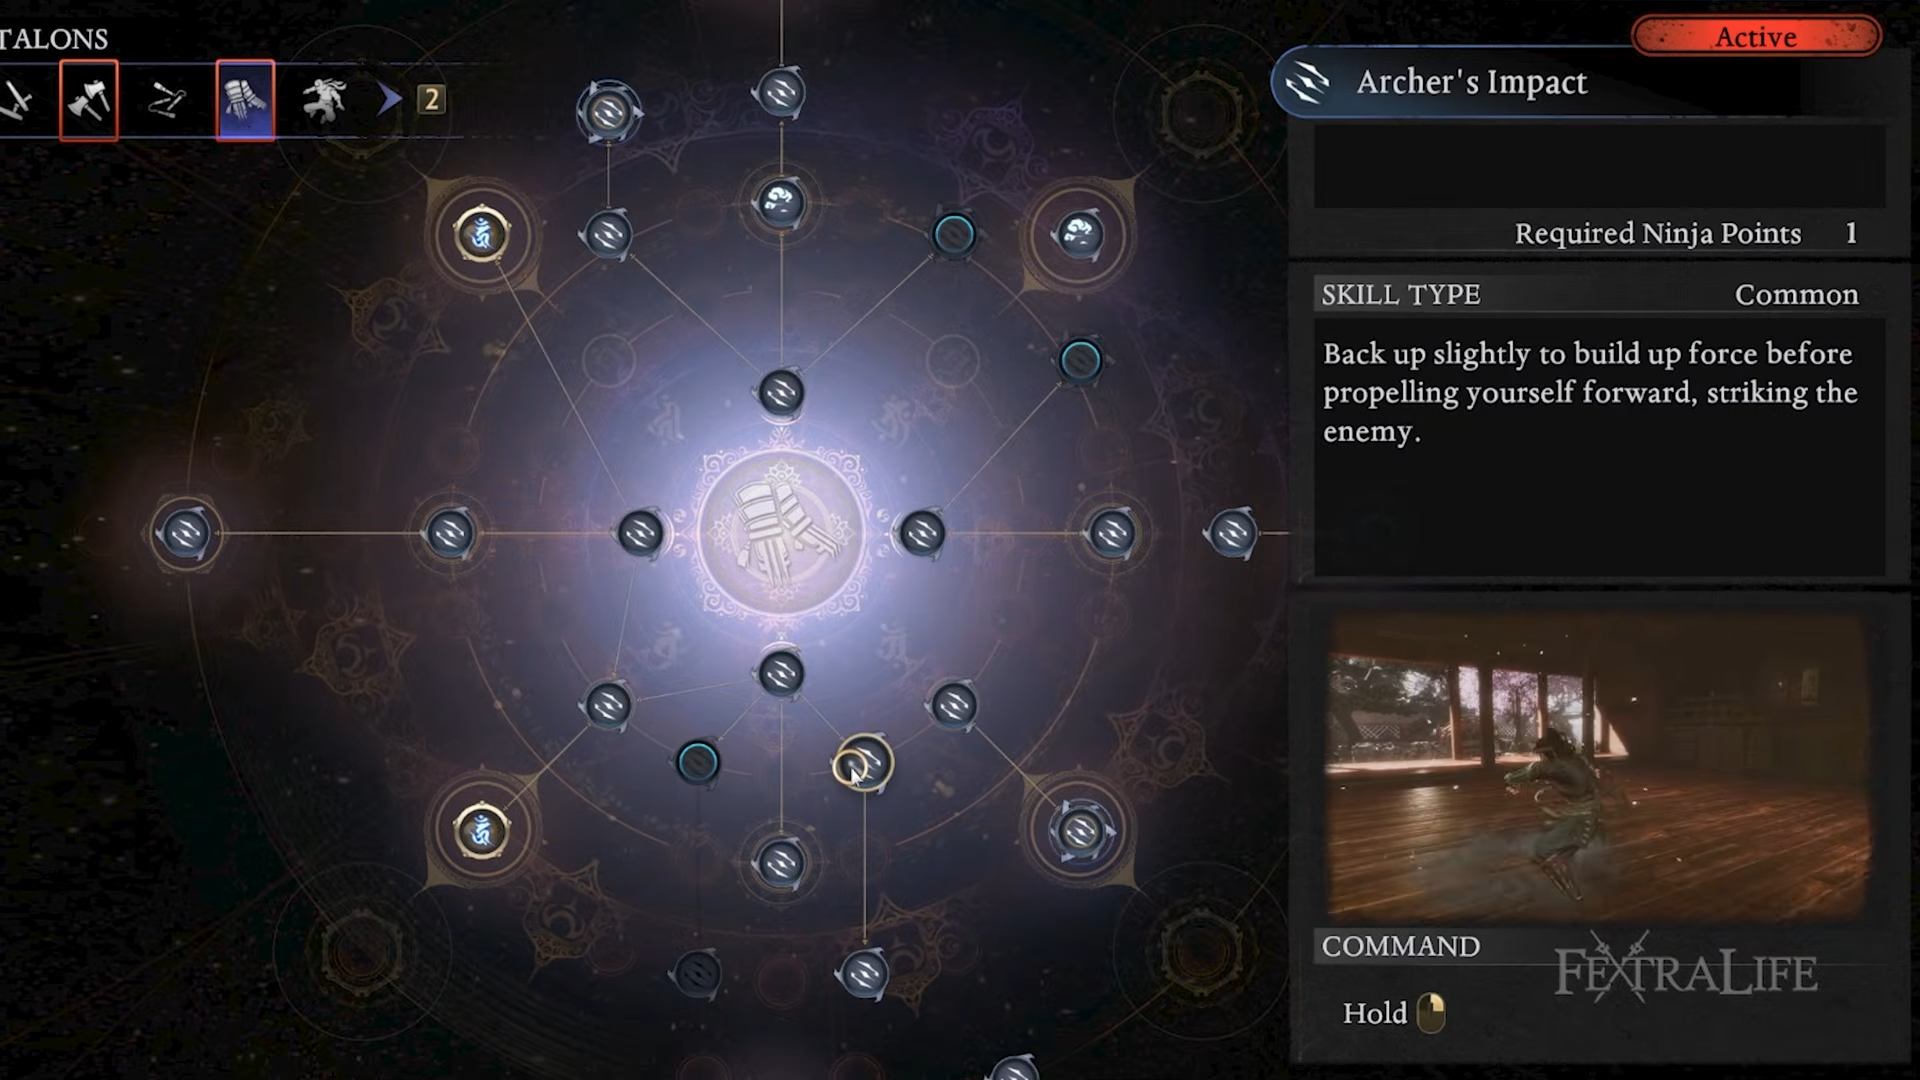
Step 2: Slot Archer’s Impact to solve spacing
You back up slightly, then launch forward into a strike, letting you start offense from range and still deal solid ki damage.
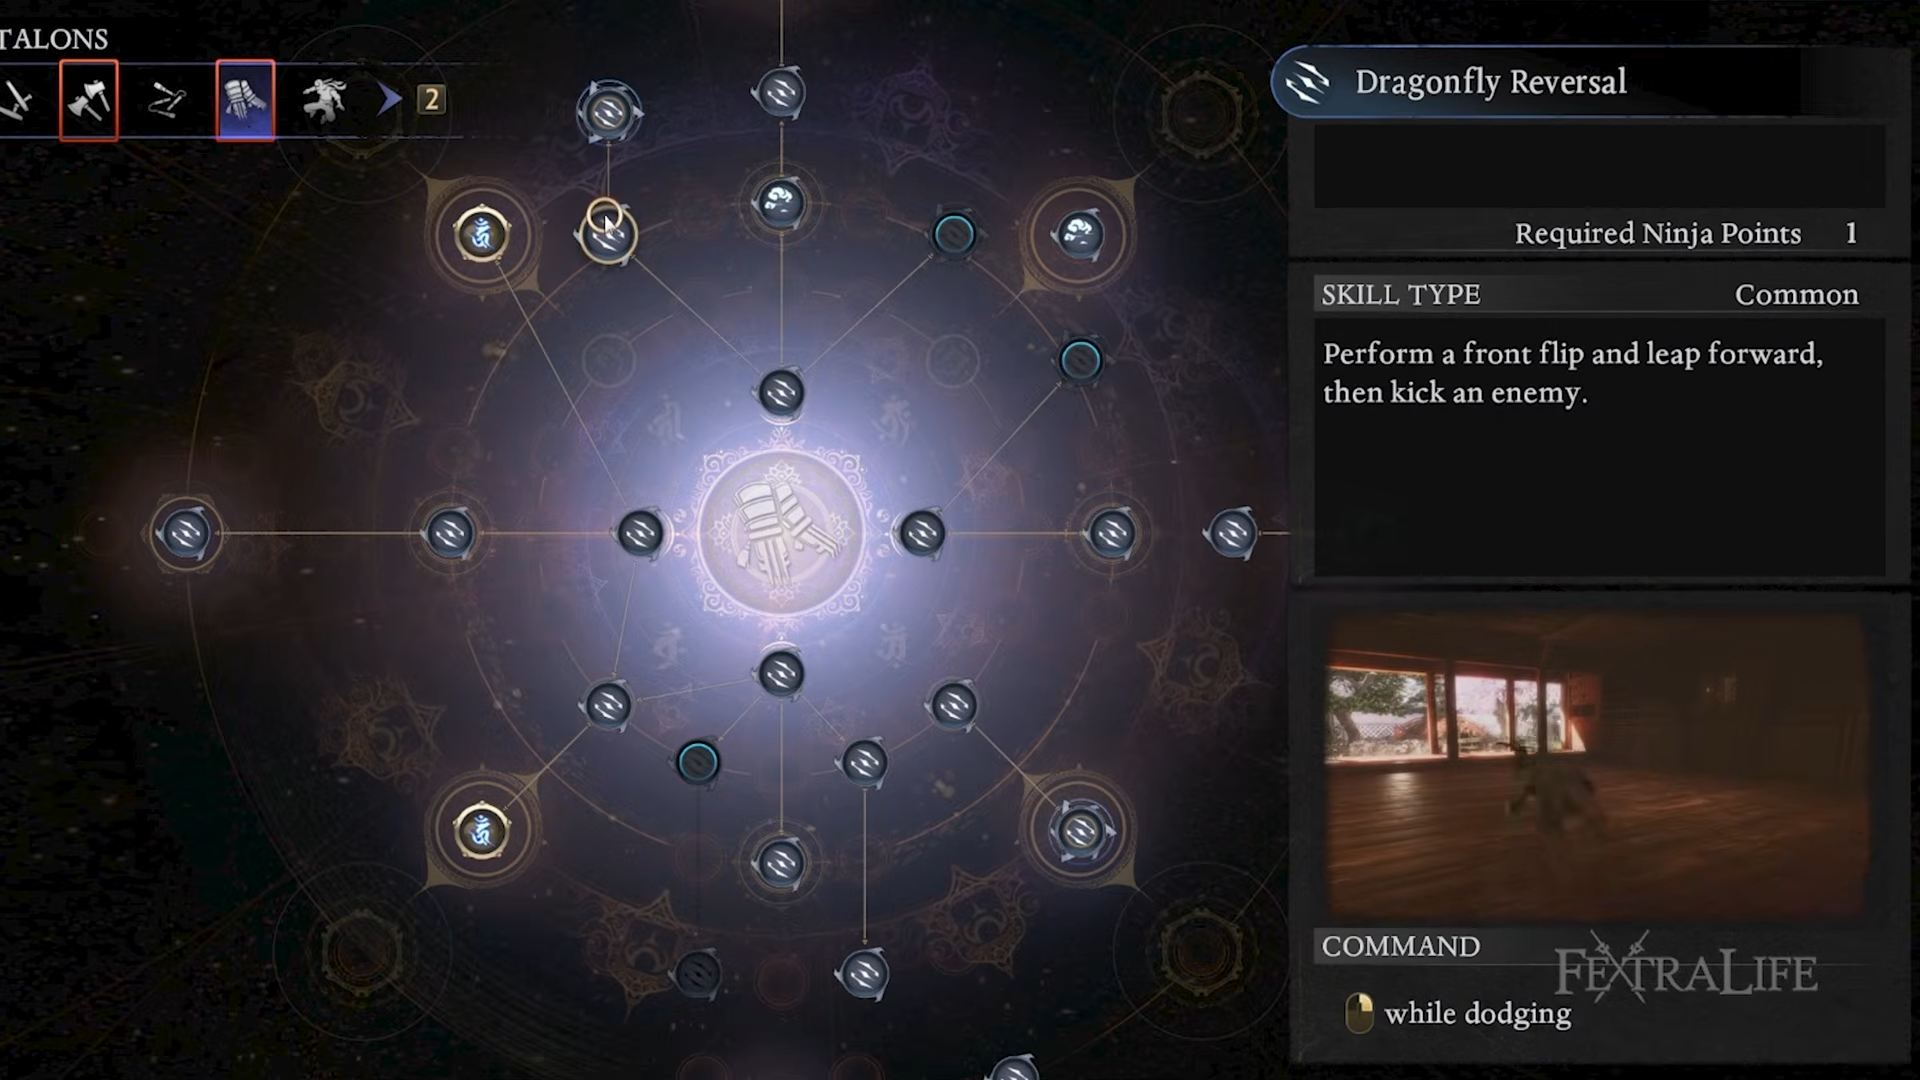
Step 3: Keep Dragonfly Reversal for dodge-to-attack flow
Perform a strong attack while dodging to attack straight out of movement, maintaining pressure while staying evasive.
How to run Ninjutsu without turning it into your main damage source
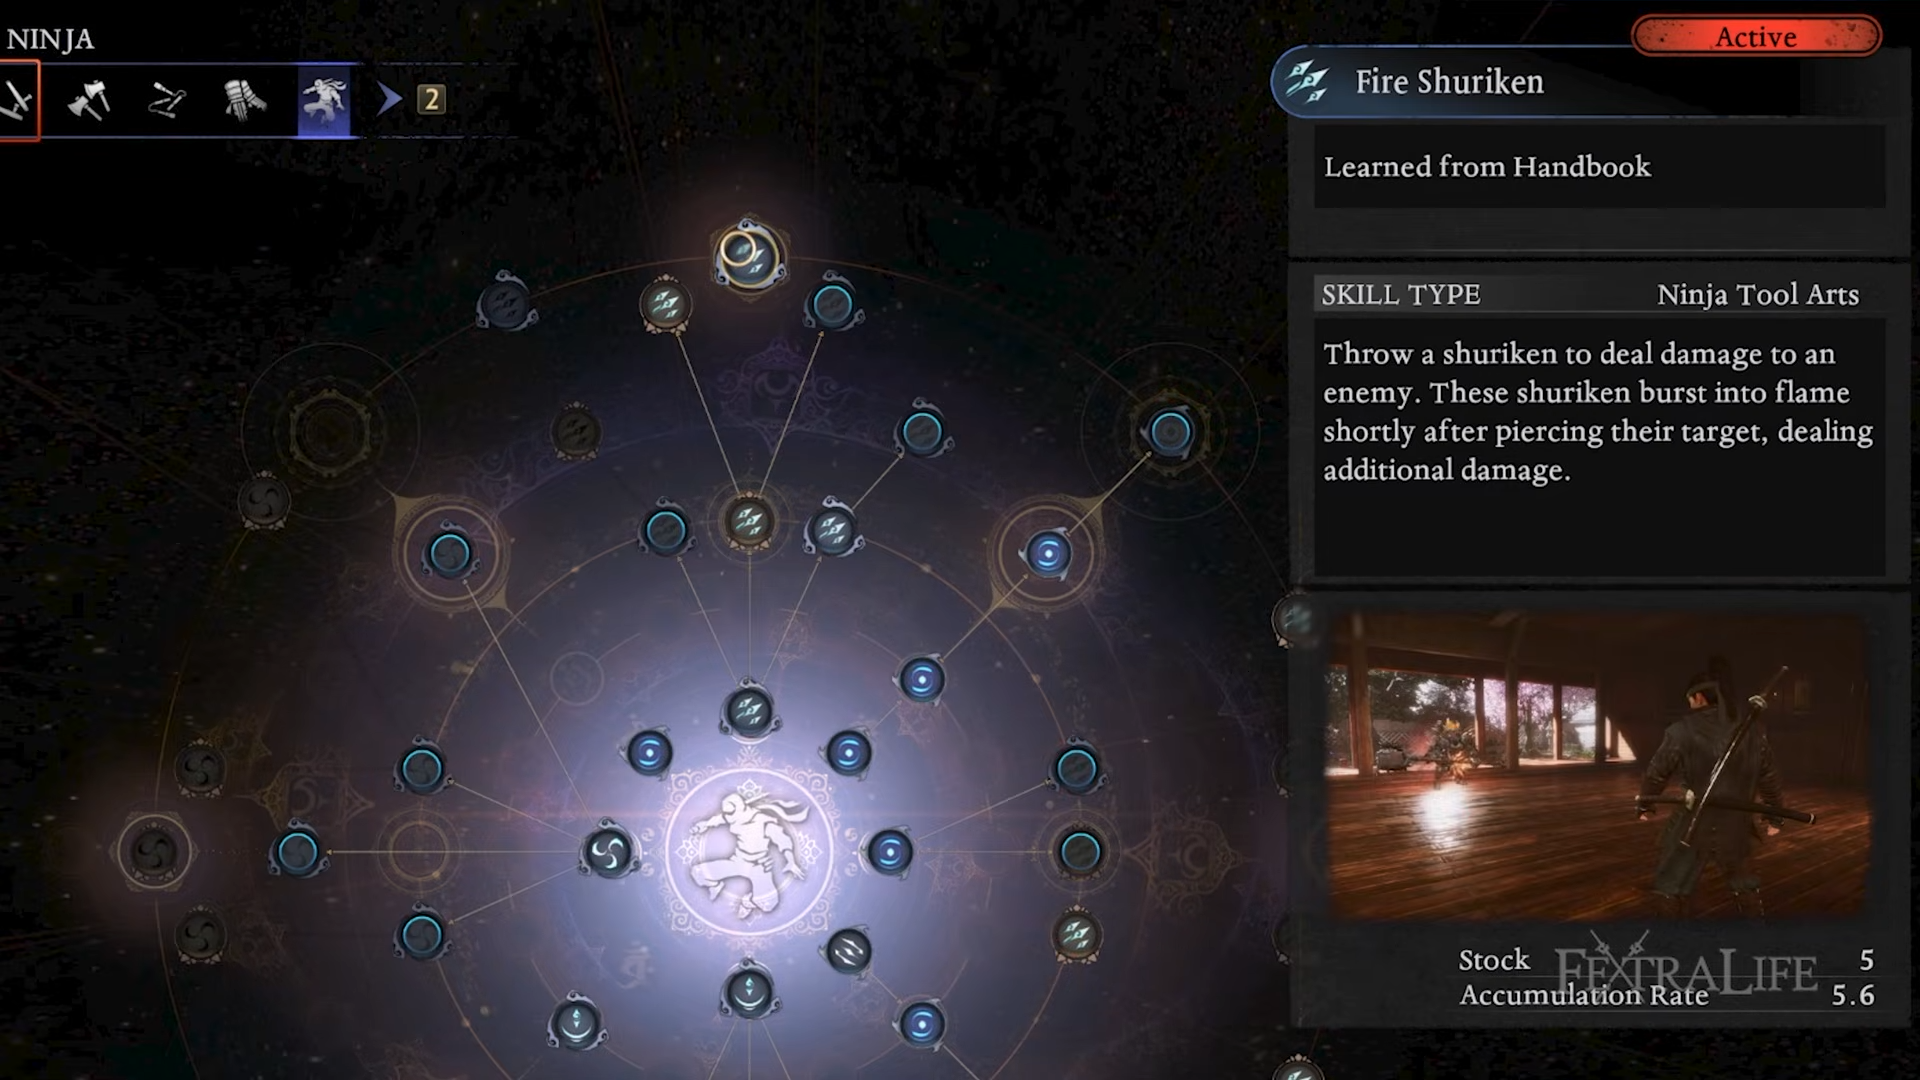
Step 1: Apply Fire and Poison at range
Fire Shuriken and Poison Shuriken help inflict Scorch and Poison damage-over-time, setting up your status-based bonuses while keeping you safer.
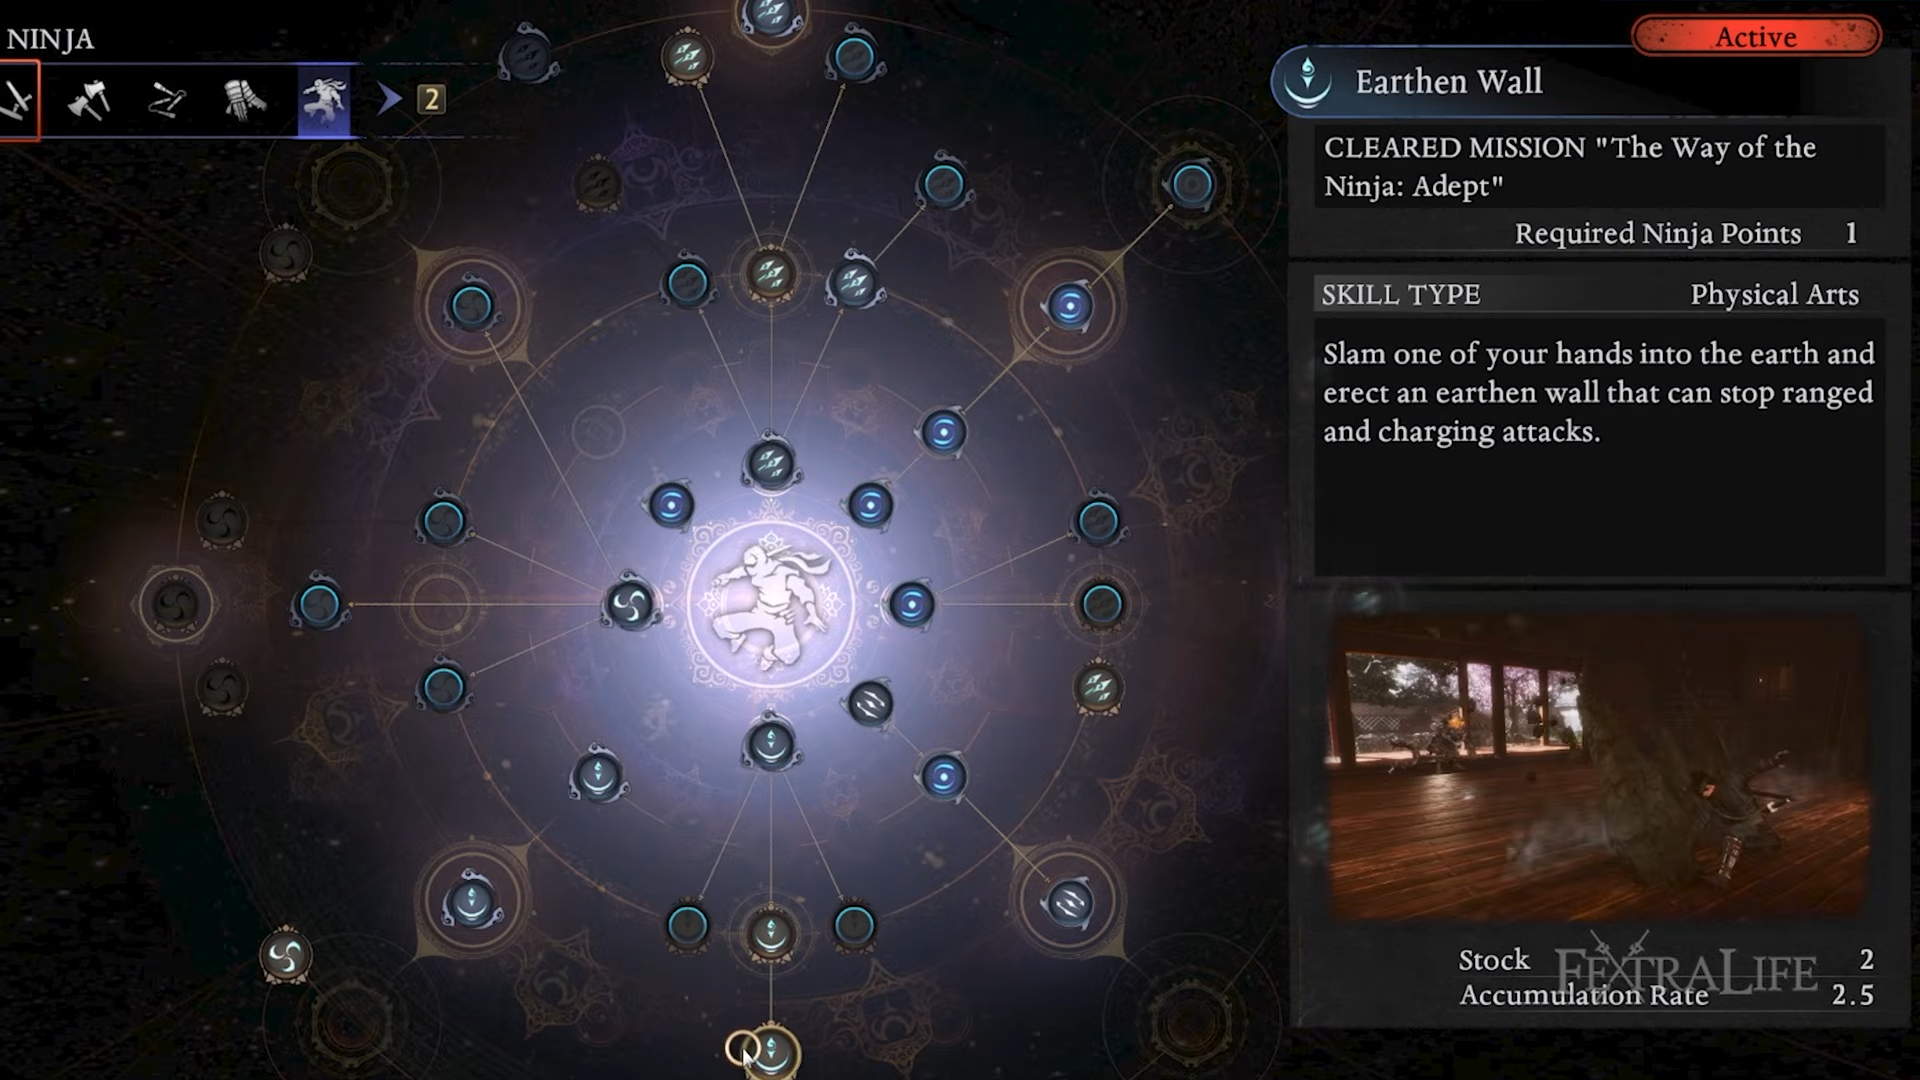
Step 2: Use Earthen Wall as a finisher or emergency tool
When you’re low on ki, use it to end a combo safely, or drop it defensively to block charges and projectiles so you can reset.
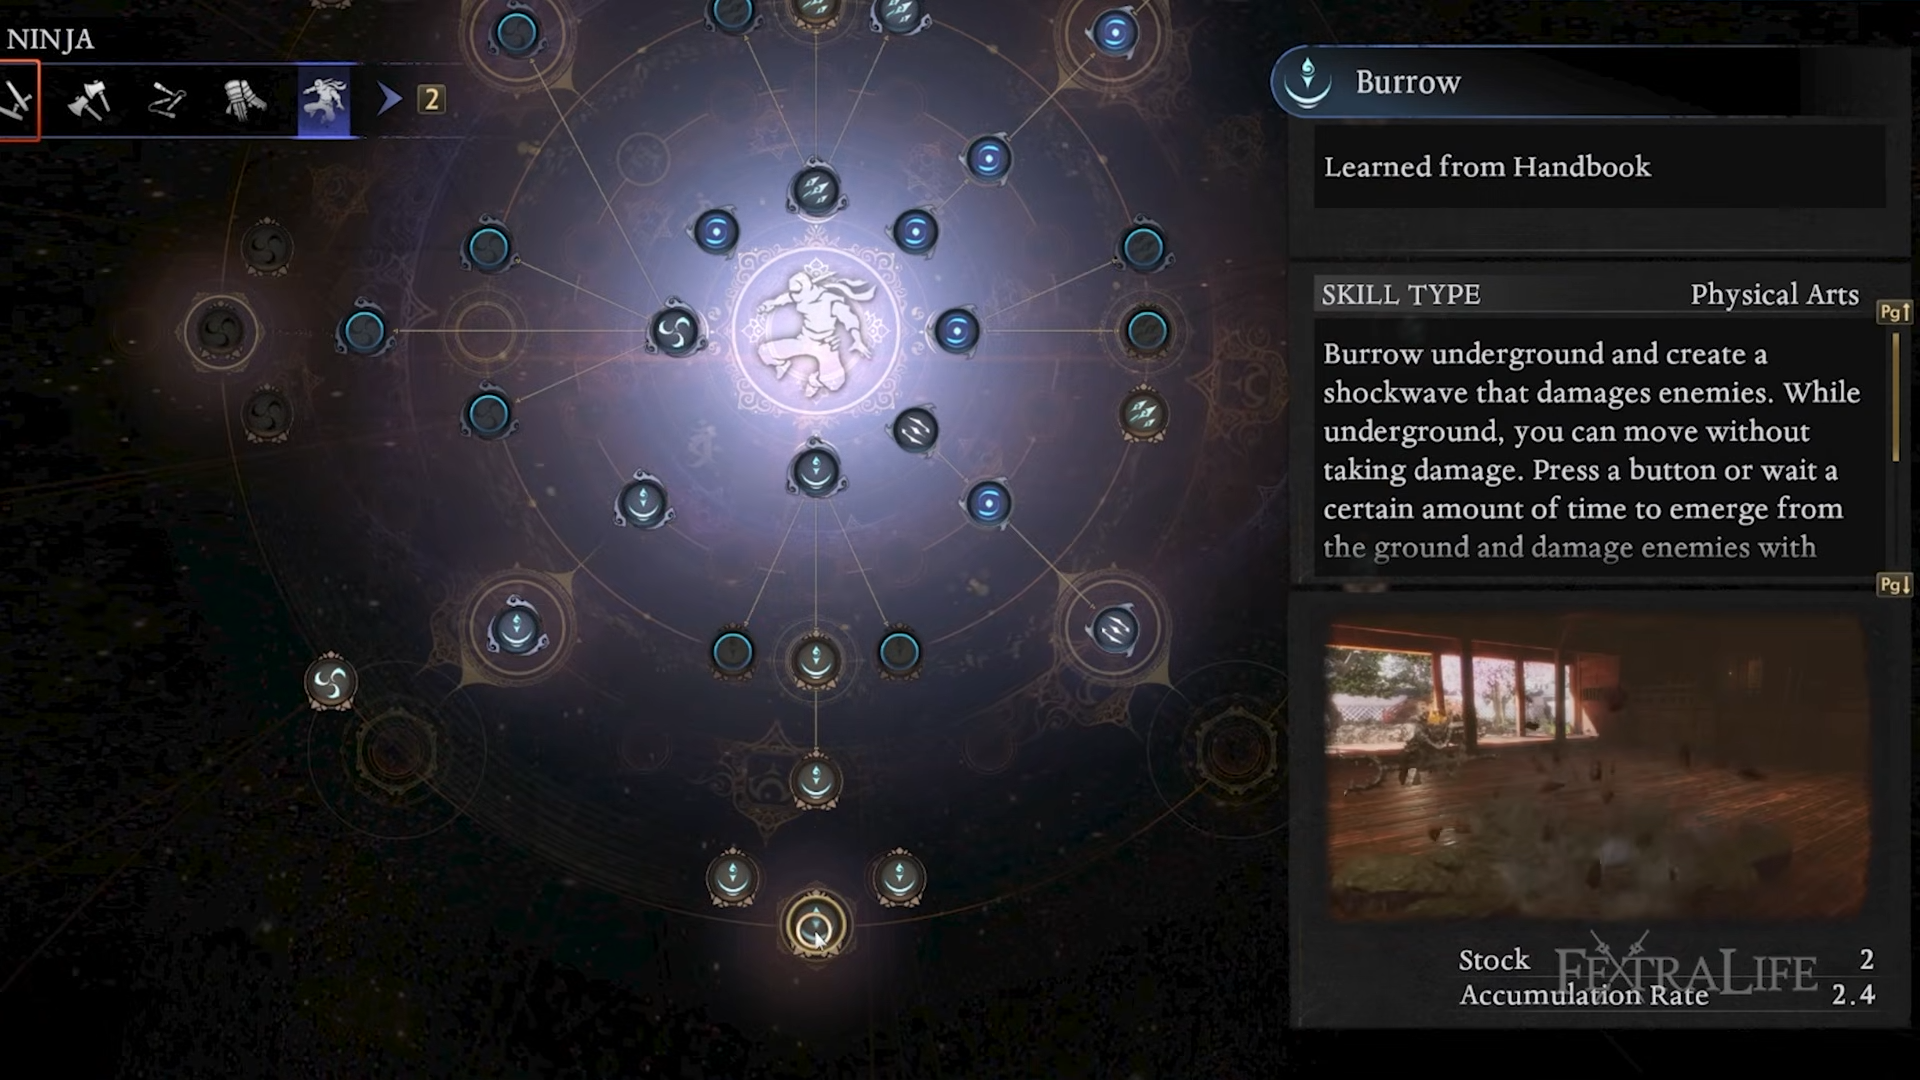
Step 3: Swap in a defensive physical art if you want more safety
Options like Burrow or Shadow Self can make dodging and surviving easier if you prefer a more defensive feel.
How to pick Guardian Spirits for melee, range, and Samurai fallback
Step 1: Switch to Enko early for a melee-first version
It boosts melee damage versus scorched enemies and also boosts damage over time, which fits your Scorch/Poison plan.
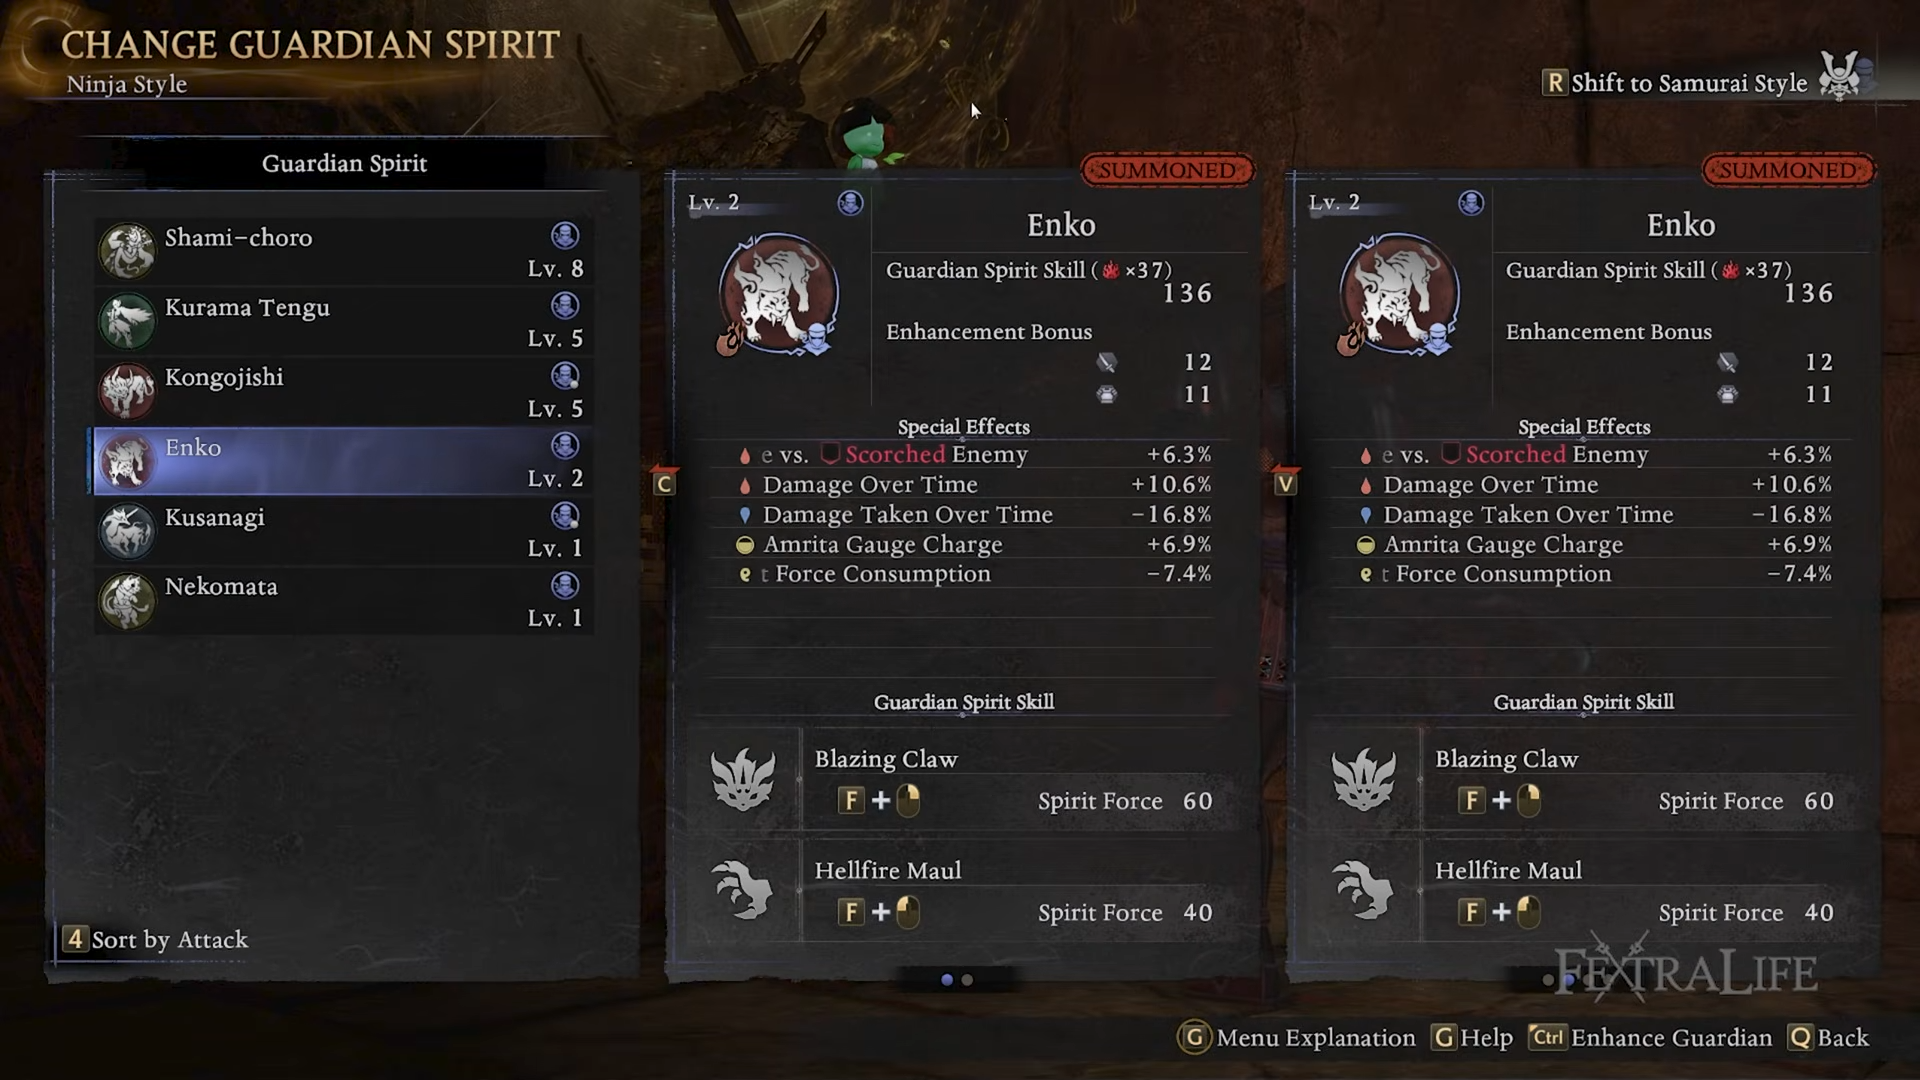
Step 2: Use Enko’s Hellfire Maul to keep combos rolling
It’s a fast flaming kick that staggers most enemies (excluding large yokai), helps with spirit burst breaking, and contributes to applying Scorch.
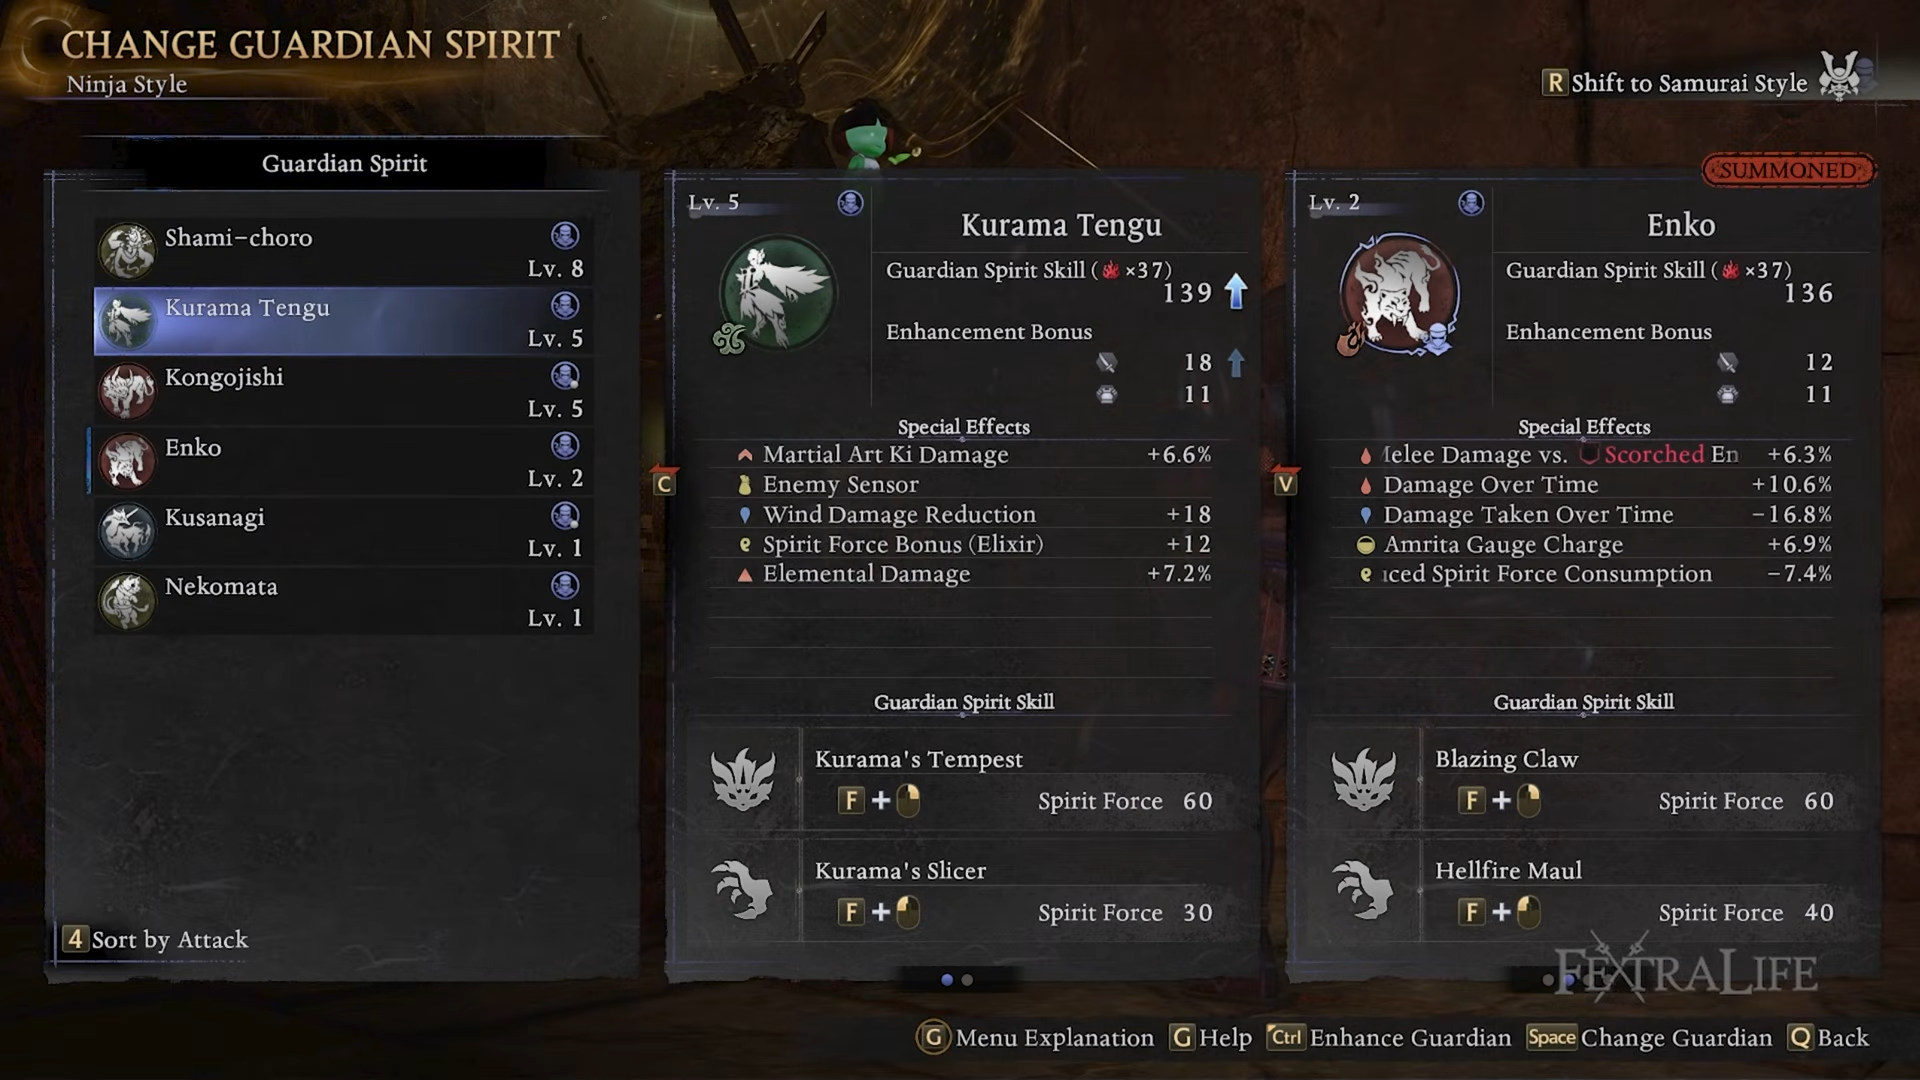
Step 3: If you prefer distance, move to Kurama Tengu
Its guardian spirit skill Kurama Slicer is a ranged attack that can help prevent some ground attacks and enable spirit burst breaks from afar, and Enemy Sensor helps exploration by revealing enemies on the minimap.
Step 4: For Samurai spirit, Congo Jishi is a sturdy option
It offers survivability with extra life and reduced damage taken while attacking, and its guardian spirit skill can be used quickly for burst breaking or charged for more power.
How to set up Soul Cores for quick-attack damage, defense, and utility
Step 1: Use Amu in the Yang slot for quick-attack scaling
It boosts quick-attack damage (perfect for Talons) and increases movement speed when you gain amrita, which is easy to trigger against yokai when you drain their spirit force.
Step 2: Add defensive coverage with Nurikabe in a Yin slot
It provides Steel Talismans, giving you a straightforward defense boost to support your aggressive play.

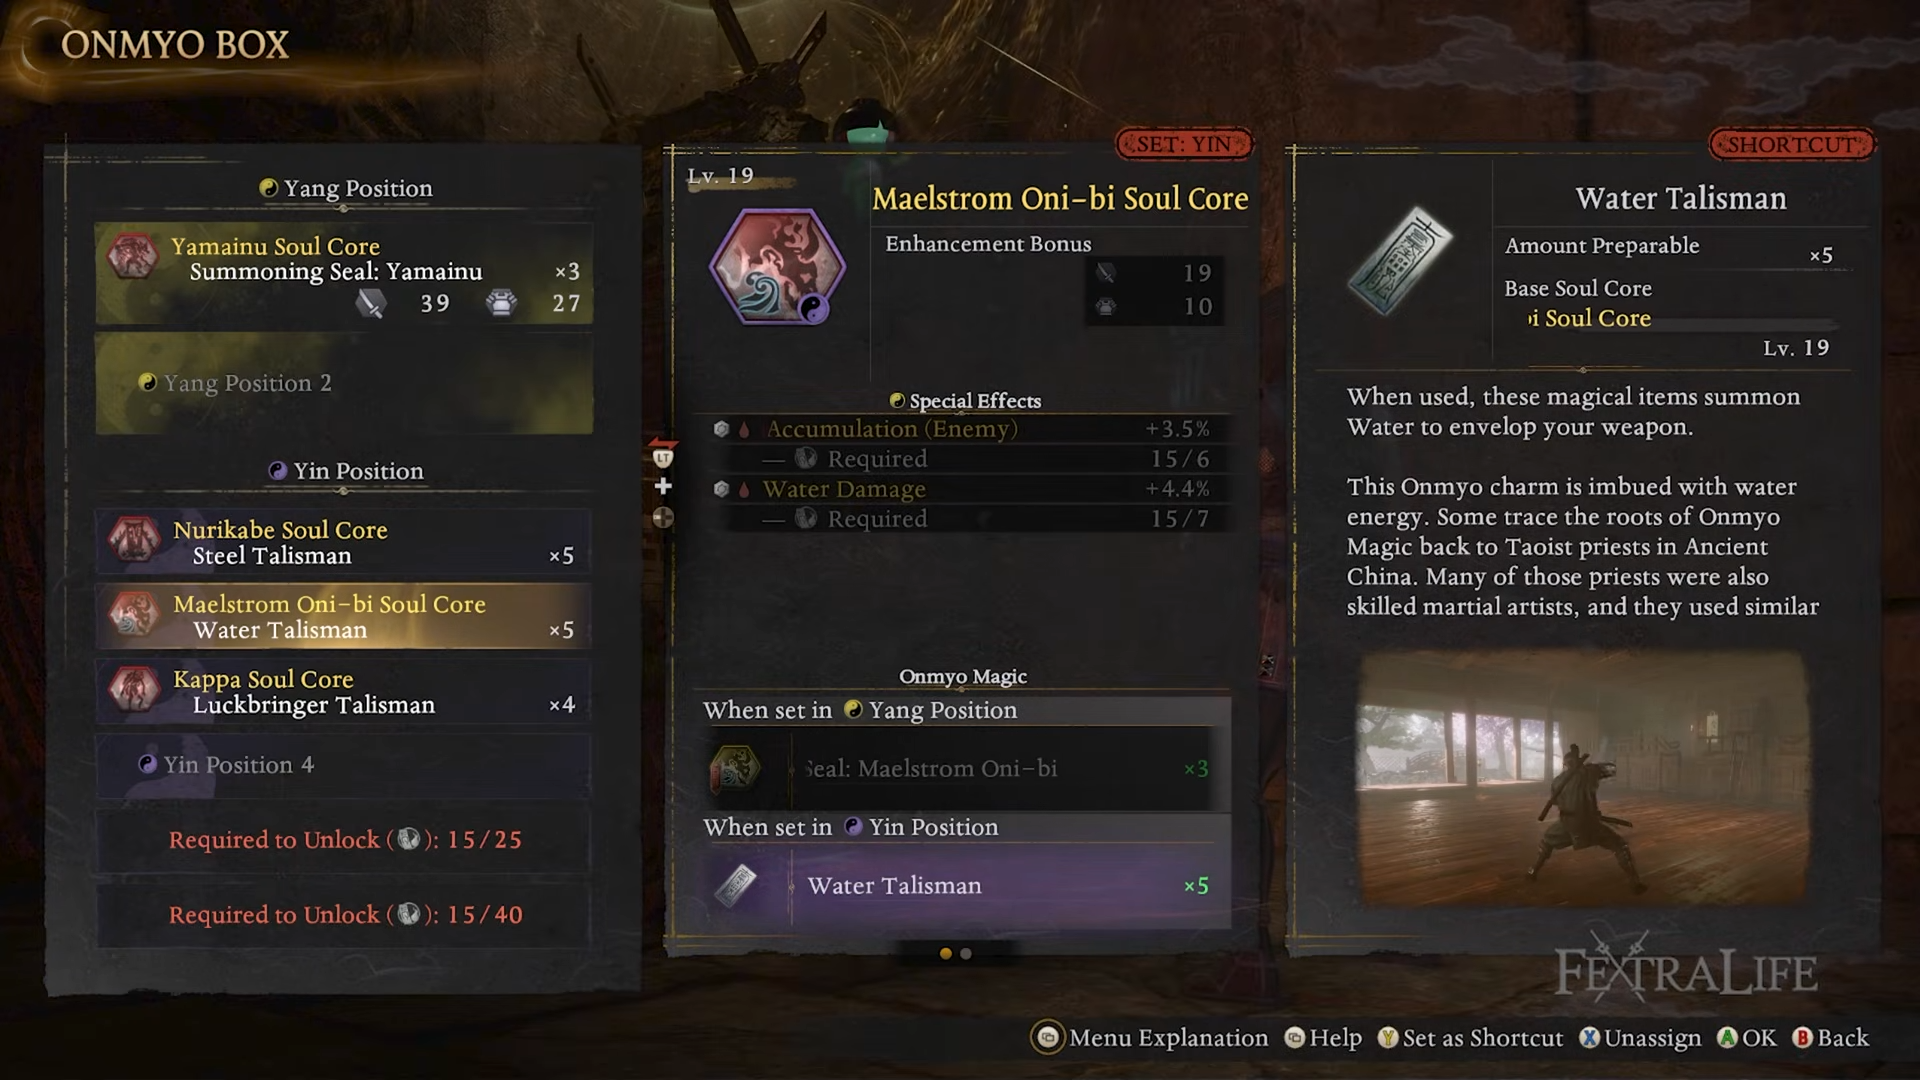
Step 3: Add an elemental talisman core for easy Saturate
Maelstrom Oni can give you Water Talismans so you can imbue water and inflict Saturate, increasing damage taken by the target; you can swap this to another element or carry two elements across slots if you prefer.
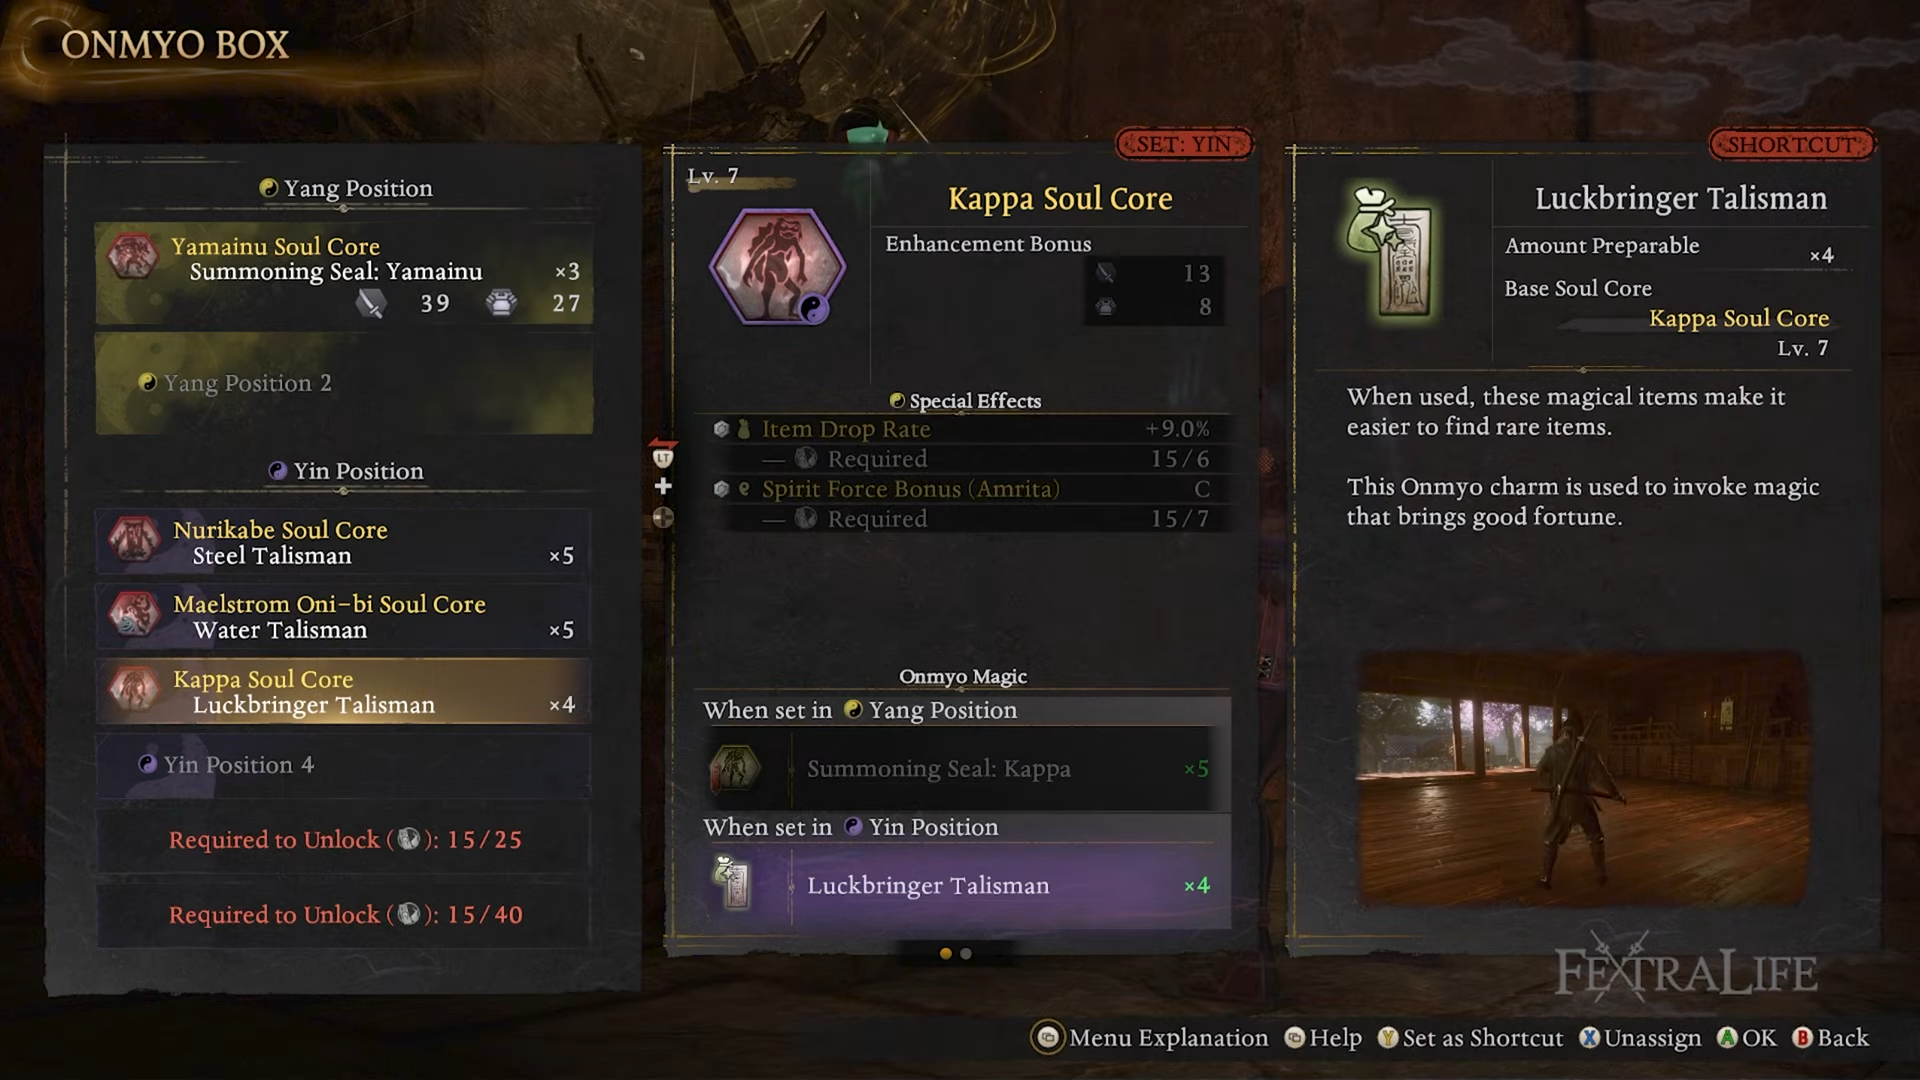
Step 4: Use Kappa for farming-friendly luck while exploring
It provides Luck Bringer talismans, which helps you find rarer gear during missions.
Step 5: Swap to more defensive alternatives if needed
Barrier Talisman (via Oroshi) helps ki recovery speed and dispels Yo-kai realms, while Oasis Talisman (via Hero Enma) gives an extra healing source alongside elixirs.
How to set Titles for ki, mobility, and breaking enemies
Step 1: Max melee attack ki consumption reduction
This lets you extend combo strings before you need to back off and recover ki.

Step 2: Prioritize dodge ki consumption reduction if you want safer boss fights
You can spend into more damage (like ninjutsu ki damage), but reducing dodge cost improves mobility and survivability in the fights that matter most.

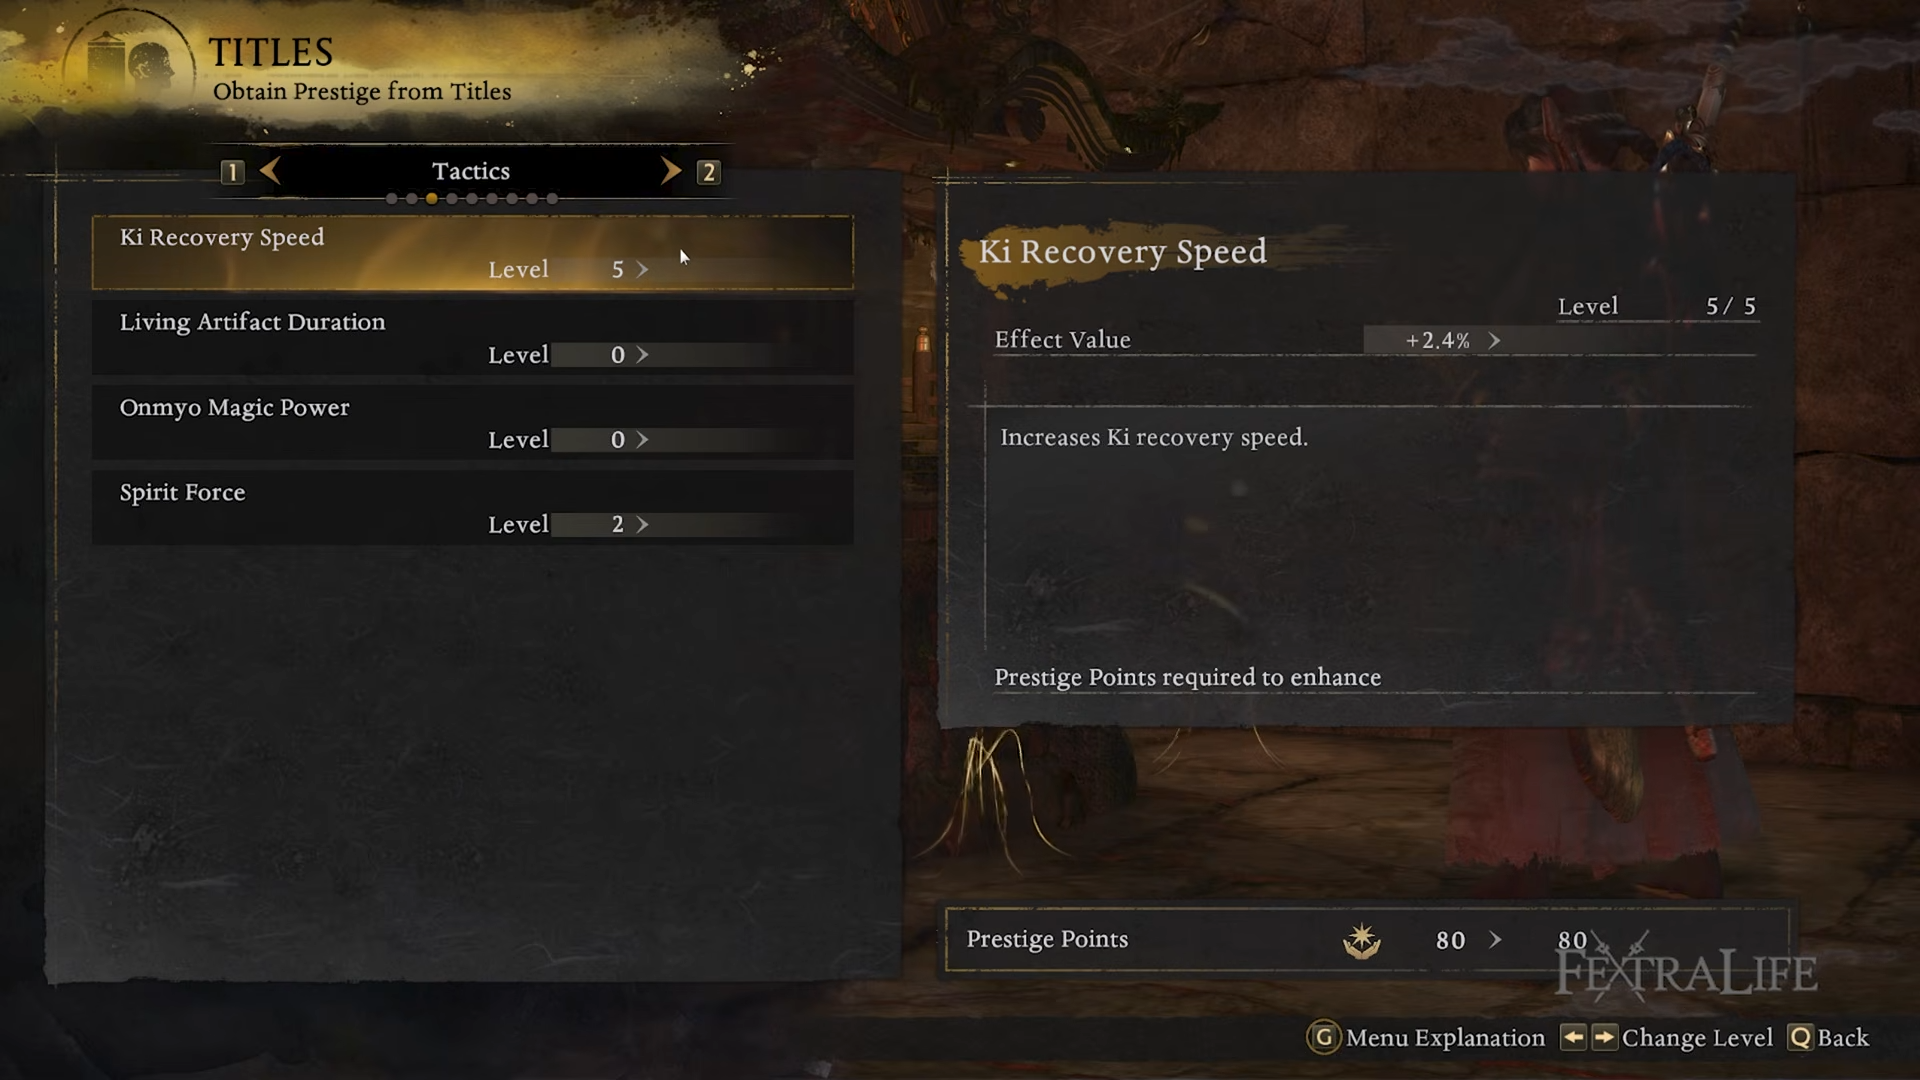
Step 3: Add tactic ki recovery speed and melee ki damage
Higher ki recovery speed supports the build’s constant motion, and melee ki damage helps drain enemy ki or spirit force faster.
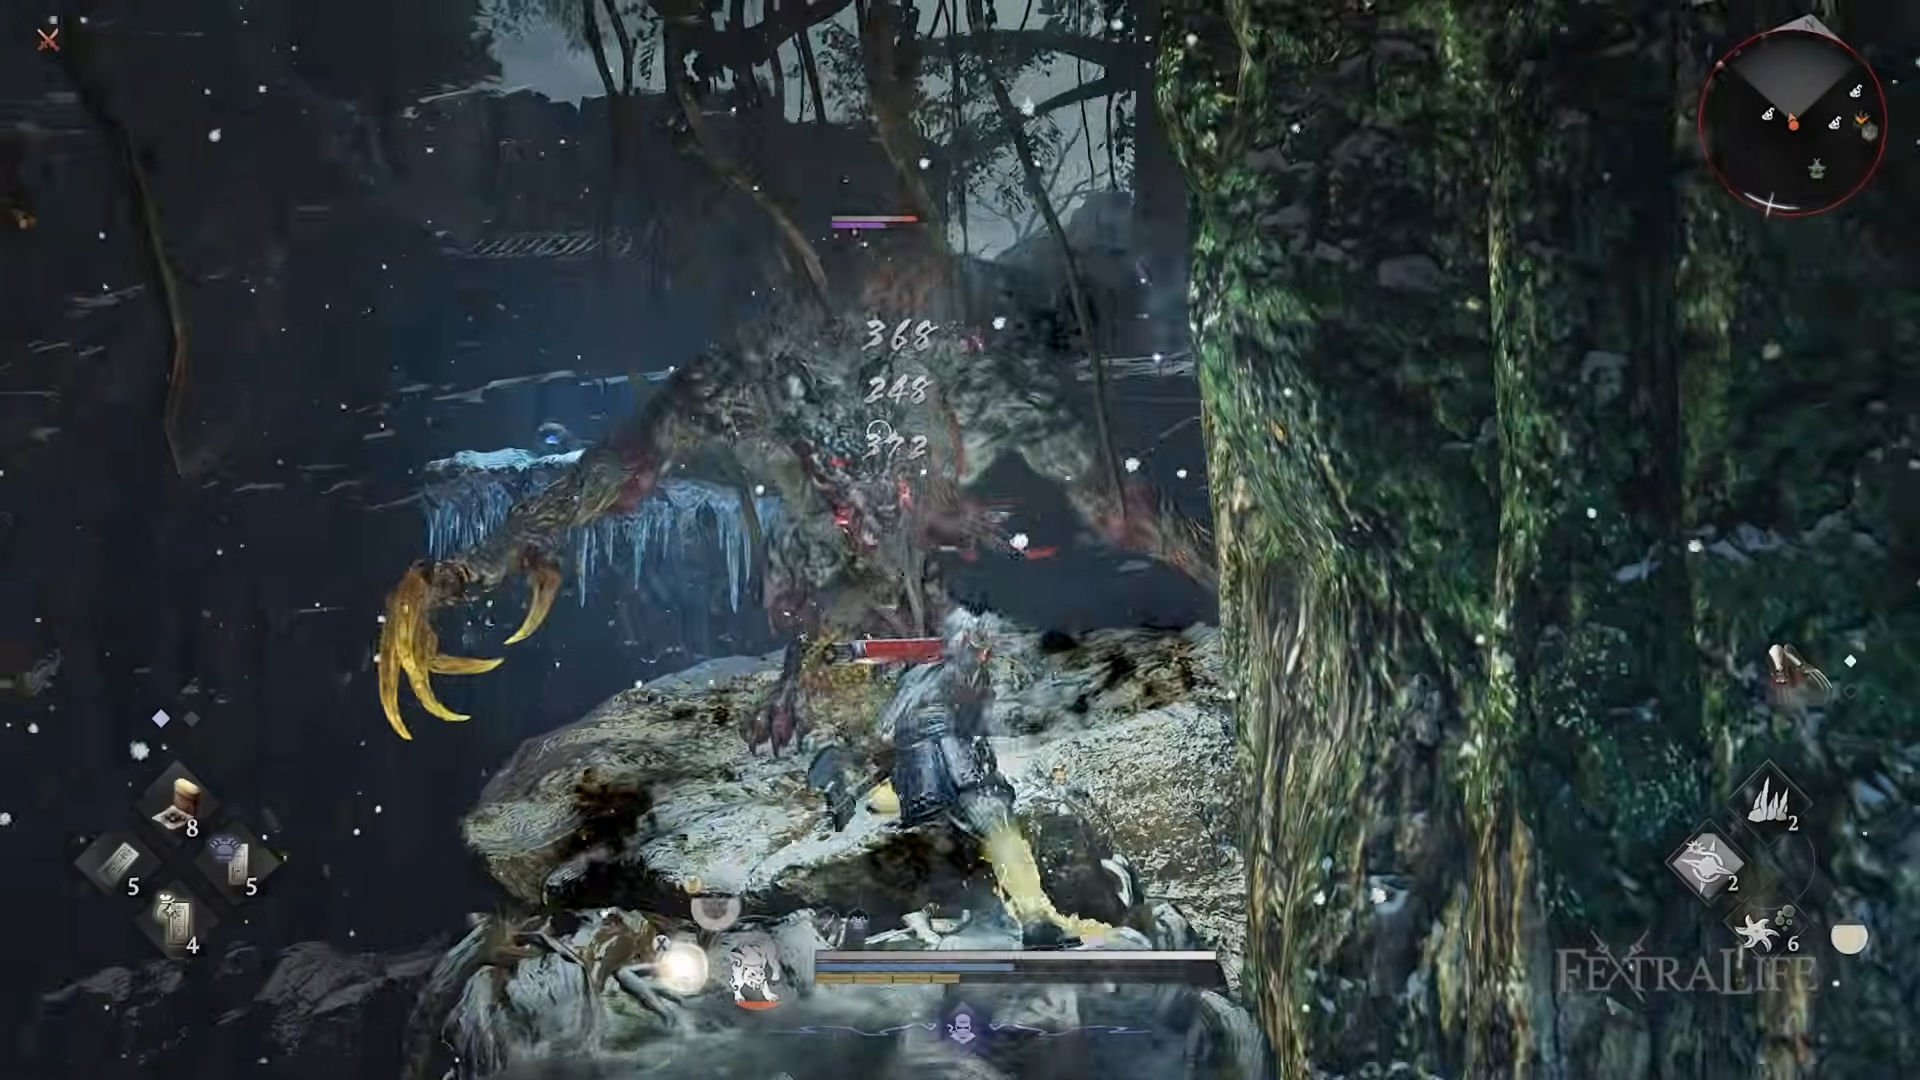
How to play Ferocious Claws in real fights
Step 1: Stay close and commit to positioning
Talons have very short reach, so you need to fight almost on top of the target and keep your spacing tight.
Step 2: Use Archer’s Impact to enter, then chain fast strings
Close the gap safely, then pressure with fast Talon combos that punish short openings better than slower weapons.
Step 3: Stack multiple ailments to trigger Confused
Imbue your weapon with an element via talismans, layer in status from shuriken, and aim to keep multiple ailments active at once so Confused triggers—this increases damage taken and slows enemy ki recovery.
Step 4: Burst break, punish, and return to Ninja tempo
You can leverage Samurai style briefly after a style shift burst break for hard-hitting punishment, but the build’s main value is in Ninja speed and relentless pressure.
Step 5: As you level, widen stats without losing your identity
After you reach at least 40 Intellect, start spreading more points into Heart and Stamina for extra ki and life so the build remains durable later, and gradually raise Magic for more talisman slots as needed.
Rewards
| Skill text reward | What it unlocks | Benefits |
|---|---|---|
| Repel Expert | Common skill | Bigger burst break success window for survivability |
| Vigorous Spirit | Common skill | Auto life recovery above a threshold |
| Awakening Master | Common skill | Faster magic casting, less buff downtime |
| Fortitude I and II | Common skill | More life points to offset lower defense gear |
| Backstab Life Siphon | Ninja skill | Healing from behind-the-back damage |
| Elucory Dragon | Ninja skill | 12% more damage vs status-afflicted enemies |
| Hollow Form | Ninja skill | Afterimage that can restore ki on contact |
| Snake Bite Technique | Ninja skill | 16% more damage-over-time inflicted |
Where this build goes next as you progress
Once your Intellect foundation is set, you can pivot into sturdier stat spread and improved gear without changing the core loop. A notable upgrade path is moving into the Sage set later, which complements an Intellect-based setup by granting bonus attack damage scaling with the stat across all six pieces.
If you like fast melee that rewards clean positioning, Ferocious Claws is built to keep you on the offensive while still giving you practical sustain and ki tools. Focus Intellect, keep your encumbrance in the 30–70% window, and lean on multi-ailment pressure to keep Confused active and enemies overwhelmed.


