Dive into Ninja Gaiden 4’s arsenal of weapons and learn how to integrate defence, transformation and finishers into every fight.
- What to know
- Movement and foundational combat in Ninja Gaiden 4
- Combat skills
- New defensive options
- Bloodraven Form specifics
- Weapon overview
- Twin Blade/Tachi skills
- Rapier/Lance skills
- Staff/Hammer skills
- Assassin’s Tools/Mechanical Arms skills
- Bloodbath finishers
- Mastering weapon and combat flow in Ninja Gaiden 4
What to know
- Combat balances aggressive offence with deeply timed defensive mechanics for a high-skill loop.
- You’ll manage a weapon arsenal with distinct styles (speed, reach, blunt, gadgets), each suited to different enemy types.
- A transformation mode (Bloodraven Form) ties offence and defence together, serving as a reward loop for skilled play.
- Finishers (“Bloodbath Finishers”) cap off encounters dramatically, giving payoff for execution and strategic timing.
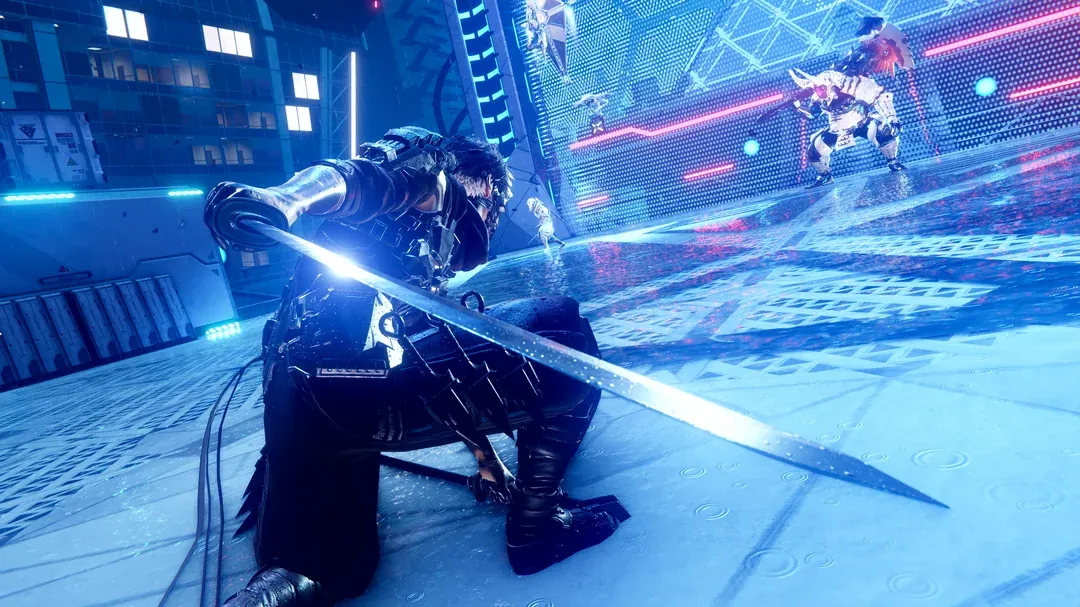
In Ninja Gaiden 4, you’re stepping into a revitalised action-slash experience where speed, weapon variety and strategic defence combine. Whether you’re charging through hordes, duelling a boss or performing that perfect cinematic finisher, you’ll need to understand not just how to hit, but when to move, defend, switch weapon and transform.
Movement and foundational combat in Ninja Gaiden 4
The fundamentals start with your movement and basic attack repertoire. You’ll wall-run, rail-grind and use a grappling tool in both traversal and combat contexts, enabling dynamic positioning that weaves into fights.
Your attacks are layered: light attacks build into heavy attacks or launchers which in turn let you chain into aerials or weapon switches. Effective combat isn’t button-mash but rhythm-based, identifying openings and chaining accordingly.
Here’s a breakdown of how the system layers:
| Layer | Actions | Purpose |
|---|---|---|
| Normal attacks | Light/heavy combos, chaining hits | Builds meter, keeps momentum |
| Weapon switching | Mid-fight change between weapon types | Tailor to enemy type & situation |
| Defensive action | Dodges, perfect dodges, parries | Prevents damage, opens enemy guard |
| Transformation mode | Bloodraven Form activation | Introduces guard-breaks, high damage output |
Movement, positioning and timing form the core of every encounter — you’re not just hitting but navigating space, anticipating enemy aggression and using weapon tools appropriately.
Combat skills
As you progress, your combat skills expand beyond basic hits. Key skills include:
- Combo chaining, knowing when to finish a combo with a launcher or special attack.
- Perfect dodge/parry timing, your move just before the enemy attacks to open them up.
- Guard-break attacks on some enemy defences will force you into transformation or special attacks to break.
- Meter management nearly every successful action feeds your transformation meter, rewarding skilled play.
- Finishers, once the meter is high and conditions met, you trigger cinematic finishers for massive payoff.

New defensive options
The defensive side is more active than ever. Instead of simply blocking and waiting, you’re expected to dodge, parry and counter. A perfect dodge gives you the advantage and directly feeds into higher damage potential. Reviewers note the heavy emphasis on timing and precision rather than brute-force defence.
The rhythm is clear: defend smart → build meter → attack hard. When you dodge or parry at the right moment, you not only avoid damage but generate the resource that allows you to transform and break the enemy’s guard.
Bloodraven Form specifics
The transformation mode (often referenced as Bloodraven Form or similar) ties everything together. When your meter is sufficiently filled by attacks, dodges and counters, you hold the transformation trigger and shift into a powered-up state where your weapon and attacks change.
In this form:
- Your attacks deal significantly more damage and can break through normally safe enemy defences.
- Some moves change their animation and effects (for example, a weapon may gain a drill head or twin swords fuse).
- You can weave into and out of this form mid-combo, making it a strategic tool rather than a one-time burst.
- Using it at the right moment (e.g., when an enemy is charging an unblockable) can turn the tide of battle.
Best practices for using the form
Step 1
During normal play, balance offence and defence to keep your meter topped up.
Step 2
Identify when the enemy is vulnerable (after a guard break, stagger or charging attack).
Step 3
Activate Bloodraven Form and execute the strong attack or finisher that matches your weapon’s style.
Step 4
After the burst, either continue in normal form or switch weapon depending on the next wave.
Step 5
Avoid using the form when the enemy is fully safe or you have no momentum — you’ll waste meter and open yourself to counterattack.

Weapon overview
You’ll have access to several weapon types, each with strengths and weaknesses. Understanding when and how to switch is as important as mastering one weapon style.
Weapon types and roles
| Weapon type | Role | Ideal situations |
|---|---|---|
| Twin Blade / Tachi | High speed, chaining combos | Fast enemies, groups, meter build |
| Rapier / Lance | Longer reach, thrusts | Enemies with space or ranged attacks |
| Staff / Hammer | Slower, heavy hits, guard-break focus | Armoured foes, heavy hitters |
| Assassin’s Tools / Mechanical Arms | Gadgets or alternate mechanics | Special enemy types, finishing etc |
Weapon switching is seamless, encouraging situational adaptability. Use the weapon that fits the moment instead of committing to one for the entire fight.
Twin Blade/Tachi skills
This style centres on speed and combo chaining. Use it when you need to build meter quickly or overwhelm fast enemies.
How to use them effectively
Step 1
Open with light attack chains to test enemy movement and generate meter.
Step 2
Follow with heavy or launcher when the enemy shows an opening (after dodge or stagger).
Step 3
Use aerial attacks if available to extend combos and damage.
Step 4
If you’ve filled your meter, switch into the form and perform the weapon’s special guard-break move.
Step 5
Monitor enemy behaviour; if they transition to aggressive or ranged, consider switching weapon until you have space again.
Skill tips
- Twin Blades flourish in mobility — stay mobile rather than plowing through hits.
- Learn your combo link rhythm; speed without control leads to guard breaks or counter hits.
- Use horizontal sweeping moves to hit multiple foes.
- Use form activation when you have momentum rather than desperation.

Rapier/Lance skills
These weapons emphasise reach and spacing. They are ideal for enemies that pressure you or when you want to control flow.
How to approach this style
Step 1
Keep mid-range; use thrusts and lunges to poke the enemy and build your meter safely.
Step 2
When an enemy commits to an attack, dodge or parry then immediately burst with a Rapier/Lance strike.
Step 3
Once your meter allows, activate the form and utilise the weapon’s enhanced long-range finisher.
Step 4
If the enemy closes the gap aggressively, switch to a shorter-range weapon (Twin Blades) until you regain space.
Step 5
Use environment and positioning to maintain reach — avoid being cornered or surrounded.
Strategy tips
- Good for enemies that rush or use ranged attacks — you can keep them at bay.
- Less effective in tight crowds or enclosed spaces.
- The reach gives you more reaction time, so focus on meter build and timing.

Staff/Hammer skills
This style is about slower, heavier hits focusing on quality over quantity. Great for defence-breaking and dealing with strong foes.
How to use them effectively
Step 1
Target foes with strong armour or defence; initiate with moderate hits to bait movement.
Step 2
Once the enemy shows an opening (after you dodge or cause stagger), hit with a heavy or smash.
Step 3
Use your meter build from safe hits; because you’ll land fewer but bigger hits, the meter build is more deliberate.
Step 4
When meter allows, shift into form and execute the weapon’s highest impact move.
Step 5
After the finisher, reposition or switch weapons — you’ll be more vulnerable while executing heavy swings.
Tips for success
- Prioritise timing and spacing — heavy weapons carry risk.
- Use movement and defences to set up hits rather than brute-forcing attacks.
- Great for bosses or guards; less ideal for fast mob situations.

Assassin’s Tools/Mechanical Arms skills
These weapons/gadgets/internals add variety and special mechanics. They often fill niche roles rather than being primary weapons.
How to incorporate them
Step 1
Use your main weapon until you spot an enemy in a vulnerable state (guard broken, low health, crowd situation).
Step 2
Switch to Assassin’s Tools or Mechanical Arms and trigger their special mechanic (throw, gadget, mechanical strike).
Step 3
If meter permits, activate the form to enhance gadget effect and deliver a high-impact tool finish.
Step 4
Observe what the tool is best for (crowd control vs heavy foe vs finishing) and use it accordingly.
Step 5
Once the tool’s effect is done, revert to your primary weapon and continue chaining hits and building meter.
Notes
- These tools are not always optimal for primary engagement but shine in special circumstances.
- Experiment with them in your playthrough to discover which enemy types they counter best.
- Because they may have unusual animations or effects, ensure you’re not caught off-guard during their use.

Bloodbath finishers
Finishers are dramatic cinematic moves triggered when certain conditions are met: enemy guard broken or health low, meter high, form activated. These deliver satisfying payoff and strategic reset.
How to trigger and use finishers
Step 1
Engage enemy until they’re staggered, guard broken or low health.
Step 2
Ensure your meter is high enough — your attacks and defence actions should have built it.
Step 3
Switch into Bloodraven Form and execute the weapon’s finisher sequence (often unique per weapon style).
Step 4
Watch the cinematic — the enemy is taken out in style, often with limb severing or large scale effects.
Step 5
After the finisher, you’re free to reposition, weapon-switch and prepare for next encounter with renewed momentum.
Why they matter
- They provide visual and mechanical reward for mastering the combat loop.
- They free you to move on quickly, resetting the fight’s pressure or allowing you to tackle multiple foes.
- They serve as a skill-differentiator: players who master timing will trigger more finishers and thus deal more efficient kills.

Mastering weapon and combat flow in Ninja Gaiden 4
You now have a strong foundation for how Ninja Gaiden 4’s combat system works — from understanding baseline movement and attack layers, through the defensive mechanics, to weapon types, transformation and finishers. The core lesson: mix offence and defence smartly, switch weapons situationally, build meter and activate your transformation at the right moment to break an enemy’s guard or finish them in style.
Focusing on rhythm, timing and adapting to each enemy will serve you far more than brute-forcing combos. When you feel comfortable with one weapon style, experiment with others and toggle between them based on opponent behaviour. The payoff is dramatic, satisfying and razor-sharp.