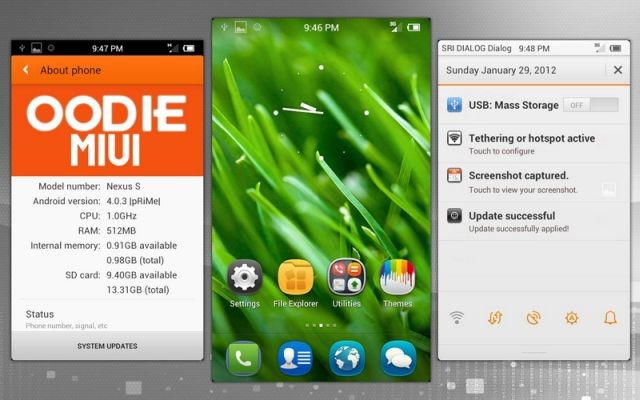
Another new week, and another MIUI 4 Custom Rom based on Ice Cream Sandwich is out!!! This time, it reaches one of the developer favorites, the Nexus S. XDA member Oodie, who happens to be the same dev who gave us an MIUI 4 Alpha ROM for the Xperia X10 a few days ago, has recently got himself a Nexus S, and has now turned some of his attention towards this wonderful device. The result is an MIUI 4 Ice Cream Sandwich Rom for the Nexus S!
The ROM is called Oodie Prime V2 (since the original Oodie Prime title had already been given to MIUI 4 for the Xperia X10), and is based on stock MIUI 4 with some tweaks added. MIUI 4 by itself is in a pre-beta stage and not completely stable yet, plus this is Oodie’s first release for the Nexus S, and there may be some minor errors here and there, but it is a ROM definitely worth trying out!!
Warning
The steps and methods included in this guide are considered risky. Please do not attempt to try this unless you know exactly what you are doing, as it may render your device unusable, and your pocket lighter by the amount it takes to replace it. You have been forewarned!!!
Compatibility
This rom and the guide below is compatible only with the Nexus S GSM version. Please do not attempt to flash it on an incompatible device, as it could cause damage to your device and brick it. Check your device’s model number in: Settings » About device.
Pre-Installation Requirements
- Rooted Nexus S with Clockworkmod Recovery.
- Installing/Flashing this ROM will erase your apps and data. So, it’s a very important you back them up before proceeding further. To backup your apps and important data — bookmarks, contacts, SMS, APNs (internet settings), etc. this Android backup guide would help you.
- Make sure your Nexus battery is fully charged
Download Links
→ Oodie Prime V2 File Name: update.miui4.2.1.20.oodie.prime.v2.zip | Size: 108.18 MB
How To Install Oodie Prime V2 MIUI 4 on Nexus S
- Download the Oodie Prime V2 ROM zip file to your PC (link provided above)
- Connect the Nexus S to your PC via USB cable and transfer the downloaded zip file to the root of internal storage
- Power off the phone
- Now reboot the phone by holding down Volume Up and Power until Fastboot mode comes up.
- Scroll down and select Recovery and wait for the phone to reboot into recovery mode.
- Once in recovery, scroll down to Backup & restore, and on the next screen Select Backup. This will backup your existing ROM (Recommended in case something goes wrong and you want to revert to your earlier setup)
- Once the backup is complete, Select Wipe Data/Factory reset from the main menu, and on the next screen select Yes-wipe data
- Now scroll to Wipe Cache Partition and select it. On the next screen Select Yes-wipe cache.
- Now on the main menu, click Advanced,and then Select Wipe Dalvik cache. On the next screen, Select Yes-Wipe Dalvik
- Now that you have completed the full wipe, scroll to ‘Install zip from SD card‘
- Then Select Choose zip from sd card and navigate to the ‘update.miui4.2.1.20.oodie.prime.v2.zip‘ file you transferred to the sd card in Step 2
- This will start flashing the ROM to your phone. Let the installation complete.
- Now select Go Back, and then select Reboot System.
- This will reboot the phone. Please note that the first boot might take a while. Do not worry, as this is normal. Once the phone has booted up completely, do not touch it for 5 mins. After 5 mins have passed, reboot the phone again to make sure that all the default apps have settled down.
- That’s it!! You can now enjoy the slick elegance of MIUI 4 Ice Cream Sandwich on your Nexus S.


I’m waiting for MIUI 4 for my Motorola Defy :/
I’m waiting for MIUI 4 for my Motorola Defy :/
I’m waiting for MIUI 4 for my Motorola Defy :/
Hi, but if Recovery doesn`t work by me, how can i fix this problemm ?
please need a urgently help for fix this problemm,otherwise i can`t do something without Recovery it`s dead robot showing 😀
write to my mail please..
Hi, but if Recovery doesn`t work by me, how can i fix this problemm ?
please need a urgently help for fix this problemm,otherwise i can`t do something without Recovery it`s dead robot showing 😀
write to my mail please..
Hi, but if Recovery doesn`t work by me, how can i fix this problemm ?
please need a urgently help for fix this problemm,otherwise i can`t do something without Recovery it`s dead robot showing 😀
write to my mail please..