- What to know
- Quick overview of the Pinwheel Command Wing entry method
- Orientation rooftop location that leads to the Pinwheel base
- How destroying the hidden red panels disables the force field
- How to unlock the Command Wing door inside the Pinwheel base
- Why is this the fastest method to enter the Command Wing
What to know
- The Pinwheel Command Wing is locked behind a security force field and a blue sealed door in the Outpost area.
- You must destroy four hidden red panels to disable the entrance force field.
- Two hidden switches inside the facility must then be activated to unlock the Command Wing.
- Panel locations can change between raids, but the general spawn areas remain consistent.
Entering the Pinwheel Command Wing in Marathon’s Outpost area can seem confusing during your first raid. The base is protected by multiple layers of security designed to slow down players attempting to reach valuable loot and mission objectives inside the Command Wing.
However, once you understand the puzzle mechanics behind the entrance, the entire process becomes surprisingly fast. The key lies in disabling the red security field blocking the base entrance and then activating two hidden switches that unlock the final door. If you follow the method explained below, you can consistently access the Command Wing within a few minutes of arriving at the Outpost.
Quick overview of the Pinwheel Command Wing entry method
| Step | Objective | Location | Result |
|---|---|---|---|
| 1 | Reach the rooftop entrance | Orientation rooftop | Access Pinwheel Base entrance |
| 2 | Destroy four red panels | Around the blocked doorway | Disables red force field |
| 3 | Activate hidden switch #1 | Bottom floor of Pinwheel area | Enables Command Wing unlock sequence |
| 4 | Activate hidden switch #2 | End of Drone Wing hallway | Unlocks the blue Command Wing door |
| 5 | Enter Command Wing | Blue door inside base | Access to Command Wing interior |
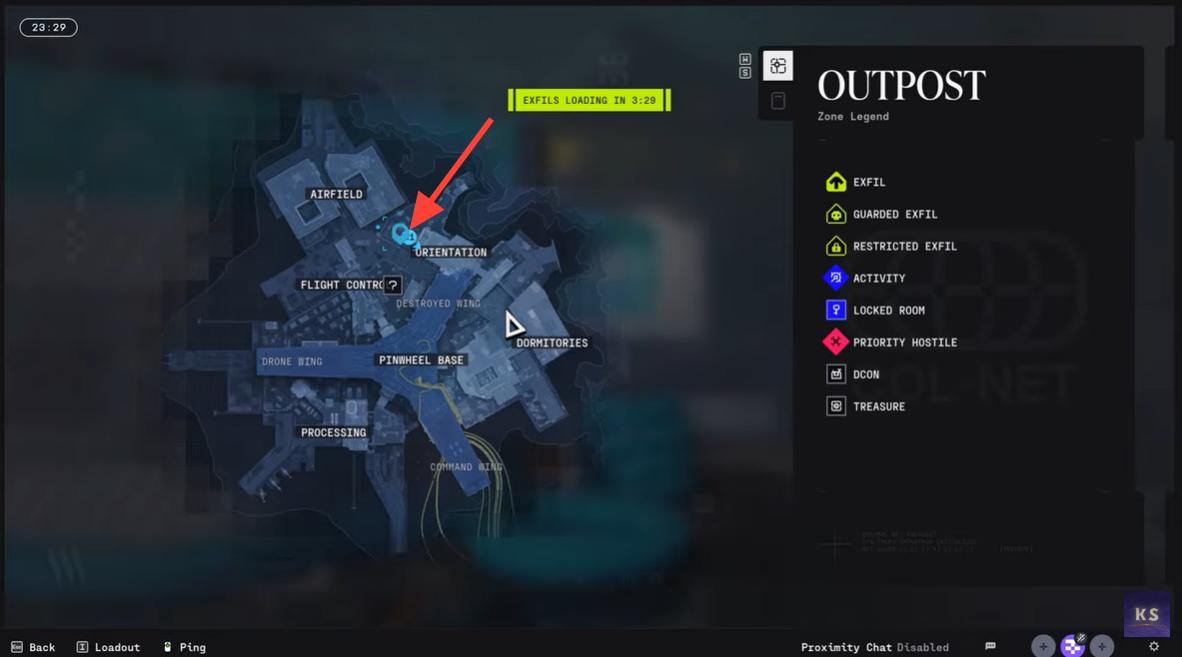
Orientation rooftop location that leads to the Pinwheel base
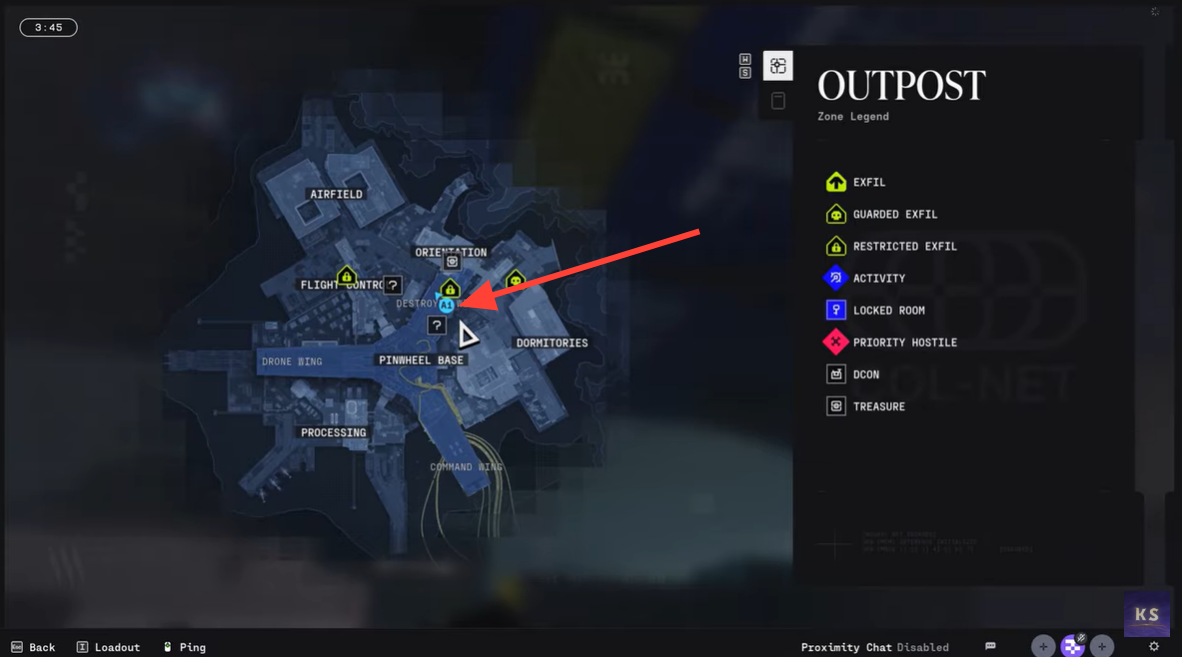
The fastest way to begin the process is by heading toward the Orientation structure located near the Pinwheel Base in the Outpost zone. From here, you must climb up to the rooftop area where the entrance to the Pinwheel Base can be seen.
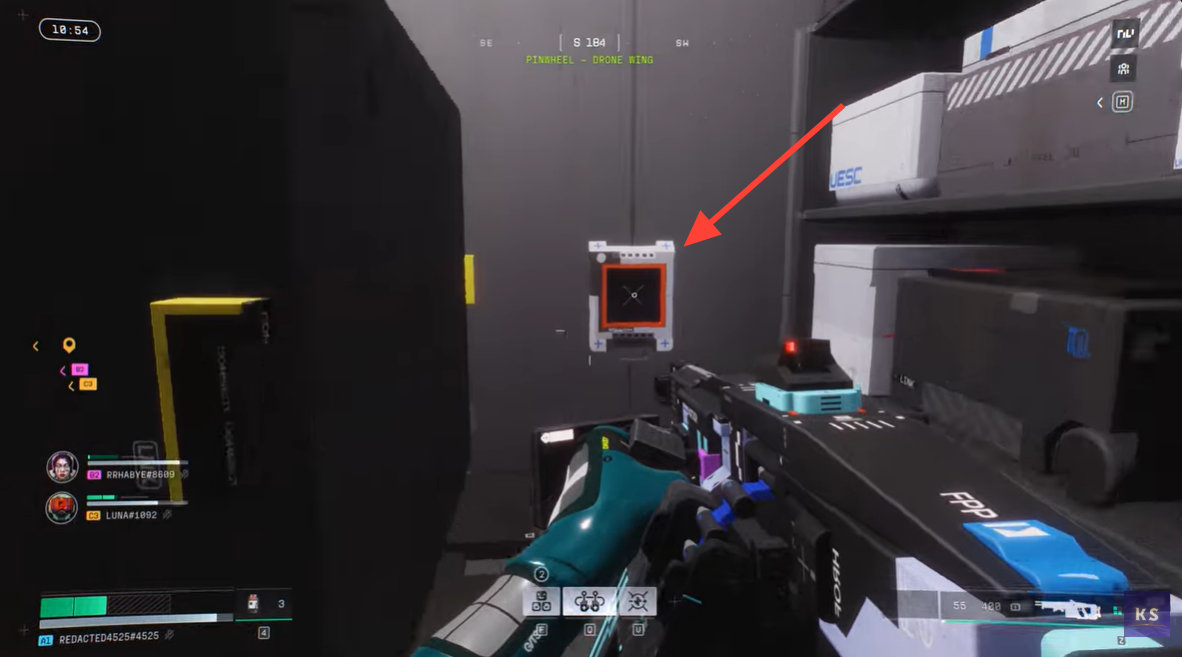
The entrance itself will appear completely blocked by a bright red security force field, which prevents players from simply walking inside. This barrier is part of the base’s defensive system and cannot be disabled directly from the door. Instead, the force field is powered by multiple hidden panels scattered around the immediate exterior area.
Once you reach the rooftop and locate the sealed entrance, the next step is to track down the power panels that maintain the force field.
The red force field protecting the entrance is powered by four small red security panels hidden around the doorway area. Each of these panels must be destroyed before the barrier shuts down.
Although the exact locations can shift slightly between raids, the game generally places the panels in the same surrounding spots. The first panel is often positioned near the locked entrance door itself, making it the easiest to find. Another panel commonly appears beneath the broken bridge structure close to the entrance, which requires you to look down or reposition slightly to spot it.
A third panel frequently spawns to the left side of the broken bridge, tucked near structural debris or walls that partially conceal it. The final panel is usually positioned to the right side of the bridge area, completing the set of four required targets.
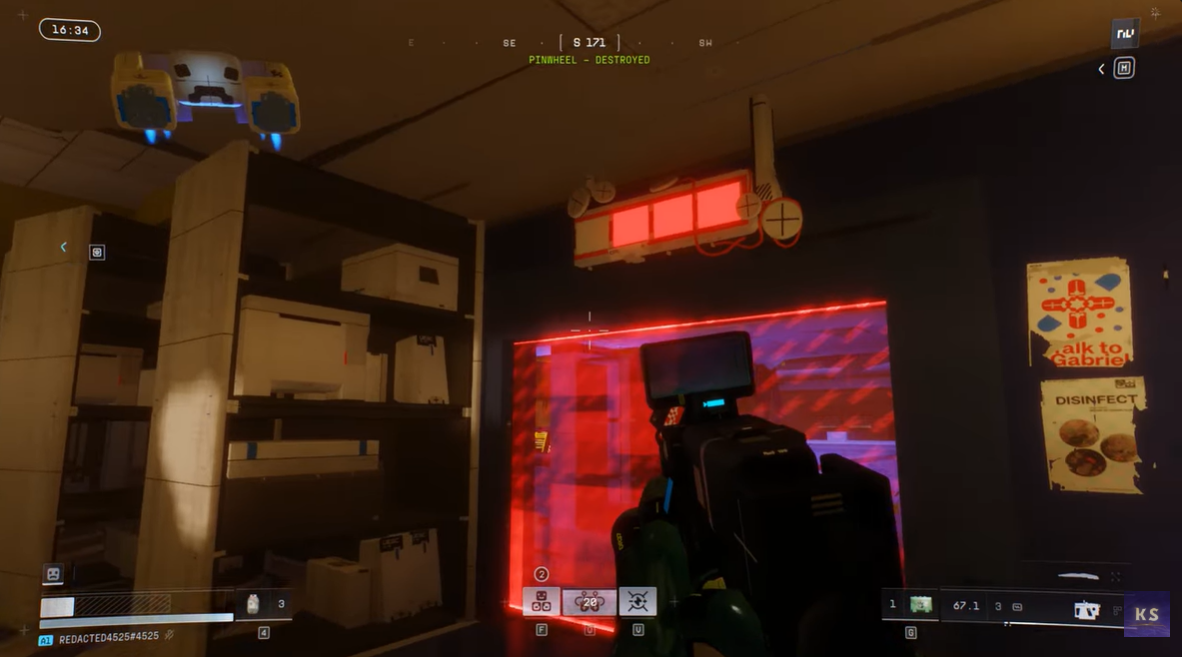
Each panel must be destroyed with weapon fire, and once the fourth one is eliminated, the entire red security barrier will automatically power down. When this happens, the previously blocked entrance becomes fully accessible and you can move directly into the Pinwheel Base interior.
Red panel locations used to disable the entrance force field
| Panel | Area Around Entrance | Detailed Location | Notes |
|---|---|---|---|
| Panel 1 | Entrance Doorway | Mounted on the structure directly beside the locked Pinwheel Base entrance | Usually the easiest panel to spot and destroy first |
| Panel 2 | Broken Bridge (Lower Area) | Located underneath the broken bridge near the entrance platform | Requires looking downward or moving below the bridge structure |
| Panel 3 | Left Side of Bridge | Positioned along the wall or structure to the left of the broken bridge | Often partially hidden by environmental debris |
| Panel 4 | Right Side of Bridge | Located along the structure on the right side of the bridge near the entrance | Typically the final panel players find while circling the entrance area |
How to unlock the Command Wing door inside the Pinwheel base
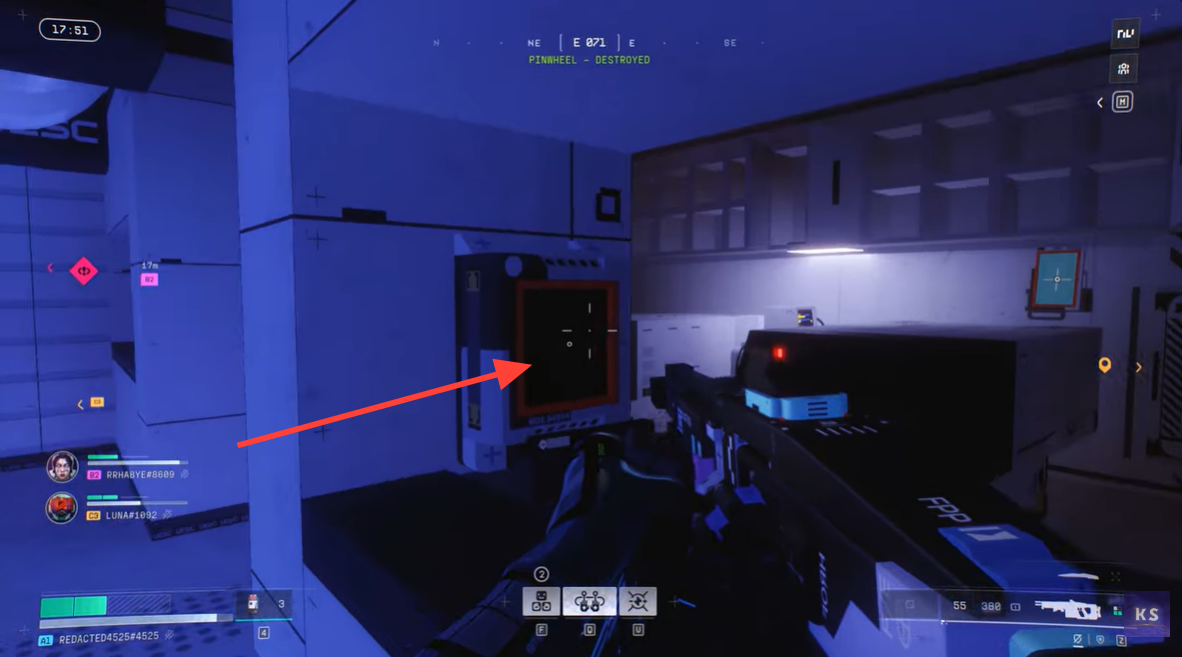
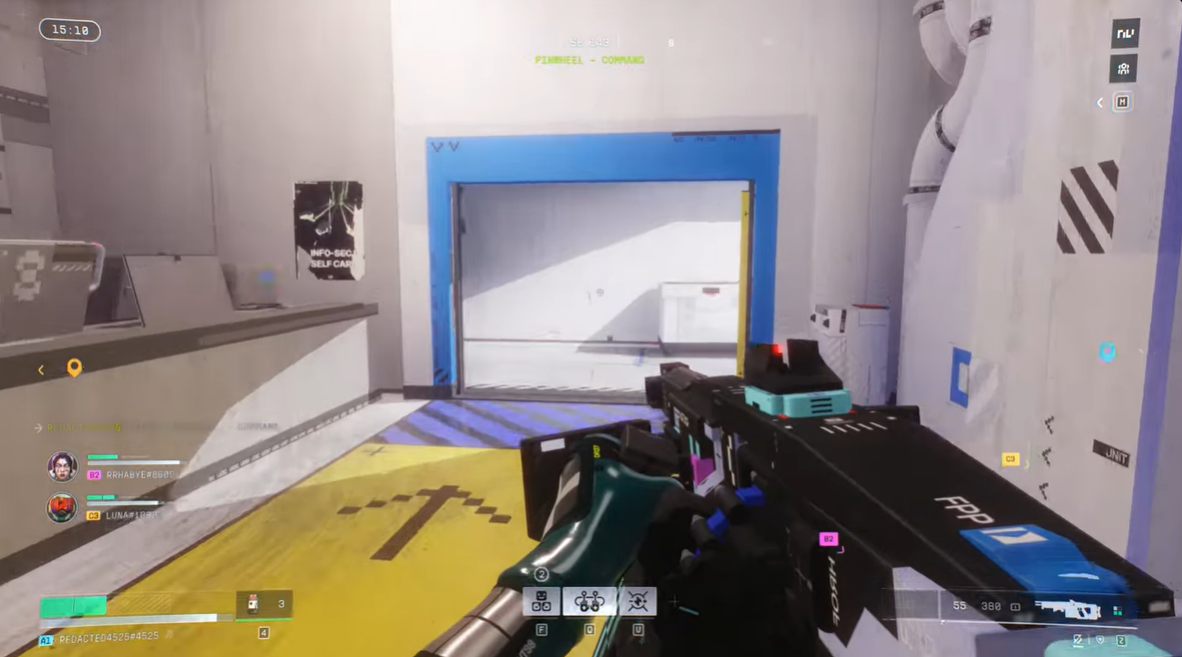
Disabling the force field only grants access to the interior of the base. The Command Wing itself remains locked behind a separate blue security door, which requires activating two hidden switches located within the facility.
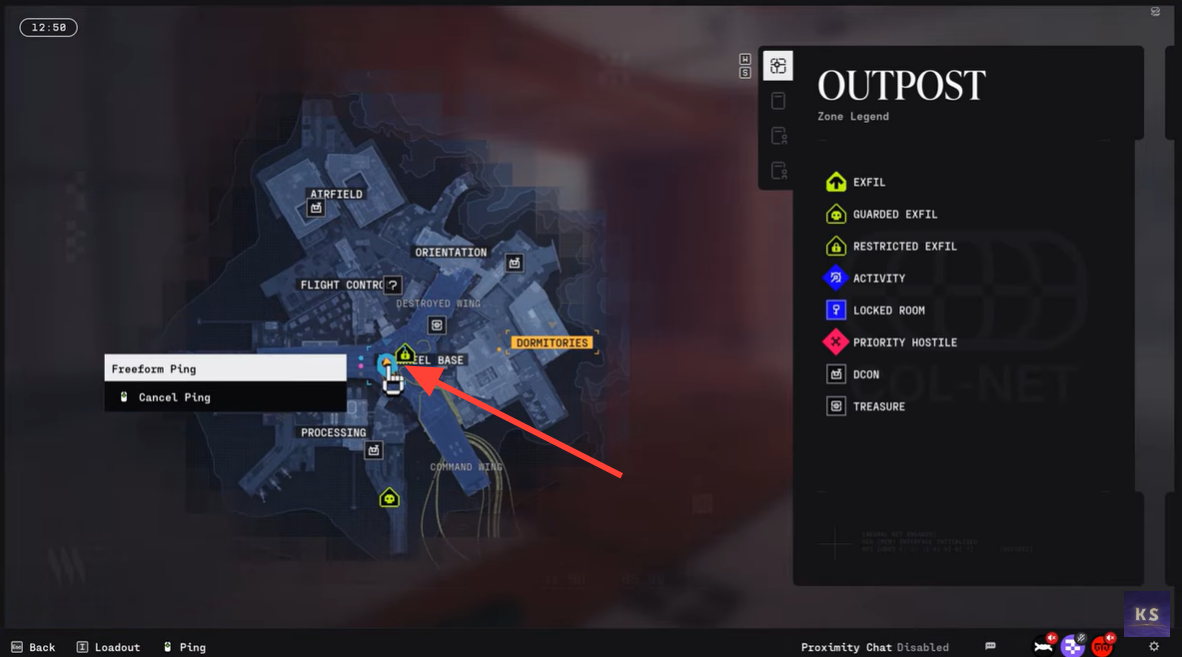
These switches are placed in different sections of the base, meaning players must explore a bit before the door unlocks.
Switch locations for unlocking the Pinwheel Command Wing
| Switch | Exact Area | Detailed Location | What It Does |
|---|---|---|---|
| First Switch | Pinwheel Base Interior | Bottom floor near the entrance, hidden behind a wall panel in the main Pinwheel area | Activates the Command Wing unlock sequence and enables the second switch |
| Second Switch | Drone Wing | At the very end of the Drone Wing hallway, mounted on the back wall of the final room with a dark/black wall | Completes the security override and unlocks the blue Command Wing door |
How the first hidden switch inside the Pinwheel area unlock sequence works
Step 1
Once you enter the base, move down toward the bottom floor of the Pinwheel interior area. Near the entrance section, you will find a wall that partially hides a small interactive panel. This is the first hidden switch required for the Command Wing unlock sequence.
Activate the switch and wait for the confirmation prompt indicating the system has been triggered. This switch essentially enables the second part of the security override.
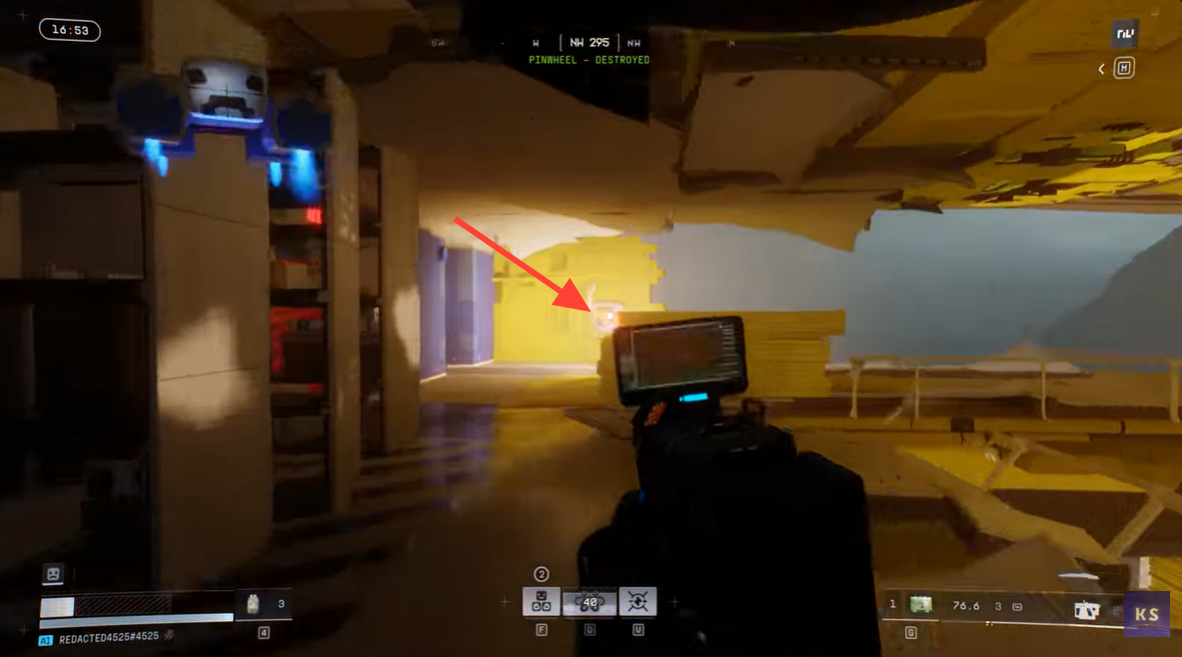
How to activate the second switch inside the Drone Wing
Step 2
After activating the first switch, head toward the Drone Wing entrance inside the same base complex. This wing branches off from the main interior area and leads into a long hallway.
Proceed through the Drone Wing and continue all the way to the very end of the corridor. The second switch is located in the final room, positioned against a dark or black wall at the back of the area. Once you interact with this switch, the system will complete the override process.
Activating both switches immediately unlocks the blue Command Wing door.
Entering the Command Wing
Step 3
With both switches triggered, return toward the blue security door leading to the Command Wing. The door will now automatically open, allowing you to access the interior command area of the Pinwheel Base.
At this point the Command Wing is fully accessible, meaning you can explore the area for mission objectives, hidden items, or strategic advantages depending on your raid goals.
Why is this the fastest method to enter the Command Wing
Many players initially struggle with this location because the entrance puzzle is not immediately obvious. The red force field and the hidden switches create a layered security mechanic that can easily slow players down during a raid.
However, once you memorize the red panel spawn spots and the two switch locations, the entire sequence becomes very efficient. Skilled players can complete the process extremely quickly by destroying the panels in rapid succession and heading directly to the two switches without unnecessary exploration.
Mastering this route makes the Pinwheel Command Wing one of the fastest high-value areas to access during a Marathon Outpost run.