What to know
- Bioprinters like Sparkleaf and Fungal types spawn in specific buildings across South Relay, Overflow, and other Perimeter POIs.
- Scan two of each type in sequence for Data Reconstruction 1 contract by NuCaloric.
- Use environmental clues like forklifts, shelves, and desks to spot them easily.
- Progress carries over if knocked out, with rewards including med packs and credits.
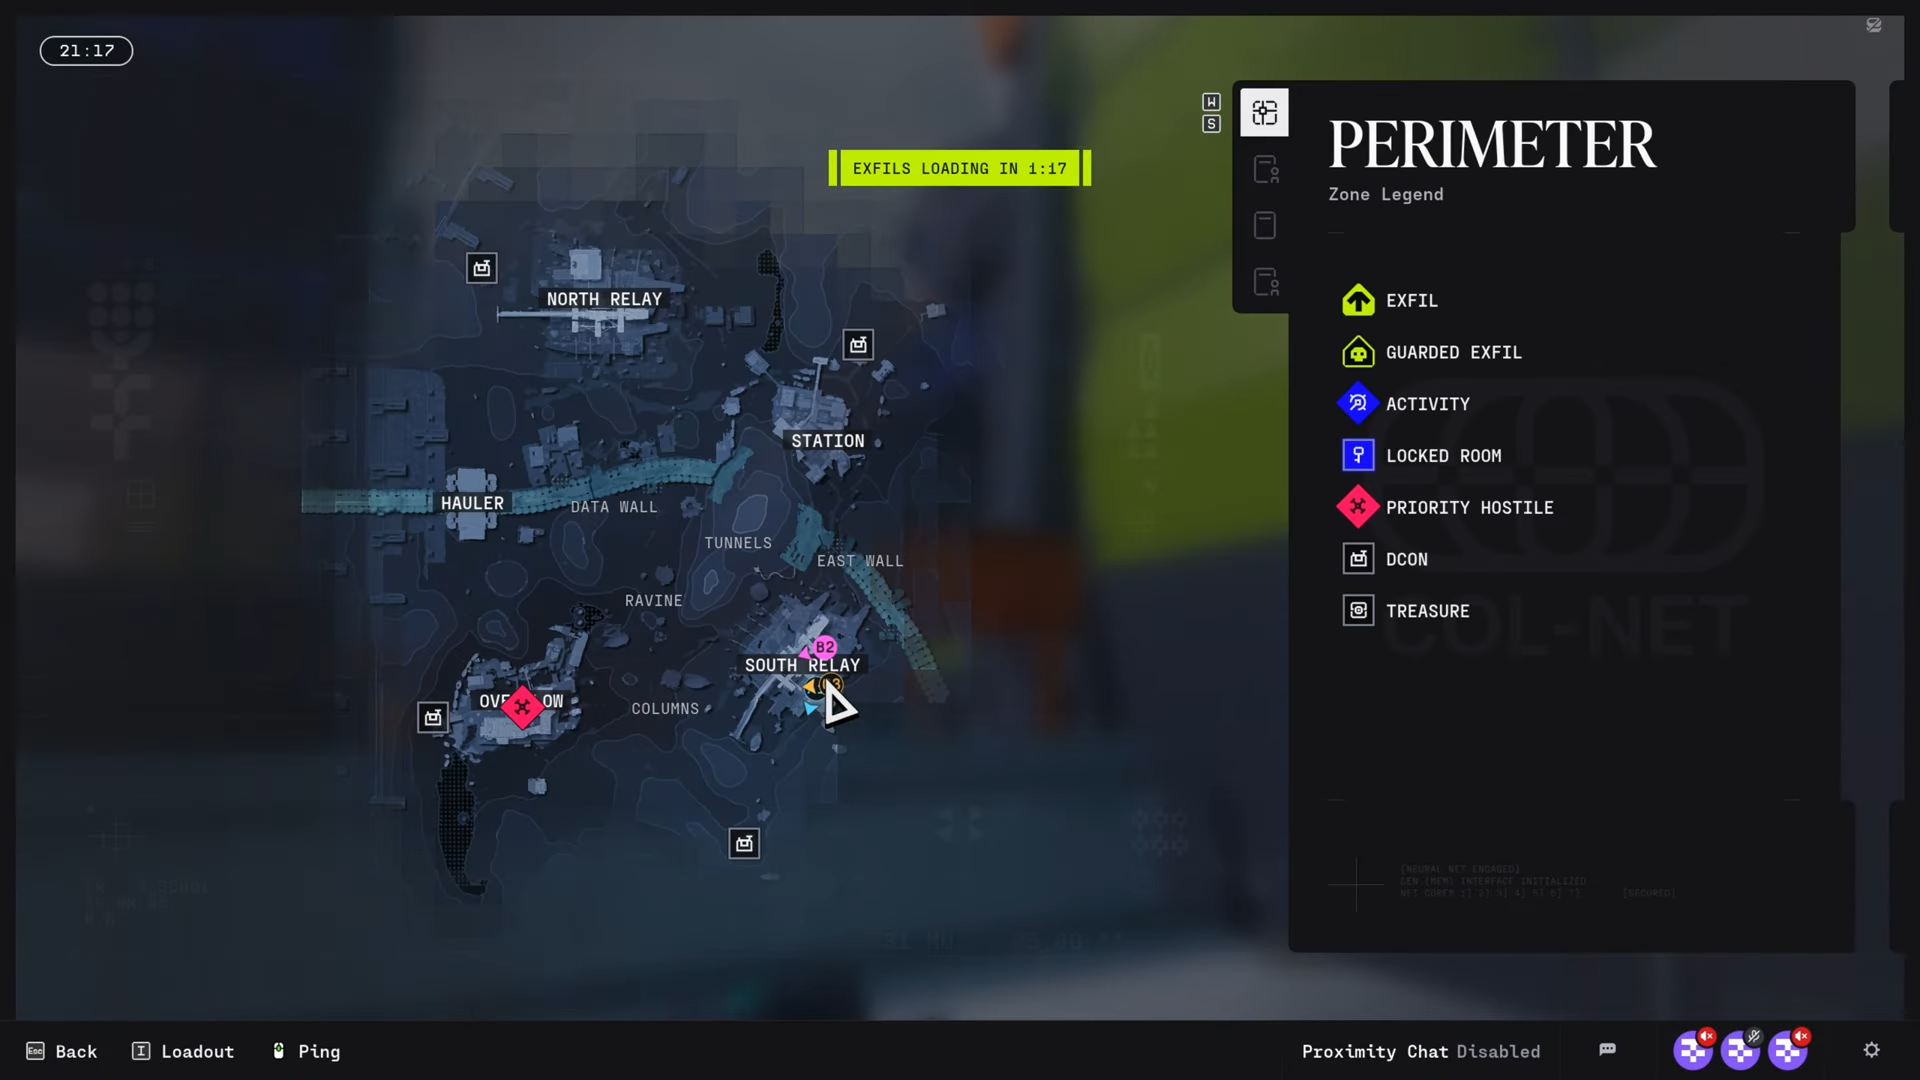
Bioprinters in Marathon serve as vital loot sources and contract objectives, hidden in industrial buildings across the Perimeter map. You must explore named locations carefully since markers only appear close by.
| Aspect | Details |
|---|---|
| Primary Zones | South Relay (Sparkleaf), Overflow (Fungal), North Relay (related terminal) |
| Scan Requirement | Two Sparkleaf, two Fungal per contract stage |
| Visibility | Quest markers activate within 20m |
| Loot Potential | High in lab-like areas with desks and shelves |
| Contract | Data Reconstruction 1 by NuCaloric (first of three parts) |
Key locations
South Relay features Sparkleaf Bioprinters in northwest single-story buildings and southeast NuCaloric structures, while Overflow hosts Fungal ones on upper floors of eastern buildings accessible via forklifts; North Relay includes a powered terminal in the northwest building reached through vents and stairs for the agriculture report to complete the chain.
How to scan Sparkleaf Bioprinters in South Relay
Head to South Relay on the Perimeter map first, as objectives follow a strict order.
First Sparkleaf Bioprinter
Locate the small single-story building with cracked glass northwest of the main compound.
Enter and check the cubicle-like desk area for the bioprinter.

Approach closely for the scan marker to appear.
Second Sparkleaf Bioprinter
Move southeast to the opposite side into a NuCaloric building.
Enter from the bottom floor and proceed to the back storage room.
Find it on a white shelf and interact to scan.
Alternatively, in the cyan room under the UESC comms antenna building, enter the door near the central area, stay left without exiting, and scan beside the inner door.
How to scan Fungal Bioprinters in Overflow
Travel to Overflow POI after South Relay scans.
First Fungal Bioprinter
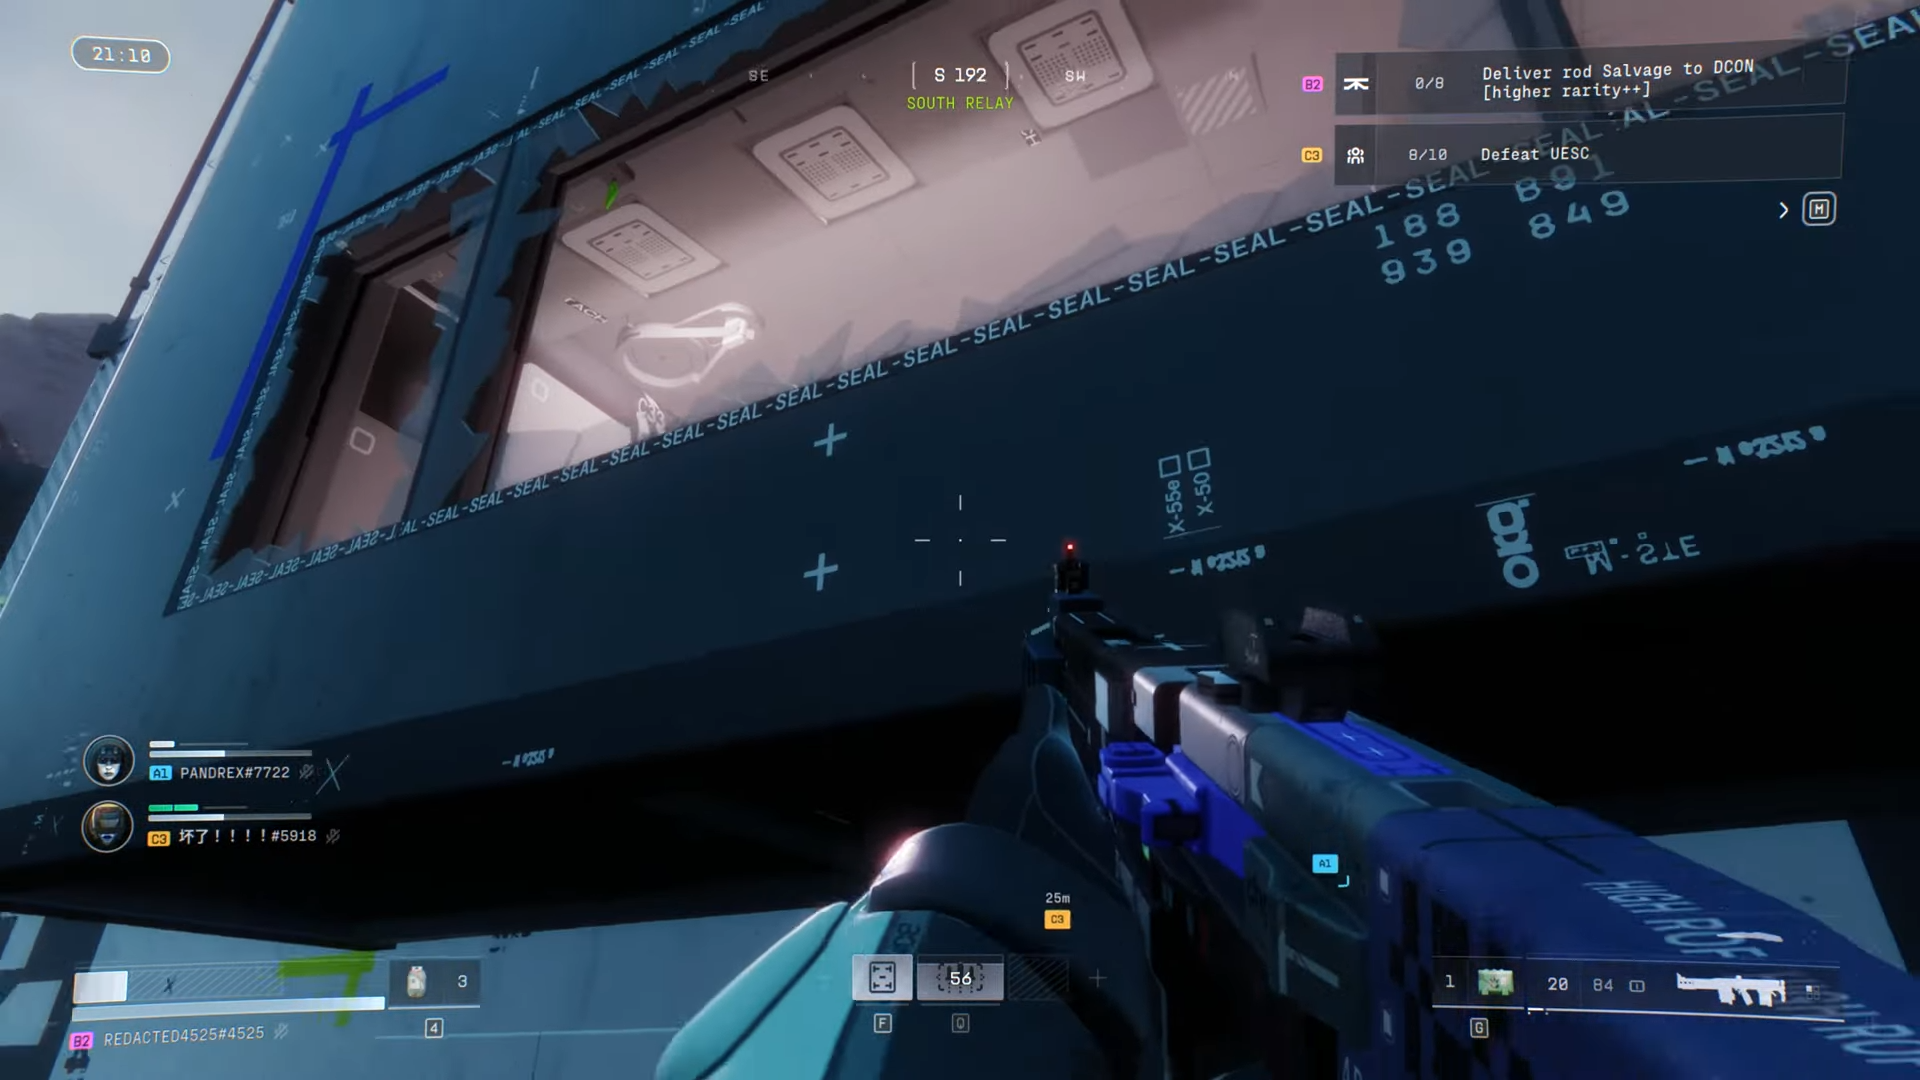
Target the eastern building’s second floor. Use the forklift by the broken window to climb up. Then follow right-side corridors to the green marker on a shelf.
Step 1
Position on the forklift and jump to the broken window ledge.
Step 2
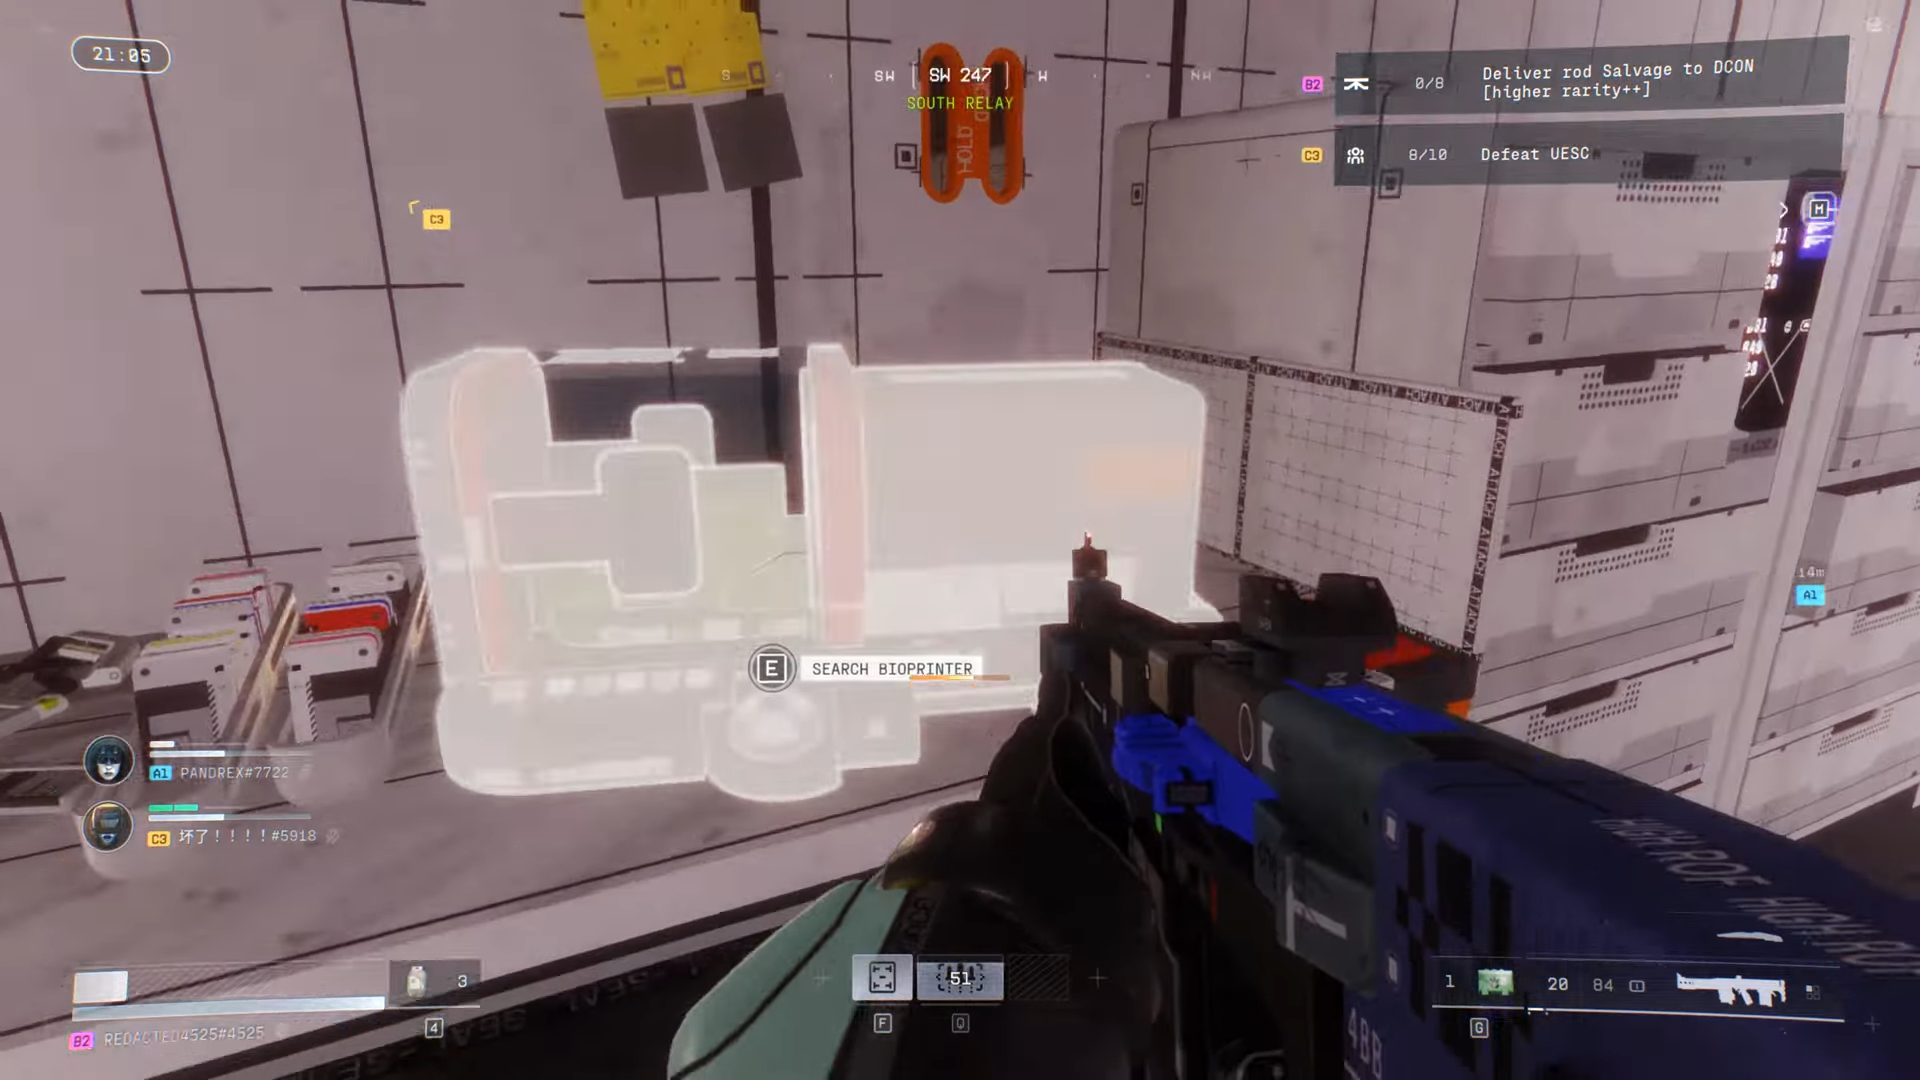
Navigate corridors rightward until the marker guides to the shelf-top bioprinter.
Step 3
Interact to scan.
Second Fungal Bioprinter
Stay in the same building, head southwest through continued corridors. Reach the server rack area marked on maps and scan the bioprinter atop the rack.
Completing the agriculture report in North Relay
Go to North Relay northwest building post-bioprinter scans. Climb stairs right, left into bathroom vent to reach the terminal. Backtrack downstairs to flip the wall power switch if no power. Return upstairs via vent to download the report. Then extract from the zone.
Contract rewards
| Reward Item | Quantity |
|---|---|
| 8XS Med Pack | 1 |
| Credits | 1500 |
| Shield Recharge | 3x |
| Unstable Biomass | 3x |
| Faction Intel (Codex Entry) | 1 |
| Patch Kit | 3x |
Tips for efficient bioprinter looting
Carry a Self-Revive kit for long runs. Team up to share scans, halving effort on duplicates. Check lab desks and server areas in POI centers for highest spawn rates.
Focus on Perimeter POIs during contracts for chained progress and loot. Practice paths to shave time, and always restore power before terminals.


