Here is a simple root procedure for the famed LG’s shine and pride, G Pad 8.3. The tablet not only excels in its specifications and usage but also has quite a developer base.
Follow our guide below to have root privileges on your G Pad. With root privileges, you can run many useful root apps and also tinker around with the system of your tab. But be careful, dragons ahead.
WARNING!
Warranty may be void of your device if you follow the procedures given on this page.
You only are responsible for your device. We won’t be liable if any damage occurs to your device and/or its components.
CHECK DEVICE MODEL NO.
To make sure your device is eligible with this, you must first confirm its model no. in ‘About device’ option under Settings. Another way to confirm model no. is by looking for it on the packaging box of your device. It must be V500!
Do not use the procedures discussed here on any device of Sony or any other company. You have been warned!
BEFORE YOU BEGIN..
You must do this pre-installation stuff before attempting to root your LG G Pad 8.3 in order to avoid any complications later, and have a smooth and successful process.
BACK UP YOUR DEVICE
Back up important data and stuff before you start playing around here as there are chances you might lose your apps and app-data (app settings, game progress, etc.), and in rare case, files on the internal memory, too.
For help on Backup and Restore, check out our exclusive page on that linked right below.
► ANDROID BACK UP AND RESTORE GUIDE: APPS AND TIPS
INSTALL LG G PAD DRIVER
You must have proper and working driver installed on your windows computer to be able to successfully root your G Pad. In case you are not sure follow the instructions below.
Open the link below and download the LGUnitedMobileDriver_S50MAN310AP22_ML_WHQL_Ver_3.10.1.exe. Run this driver file and follow the instructions on the screen. After the installation process is done, restart your PC.
► LG G PAD 8.3 V500 UNITED MOBILE DRIVER DOWNLOAD
CHARGE YOUR DEVICE
If your android device powers off due to lack of battery while the process is underway, it could damage the device.
So, make sure your device is adequately charged — at least 50% battery of the device.
GUIDE: LG G PAD 8.3 ROOT
DOWNLOADS
Download the root file for your LG G Pad.
ROOT FILE PACKAGE
LG G Pad V500 Root: Download Link | Mirror | File name: root_gpad.zip (2.64 MB)
STEP-BY-STEP GUIDE
- Prepare your phone:
- Enable developer options: Go to your phone’s Settings » select About phone » Scroll to the bottom and tap on “Build number” seven times to enable developer options.
- Enable USB Debugging: Open phone’s Settings » select Developer options » Tick the “USB debugging” checkbox (under Debugging section).
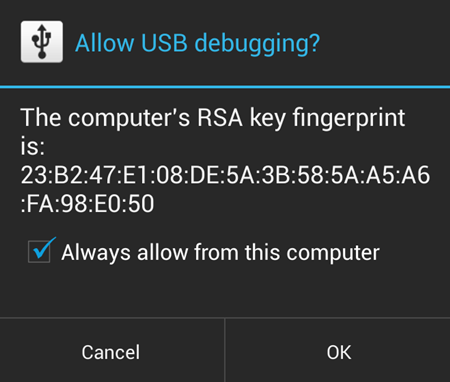
- Connect your phone to PC with a USB cable and if a pop-up screen shows up on Phone asking you to Allow USB debugging for the computer, make sure you tick the checkbox and tap OK.

- Extract the root file package, root_gpad.zip (using 7-zip, preferably), to get the following files, and one folder:
- api (folder)
- adb.exe
- AdbWinApi.dll
- AdbWinUsbApi.dll
- G_security
- root.bat
- su
- Superuser.apk
- Double-click/Run the root.bat file and follow the simple on-screen instructions like “Press any key to continue”.
- It will remind you to USB Debugging, which we did in 2nd step. Make sure it’s enabled.
- It will push g_security to your SD-Card. After that the process will pause.
- Now, at this point, you need to disconnect your G Pad from your computer and disable and re-enable USB Debugging (This instruction will be shown on the screen). After doing this press any key to continue with the process.
- Now, it will show a warning which would explain that continuing the process further will trip the root checker of your LG Device. Meaning, you are now voiding your device’s warranty. If you are not sure about rooting your G Pad, this is the best time to quit the process by pressing ctrl + c. If you are sure to continue then follow the on-screen instructions which are pretty direct from here on.
- Once the your G Pad is successfully rooted, reboot your tablet. You will now see the Superuser.apk in your app drawer.
That’s all!
If you need any help with the guide above, let us know in comments below. We’d be happy to help!
Your suggestions are most welcomed!


