What to know
- Photo Mode is opened from the in-game Tools button near the skill UI, then entering the Camera option.
- Scene controls can hide common distractions like characters, NPCs, and environmental/factory elements.
- Depth of field can be adjusted with an aperture-style slider for stronger subject focus.
- Formation controls can help reposition operators before capturing.
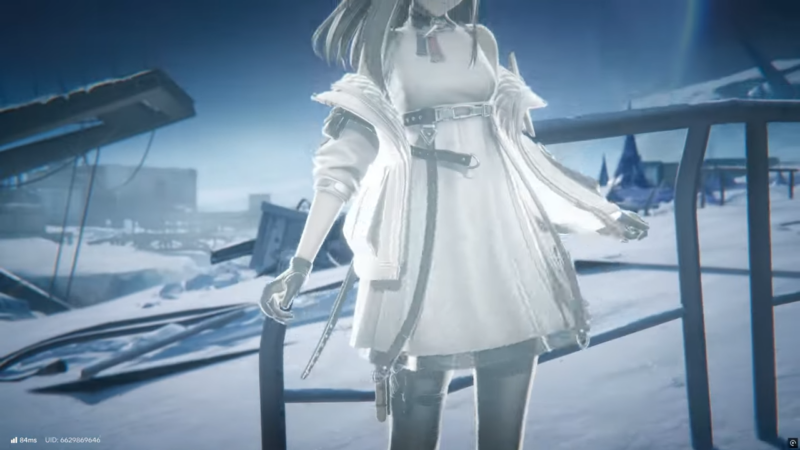
Photo Mode exists for one main purpose: making screenshots look intentional rather than accidental. When the HUD, floating prompts, and busy background elements are removed, the environment design and operator models read more clearly, and the final image looks closer to key art than a quick capture. The feature is also useful for documenting bases and layouts, capturing memorable story moments, and creating reference images for team planning or fan content.
To keep results consistently strong, think of Photo Mode as a quick workflow: enter camera, clean the scene first, compose second, add depth-of-field third, then capture in Arknights: Endfield.
Photo Mode controls at a glance
| Control area | What it changes | Best used for | Watch-outs |
|---|---|---|---|
| Scene controls (visibility toggles) | Removes selected elements (characters/NPCs/structures/items) | Clean landscapes, minimalistic portraits, uncluttered factory shots | Hiding too much can make scenes feel empty—leave a few anchors for scale |
| Aperture / depth of field | Background sharpness vs. blur | Character portraits, cinematic shots, mood-heavy lighting | Excessive blur can look unnatural or hide important context |
| Formation | Operator arrangement and positioning | Group photos, dynamic line-ups, preventing overlap | Small changes help most—over-tweaking can make shots feel staged |
Where to find Photo Mode during gameplay
Photo Mode is accessed from the small Tools button located near the skill interface on the right side of the gameplay screen. The key detail is that it’s typically opened by holding that Tools button rather than a simple tap, which brings up a tool selection menu. From there, selecting the Camera option switches the game into Photo Mode.
If Photo Mode doesn’t appear immediately, make sure gameplay is in a state where menus can be opened normally (not during restricted interactions or certain scripted moments). In many games with similar camera features, some encounters or transitions may temporarily limit camera tools, so moving a step away from triggers or returning to free movement can help.
How to enter Photo Mode cleanly
Step 1
Start in normal gameplay and locate the Tools button positioned above the skill buttons on the right side of the screen.
Step 2
Press and hold the Tools button until the tool menu opens.
Step 3
Select the Camera icon to enter Photo Mode.
Step 4
Wait a moment for the Photo Mode interface to appear, then begin adjusting scene and camera settings before taking the shot.
What the Photo Mode settings generally control
Photo Mode settings are designed to solve three common screenshot problems: clutter, weak subject focus, and awkward character placement.
- Scene controls: These typically include show/hide toggles for common elements that “pollute” a frame, such as operators, NPCs, factory structures, and item drops. Turning off these elements is the fastest way to shift a shot from “gameplay snapshot” to “clean composition.”
- Aperture / depth of field: This setting changes how sharp the background is compared to the subject. A stronger blur makes characters stand out and reduces noisy backgrounds, while a sharper background works better for landscape shots or base/factory showcases.
- Formation controls: These help arrange or reposition operators for intentional poses, spacing, and framing. Even small adjustments (moving a character a step left, spreading a group out, or turning a subject toward the camera) can dramatically improve readability.
How to take a polished screenshot step by step
Step 1
Decide the subject before touching any sliders: an operator portrait, a duo/group shot, or an environment/factory showcase.
Step 2
Use scene toggles to remove distractions first. If the goal is a landscape, hide extra characters; if the goal is a character portrait, hide busy world elements that compete for attention.
Step 3
Set the camera angle and framing next. A few reliable composition choices:
- Place the subject slightly off-center to keep the image dynamic.
- Keep the horizon level for scenic shots and bases.
- Use foreground objects (rails, rocks, structures) to add depth without crowding the subject.
Step 4
Adjust aperture (depth of field) after framing. Start subtle: apply just enough blur to separate the subject from the background while keeping the scene recognizable. For environmental shots, reduce blur so terrain and structures remain readable.
Step 5
If the shot includes operators, use formation controls to avoid overlaps and awkward spacing. Aim for clear silhouettes and readable poses:
- Leave space between characters so each outline is distinct.
- Avoid having weapons or accessories intersect faces.
- Keep the main subject closest to the camera if depth of field is strong.
Step 6
Do a final “edge check” around the frame. Look at the corners and borders for anything distracting (floating objects, half-cut NPCs, factory parts blocking faces).
Step 7
Capture the screenshot using the Photo Mode capture button.
Step 8
Exit Photo Mode and confirm the image saved correctly. If the shot is important, take two or three variations (slightly different angles and blur levels) to avoid a single imperfect capture.
How to choose the right style of shot
Different subjects benefit from different settings, and using the same “recipe” every time can make screenshots feel repetitive.
Operator portraits
Portrait shots look best when the background is simplified and depth of field is used to separate the character. Keep the camera at roughly chest-to-eye level for flattering proportions, and avoid extreme angles unless aiming for dramatic effect.
Squad and group photos
Group shots are where formation controls matter most. Prioritize spacing and silhouette clarity over perfect symmetry, and ensure every face or defining feature is visible. If the background is busy, reduce it with scene toggles rather than heavy blur—too much blur can make a group shot look like a cutscene freeze-frame.
Scenery, factories, and base layouts
For layout or environment documentation, keep depth of field relatively sharp so structures and pathways remain readable. Instead of blurring, use scene toggles to remove clutter. Consider taking one “clean” image (no characters) and one “scale” image (with an operator present) so the viewer understands size.
Common issues and quick fixes
- The shot looks noisy or cluttered: Remove item drops and extra NPCs first, then reframe.
- The subject blends into the background: Increase depth of field blur slightly, or change the angle so the subject is against a simpler backdrop.
- Characters overlap or block each other: Spread the formation and prioritize clear outlines; avoid stacking characters directly behind the lead.
- The image feels flat: Add depth by placing something in the foreground, shooting slightly downward from a higher point, or using diagonal lines in the environment.
- The background blur looks too strong: Reduce blur until major shapes are recognizable; cinematic doesn’t have to mean unreadable.
Using Photo Mode with intention
Photo Mode in Arknights: Endfield works best when used as a repeatable workflow: clean the scene, frame the subject, fine-tune depth of field, arrange operators if needed, then capture a few variations. With just small adjustments—especially visibility toggles and subtle depth-of-field—screenshots can shift from casual captures to consistently polished images.