
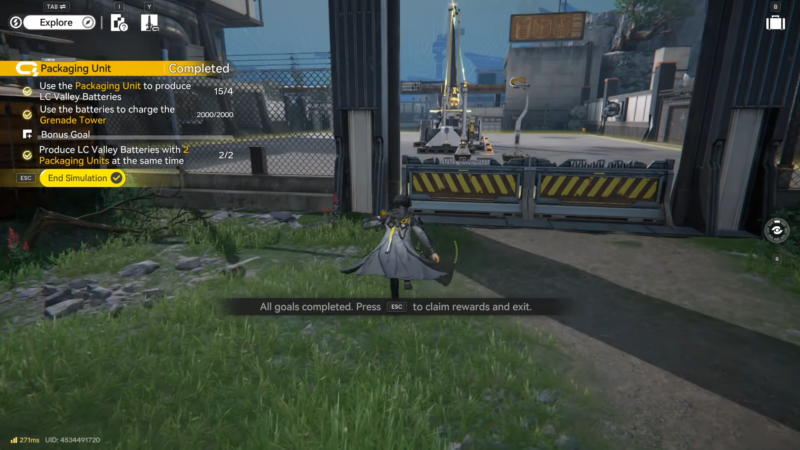
- What to know
- Arknights Endfield Packaging Unit details
- What the Packaging Unit is for in practical base building
- How to unlock and access the simulation smoothly
- How to place and adapt the blueprint without breaking it
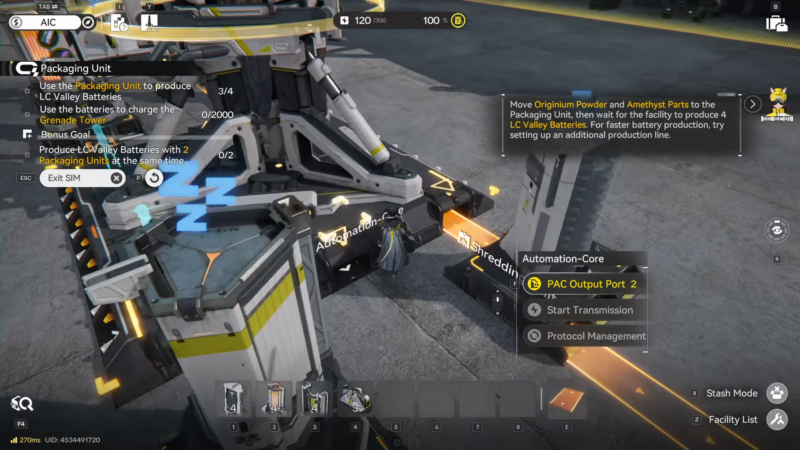
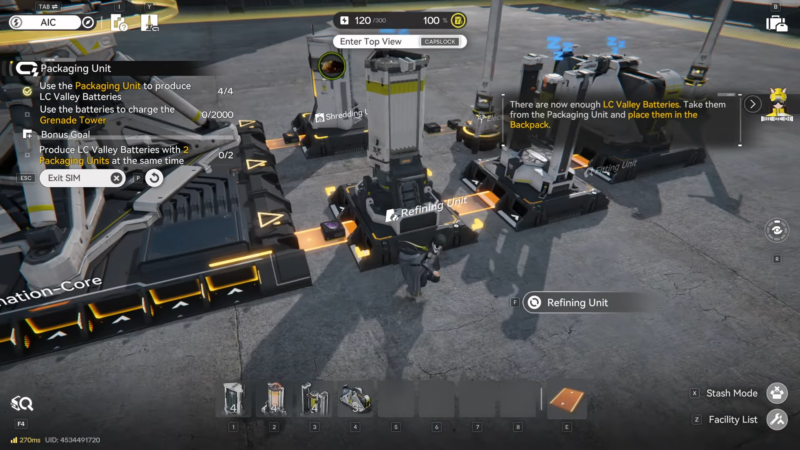
- Detailed step-by-step setup guide
- Common issues and quick fixes
- Practical scaling tips for later
- Making the blueprint work reliably
What to know
- Packaging Units become available after unlocking the relevant Packaging Tech in the AIC Factory Plan.
- The simulation blueprint is meant to teach correct belt routing, power coverage, and clean input/output handling.
- The fastest way to succeed is to place the blueprint unchanged first, confirm it runs, then modify for the chosen recipe and throughput.
- If a blueprint seems “broken,” the cause is usually missing unlocks, power gaps, or incorrect/blocked belt lanes.
A Packaging Unit simulation blueprint is best thought of as a “known-good” production layout: it demonstrates how the game expects a Packaging Unit to be fed, how outputs should be collected, and how surrounding logistics pieces (splitters, bridges, depot transfers) fit together.
Even if the exact recipe differs from the simulation, the structure—inputs → processing chain → packaging → output routing—translates well to most factory setups.
Arknights Endfield Packaging Unit details
Packaging is not usually the very first automation step. It tends to come online after the basics are in place: stable power, reliable mining/extraction, and at least a simple logistics backbone (belts and routing tools). Once Packaging Tech is unlocked, the simulation blueprint becomes valuable because it compresses the learning curve—especially around multi-input routing and avoiding belt conflicts.
If the goal is scaling, packaging often becomes a “final assembly” layer. That means it depends heavily on upstream consistency: if the inputs arrive in bursts or stall, the Packaging Unit will idle regardless of how well the packaging section is built.
What the Packaging Unit is for in practical base building
Packaging generally converts prepared materials into higher-value finished goods. In real base planning, it often plays one (or more) of these roles:
- Progression gate items: finished goods required for upgrades, research, or crafting chains.
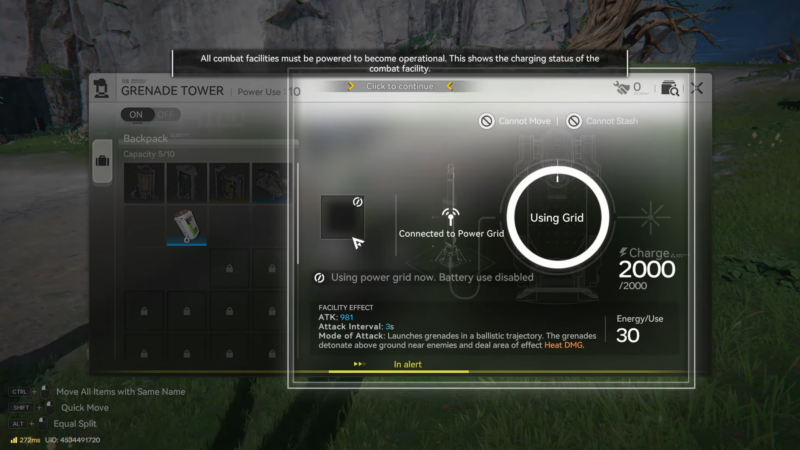
- Power-related production (in many factory-building metas): battery-like outputs that integrate into energy workflows.
- Logistics simplification: instead of moving multiple raw components everywhere, packaging consolidates value into fewer, easier-to-route outputs.
Because packaging sits late in a chain, it’s also one of the easiest places to diagnose systemic issues: if packaging is starved, upstream is the problem; if packaging is jammed, the output routing/storage is the problem.
How to unlock and access the simulation smoothly
In most cases, success is about doing things in the correct order:
- Ensure Packaging Tech (and any required prerequisite nodes) is unlocked.
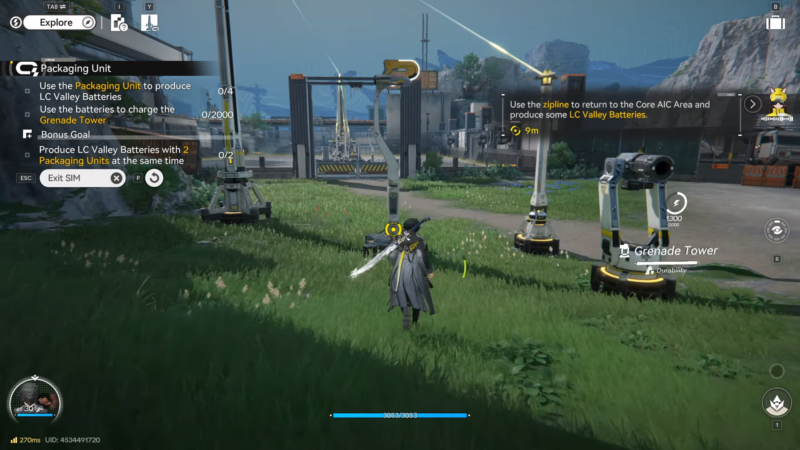
- Locate the relevant simulation entry and run it as soon as it becomes available.
- Save the resulting layout/blueprint so it can be reused as a template in the main base.
- Only after it runs once without edits, start swapping recipes or rebalancing inputs.
This “place-first, edit-second” approach prevents a common trap: changing two or three things at once and not knowing which change caused the stall.
How to place and adapt the blueprint without breaking it
The simulation blueprint usually assumes specific lane discipline—each belt lane is intended for a particular input. When adapting it, keep the structure but change one variable at a time.
Good early adaptations
- Swap the Packaging Unit recipe but keep the same belt geometry.
- Replace long belt runs with cleaner routing (bridges/overpasses) while keeping directions identical.
- Add buffer storage (or depot transfer points) at inputs so short mining dips don’t stall the unit.
Adaptations that commonly break the line
- Merging two different inputs onto one belt lane “because there’s space.”
- Reversing belt direction to “make it reach” and forgetting to adjust downstream splitters.
- Removing a splitter/bridge that the blueprint used to prevent belt conflicts.
- Moving the Packaging Unit slightly and accidentally breaking reach/connection rules for adjacent logistics pieces.
Detailed step-by-step setup guide
Step 1: Confirm packaging is actually unlocked
Check the AIC research progression and verify Packaging Tech is completed. If the Packaging Unit doesn’t appear in build options, the blueprint cannot be placed correctly even if it’s visible in a menu.
Step 2: Prepare a clean build area
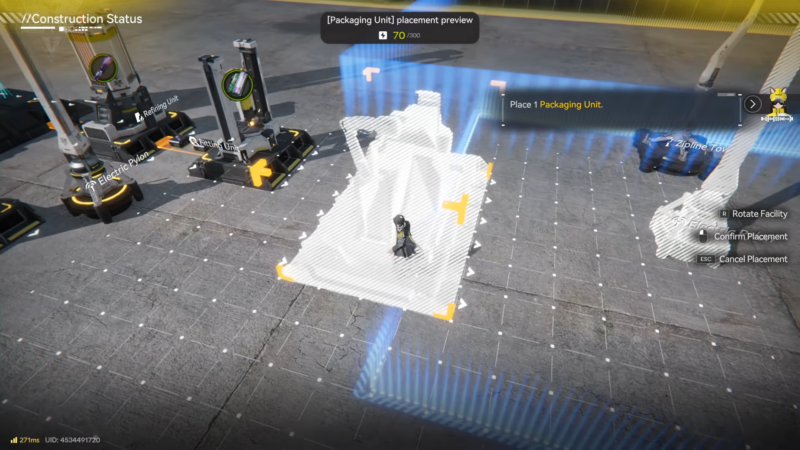
Pick a flat, unobstructed zone with enough room for inputs, the Packaging Unit footprint, and a straight output run. Leaving extra space matters because packaging lines often expand with added buffers, splitters, or a second parallel unit.
Step 3: Place the blueprint exactly as provided
Deploy the simulation blueprint without edits. Don’t rotate or mirror it unless the game explicitly supports that reliably for the same layout.
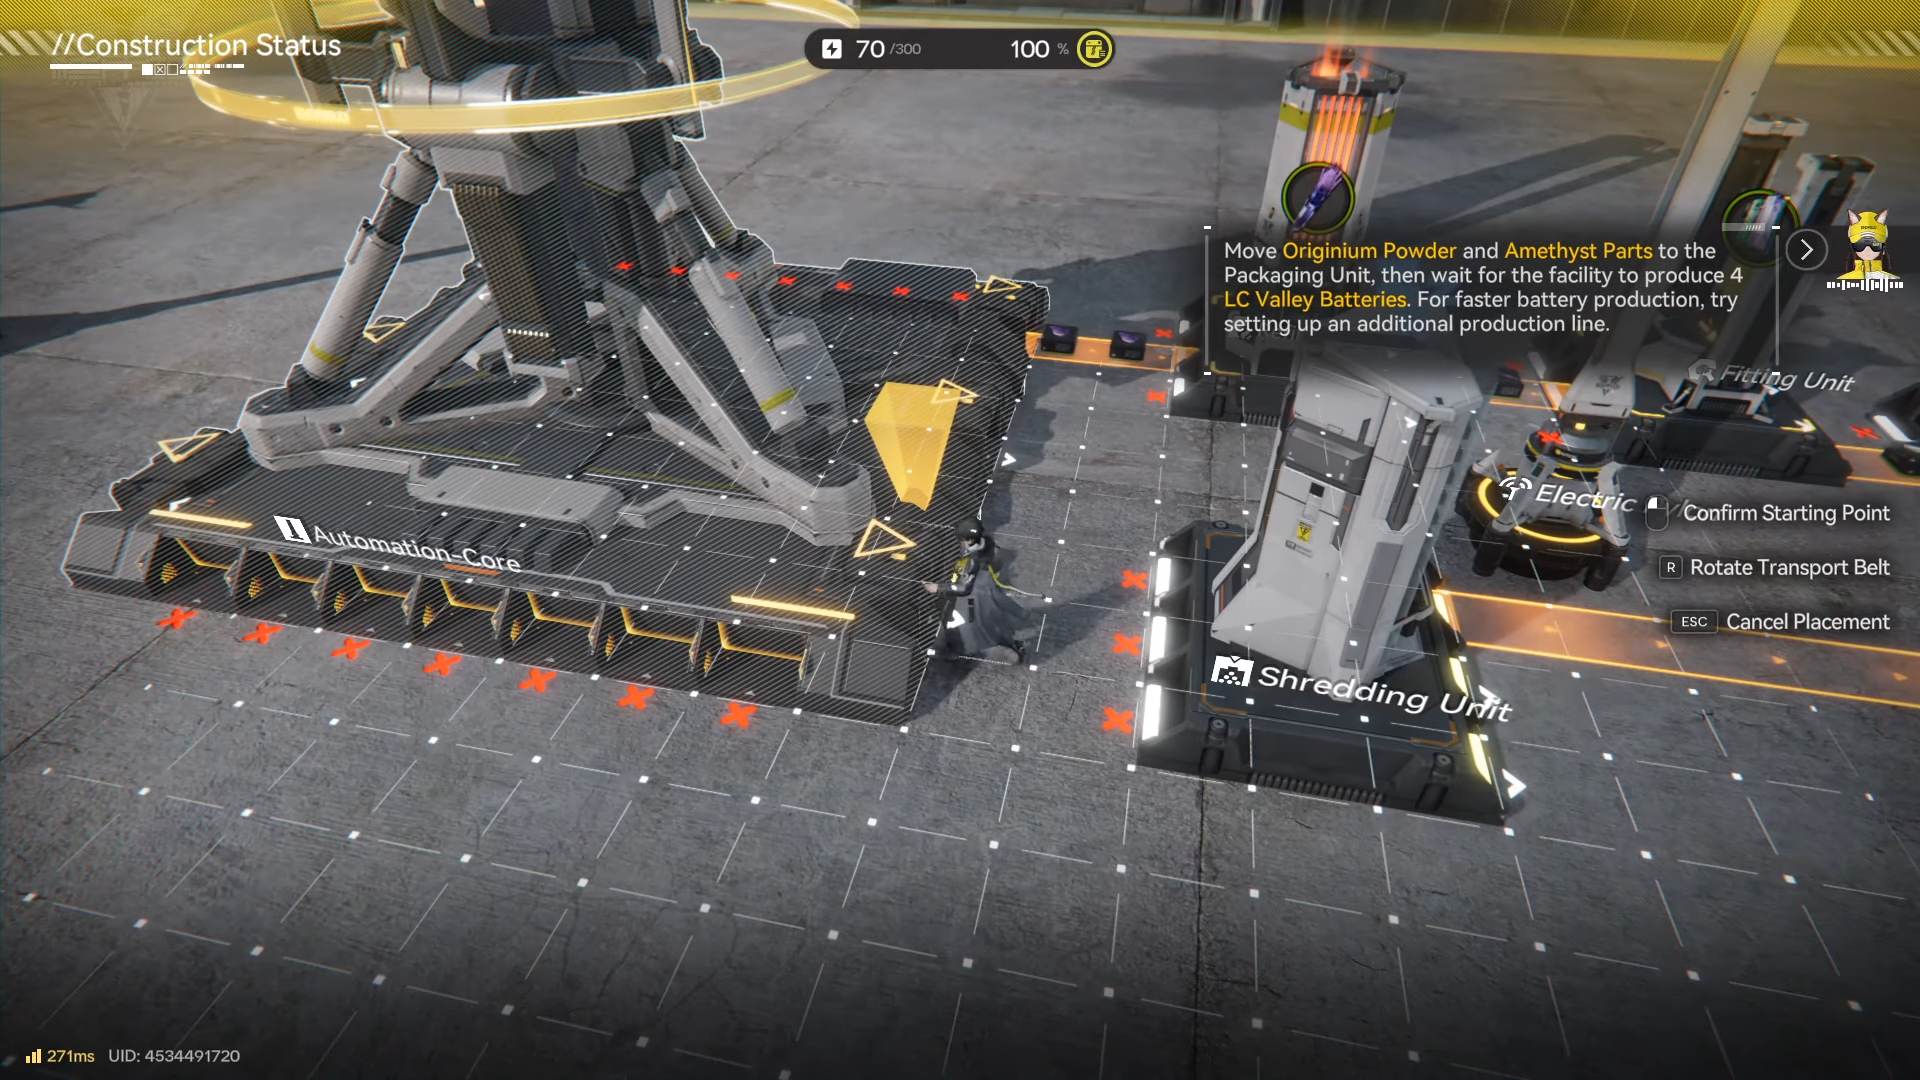
Step 4: Connect power first, then belts
Make sure the unit and any required adjacent structures are powered before diagnosing belt flow. An unpowered unit can look like an input problem when it’s simply not running.
Step 5: Feed only the intended inputs
Provide the exact inputs on the exact lanes the layout expects. If inputs are coming from a mixed belt, split them into dedicated lines before they enter the blueprint area.
Step 6: Verify output handling so nothing backs up
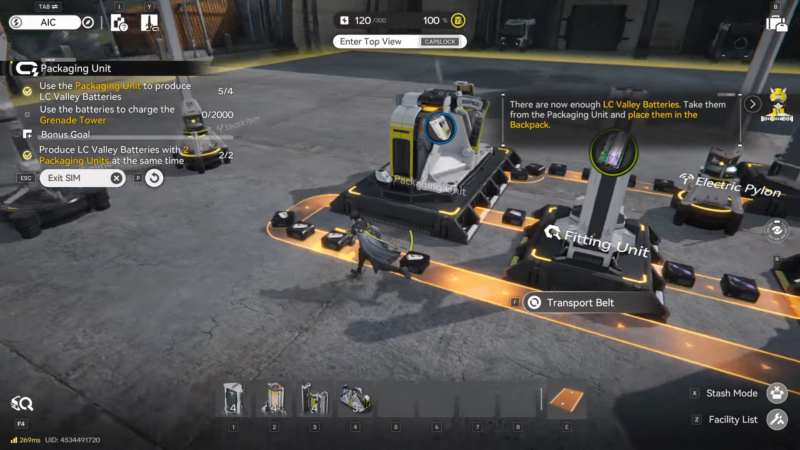
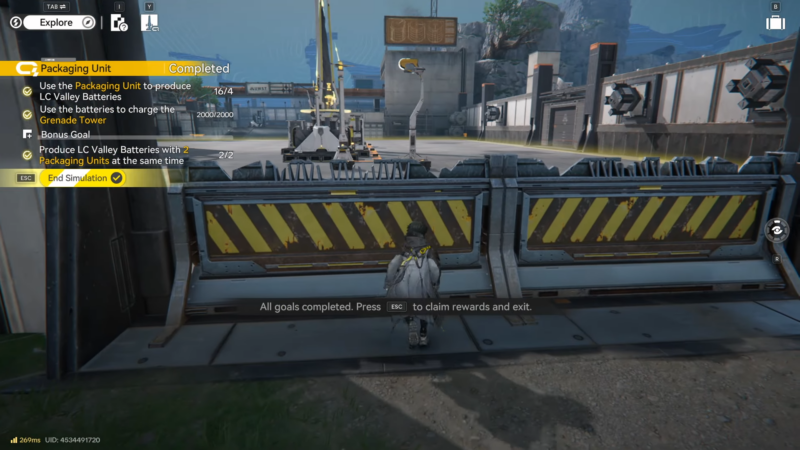
Route outputs to a destination that can accept them continuously (storage, depot transfer, or the next production stage). Many lines “work for 20 seconds” and then stall because the output belt fills and the unit can’t place finished goods.
Step 7: Adapt for the target recipe one change at a time
Change recipe first; test. Then adjust upstream supply; test. Then optimize routing; test. This makes troubleshooting straightforward and prevents chasing multiple interacting problems.
Common issues and quick fixes
Here are the problems most players run into with packaging layouts, plus the fastest way to isolate each one:
- The unit never starts: power coverage missing, recipe not selected, or the unit is not actually unlocked yet.
- Inputs are present but still “missing”: wrong item on the lane, lane is reversed, or a splitter is prioritizing a different branch.
- Runs briefly then stops: output is blocked (full belt/storage), or one input is supplied intermittently and the unit waits for it.
- Looks correct but throughput is poor: upstream chain is the bottleneck (refining/shredding/fitting), or conveyors can’t deliver inputs at the needed rate.
Practical scaling tips for later
Once the first line is stable, scaling usually goes better with duplication than with over-complicating a single line:
- Duplicate the packaging line for parallel output rather than pushing one line to perfection.
- Standardize input formats (same belt directions, same lane conventions) so future expansions snap in easily.
- Add buffers at the edge of the blueprint rather than inside it; the inside should remain “clean” for easy copying.
- Keep outputs simple and straight—complex output routing causes jams faster than complex input routing.
Making the blueprint work reliably
The Packaging Unit Simulation Blueprint is most valuable as a stable baseline: place it unchanged, verify power and lane-correct inputs, ensure outputs can’t back up, then adapt gradually for the chosen recipe and scale. With that approach, packaging becomes one of the easiest factory steps to expand because it’s modular and responds well to parallel duplication.


