This rooting guide for XWJW1 firmware is coming pretty late from us, and we’re sorry for that. But those of you who’re still looking for a great tutorial to root their Galaxy S i9000 running XWJW1 Android 2.3.6 firmware, here it’s ─ noob-proof and neat (as always).
Compatibility!
This guide is applicable only for Samsung’s Galaxy S international version (GT-i9000). Check your phone’s version in Settings – About Phone. It has to be “GT-i9000” for this procedure to be compatible with your phone. If it’s not GT-i9000, please do not try this.
Warning!
The methods and procedures discussed here are considered risky and you should not attempt anything if you don’t know completely what it is. If any damage occurs to you or your device, we won’t be held liable — you only will be responsible, you’ve been warned!!! The procedure has been tested to make sure it works, but things can always go wrong. So be careful.
Pre-installation Tips:
- (Optional) This rooting procedure will NOT erase anything on your phone, however, it’s always best to make a backup of your apps and information like Contacts, SMS, etc, before trying out any such procedure. To backup your apps and data, head to the following article: Android Backup Guide
- Drivers! — it’s important you have the proper drivers installed. Download links below:
32 bit (x86) Windows | 64-bit (x64) Windows
NOTE: If you already have Kies installed on your PC, you already have the drivers and don’t need to download them again. - If you have Kies installed, right-click on the Taskbar, select ‘Start Task Manager’, go to the Processes tab, and then select the ‘KiesPDLR.exe’ and ‘KiesTrayAgent.exe’ processes in the list and end them by clicking the ‘End Process’ button at the bottom right. This is important as Kies can interfere in the flashing process.
Step by Step Guide:
- Download the file ROOTED_GTI9000_I9000XWJW1_stock+.zip. Extract this file using Winzip or WinRAR or similar program to get a folder with the following contents:

- Turn off the phone completely (check button lights), then boot into Download Mode. (Press and hold the following keys in this order: Volume-Down + Home + Power, let go once the Download screen comes up) The phone will boot into Download mode and show a screen as shown below.
- Open ODIN by clicking on the file I9003_ODIN3 v1.82 file
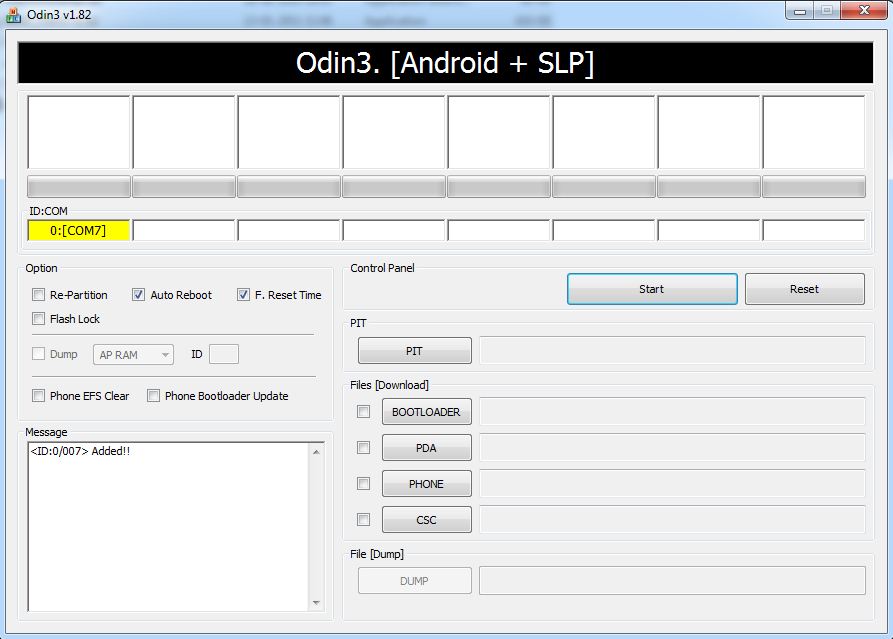
- Now, connect your phone (while in download mode) to the PC. You’ll see ODIN say ADDED! if the device is detected (Check screenshot below). If your device doesn’t get detected, try connecting the phone to a different USB port and also check whether you have the drivers installed properly.

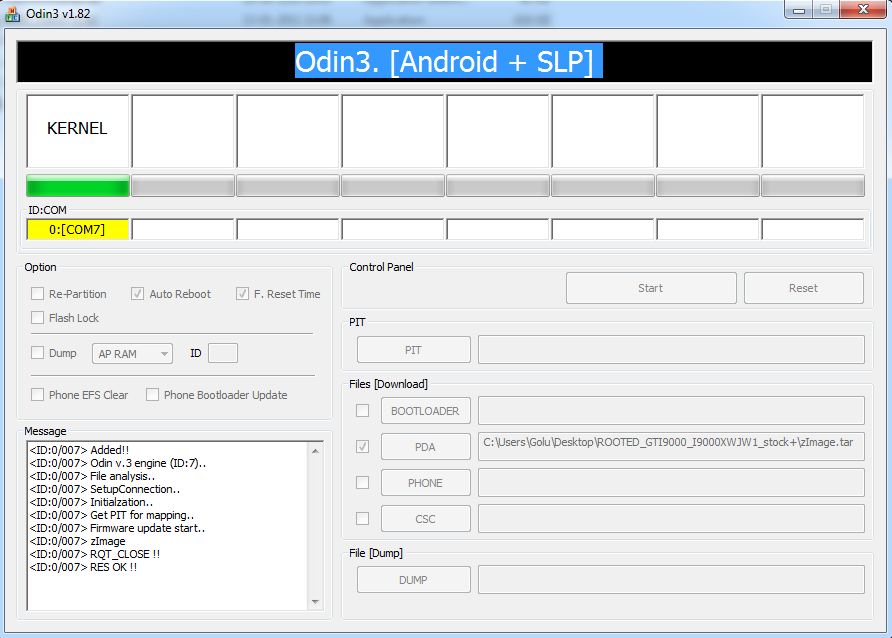
- Now, click on the PDA button in ODIN, then navigate to the folder you extracted and double-click the file named zImage.
- Now, click on Start, and let the procedure finish. Your phone will automatically reboot after the flashing is done. Do not disconnect the phone yet. (Check screenshot below)

- Now, close ODIN. However, keep the phone connectedto the PC.
- Let the phone boot up completely. Then, with phone connected to PC, run the file called ‘RUNME’ (from the folder you extracted in Step 1). A screen will come up and close automatically after doing this.
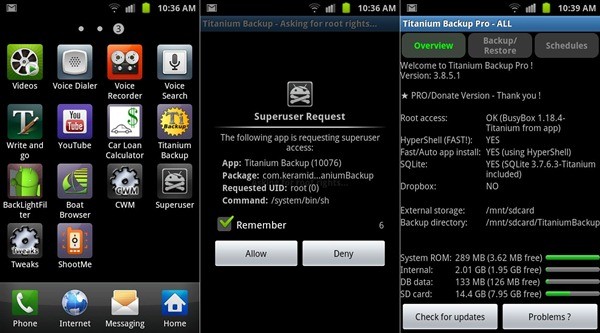
- Now, go to the Market, search for Superuserand install that.
- That’s it, you now have root access on your phone. Enjoy!
NOTE: If Odin doesn’t seem to be progressing/doing anything for more than a minute, do the following:
Disconnect the phone from the PC, close ODIN, remove battery, re-insert it, turn phone on in Download mode again, and do the procedure again from Step 3.
That’s it. Let us know in the comments below if you run into any problem, we’ll try to help 🙂


nice 😀
great article Abhijeet. I am sure many will find this helpful.u00a0
great article Abhijeet. I am sure many will find this helpful.
nice 😀
nice 😀
great article Abhijeet. I am sure many will find this helpful.u00a0
great article Abhijeet. I am sure many will find this helpful.
Hi : I’m using xwjvh 2.3.3 ,can I user the newer version ?
You should use the CF-Root version for XWJVH. get the related file from here, then follow this guide with that file to root it:
http://forum.xda-developers.com/showthread.php?t=788108
@Gazza….yes you can….use this guide first to upgrade to 2.3.6
http://nerdschalk.com/new-android-2-3-6-firmware-leaked-for-galaxy-s-i9000-
and then use the above guide to root it….
@Gazza….yes you can….use this guide first to upgrade to 2.3.6
https://nerdschalk.com/new-android-2-3-6-firmware-leaked-for-galaxy-s-i9000-
and then use the above guide to root it….
Hi : I’m using xwjvh 2.3.3 ,can I user the newer version ?
You should use the CF-Root version for XWJVH. get the related file from here, then follow this guide with that file to root it:
http://forum.xda-developers.com/showthread.php?t=788108
@Gazza….yes you can….use this guide first to upgrade to 2.3.6
http://nerdschalk.com/new-android-2-3-6-firmware-leaked-for-galaxy-s-i9000-
and then use the above guide to root it….
Hi,
I receive the following error:
C:UsersdmeDesktopROOTED_GTI9000_I9000XWJW1_stock+>RUNME.BAT
** Stock+ Rooted kernel update for I9000XWJW1 GT-i9000 ROM
**
** RUN ODIN and flash zImage as PDA, after successfully reboot, enable USB Debug
ging and push Space here to continue!
**
**
Press any key to continue . . .
** Remounting filesystem
error: device not found
** Pushing SU …
error: device not found
** Changing owner and permissions of SU ..
error: device not found
error: device not found
** SU installed! your phone is now r00ted!
** Regards by stock+ team! and gratz to all XDA-DEVELOPERS!
Install Titanium backup (free app) from android market and see it’s working. You may have got root and cwm already. Let me know.
What have they done with Internet?! To get one free file downloaded I already used one hour and still no result, just endless loop of premium and free download links and waitings!
What have they done with Internet?! To get one free file downloaded I already used one hour and still no result, just endless loop of premium and free download links and waitings!
What have they done with Internet?! To get one free file downloaded I already used one hour and still no result, just endless loop of premium and free download links and waitings!
hi,
I tried to do this and had to restart my comp before hand then forgot to close kies again.
Did the odin thing and it said it was successful. but now when it tries to reboot it comes up with the galaxy loading screen that comes up when you first turn it on, then it stays there for a while then it disappears then comes back again.
What can I do??
Where can I get the file please!! All links seem to be dead 🙁
Where can I get the file please!! All links seem to be dead 🙁
Where can I get the file please!! All links seem to be dead 🙁
LINKS ARE BROKEN. now the links are to one of those crappy installers trying to install all sorts of malware. Please fix
LINKS ARE BROKEN. now the links are to one of those crappy installers trying to install all sorts of malware. Please fix
LINKS ARE BROKEN. now the links are to one of those crappy installers trying to install all sorts of malware. Please fix
Stuck in bootloop after odin says Success. What do i do?
Stuck in bootloop after odin says Success. What do i do?
Stuck in bootloop after odin says Success. What do i do?
Well the firmware link just make me download malware and everyone seem to have problems with getting firmware to work, so i think ill just skip this.
Well the firmware link just make me download malware and everyone seem to have problems with getting firmware to work, so i think ill just skip this.
Well the firmware link just make me download malware and everyone seem to have problems with getting firmware to work, so i think ill just skip this.