
What to know
- You can import external
.OBJmodels directly in Creative Mode - Imported models are converted into voxel/block structures
- Scale and block material are chosen during import
- Models become fully editable with standard Creative tools
Hytale gives creators powerful tools to build large, detailed structures quickly. One of the most useful features in Creative Mode is the ability to import external 3D models in .OBJ format and convert them into in-game voxel builds you can edit like any other structure.
Below is a clear, up-to-date guide on how this system works and how to use it effectively.
How OBJ model importing works in Creative Mode
When you import a .OBJ file, the game does not keep it as a traditional polygon mesh. Instead, Hytale voxelizes (volumetric pixels) the model, converting its shape into blocks. Once placed, the structure behaves exactly like a normal build, meaning you can replace blocks, recolor materials, or reshape parts freely.
This makes OBJ importing ideal for large-scale builds where manual construction would be slow or repetitive.
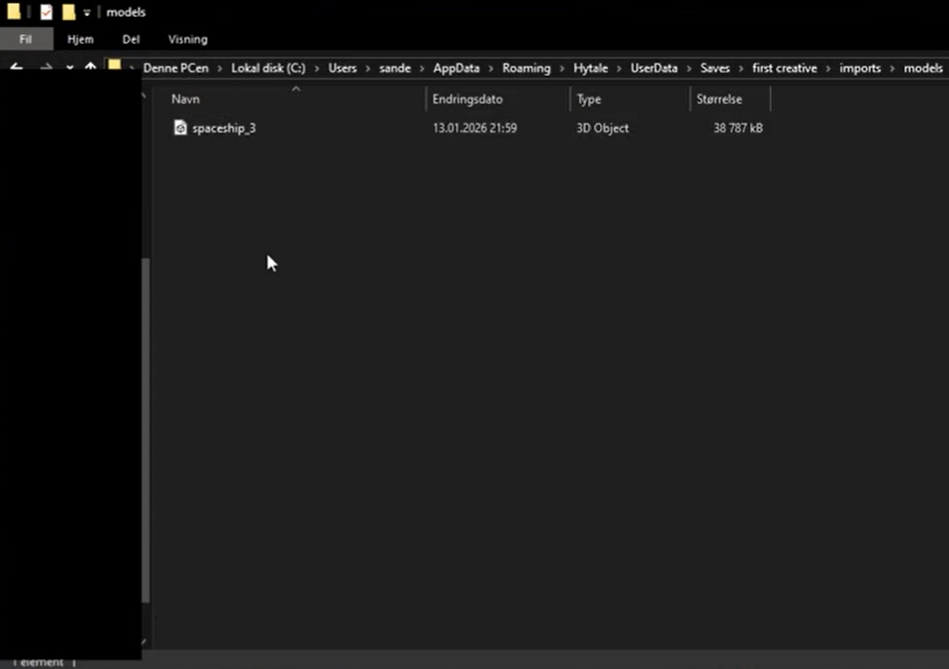
Where to save your 3D model OBJ file
Follow this path to find the Import folder in the Hytale app data on your PC.
App Data > Roaming > Hytale > UserData > Saves > “select world” > imports > models
You can save your .OBJ file here so that it reflects on the Hytale database when you want to import it.
How to import a 3D OBJ model step by step
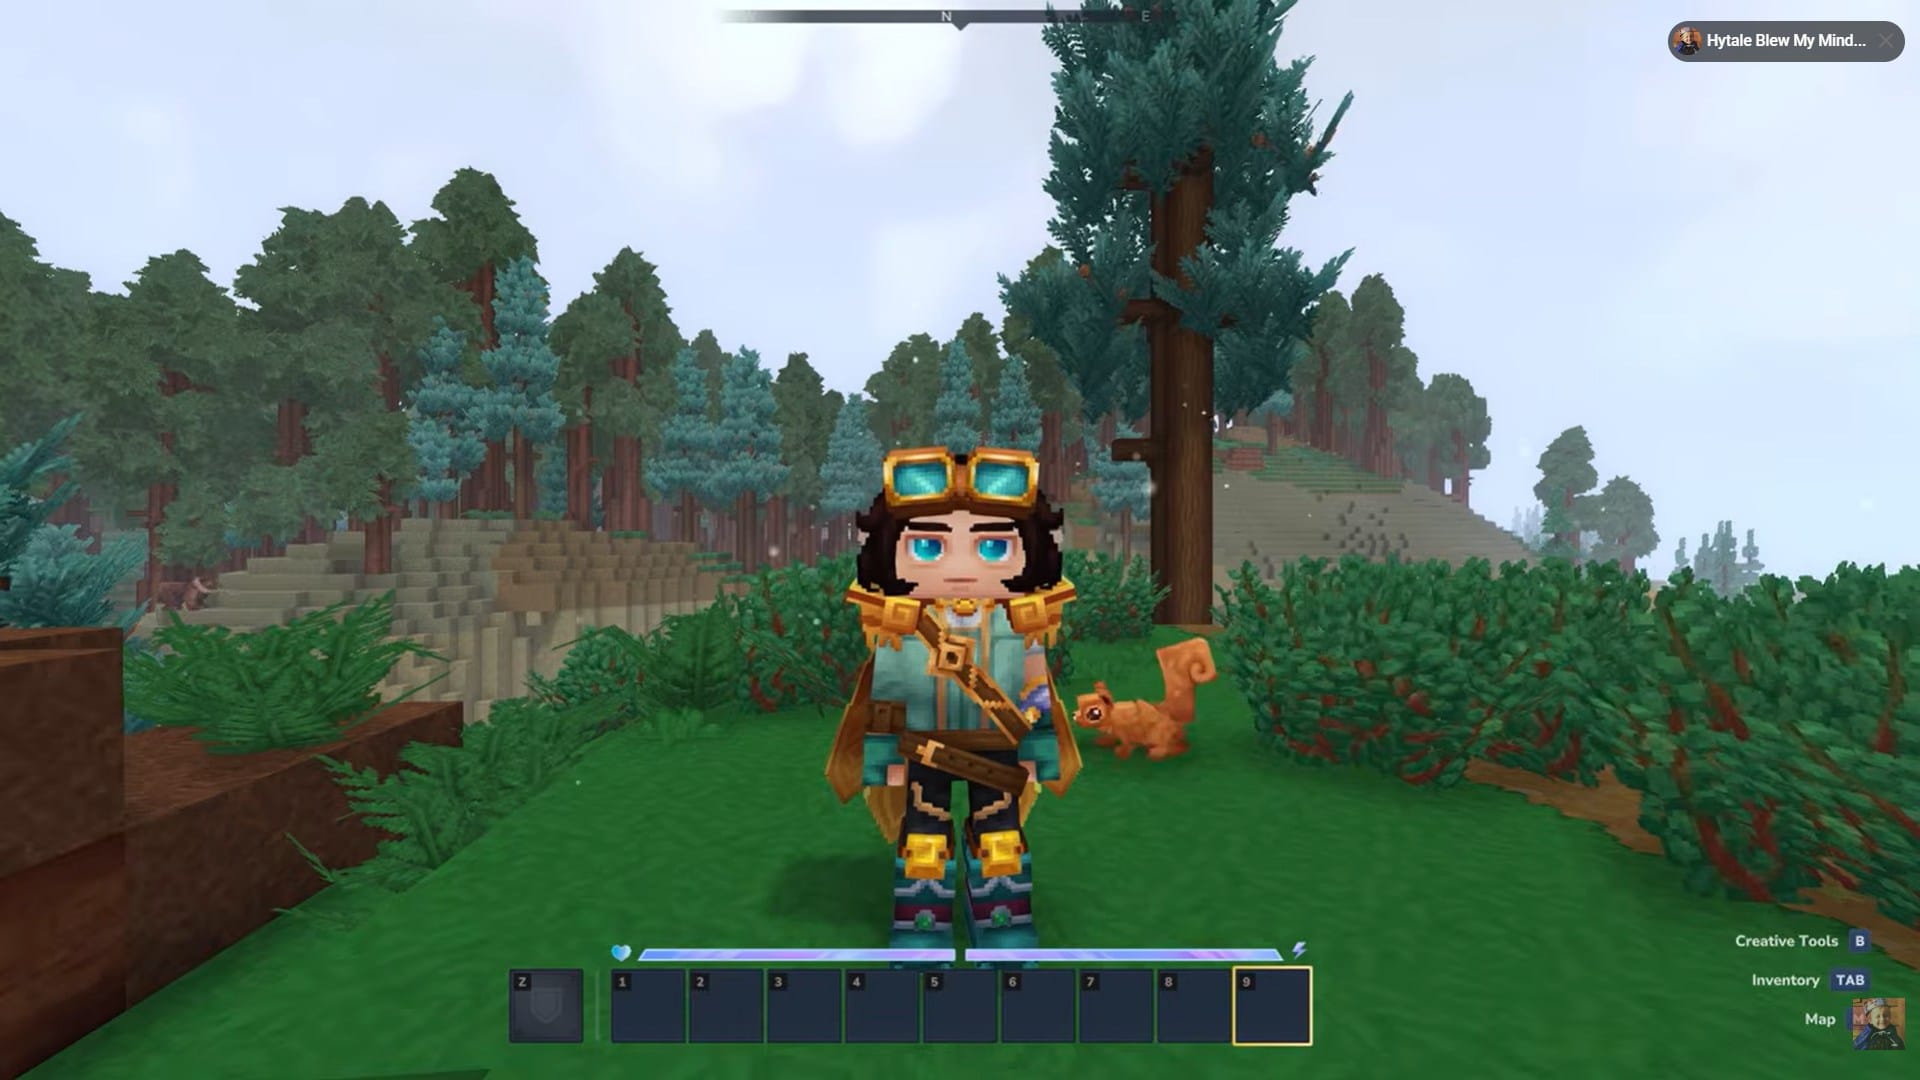
Step 1: Enter Creative Mode
Launch the game and load a world in Creative Mode. Importing tools are not available in Survival worlds.
Step 2: Open World Tools
Open the Creative interface and access the World Tools menu, where structure and terrain utilities are located.
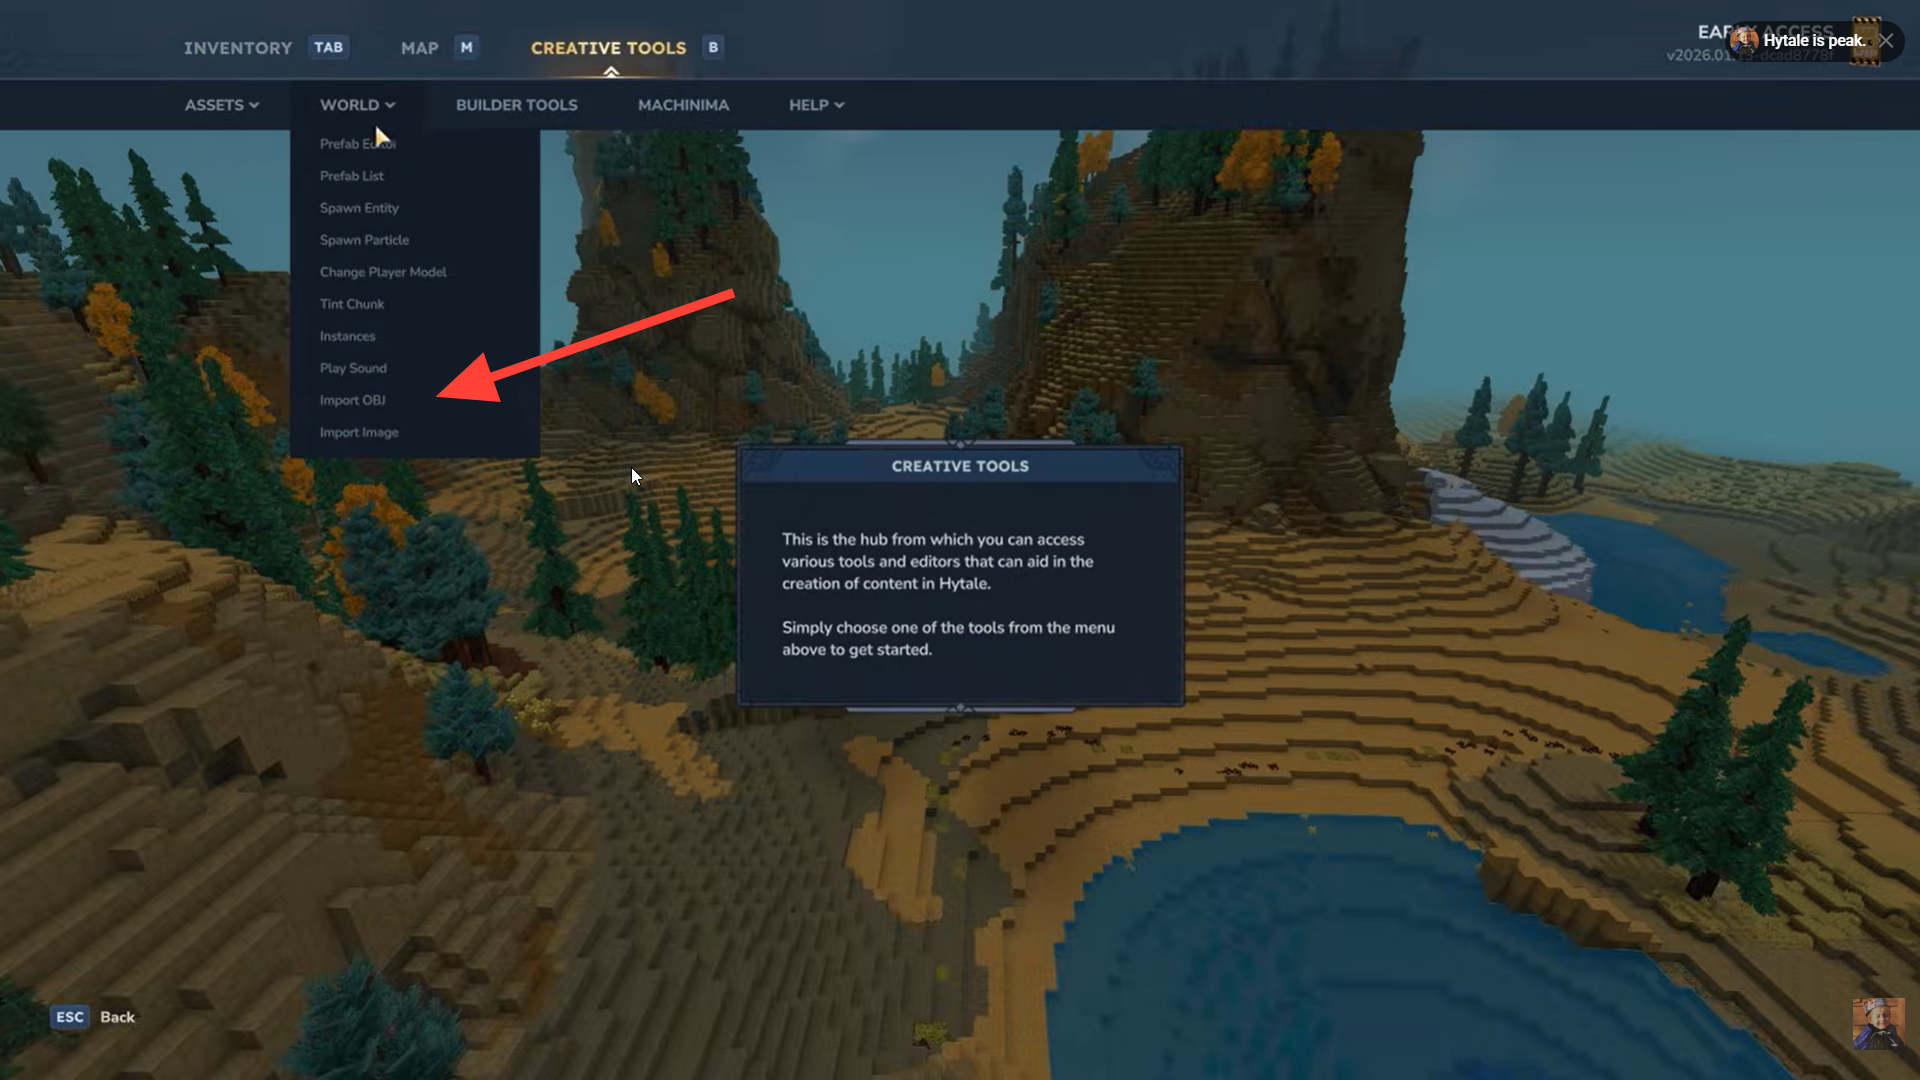
Choose the Import OBJ option. This opens a file browser allowing you to locate your .OBJ file.
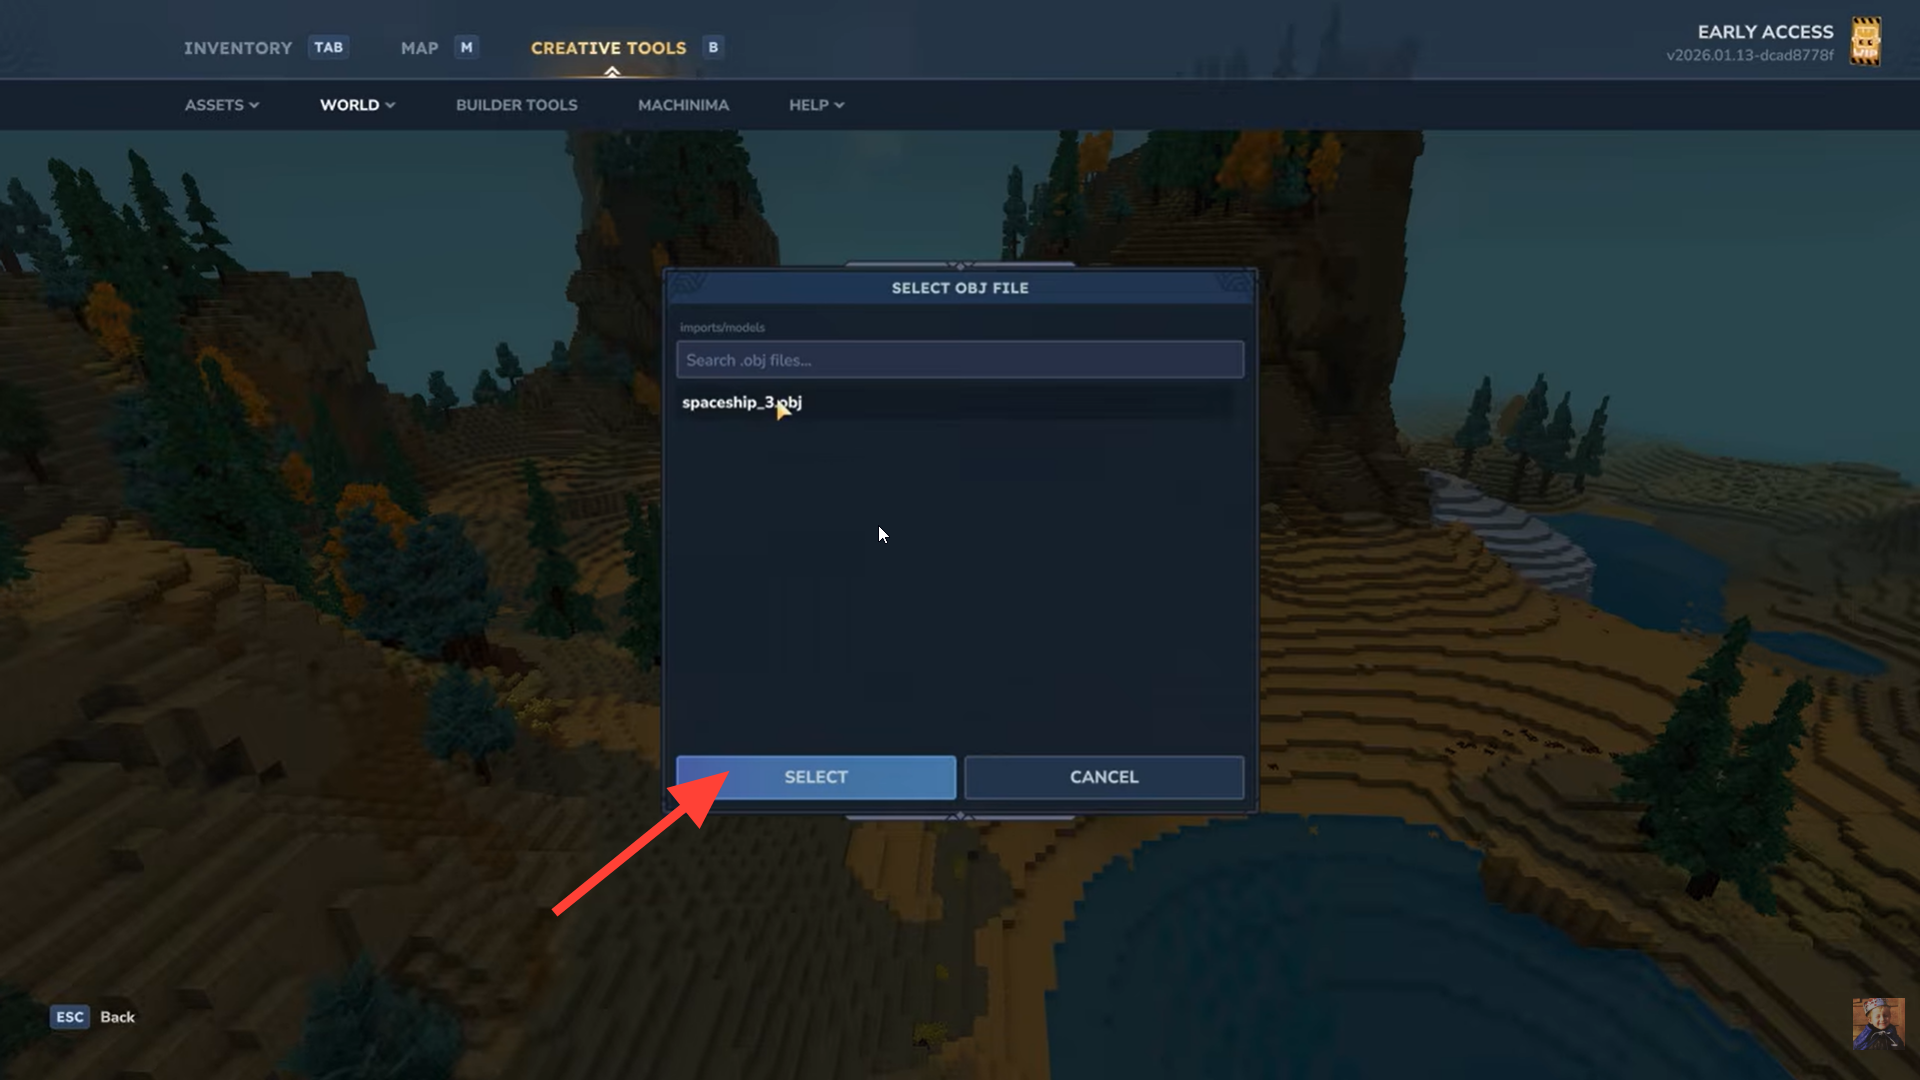
Step 3: Choose the OBJ file
Navigate to the folder containing your model and select the .OBJ file you want to import.
Step 4: Set the model scale
You’ll be prompted to define the model’s height in blocks. This value determines how large the structure will be once placed in the world.
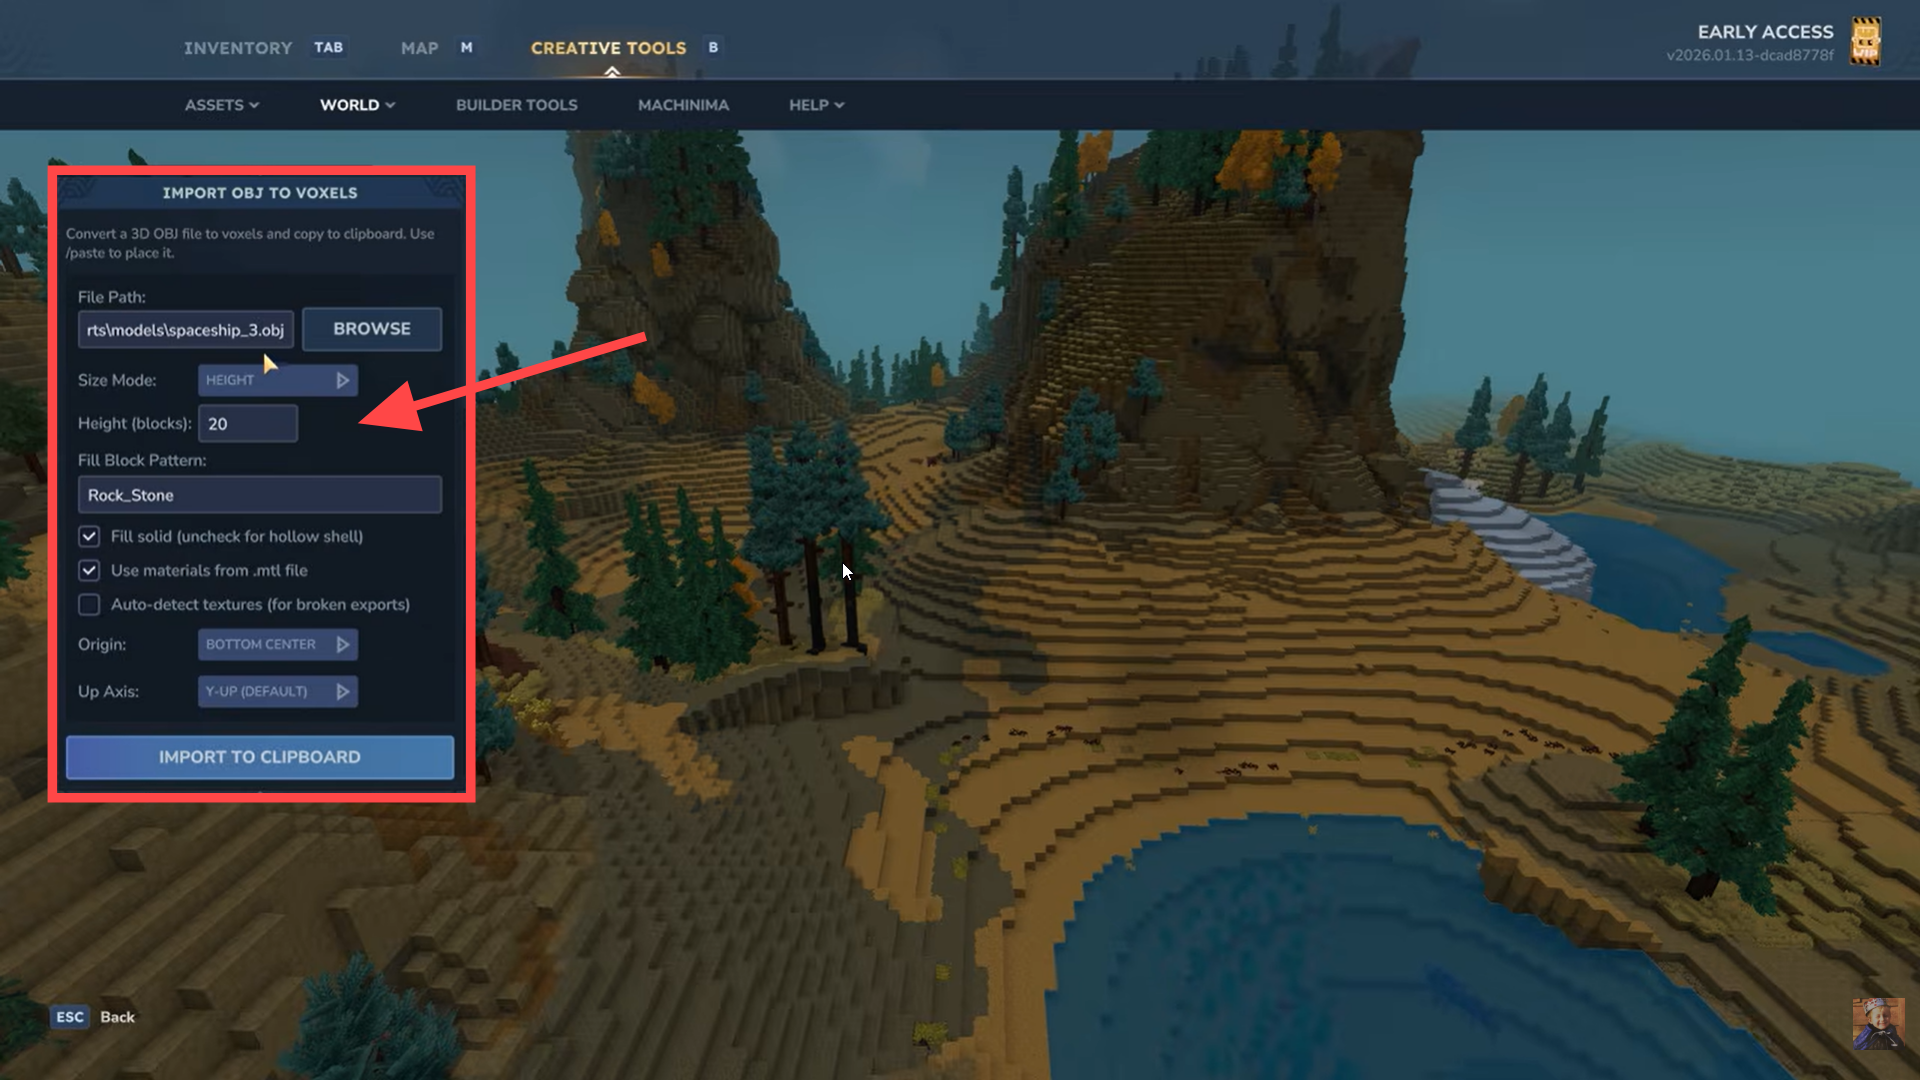
Step 5: Place the structure
Select the block type that will fill the imported model, such as stone, wood, or another base material. You can change individual blocks later.
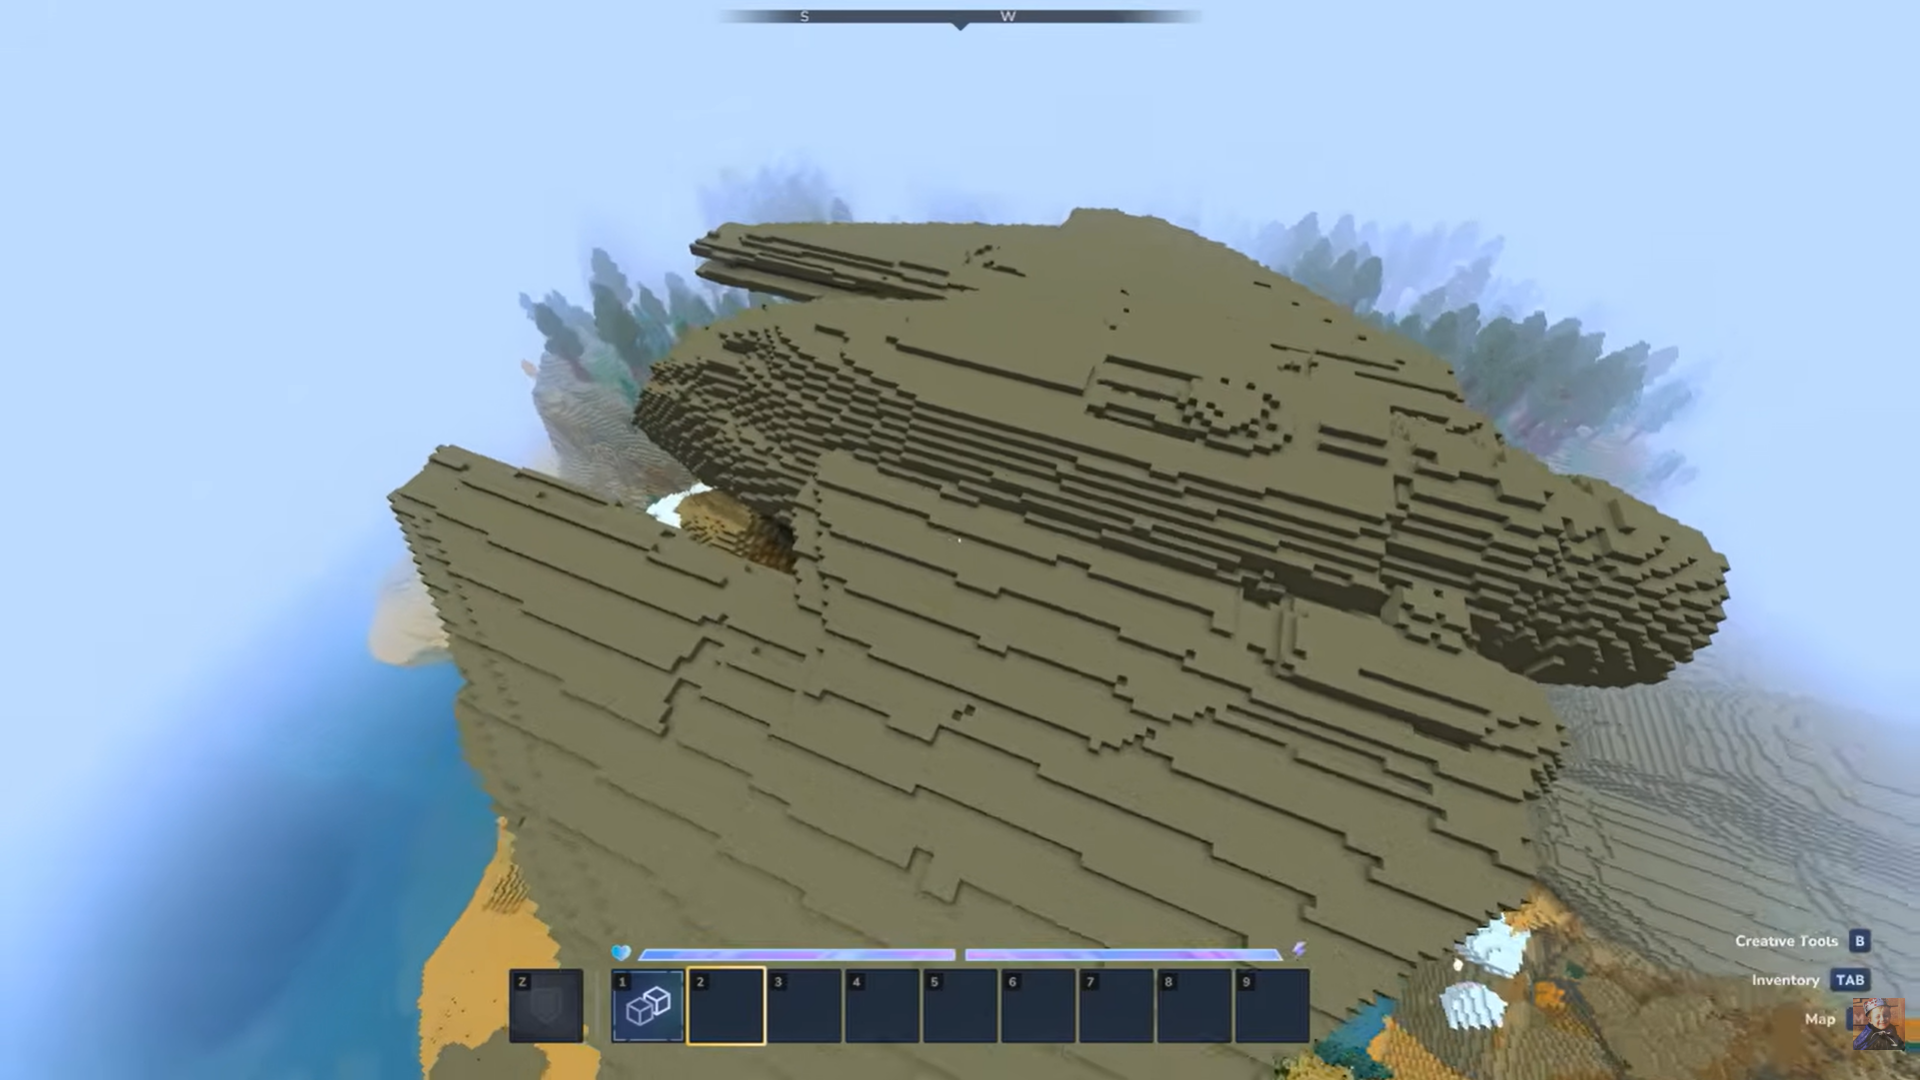
After importing, the model acts like a placement brush. Click in the world to place it, then fine-tune the structure using standard Creative tools.
Best practices for clean imports in Hytale
- Using simple meshes is important because complex geometry can create uneven or messy voxel conversion results.
- Keeping the scale consistent matters because it prevents models from being imported as oversized or too small.
- Optimizing models before importing them is necessary because it helps reduce the total block count and prevents in-game lag.
- Testing with small models first is helpful because it allows you to understand and adjust to how scaling behaves during the import process.
Common use cases for imported models
- Large statues and monuments
- Custom buildings and landmarks
- Decorative props for adventure maps
- Terrain features like cliffs or ruins
Because imported structures are fully editable, you’re never locked into the original model shape.
Thanks for staying till the end! If this how to import 3D models guide for Hytale made things easier or gave you useful insights, we’d love to hear your thoughts. Drop your feedback or questions in the comments—we’re always active and ready to assist with anything that still feels unclear.


