- What to know
- Understanding Agony modifiers and Trim Medal conditions
- Building a reliable F2P squad for Agony clears
- How to clear Bolts and Shadows in Agony
- How to handle Rampaging Shields without triggering rage chaos
- How to break Rock Solid before the attack buff spirals
- Trim Medal rewards overview
- Securing the F2P Trim Medal
What to know
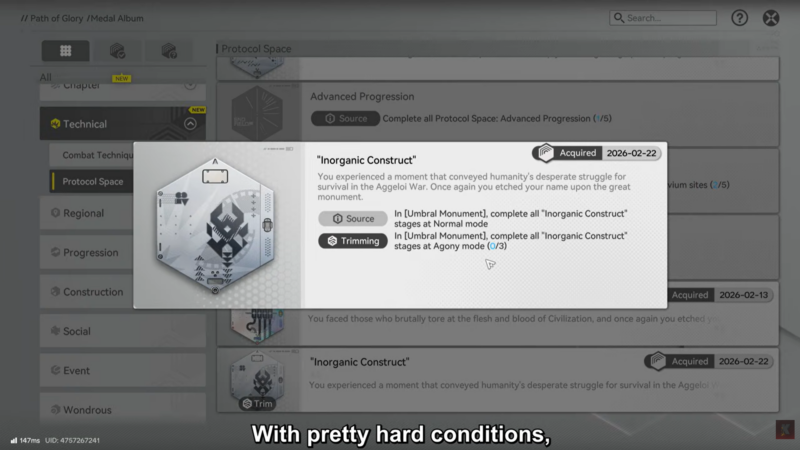
- Umbral Monument: Inorganic Construct (Agony) is tuned for Recommended Operator Level 90 and restricts tacticals and consumables.
- Each stage has unique mechanics that punish sloppy clears, especially stagger recovery and rage buffs.
- You have 10 minutes per stage, so a steady, controlled pace is safer than rushing.
- A reliable healer and balanced damage composition are essential for F2P consistency.
The Umbral Monument: Inorganic Construct – Agony difficulty in Arknights Endfield is designed as a mechanical check rather than a raw stat wall. If you are aiming for the Trim Medal using a free-to-play squad, you need consistency, clean execution, and a proper understanding of each stage’s gimmicks. While the recommended level is 90, disciplined play and smart team construction allow F2P players to complete it reliably without premium-heavy investments.
Below is a quick overview of the three Agony stages before we break them down in detail.
| Stage Name | Core Threat | Key Mechanic | Primary Counter | Trim Risk Factor |
|---|---|---|---|---|
| Bolts and Shadows | Immunity cycling boss | Destroy small triple-linked enemies to remove immunity | Balanced DPS + Healer | Ignoring flying enemies |
| Rampaging Shields | Dual rushing elites | Rage mode if one dies early | Physical control and synchronized kill | Desynced elimination |
| Rock Solid | Core-based boss | Shortened weakpoint window + ATK buff if failed | Burst damage during exposure | Poor stamina management |
Understanding Agony modifiers and Trim Medal conditions
The Agony difficulty layer increases enemy strength while removing safety nets. Across stages, enemies are stronger, recover from stagger more quickly, and are harder to interrupt. Certain stages also prevent the use of tacticals and consumables, which removes emergency recovery options.
The Trim Medal requirement hinges on clearing the Agony difficulty without failing the conditions attached to the event. In practice, that means surviving the increased pressure while maintaining proper mechanical execution. You are not racing against an extreme timer, since each stage provides a 10-minute clear window, but you are heavily punished for mistakes.
Because stamina recovery may be reduced and stagger windows are shorter, you cannot rely on panic dodging or brute force. Controlled positioning and proper skill timing matter far more than flashy play.
Building a reliable F2P squad for Agony clears
A successful free-to-play clear revolves around three pillars: sustained healing, consistent physical interruption, and burst damage during vulnerability windows.
A healer like Ardelia is strongly recommended for F2P teams. Even with a simple build focused on healing efficiency links and recovery optimization, she stabilizes otherwise lethal situations. Agony scaling makes chip damage accumulate quickly, so passive sustain is critical.
Physical damage sources are especially valuable in the second stage, where interrupting movement can prevent devastating rush attacks. Units capable of applying physical status effects or control contribute far more than pure elemental burst in that encounter.

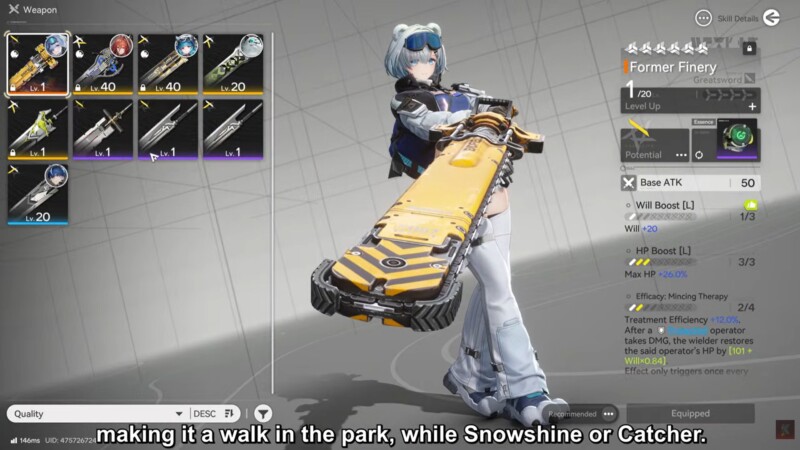
Snowshine and Catcher are particularly useful for F2P players because they provide accessible control and defensive utility. Snowshine can block and mitigate, while Catcher adds additional crowd stability. The key is synergy, not rarity.
How to clear Bolts and Shadows in Agony
This first stage introduces immunity cycling tied to auxiliary enemies.
The boss periodically becomes immune, and the immunity can only be removed by eliminating small triple-linked enemies. These enemies are not optional. If you ignore them, you lose valuable uptime and risk timeout pressure.

Flying enemies are also present and can become extremely disruptive. They chip away at your formation and disrupt healing patterns, especially under reduced stagger conditions.
Stage mechanics snapshot
| Mechanic | Effect |
|---|---|
| Increased enemy strength | Higher sustained damage intake |
| Faster stagger recovery | Harder to interrupt |
| Immunity phase | Requires killing triple-linked adds |
| No tacticals/consumables | No emergency recovery |
Execution approach
Keep your formation tight and do not chase the boss aggressively during immunity. When triple-linked enemies spawn, immediately pivot your DPS to eliminate them. Once immunity drops, rotate back into burst damage on the boss.

Maintain healer uptime constantly. Because stamina management matters less here compared to Stage 3, controlled dodging rather than spam rolling is sufficient.
The Trim risk comes primarily from neglecting flying enemies or failing to remove immunity quickly. As long as you rotate targets properly and keep sustain active, this stage is manageable even for F2P.
How to handle Rampaging Shields without triggering rage chaos
The second stage is widely considered the most difficult of the three. Two rushing enemies apply heavy pressure and deal high burst damage. The key mechanic is their rage mode.
If one enemy dies significantly earlier than the other, the surviving unit enters rage mode, gaining attack and HP restoration buffs, making the fight exponentially harder.

Stage mechanics snapshot
| Mechanic | Effect |
|---|---|
| Stronger enemies | Increased base damage |
| Faster stagger recovery | Harder interruption |
| Rage trigger | ATK + HP recovery if partner dies |
| Movement pressure | Constant rushing |
Control-focused strategy
This stage favors physical compositions because physical attacks can interrupt or slow the rushing enemies. Snowshine and Catcher are particularly useful here due to their ability to block or stabilize incoming pressure.
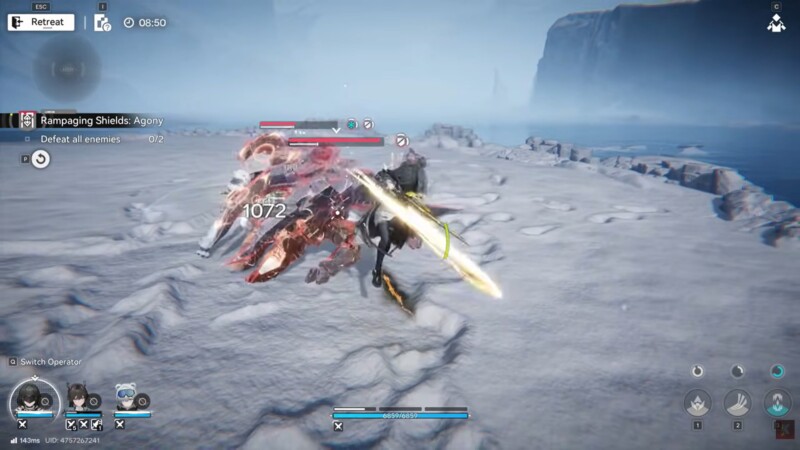
The critical rule is synchronized elimination. You should weaken both enemies evenly before committing to burst. Monitor health bars closely. Once both are near defeat range, execute coordinated burst damage to remove them nearly simultaneously.
If rage mode triggers, do not panic. Maintain healer uptime and rely on disciplined dodging. However, preventing rage mode entirely is the safest route for Trim consistency.
This stage tests patience. Do not rush damage cycles just because the timer allows 10 minutes. Agony punishes impatience more than low DPS.
How to break Rock Solid before the attack buff spirals
The final stage, Rock Solid, introduces stamina pressure and weakpoint timing.
Operator stamina recovery is significantly reduced, making random dodge spam extremely dangerous. The boss exposes a core temporarily. If you fail to destroy it within the exposure window, the boss gains a massive attack buff.

Stage mechanics snapshot
| Mechanic | Effect |
|---|---|
| Reduced stamina recovery | Limited dodge capacity |
| Shortened weakpoint window | Faster reaction needed |
| Massive ATK buff if failed | Damage spike |
| No consumables | No emergency patch |
Managing stamina and burst timing
Avoid unnecessary dodges. Only evade when an attack is guaranteed to connect. Since stamina regeneration is limited, poor resource management can lead to lethal situations later in the fight.
When the core becomes exposed, shift immediately into full burst rotation. This is where your damage check lies. F2P squads must ensure at least one reliable burst source is available during this window.
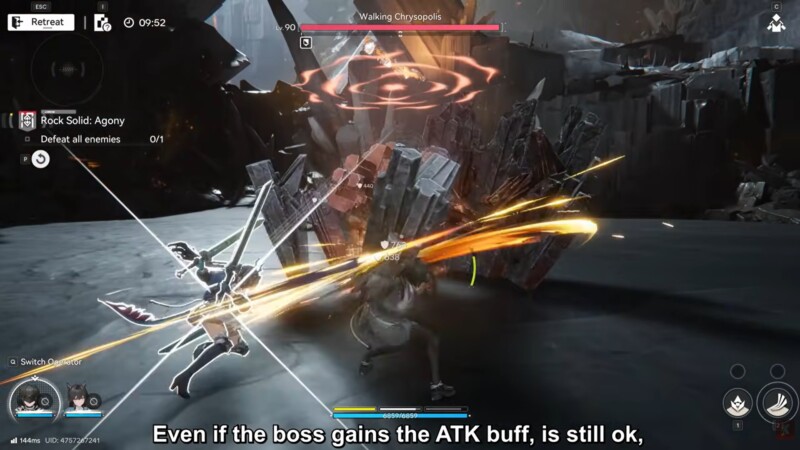
If the boss gains the attack buff, survival becomes much tighter but still possible. Clean dodging can offset the increased damage, though it prolongs the encounter.
Consistency here depends on discipline. Preserve stamina for key mechanics and focus on core break efficiency.
Trim Medal rewards overview
The Trim Medal completion on Agony difficulty grants standard event rewards plus the trimmed version of the commemorative medal. Based on current event structure, rewards typically include currency and enhancement materials.
| Reward Type | Description |
|---|---|
| Event Currency | Used in limited-time shop |
| Upgrade Materials | Character progression items |
| Enhancement Resources | Equipment strengthening |
| Trimmed Medal | Permanent achievement cosmetic |
While the material rewards are valuable, the Trim Medal itself represents mastery of the Agony mechanics under restriction conditions.
Securing the F2P Trim Medal
The Umbral Monument: Inorganic Construct – Agony challenge in Arknights: Endfield is less about raw power and more about discipline, synchronized eliminations, and precise burst timing. If you build around sustained healing, controlled physical interruption, and smart stamina usage, a free-to-play squad can absolutely secure the Trim Medal.
You are given enough time to play methodically. Respect the mechanics, avoid unnecessary risks, and focus on synchronized kills and core breaks. With patience and clean execution, the Trim Medal is entirely within reach.


