What to know
- You can edit StandBy to remove existing widgets added by default.
- To enter the editing mode, tap and hold on to a widget when the StandBy is active.
- You can replace or add multiple widgets for a supported app. You can switch between multiple widgets by swiping on them.
- Turning on Smart Rotate will automatically display relevant widgets based on your Siri suggestions and past usage.
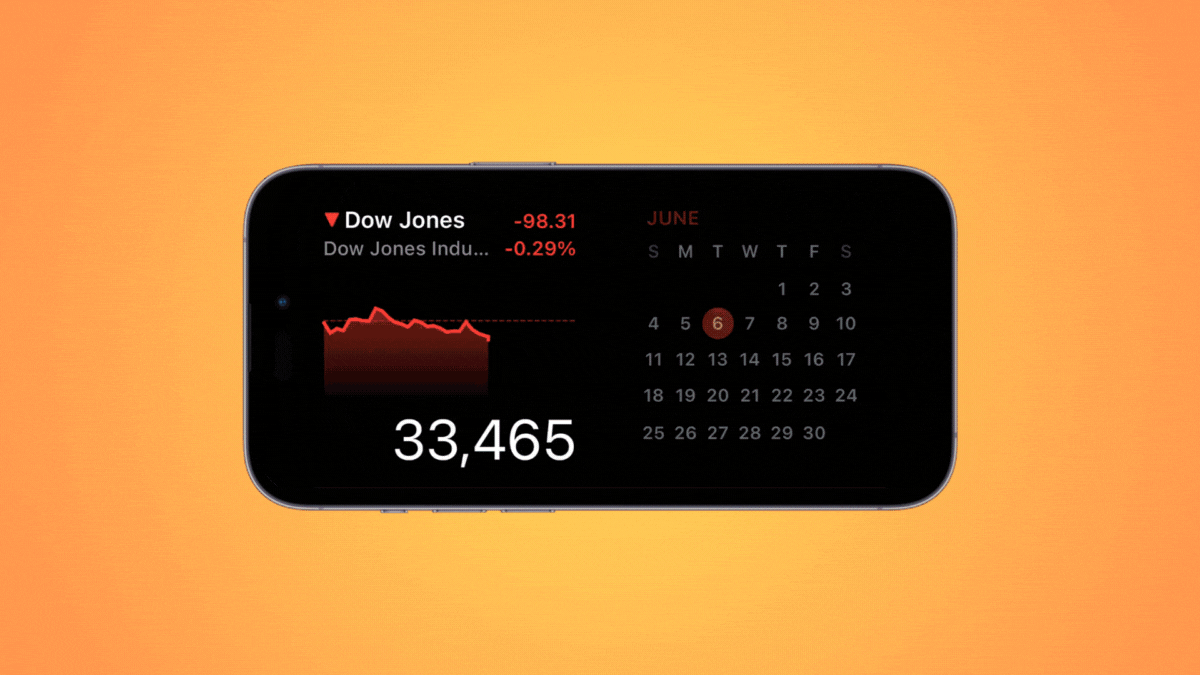
With the iOS 17 update, you get the StandBy mode on your iPhone, which is a new and improved way to view information at a glance while your phone is idle. You can view the clock, check on upcoming events, view the calendar, weather information in your area, and much more using the StandBy. Once enabled, your iPhone will automatically enter the StandBy once it is placed in landscape mode while charging.
This is ideal for wireless charging nightstands or times when you leave your iPhone charging and idle during your daily workflows. You can then swipe between the widgets displayed in StandBy to view different information from different apps. But you might want to change these widgets or remove some of them depending on your preferences and the information you wish to see regularly. So here’s how you can edit and customize the StandBy according to your preferences on your iPhone.
How to edit and customize StandBy on iPhone
StandBy can be edited when it is active on your iPhone. Follow the steps below to edit and customize the StandBy.
- Required: iOS 17 update (Check under Settings > General > Software Update).
Enter the StandBy & choose a page to edit
Start by entering the StandBy on your iPhone. If you have a wireless charging stand, you can simply place it on the same in landscape mode. Alternatively, you can start charging it using a wired charger and place it in landscape mode for a few seconds to enter the StandBy. Once you enter the StandBy, you can swipe and choose the page you wish to edit. Swipe left to switch between different pages of the StandBy.

Note: You will be required to unlock your device so you can edit and customize the StandBy. You can use Face ID to unlock your iPhone in landscape mode on iPhone 13 and above. However, if you have an older iPhone, then you will be prompted to enter your passcode instead.
Edit the widgets Standby page
The Widgets standby page is the first page visible by default. It contains various widgets for stock apps by default that can be removed, replaced, or customized according to your preferences. You can add multiple widgets to this page and even enable smart rotate to switch between them intelligently based on your previous usage. Follow the sections below to help you customize the widgets on the Standby page on your iPhone.
Remove widgets from the StandBy widgets page
With StandBy active on your iPhone, follow the steps below to remove widgets you no longer wish to view from your iPhone.
Tap and hold on to any widget stack in the StandBy.

Note: If you wish to edit the left widget stack, tap and hold on it. If you wish to edit the right widget stack, tap and hold on the same.
You will now be asked to verify your identity. If you have an iPhone 13 or higher, you can use Face ID. However, if you have an iPhone 12 or older, then you can use your passcode instead.

Once unlocked, you will have entered the editing mode. Now tap the minus (![]() ) beside the widget you wish to remove.
) beside the widget you wish to remove.

Tap Remove to confirm your choice.

Repeat the steps above to remove any additional widgets you might wish to remove from the StandBy.

Tap Done in the top right corner once you’re done removing widgets.

And that’s how you can remove widgets from the Widgets Standby page.
Add Widgets to the StandBy widgets page
When you’re in StandBy, follow the steps below to add widgets to the widgets page in StandBy. Let’s get started.
Tap and hold onto a widget to enter the editing mode. Tap and hold on to the widget on the left to edit the left widget stack or on the right side widget to edit the widget stack on your right.

Verify your identity once you’re prompted. As stated earlier, you will be required to use your passcode on iPhone 12 and older or use your Face ID on iPhone 13 or higher.
Now tap the plus (![]() ) icon in the top left corner to add widgets.
) icon in the top left corner to add widgets.

Select a widget category you like from the left sidebar.

You can also tap Other to add widgets for apps without optimized widgets for the StandBy. As of writing this post, this includes the Fitness, Game Center, and Sleep widgets.

Let’s add a Music widget for this example. Tap Music.

The widget preview will now be available on your right. Tap + Add Widget to add the widget to your StandBy widget page.

Tap and drag the widget up or down to reposition it in your widget stack.

Repeat the steps above to add any more widgets you wish to add to your StandBy widgets page.

Tap Done once you’re done adding widgets.

And that’s how you can add more widgets to your stack on the StandBy widgets page.
What is Smart Rotate, and should you turn it on or off?
Smart rotate allows iOS to determine which widget to display in the StandBy each time it’s activated based on your usage, background activity, and recent updates. For example, if there have been drastic changes to the weather in your area, then iOS will display the weather widget with the latest updates on the Standby screen if it has been added.
Similarly, if you have music playing in the background, then iOS will automatically rotate the widget stack to display the music widget so you can easily control the playback on your iPhone. Alternatively, if there are no updates and you decide to check your device in the night while it is charging, then you will likely be shown the clock. This can be quite useful in conjunction with the two smart stacks, where one stack can show you the latest updates or ongoing background activity, like music, while the other can display upcoming events, reminders, dates, and more.
We recommend you turn on Smart Rotate if you plan on using the widget page in StandBy a lot. This will help you stay updated with the latest information without having to swipe through multiple widgets on your own. Alternatively, if you use a handful of widgets and prefer manual control, then you can turn this feature off. Use the steps below to toggle Smart Rotate for your widget stacks in the StandBy.
With StandBy activated on your iPhone, tap and hold on a widget stack for which you wish to enable Smart Rotate. You can toggle Smart Rotate for each widget stack individually based on your preferences.
Verify your identity using your passcode or Face ID based on your current device.
You will now have entered the editing mode. Tap on Smart Rotate on your right to enable or disable it depending on its current status.

Tap Done in the top right corner once you’re done.

And that’s how you can toggle Smart Rotate for a widget stack in the StandBy.
Enable or Disable Widget Suggestions on the StandBy widgets page
Widget Suggestions allows iOS to show widgets based on your usage and Siri suggestions in each stack. This feature can also help you stay up to date with the latest updates from each widget by allowing iOS to show widgets that you might not have added to your widget stack. Follow the steps below to enable or disable Widget Suggestions for a stack in the StandBy on your iPhone.
While the StandBy is active on your iPhone, tap and hold on to a stack for which you wish to enable suggestions.
Verify your identity using your passcode or Face ID.
Now simply tap the Widget Suggestions option on your right to toggle the same.

Tap Done in the top right corner once you’re done.
And that’s how you can enable or disable Widget Suggestions for a stack in the StandBy.
Edit the StandBy Photos page
When you swipe left when StandBy is active, the next page will be the Photos page. A simple display that shows your featured photos as a landscape background alongside a minimal clock as well as today’s date. Your iPhone needs to be unlocked for your photos to be visible, and your phone will switch between your featured photos automatically.
However, as many have come to realize in the past, not all photos featured by your iPhone might be a favorable choice for your lock screen. In such cases, you might want to select a custom album or a set of albums to be shown on the StandBy Photos page instead. Follow the steps below to help you do the same on your iPhone.
Let’s first create an album you wish to use on your lock screen. If you already have an album created that you wish to use, then you can skip these first few steps. Open the Photos app and tap Albums at the bottom.

Tap the + icon in the top left corner.

Tap and select New Album.

Name your new Album as needed.

Now tap Save once you have set the preferred name.

Tap and select the photos you wish to add to the album.

Tap Add in the top right corner once you’re done.

The album will now be created. Close the Photos app, lock your iPhone, and place it in landscape mode while it is charging. With the StandBy now active on your iPhone, swipe left on the widgets page to switch to the Photos page.

Now tap and hold on to it to enter the editing mode.

Tap the plus (![]() ) icon in the top left corner.
) icon in the top left corner.

Swipe and tap on the album we recently created.

The album will now be added to the stack. The featured album will be enabled by default. Tap the Visible icon in the top left corner of it to hide it.

Tap the plus (![]() ) icon to add more albums if you want.
) icon to add more albums if you want.

Tap Done once you’re done.

You can now swipe up or down to switch between the selected albums.

And that’s how you can customize your iPhone’s StandBy Photos page.
Edit the dedicated StandBy Clock page
The StandBy also has a dedicated Clock page, which displays a simple clock with the current time on your screen. This is an ideal choice for nightstands as you can glance at your phone any time to keep track of the current time. Follow the steps below to customize this page on your iPhone’s StandBy.
Swipe left on your StandBy Widgets page twice to view the dedicated Clock page.

Tap and hold on to the same to enter the editing mode.

Verify your identity using your device passcode or Face ID based on your current device, as discussed above.
Swipe up and find a clock you like. You have the following choices to choose from.
- Digital
- Analog
- World
- Solar
- Float

Once you have selected your clock, tap the Picker icon to pick your preferred color palette.

Now tap and choose a color you like from the choices at the bottom of your screen.

Tap Done once you are happy with the look of your clock.

And that’s how you can customize your iPhone’s StandBy Clock page.
We hope this post helped you easily edit and customize the StandBy on your iPhone to your liking. If you have any more questions or face any issues, feel free to drop us a comment below.


