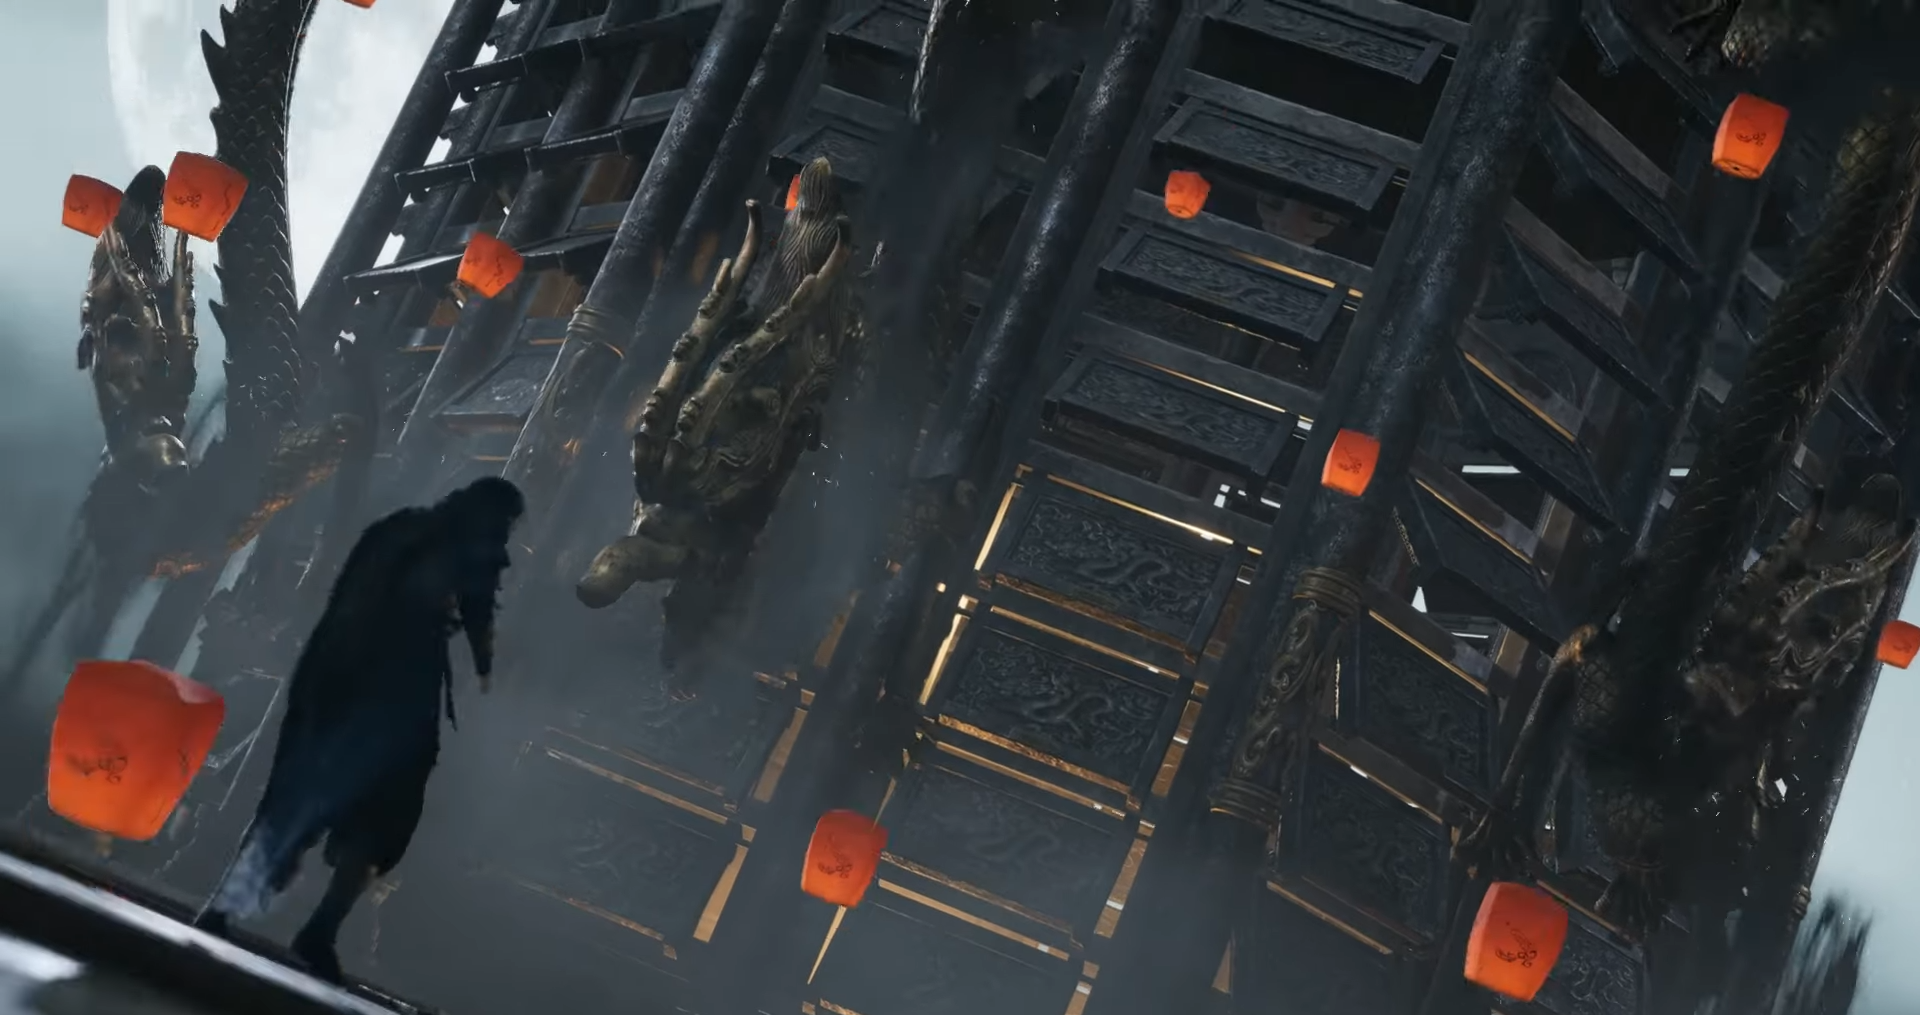
In Where Winds Meet, Right after the earlier furnace and chase sequences in Gambit Beneath the Shimmer, the Five-Clawed Golden Dragon is a boss that comes as a tester of skill for your parry timing and composure under sustained pressure. If you already reached this fight, you have the core tools you need; now you just have to apply them systematically. Here’s a guide on defeating the Five Clawed Dragon boss in Where Winds Meet.
How to prepare before engaging the dragon
A little setup before the encounter makes the fight far more forgiving, especially if you want to clear it without leaning on co-op.
Build and gear priorities
- Prioritize parry/deflect-friendly weapons and martial skills
- Use a weapon you are already comfortable perfect-deflecting with, even if it is not your absolute top DPS.
- Keep at least one ranged option (bow or ranged martial skill) ready for safe chip between volleys and to punish openings.
- Boost survivability over pure damage
- Favor armor and accessories with HP, damage reduction, or parry bonuses; you want to live through the occasional missed deflect.
- Equip at least one reliable healing option (fan, flask, or equivalent) so a single mistake does not force a restart.
Resource and practice setup
- Practice your parry timing on other fire-using or ranged bosses
- The final quest’s design assumes you can chain deflects under pressure, so practicing on earlier Kaifeng encounters can help a lot.
- Training against solo boss versions (where available) is a good way to sharpen your parry window feel.
- Enter the fight with full consumables and cleared cooldowns
- Make sure your heals, buffs, and key mobility or defensive abilities are ready before triggering the platform sequence.
- If you are in co-op, coordinate who is focusing on deflecting versus covering missed projectiles or reviving.
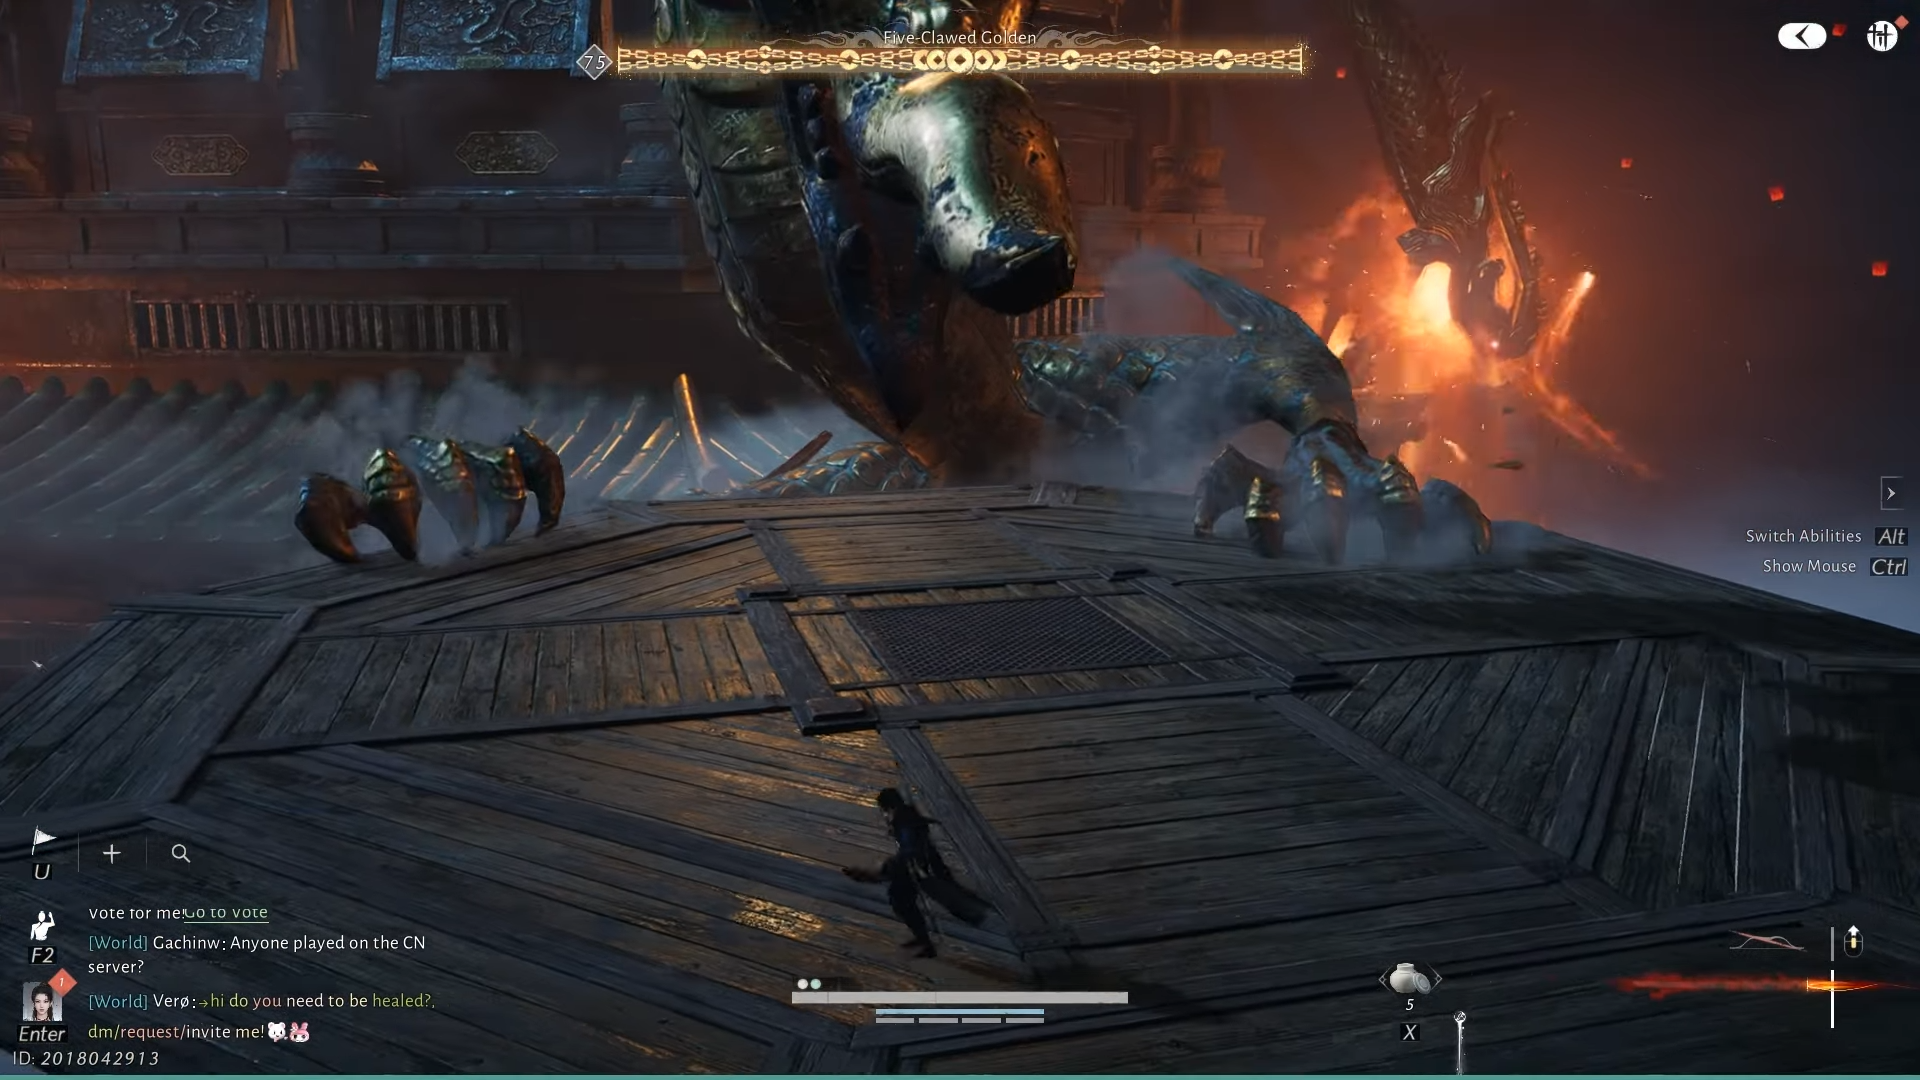
Five clawed dragon boss fight mechanics
The Five-Clawed Golden Dragon encounter is short but divided into clearly defined patterns you can learn. Treat each as its own mini-lesson in timing.
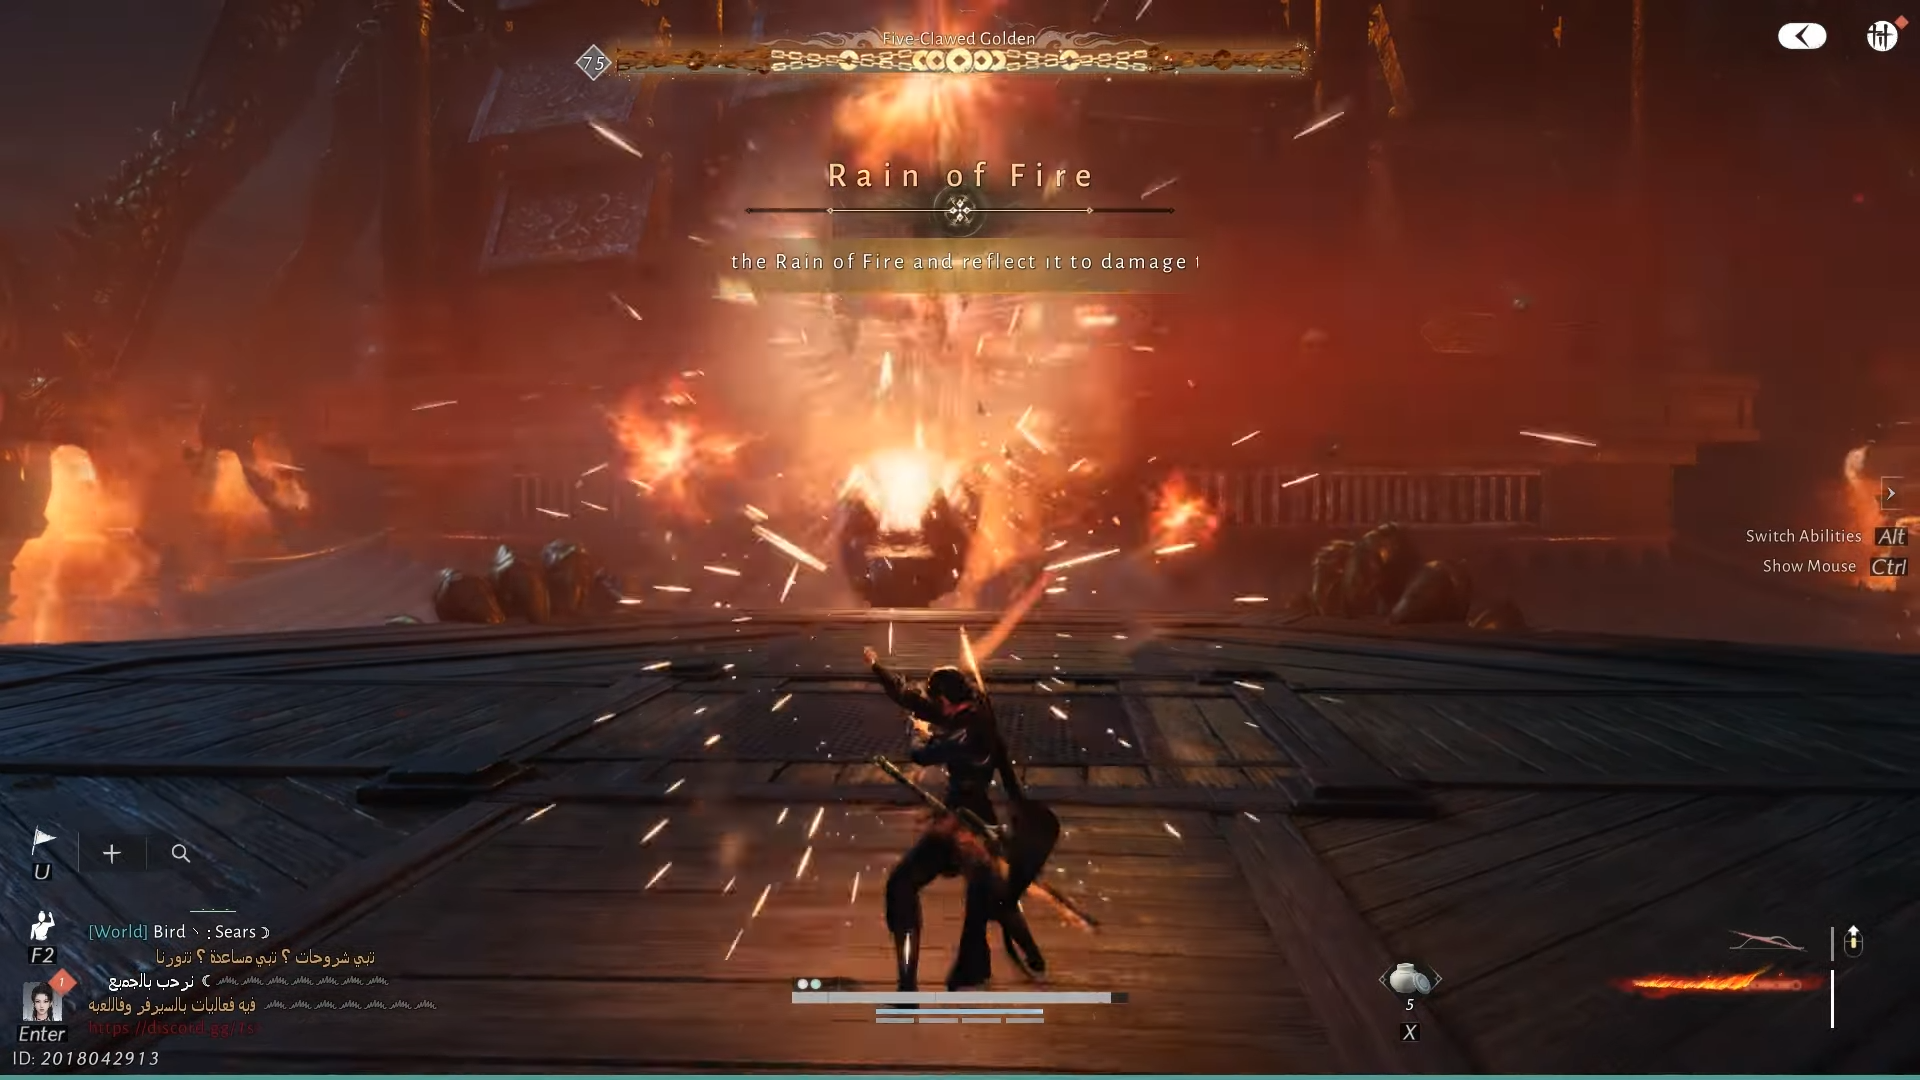
Phase 1 – Charging Blade Momentum through deflects
- Recognizing the first phase
- The dragon hangs at range and rains down broad waves of fire rather than close-range swipes.
- Your objective is not traditional DPS here; it is to deflect consistently and charge Blade Momentum to prepare the next step.
- How to play this phase
- Stand near the center of the platform so you can adjust to both sides without getting cornered.
- Time deflects in rhythm rather than mashing; once you feel the tempo, you can chain parries and build huge momentum safely.
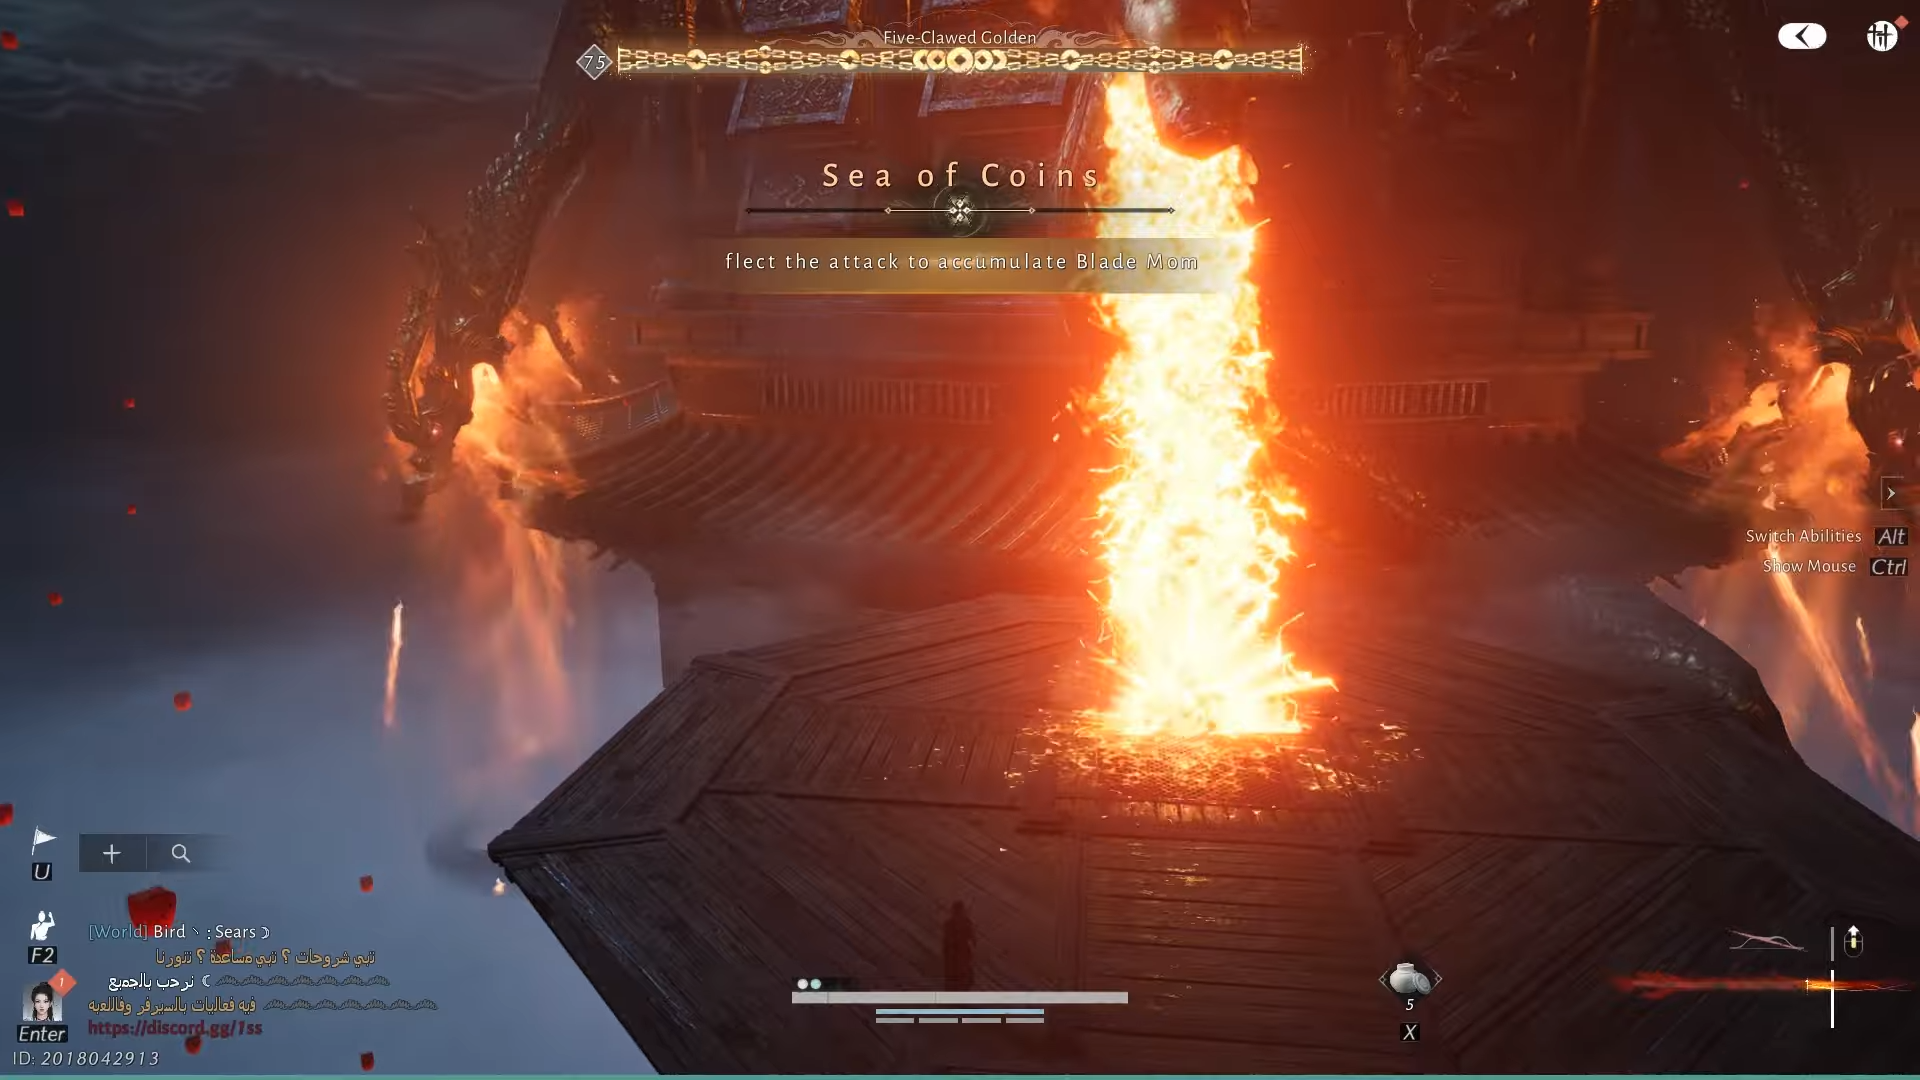
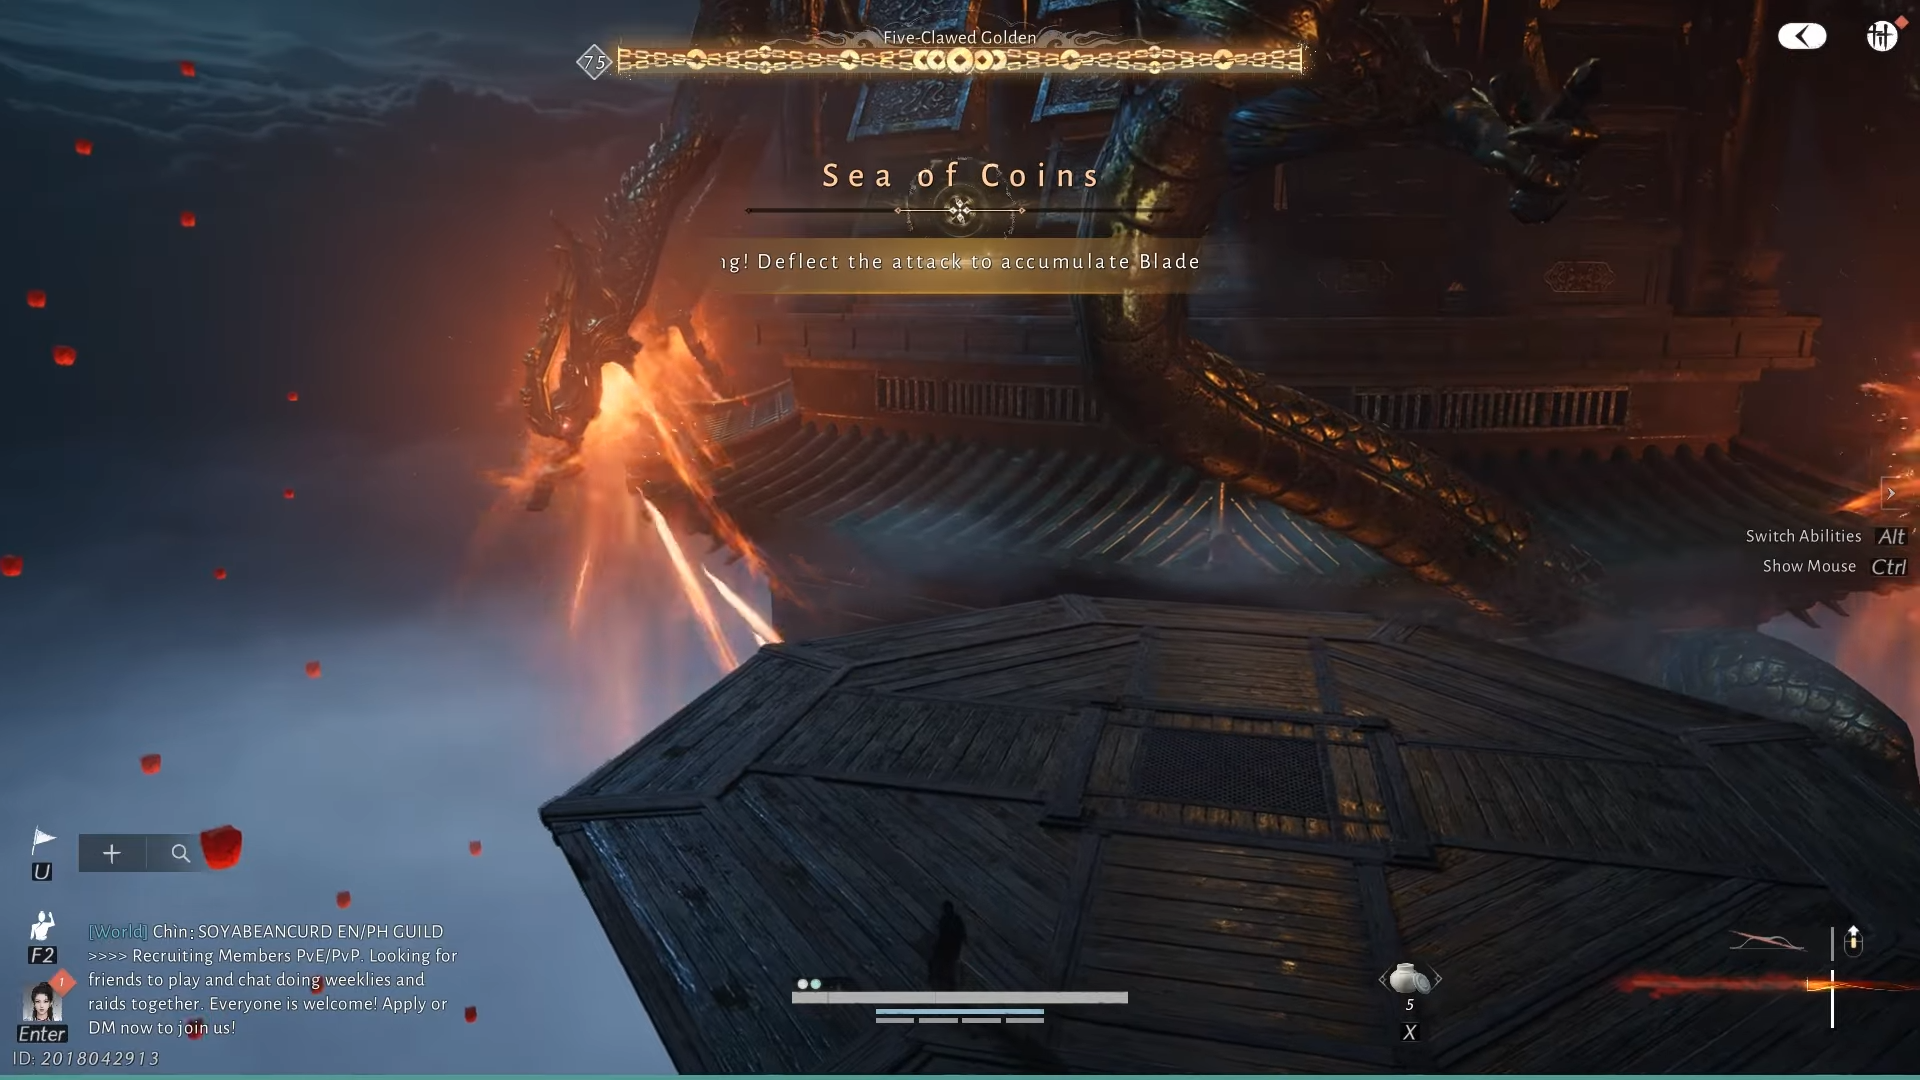
Phase 2 – Reflecting fireballs back at the dragon
- Transition into focused parry sequences
- Once Blade Momentum is high enough, the dragon shifts from broad waves to faster, more concentrated fireball volleys.
- Deflecting these volleys sends power back, damaging the dragon and moving the fight toward self-destruction territory.
- Staying alive through rapid-fire barrages
- Plant your feet and commit to timing; rolling too much makes you lose parry windows and drains stamina you might need.
- If you mistime one volley, back off to reset your rhythm, heal if needed, then re-engage with deliberate timing instead of panic deflecting.
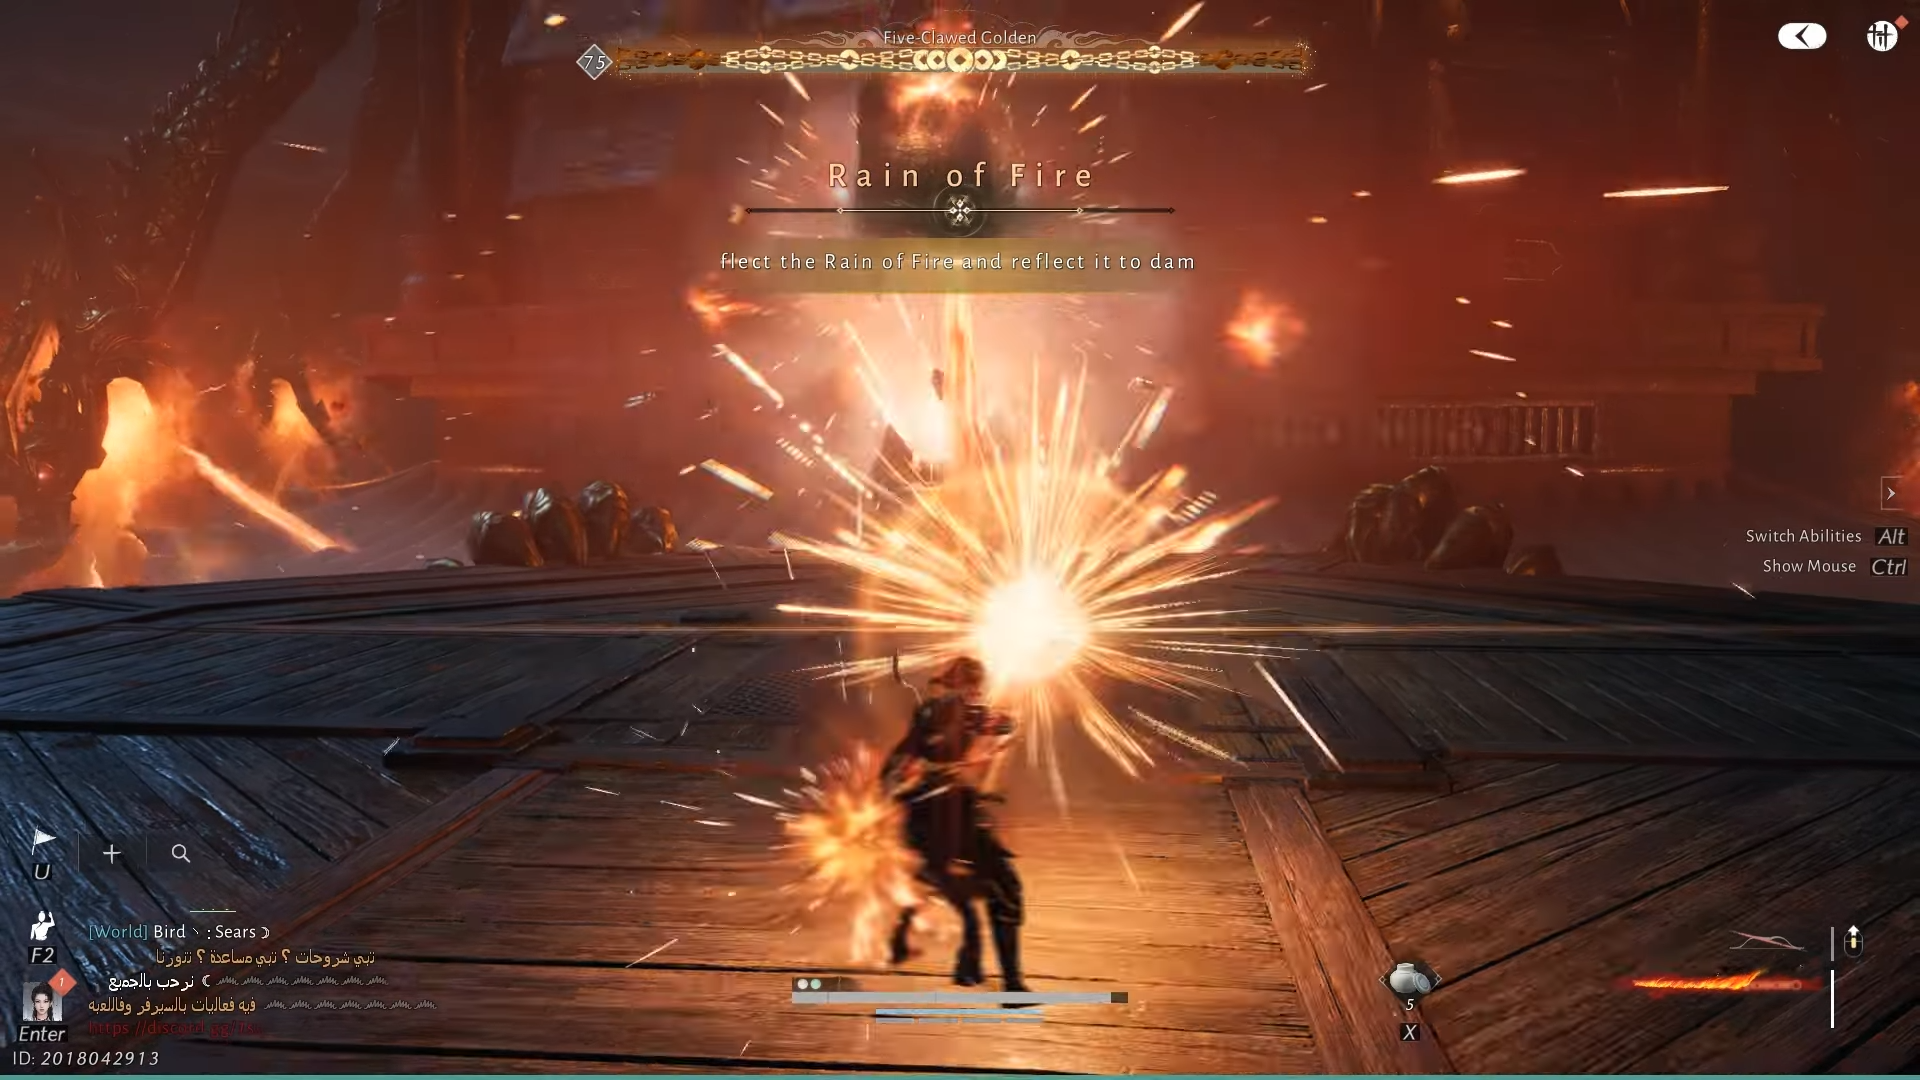
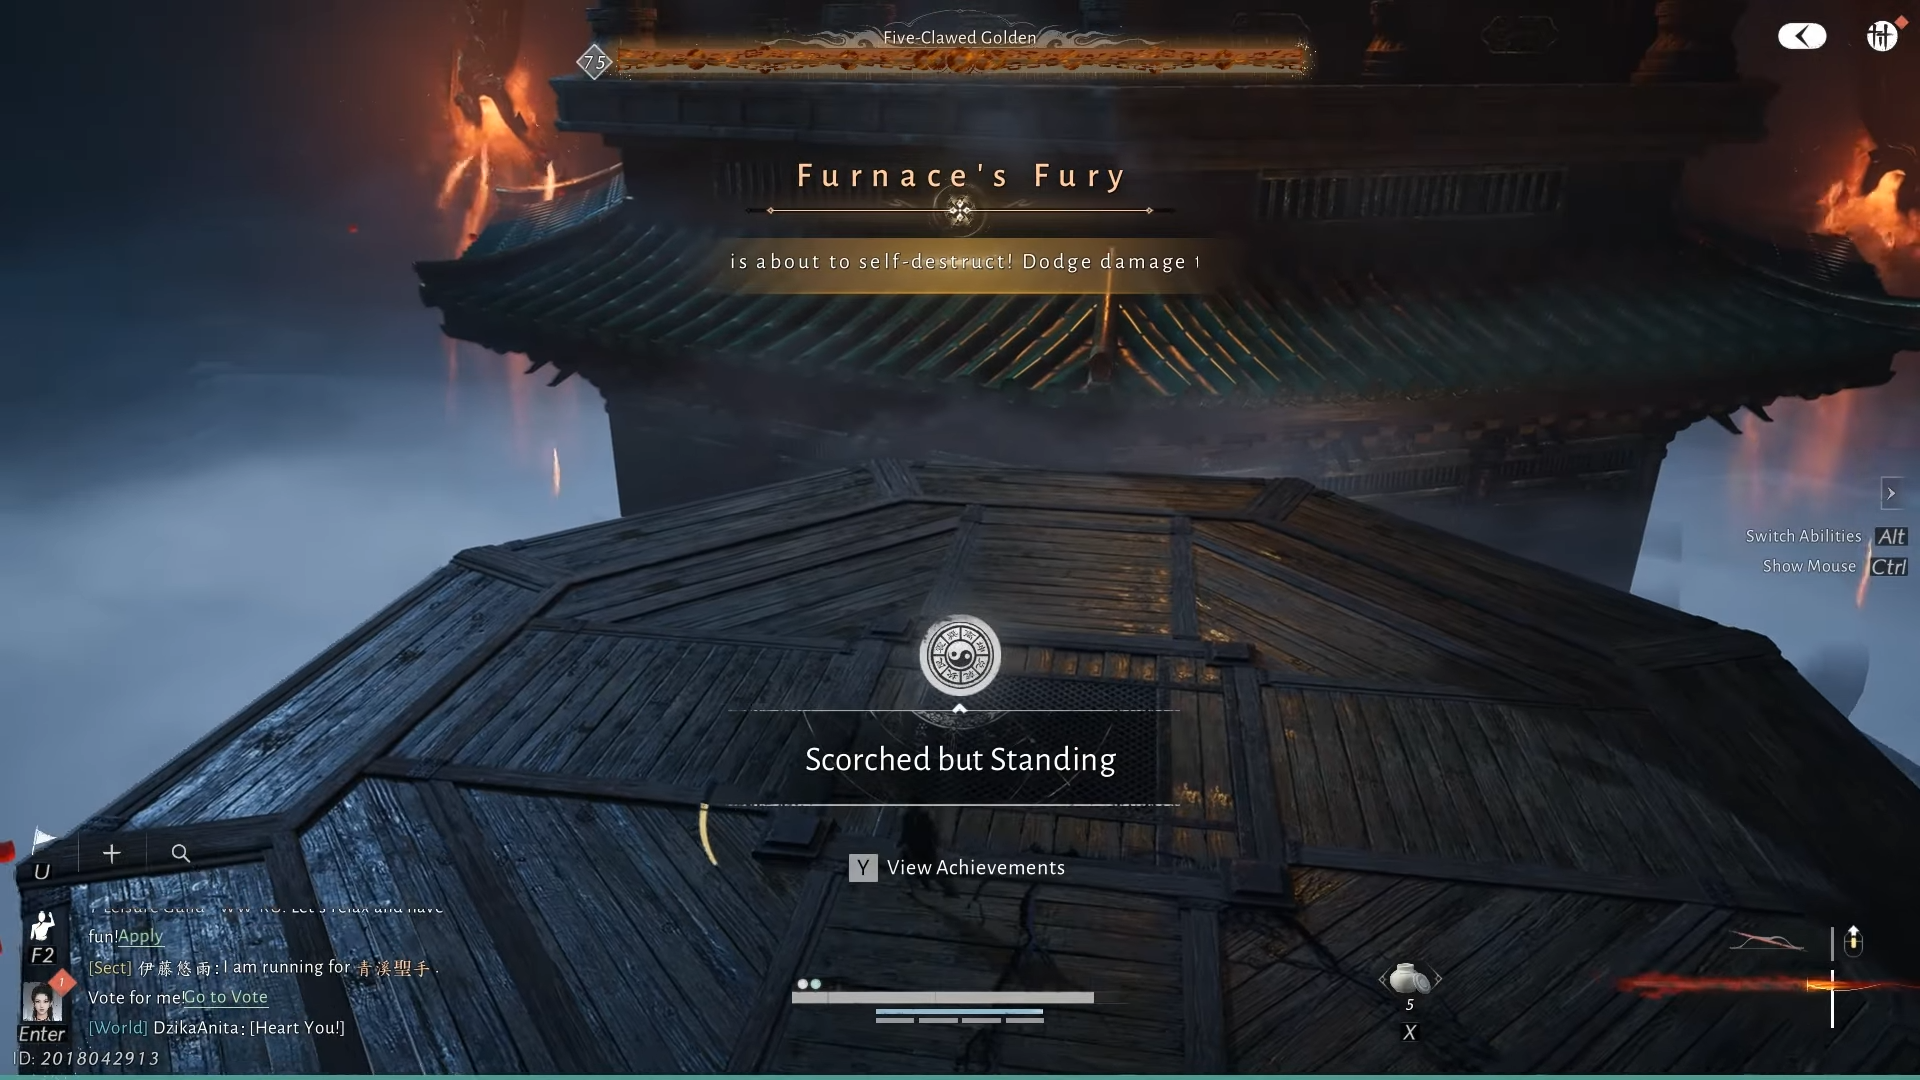
Phase 3 – Twin dragon beam sweeps
- Visual cues and danger zones
- As the dragon begins to self-destruct, twin heads sweep beams of flame across the platform in alternating patterns.
- These beams telegraph with head movement and beam angle; learning their path lets you pre-position instead of reacting last second.
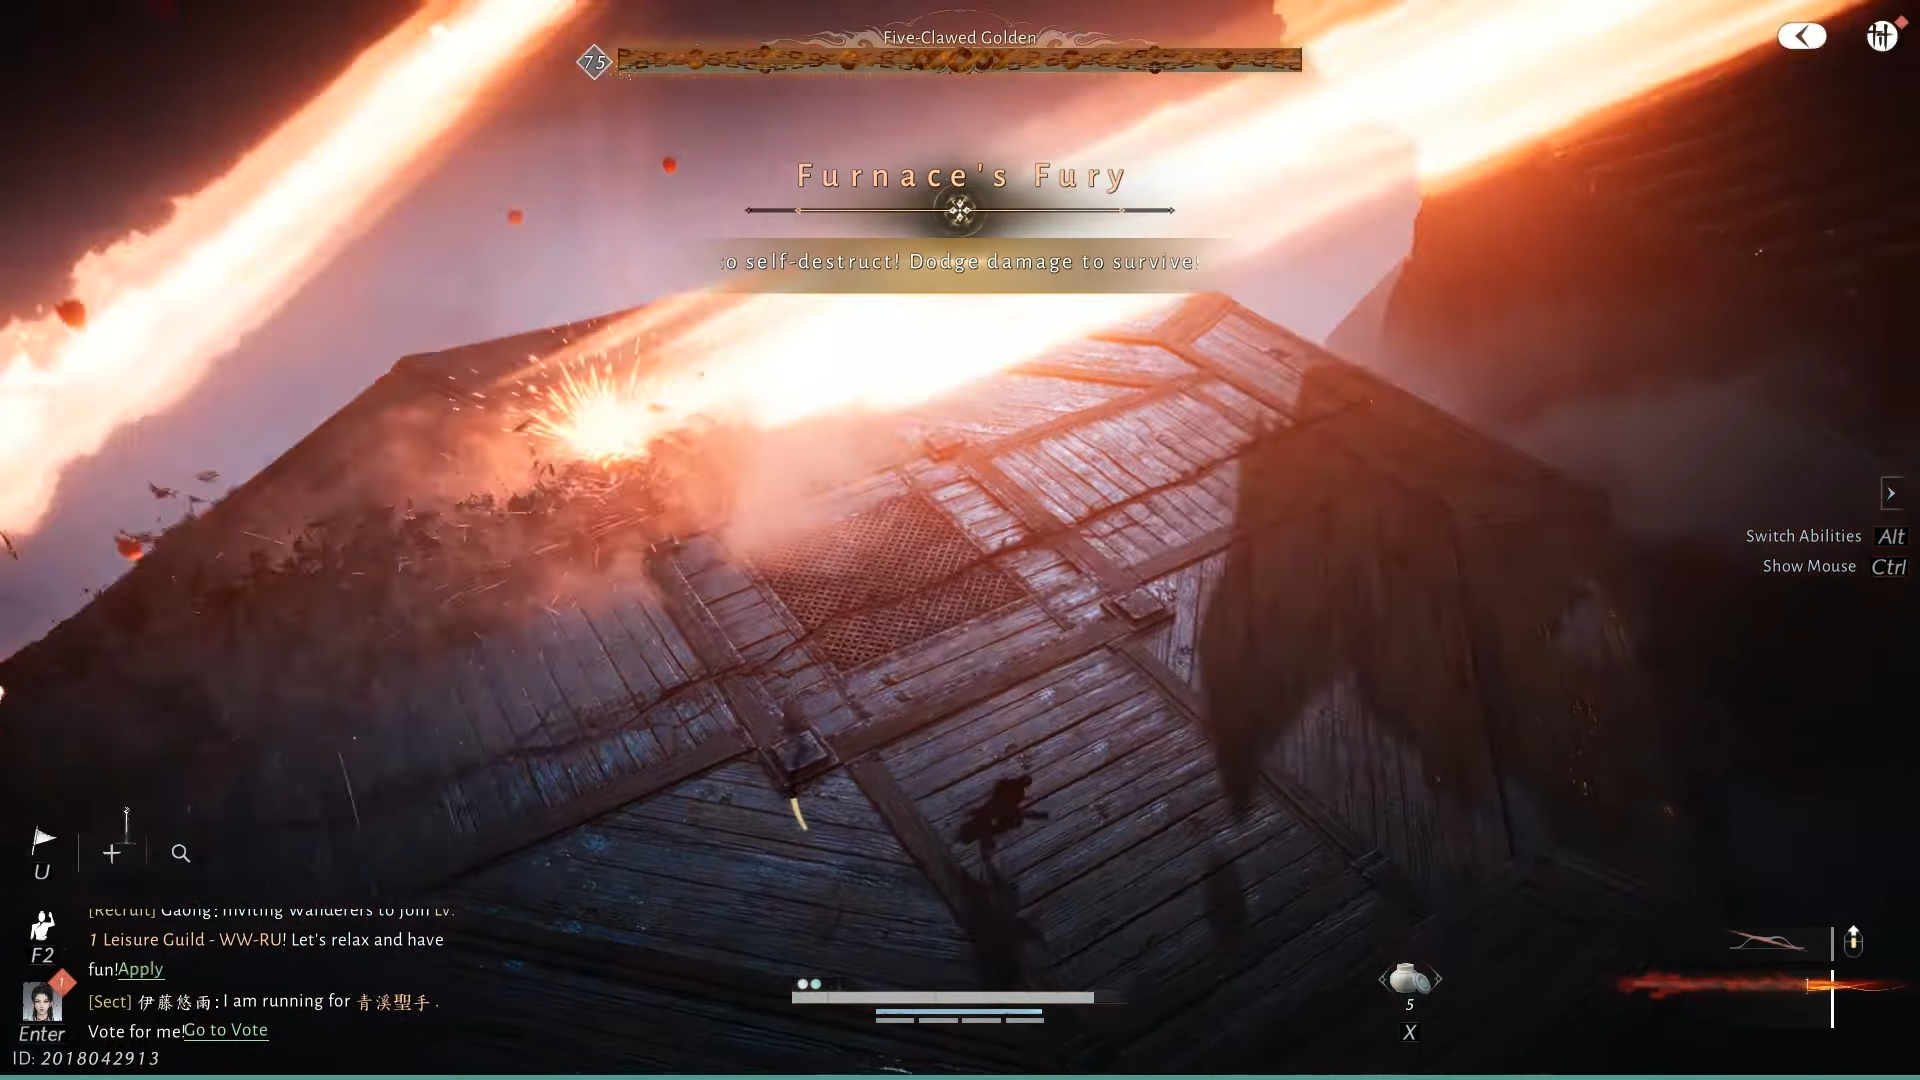
- Safe movement through beam patterns
- Use short, controlled dodges perpendicular to the beams rather than long panic rolls that can carry you into the next sweep.
- Keep your camera steady so you can read both beams; losing sight of one head is a common reason players get clipped.
How to beat the Five-Clawed Golden Dragon step by step
Below is a practical, fight-only guide you can follow when you enter the dragon’s arena.
Step 1 – Center yourself and read the first wave
Move to the middle of the platform as soon as the fight begins, keeping enough space behind you to dodge if something goes wrong. Watch the timing of the first fire wave without committing; use this to sync your internal rhythm to its speed.
Step 2 – Commit to deliberate deflect chains
Start deflecting each wave, focusing more on consistency than squeezing in extra attacks between volleys. Your priority here is filling Blade Momentum reliably, so always favor a safe deflect over a greedy punish.
Step 3 – Use brief openings for chip damage
When there is a noticeable gap between volleys, take one or two ranged shots or a quick martial skill, then immediately return to a ready stance. Do not chase long combos; missing one deflect costs far more than a tiny bit of missed damage.
Step 4 – Shift to tight timing on fast fireballs
As the dragon shifts to faster, more focused fireballs, narrow your attention to timing the first projectile correctly. Once the first deflect lands, let your muscle memory carry you through the rest of the chain rather than overthinking each hit.
Step 5 – Recover smartly from mistakes
If a volley hits you, immediately break the pattern: back up, heal if safe, and wait for the next clear sequence instead of trying to “catch up” mid-barrage. Getting greedy after a mistake often causes a second, lethal hit, especially if your stamina is low.
Step 6 – Prepare for the twin-beam section
Once enough damage is reflected, you will see the dragon’s behavior change and the twin heads appear with sweeping beams. Stop thinking about deflecting at this point and mentally switch to a pure survival mindset.
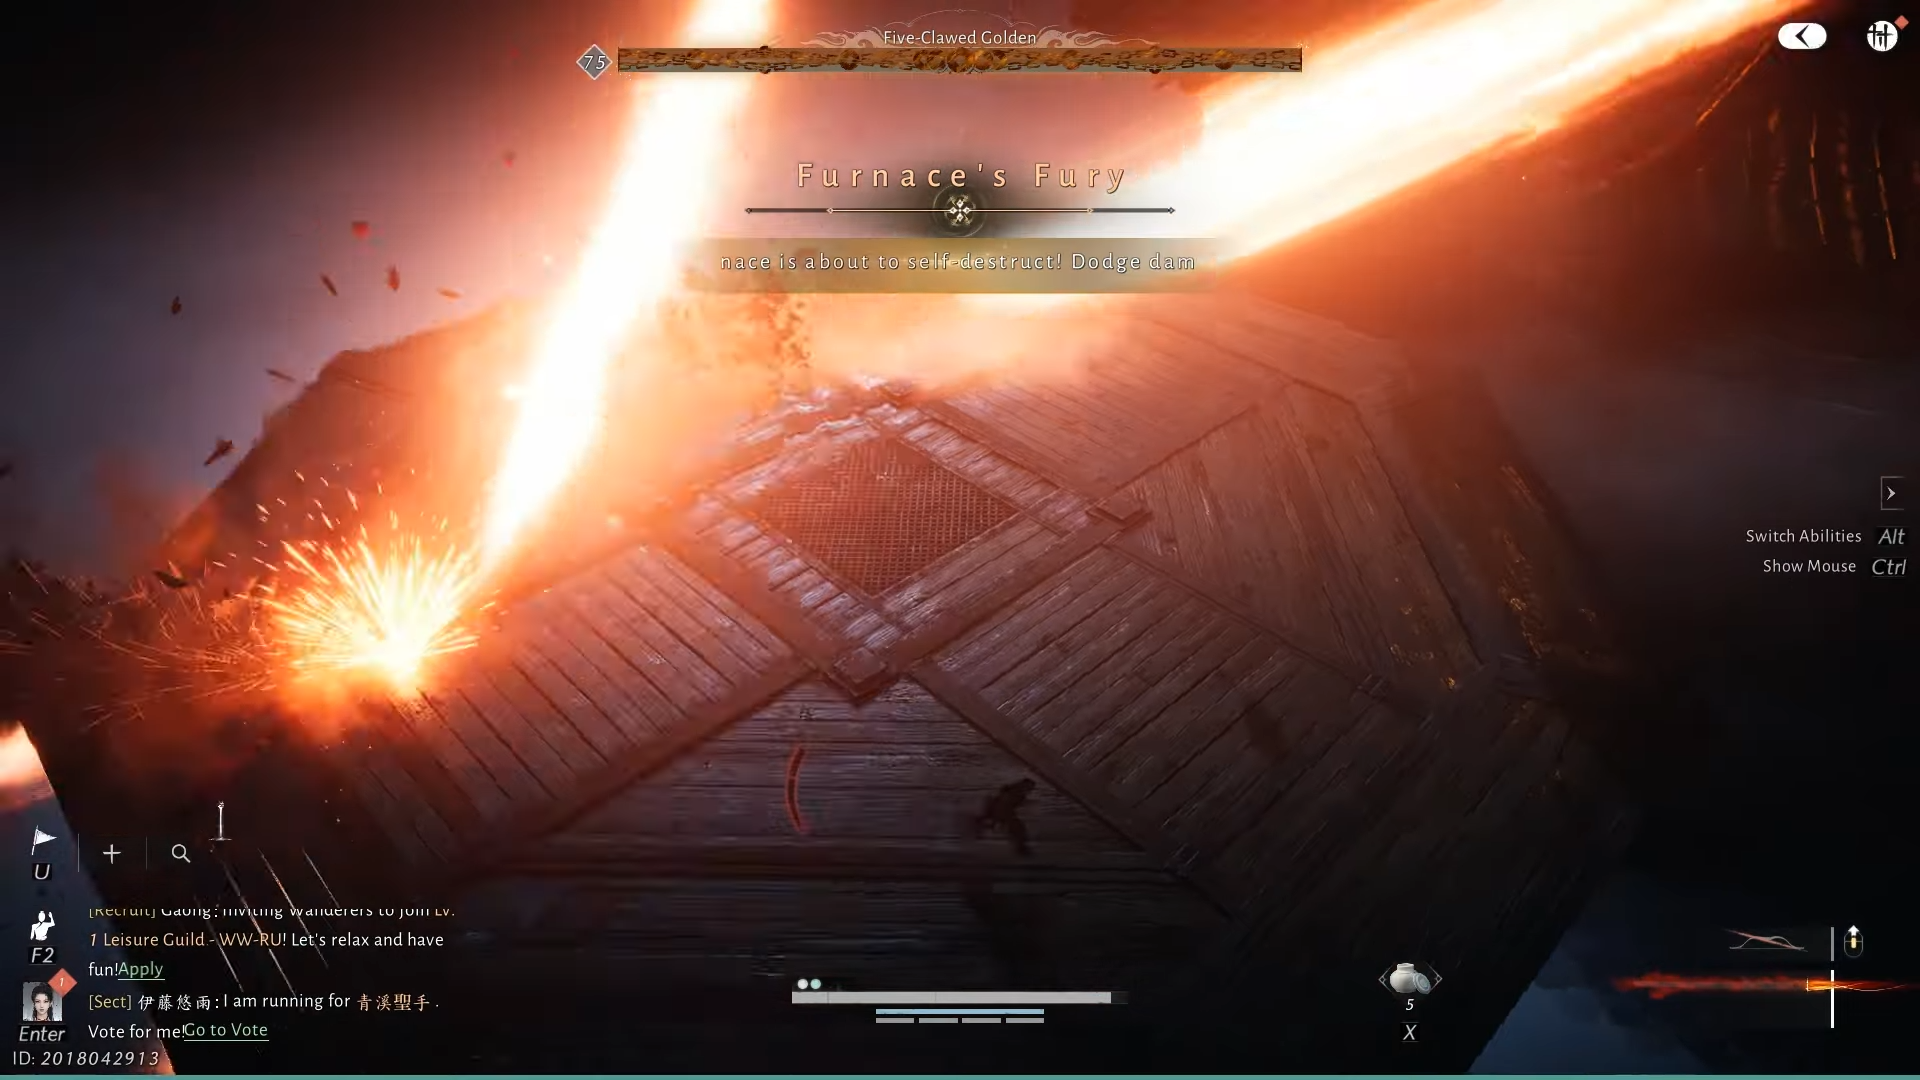
Step 7 – Track head movement, then dodge in short bursts
Watch the heads to anticipate beam direction, then make short dodges to get through gaps as beams sweep the floor. Avoid hugging the very edge of the platform; staying near the inner lanes gives you more room to adjust if a surprise angle appears.
Step 8 – Stay alive until the timer ends
There is no need to attack during the twin-beam section; your goal is simply to avoid damage until the scripted timer resolves the encounter. Maintain calm, breathe between sweeps, and resist the urge to over-move, which gets you caught in crossing beams.
Rewards for clearing Gambit Beneath the Shimmer quest and the boss
- Lingering Melody – x1
- Medicinal Tales – x1
- Lv. 3 Ebon Iron – x4
- Echo Jade – x30
- Kaifeng Exploration – x30
- Enlightenment Points – x30
- Character EXP – x30,000
- Coin – x20,000
The Five-Clawed Golden Dragon in Gambit Beneath the Shimmer is less about raw numbers and more about your ability to stay calm, read patterns, and commit to clean deflects under pressure. If you build for survivability, practice parry timing, and treat each phase as a clear pattern to memorize instead of a chaos storm, you will turn this intimidating set-piece into a reliable clear on repeat runs.


