Awoos echo through Pharloom’s depths, calling you to rescue 30 lost fleas in Hollow Knight: Silksong. Each batch of five unlocks rewards and shifts the caravan’s path.
What to know
- Exactly 30 hidden across Pharloom’s regions, trapped in cages and audible by their dog-like whines.
- Starts as “The Lost Fleas” wish with Fleamaster Mooshka; rewards trigger every five rescues, including tools like Flea Brew for speed boosts.
- Free 5 to advance the caravan to Greymoor, 15 to the Blasted Steps, and 25 to the Putrified Ducts’ final spot.
- All 30 yield the Egg of Flealia, cutting Silk Skill costs when health is maxed, plus minigames and map aids.
- Most fleas are found in the game’s first two acts but require advanced movement abilities to reach many of them.
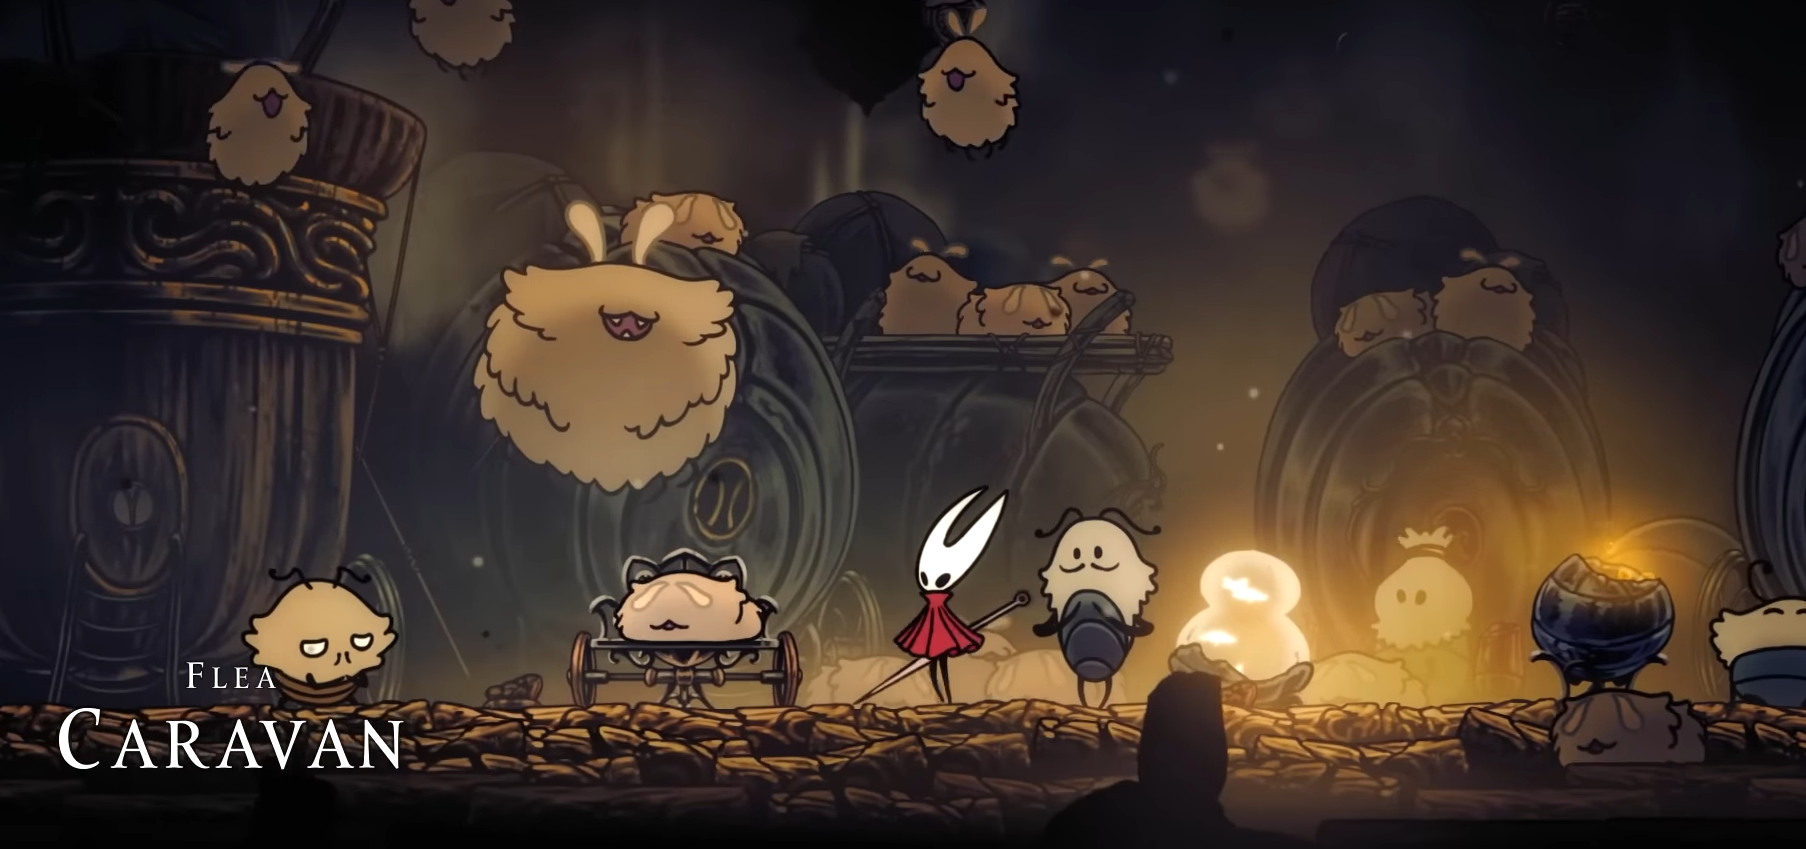
Helping the Fleamaster retrieve the scattered Lost Fleas is one of Silksong’s signature sidequests, akin to the Grubs quest from the original Hollow Knight. It offers new rewards and helps guide progression across different regions in Pharloom.
Total number of fleas and where to find them
Every region contains several Lost Fleas, with their telltale cries and often tricky locations. The maximum across all of Pharloom is 30, with some areas only accessible after acquiring tools like Drifter’s Cloak, Clawline, or Cling Grip.
Here’s a table summarizing the key thresholds and what happens when you hit them:
| Number of Lost Fleas freed | What triggers / unlocked effects | Caravan destination or what changes |
|---|---|---|
| 5 fleas | After rescuing 5, talk to Mooshka to complete the initial Lost Fleas Wish; get the Flea Brew tool; you’re offered a ride with the Caravan. | Caravan moves from The Marrow to Greymoor. |
| 15 fleas | Further progress; rescue more fleas and talk to Mooshka when able. New reward(s) become available (some spool fragments, etc.) | Caravan moves to Blasted Steps (just at or near the Grand Gate entrance) after 15 fleas. |
| 25 fleas | Additional rewards; NPCs like Vog can reveal missing flea locations; tool pouch etc. | Caravan moves to the Putrified Ducts (Blue Lake area) after 25 fleas. |
| 30 fleas | Finding all the fleas gives the final reward(s) — highest-tier tool, cosmetic / achievement etc. | The Caravan stays in its final location; no further moves triggered by fleas. |
All areas combined bring the total to 30 fleas, and the locations require exploration and specific movement upgrades, especially in Acts 1 and 2.
Mapping the flea’s desperate calls across regions
Pharloom’s fleas cluster by biome, from Marrow’s heat haze to the Ducts’ fetid drip. No two hides are alike: some demand brute force on breakable walls, others a deft dodge through spike gauntlets or boss-adjacent puzzles. Below is a breakdown by area, with counts and quick sketches of the hunts.
| Region | Flea Count | Notable Challenges | Caravan Tie-In |
|---|---|---|---|
| The Marrow | 4 | Lava platforms, bramble clears | Starting hub; initial 5-goal push |
| Hunter’s March | 3 | Skarnguard boss gate, bud mazes | Early backtrack bait |
| Far Fields | 2 | Cracked-wall secrets, vertical shafts | Completes first threshold |
| Deep Docks | 3 | Hidden lava falls, Bellway smashes | Mid-game traversal test |
| Greymoor | 5 | Moorwing prep skips, west-side traps | Post-5 relocation; Act 2 gateway |
| Bilewater | 3 | Vulpine thief fights, spike dodges | Hidden benches as rest spots |
| Blasted Steps | 4 | Grand Gate adjacency, judge echoes | 15-flea camp; late Act 2 spike |
| Putrified Ducts | 3 | Barnak tongue rides, spike climbs | Final 25-spot; Vog’s map reveal |
| Choral Chamber | 2 | Fake ceilings, Shakra quest overlap | Citadel edge; minigame unlocks |
| Citadel | 1 | Upper-right illusions | Ties into Ecstasy of the End bounty |
How to progress the caravan by freeing fleas
The Lost Fleas questline advances in set increments, triggering key changes in the Flea Caravan’s position—crucial for completionists and those seeking all rewards:

Step 1
Find and free the first 5 fleas to move the Flea Caravan from the Marrow to Greymoor.

Step 2
After freeing 15 fleas, the caravan advances from Greymoor to the Last Judge boss room in the Blasted Steps.

Step 3
With 25 fleas liberated, the caravan moves to its final destination in the Putrefied Ducts.

Step 4
Freeing all 30 unlocks the final quest reward and brings full completion for this storyline.

Guide to collecting Lost Fleas
Step-by-step, seeking fleas involves:
Step 1
Listen for the distinctive whines or barks from Lost Fleas as you explore and search hidden alcoves and platforms.
Step 2
Approach each trapped flea and break obstacles or cages to free them.
Step 3
After every set of 5, return to the current location of the Flea Caravan to receive a reward.

Step 4
Refer to region maps and detailed guides for help with the trickiest locations. Some require backtracking after new movement abilities are unlocked.
How to plan rescuing fleas efficiently
Here’s a strategy to minimize backtracking or being blocked because you don’t have abilities yet:
- Begin with the earliest zones (The Marrow, Deep Docks, Far Fields) to pick up the 5 required fleas.
- Once you have movement tools (double jump, climb/grapple) or keys, explore Greymoor and nearby zones to get to 15 fleas.
- After you reach 15 and unlock the caravan’s next movement, focus on fleas in the farther, harder zones as your abilities and equipment improve.
- Use Vog once available (after a certain number of fleas) to have missing flea locations marked, making the search easier.

Tracking down all 30 Lost Fleas is both a test of exploration and a fun callback for fans of collectible sidequests. Steady progress brings the Flea Caravan new places and grants useful upgrades or unique rewards along the way.