Highguard is a PvP raid shooter developed by the creators of Apex Legends and Titanfall. The game combines team-based tactical gameplay with objective-focused combat, where two teams of three players face off in intense base-raiding scenarios.
| Topic | Quick details |
|---|---|
| Core mode | 3v3; both teams have bases; first team to destroy the other base wins. |
| Win conditions | Reduce base to 0 health or destroy the Anchor Stone for an instant win. |
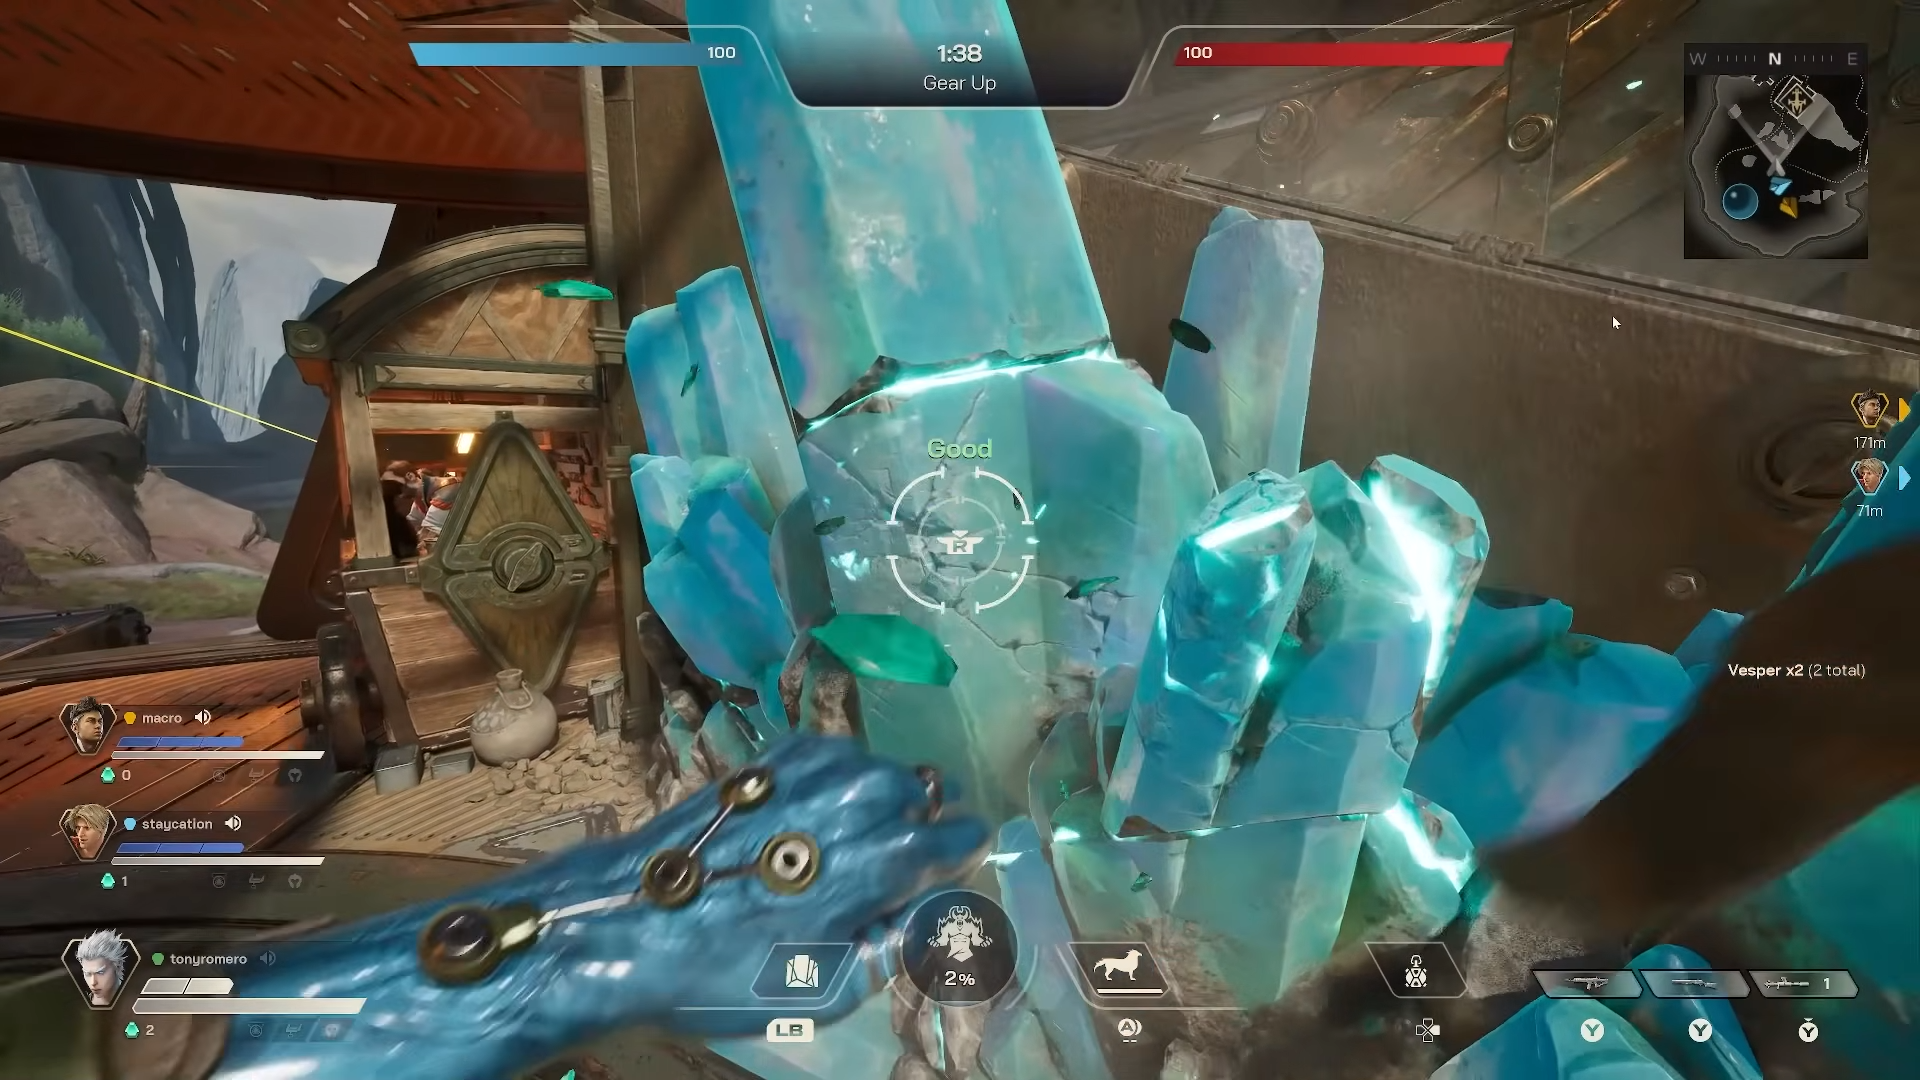
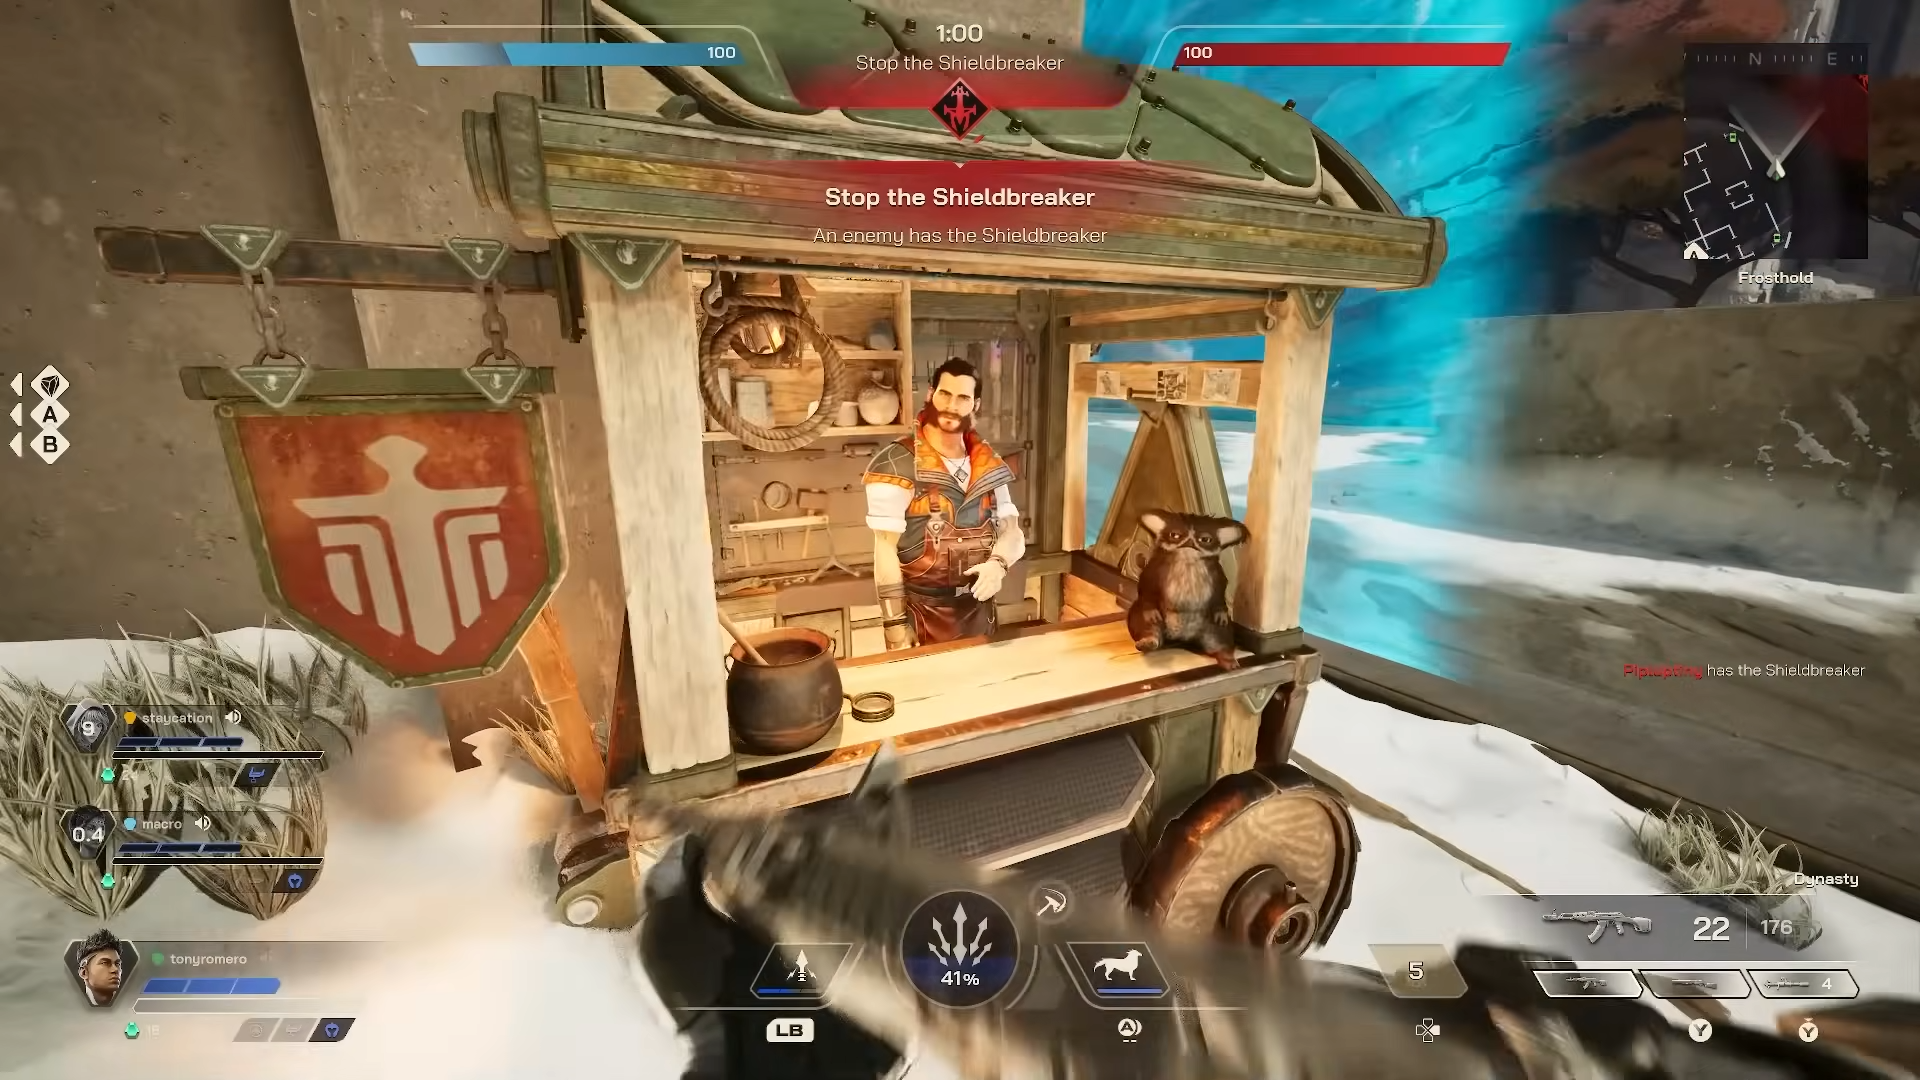
| Key objective | The Shieldbreaker forms on the map; planting it at the enemy base starts a raid. |
| Economy | Loot from chests; harvest Vesper as currency to buy/upgrade items via Flynn. |
| Match length | Roughly 8 to 30 minutes depending on how close the game is. |
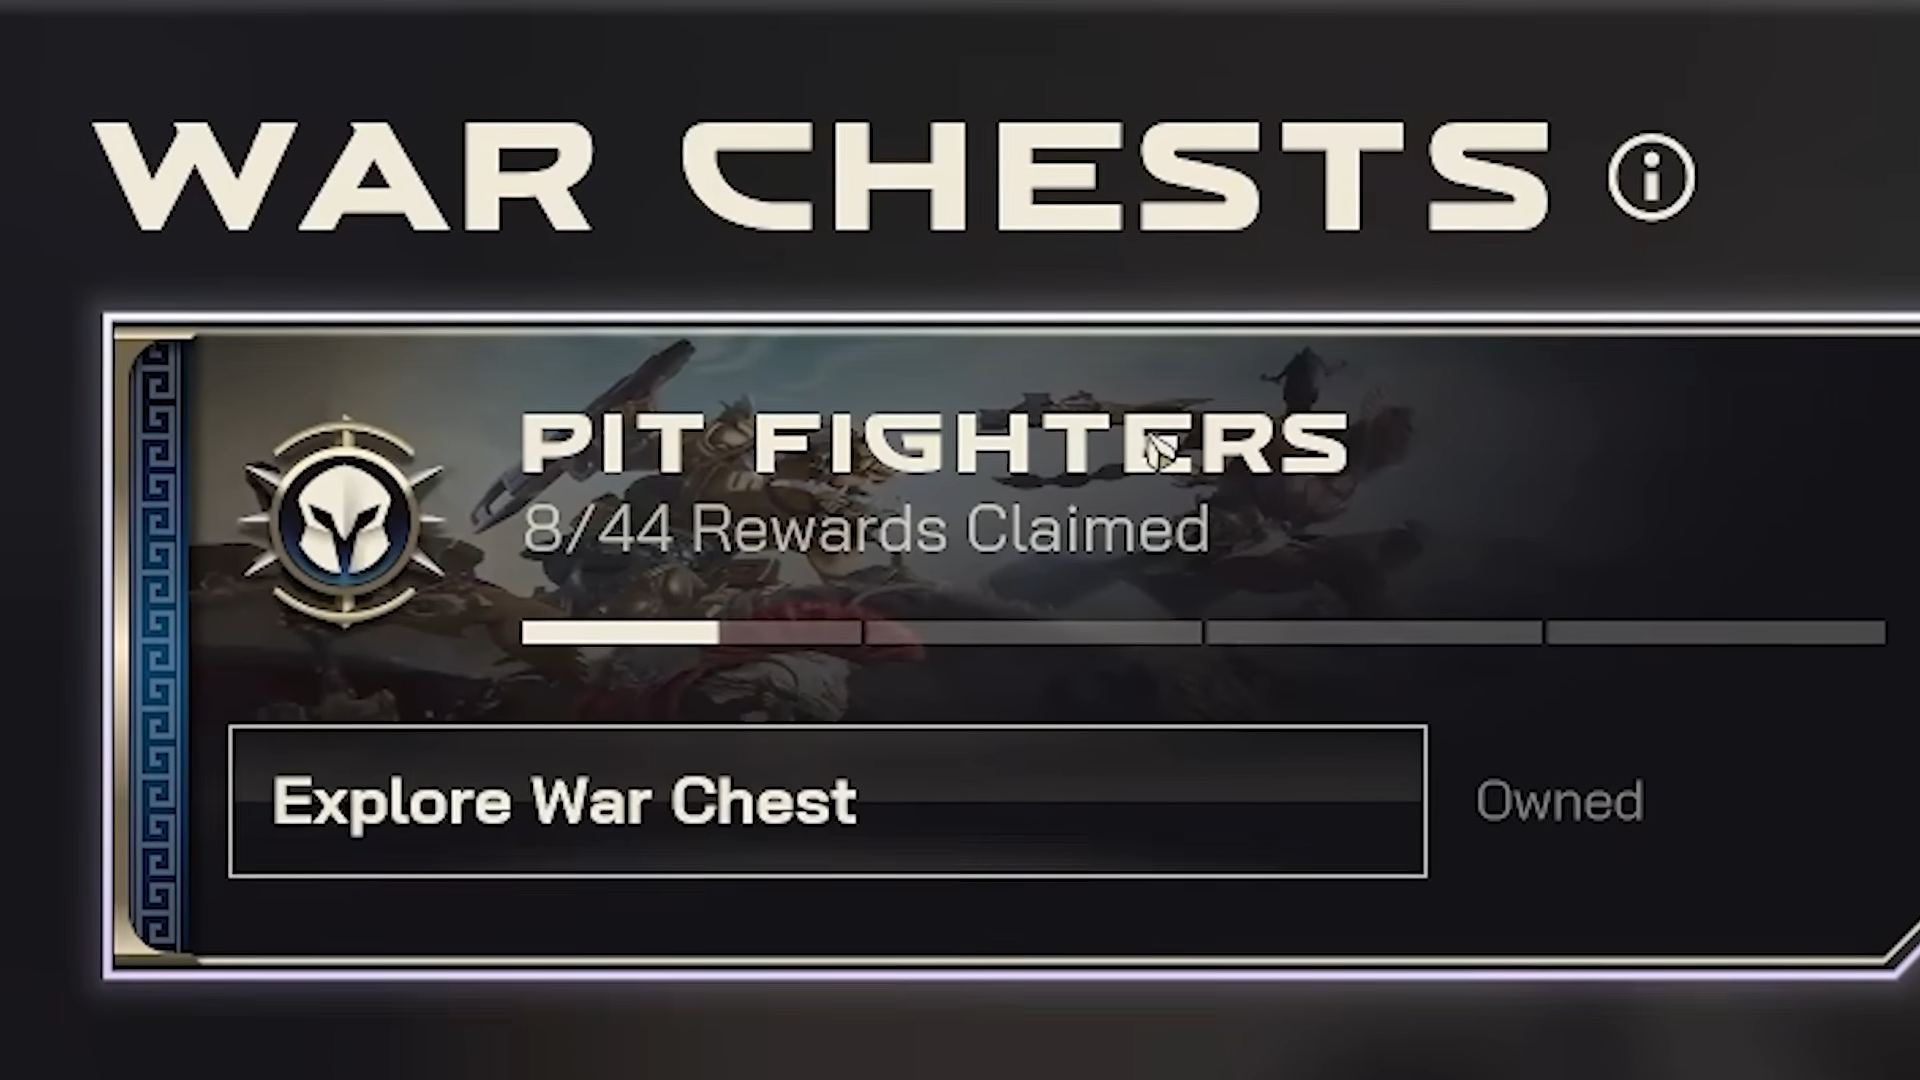
| Seasonal progression | “Warchests” (battle-pass style) don’t expire; first one is free at launch. |
At its heart, Highguard is straightforward: your team and the opposing team each control bases, and your objective is to raid and destroy the enemy base while defending your own. Despite the layers of mechanics surrounding it, this fundamental goal drives all gameplay decisions.
The Game Loop Explained
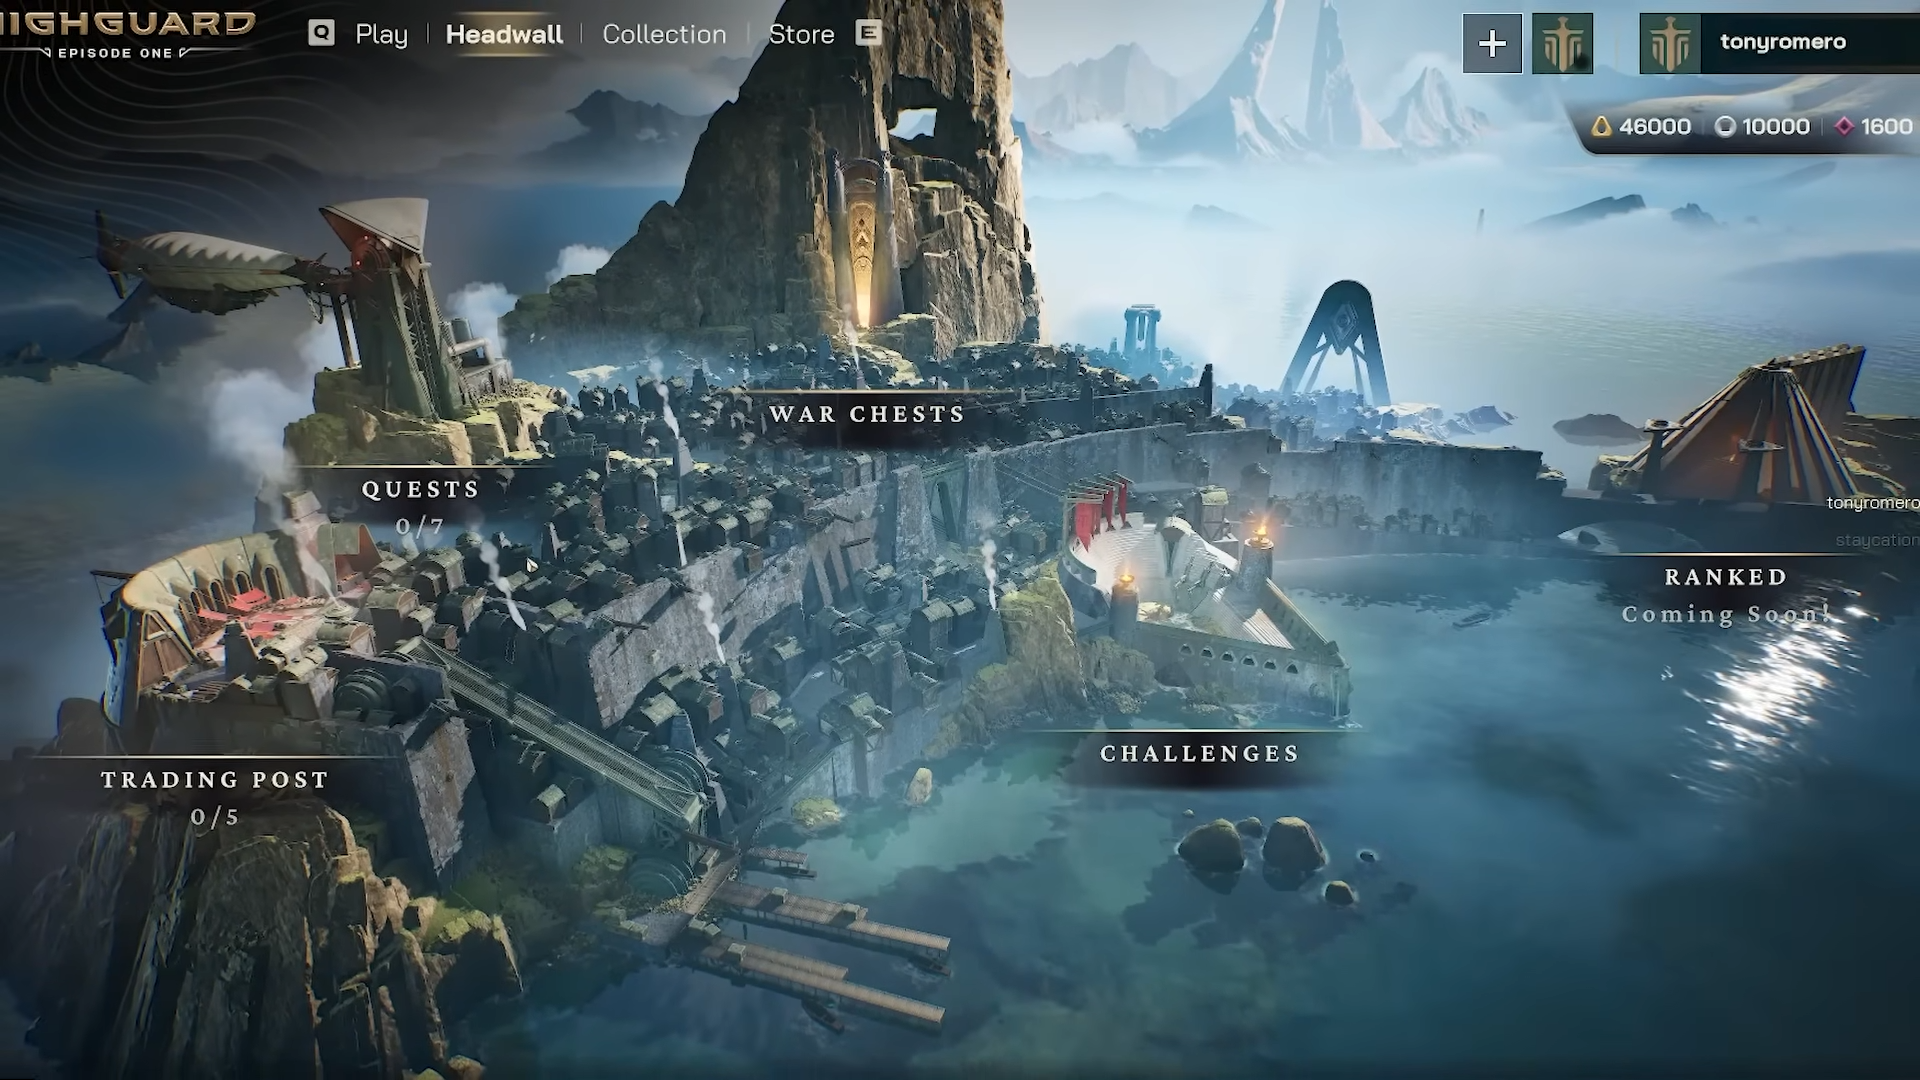
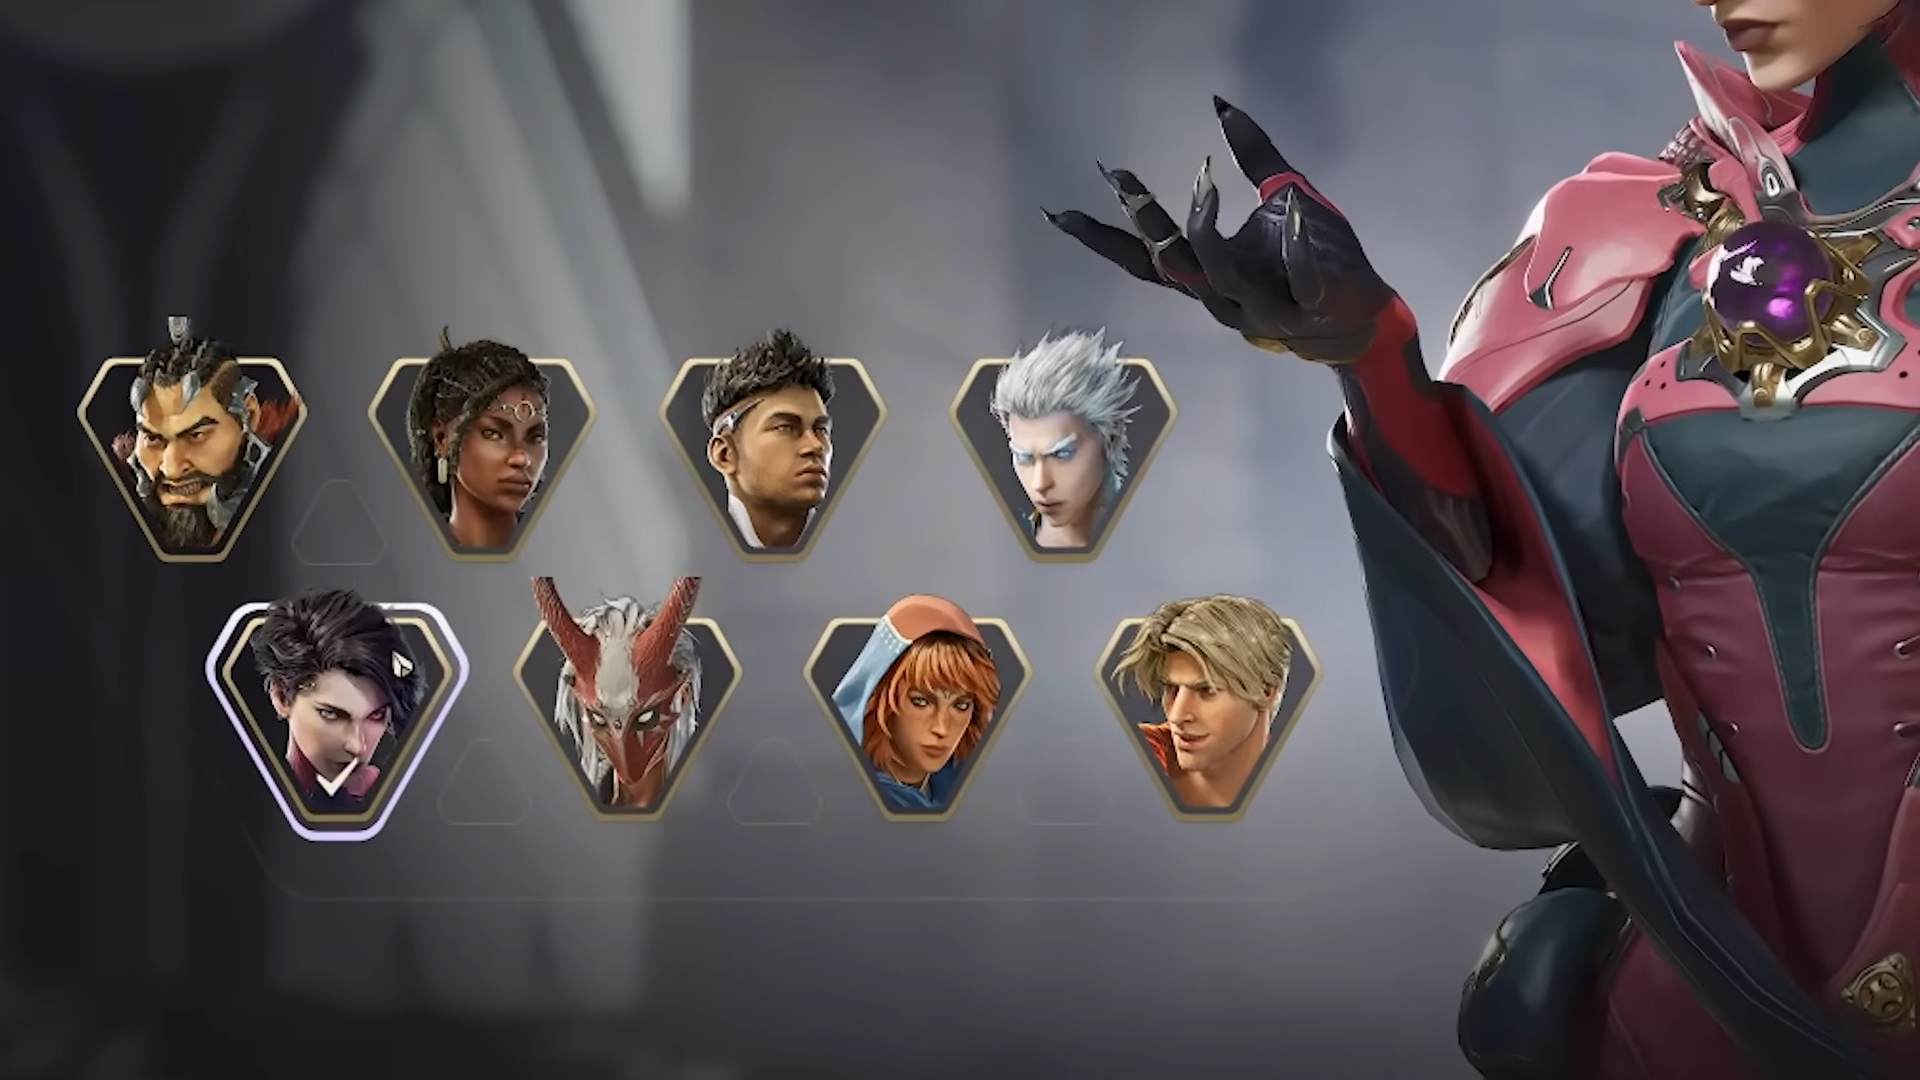
Phase 1: Character & Base Selection
Before the match begins, your team selects characters called Wardens. Each Warden brings unique abilities that cater to different playstyles and team compositions. Highguard launches with eight Wardens to choose from.
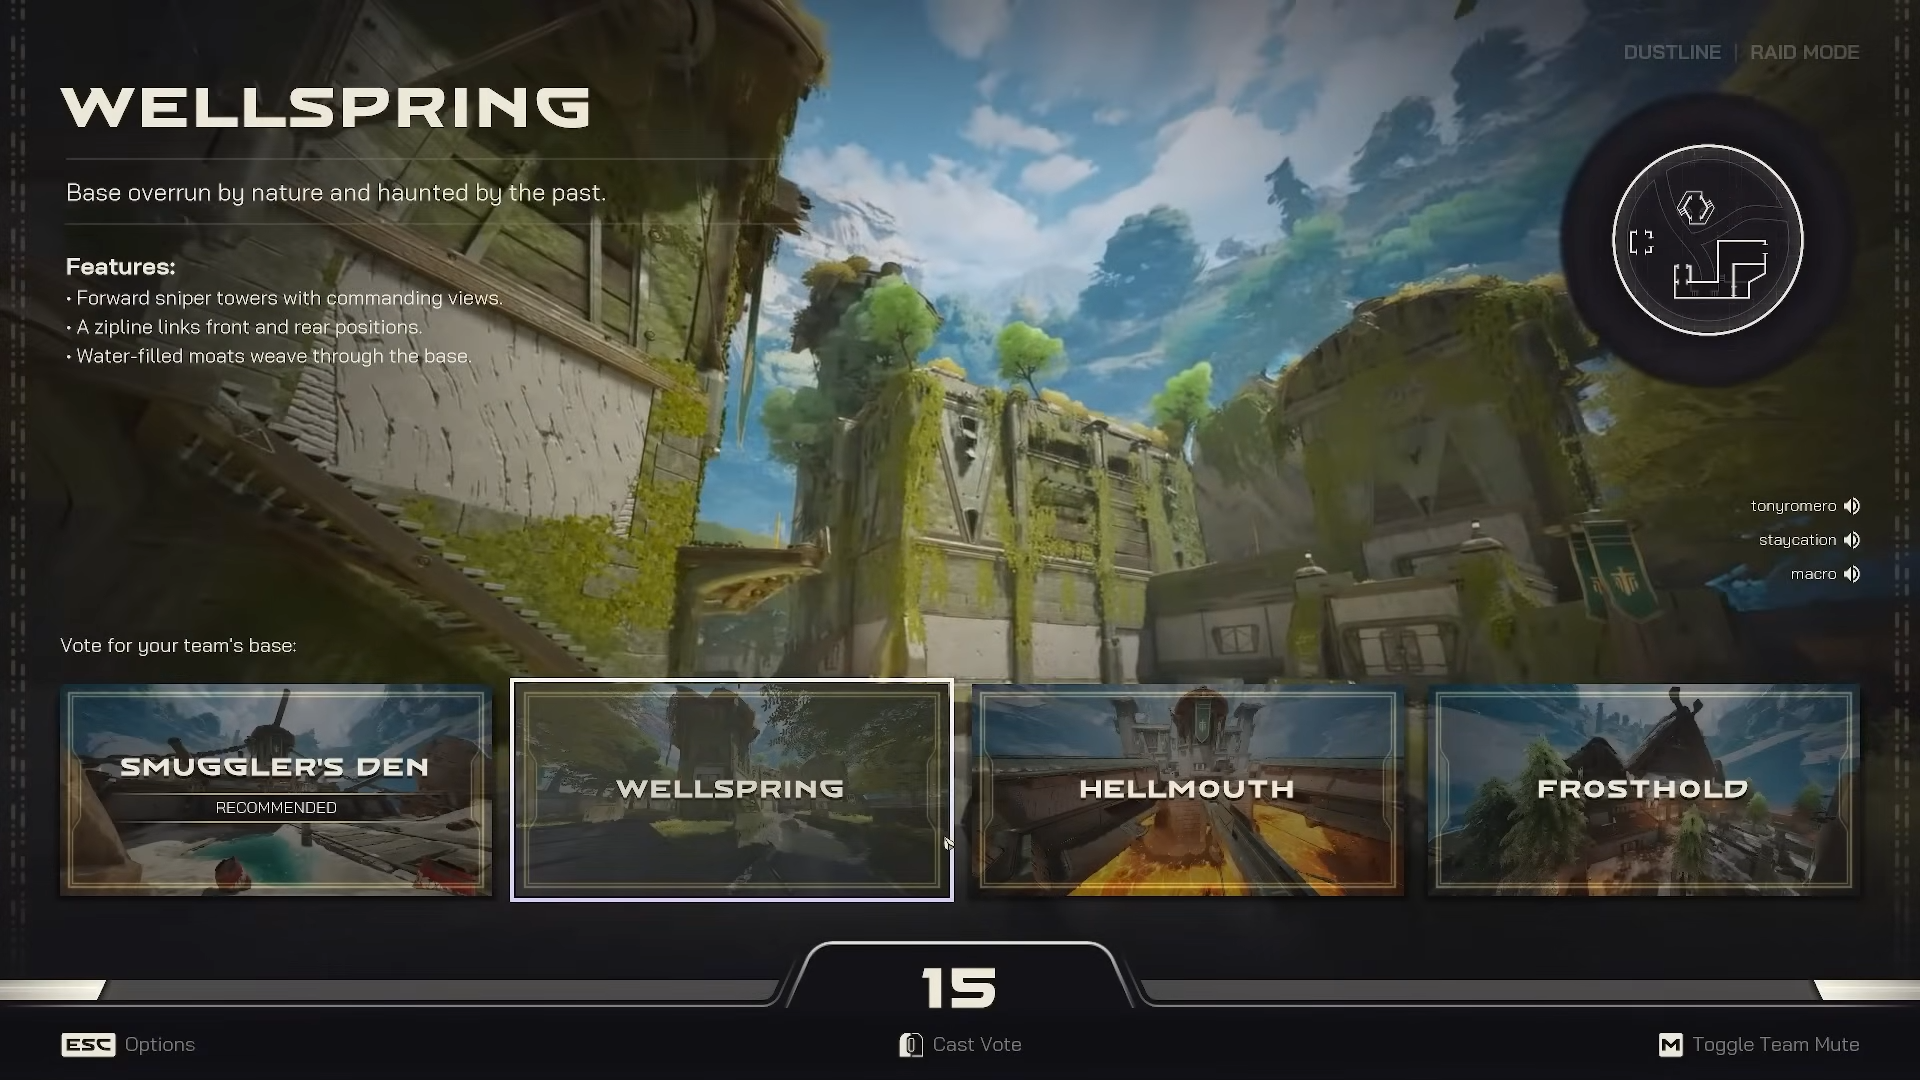
After character selection, both teams vote on four available bases. Your chosen base becomes your defensive stronghold and influences your tactical positioning.
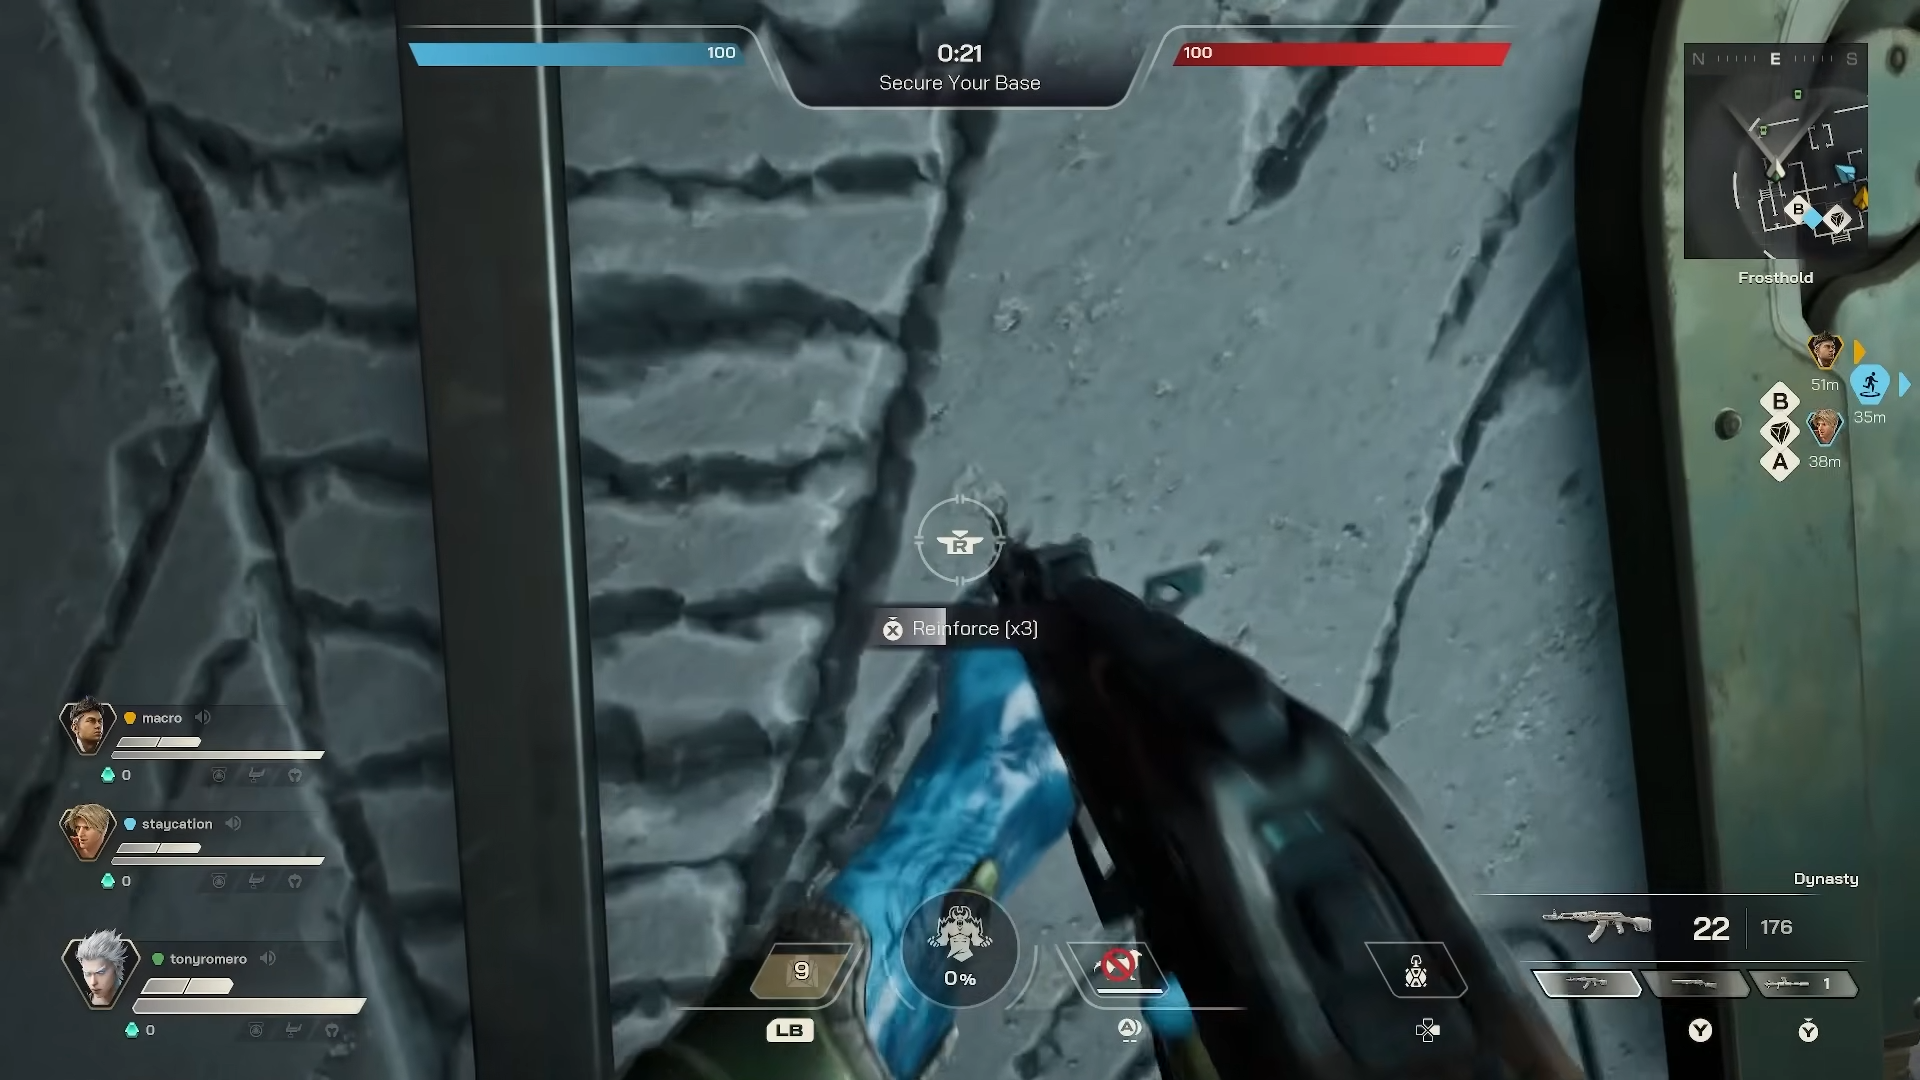
Phase 2: Defensive Phase (3 Minutes Total)
The match starts with two critical preparation waves:
Wave 1 – Secure & Gear Up (1 Minute)
-
A protective dome shields your base from enemy attacks
-
Reinforce your walls to strengthen defenses
-
Customize your weapons and loadouts for the upcoming encounter
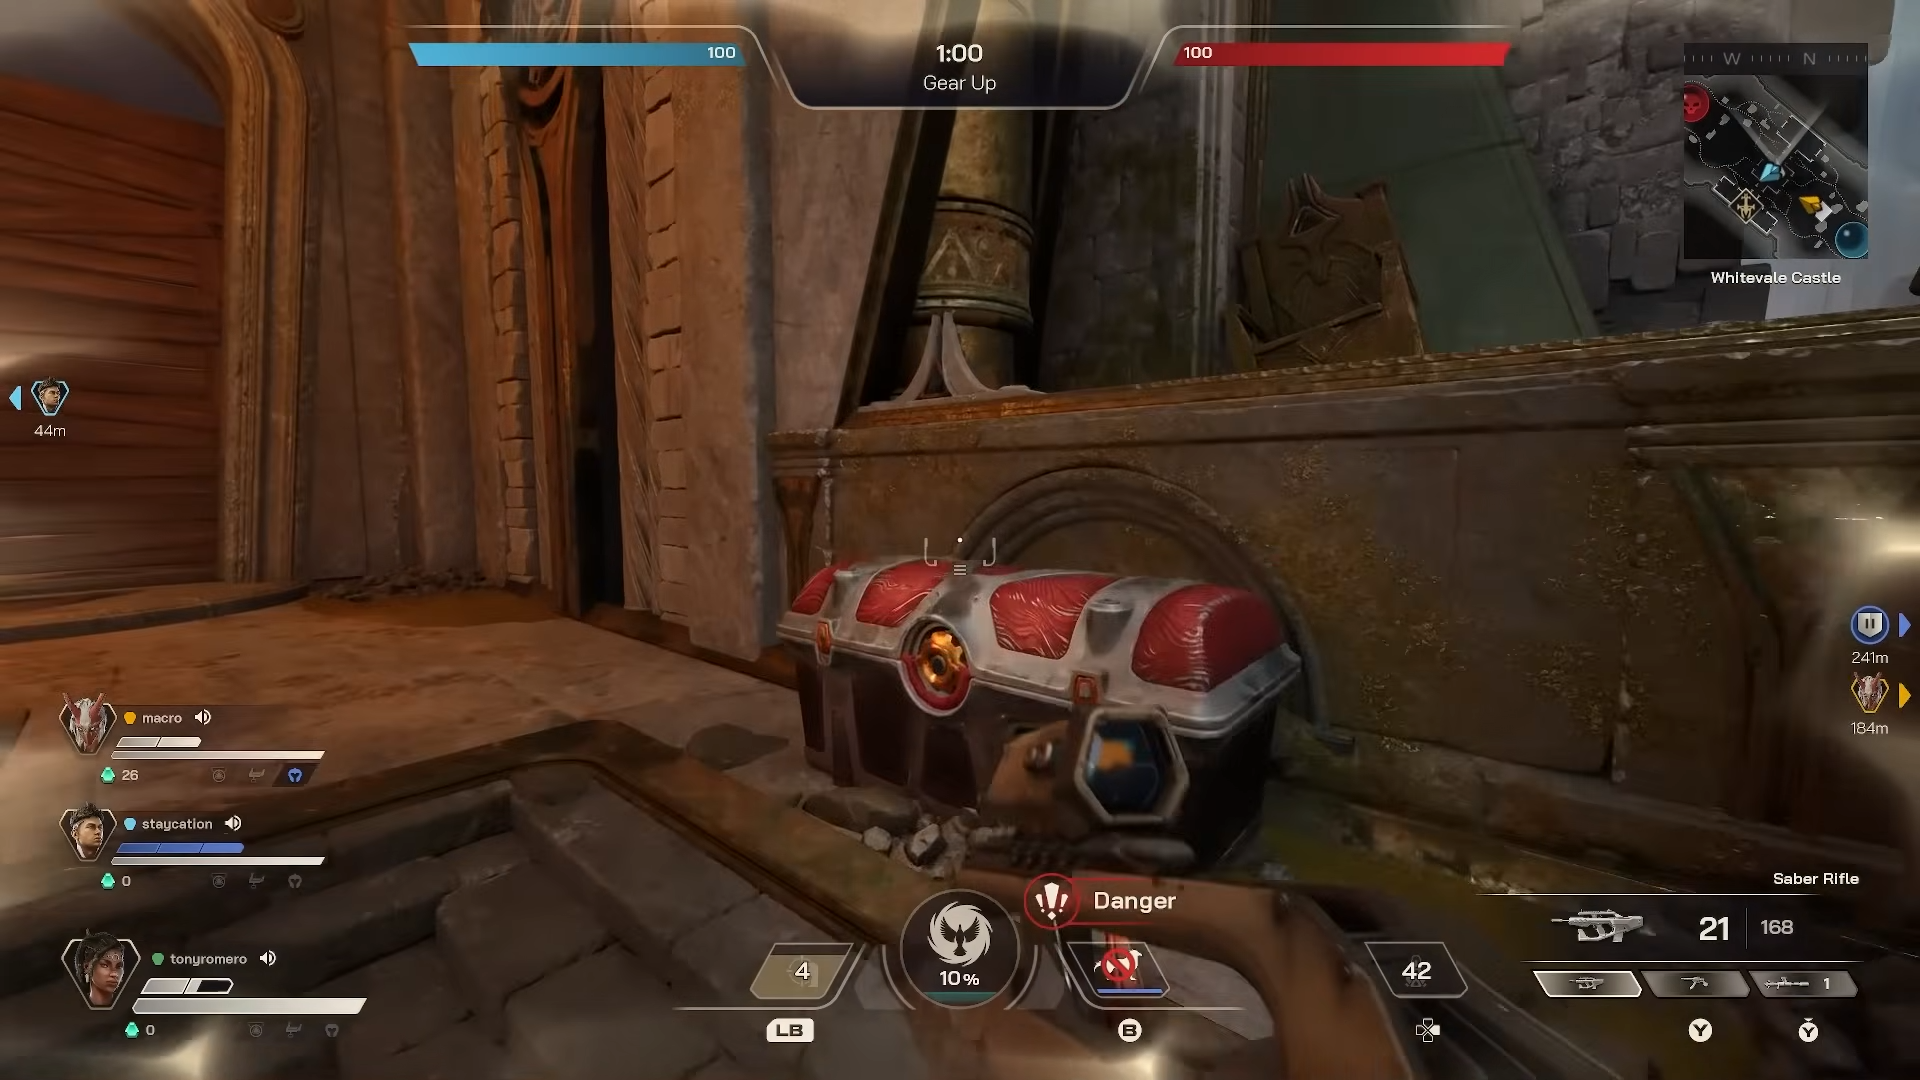
Wave 2 – Resource Gathering (2 Minutes)
-
The dome retracts, and both teams venture into the map
-
Loot chests scattered across the terrain contain valuable equipment
-
Harvest Vesper currency to trade with Flynn for item upgrades throughout the match
-
This is your first taste of combat as teams scout for resources and encounter each other
Phase 3: Intercept Phase
The intensity ramps up significantly during this phase:
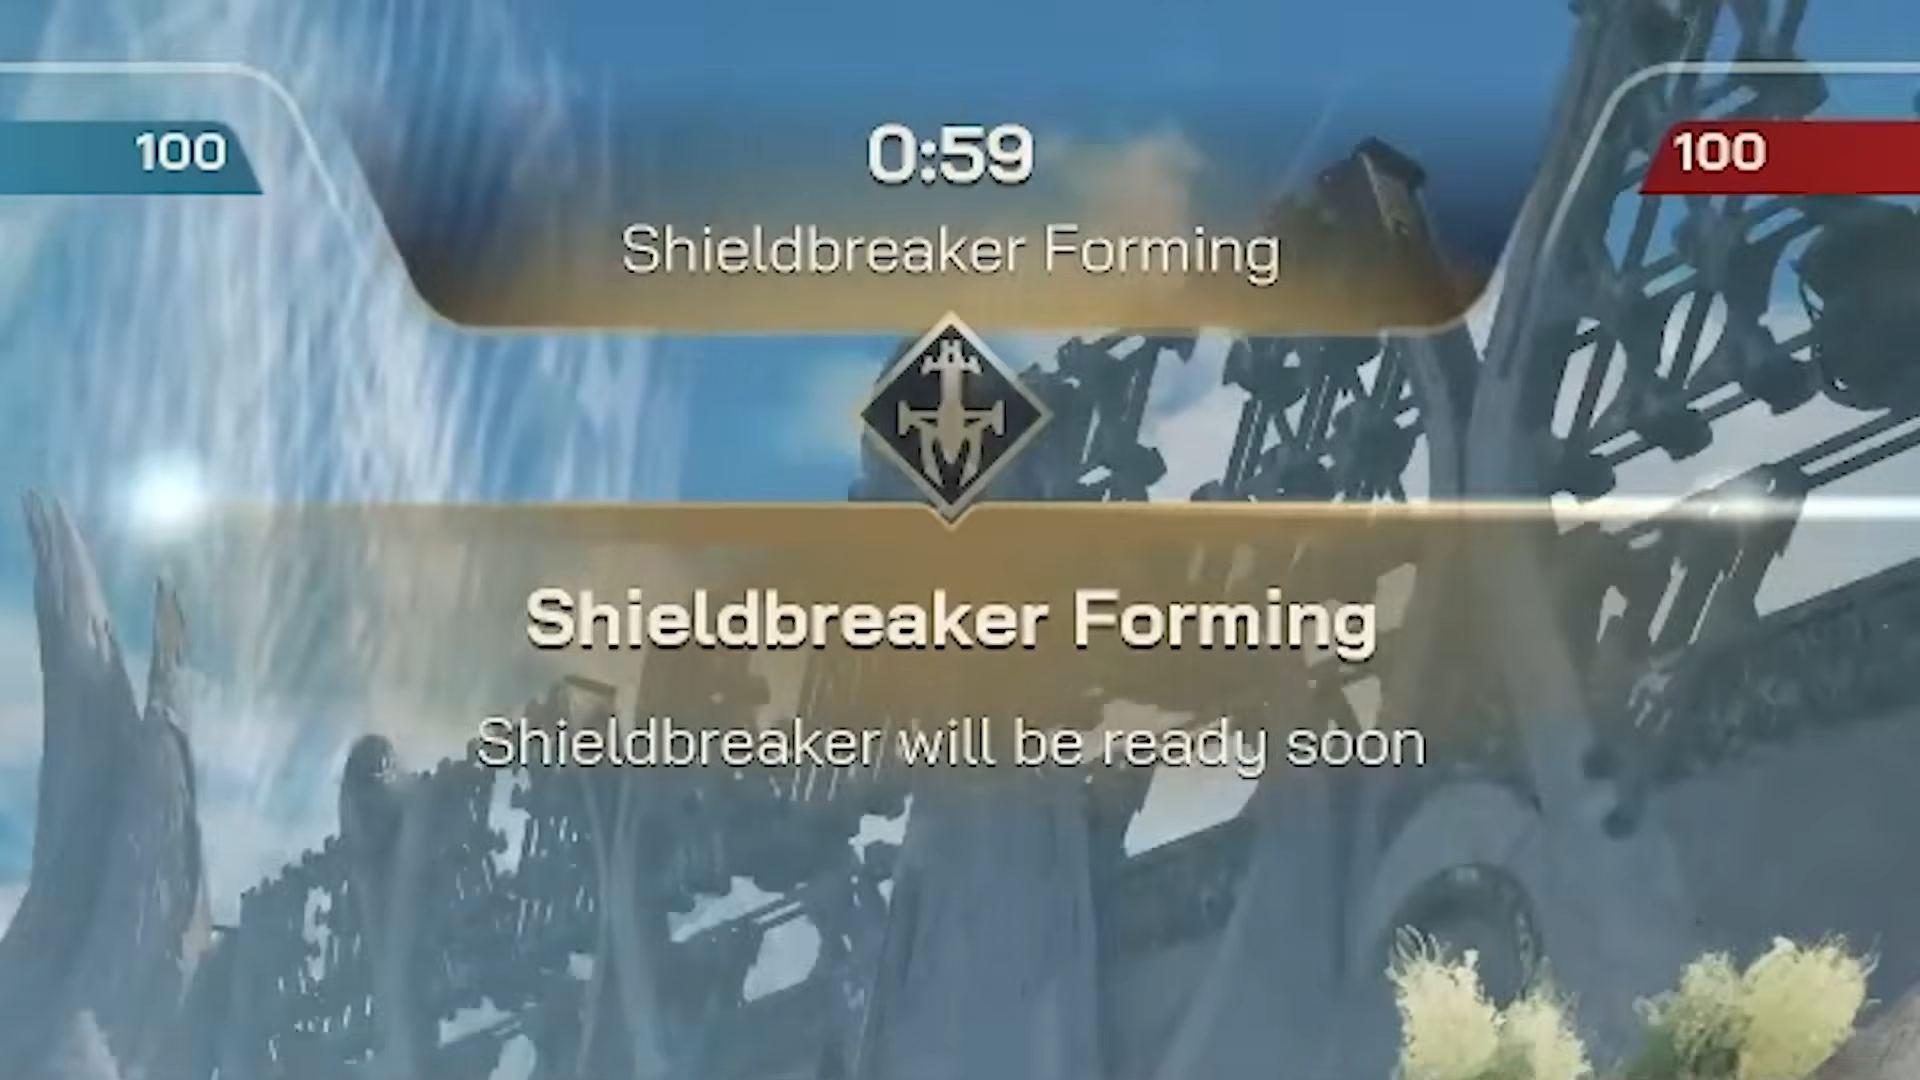
Shield Breaker Formation
-
A Shield Breaker begins forming at a specific map location
-
Both teams receive visual and audio notifications of its location
-
It takes 1 minute to fully materialize, giving players time to traverse the map
-
Once formed, a 2-minute timer begins.
Competing for the Shield Breaker
-
Teams must reach the Shield Breaker and transport it to the enemy base
-
If a player holding the Shield Breaker is eliminated, it drops and becomes available to any team
-
Possession is key—the team that successfully plants the Shield Breaker at the enemy base initiates a raid
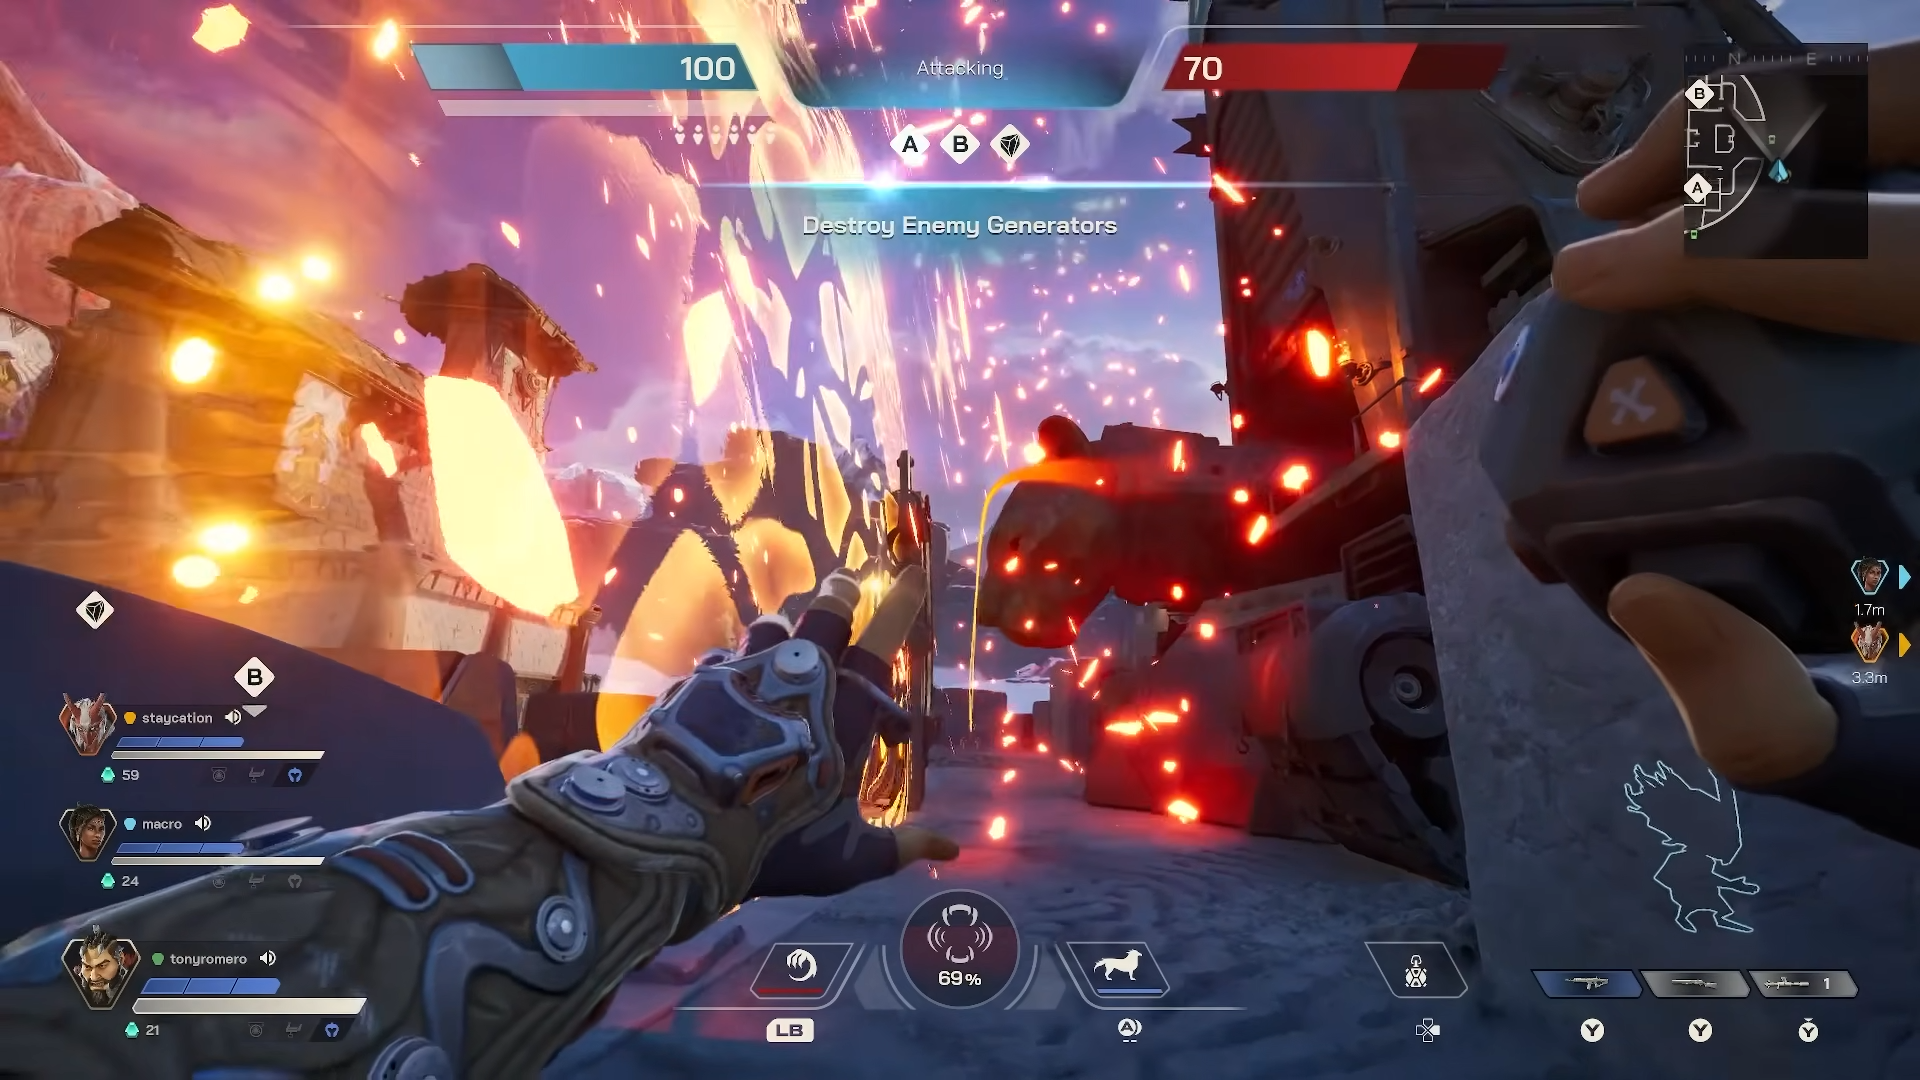
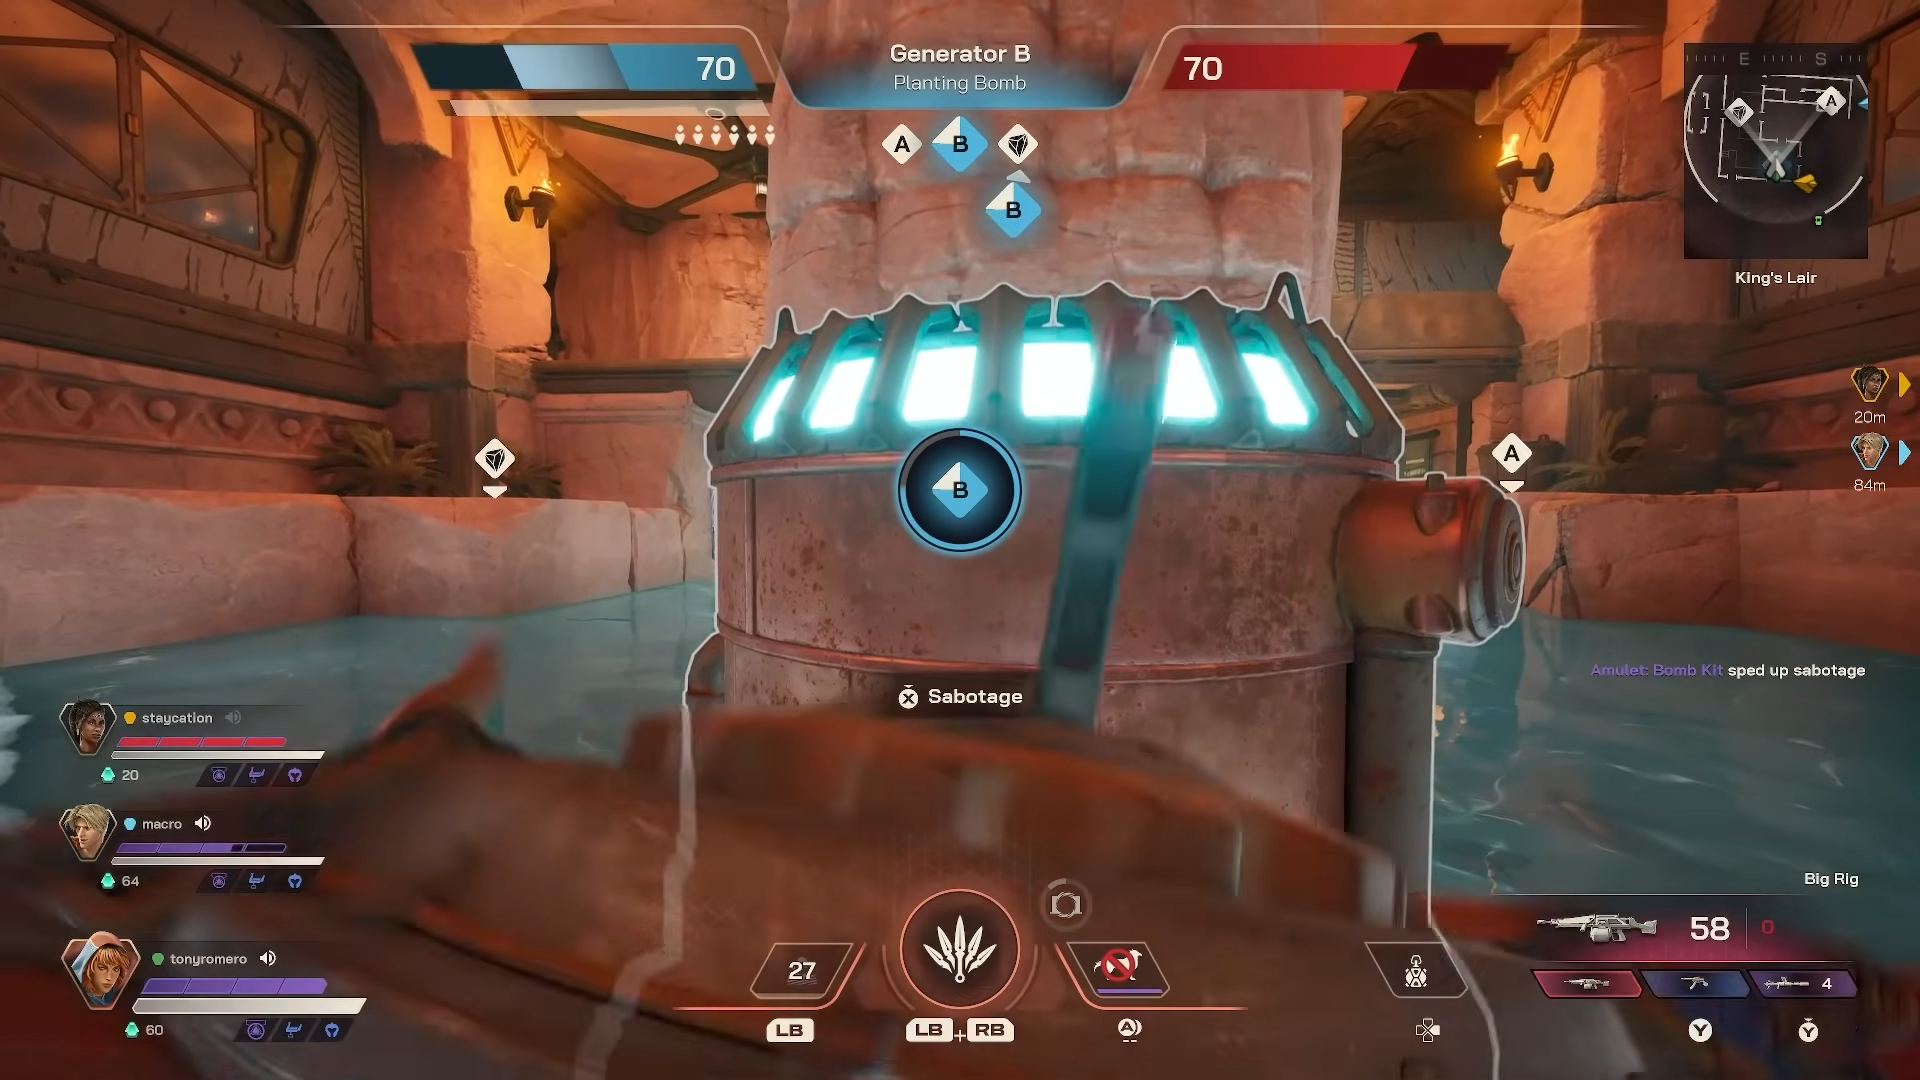
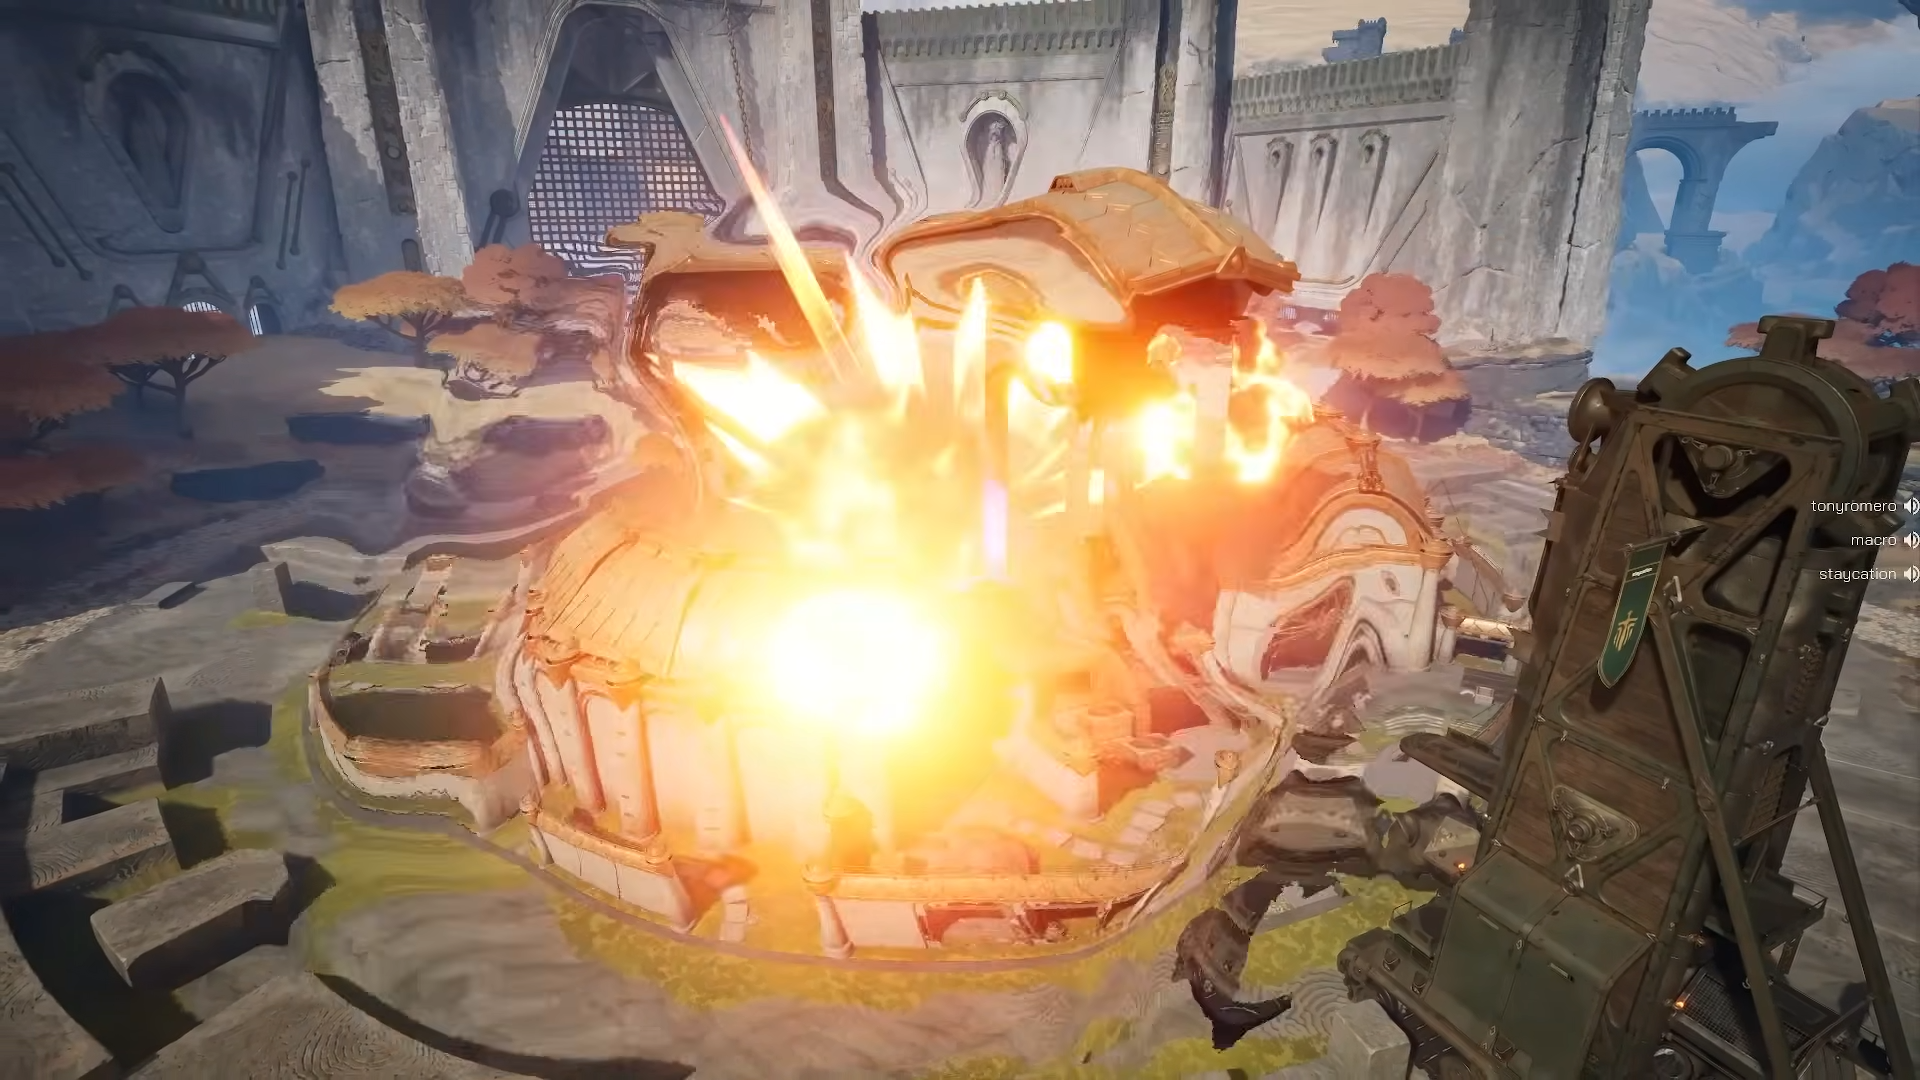
Phase 4: The Raid Phase
Once your team plants the Shield Breaker in the enemy base, the raid begins. This phase determines the match outcome.
Attacking Team Objectives
-
Breach walls to penetrate deeper into the base
-
Use Warden abilities or raid tools to overcome defenses:
-
Rocket launcher for ranged destruction
-
Zipline for mobility and access
-
Blast hammer for close-range breaching
-
-
Plant bombs on two generators (each deals 35 damage to the enemy base)
-
Optionally target the Anchor Stone (much harder to destroy but grants instant victory if successful)
-
After planting charges, defend the objective while the enemy team attempts to disarm them.
Defending Team Strategy
-
Prevent enemies from advancing through choke points
-
Disarm planted charges before they detonate
-
Eliminate attackers to buy time and reset the match flow
Winning Conditions
-
Reduce the enemy base health to zero through accumulated damage
-
Successfully destroy the Anchor Stone for an instant victory
-
Prevent the enemy team from destroying both generators and the Anchor Stone.
Match Duration
Highguard matches are dynamic and variable, ranging from 8 to 30 minutes depending on how both teams perform. Competitive matches often come down to clutch plays or last-second bombing decisions that determine the outcome.
The Eight Wardens: Abilities & Roles
Each Warden possesses a passive ability, a tactical ability, and an ultimate ability. Understanding each character’s toolkit is essential for effective teamplay.
Redmane – The Destructor
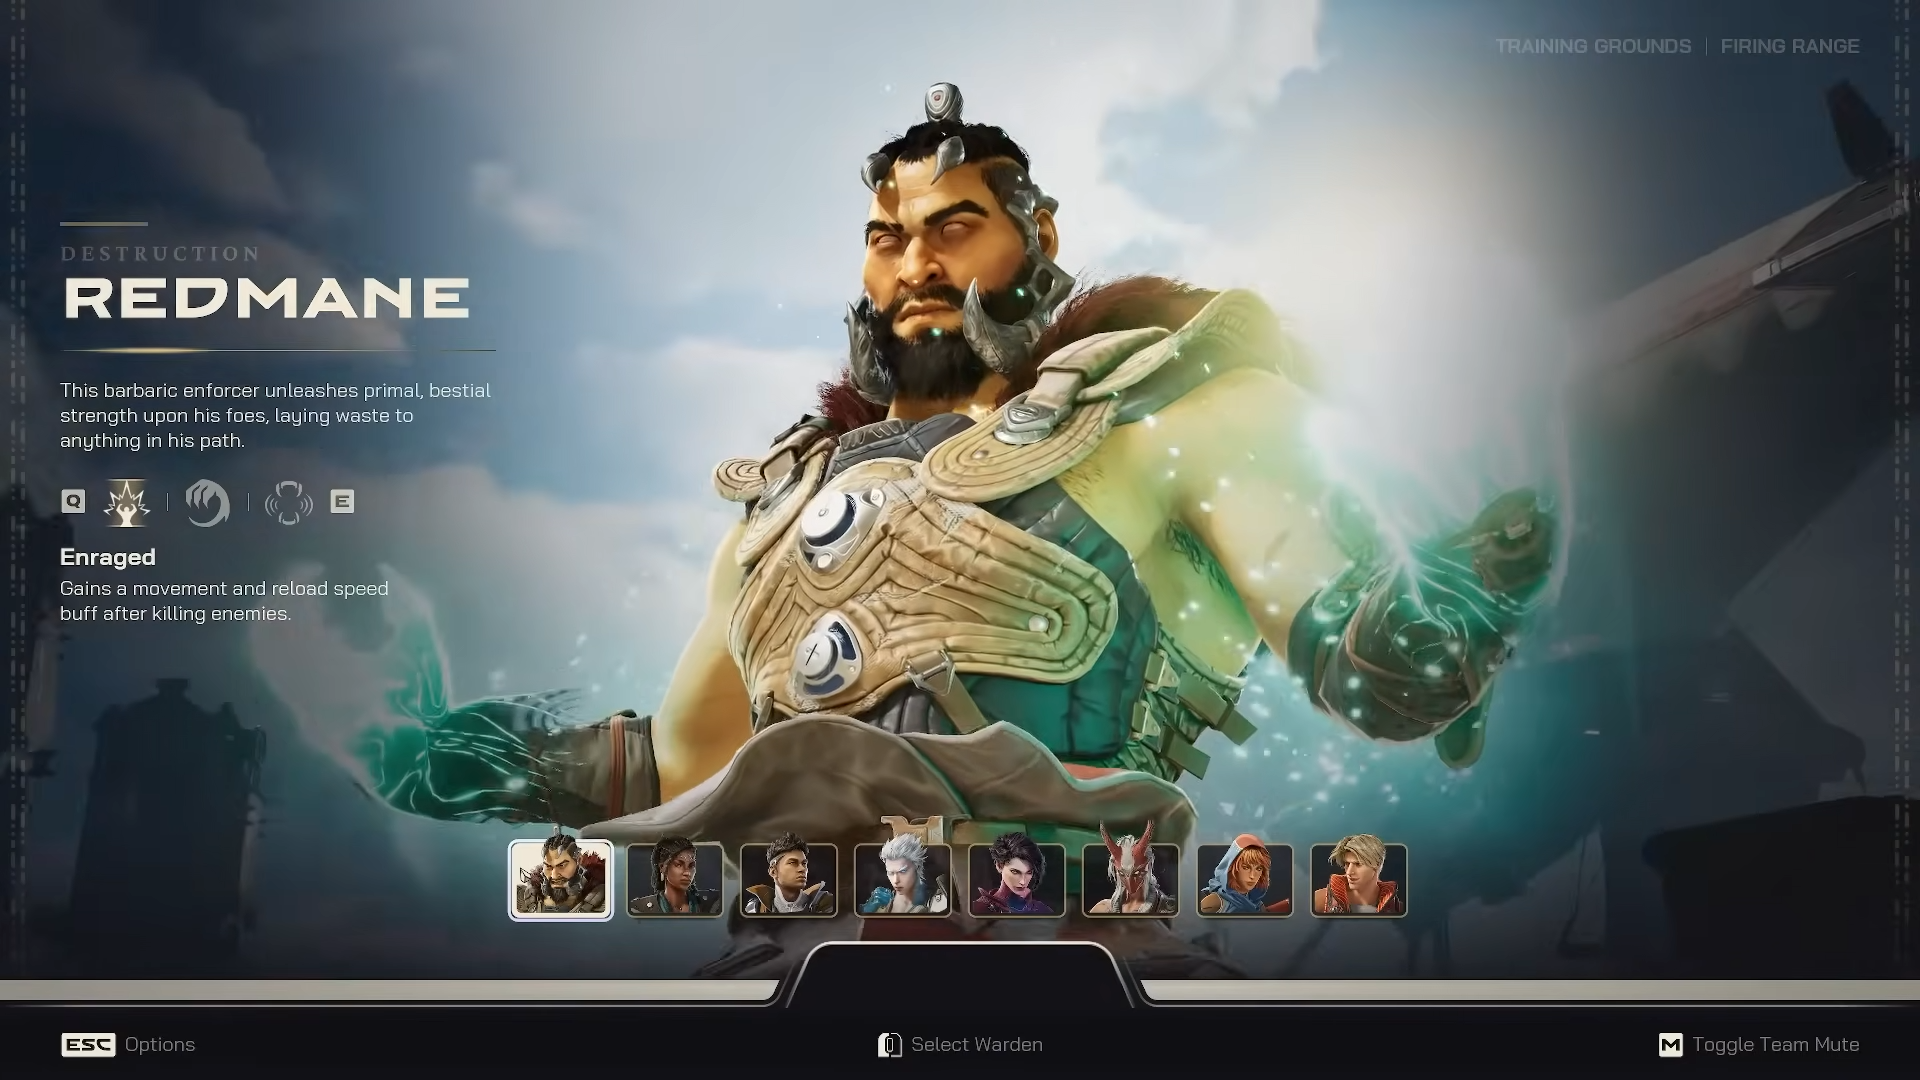
Role: Destruction-focused character ideal for breaking through defenses.
Passive – Enrage: Gains increased movement speed and reload speed after eliminating enemies, rewarding aggressive play.
Tactical – Pounce: Breaks walls on impact. Hold the button to leap forward for repositioning and mobility.
Ultimate – Beast’s Roar: Destroys walls and breakable objects in front of you while dealing damage to enemies in the area.
Best For: Players who enjoy aggressive, in-your-face gameplay and leading the charge.
Condor – The Scout
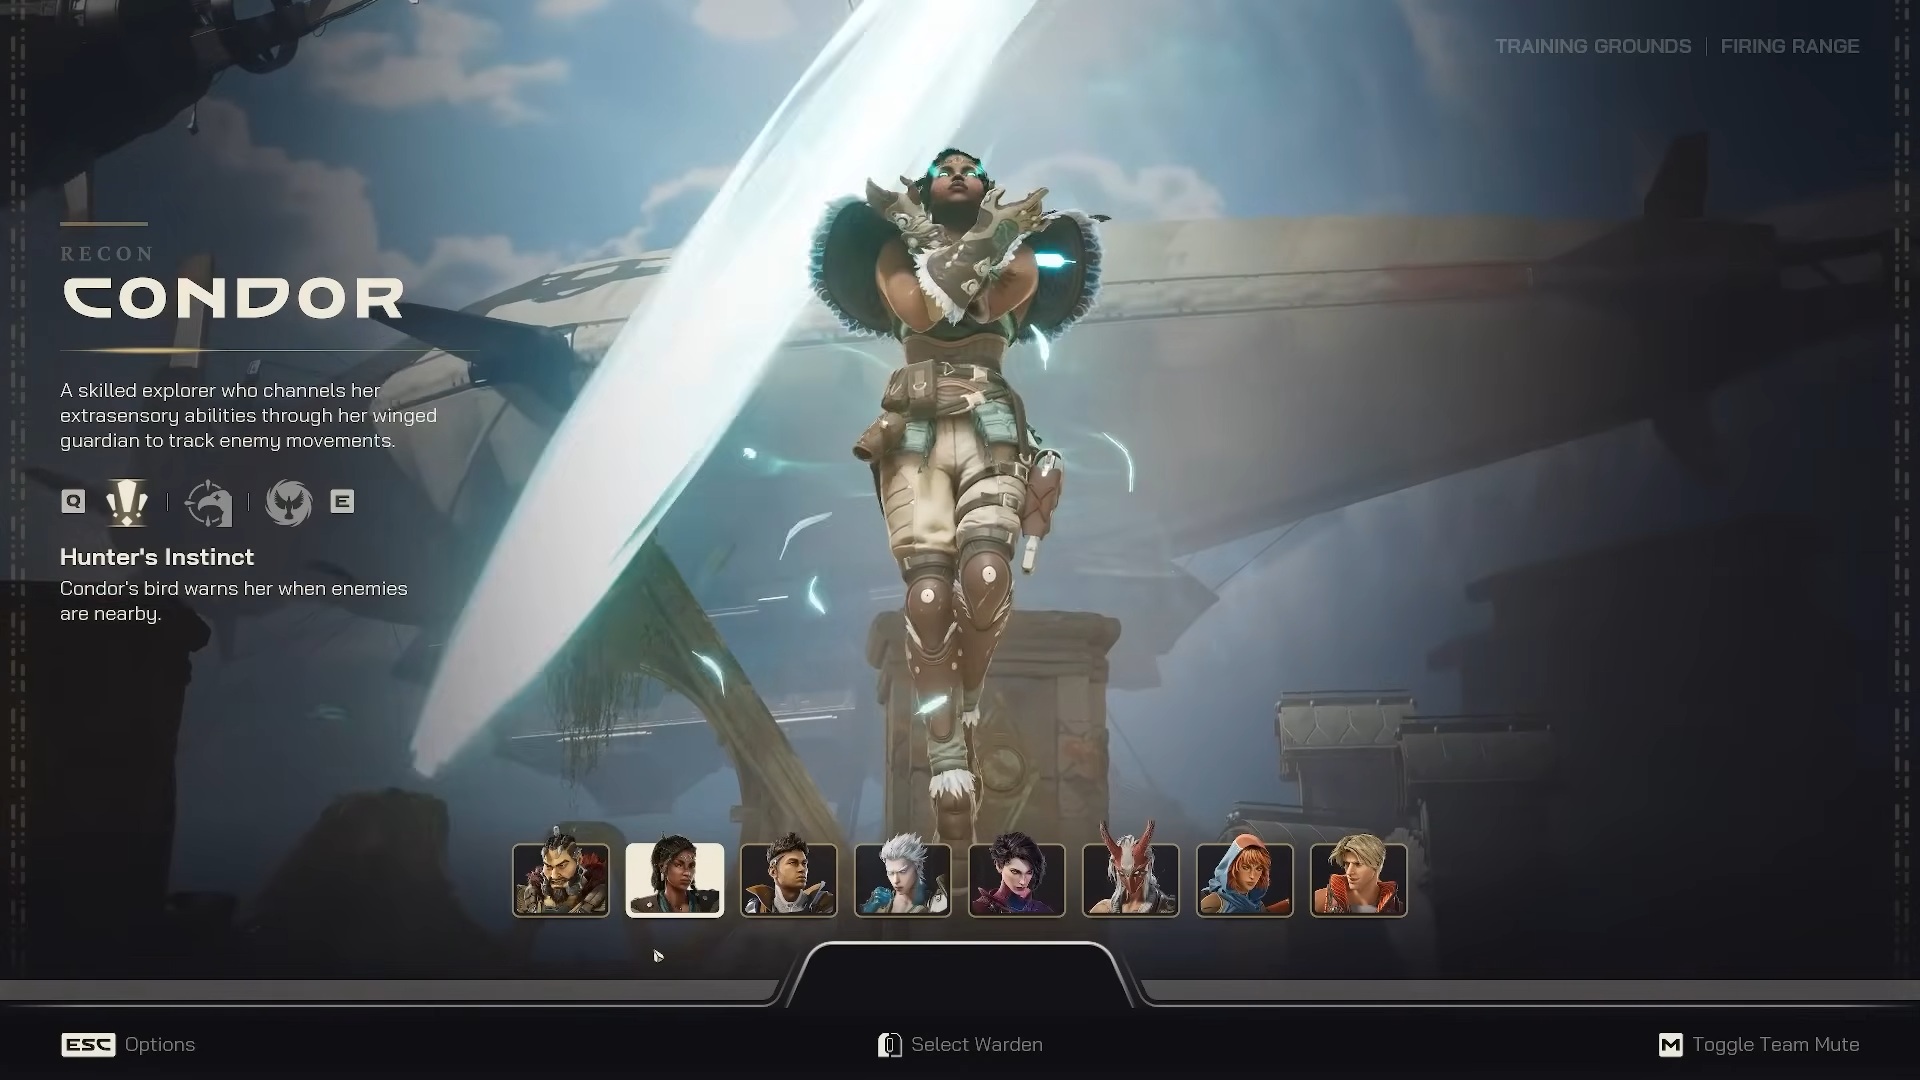
Role: Reconnaissance specialist providing critical enemy intelligence.
Passive – Hunter’s Instinct: A Condor bird warns you when enemies are nearby, providing early warning of threats.
Tactical – Eyes in the Sky: Sends your bird to scan the area, detecting enemies that move. Stationary enemies remain undetected.
Ultimate – Soaring Guardian: Launch up to three smoke clouds in an area. Enemies passing through are revealed to your team.
Best For: Players who excel at information gathering and supporting teammates with positioning intel.
Attakus – The Storm Warrior

Role: Lightning-wielding assault character with crowd control capabilities.
Passive – Supercharged Axe: Your charged axe releases electrical explosions that damage nearby resource nodes, accelerating Vesper collection.
Tactical – Shock Spear: Throw a charged spear that shocks nearby enemies, disrupting their positioning.
Ultimate – Power Storm: Rise into the air and rain lightning spears on enemies, dealing heavy damage and destroying structures simultaneously.
Best For: Players who want versatile combat presence with both offensive and resource-gathering benefits.
Kai – The Ice Guardian
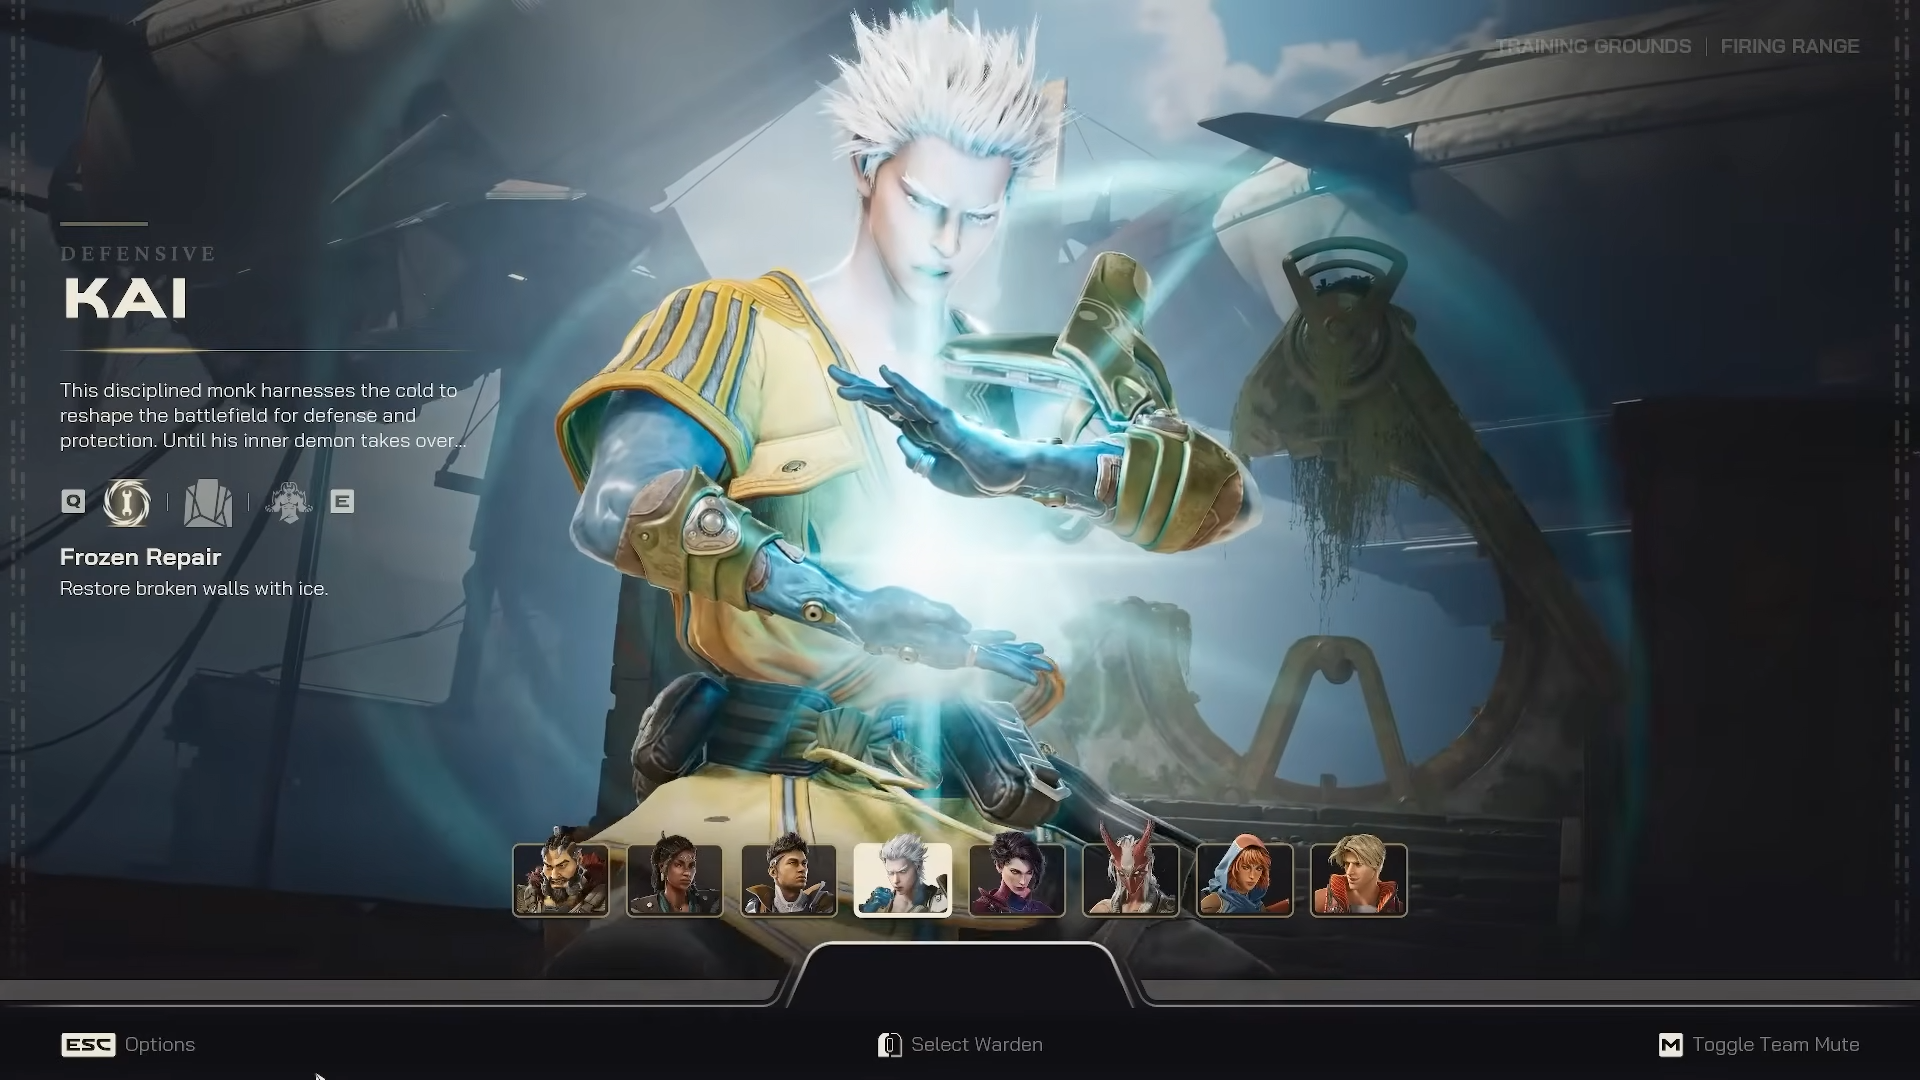
Role: Defensive specialist creating barriers and controlling space.
Passive – Ice Restoration: Restore broken walls using ice, helping defend against breaches.
Tactical – Ice Wall: Create an ice wall to block enemy advances or obstruct sightlines for tactical advantage.
Ultimate – Frost Giant: Transform into a giant ice demon with a massive shield. Deal significant damage to enemies and structures while absorbing incoming damage.
Best For: Players who prioritize defense and protecting objectives during raids.
Mara – The Support Anchor
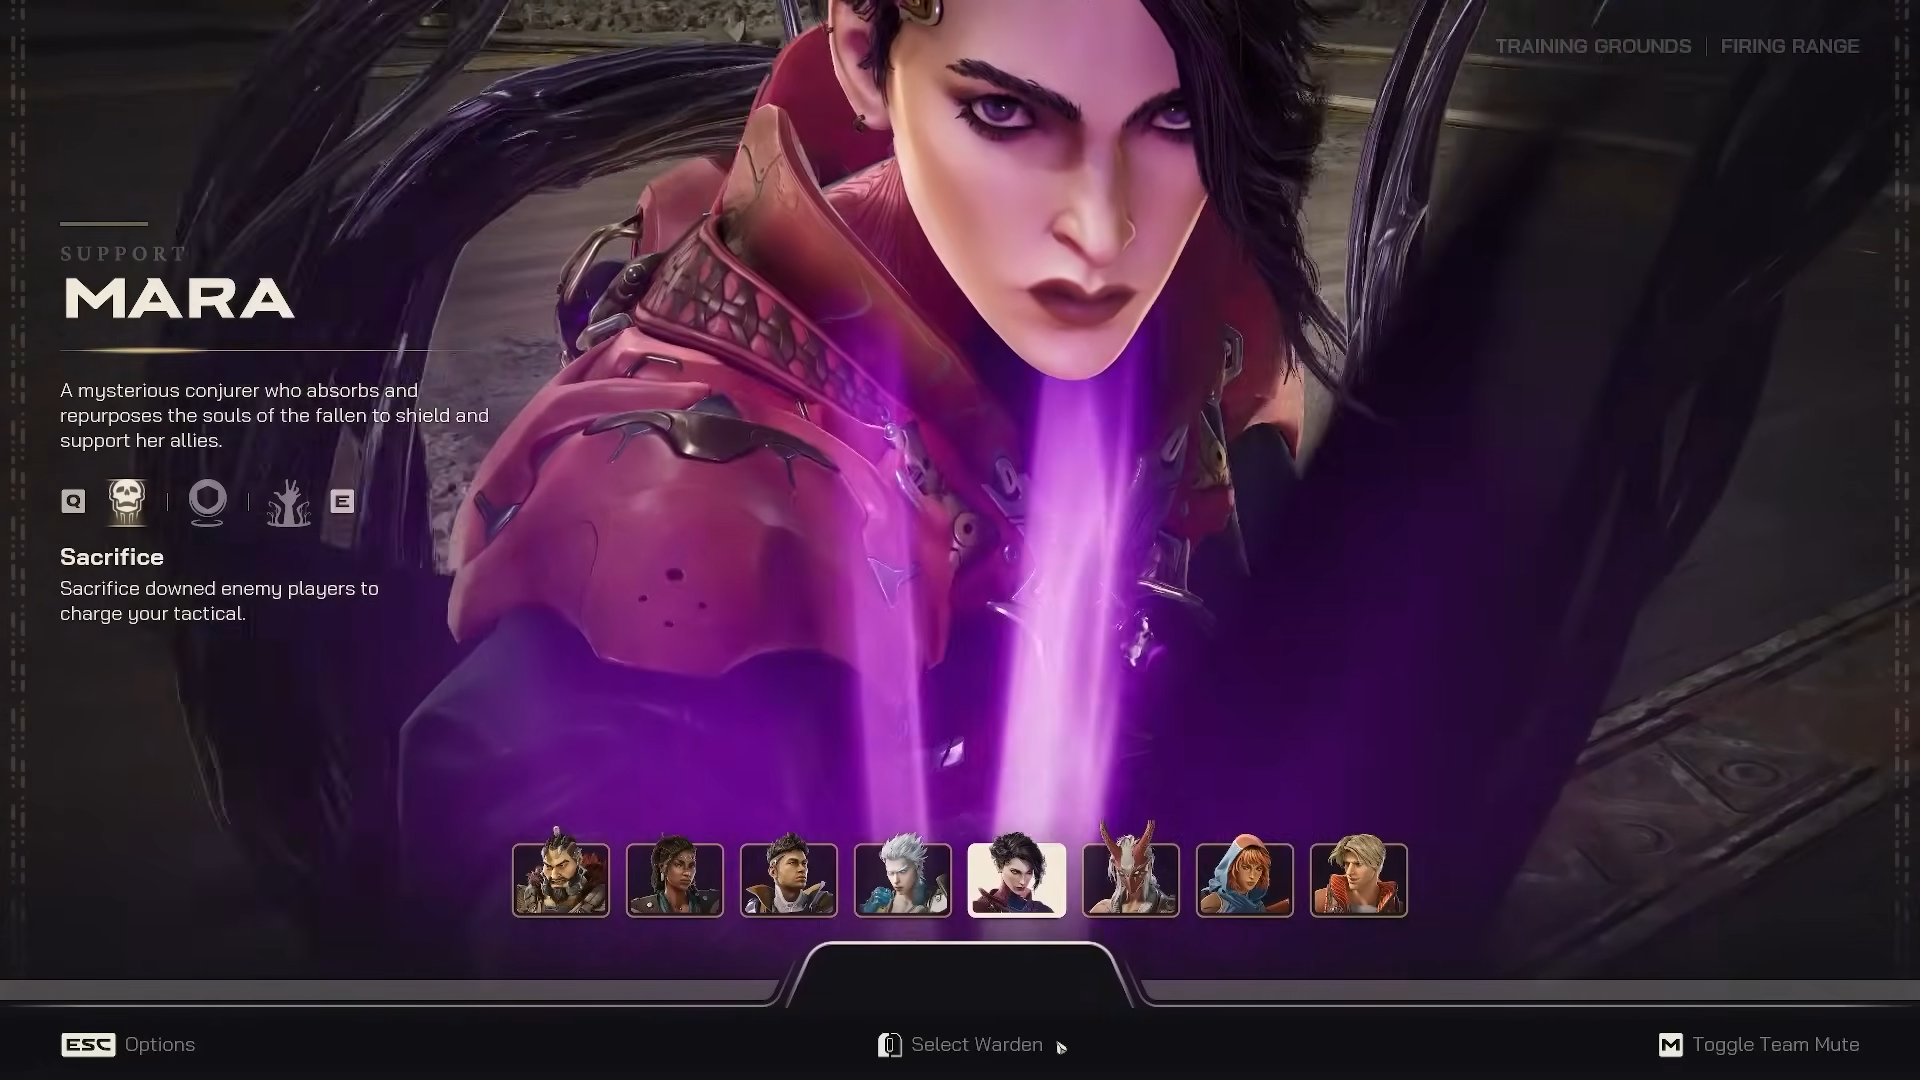
Role: Support character enabling team survival and respawning.
Passive – Sacrifice: When you eliminate a downed enemy, regain a charge of your tactical ability.
Tactical – Soul Armor: Grant allies an overshield that absorbs damage. The overshield displays as a different color on the health bar above their standard health.
Ultimate – Immortal Coil: Place a new spawn point for your team. This is exceptionally valuable during raids, giving respawning teammates a forward position rather than spawning at the base.
Best For: Players who thrive on enabling teammates and keeping their squad in the fight.
Una – The Summoner
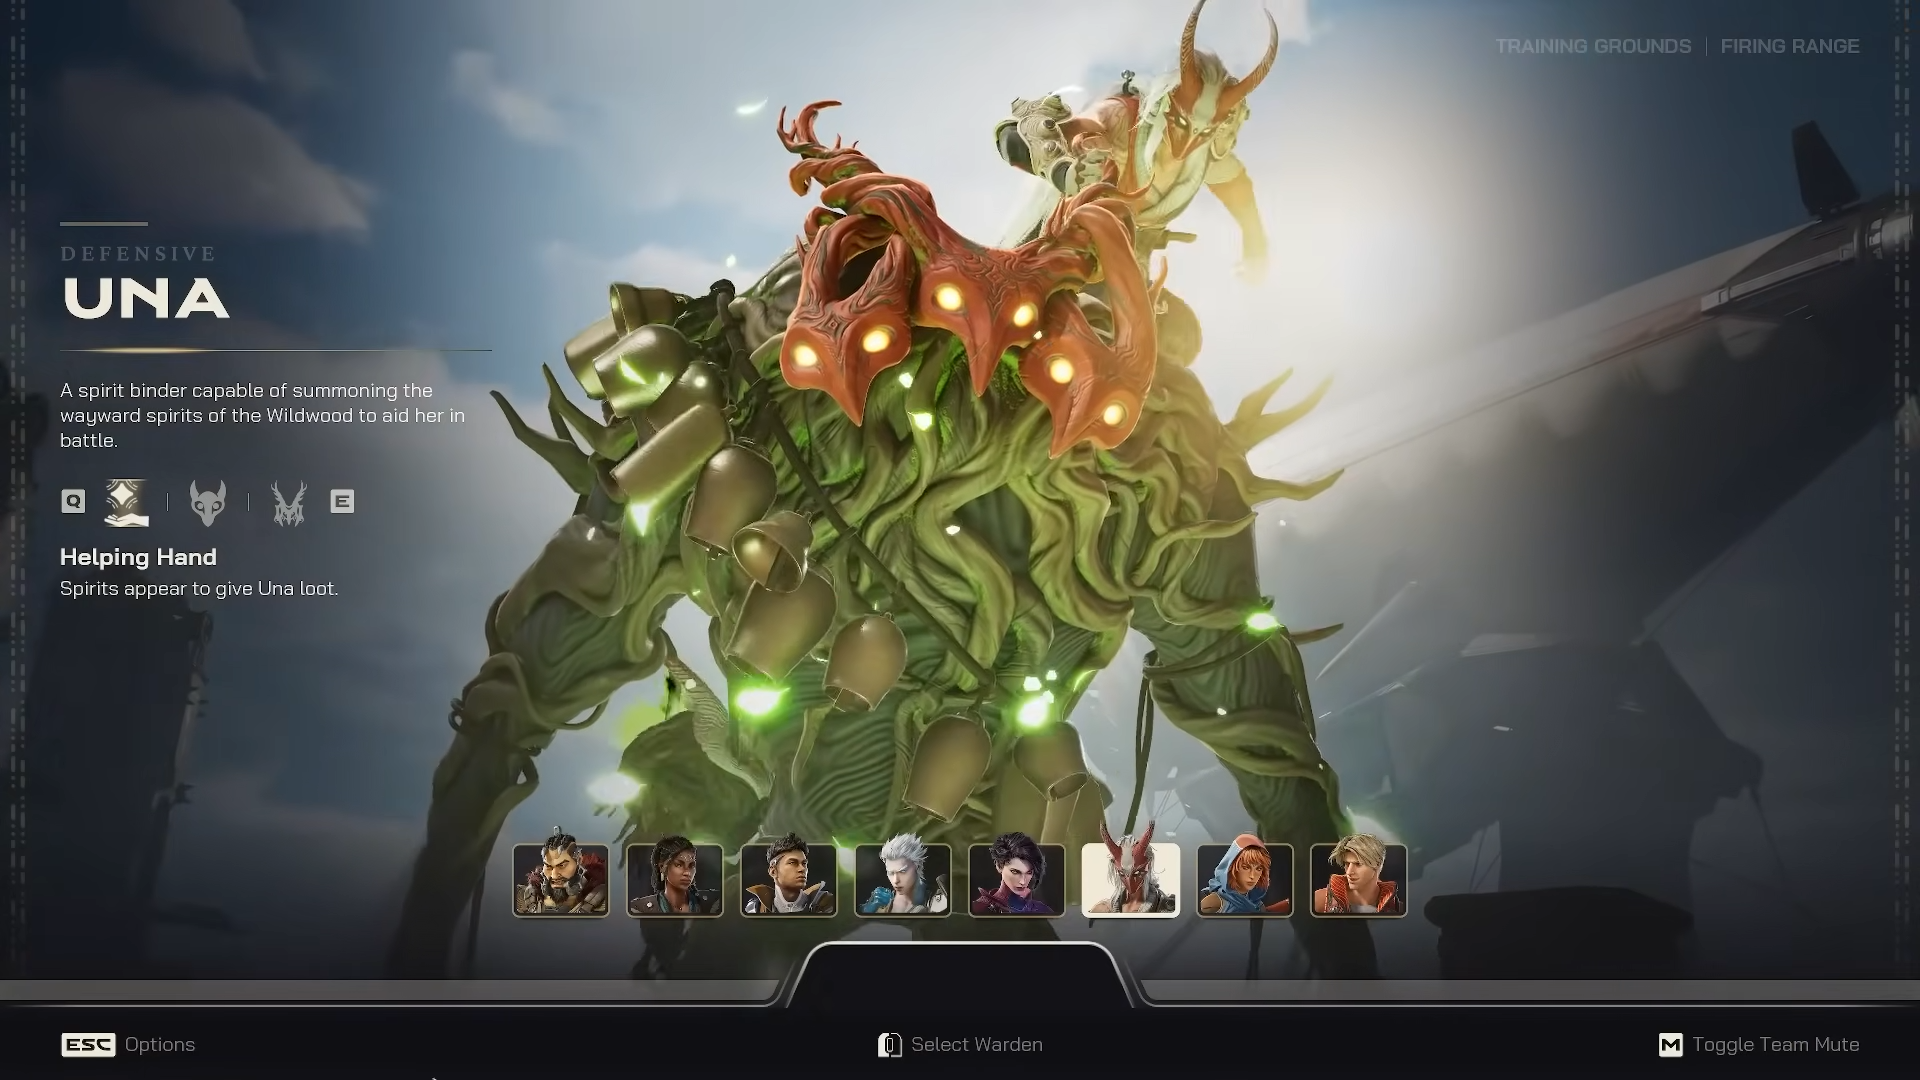
Role: Defensive character using spirit summons for area control.
Passive – Helping Hand: Random spirits spawn near you and provide loot, adding passive resource gains.
Tactical – Force Wisps: Summon spirits that lob concussion grenades at enemies like autonomous turrets.
Ultimate – Treewalker: Summon a large forest spirit tree that throws smaller explosive spirits at enemies, creating sustained area denial.
Best For: Players who enjoy passive and active area control through summoned entities.
Scarlet – The Desert Assassin
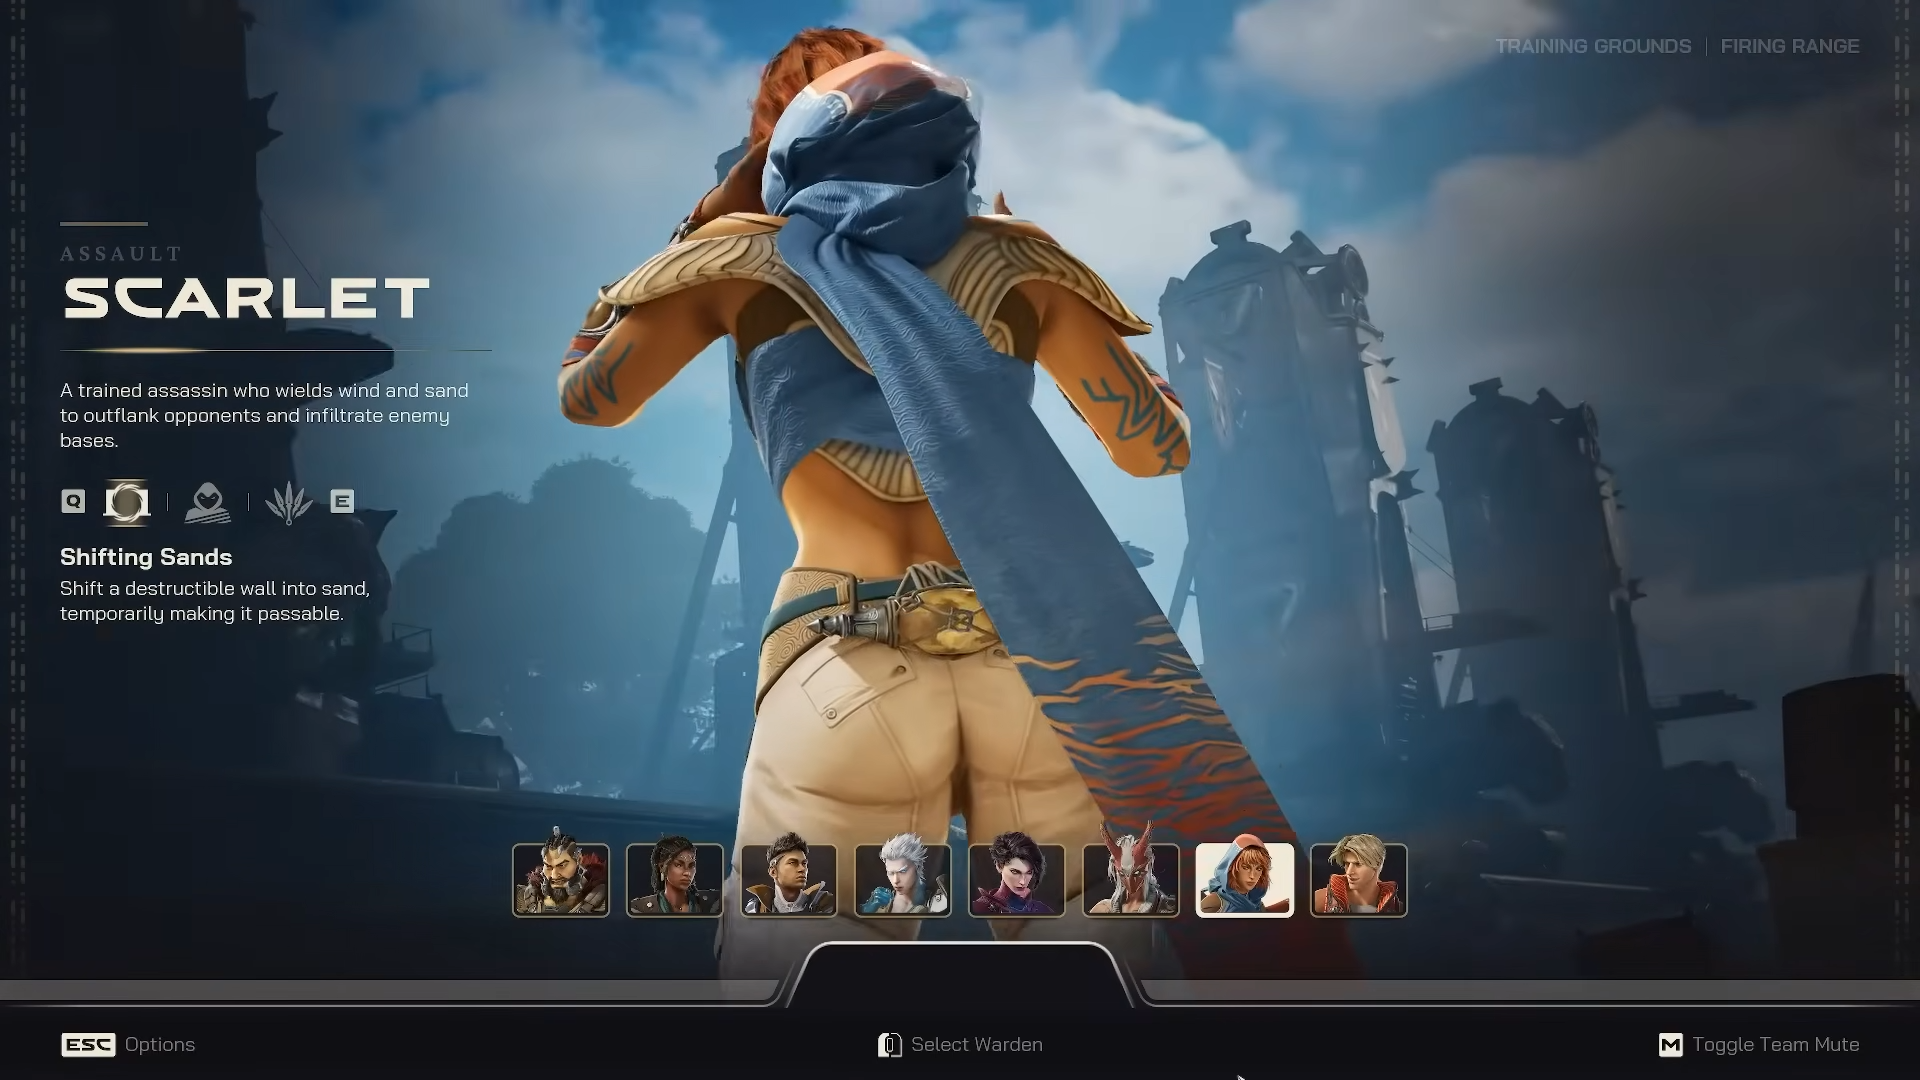
Role: Assault character specializing in wall manipulation and mobility.
Passive – Shifting Sand: Transform destructible walls into sand you can pass through temporarily. Invaluable for offense when you need to breach walls quickly and reach objectives.
Tactical – Sandstorm: Enter stealth mode, becoming invisible to distant enemies (enemies nearby can still detect you).
Ultimate – Whirling Blades: Throw up to six deadly daggers. Eliminating enemies with daggers resets the cooldown, allowing continuous damage output.
Best For: Players who like flanking, creative pathing through defenses, and maintaining pressure through mobility.
Slade – The Inferno Striker
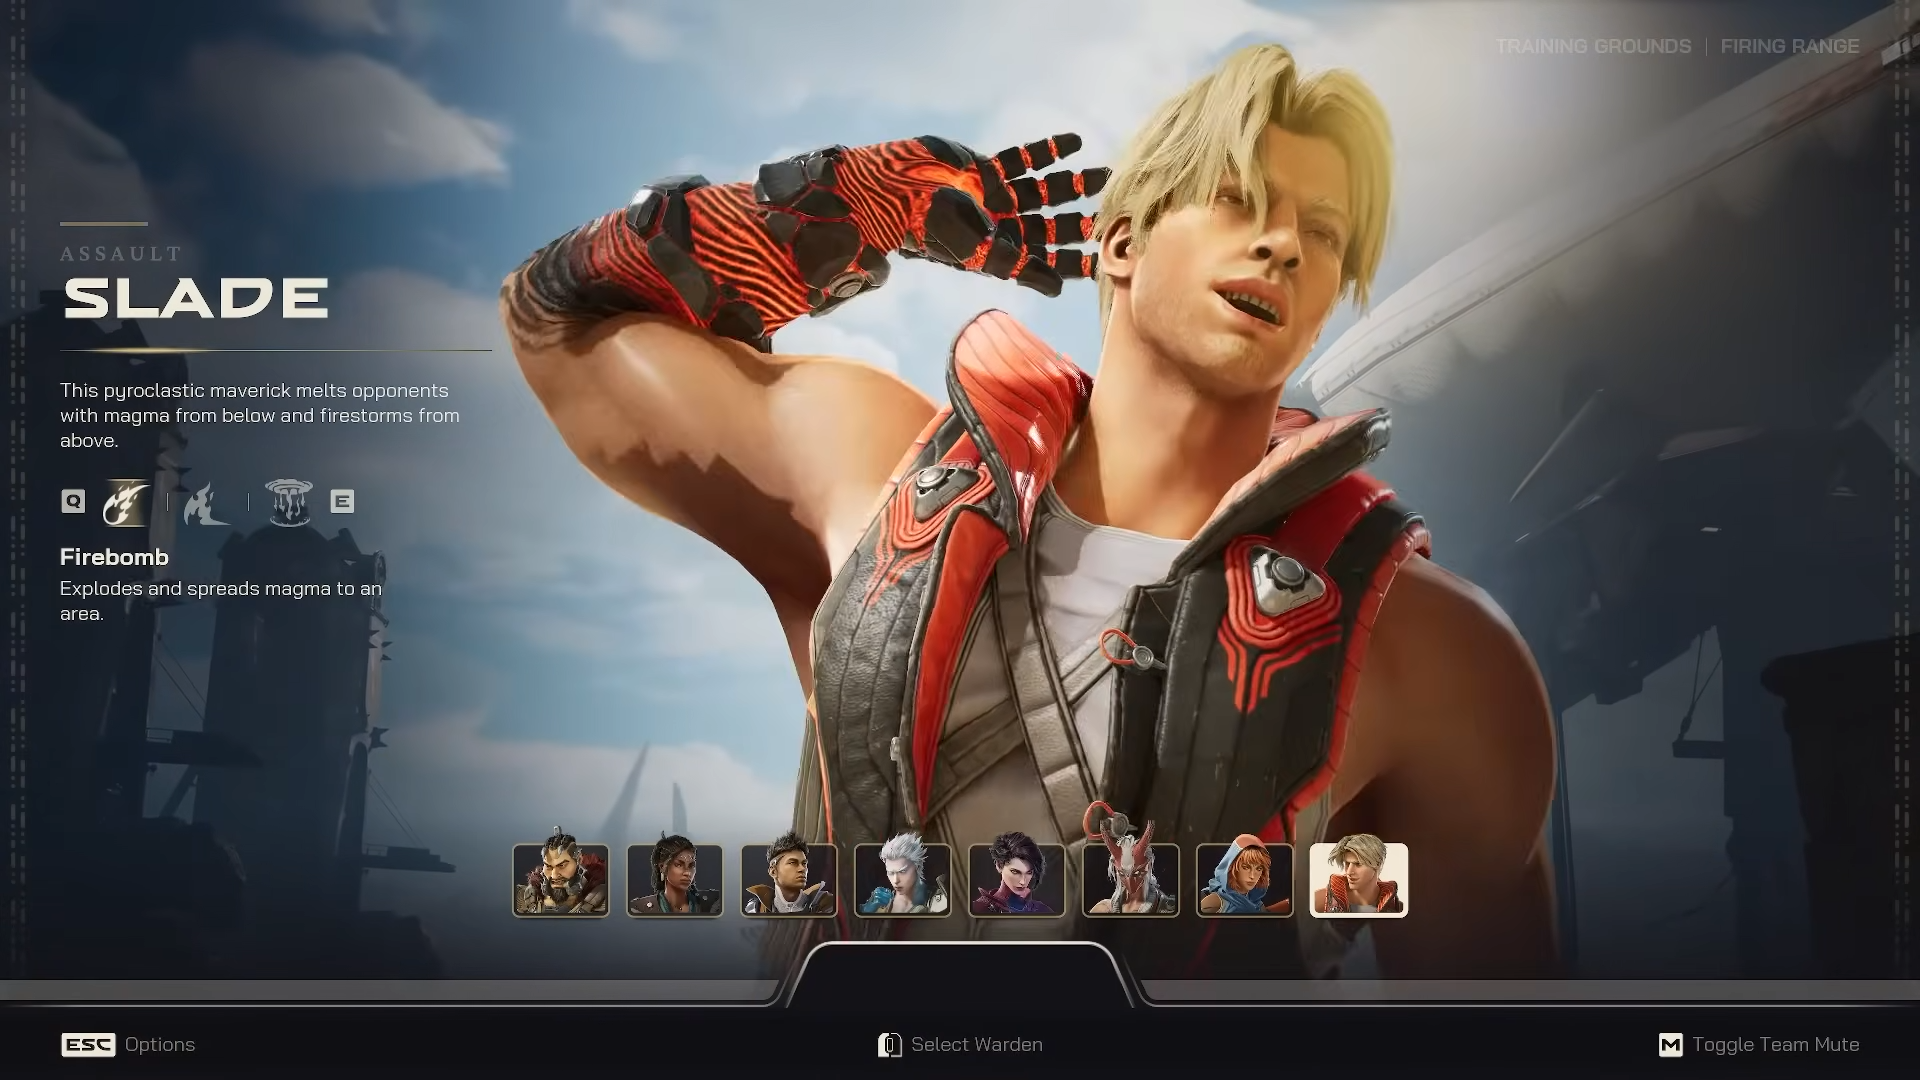
Role: Assault character leveraging fire damage for destruction and area control.
Passive – Fireball: Your grenades are replaced with fireballs that explode and spread magma in the area, creating persistent fire hazards.
Tactical – Heatwave: Deploy flames that damage and displace enemies.
Ultimate – Firestorm: Call down a massive firestorm dealing devastating damage to enemies and structures over a large area.
Best For: Players who enjoy area denial, persistent threat zones, and fire-based damage patterns.
Building Your First Team Composition
Effective team composition balances offense, defense, and utility:
-
Offensive Core: Include a destruction or assault character (Redmane, Scarlet, or Slade) to breach defenses and push objectives.
-
Defensive Anchor: Pair with Kai or Una to hold positions and create space control.
-
Support Element: Add Mara for survival tools and respawn positioning, or Condor for information advantage.
Don’t overthink it initially—practice with different characters to discover your strengths and preferences.
Currency & Progression System
Vesper Currency
Vesper is your primary in-match currency, earned by:
-
Harvesting resource nodes during the gathering phase
-
Completing objectives
-
Eliminating enemies
Trade Vesper with Flynn to:
-
Purchase weapon upgrades
-
Buy equipment enhancements
-
Strengthen your loadout mid-match
Battle Pass System (Warchest)
Highguard features a seasonal battle pass system with no FOMO. Items that rotate off the current warchest will return in future seasons, ensuring you’re never permanently locked out of cosmetic content.
The game emphasizes cosmetics over pay-to-win mechanics, meaning the store contains optional visual upgrades rather than competitive advantages.
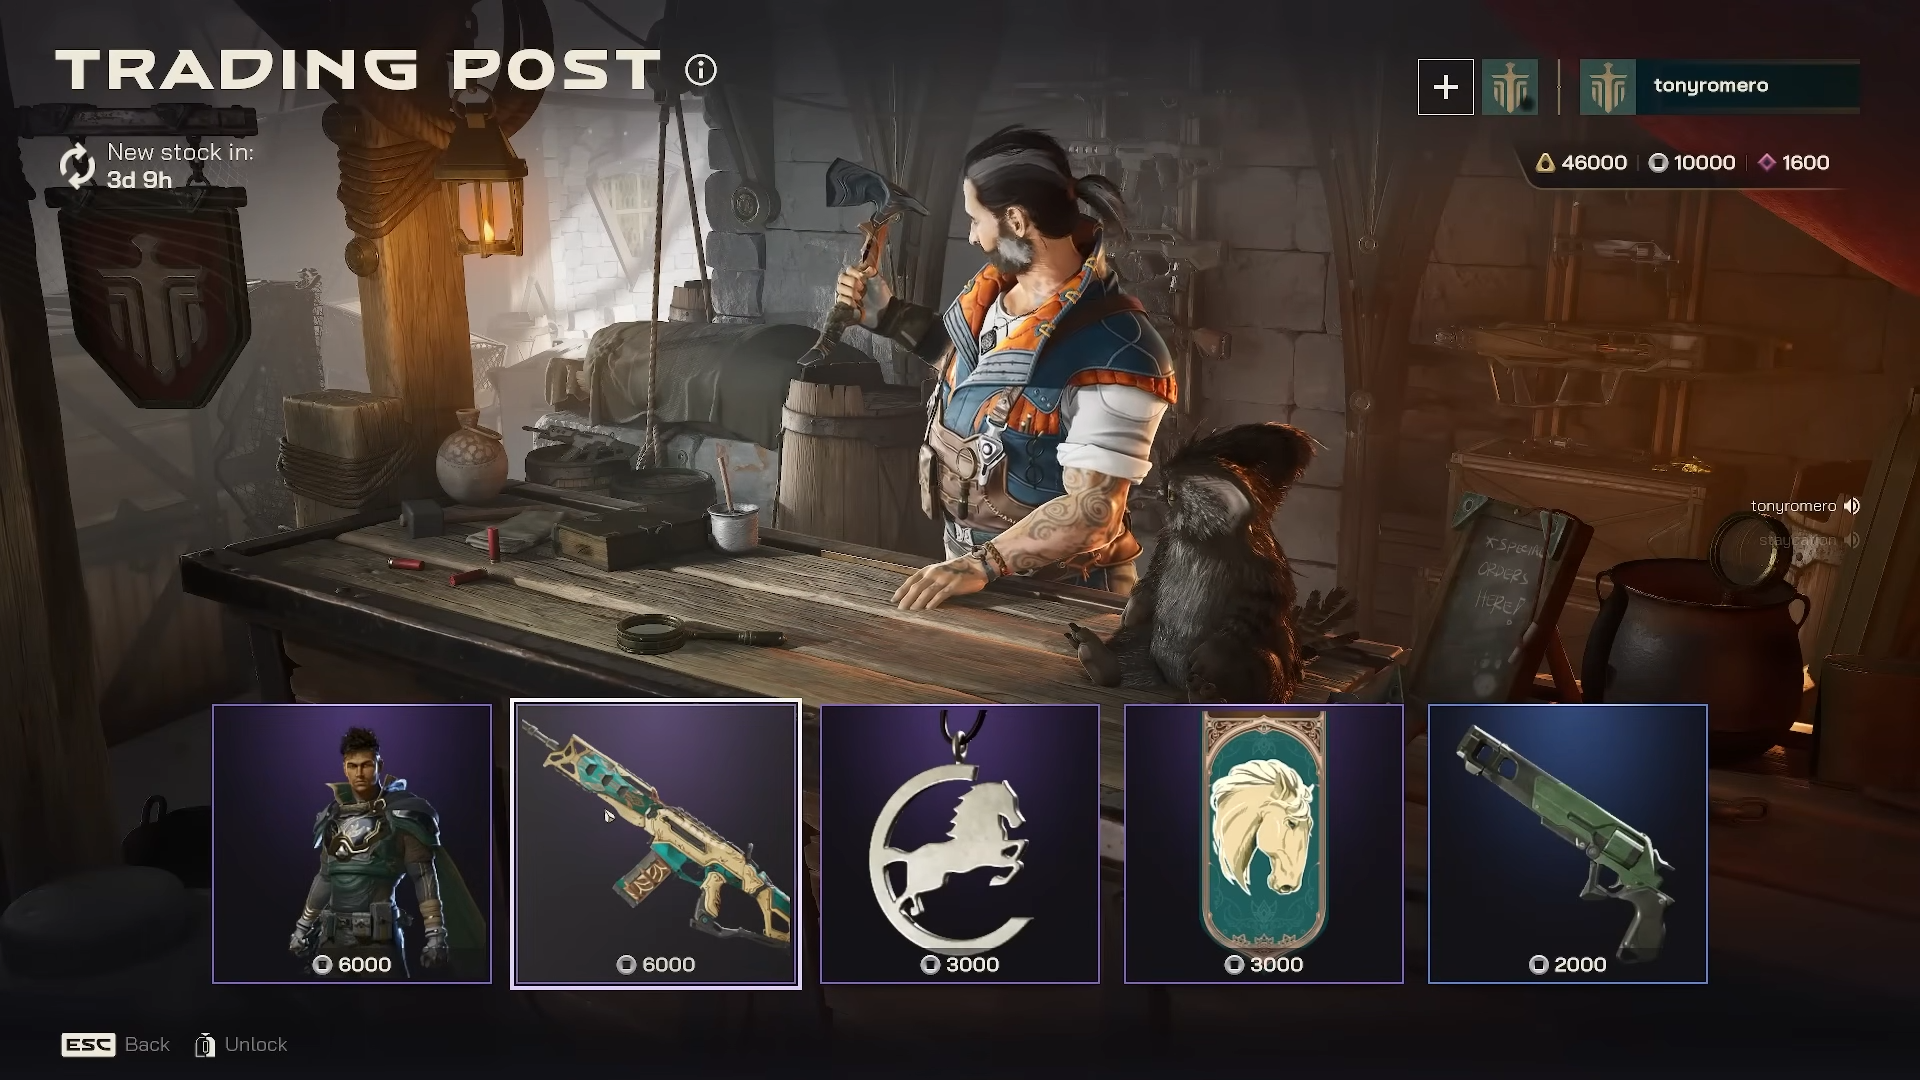
Trading Camp
A daily trading camp refreshes with available items. Earn the required currency through gameplay objectives to purchase cosmetics and cosmetic upgrades.
Content at Launch
At launch, expect:
-
8 unique Wardens with distinct abilities
-
Multiple base maps with different layouts and tactical considerations
-
Ranked competitive mode for skill-based progression
-
Cosmetic store with regular updates
-
Battle pass system with seasonal content
-
Trading camp daily rotation
Key Gameplay Tips for Beginners
Master the Fundamentals
Start by understanding the basic raid shooter flow. Every decision eventually serves the core objective: destroy the enemy base or defend yours.
Learn One Warden First
Rather than jumping between characters, master one Warden’s abilities and positioning. This accelerates your learning curve and builds muscle memory.
Positioning Over Kills
Unlike traditional shooters, map control and objective positioning matter more than eliminations. Death has consequences—your teammate must respawn. Play safe around high-value positions.
Coordinate Shield Breaker Plays
The 2-minute window to grab and plant the Shield Breaker is critical. Coordinate with teammates to secure this objective before engaging in prolonged firefights.
Time Your Raids
Successful raids require synchronized ability use. Don’t commit to a raid attempt without your team’s full participation and ability availability.
Adapt Loadouts
Use Vesper strategically between encounters. If the enemy team is running defensive Wardens, upgrade weapons for sustained damage. If they’re aggressive, invest in defensive upgrades.
Play the Long Game
Matches can swing dramatically in the final minutes. Maintain focus, respect the enemy’s abilities, and execute clean tactical plays rather than rushing objectives.
Highguard delivers a fresh take on team-based shooters by combining tactical base defense with objective-focused raiding. The eight Wardens provide diverse playstyles, and the match structure demands coordination and strategy beyond mechanical skill.
Start with a character that matches your playstyle, learn the raid phases, and gradually develop team synergy. The game rewards smart positioning and coordinated plays far more than raw aim, making it accessible to players of all skill levels while maintaining depth for competitive play.