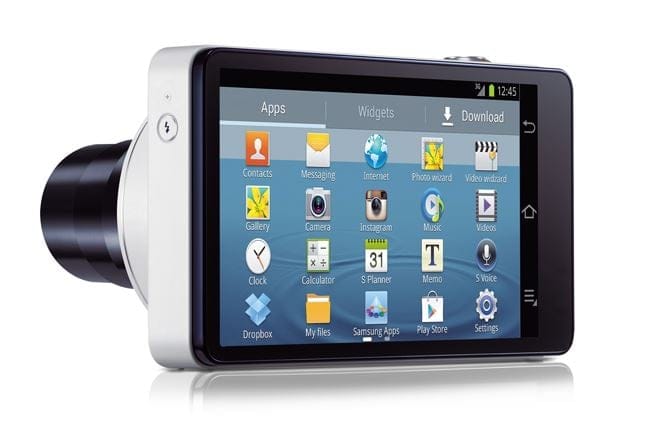
The Galaxy Camera may not be a smartphone in the true sense of the word, specially since it doesn’t let you make calls and is mainly a full-blown camera, but it runs Android just like any smartphone. Which means the productive Android development community wasted no time in grabbing hold of the Galaxy Camera and start playing around with its software, and we now have a way to root the camera-cum-smart device.
The man behind achieving root access on the Galaxy Camera is XDA Elite Recognized Developer AdamOutler, who used the CF-Auto-Root root method by Chainfire (the popular and well-known developer in the community of Samsung device owners) and made a version specially for the Galaxy Camera.
As always, you have to keep in mind that performing hacks like rooting can potentially brick your device and void its warranty, and while the Galaxy Camera doesn’t seem to have a flash counter that when changed can void warranty, it may do so in the future.
Now let’s take a look at how the Galaxy Camera can be rooted.
Compatibility
The procedure described below is only for the Samsung Galaxy Camera. Do not try it on any other device.
Warning!
The methods and procedures discussed here are considered risky, so try them out at your own risk, and make sure to read each step carefully before attempting anything. We will not be held responsible if anything goes wrong.
How to Root Galaxy Camera
- You need to have the drivers for the camera installed on your computer. You can download Samsung’s Kies software and install it, which will install the drivers as well (skip this step if Kies is already installed on your computer).
Download Kies
You can also download the drivers directly — download from here: 32 bit (x86) Windows | 64-bit (x64) Windows - Download the CF-Auto-Root package from the link below.
Download CF-Auto-Root | Filename: CF-Auto-Root-gd1-ekgc100.zip - Extract the file you downloaded in step 2 to obtain the actual file we need to flash to obtain root. The file should be named CF-Auto-Root-gd1-ekgc100.tar.md5 (though the file name may end at .tar instead of .md5, which is normal).
- Download Odin. Odin is Samsung’s PC tool for flashing firmware, and we’ll use it to flash the CF-Auto-Root file obtained in step 3.
Download Odin3 v3.04 | Filename: Odin3_v3.04.zip - Extract the contents of the Odin3_v3.04.zip file to a convenient location on your computer.
- Turn off the Galaxy Camera. Then, hold down the Volume Down + Camera + Power buttons together till the screen turns on to boot into download mode. If you get a Warning! screen instead, press the Volume Up button to boot into download mode.
- Open Odin by double-clicking on the Odin3 v3.04.exe file obtained in step 6 after extracting the Odin3_v3.04.zip file.
- Connect the camera to PC now. You should get the message “Added !!” under Odin’s message box in the bottom left.
- If you don’t get this message, make sure you installed drivers correctly (using Kies or directly) as given in step 2. If it still doesn’t work, try changing to another USB port on the computer and also use the USB ports on the back if you have a desktop PC.
- Click on the PDA button in Odin, then browse to and select the CF-Auto-Root-gd1-ekgc100.tar.md5 file obtained in step 3 above.
- Important! Do not make any other changes in Odin except selecting that file in the PDA section as given in step 9. Make sure the Re-Partition check box is not selected.
- Now, click the Start button in Odin to start flashing the CF-Auto-Root image on the camera. When the flashing is complete and is successful, you’ll get a PASS message (with green background) in the left-most box at the very top of the Odin, and the camera will automatically reboot. When you see the Samsung logo, you can safely unplug the cable.
- What do if Odin gets stuck or doesn’t do anything: If ODIN gets stuck on setup connection or at any stage of this process after you’ve hit the Start button, and doesn’t seem to be doing anything, or if upon completion of the process you get a FAIL message (with red background) in ODIN, do this: disconnect the camera from the PC, close ODIN, remove battery for 4-5 seconds, re-insert it, turn camera on in Download mode again, and do the procedure again from Step 7.
- Once the camera boots up, it will be rooted and ready to be used.
Your Galaxy Camera, along with taking professional pictures, is now also rooted just like a normal smartphone. Have fun!







Discussion