What to know
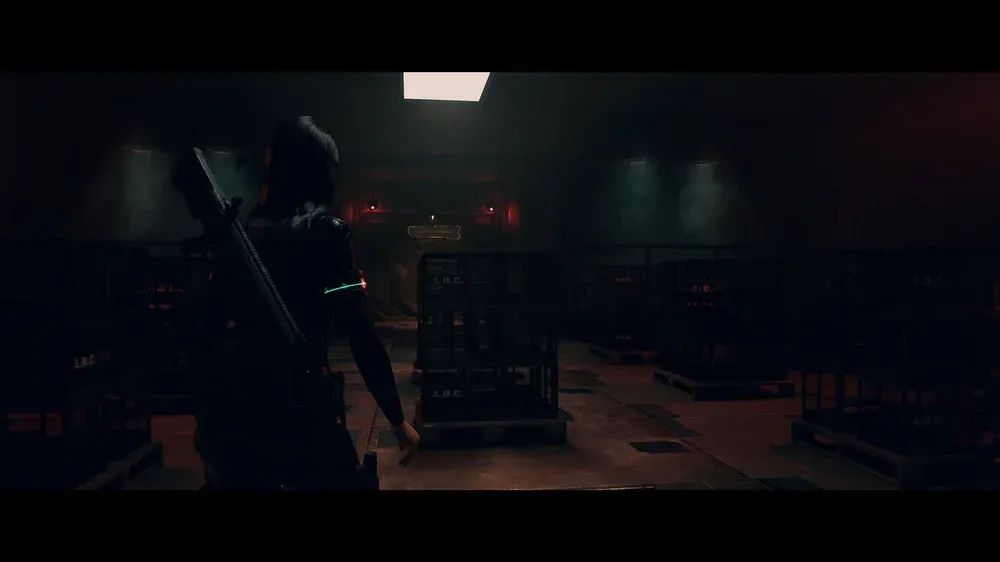
- This puzzle appears in the Communications Facility during the “Turn on Backup Power” objective, right at the generator console.
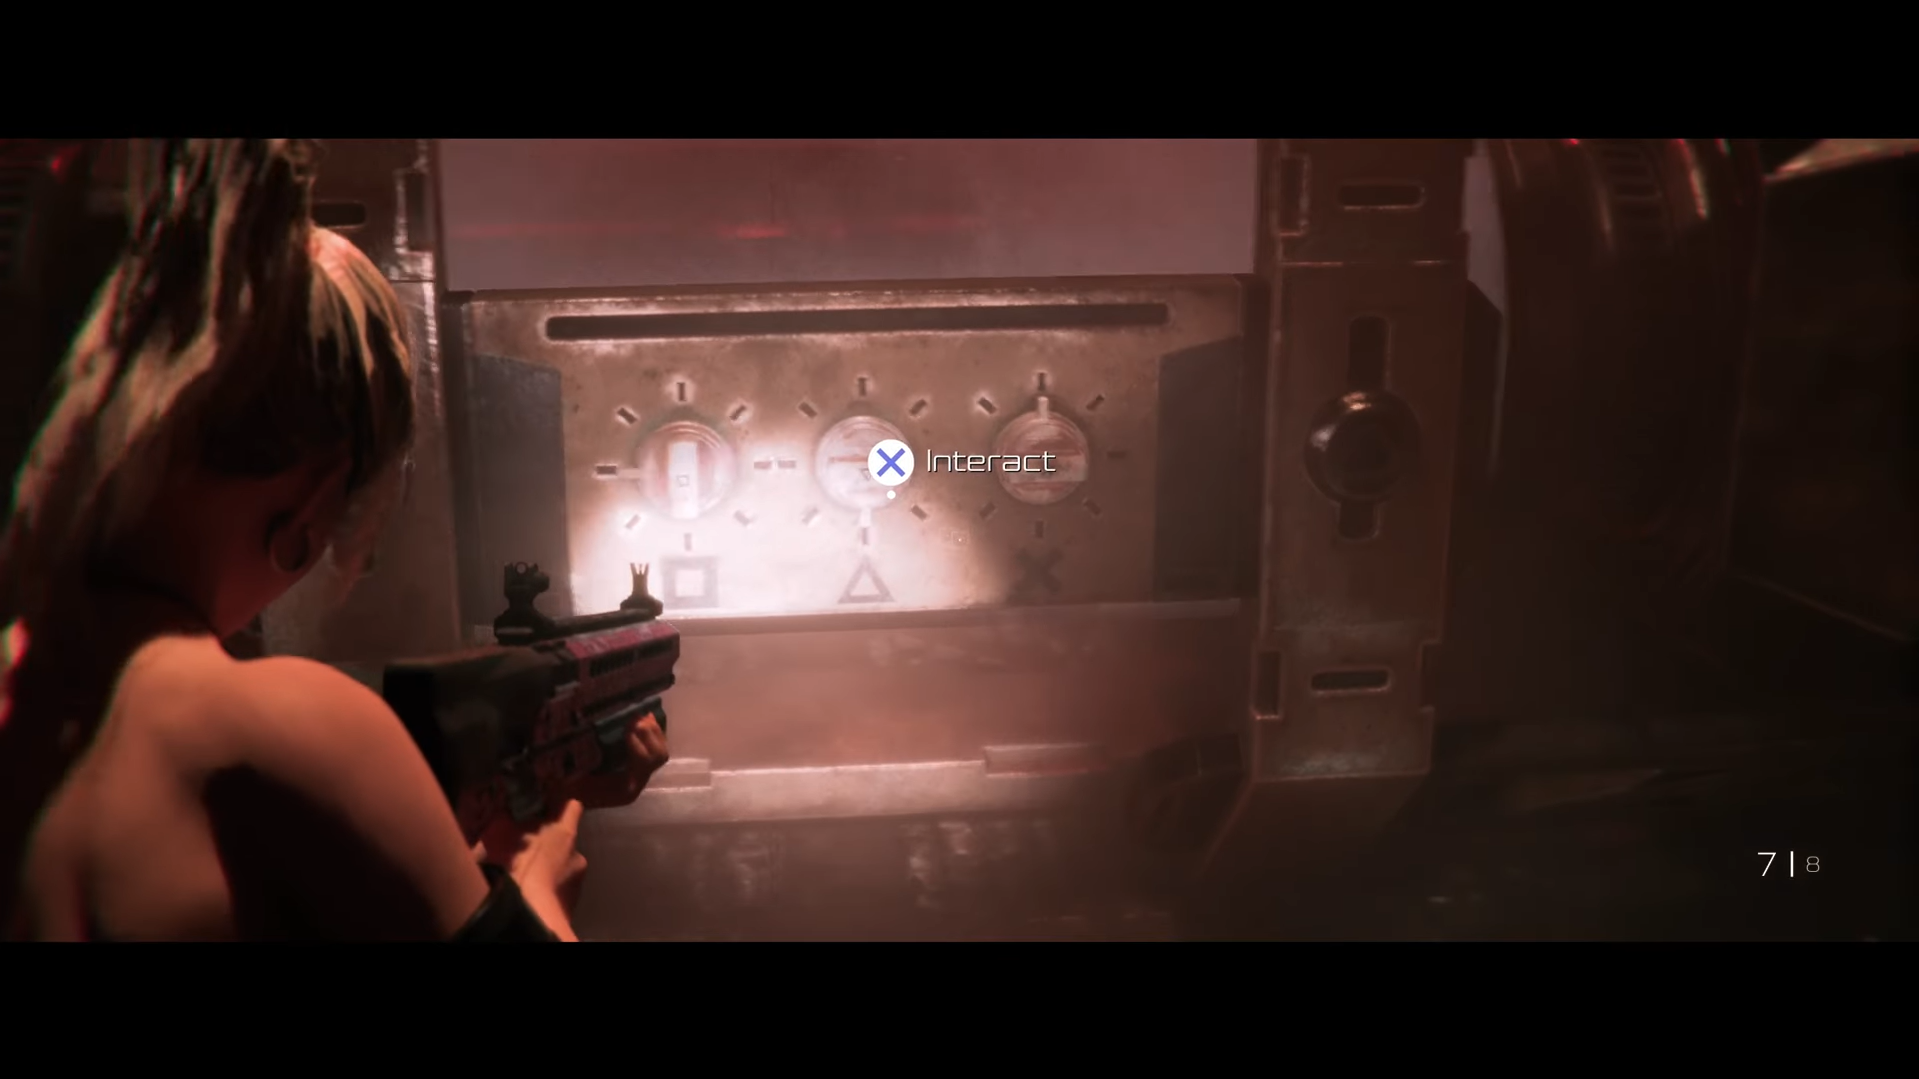
- It’s a simple knob‑alignment puzzle: you must rotate three control knobs on the generator to specific positions shown in a hidden clue.
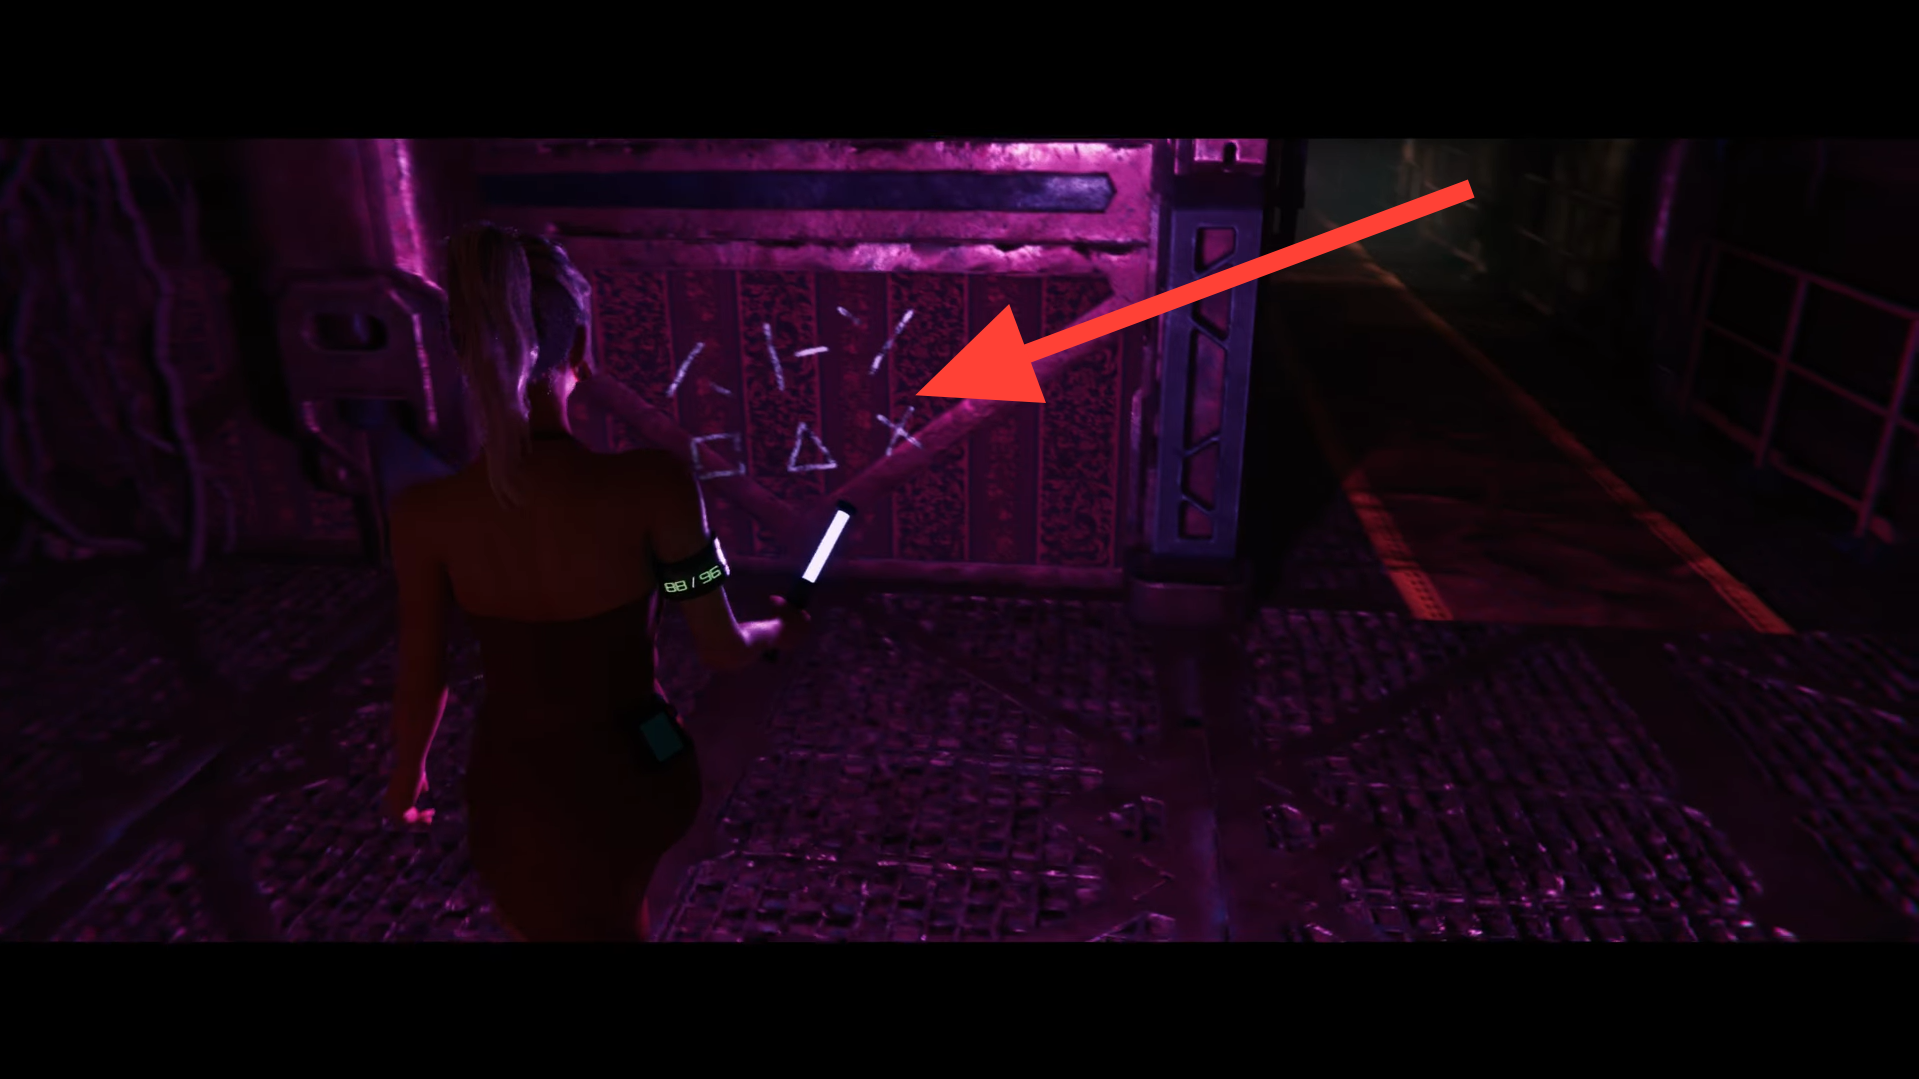
- The solution is written in invisible ink on the wall in front of the puzzle and only becomes visible when you shine your black light on it.
- Once the knobs are set correctly using the clue, backup power is restored and the objective completes immediately, letting you move on.
The Generator puzzle in Code Violet is a quick roadblock that appears during the Communications Facility section, but it’s easy to solve once you know what to look for. Instead of trial and error, the game gives you a hidden clue that spells out the exact solution, you just need the right tool to see it. This short guide walks you through solving the puzzle cleanly so you can restore power and move on without frustration.
Where is the puzzle?
You’ll encounter this puzzle in the Communications Facility during the “Turn on Backup Power” objective in Code Violet. To restore power, you need to interact with the generator and solve a simple alignment puzzle using its three control knobs.
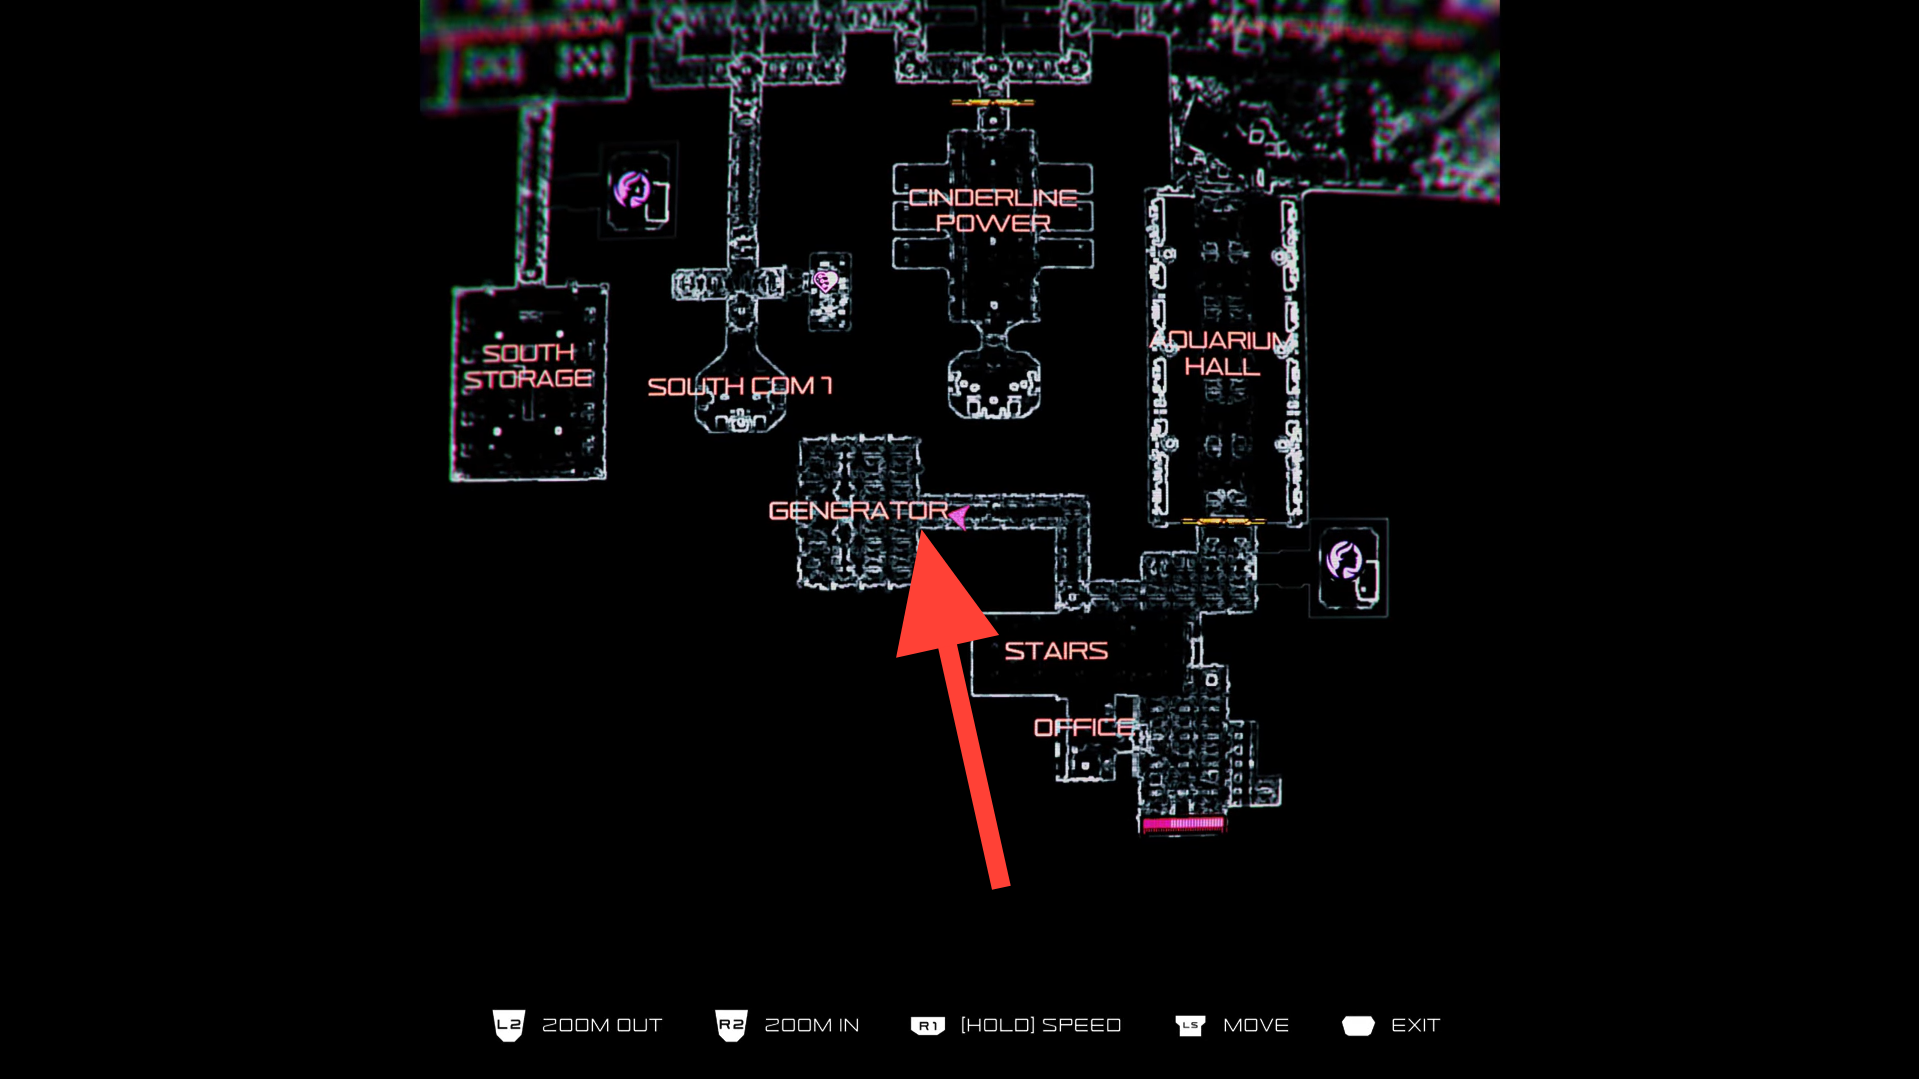
Generator puzzle location. Image credits: TeamKill Media / YouTube: The Evil Plague Trophy Hunters
How to solve the puzzle
Follow the steps below to solve the generator puzzle with ease in Code Violet:
Step 1: Use the black light
Equip your black light and shine it on the wall in front of the puzzle. The clue is written in invisible ink and only becomes visible under the black light, revealing the solution you need.
Step 2: Rotate the knobs
Use the solution revealed on the wall, interact with the generator, and turn each knob to the correct position to complete the puzzle.
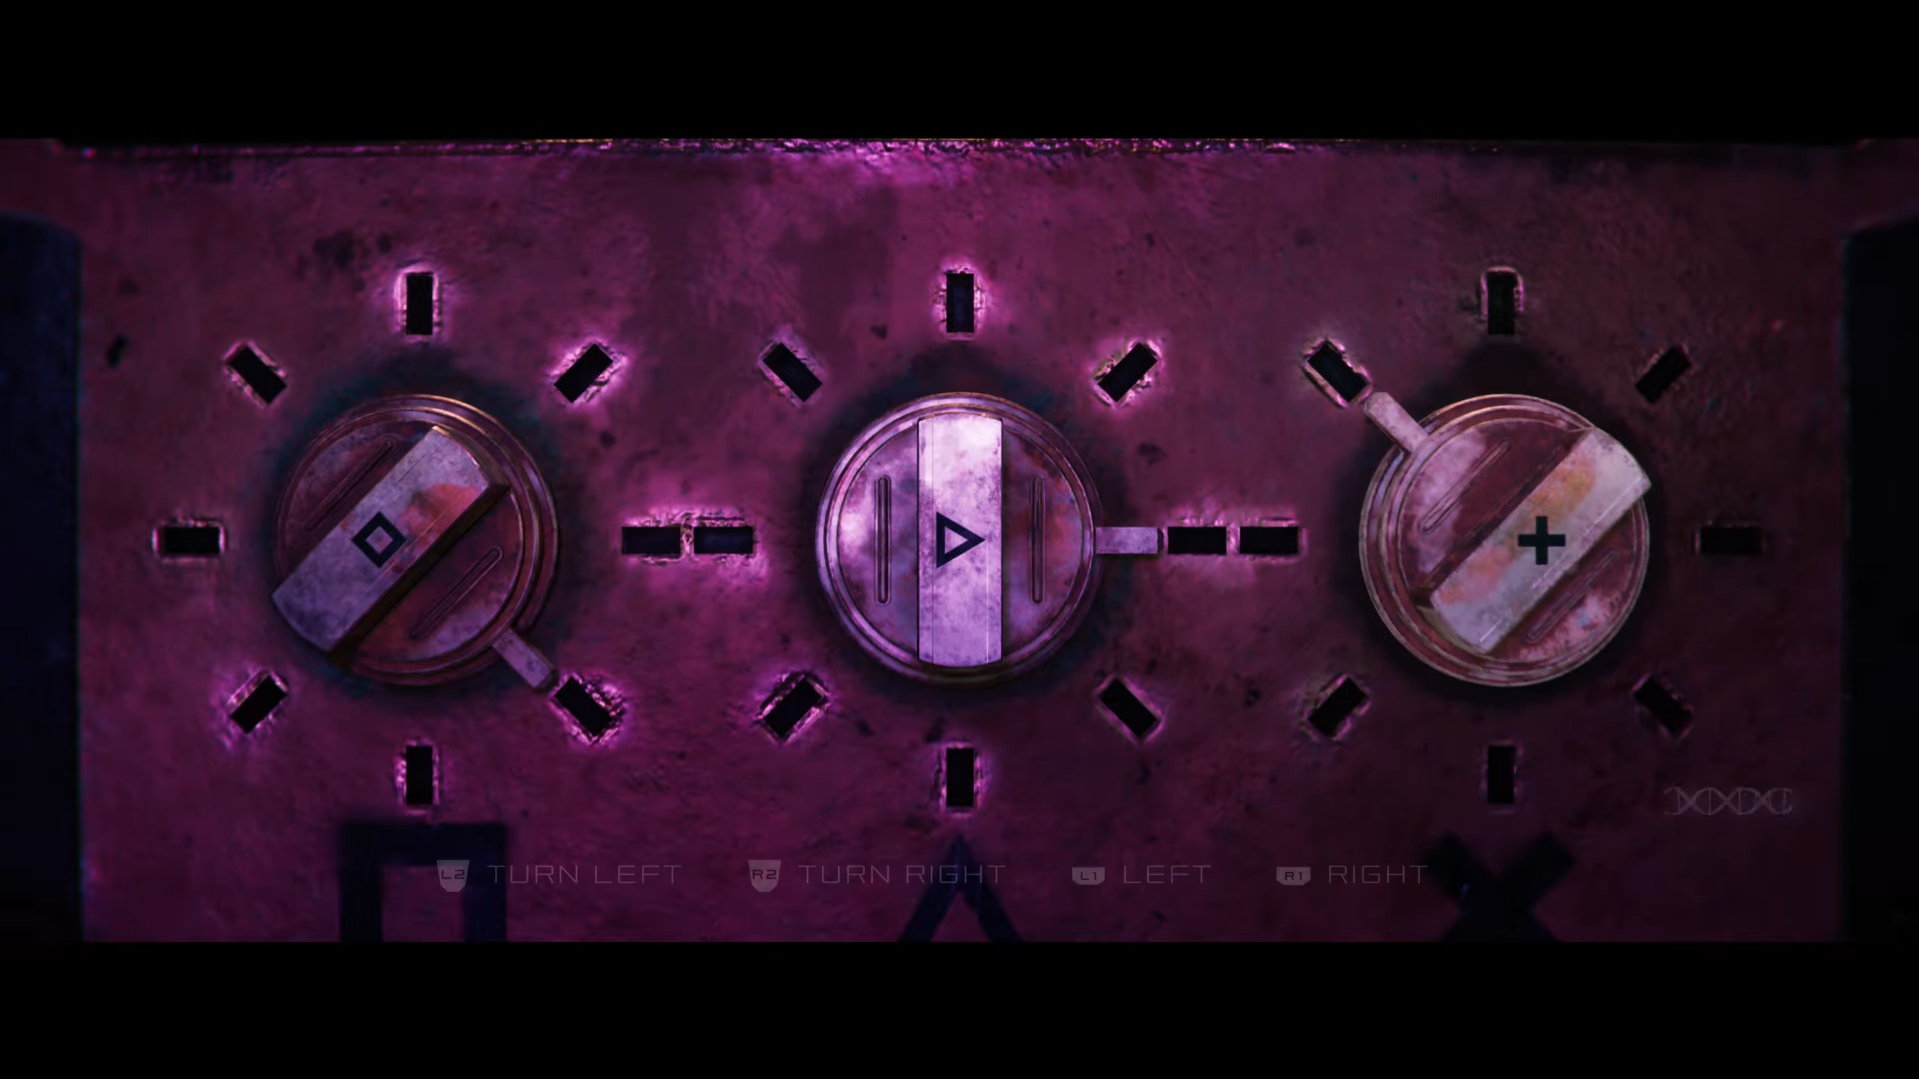
Entering the correct sequence solves the puzzle and lets you continue the story.
Backup power secured
Once you’ve revealed the clue and set the knobs correctly, the generator powers up and the objective completes immediately. It’s a simple puzzle designed to test observation rather than logic, so keeping your black light handy will save you time. With the backup power restored, you’re free to continue deeper into the story and the next set of challenges waiting in the facility.
Hope this Generator puzzle walkthrough proved helpful. Feel free to leave your opinions, corrections, or questions in the comments—we keep an eye on them and respond as needed.


