- What to know
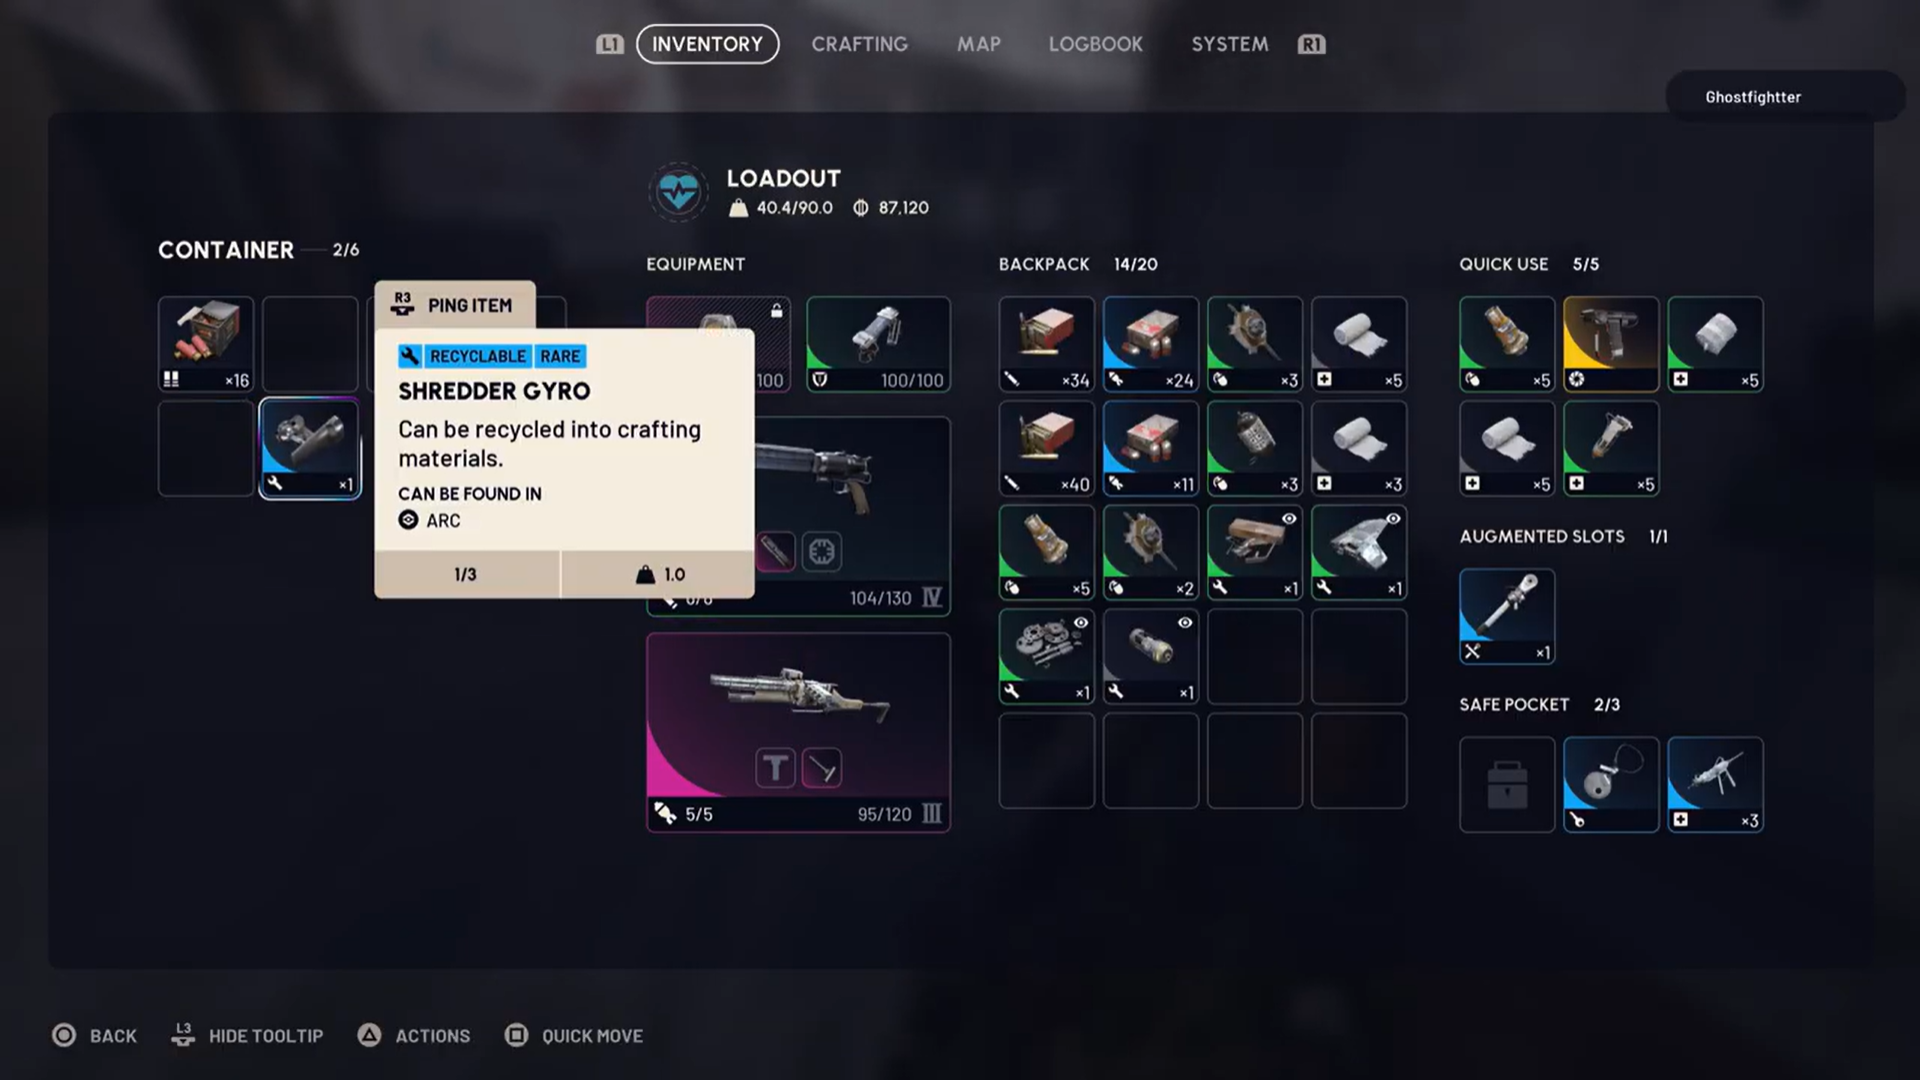
- ARC Raiders Shredder Gyro farming details
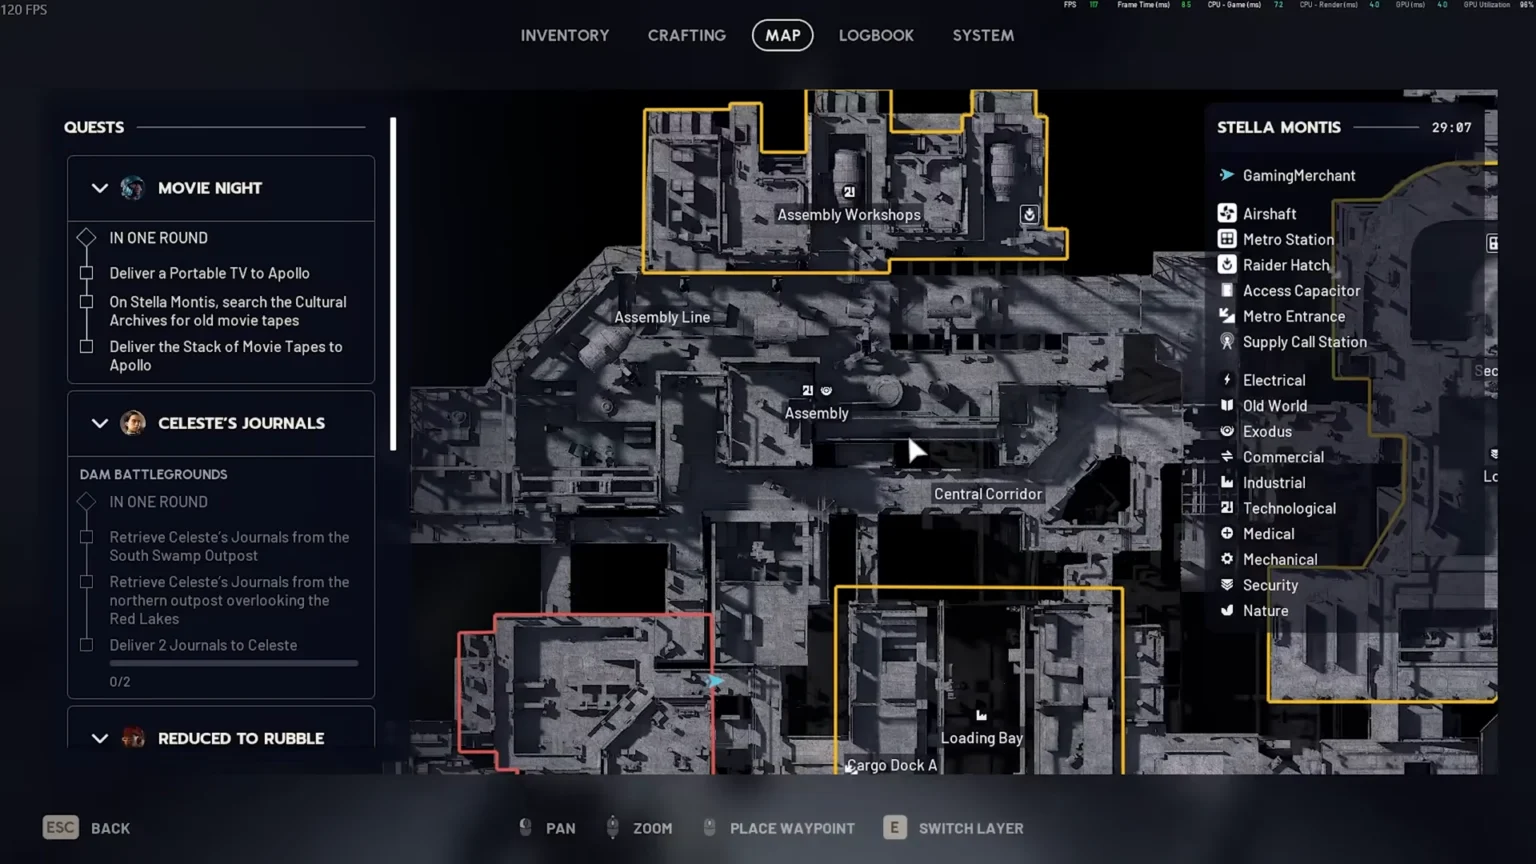
- Why Stella Montis is the preferred farming zone
- Why the Hullcracker makes farming faster
- Understanding Shredder behavior for efficient kills
- Managing spiders and “rolly balls” during farming runs
- How to farm Shredder Gyros efficiently
- Farming with teammates for higher consistency
- Estimated farming efficiency comparison
- Maximizing long-term project progression
What to know
- Shredder Gyros drop primarily from Shredder-type ARC enemies.
- Stella Montis is one of the most reliable farming zones.
- The Hullcracker weapon is highly effective against armored ARC targets.
- Managing “spiders” and coordinating with other players improves survival and efficiency.
In ARC Raiders, farming materials efficiently can make the difference between slow progression and steady upgrades. If you’re working on a project that requires Shredder Gyros, you need a focused approach that balances combat efficiency, survivability, and extraction timing. This guide breaks down the most effective method currently used by experienced players to farm Shredder Gyros quickly and consistently.
ARC Raiders Shredder Gyro farming details
| Aspect | Key Details |
|---|---|
| Primary Target | Shredder-class ARC units |
| Best Farming Area | Stella Montis |
| Recommended Weapon | Hullcracker (high armor penetration) |
| Main Threats | “Spiders” / small rolling ARC units |
| Ideal Playstyle | Controlled aggression with mobility |
| Optional Strategy | Light teamwork for tougher engagements |
| Objective | Secure Gyros and extract safely |
Why Stella Montis is the preferred farming zone
The Stella Montis region stands out because of its consistent Shredder spawn patterns and manageable terrain layout. You’ll encounter ARC patrol routes that frequently include Shredders, which are the primary source of Shredder Gyros. The area provides enough elevation changes and natural cover to reposition without being overwhelmed.
Unlike tighter industrial zones where small enemies can surround you, Stella Montis offers better visibility. This is important because farming runs become inefficient when you’re constantly interrupted by minor threats.
If you plan your path through likely spawn corridors, you can cycle encounters efficiently without wasting ammunition or healing resources.
Why the Hullcracker makes farming faster
The Hullcracker is particularly effective against armored ARC units due to its high damage output and armor penetration capability. When farming Shredders, time-to-kill matters. The faster you eliminate them, the less likely you are to draw additional patrols or trigger waves of smaller enemies.
Shredders are durable and can drain your resources if you rely on lower-tier or rapid-fire weapons. With the Hullcracker, you can focus on precision shots, conserve ammunition, and reduce exposure time during each engagement.

Efficient kills mean you can complete more farming loops per session, increasing overall Gyro yield.
Understanding Shredder behavior for efficient kills
Shredders typically patrol in mid-sized ARC formations. They apply sustained pressure but are not as erratic as smaller spider-type enemies. Their attack patterns reward controlled spacing rather than reckless rushing.
When farming, your goal is not prolonged combat but target isolation. You should thin out smaller units first only if they interfere with your line of sight or movement. Otherwise, focus fire on the Shredder to secure the Gyro drop quickly.

Maintaining mobility is critical. Standing still invites flanking from spiders or other ARC reinforcements.
Managing spiders and “rolly balls” during farming runs
One of the most common frustrations during Shredder farming is dealing with small ARC units often described as “spiders” or rolling bots. These enemies do not drop Shredder Gyros, yet they frequently disrupt farming efficiency.
They apply constant pressure and can chip away at your health while you focus on larger targets. The key is not to overcommit to clearing every small unit. Instead, maintain awareness and eliminate only those that threaten your positioning.

If you get bogged down fighting waves of minor enemies, your farming run becomes inefficient. The ideal approach is controlled movement with short bursts of engagement, keeping your objective clear: eliminate Shredders, collect Gyros, and move.
How to farm Shredder Gyros efficiently
Preparing before deployment
Before entering Stella Montis, ensure your loadout emphasizes armor penetration, moderate sustain, and mobility. The Hullcracker should be paired with enough ammunition to handle multiple Shredder encounters without relying on scavenged ammo alone.
Your objective is efficiency, not extended PvP-style engagements. Avoid unnecessary fights with other players if your sole focus is farming materials.
Establishing a farming route
Instead of wandering randomly, move through known ARC patrol areas where Shredders are most commonly encountered. Keep your movement deliberate. Engage, eliminate, loot, and reposition.

Repeated looping of high-traffic ARC areas is more effective than roaming large sections of the map.
Securing the kill and confirming drops
Once a Shredder is eliminated, immediately confirm the drop and collect the Shredder Gyro. Do not linger longer than necessary. Prolonged looting windows increase risk.
Resetting the cycle
After clearing a cluster, rotate through nearby terrain to allow respawns or locate additional patrols. Efficient farmers maintain rhythm: engage, collect, rotate, repeat.

Extracting at the right time
The biggest mistake players make is overextending. When your inventory contains multiple Shredder Gyros, extraction becomes the priority. Losing them on death resets your progress and wastes your run.
Farming with teammates for higher consistency
While solo farming is viable, light cooperation increases survivability against unexpected ARC clusters. Short, coordinated engagements allow faster Shredder takedowns while one player manages smaller enemies.
Team synergy reduces downtime and helps control chaotic encounters. However, large groups may attract additional ARC activity, so balance efficiency with noise management.
Estimated farming efficiency comparison
| Approach | Average Risk | Kill Speed | Gyro Yield Per Run | Survival Rate |
|---|---|---|---|---|
| Solo with standard weapon | Medium-High | Moderate | Moderate | Variable |
| Solo with Hullcracker | Medium | High | High | Stable |
| Duo with Hullcracker focus | Low-Medium | Very High | Very High | High |
| Large squad roaming | High | High | Inconsistent | Variable |
These observations reflect current player strategies focused on optimized farming rather than casual exploration.
Maximizing long-term project progression
Shredder Gyros are typically required for crafting and project advancement tied to mid-to-late progression systems. Efficient farming ensures you’re not stalled by resource bottlenecks.
Consistency is more important than high-risk bursts. You want repeatable, controlled farming sessions rather than risky, all-in pushes.
By focusing on Stella Montis rotations, Hullcracker efficiency, and threat prioritization, you create a repeatable loop that steadily feeds your project requirements.