
What to know
-
Claim everything in the Present Box immediately, then equip the gold- and XP-boosting hearts right away.
-
Farm Metal Slimes early using either the Slime Stick bonus method or the normal spawn area near the RoR Encampment.
-
Grab several long-lasting early power items from specific past/present locations, especially all-target weapons and agility/crit boosters.
-
Abuse Lucky Panel resets and early vocation planning so you do not get walled by the first post-job-change boss.
Stepping into the world of Dragon Quest VII Reimagined can be a daunting experience, especially when the initial monsters feel surprisingly formidable. To clear the story smoothly and avoid getting stuck on early difficulty spikes, it is essential to have a plan from the moment you leave Piltchard Bay. By prioritizing specific gear, managing your resources wisely, and exploiting high-experience enemies, you can transform a grueling climb into an efficient adventure.
| Must-do | Why | Key targets |
|---|---|---|
| Claim Present Box items | Front-loads power, gold, and XP gains | Gold Golem’s Heart (+50% gold), Metal Slime Heart (+20% EXP), Slime Blade/Slime Boomerang (extra slime damage), Slime Stick (summon chance) |
| Change settings early | Saves time and hand strain while traveling | Dash set to toggle (press R2 once instead of holding) |
| Use seeds freely (for Kefir) | You won’t lose out later in this version | Stat-boosting seeds on Kefir are safe |
| Hunt Metal Slimes ASAP | Big early EXP spikes | Slime Stick method (5–10% appearance), RoR Encampment region spawns, Poison Needle not usable in this version |
| Collect recommended early gear | Smooths fights and helps farming | Edged Boomerang, Power Knuckles, Fire Claws, Assassin’s Dagger, Kitty Shield, Bunny Ears, Bunny Tail, Hammer Hood Heart, Bodkin Archer Heart, Meow Jishian Heart |
| Do Lucky Panel the right way | Early access to top-tier equipment | Well at Traveler’s Inn near All Trades Abbey (past/present), 3 tries/day, sleep to refresh, aim rank 3 on hard, metal slime card boosts rank by +2, locked panels can award bonus chest loot |
| Use vocations actively when unlocked | Better stats/skills and faster progression | Hero and Gabo: Warrior/Martial Artist toward Gladiator; Marabel: Mage/Priest toward Sage |
| Farm vocation proficiency efficiently | Proficiency depends on battles, not enemy strength | Set monster strength to weak, spam battles using Gabo’s whistle, best to grind seriously after dual-class proficiency unlocks |
8 Things you must do in Dragon Quest 7 Reimagined
Claim and equip the Present Box power start
Step 1
Open the menu as soon as you can and claim all items from the Present Box, including early purchase bonuses and deluxe edition equipment.
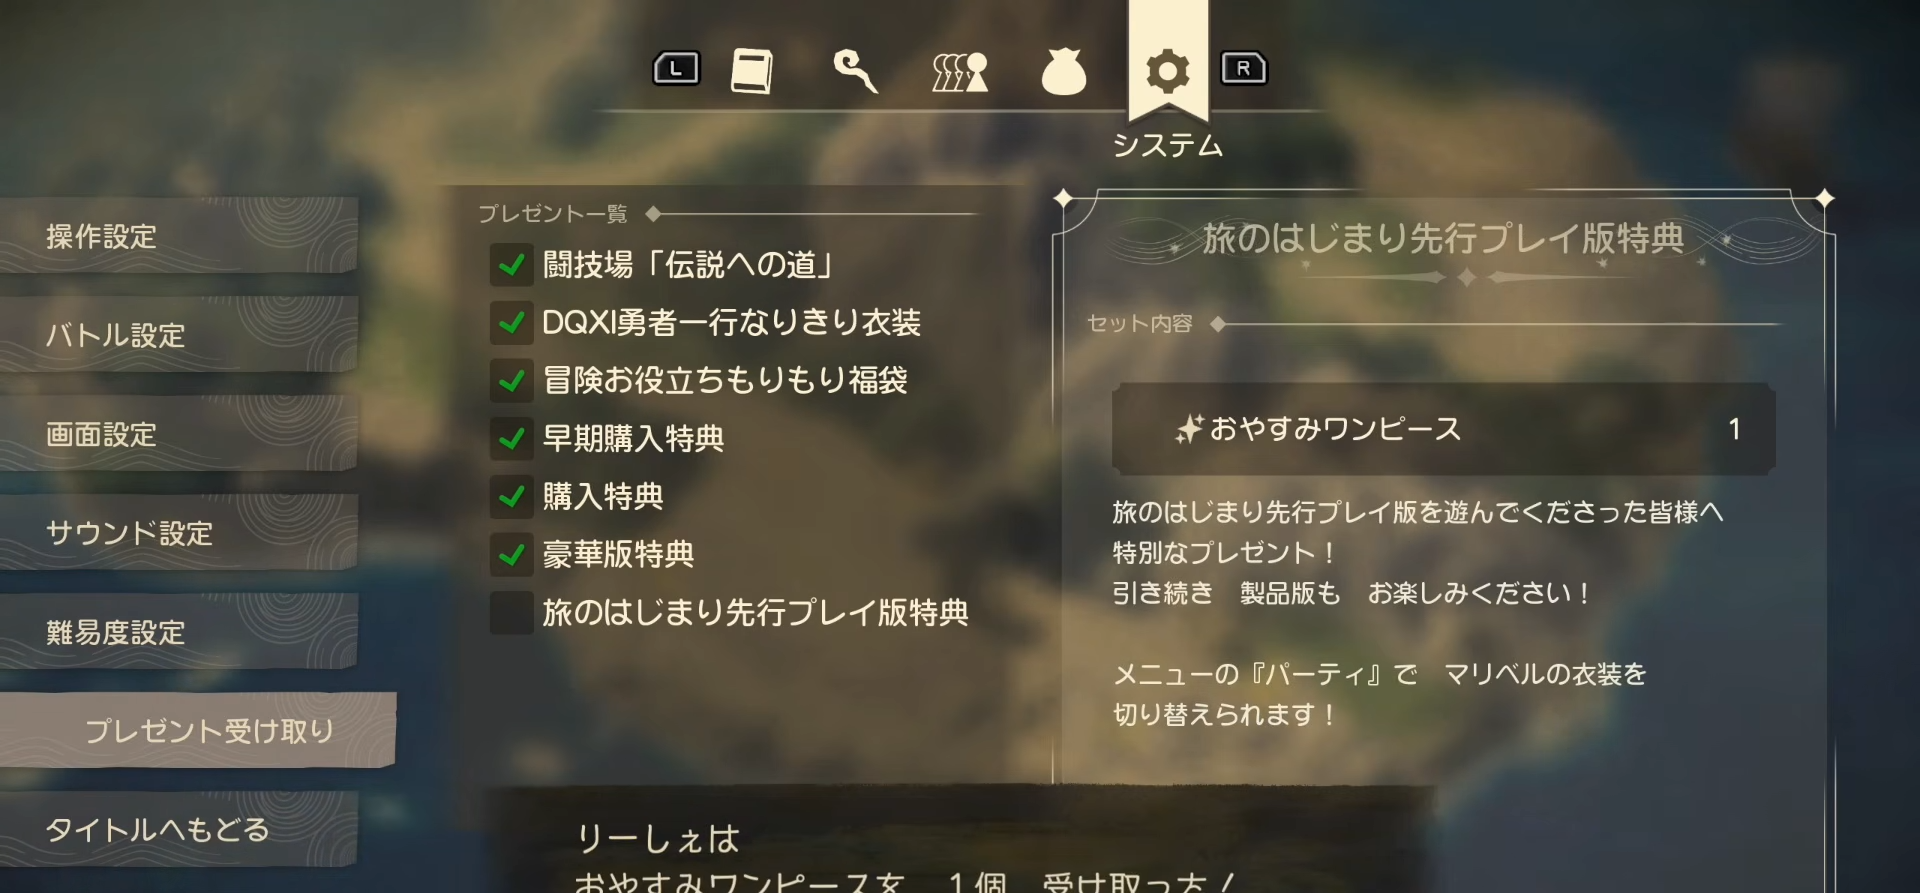
Step 2
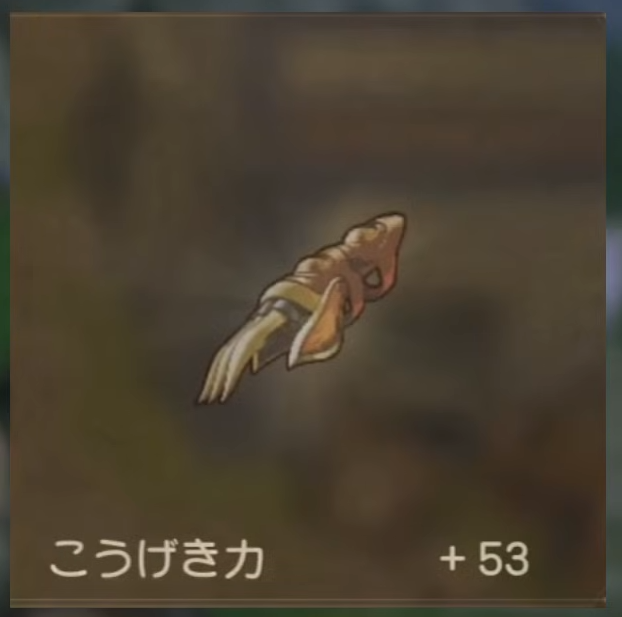
Equip Gold Golem’s Heart early so you earn 50% more gold as you progress, which builds money passively instead of forcing extra grinding.

Step 3
Equip Metal Slime Heart to increase experience gained by 20% and keep it on while you are still building levels.

Step 4
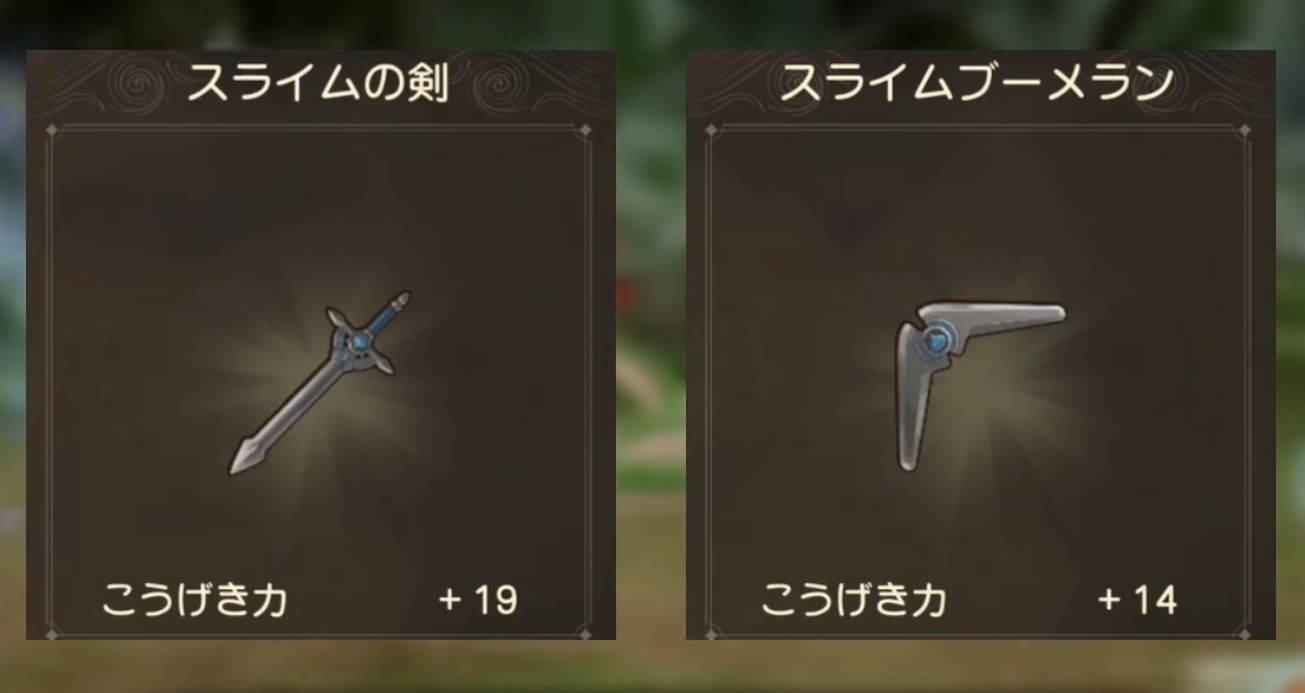
Use the Slime Blade and the boomerang early because they deal 50% more damage to slime-type enemies, letting you cruise through early encounters.
Step 5
In battle, select the Slime Stick from the items menu to summon a slime.

There’s a chance for a King Slime to appear that deals about 200 damage to all enemies for faster early leveling.

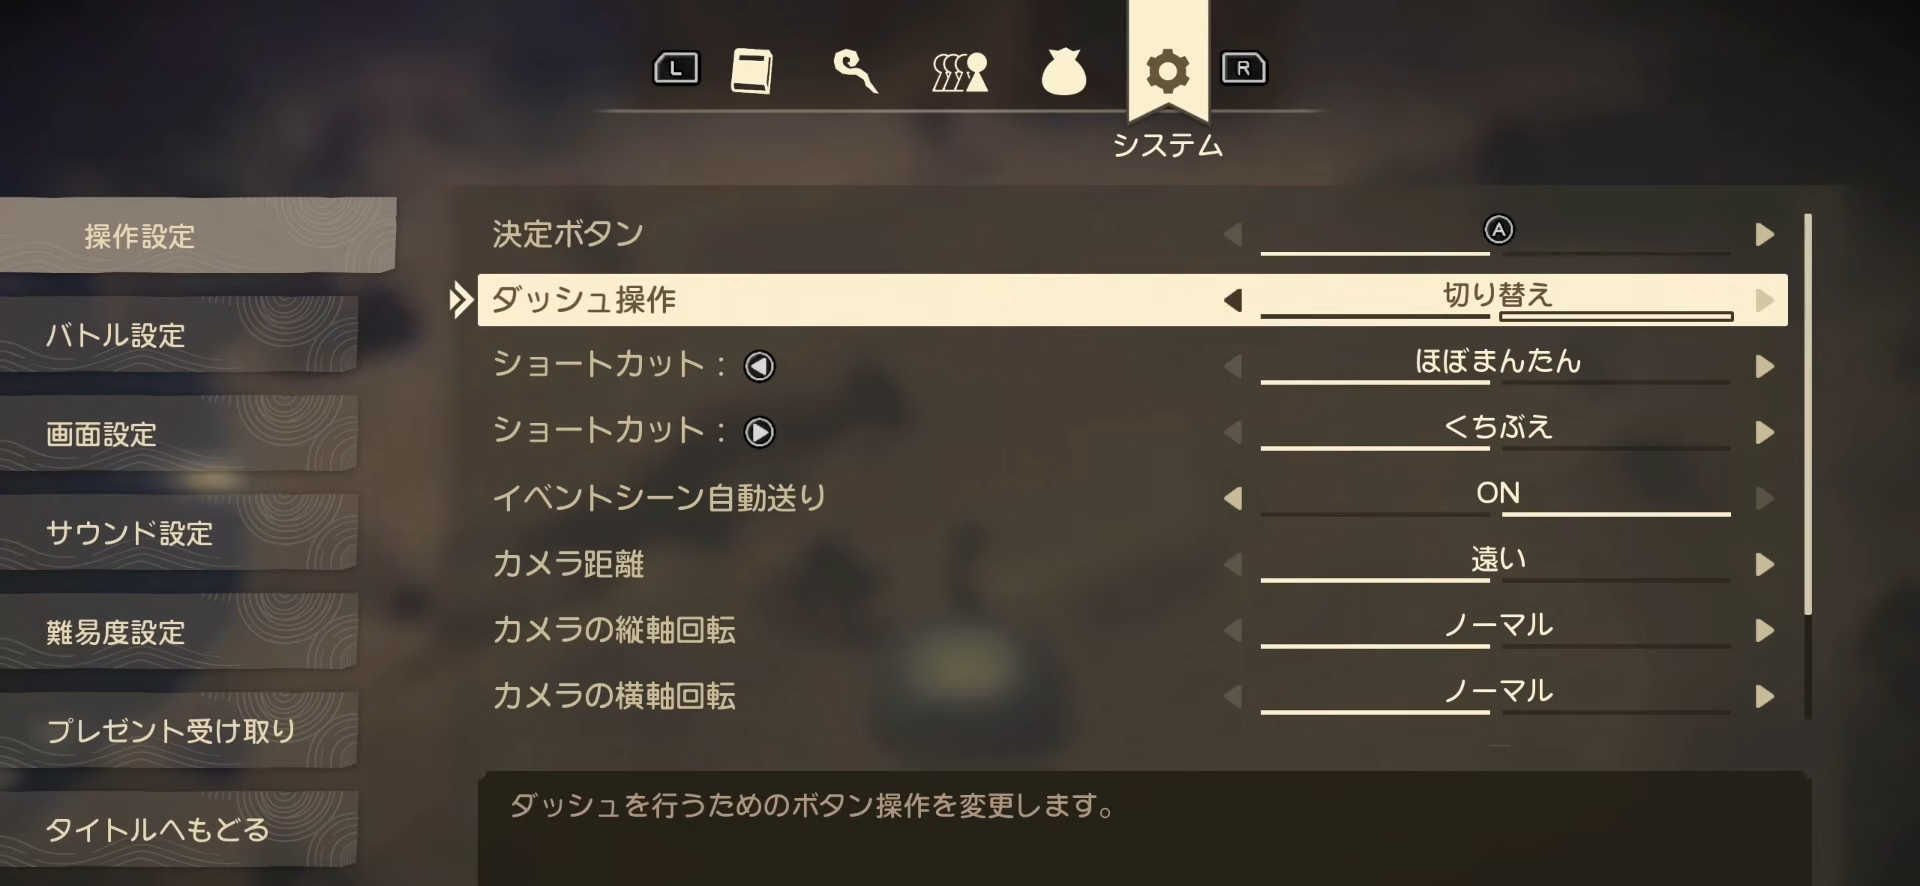
Fix movement and avoid a seed mistake
Step 1
Go into settings early and set dash to toggle so you only press R2 once to run rather than holding it down.
Step 2
If you’ve been hesitating about using stat-boosting seeds on Kefir, go ahead in this version because doing so will not cause a loss later.
Farm Metal Slimes early without wasting time
Step 1
If you have the Slime Stick, keep using it from the items menu during battles until it triggers a Metal Slime enemy appearance, which has roughly a 5–10% chance.

Step 2
If you do not have the bonus method, head to the RoR Encampment region where Metal Slimes can appear via normal gameplay.
Step 3
Use the correct kill requirement: you either need to land one damage four times, or burst it down with high damage before it escapes.
Step 4
Do not plan around Poison Needle for this hunt, because it cannot be used in this version.
Grab long-lasting early gear
Step 1
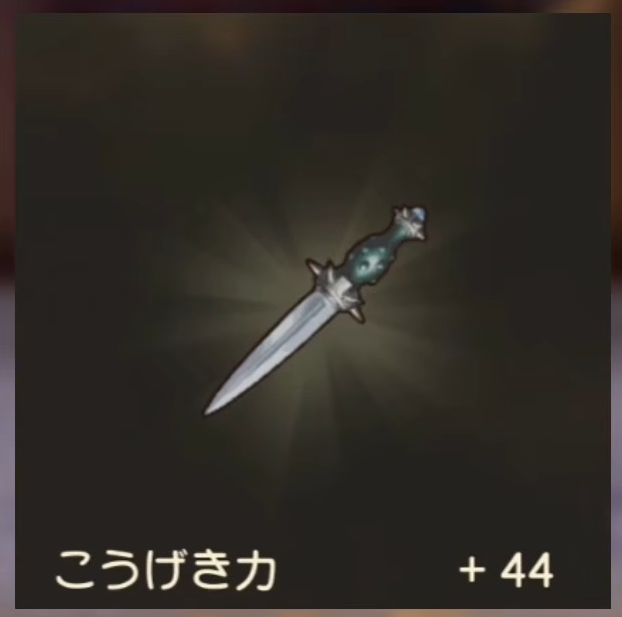
Pick up the Edged Boomerang from a treasure chest in the castle basement of Fabri in the past so you can hit all enemies early.

It outperforms the bonus slime boomerang in raw usefulness.

Step 2
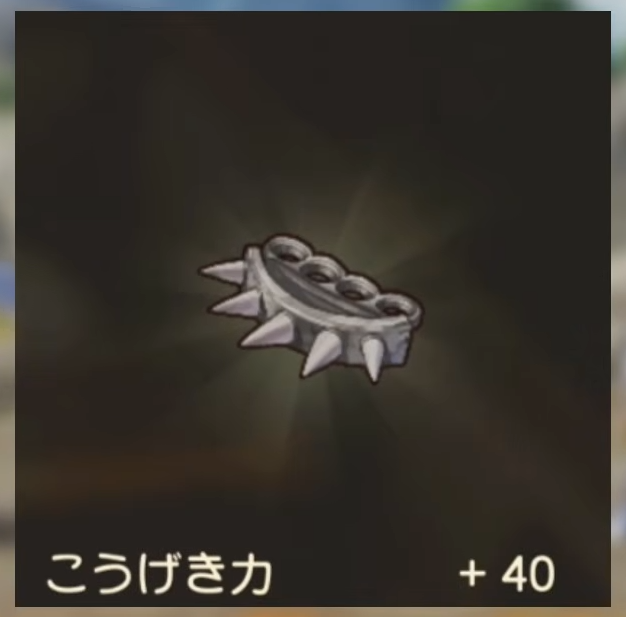
Get Power Knuckles from a dresser on the second floor of Swindlemist’s house in Piltchard Bay (past) for attack plus a +40 agility boost.
Step 3
Buy Fire Claws in Buckingham once they become available after clearing All Trades Abbey in the past.
It offers high early attack, +5% crit, casts Frizz when used, and converts physical attacks to fire element, so the recommendation is to purchase before pushing further.
Step 4
Loot the Assassin’s Dagger from a treasure chest on the fourth floor of the Likeness (past) for +10% evasion, a 5% instant-kill effect, and +10% preemptive-attack chance, with a special callout as being useful for Metal Slime hunting.
Step 5
Secure the Kitty Shield either by buying it in Larka (past) or finding it in a drawer in the mountain village (past); its defense is not high, but it sharply boosts evasion and shield-guard rate compared to other early shields.
Step 6
Grab Bunny Ears from a dresser at the weapon and armor shop in Larka (present) to boost magical might and magical mending, and the recommendation is to put it on Marabel.

Step 7
Get the Bunny Tail from a treasure chest on the third floor of the cave to the north (present) because it increases item drop rates just by being equipped, helping rare farming.
Step 8
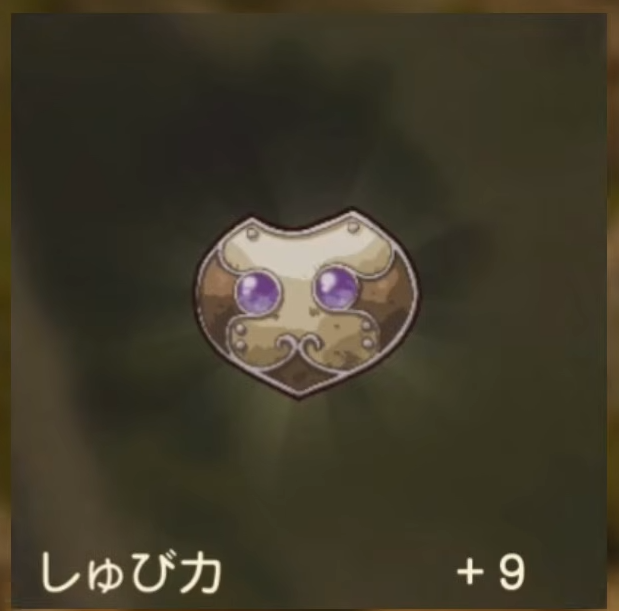
Farm the three early accessory hearts when you reach their regions: Hammer Hood Heart (from Hammerhood enemies around Ballymolloy region, past) for +10% crit rate; Bodkin Archer Heart (Emberdale region, past) for +20% damage when hitting weaknesses; Meow Jishian Heart (around the Lark region, past) for +10% spell critical rate.
Use Lucky Panel for early top-tier equipment
Step 1
Go to the Lucky Panel access point inside the well at the Traveler’s Inn near All Trades Abbey, and note it is in the same location in both the past and the present.

Step 2
Remember the daily limit: you can only attempt Lucky Panel three times per in-game day, but sleeping at an inn lets you try again.
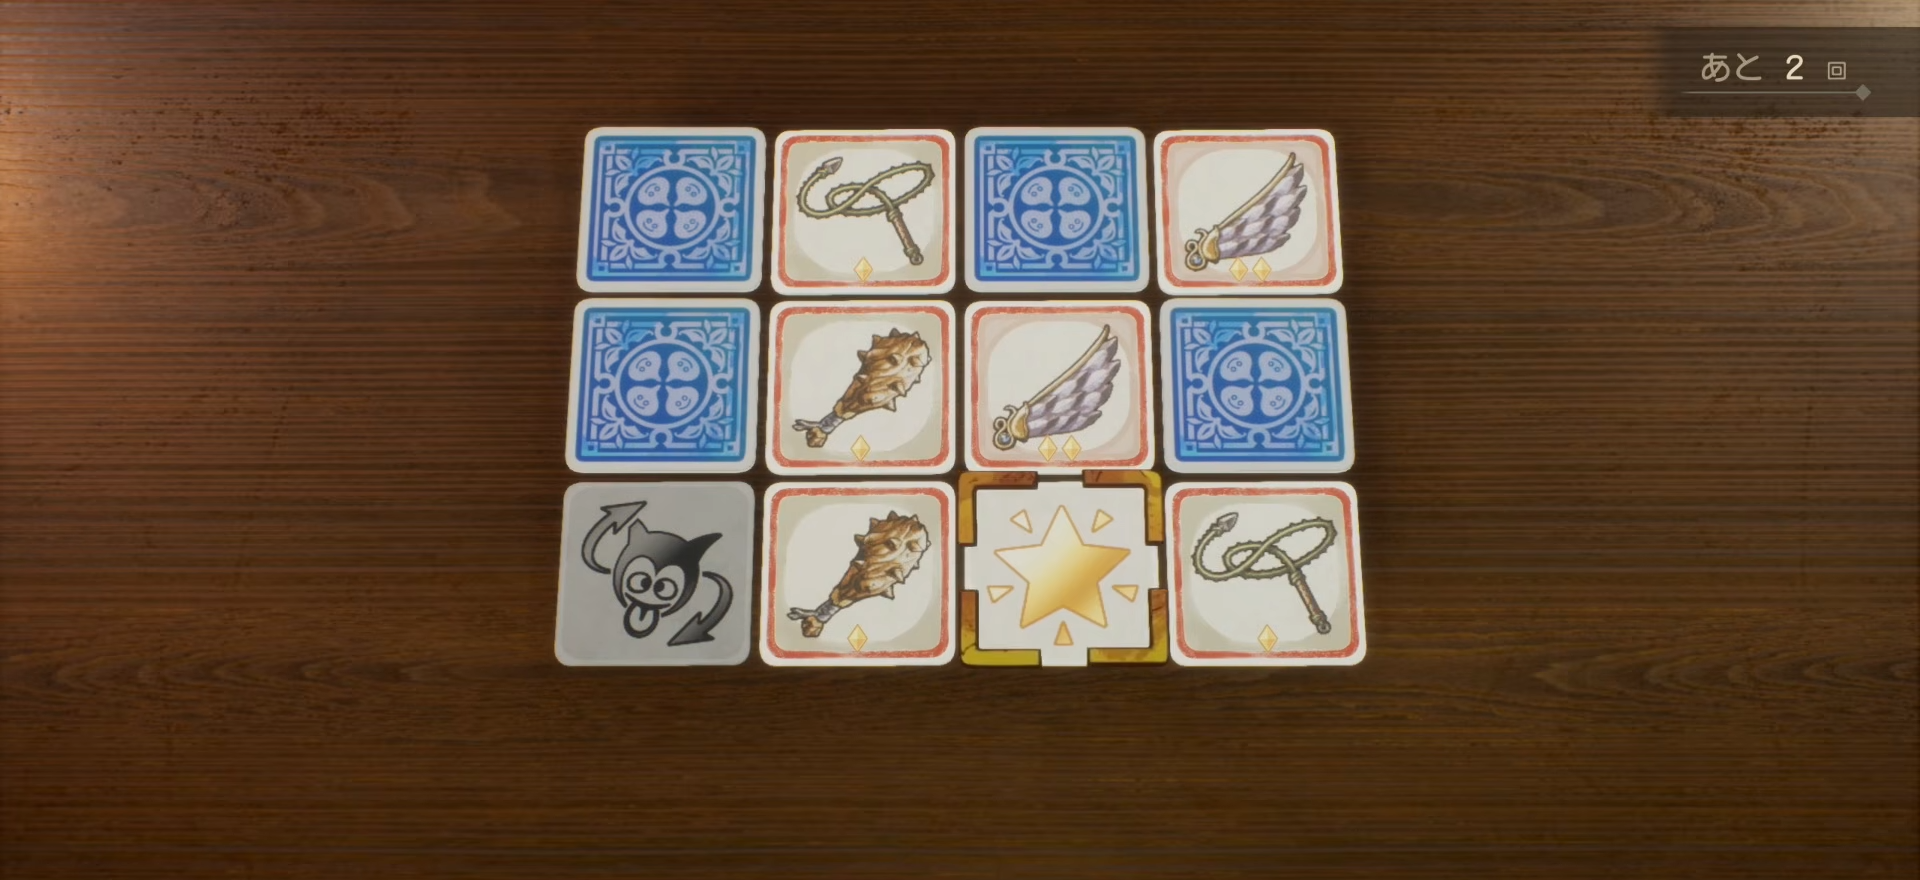
Step 3
Push for the right outcome: after you clear it once the difficulty ramps to medium and then hard, and the stated goal is to reach rank three on hard because rank one and two rewards from easy/medium are mostly unusable.
Step 4
Watch for the metal slime card: it has a low chance to appear, and if you draw it, the next difficulty’s item rank increases by two, which almost guarantees rank three or higher items.
Step 5
Exploit locked panels for bonus chests: if you reach hard with a rank three (or higher) item, that item becomes locked, and matching locked item panels awards an extra bonus reward chest with extremely powerful equipment (metal slime equipment, the echo hat, and the meteorite bracer).
Step 6
Use the reset loop: play Lucky Panel once (clear or retire, it does not matter), stop after finishing once to trigger an autosave, then retry; if the metal slime card does not appear, close the game from the home menu, reopen, and repeat from the second attempt until it appears.
How to plan vocations so the first post-change boss doesn’t brick you

Step 1
As soon as class changes unlock after progressing through All Trades Abbey, start using them actively because each class brings different parameters, skills, and spells, and mastering basics unlocks advanced classes.
Step 2
Do not switch blindly right away: a boss battle happens immediately after class changes are unlocked, and if you swap without raising proficiency the fight can become very difficult.
Step 3
Follow the early routes for the first three characters: Hero to Warrior or Martial Artist (aiming to unlock Gladiator by raising both); Marabel to Mage and Priest (aiming to unlock Sage by mastering both); Gabo follows the same route as the Hero.
Step 4
Grind proficiency the efficient way when you are ready: once dual-class proficiency is available, you can raise proficiency for two classes at once, and when one maxes out more progress spills into the other class.
Step 5
Use the fastest battle-volume strategy: set monster strength to weak and repeatedly defeat enemies using Gabo’s whistle, because proficiency gain depends on number of battles rather than enemy strength, and you can farm anywhere.
Do the Present Box, dash toggle, and seed decision immediately, then pivot into Metal Slime hunting as soon as you can reach the RoR Encampment region (or earlier if you have the Slime Stick). As you move through past/present story beats, grab the specific treasure/dresser/shop items listed, then start Lucky Panel attempts near All Trades Abbey and lock in your vocation plan before that first post-unlock boss checks your proficiency.
If you handle the bonus claims, movement settings, Metal Slimes, the listed gear pickups, Lucky Panel resets, and a disciplined vocation plan, you’ll feel far less pressure from early difficulty and you’ll build momentum that carries forward.


