What to know
- Vow of the Dead King is a strong early-game two-handed weapon with bonus damage perks
- Located deep inside the Citadel of the Forgotten Kingdom in a snowy biome
- Requires navigating environmental hazards and a mini-creature encounter
- No boss fight required, but timing and traversal skills are essential
If you’re exploring the snowy regions of Crimson Desert, this weapon is one of the best early pickups you can grab without taking on a major boss fight. The Vow of the Dead King offers solid attack stats along with bonus damage against multiple enemy types, making it a reliable choice for both PvE exploration and tougher encounters.
Before diving into the step-by-step path, here’s a quick overview of what you’re aiming for.
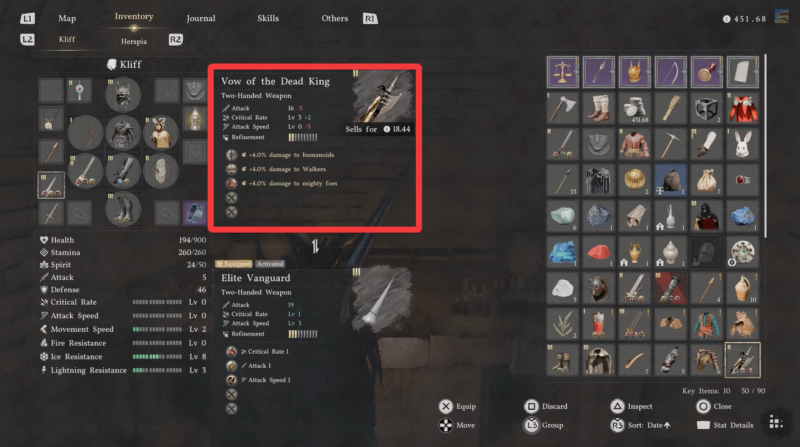
| Attribute | Details |
|---|---|
| Weapon Type | Two-Handed |
| Base Attack | 16 |
| Critical Rate | Level 3 (+2) |
| Attack Speed | Level 0 (-3) |
| Special Bonuses | +4% damage to humanoids, walkers, and mighty foes |
| Sell Value | 18.44 |
| Location | Citadel of Forgotten Kingdom |
| Region | Frostveiled Castle Ruins, Tribal State of Pailune |
Location of Vow of the Dead King weapon in Crimson Desert
The Vow of the Dead King is hidden deep within the Citadel of the Forgotten Kingdom, which lies inside the Frostveiled Castle Ruins near Silverwolf Mountain. This entire area is covered in snow and features a multi-layered dungeon filled with environmental traps rather than traditional enemies.
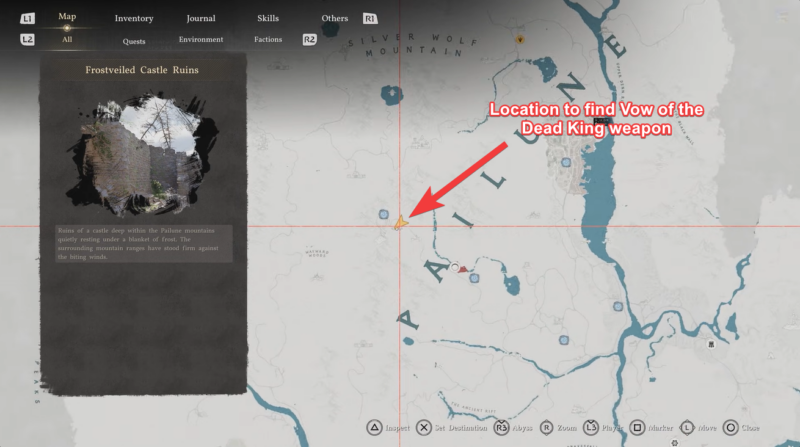
You’ll start at the surface ruins and gradually descend into darker, more dangerous sections of the citadel. The weapon is located in a locked chamber at the back of a Vein creature room, making it feel like a hidden treasure rather than a reward from combat.

How to get Vow of the Dead King in Crimson Desert quickly
Step 1: Enter the ruins and locate the descent path
Start at the snow-covered Frostveiled Castle Ruins and look for a staircase leading downward. This is your entry point into the citadel. Once you descend, you’ll immediately notice the environment becoming darker and more confined.
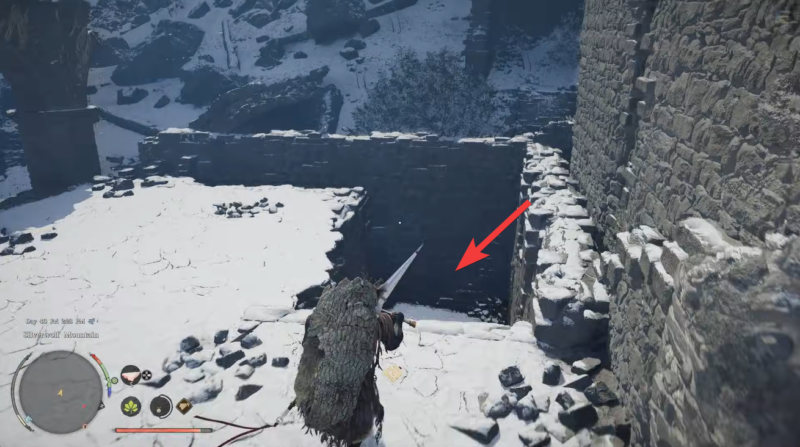
Step 2: Navigate the spiked floor trap
Inside the tunnel, your first obstacle is a series of deadly spiked floors. These cannot be crossed directly. Instead, you need to climb along the walls on either side to bypass both sections safely. Timing doesn’t matter here—just positioning.
Step 3: Reach the lowest level of the citadel
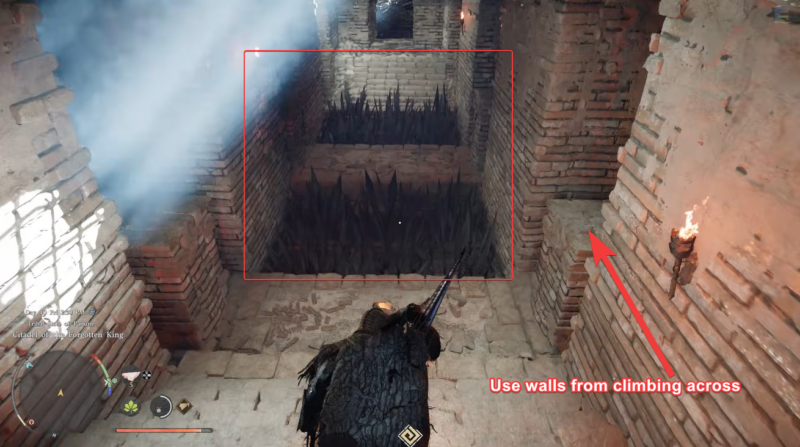
After clearing the spikes, continue descending until you reach the lowest level of the Citadel of the Forgotten Kingdom. This is where traversal becomes more complex.

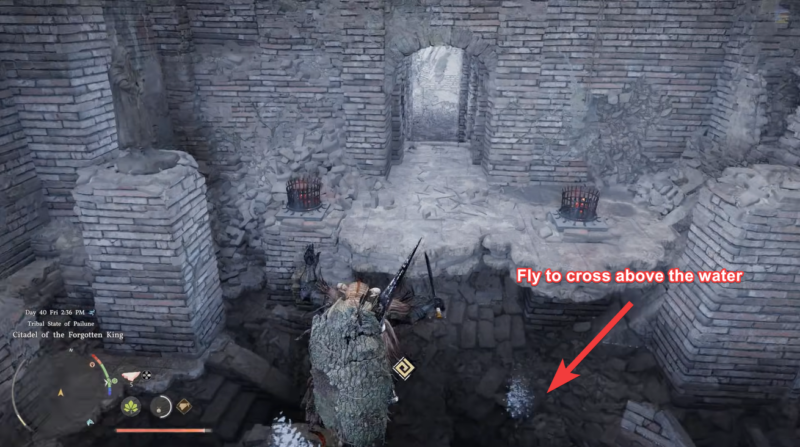
Step 4: Cross the water obstacle by flying through
You’ll encounter a flooded section that blocks your path. The easiest way to get across is by using your flight ability, allowing you to bypass the water entirely and land safely on the opposite side.
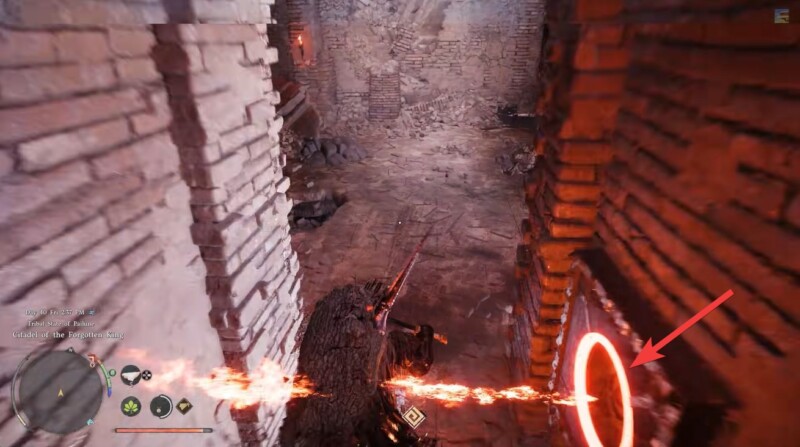
Step 5: Time your movement through fire-throwers
Next comes one of the trickiest sections: a corridor lined with fire traps. These activate in intervals.
- Wait for the flames to go out
- You’ll have roughly a 2-second window
- Count to five and move quickly through both traps in one go
- Even if you get caught on fire, use Force Palm Focus for quick healing.
Precision matters here—hesitation will cost you.
Step 6: Defeat the Stone-earth Vein creature
You’ll enter a chamber containing a Vein mini-creature, specifically a Stone-earth Vein. This enemy can deal significant damage if you’re unprepared.
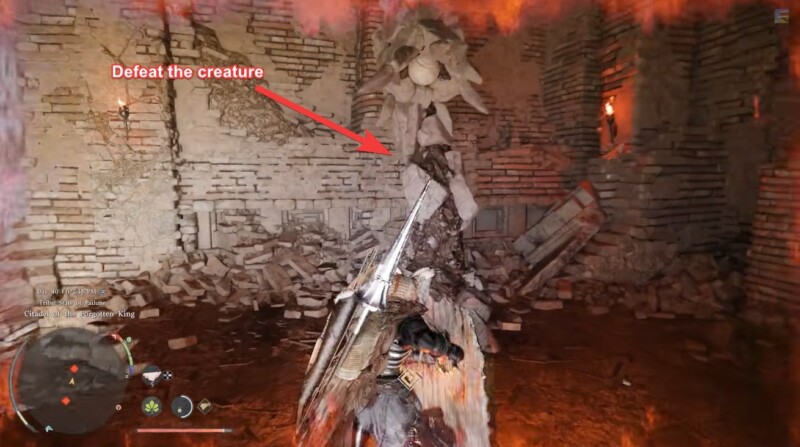
Use the Hwando weapon for an efficient takedown, as it performs well against this type of enemy. Keep your distance and avoid heavy hits.
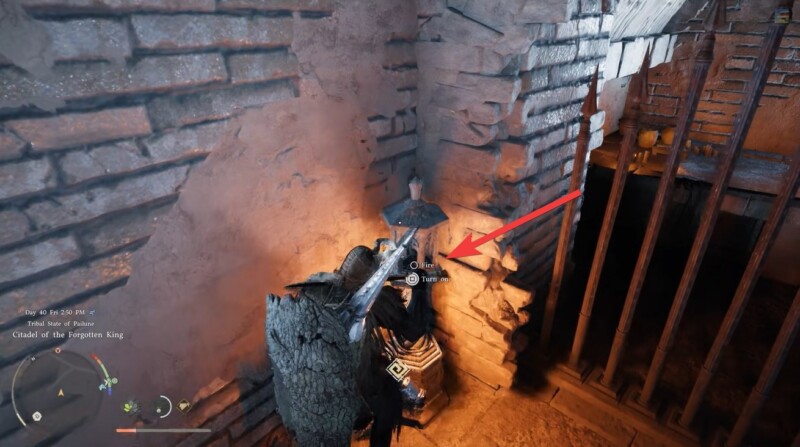
Step 7: Unlock the hidden chamber
After defeating the creature, head toward the back of the room where you’ll find a barred chamber.
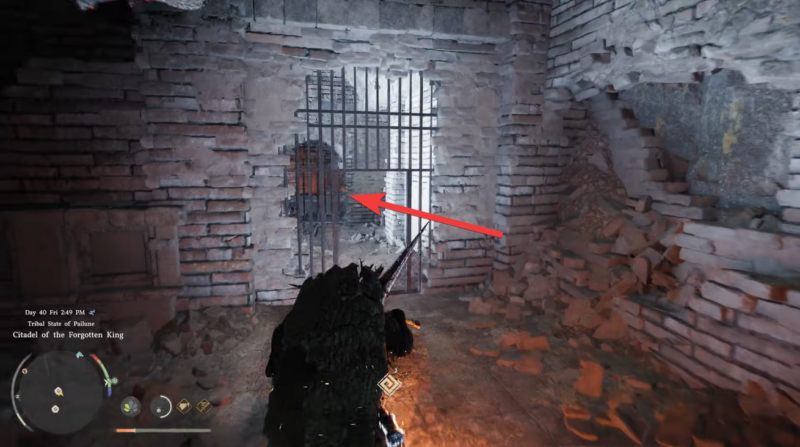
Look to your left side, light the candle positioned there to unlock the barred room.
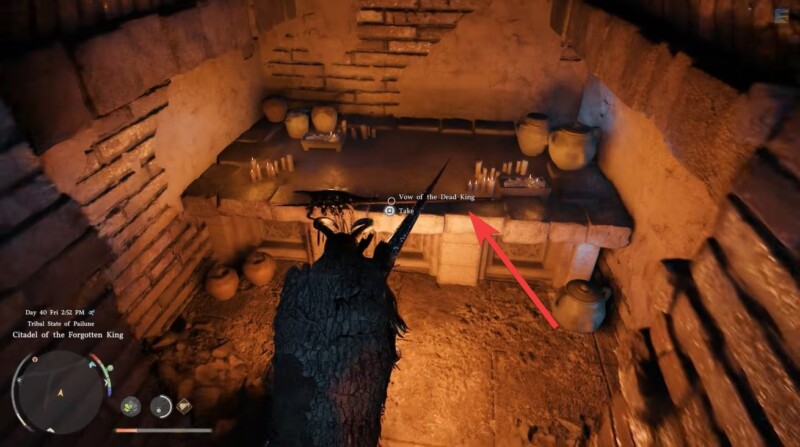
Step 8: Claim your reward
Inside the chamber, you’ll find the Vow of the Dead King waiting for you. No additional combat or puzzle is required at this point—just pick it up.
Vow of the Dead King weapon stats and performance
This weapon stands out because of its balanced offensive bonuses rather than raw power alone. While its attack speed is slightly reduced, the trade-off comes in the form of consistent bonus damage across multiple enemy types.
Detailed stat breakdown
| Stat | Value | Impact |
|---|---|---|
| Attack | 16 | Solid early-game damage |
| Critical Rate | Lv 3 (+2) | Higher chance of critical hits |
| Attack Speed | Lv 0 (-3) | Slower swings, requires timing |
| Bonus Damage | +4% (x3 types) | Effective vs humanoids, walkers, bosses |
The triple bonus damage effect is what makes this weapon particularly valuable. Instead of being situational, it performs well across a wide variety of encounters.
Securing the Vow of the Dead King early
You don’t need to defeat a major boss to obtain this weapon, which already makes it highly accessible. The challenge comes from traversal and environmental awareness rather than combat skill.
If you’re someone who prefers exploration-based rewards, this weapon is one of the most satisfying early finds. It gives you a noticeable edge in fights against common enemy types while still holding up in tougher encounters.
The only downside is its slower attack speed, so you’ll need to adjust your combat rhythm accordingly.
The Vow of the Dead King is a perfect example of high-value loot hidden behind clever level design rather than brute force difficulty. If you’re willing to navigate traps, time your movements, and handle a mini-creature encounter, you’ll walk away with a weapon that can carry you through a large portion of the game.
Make sure you grab it early—it’s absolutely worth the effort.