
- What to know
- Quick overview of the Screaming Vault puzzle
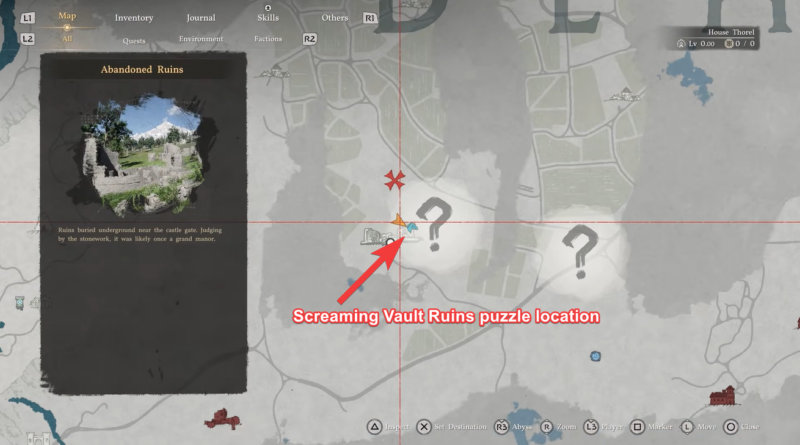
- Screaming Vault Ruins puzzle location and how to start
- Navigating arrow traps without taking damage
- Understanding the three-mechanism puzzle system
- How to solve the Screaming Vault Ruins puzzle
- Rewards for completing the Screaming Vault puzzle
- Why this puzzle stands out in Demeniss
What to know
- The Screaming Vault Ruins puzzle is located in the Abandoned Ruins of Demeniss.
- You must navigate traps and solve a three-mechanism symbol puzzle.
- Each mechanism requires correct symbol alignment to unlock the reward.
- Completing it grants you the valuable Abyss Crest artifact.
If you’re exploring Demeniss in Crimson Desert, the Screaming Vault Ruins puzzle is one of those hidden challenges that blends environmental hazards with logic-based mechanics. You’ll need both timing and observation to complete it successfully. This guide walks you through everything—from reaching the underground vault to solving the symbol mechanisms correctly.
Quick overview of the Screaming Vault puzzle
| Element | Details |
|---|---|
| Location | Abandoned Ruins, Demeniss |
| Puzzle Type | Trap navigation + symbol alignment |
| Key Mechanics | Three rotating mechanisms |
| Danger | Arrow traps with timed intervals |
| Reward | Abyss Crest (Abyss Artifact) |
| Difficulty | Moderate |
Screaming Vault Ruins puzzle location and how to start
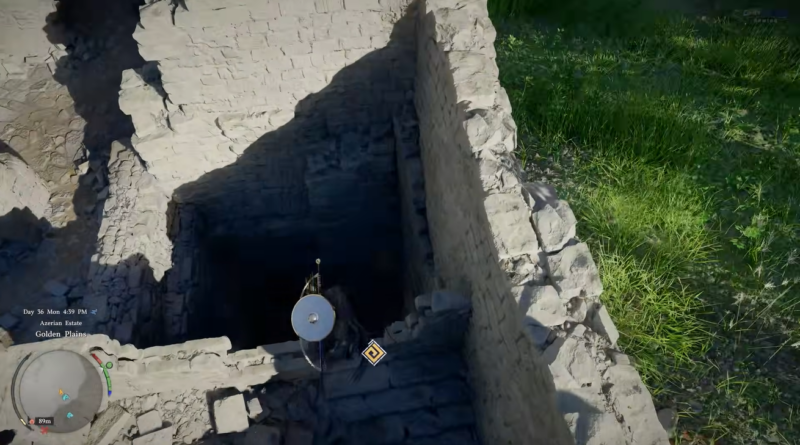
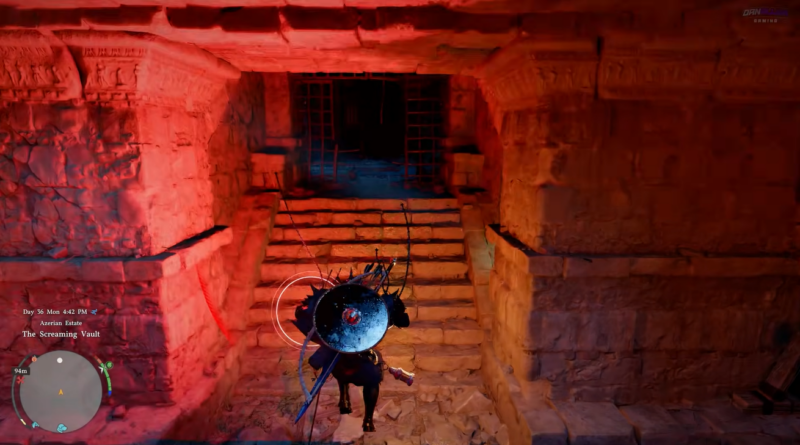
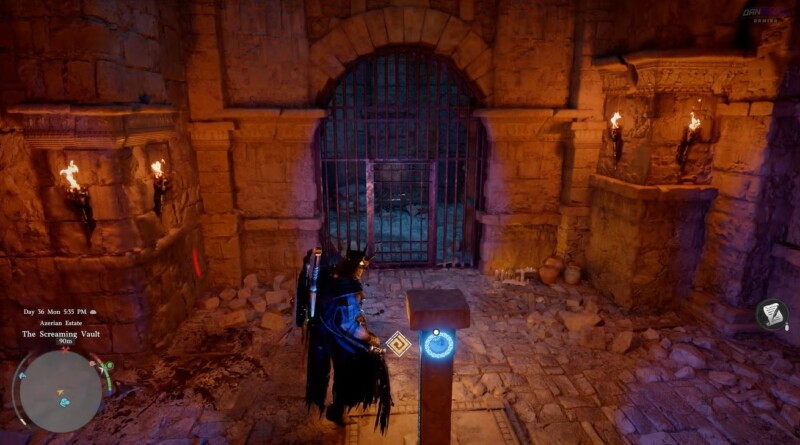
The puzzle begins at the Abandoned Ruins in Demeniss, where the entrance is not immediately visible. As you explore the ruins, you’ll need to locate a hidden opening in the ground. This opening leads to the underground vault area where the puzzle takes place.
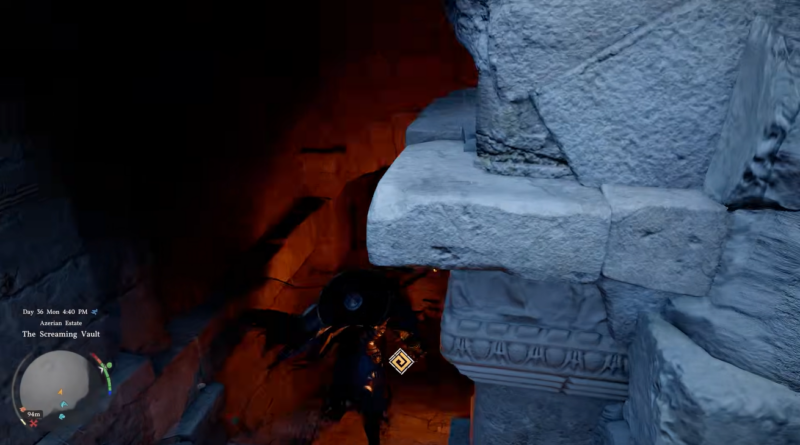
Once you find it, descend using the ladder into the lower tunnel system. The atmosphere changes instantly—tight corridors, dim lighting, and the unmistakable sound of traps activating ahead.
Before you even reach the puzzle, the game tests your timing with a corridor filled with arrow traps. These traps fire in intervals, and understanding their rhythm is crucial.
Step 1
Observe the firing pattern before moving forward. The traps operate on roughly a two-second interval, giving you a small window to act.
Step 2
Time your dodge precisely between volleys. Move only when a set of arrows has just fired.
Step 3
Advance in short bursts rather than sprinting blindly. This helps you stay in control of your positioning.
Step 4
Use crouch to pass through the narrow low tunnel section ahead. This ensures you avoid unnecessary damage and continue deeper into the vault.
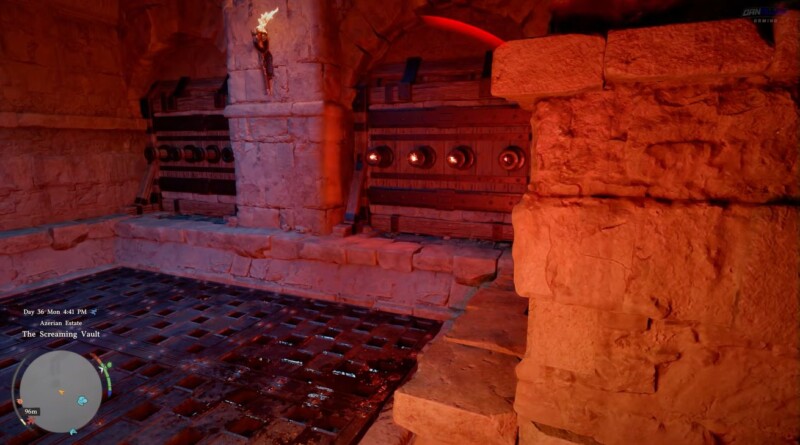
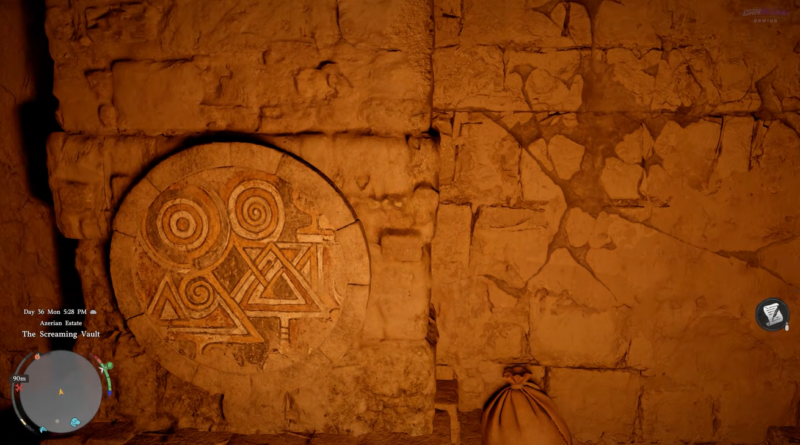
Understanding the three-mechanism puzzle system
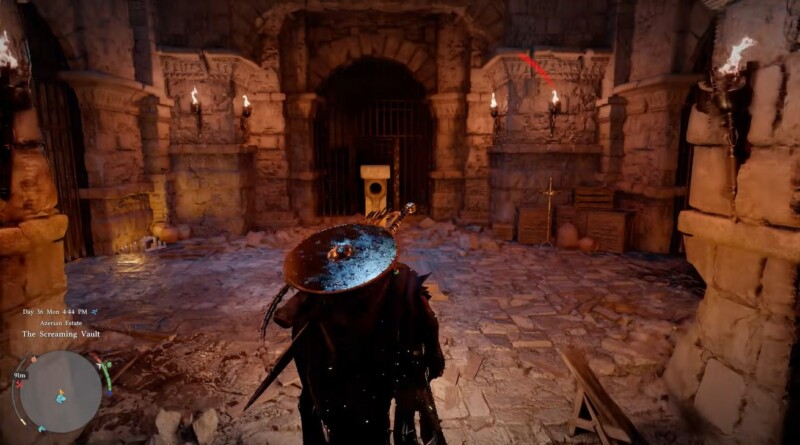
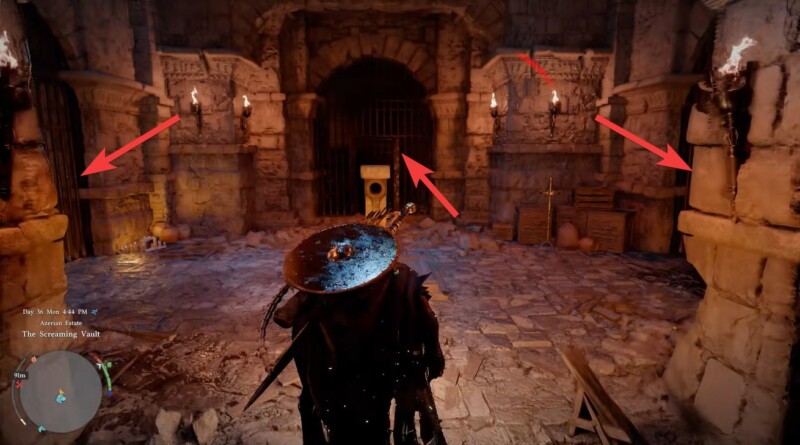
Once inside the main chamber, you’ll encounter the core puzzle involving three mechanisms positioned in different directions: front, left, and right. Each mechanism features rotating symbols that must be aligned correctly.
The challenge here is not just interaction, but getting the exact symbol orientation right for all three devices simultaneously.
How to solve the Screaming Vault Ruins puzzle
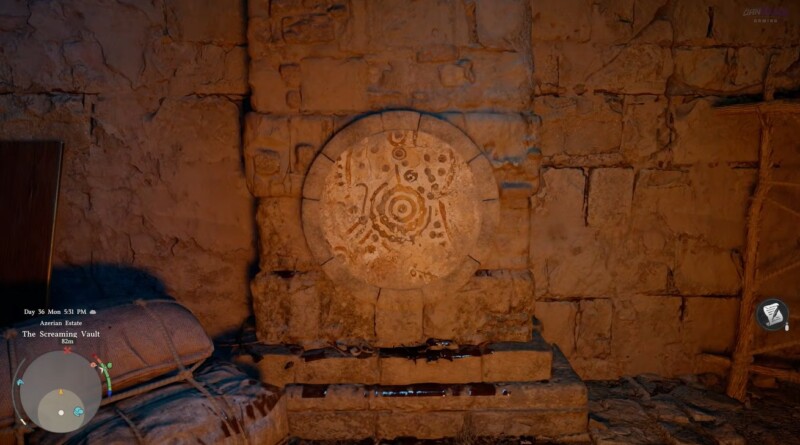
Step 1
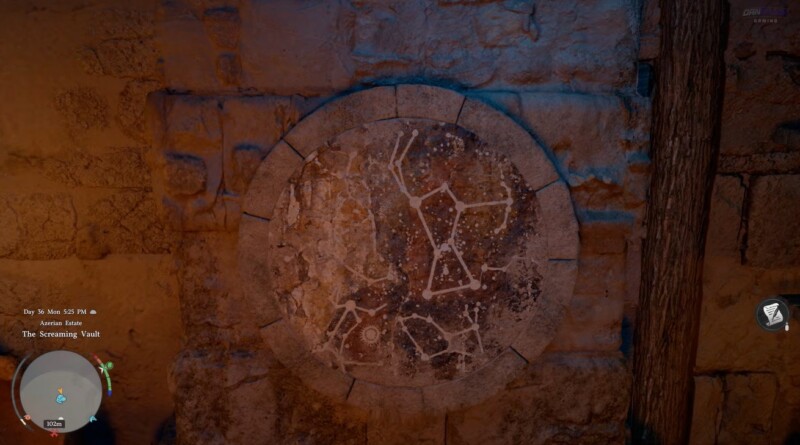
Approach the first mechanism directly in front of you. Rotate it until the symbols match the required pattern shown during interaction.
Step 2
Move to the left-side mechanism and repeat the alignment process. Pay close attention—this one often requires multiple rotations to match correctly.
Step 3
Head to the right-side mechanism and adjust it to its correct symbol position. This completes the trio of required configurations.
Step 4
Double-check all three mechanisms before stepping away. Even one incorrect alignment will prevent completion.
Step 5
Once all three are correctly positioned, the system activates automatically. You’ll notice a visual or audio cue confirming success.
Rewards for completing the Screaming Vault puzzle
Solving the puzzle unlocks access to a valuable Abyss Artifact, making the effort worthwhile. Here’s what you receive:
| Reward | Description |
|---|---|
| Abyss Crest | A rare artifact tied to Abyss-related upgrades and progression |
The Abyss Crest is particularly important if you’re focusing on deeper progression systems tied to Abyss mechanics, so this puzzle is more than just optional exploration—it directly contributes to your character’s long-term power.
Why this puzzle stands out in Demeniss
The Screaming Vault Ruins puzzle is a great example of Crimson Desert’s layered design philosophy. It doesn’t rely solely on combat or brute force. Instead, it combines environmental awareness, timing precision, and logical problem-solving.
You’re not just solving a static puzzle—you’re navigating a hostile environment where mistakes are punished instantly. This balance makes the experience both tense and rewarding.
If you approach this puzzle with patience and attention to detail, it becomes much easier than it first appears. The traps are predictable, and the mechanisms follow clear logic once you understand their purpose.
Take your time with each step, observe carefully, and avoid rushing through the trap section. Once completed, the Abyss Crest makes the entire effort feel worthwhile, especially for players aiming to maximize their progression in Crimson Desert.


